PRE-RELEASE
Rear window
| Rear window |
| 1. |
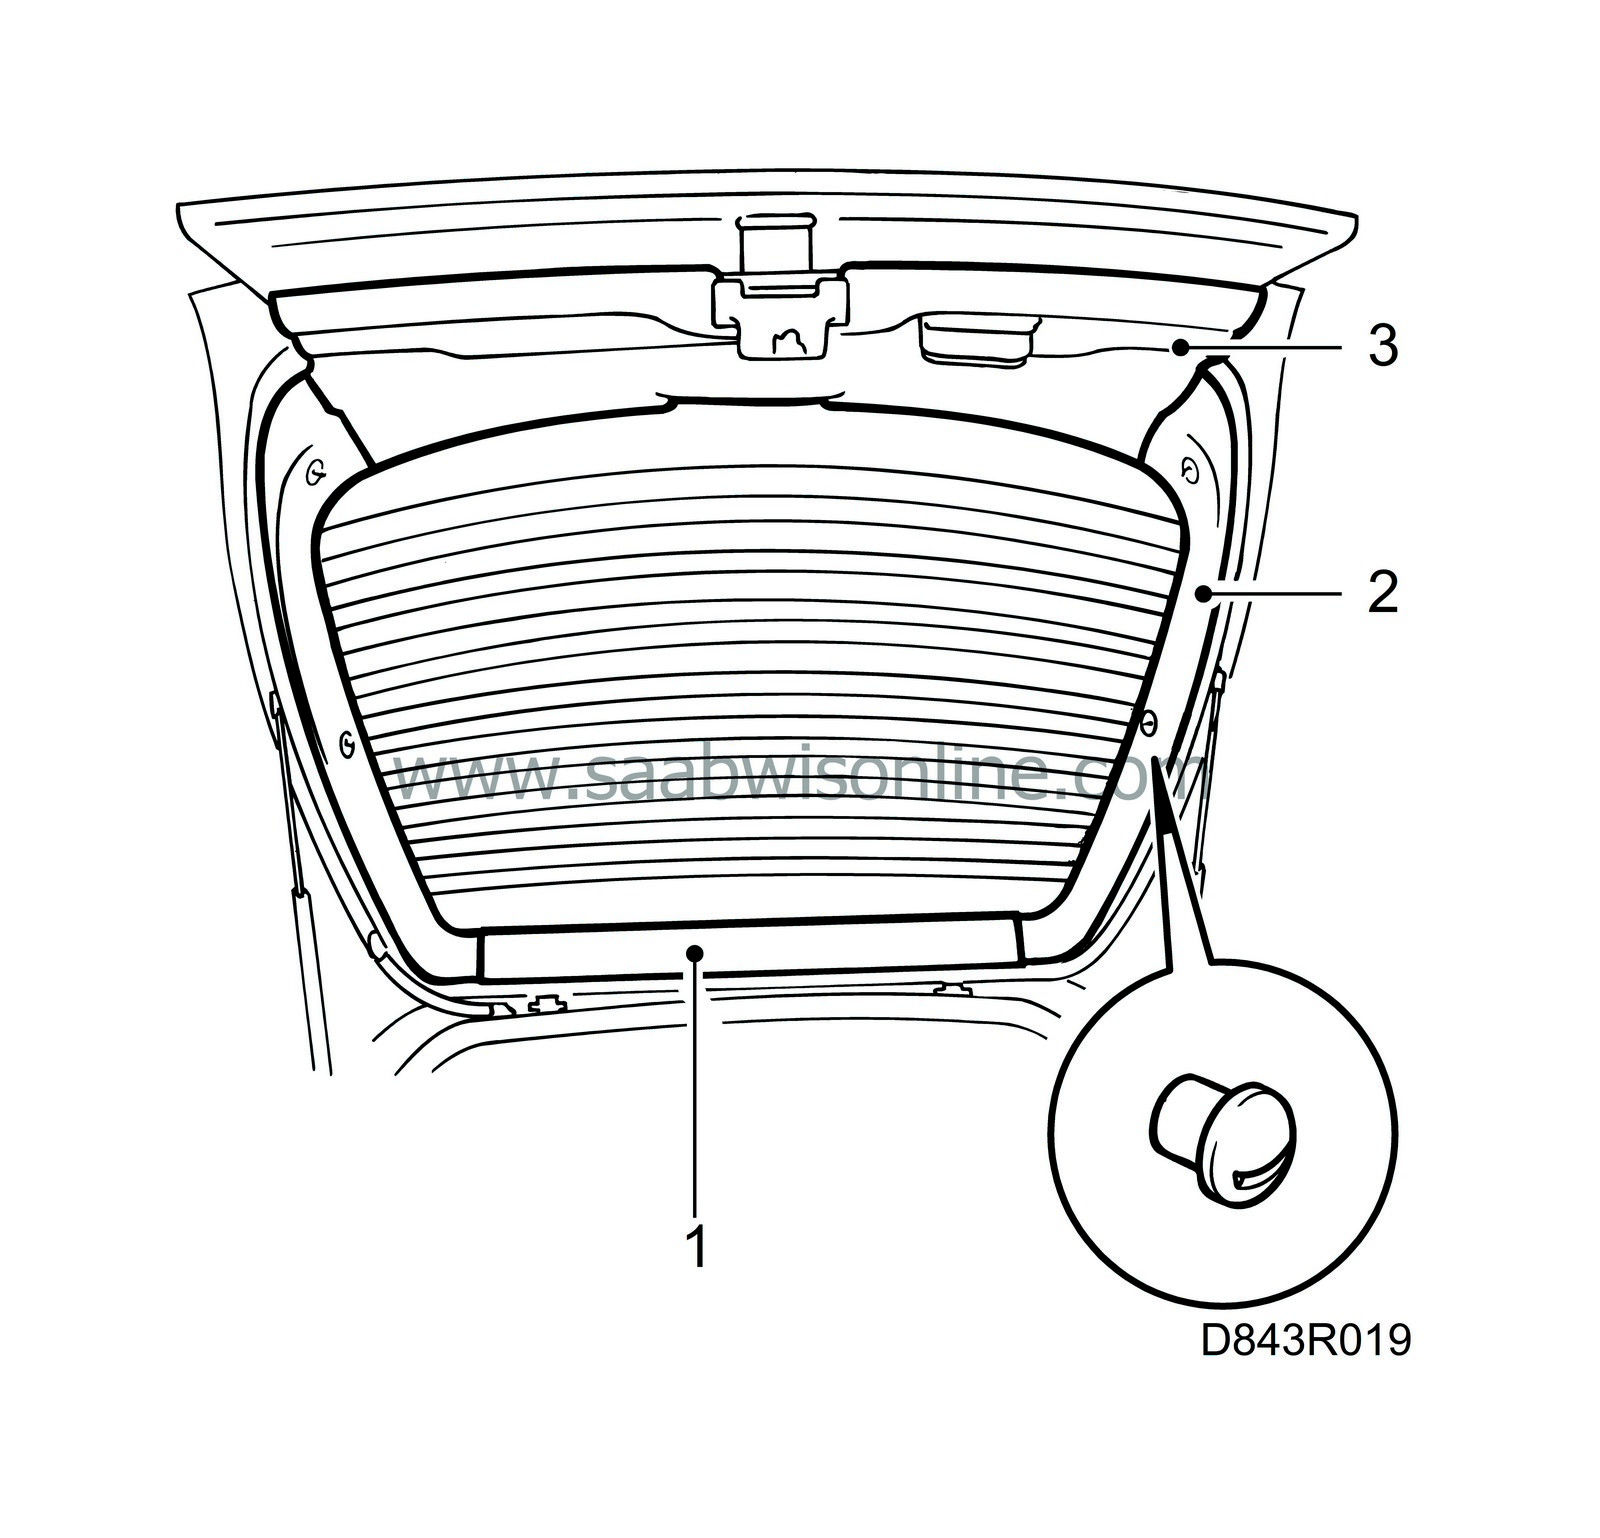
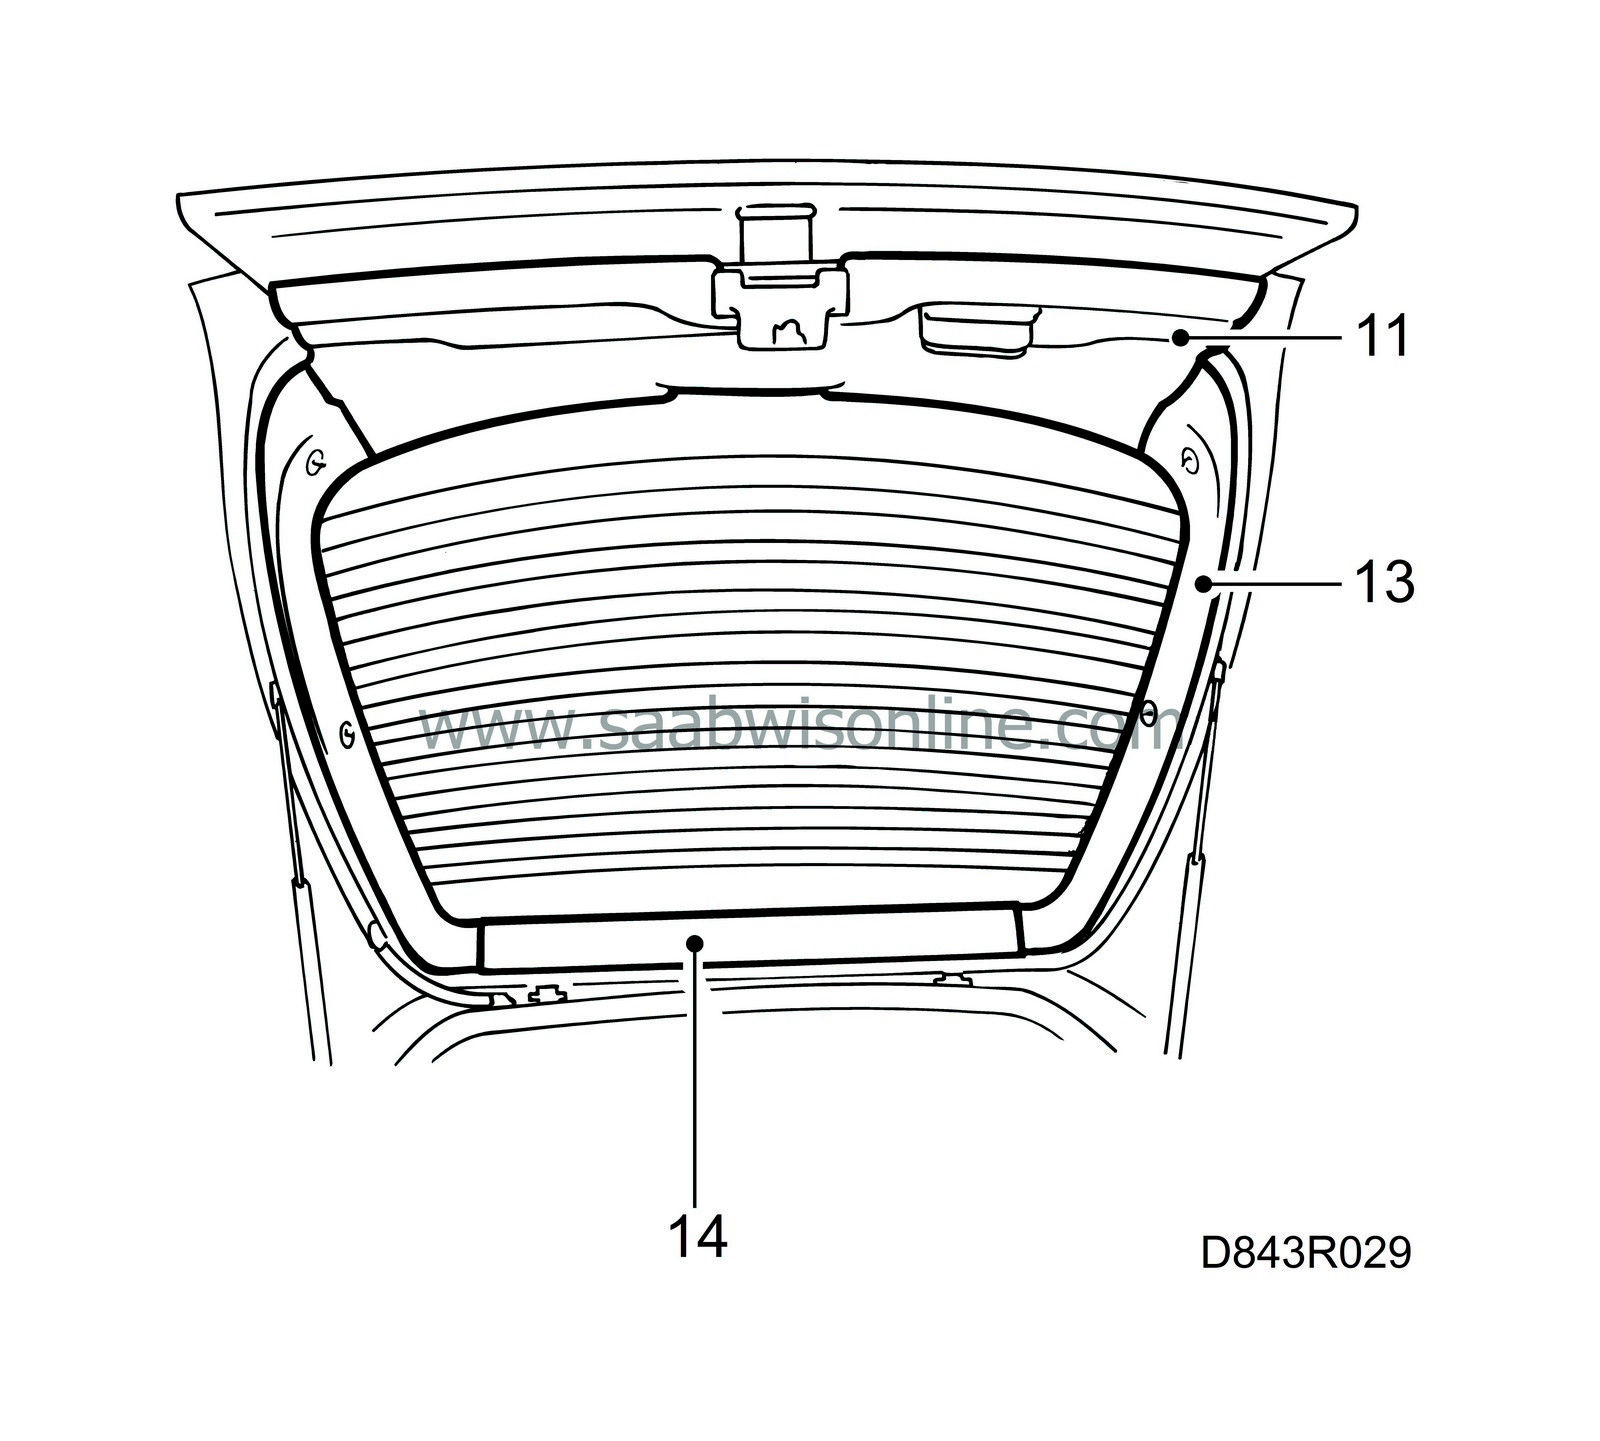
Remove the trim moulding above the rear window on the inside of the tailgate.
|
|
| 2. |
Remove the trim mouldings from the sides of the rear window on the inside of the tailgate.
|
|
| 3. |
Remove the trim from the tailgate:
|
|
| 3.a. |
Remove the tailgate handle.
|
| 3.b. |
Remove the screws securing the trim. Note that the screws differ in length.
|
| 3.c. |
Lift away the trim.
|
| 4. |
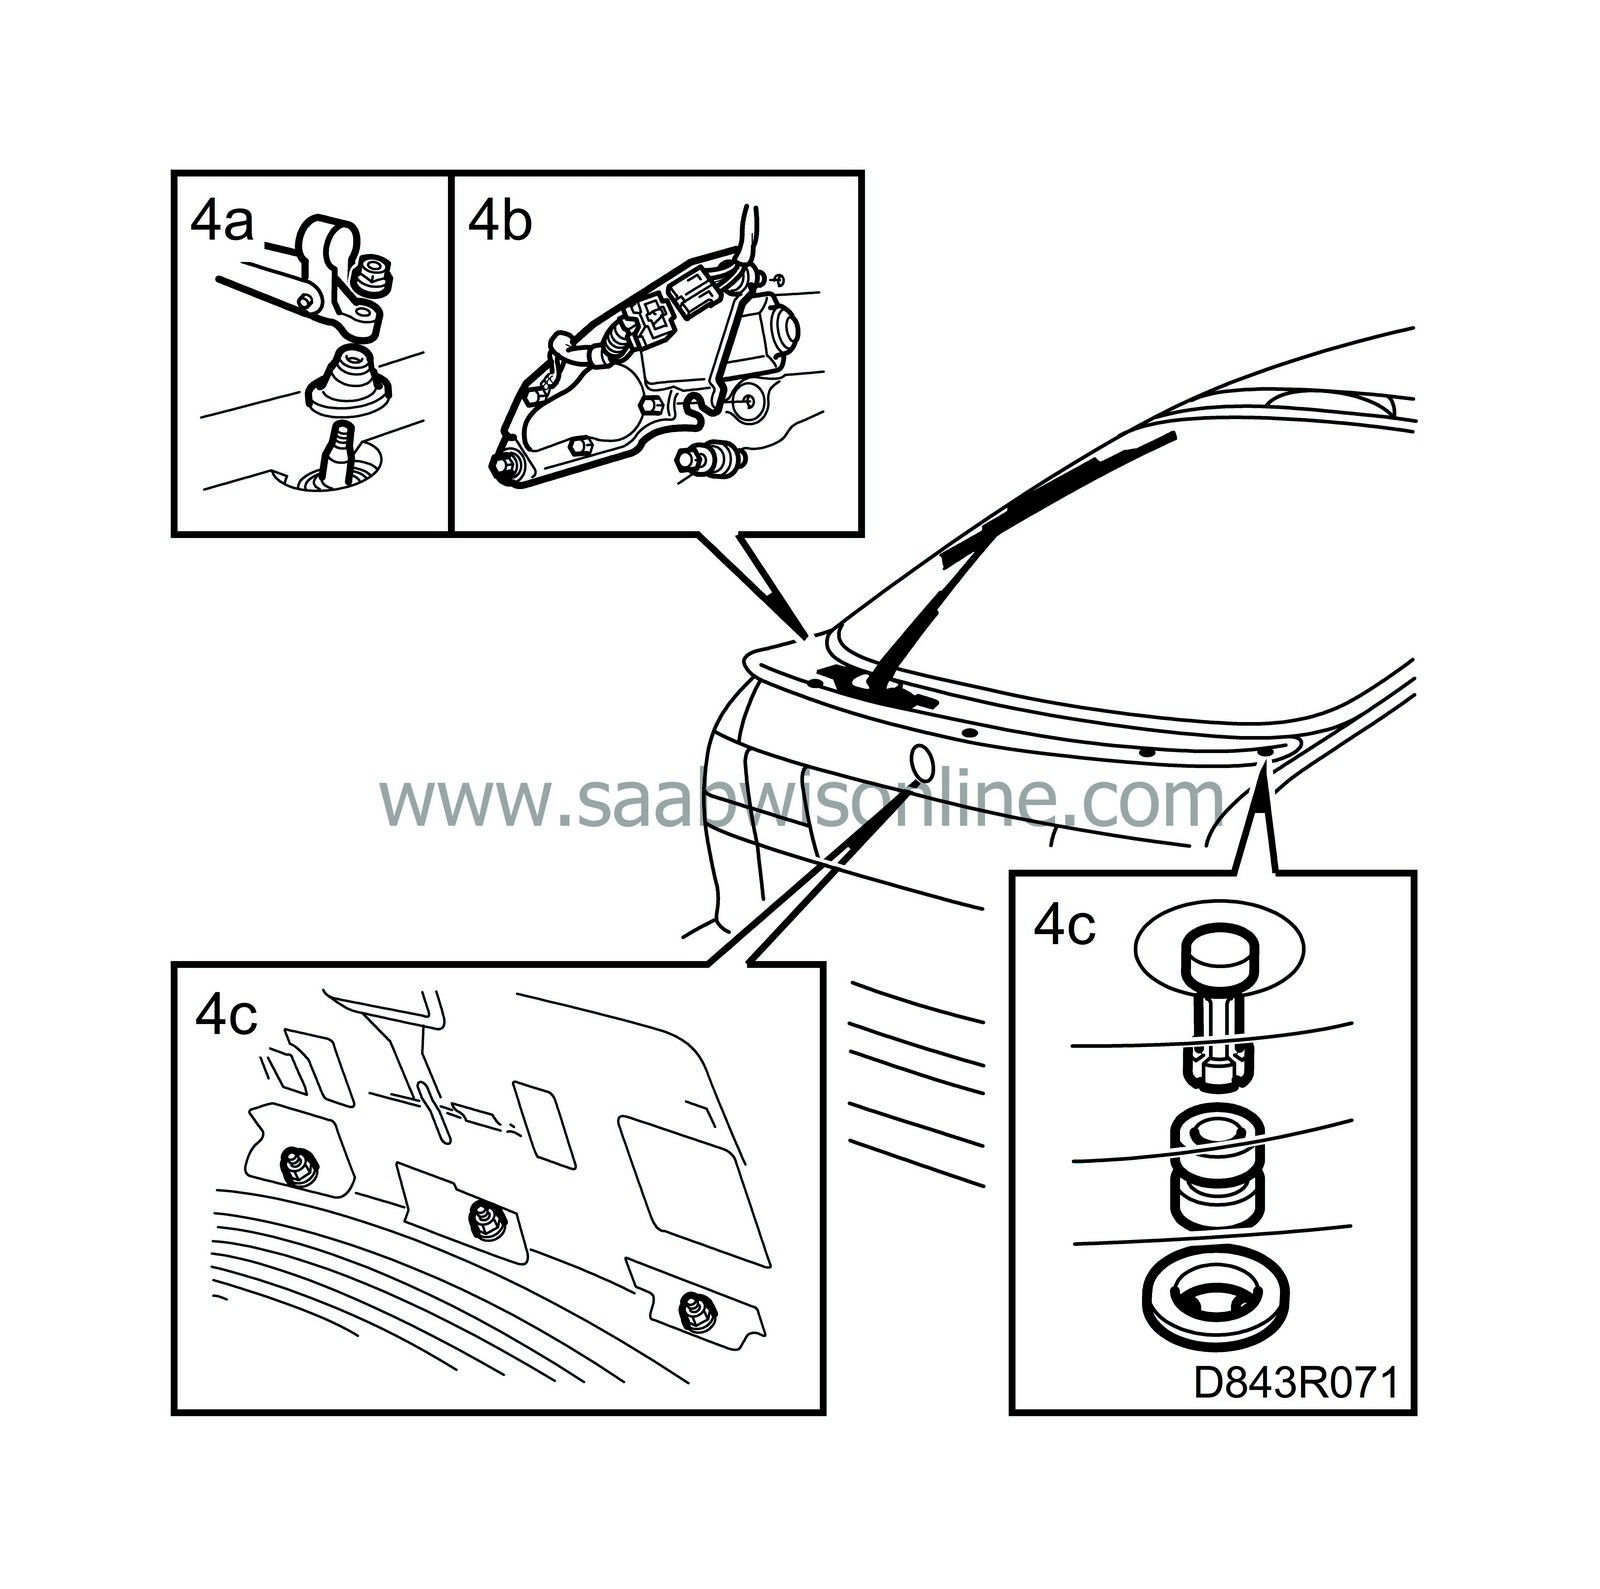
Cars with spoiler and rear window wiper on the tailgate:
|
|
| 4.a. |
Remove the rear wiper arm.
|
| 4.b. |
Remove the wiper motor.
|
| 4.c. |
Remove the screws that secure the spoiler. Lift away the spoiler.
|
| 5. |
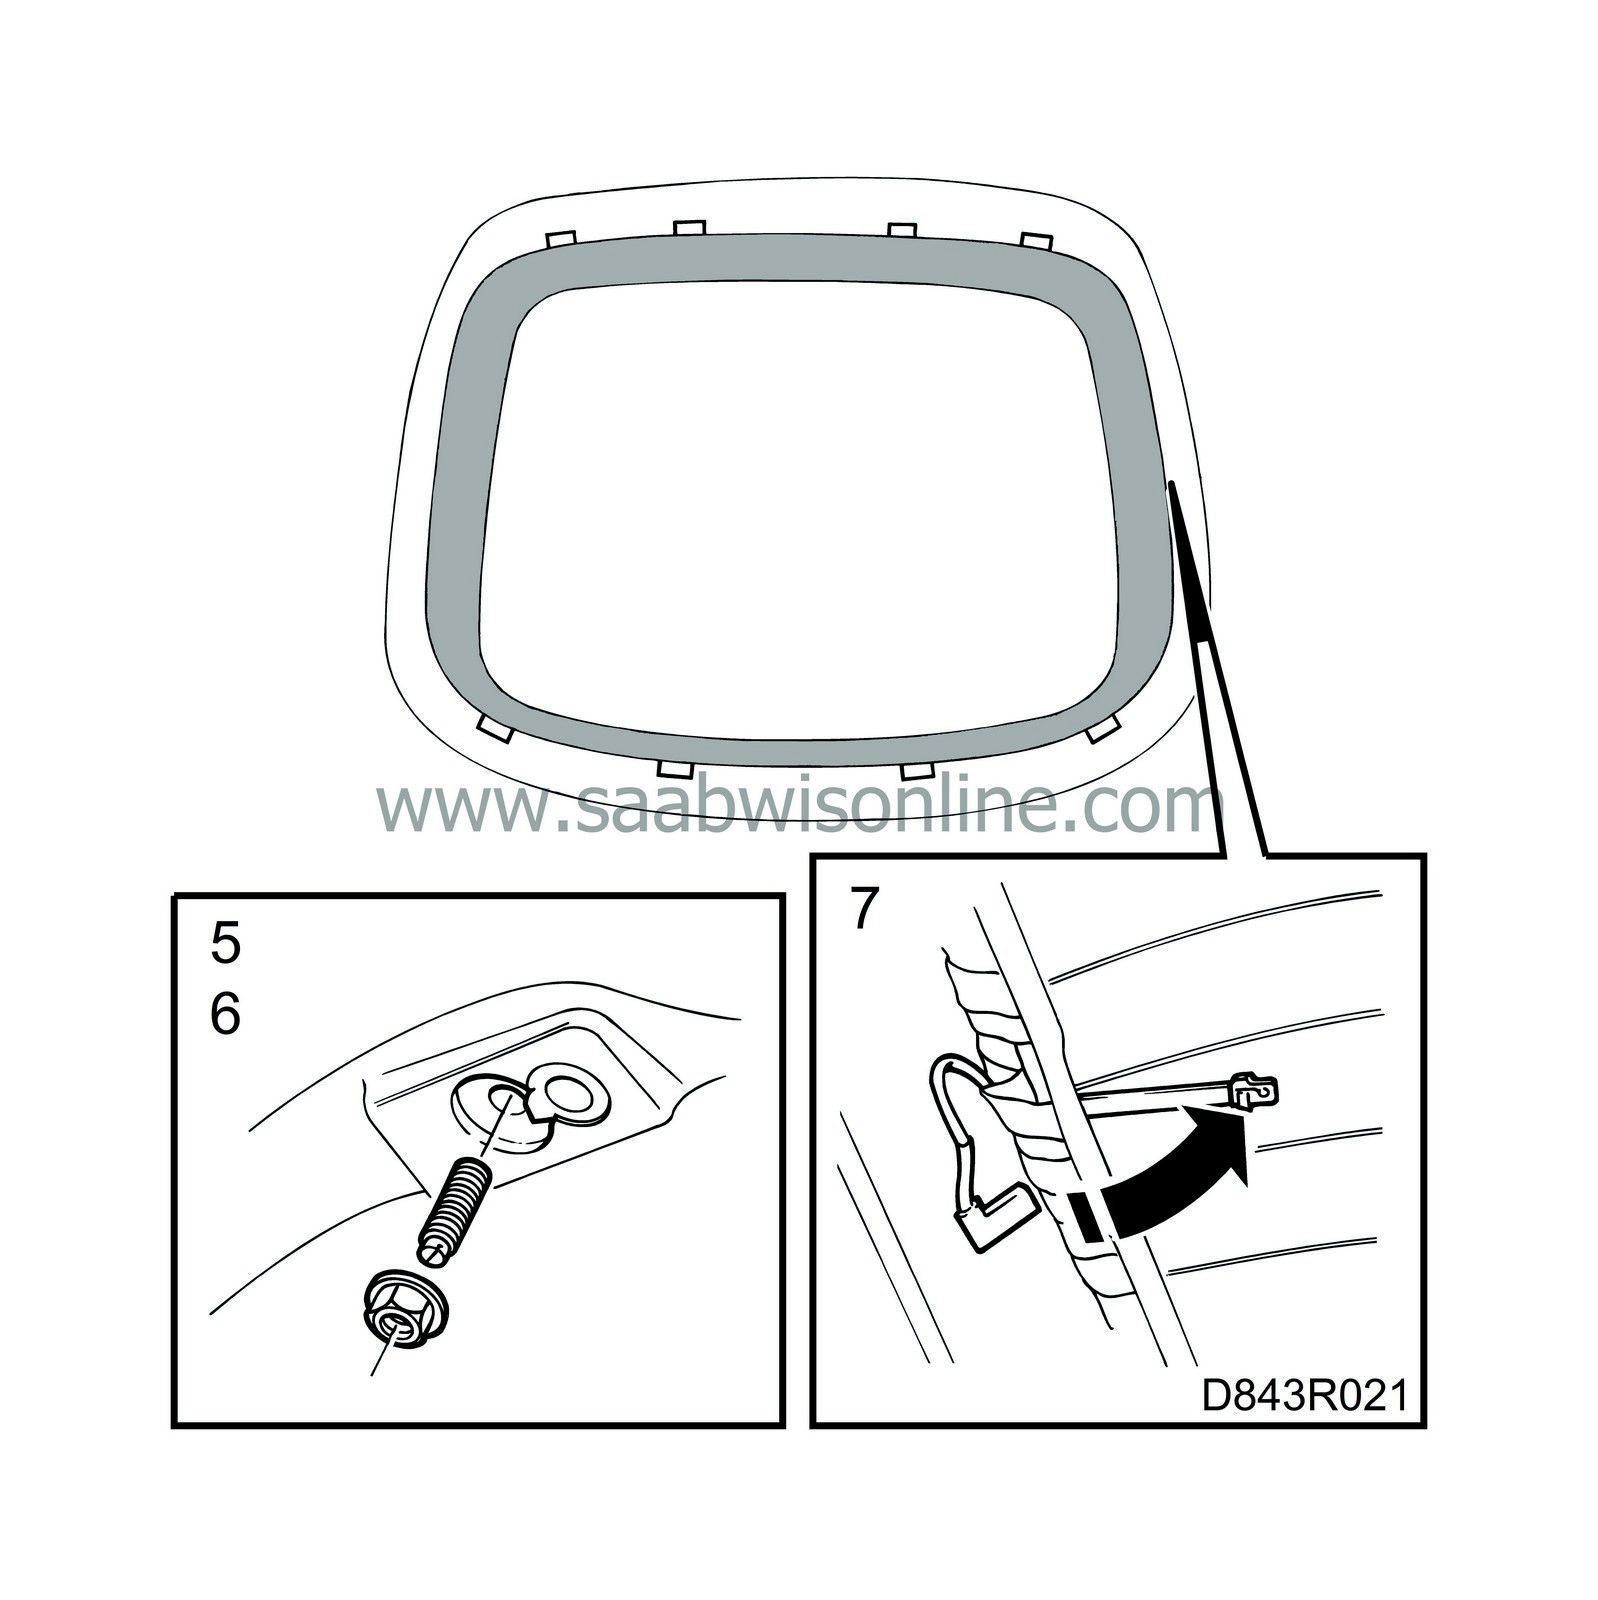
Remove the nuts and studs that secure the top edge of the window.
|
|
| 6. |
Remove the nuts and studs that secure the lower edge of the window.
|
|
| 7. |
Unplug the electric connections for rear window heating and turn up the contact plates against the window.
|
|
| 8. |
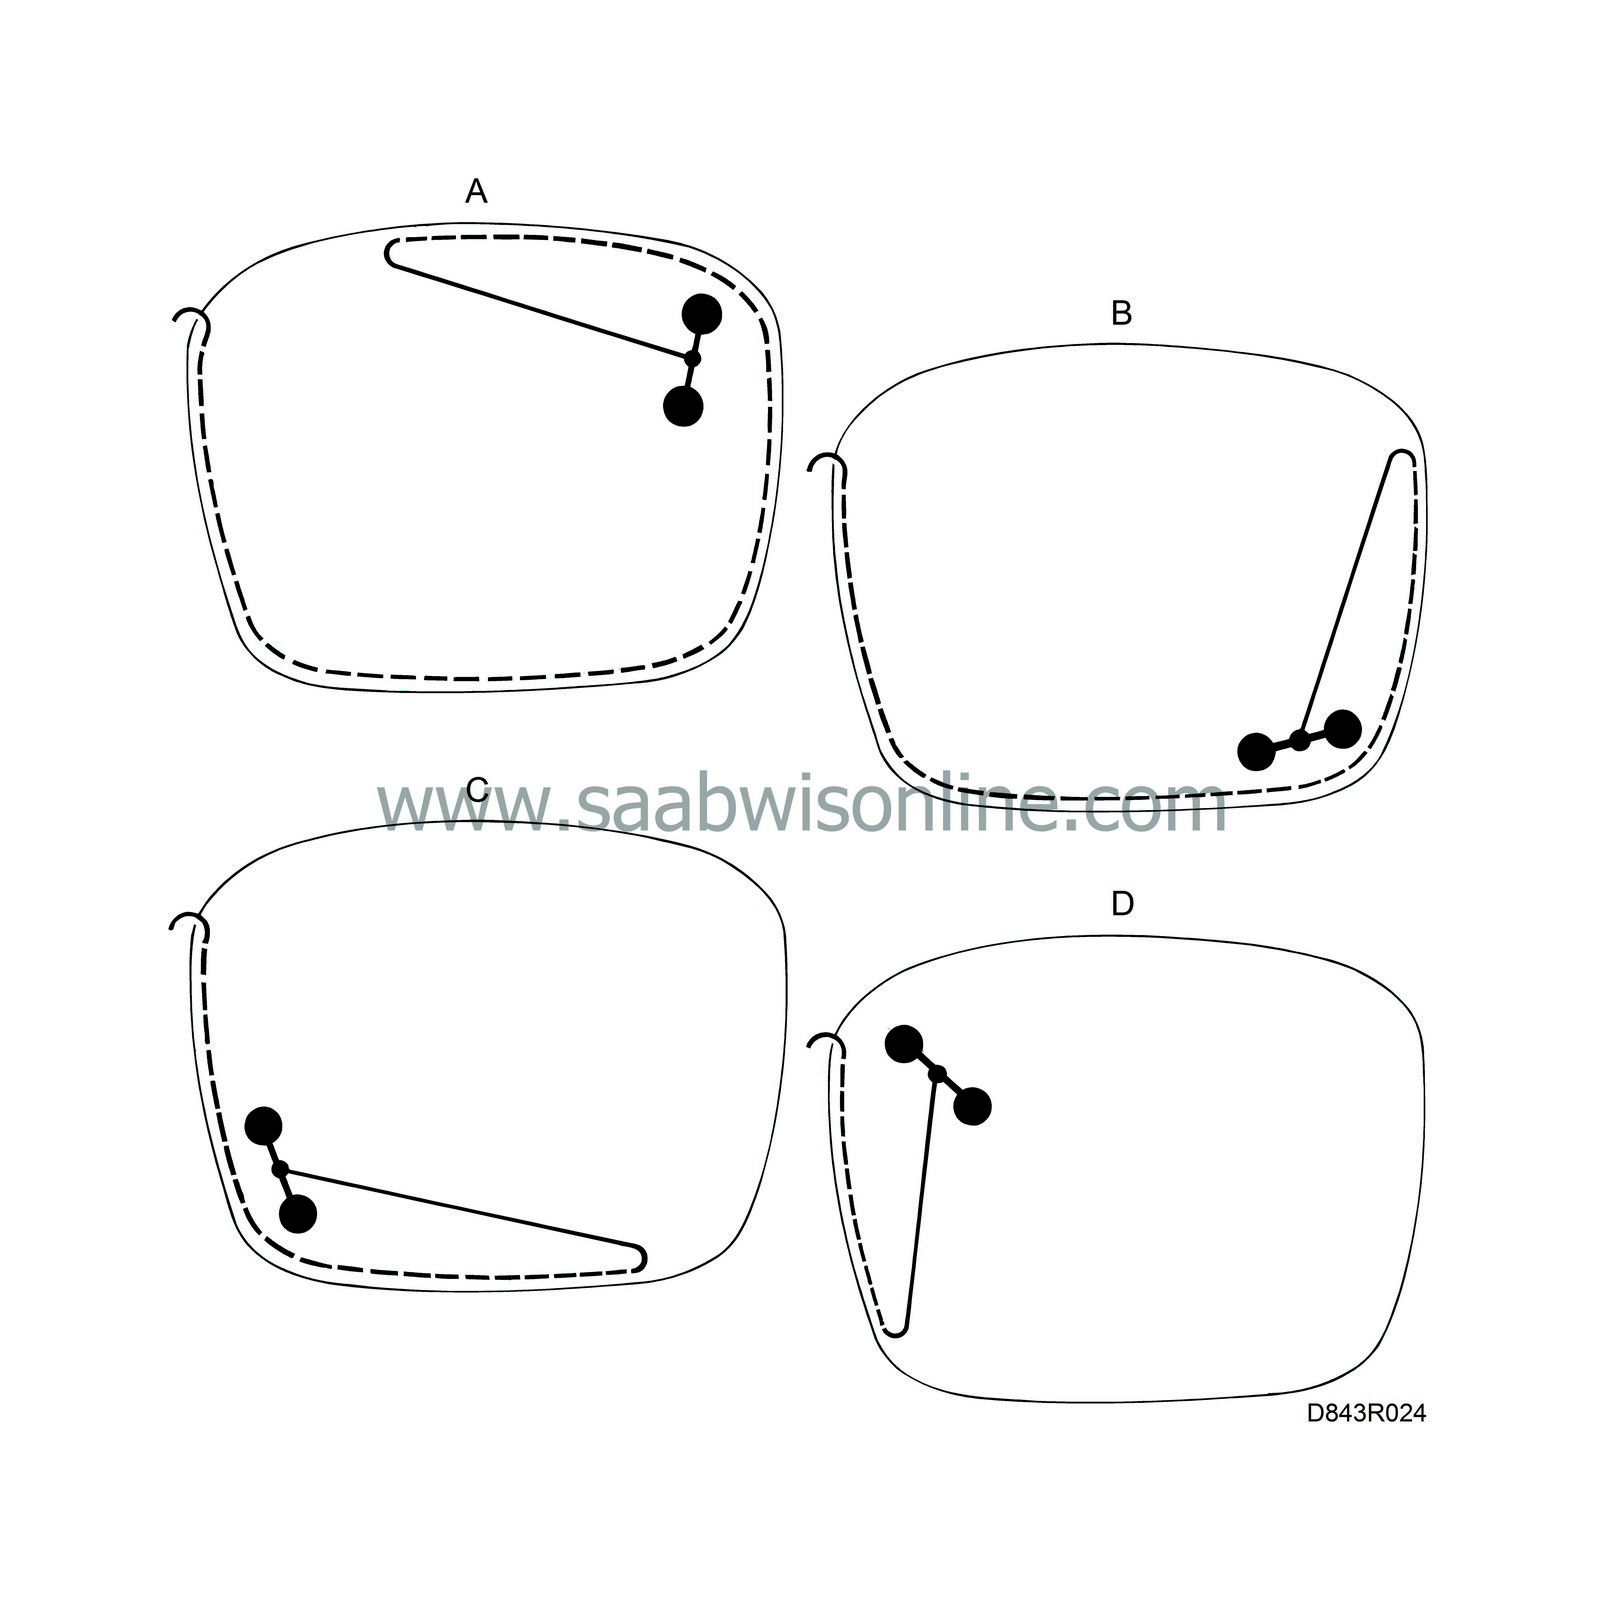
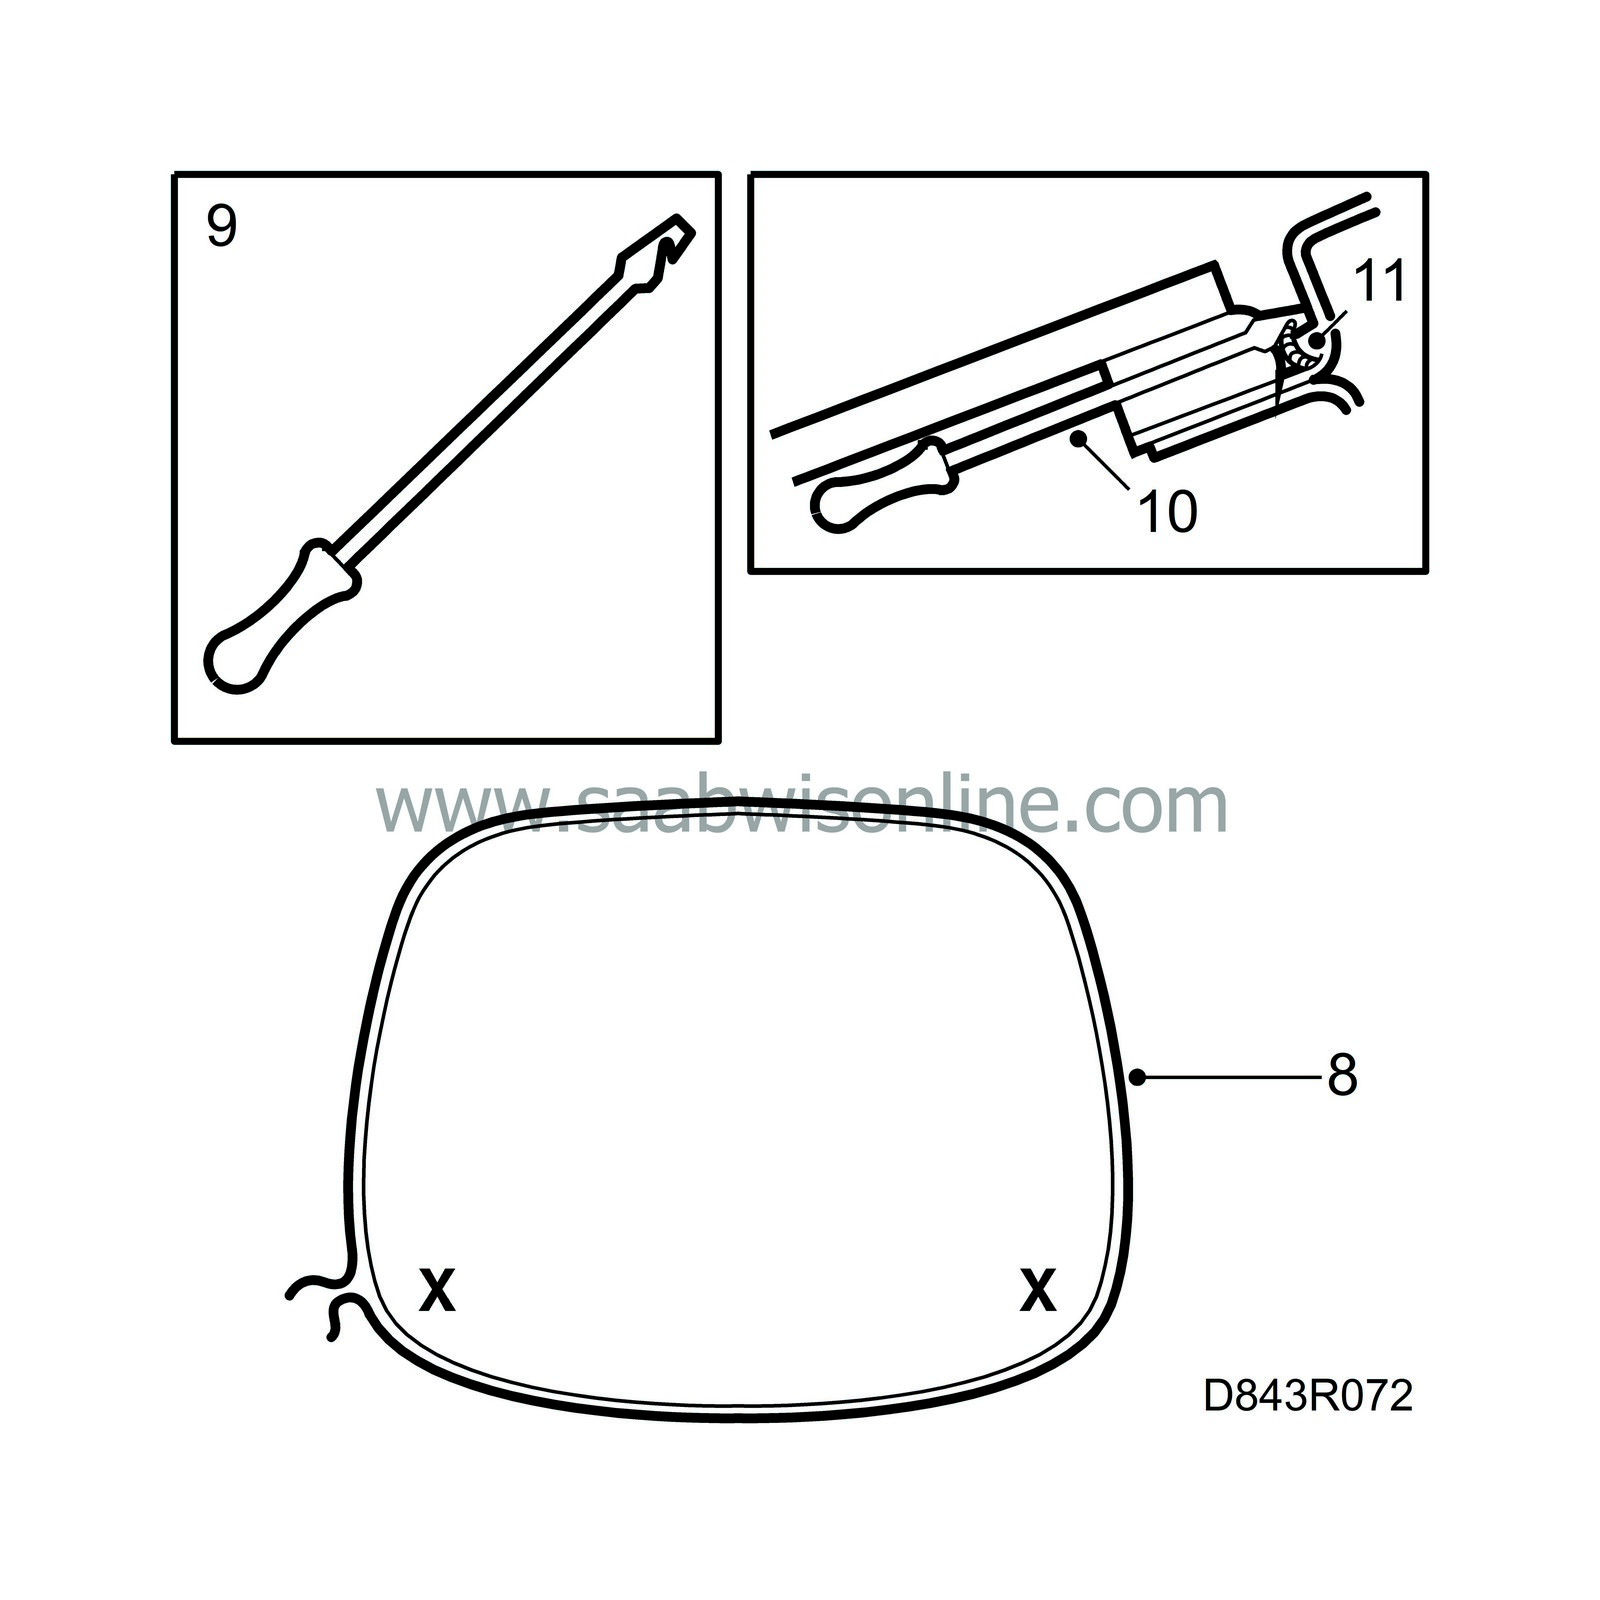
Position cutting wire part no. 82 92 831 around the rear window so that the ends of the cutting wire meet in a lower corner of the window. The wire must be positioned under the decor strip.
|
|
| 9. |
Make a special tool to quickly and easily be able to pull the cutting wire through the adhesive by making a groove in a long and narrow screwdriver as shown in the illustration. Piano wire can be used as an alternative.
|
|
| 10. |
Press the screwdriver through the adhesive in the corner where the ends of the cutting wire meet. There is a marking on the external strip where it is easiest to insert the screwdriver (there is a small space in the strip).
|
|
| 11. |
Hook one end of the cutting wire in the groove on the screwdriver and pull the wire through the adhesive.
|
|
| 12. |
Pull the other end of the cutting wire through the adhesive in the same way. Avoid crossing the wires.
|
|
| 13. |
Fasten the wire coiler part no. 82 92 823 on the inside of the windscreen.

|
|
| 14. |
Pull out the end of the cutting wire that is nearest the wire coiler and fasten it to the coiler reel.
|
|
| 15. |
Tie the other end of the cutting wire to the gas spring.
|
|
| To fit |

| Important | ||
|
Adhesive kit part no. (45) 30 05 618 must be used when fitting encapsulated glass. This kit includes the special primer (Betawipe 4000) that must be used on embedded glass. |
||
| 1. |
Cut down the adhesive on the boot lid to a height of 2 mm. If the old window is to be refitted, also cut down the adhesive on the window to 2 mm. Old, well-cohering adhesive provides a good base for the new adhesive. Loose adhesive on glass or metal must be removed.
|
|
| 2. |
Repair any paintwork damage that was caused during work with removing the window. Use a touch-up paint applicator.
|
|
| 3. |
If there is no old adhesive or if it is not complete, body primer must be applied to the surfaces on the boot lid that the adhesive will contact. Use body primer, part no. 30 07 119.
|
||||||||||
| 4. |
Position the rear window on a stand and fit a lifting handle on the outside of the window.
|
|
| 6. |
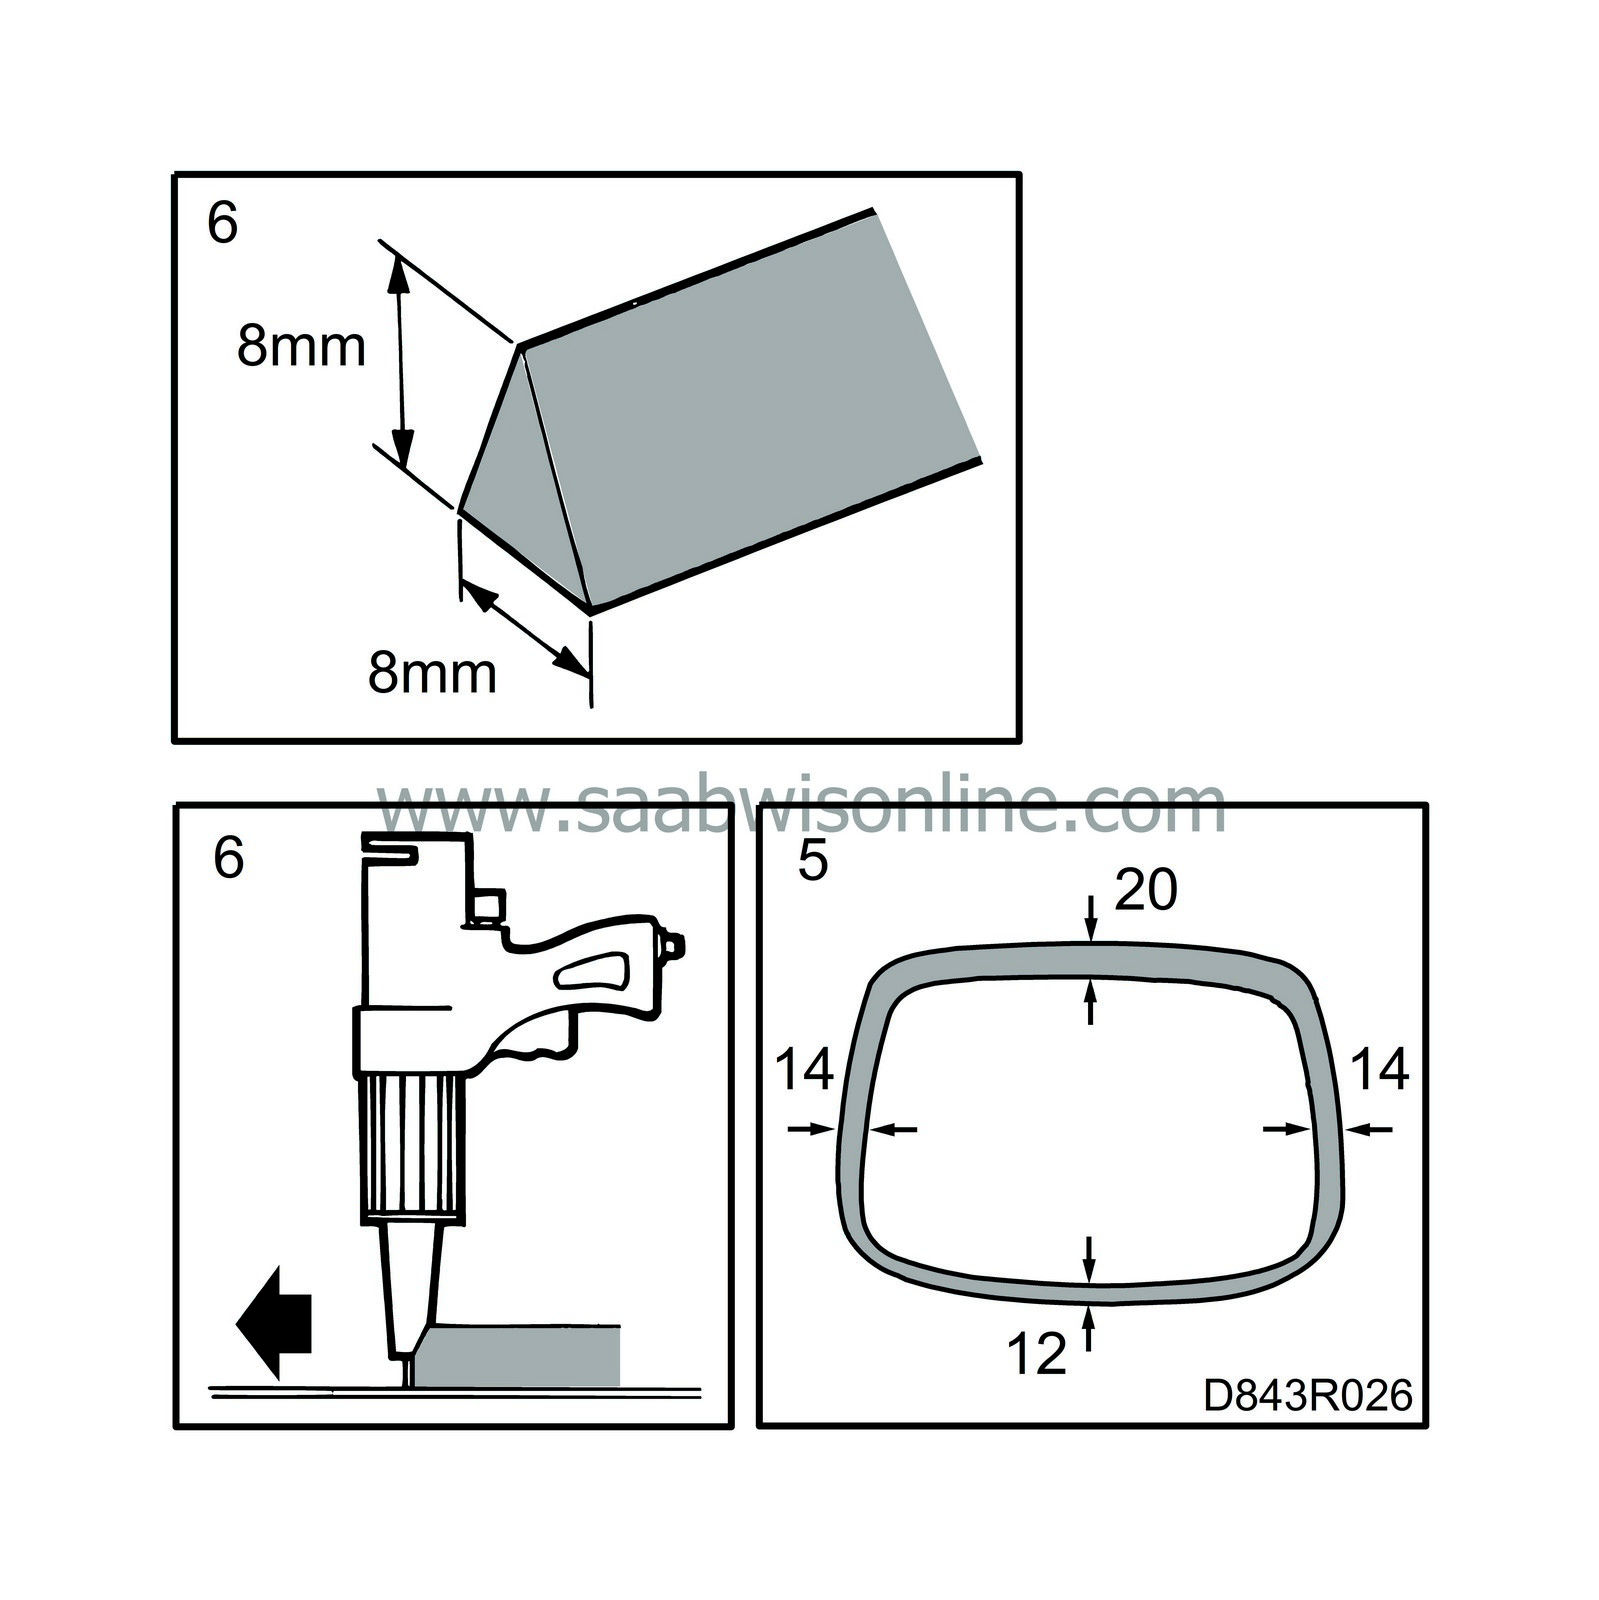
Apply the adhesive as follows:
|
|
| • |
Cut 5 mm off the tip of the adhesive applicator nozzle. Heat the nozzle in hot water and adjust the opening to the size 8 x 8 mm.
|
| • |
Adjust the pressure of the adhesive gun to obtain a bead of adhesive measuring 8 x 8 mm.
|
| • |
Hold the adhesive gun at right angles to the window and apply an adhesive bead around the rear window. Avoid getting adhesive on the decor strip.
|
||||||||||
| 7. |
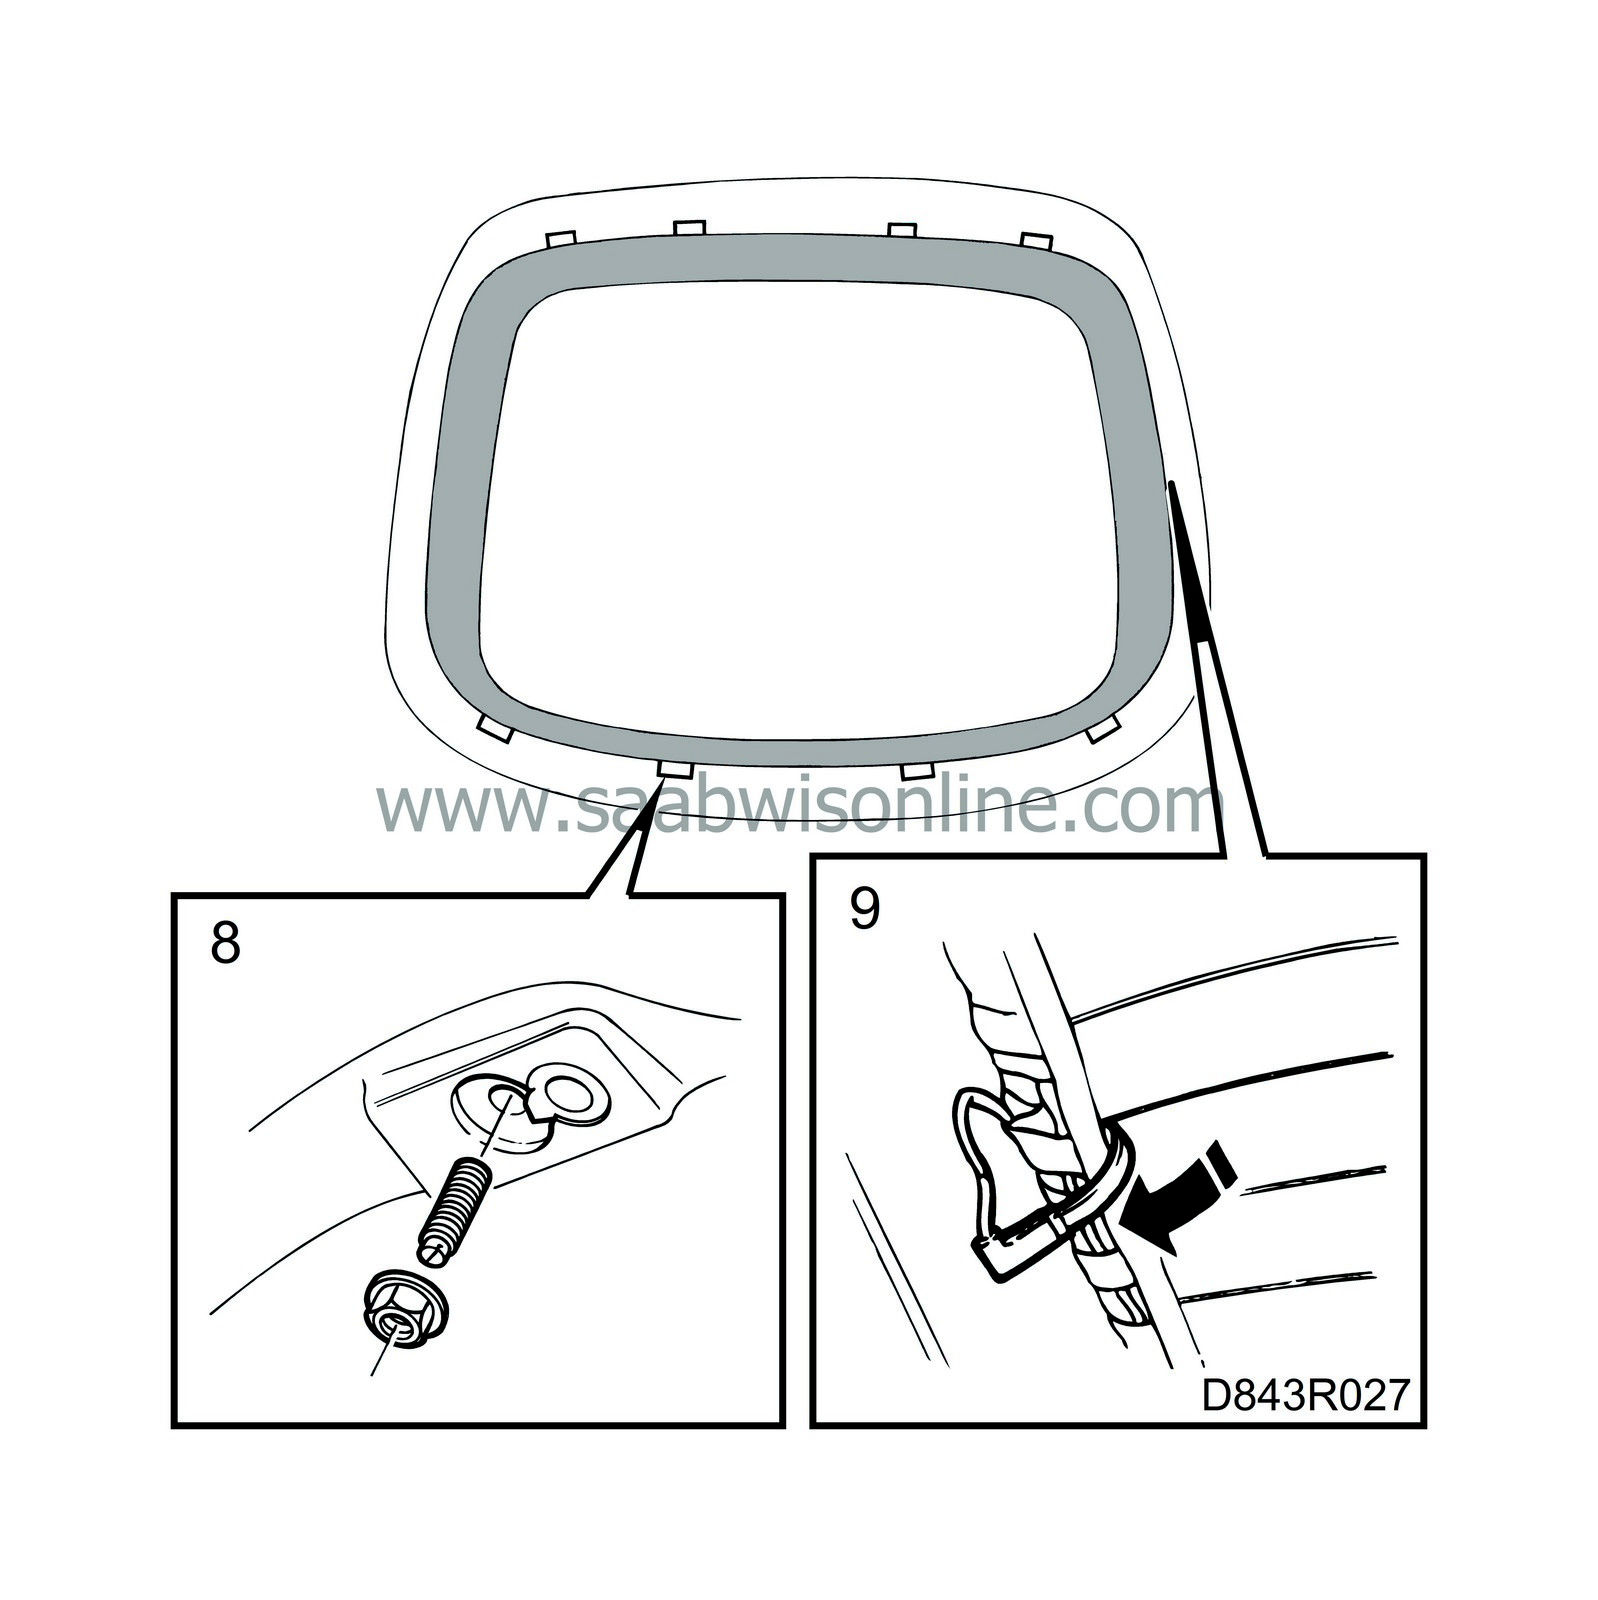
Position the window. Start by fitting at the top edge.
|
|
| 8. |
Tighten the studs and nuts that secure the window.
Tightening torque: 3 Nm (2.2 lbf ft) |
|
| 9. |
Plug in the electric connectors and fold down the contact plates around the flange.
|
|
| 10. |
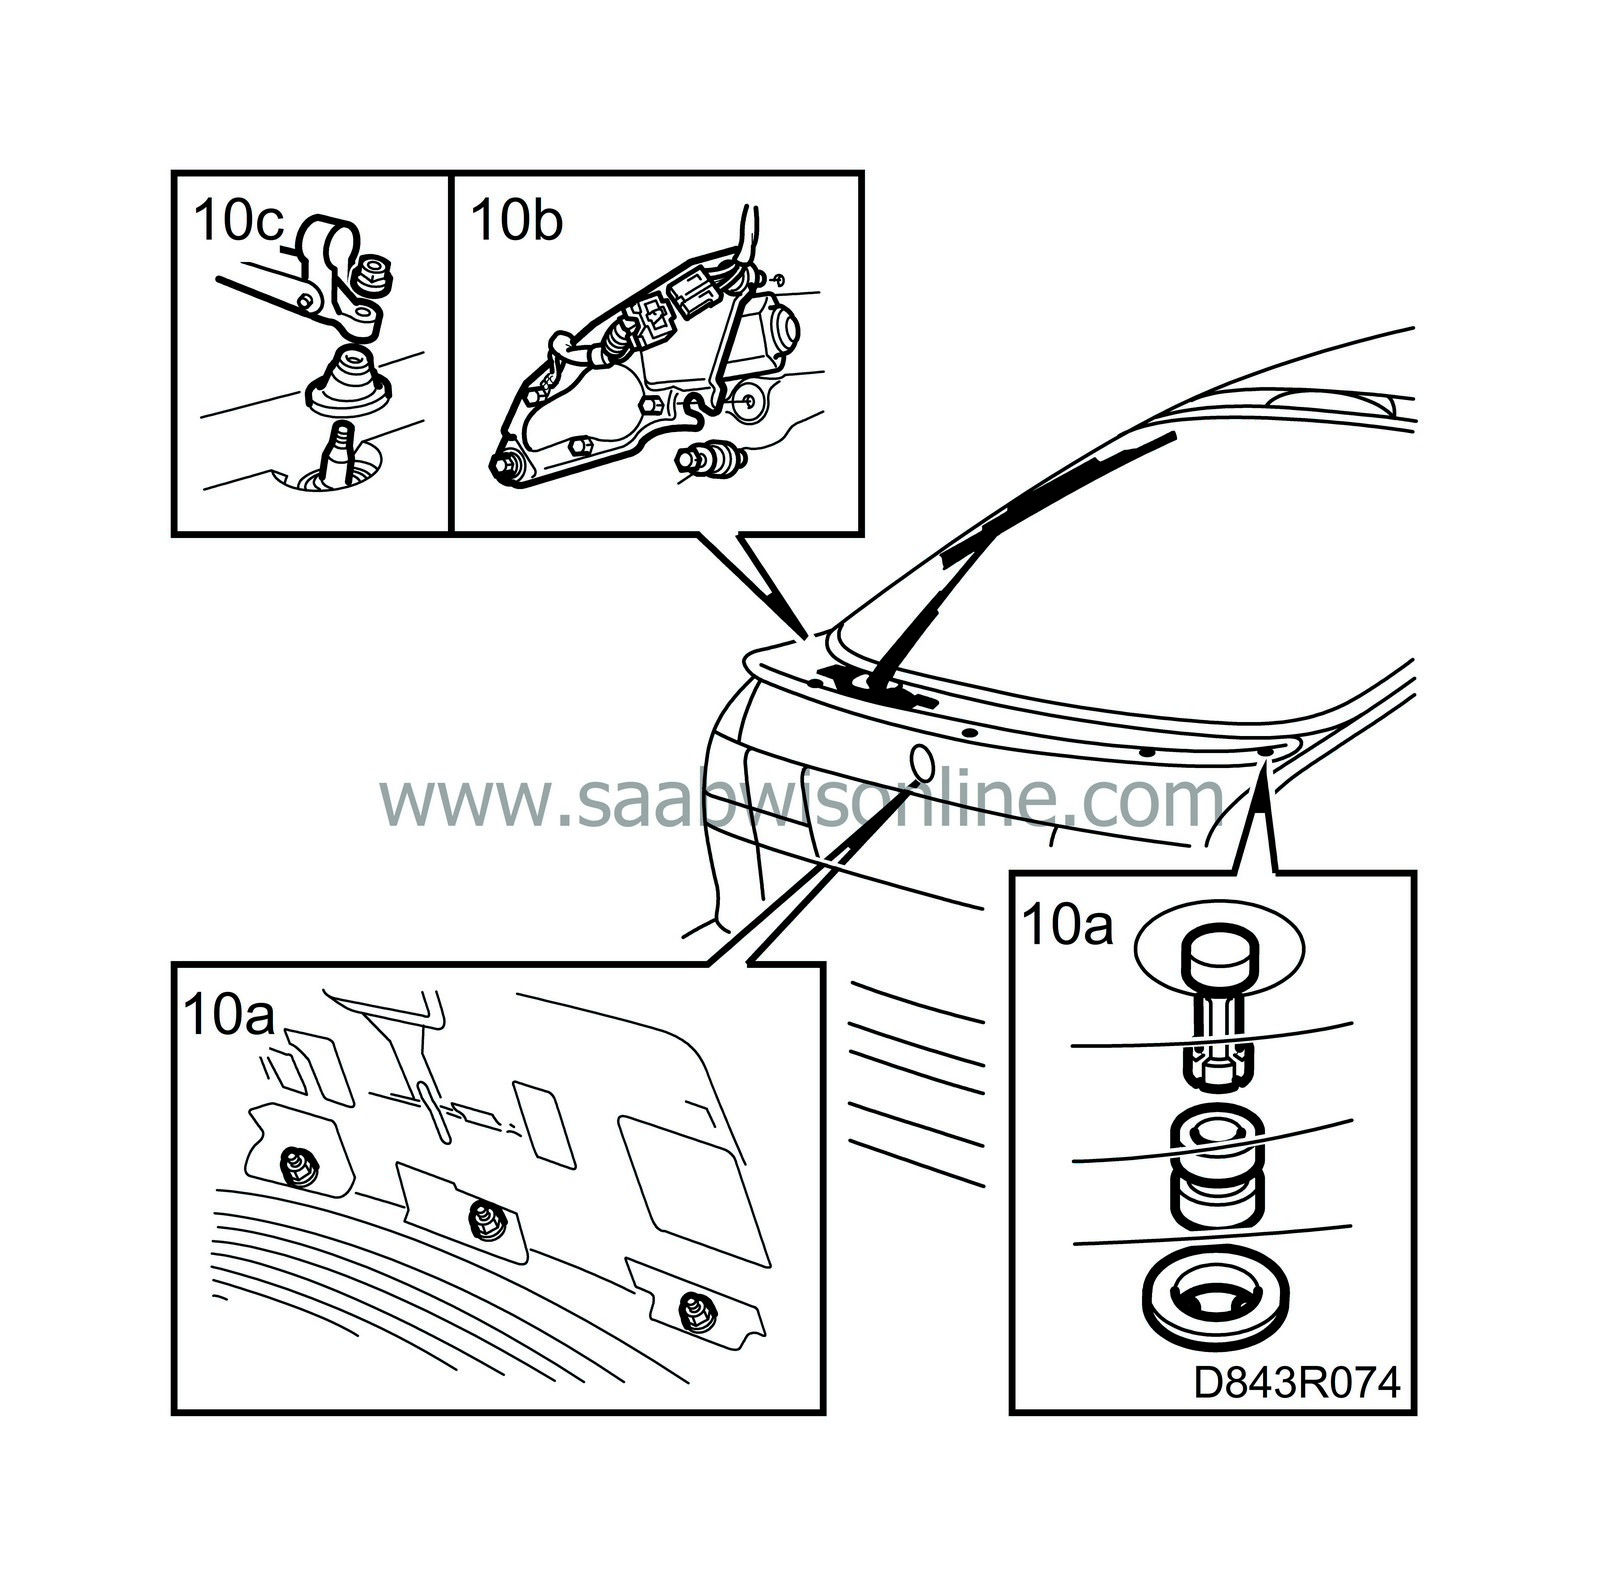
Cars with spoiler and rear wiper unit:
|
|
| 10.a. |
Fit the spoiler and tighten the screws.
|
| 10.b. |
Refit the wiper motor.
|
| 10.c. |
Refit the wiper arm.
|
| 11. |
Refit the luggage compartment trim and tighten the screws.
|
|
| 12. |
Fit the tailgate handle and tighten the screws.
|
|
| 13. |
Refit the side trim mouldings on the side, on the inside of the tailgate.
|
|
| 14. |
Press on the trim moulding at the top edge on the inside.
|
|
| 15. |
Carefully close the tailgate without locking it.
|
|
| 16. |
Allow the adhesive to harden before continuing work. Betamate E 2400 hardens in 4 hours at a temperature of 23˚C and 50 % relative humidity.
|
|

