PRE-RELEASE
Windscreen, CV
| Windscreen, CV |
| To remove |
| 1. |
Lower the soft top completely.
|
|
| 2. |
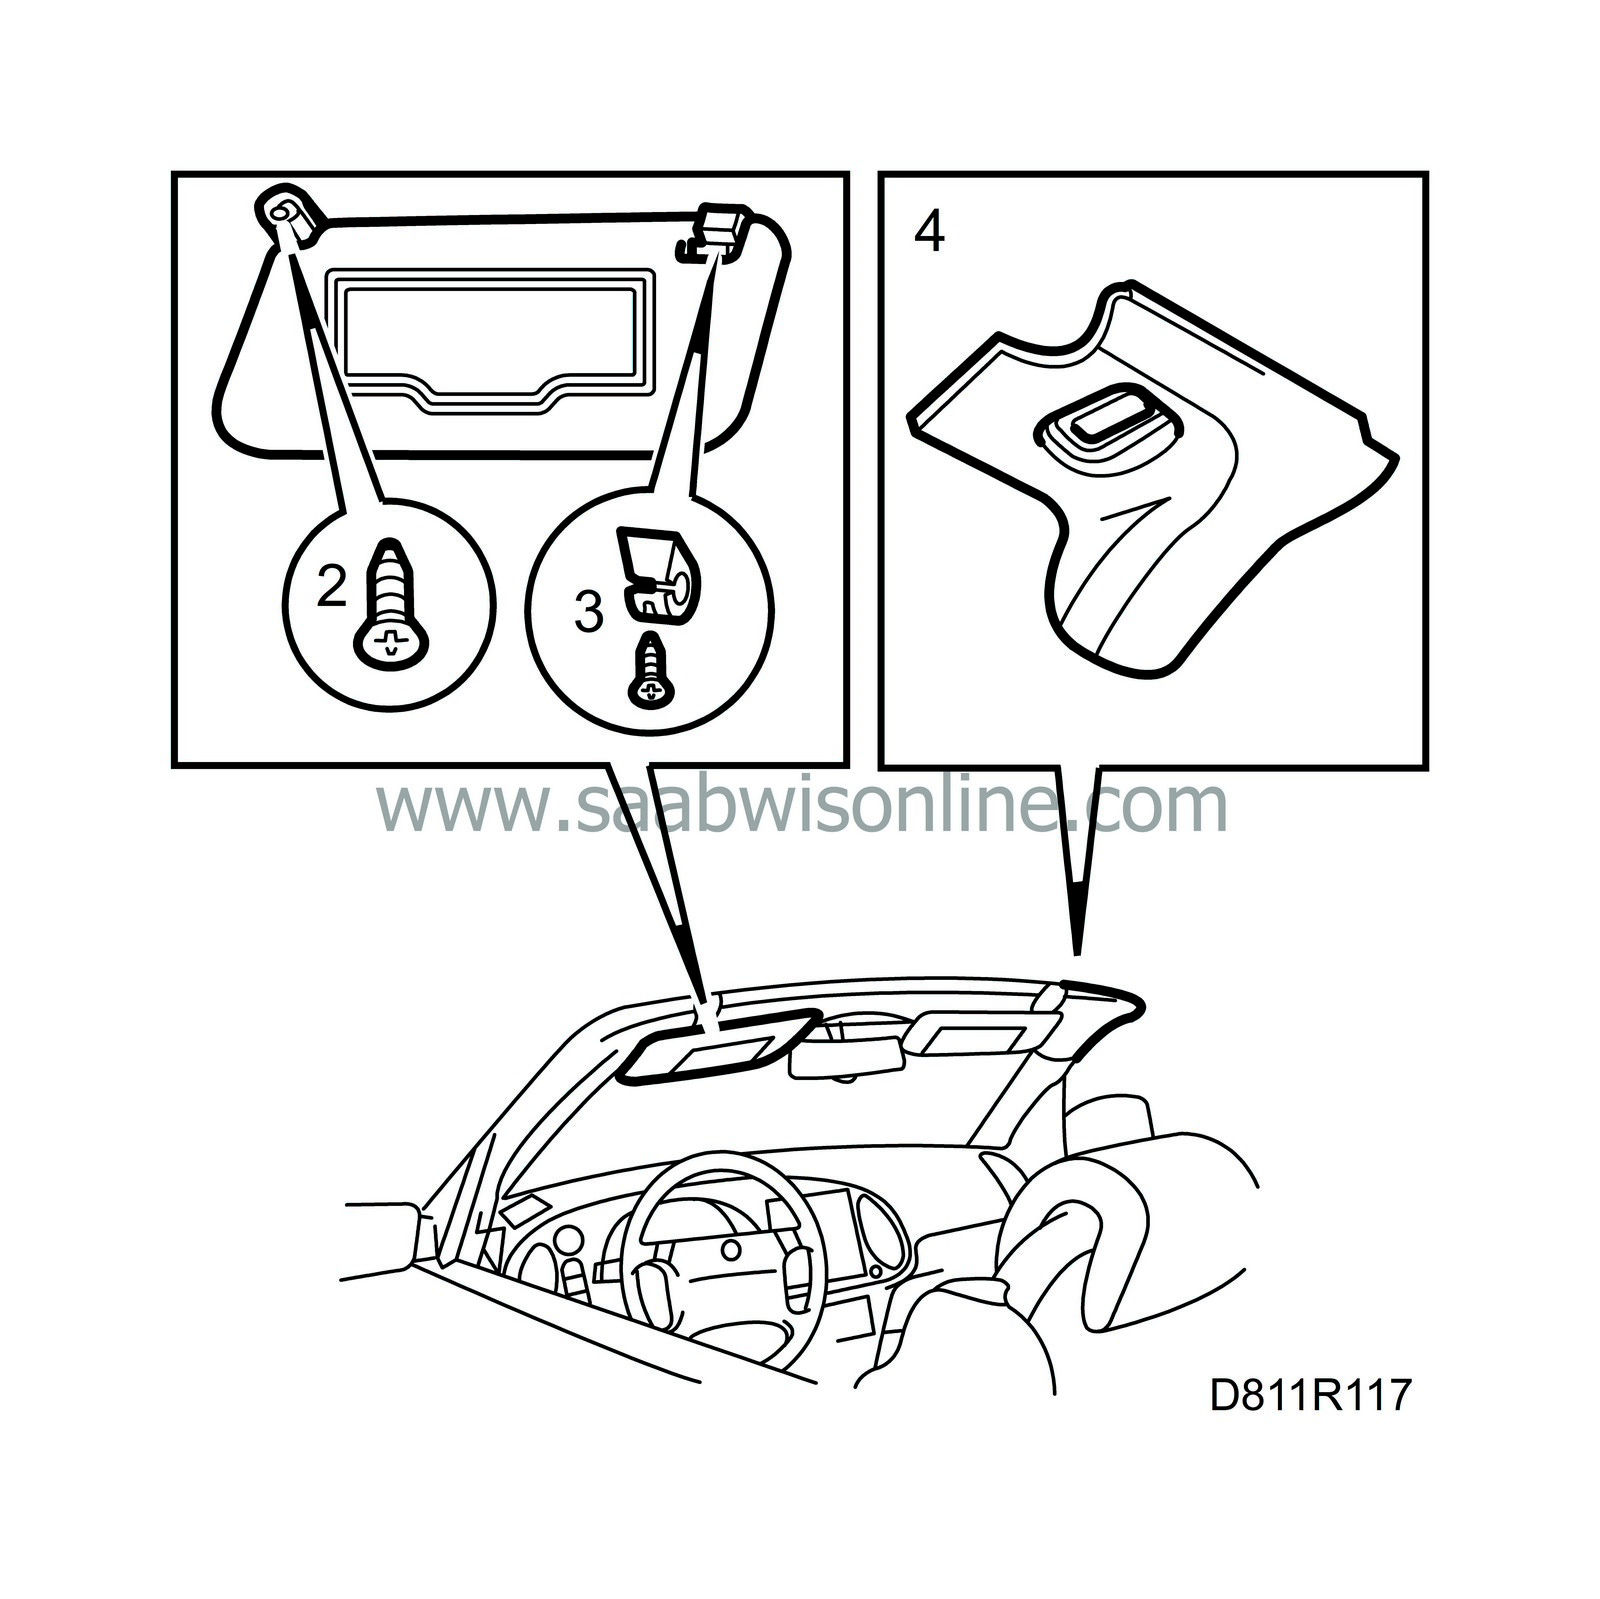
Remove the sun visors.

|
|
| 3. |
Remove the sun visor supports.
|
|
| 4. |
Remove the cover at the top right corner of the windscreen frame.
|
|
| 5. |
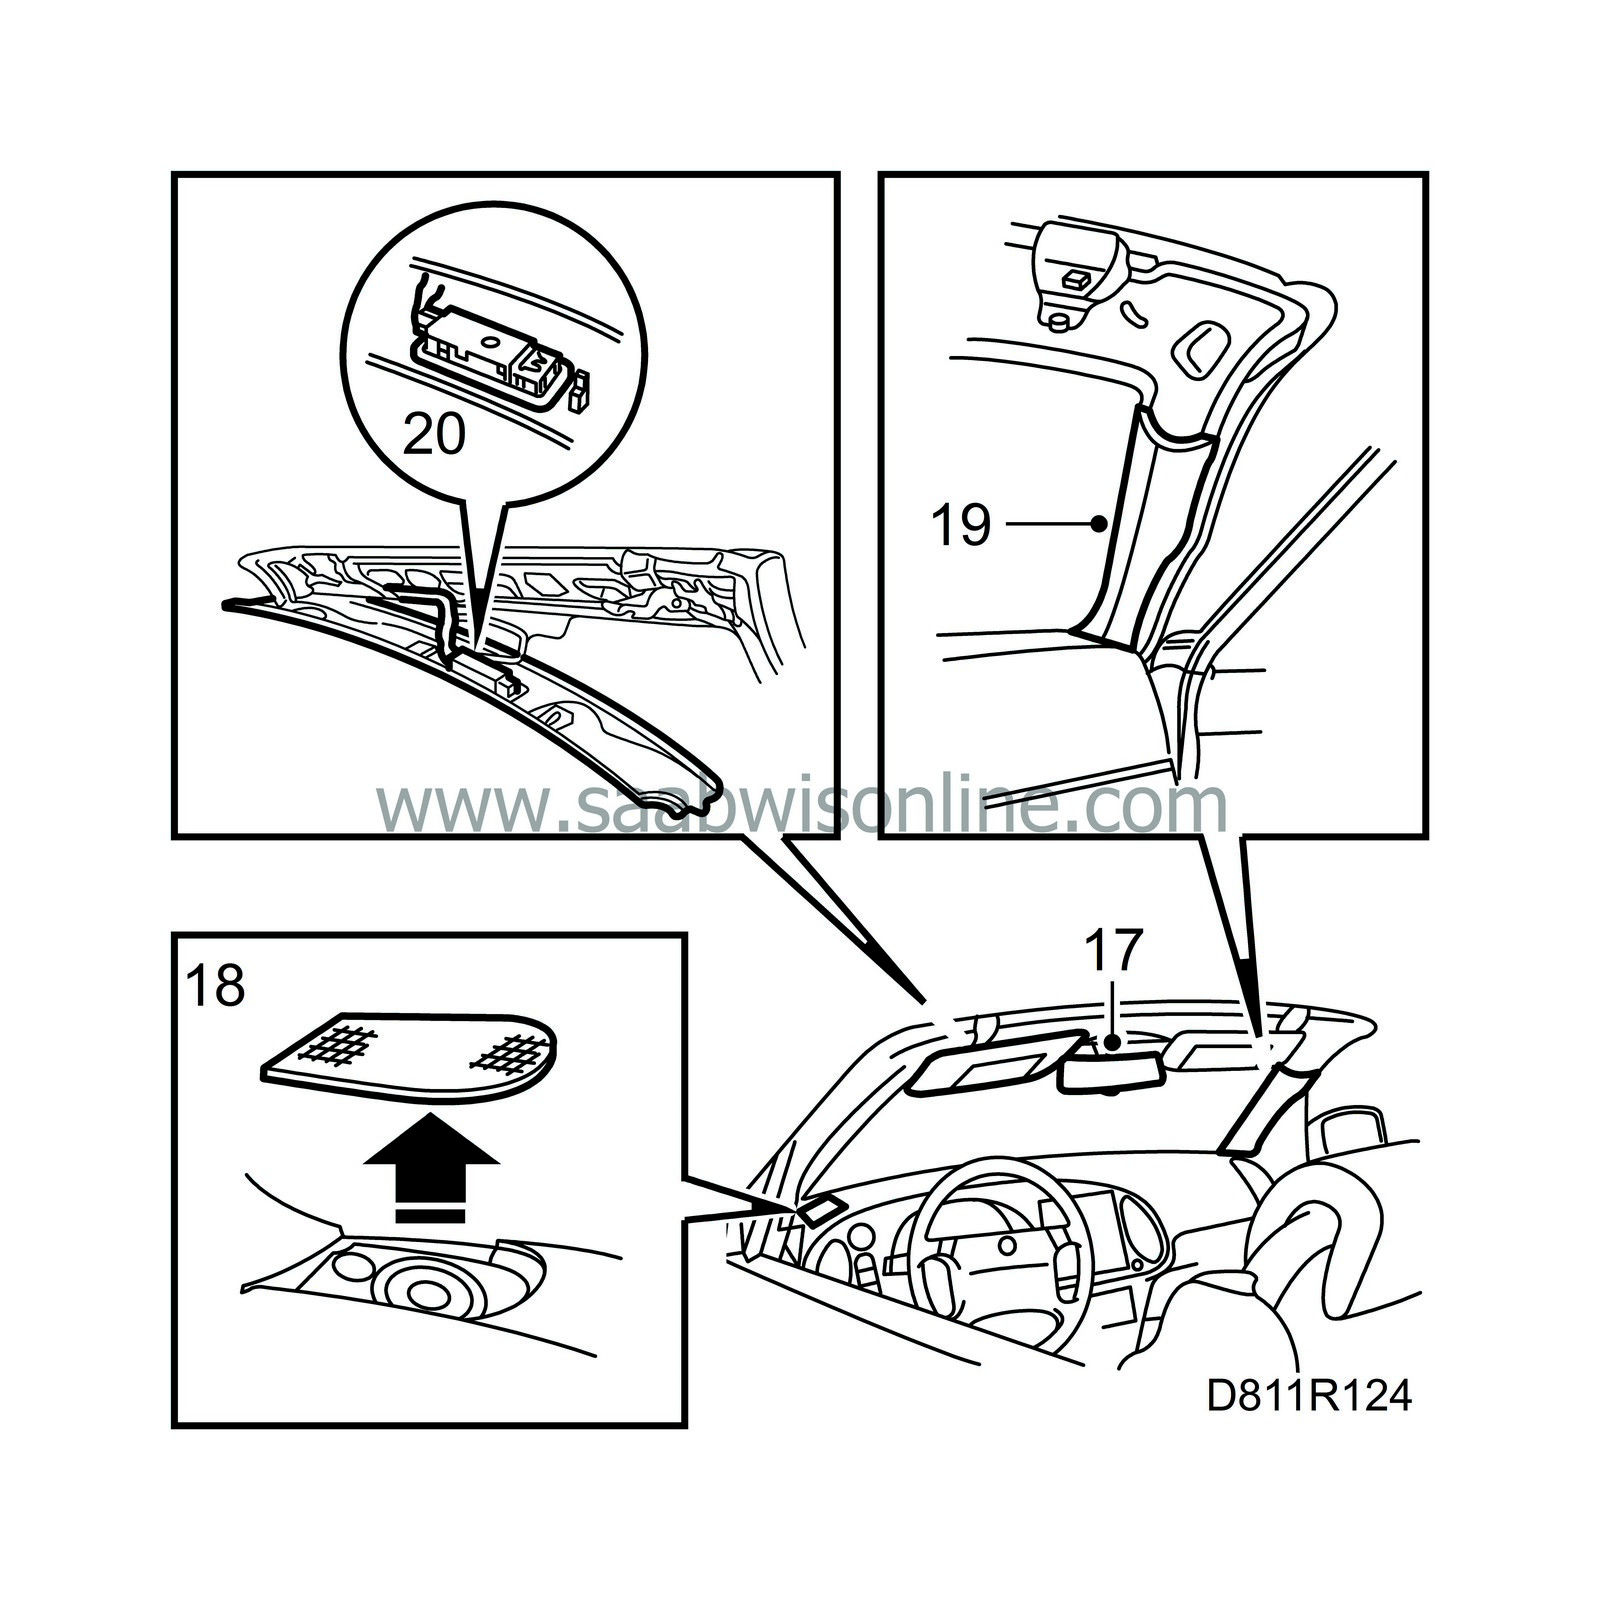
Remove the cover along the top edge of the windscreen frame and unplug the electric connection for the interior light.

|
|
| 6. |
Remove the A-pillar trim.
|
|
| 7. |
Remove the rear-view mirror.
|
|
| 8. |
Remove the loudspeaker grilles.
|
|
| 9. |
Remove the windscreen wipers.
|
|
| 10. |
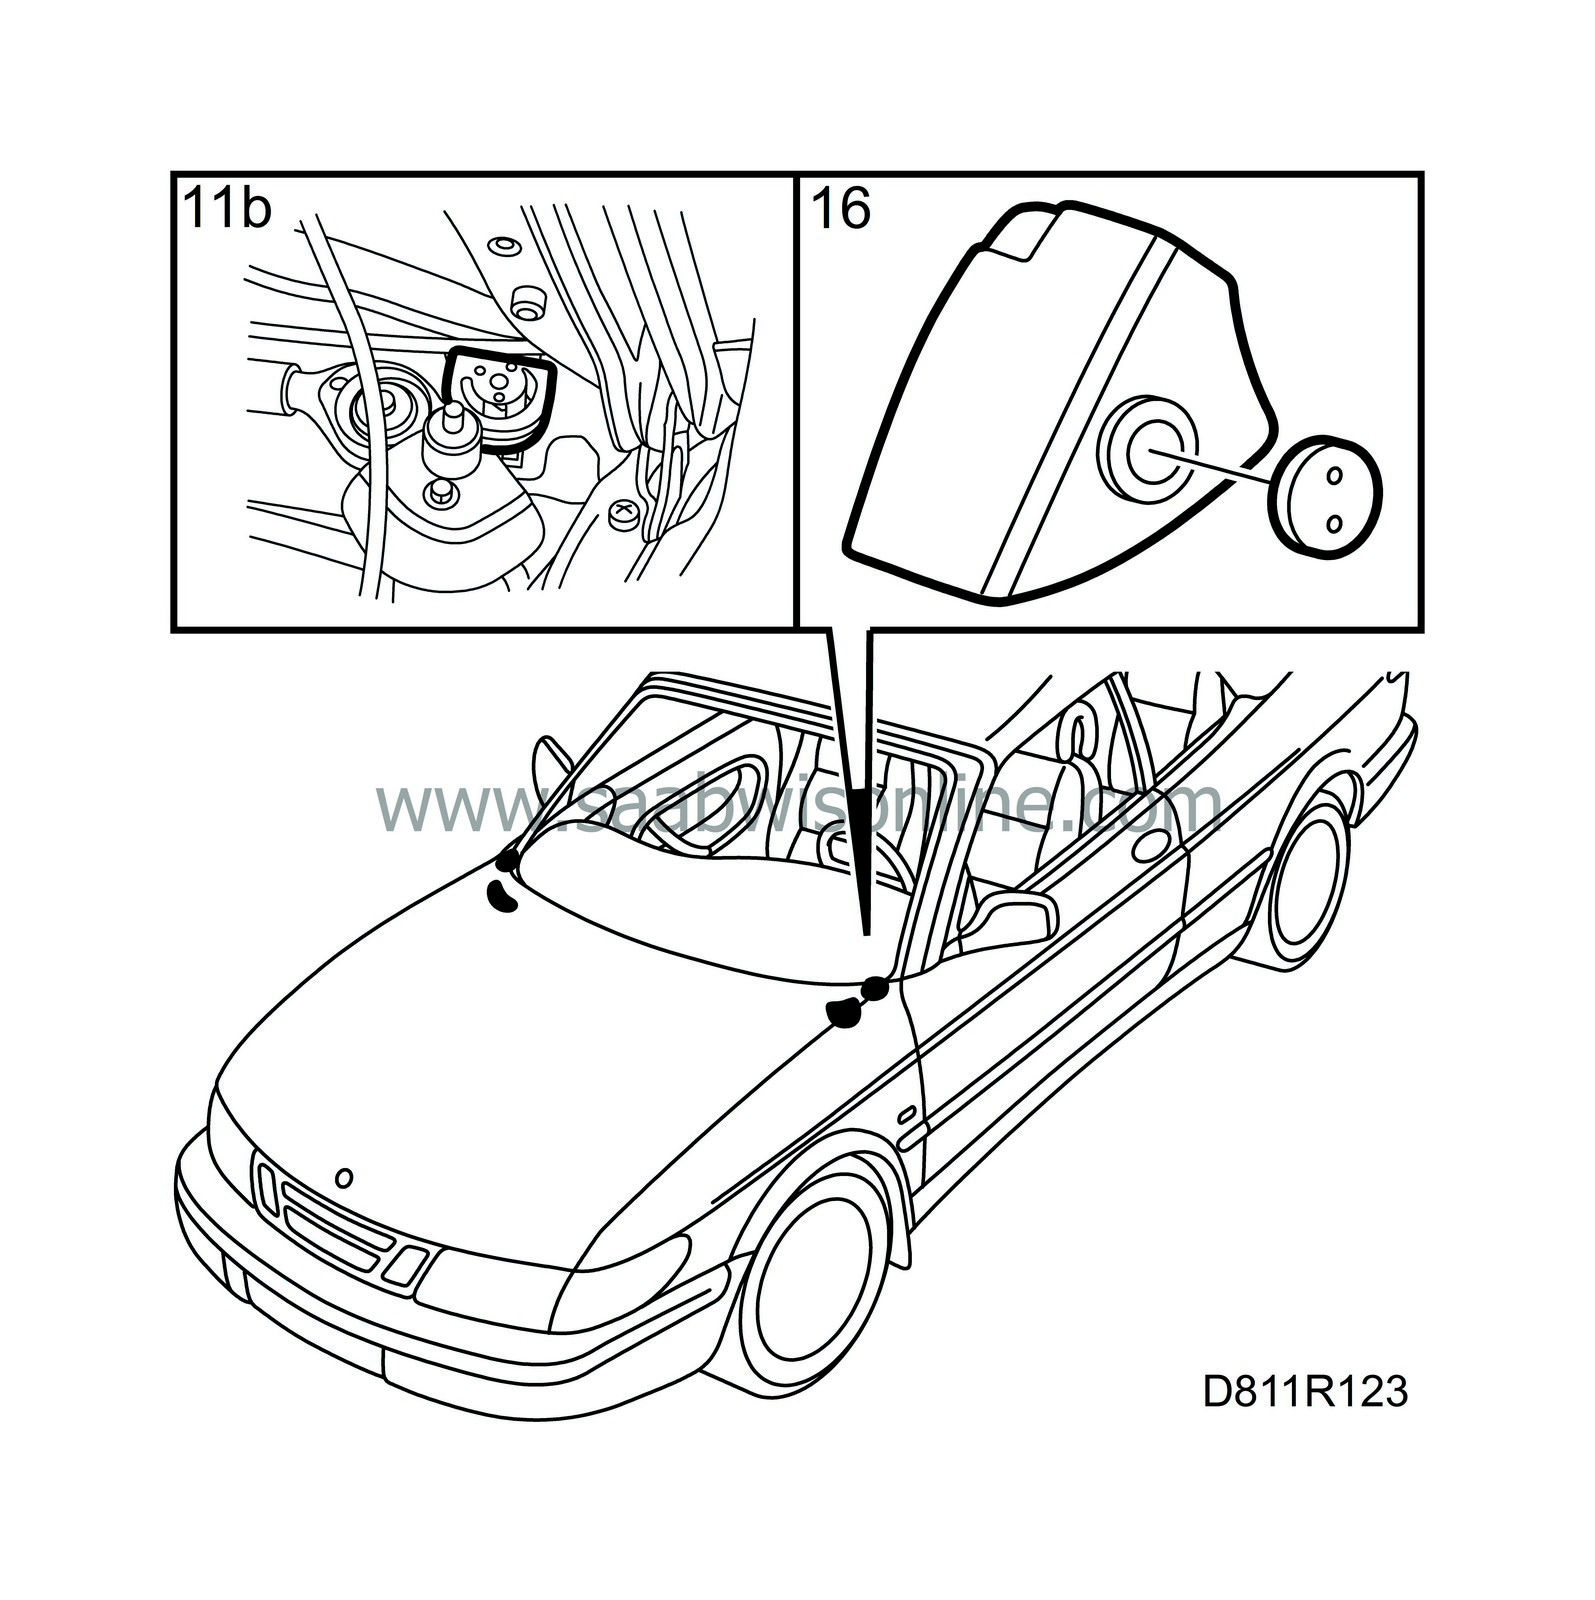
Remove the corner covers by the corners of the bulkhead cover.

|
|
| 11. |
Remove the cover over the bulkhead partition space.
|
|
| 12. |
Turn the eccentric stops to open position.
|
|
| 13. |
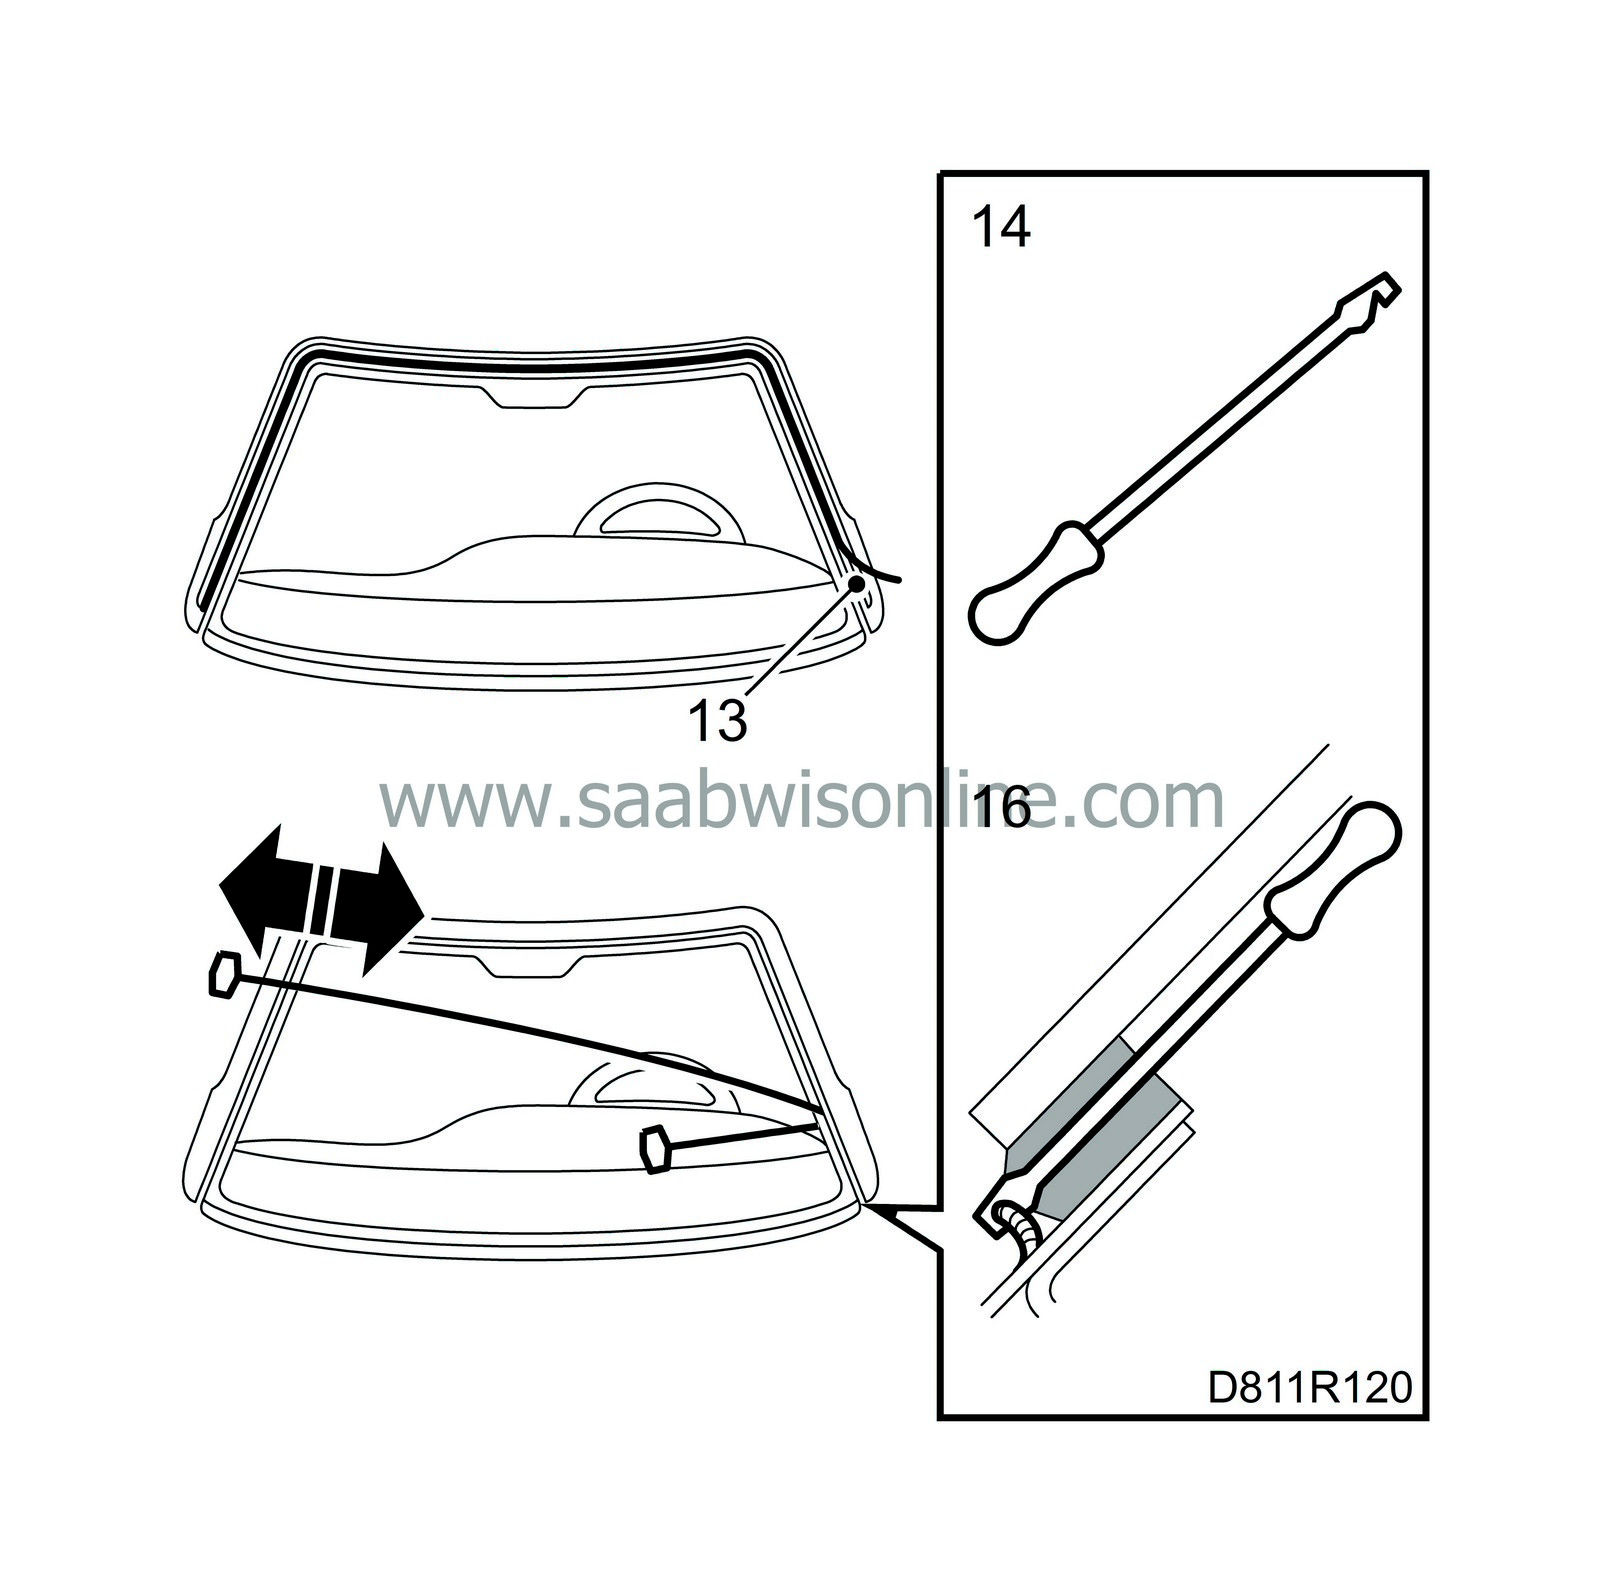
Remove the decor trim around the windscreen.

|
|
| 14. |
Manufacture a special tool to quickly and easily pull the piano wire through the adhesive bead by cutting a groove in a long and narrow screwdriver as shown in the illustration.
|
|
| 15. |
Use special tool, cutting handles part no. (45) 30 14 099 together with the piano wire.
|
|
| 16. |
Push the screwdriver through the adhesive from the inside at the bottom left corner of the windscreen.
|
|
| 17. |
Hook one end of the piano wire in the screwdriver groove and pull the wire through the adhesive bead into the cabin.
|
|
| 18. |
Fasten the piano wire to the handles.
|
|
| 19. |
Cut out the windscreen with assistance from another person.
|
|
| 20. |
Lift out the windscreen.
|
|
| To fit |
| Important | ||
|
Betamate E 2400 hardens in 4 hours at + 23°C and 50% relative humidity. In order to prevent the windscreen from jarring loose or its position being changed during the hardening time, the car must not be subjected to blows or bumping. Doors, boot lid and bonnet must not be slammed shut. The car must not be rocked or rolled. Do not clamp the windshield while the adhesive is hardening. |
||
The car should stand on all four wheels on a level surface when the windscreen is fitted. For best results, it is extremely important that all cleaned and primed surfaces are kept free of dirt and dust during the work process. The same applies to the adhesive bead when it has been applied. Once the work has been started, it must continue without interruption until the windscreen has been fitted and the adhesive is hardening. The adhesive begins to harden as soon as the content in both tubes are mixed. The windscreen must therefore be fitted within 5 minutes of the time when the adhesive application was started. Note that steps 6 - 10 must unconditionally be performed in the given order to ensure a satisfactory result with maximum adhesion.
| 1. |
Trim the adhesive bead on the windscreen flange to a height of max. 2 mm. If the old windscreen is to be refitted, the adhesive bead on the windscreen must also be trimmed to max. 2 mm. Old, well-adhering adhesive provides a good base for the new adhesive. Loose adhesive on glass or sheet metal must be removed.
|
|
| 2. |
Remove loose particles and dirt from the metal flange with a vacuum cleaner.
|
|
| 3. |
Repair any paintwork damage as follows:
|
|
| • |
Scrape off any loose flakes of paint with a knife.
|
| • |
Clean using Teroson cleaning agent FL.
|
| • |
Apply primer. Use Standox 1K Füllprimer.
|
| • |
Apply the finish coat.
|
||||||||||
| 4. |
Apply body primer, part no. (45) 301 87 02, to any painted areas that have been touched up. Body primer must
not
be used on old, well-cohering adhesive.
|
|
| 5. |
Position the lifting handle on the outside of the windscreen and place the windscreen on a stand.
|
|
| 6. |
Carefully wash the edge of the windscreen with the cleaner that is included in the adhesive kit. Wet the edge thoroughly with a rag. Wipe dry with a lint-free rag included in the adhesive kit. Avoid touching the cleaned area.
|
||||||||||
| 7. |
Press the retainer strip and the decor trim onto the windscreen.
|
|
| 9. |
Position the spacers on the windscreen. The mark in the blackened area on the left side indicates where the spacers should be placed.
|
|
| 10. |
Apply the adhesive as follows:

|
|
| • |
Cut 5 mm off the tip of the adhesive applicator nozzle. Heat the nozzle in hot water and adjust the opening to the size 7 x 11 mm.
|
| • |
Adjust the pressure of the adhesive gun to obtain a bead of adhesive measuring 7 x 11 mm.
|
| • |
Hold the gun at right angles to the window and apply a bead of adhesive to the primed surface along the retainer strip. Start on the lower edge of the window. Make sure that there are no breaks in the adhesive bead.
|
| 11. |
Fit the windscreen.

|
|
| 11.a. |
Adjust the windscreen to the left against the spacer.
|
| 11.b. |
Secure the windscreen in this position and turn the eccentric stops so that they are positioned against the windscreen.
|
||||||||||
| 12. |
Lift up the top edge of the decor strip somewhat in the middle and pour water. Check to make sure that water does not leak into the cabin.
|
|
| 13. |
Allow the adhesive to harden before continuing. Betamate E 2400 hardens in 4 hours at + 23°C and 50 % relative humidity.
|
|
| 14. |
Refit the cover over the bulkhead partition space.
|
|
| 15. |
Refit the windscreen wipers.
|
|
| 16. |
Refit the corner covers by the bulkhead cover.
|
|
| 17. |
Refit the rear-view mirror. A loose rear-view mirror mounting should be glued with glass adhesive, part no. (45) 30 06 830.

|
|
| 18. |
Refit the loudspeaker grilles.
|
|
| 19. |
Refit the trim on the A-pillars.
|
|
| 20. |
Plug in the connector for the interior lighting and refit the cover at the top of the windscreen.
|
|
| 21. |
Refit the cover at the top right corner of the windscreen.

|
|
| 22. |
Refit the sun visor supports.
|
|
| 23. |
Refit the sun visors. Refit the tape around the connectors to reduce the risk of it rattling.
|
|
| 24. |
Clean the inside and outside of the windscreen.
|
|


