Soft top cover, headlining and rear window
|
|
Soft top cover, headlining and rear window
|
|
1.
|
Operate the soft top to half open position and position the soft top support special tool (16) 82 93 144 so that the soft top does not fall when the hydraulic pressure is released.
|
|
2.
|
Remove the front seals and their retainers.
|
|
3.
|
Remove the retainer strip in the first bow front edge (9 screws).
|
|
4.
|
Lift up the upholstery by the handle with a small screwdriver and remove the handle by pulling the pins out of the groove.
|
|
5.
|
Remove the covers that are fastened to the front rail with two plastic clips. Hold the soft top support so that it does not release when the covers are folded out.
|
|
6.
|
Remove the headlining from the first bow. The headlining is attached to the front rail with a screw on each side and is also hooked on at the front edge and has elastic bands at the sides.
|
|
7.
|
Fold up the soft top outer cover from the first bow.
|
|
8.
|
Drill out the pop rivets for the side cables, three on each side. Clean the holes from burrs.
|
|
9.
|
Remove the soft top support and balance the soft top.
|
|
10.
|
Remove the clip in the second bow and remove the plastic holder.
|
|
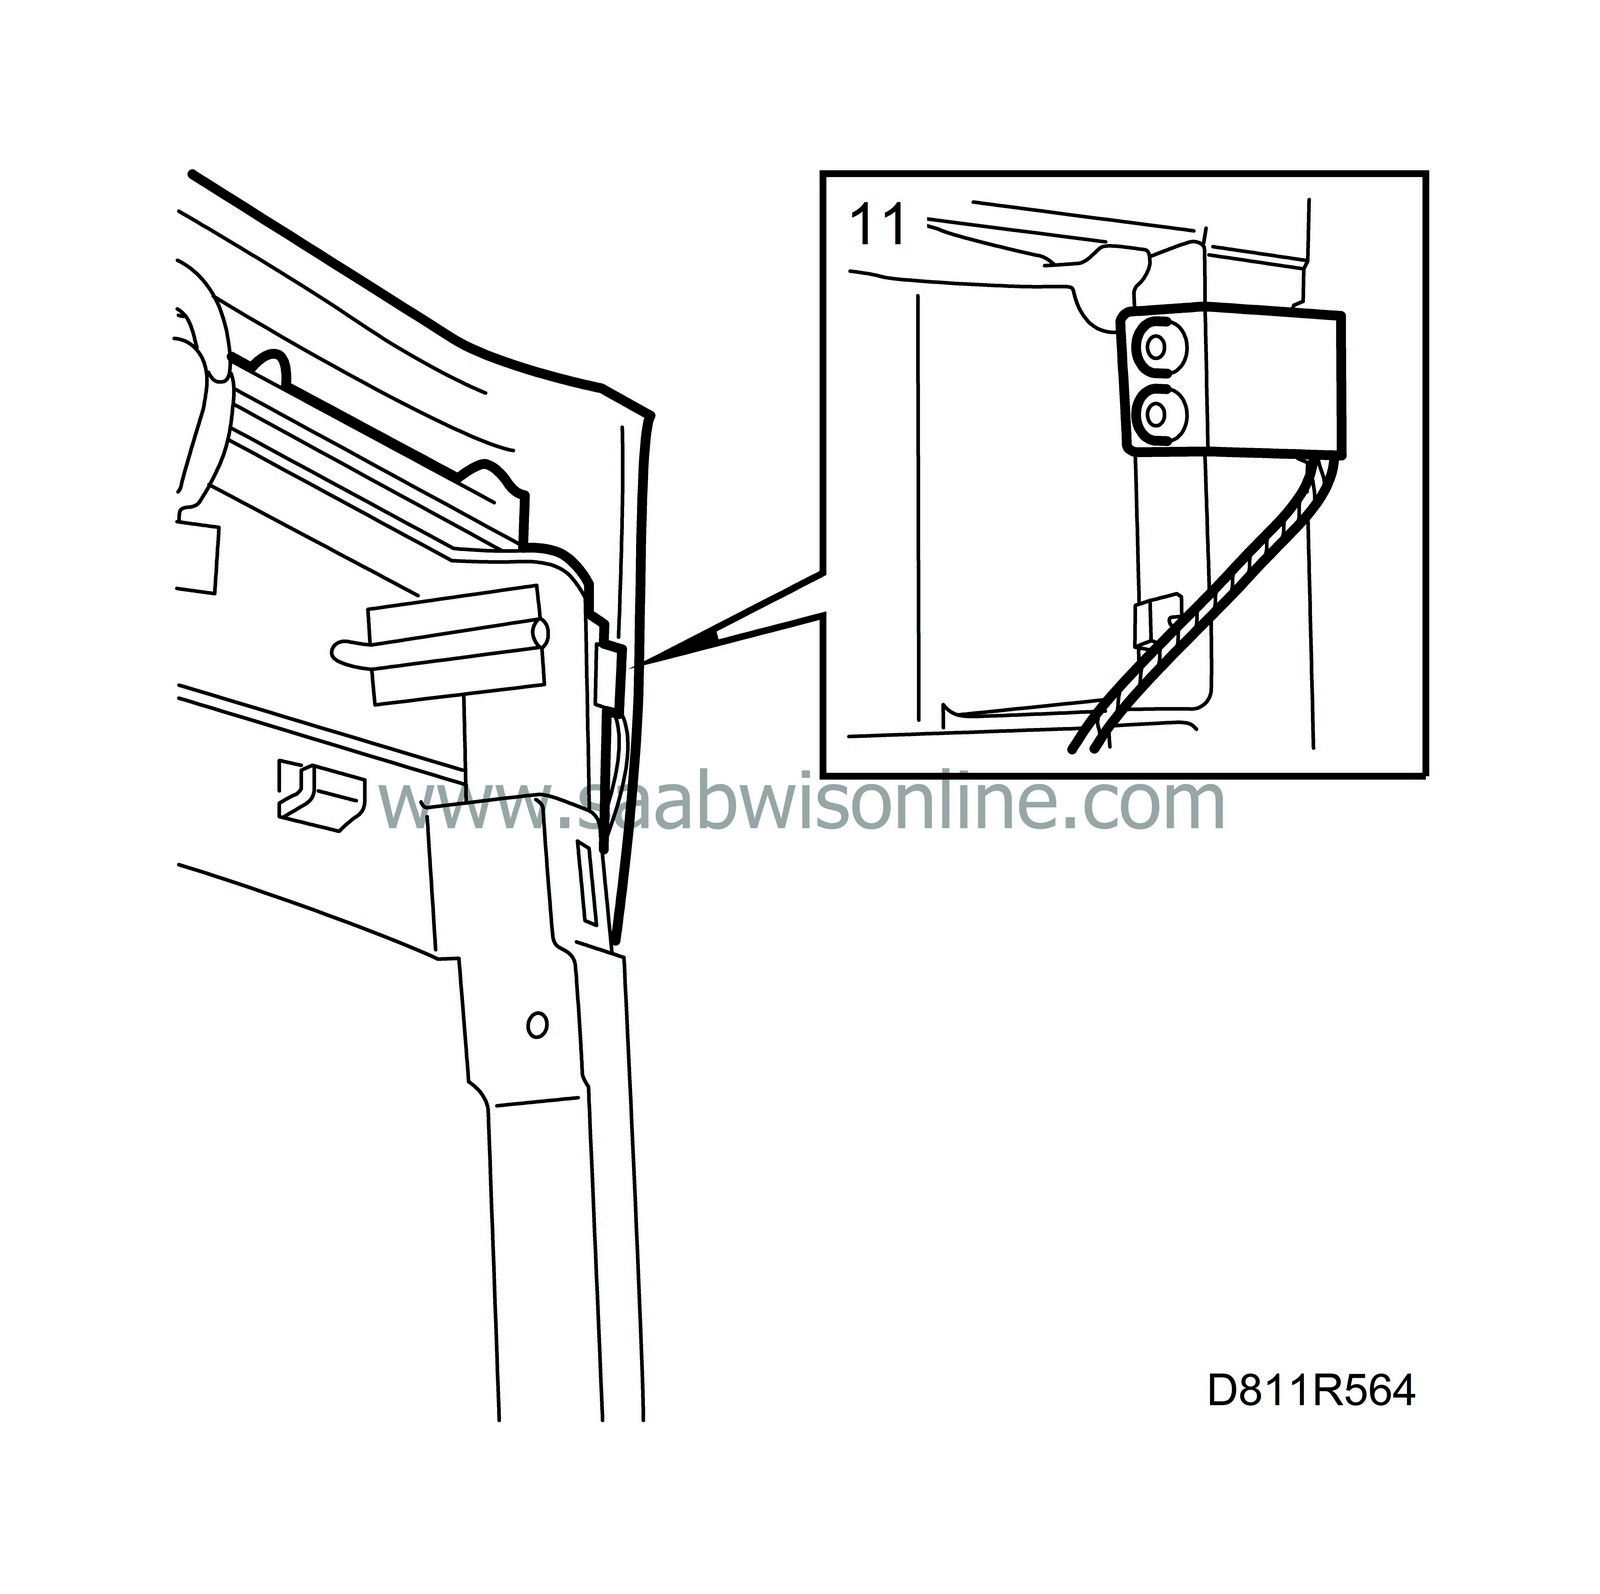
11.
|
Remove the screws/clips for the third bow and remove the plastic holder.
|
|
12.
|
Drill out the pop rivets holding the springs. Clean the holes from burrs.
|
|
13.
|
Remove the screws and clip which hold the inner roof to the rear rail.
|
|
14.
|
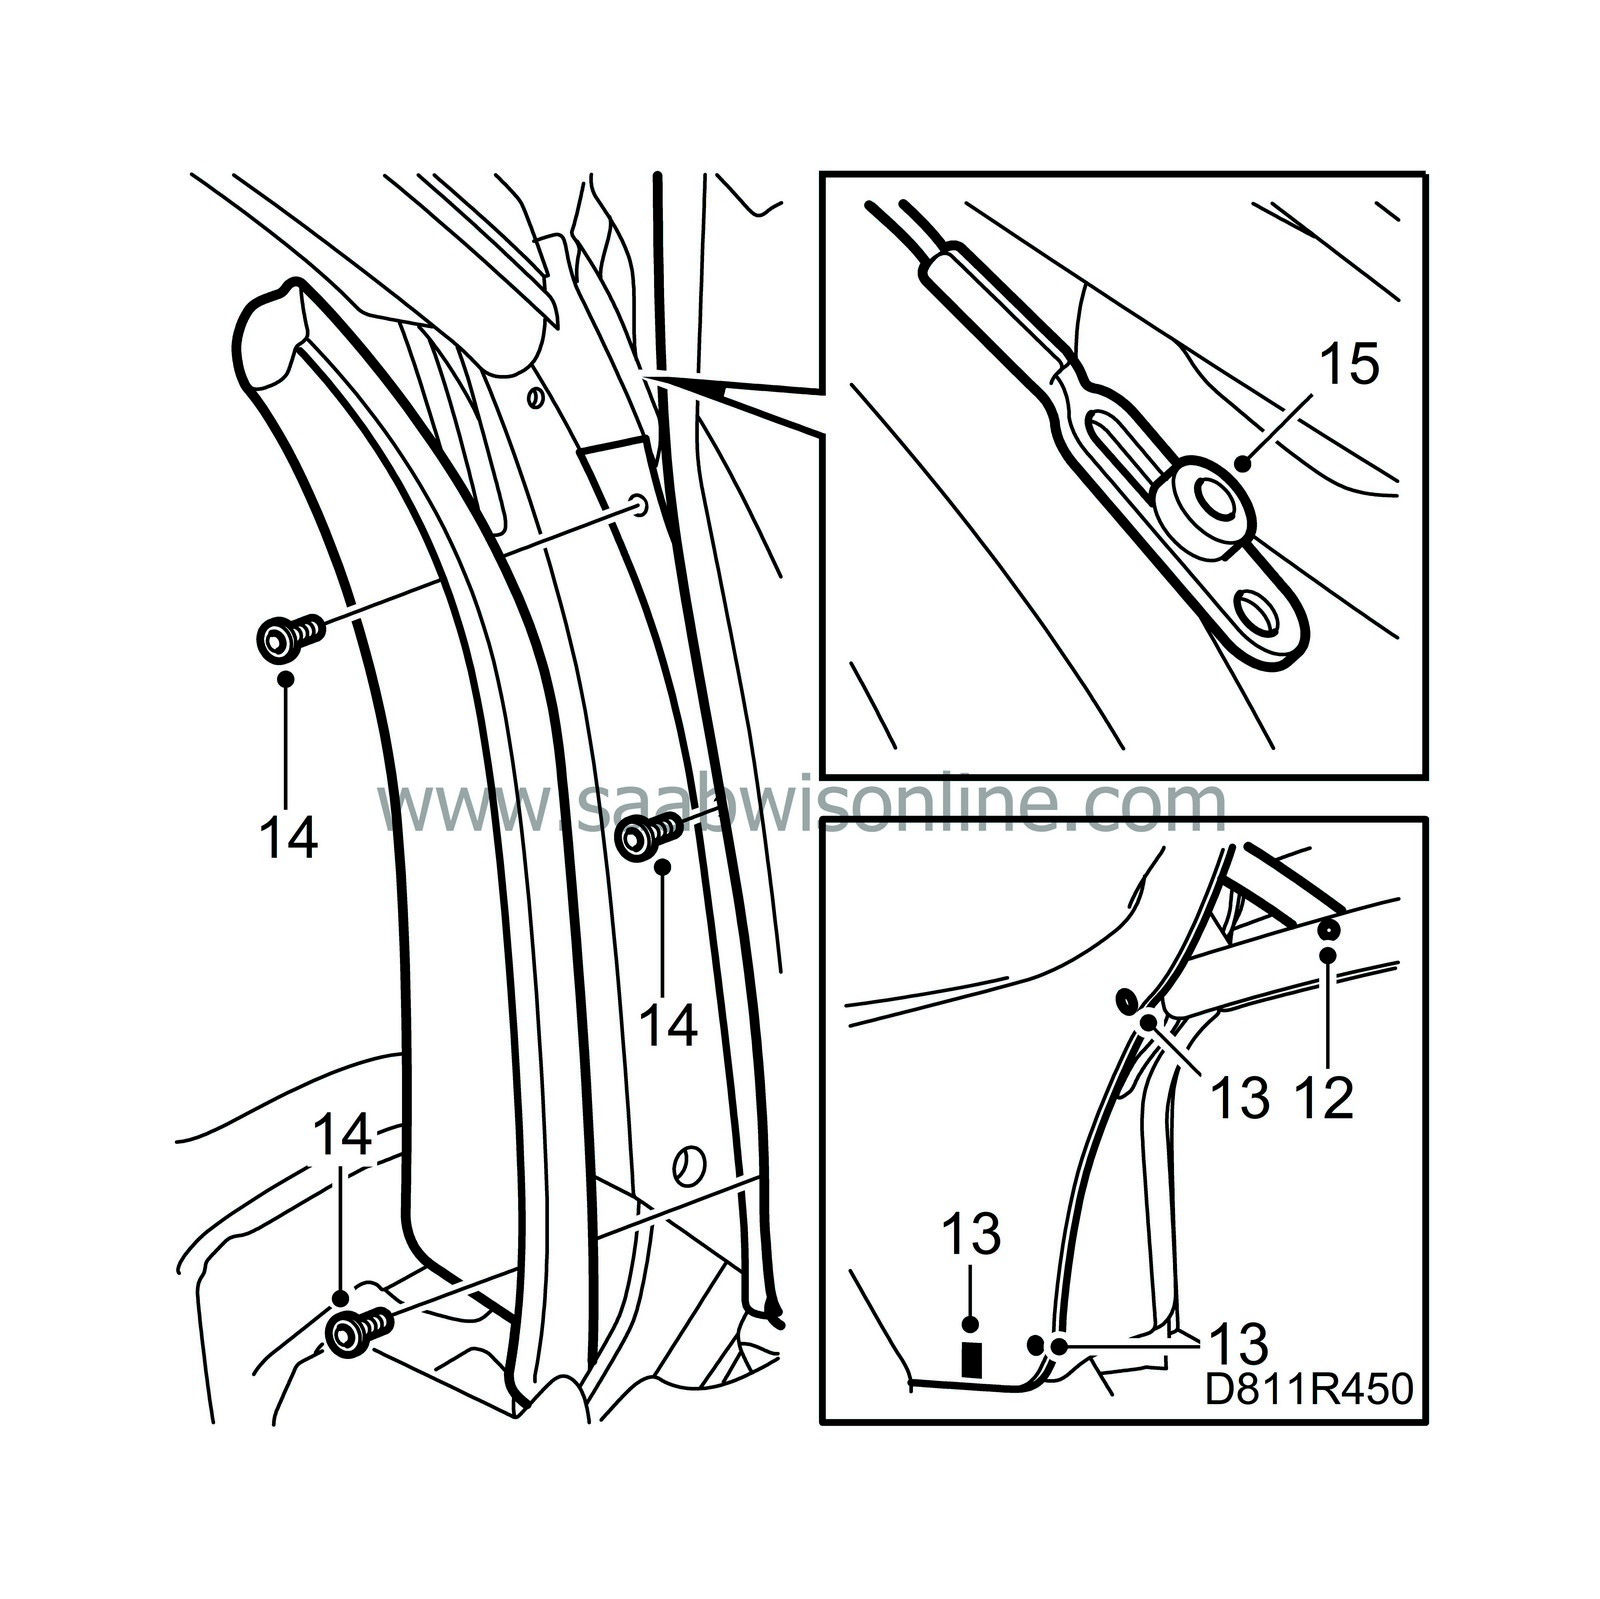
Remove the rear rail seal.
|
|
15.
|
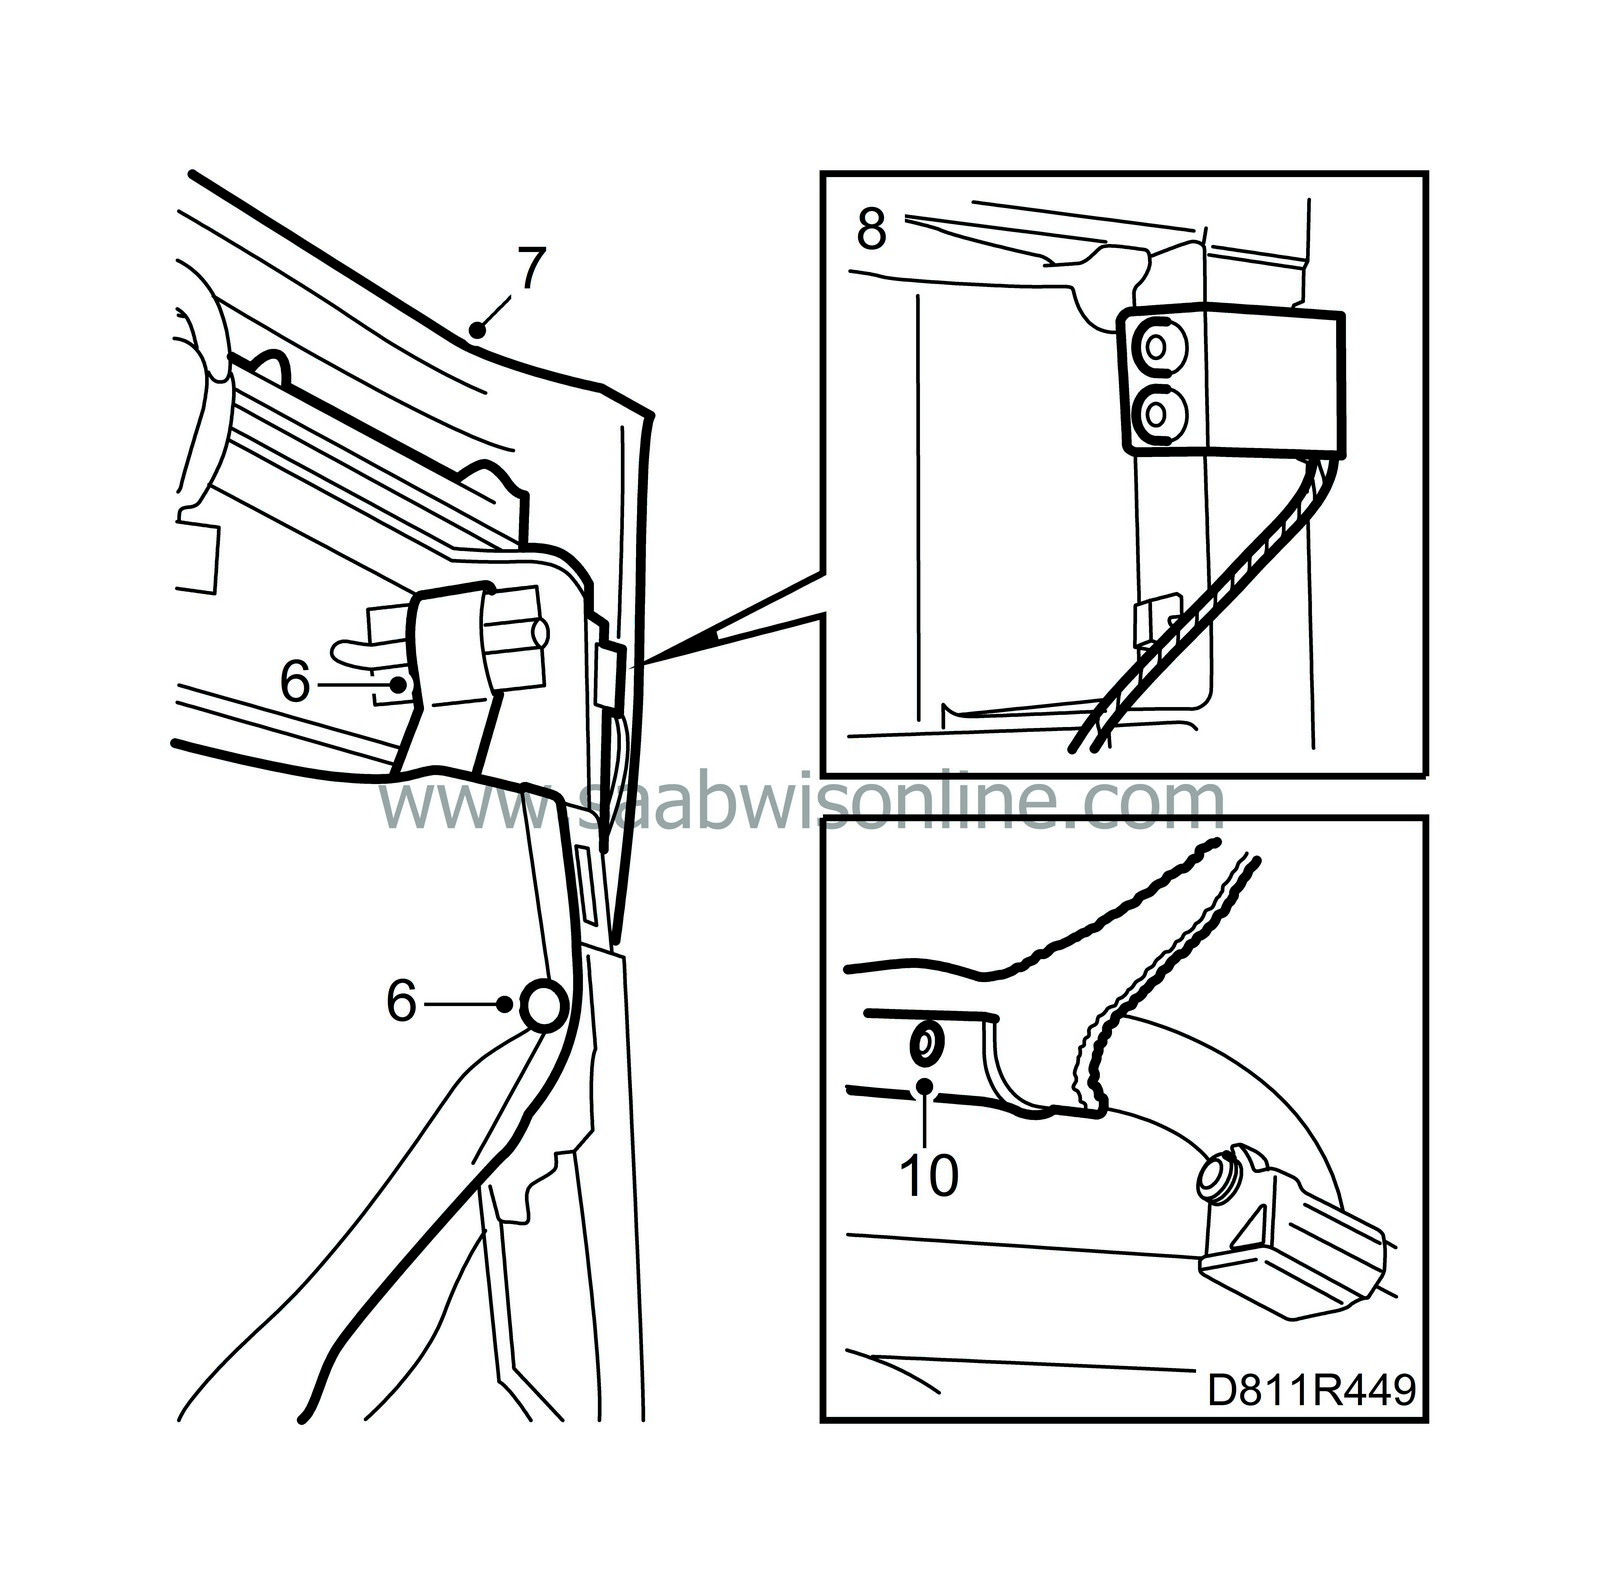
Remove the wire from the rear rail.
|
|
16.
|
Remove the outer roof from the second and third bows.
|
|
17.
|
Drill out the pop rivets which hold the spring to the fourth bow.
|
|
18.
|
Raise (close) the soft top mechanism. Pull out the cables if the soft top fabric is to be replaced.
|
|
19.
|
Raise the fifth bow and remove the elastic bands around the lock lugs on the fifth bow.

|
|
20.
|
Remove the three screws holding the inner roof to the fifth bow. Remove the inner roof rod.
|
|
21.
|
Remove the cable holder and connector for the rear screen heating, and take out the window control with the window. Remove the spring.
|
|
22.
|
Mark the fifth bow middle position on the seal. Remove the seal from the fifth bow and remove the screws securing the fifth bow seal.
|
Important
|
|
Pull away the seal carefully so that it is not damaged.
|
|
|
|
|
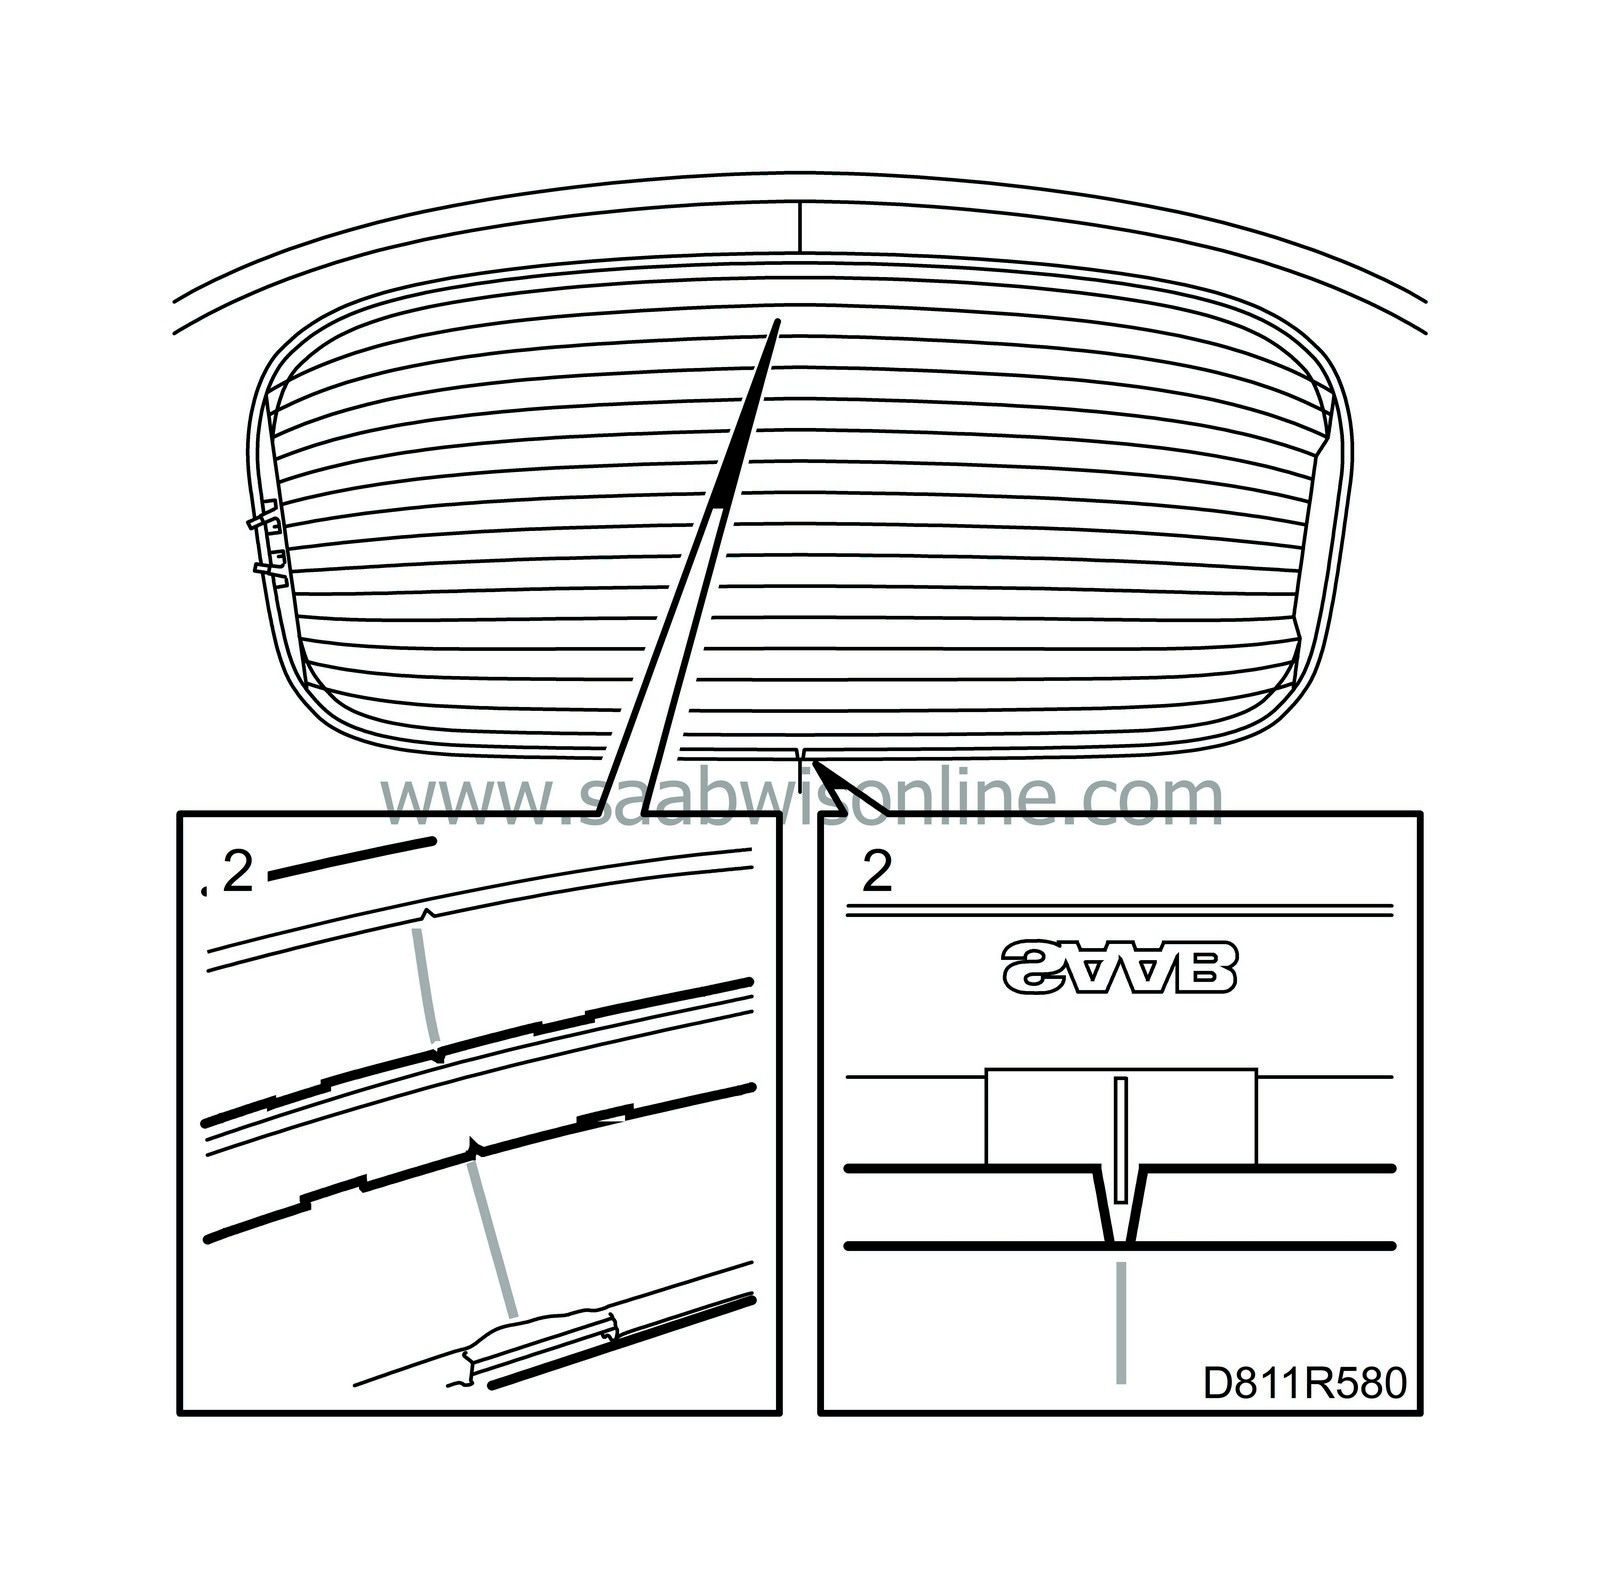
23.
|
Cars up to VIN X7020925
: Drill out the pop rivets in the fifth bow corner (4 pcs) and remove rivet residue from the holes. Remove the outer roof from the fifth bow and rear rail.
|
|
24.
|
Remove the rear window mounting from the lock lugs and lift away the soft top outer cover and the headlining along with the rear window.
|
|
Dismantling soft top cover, headlining and rear window
|
|
1.
|
Position the soft top fabric with the rear window on a work bench.
|
|
2.
|
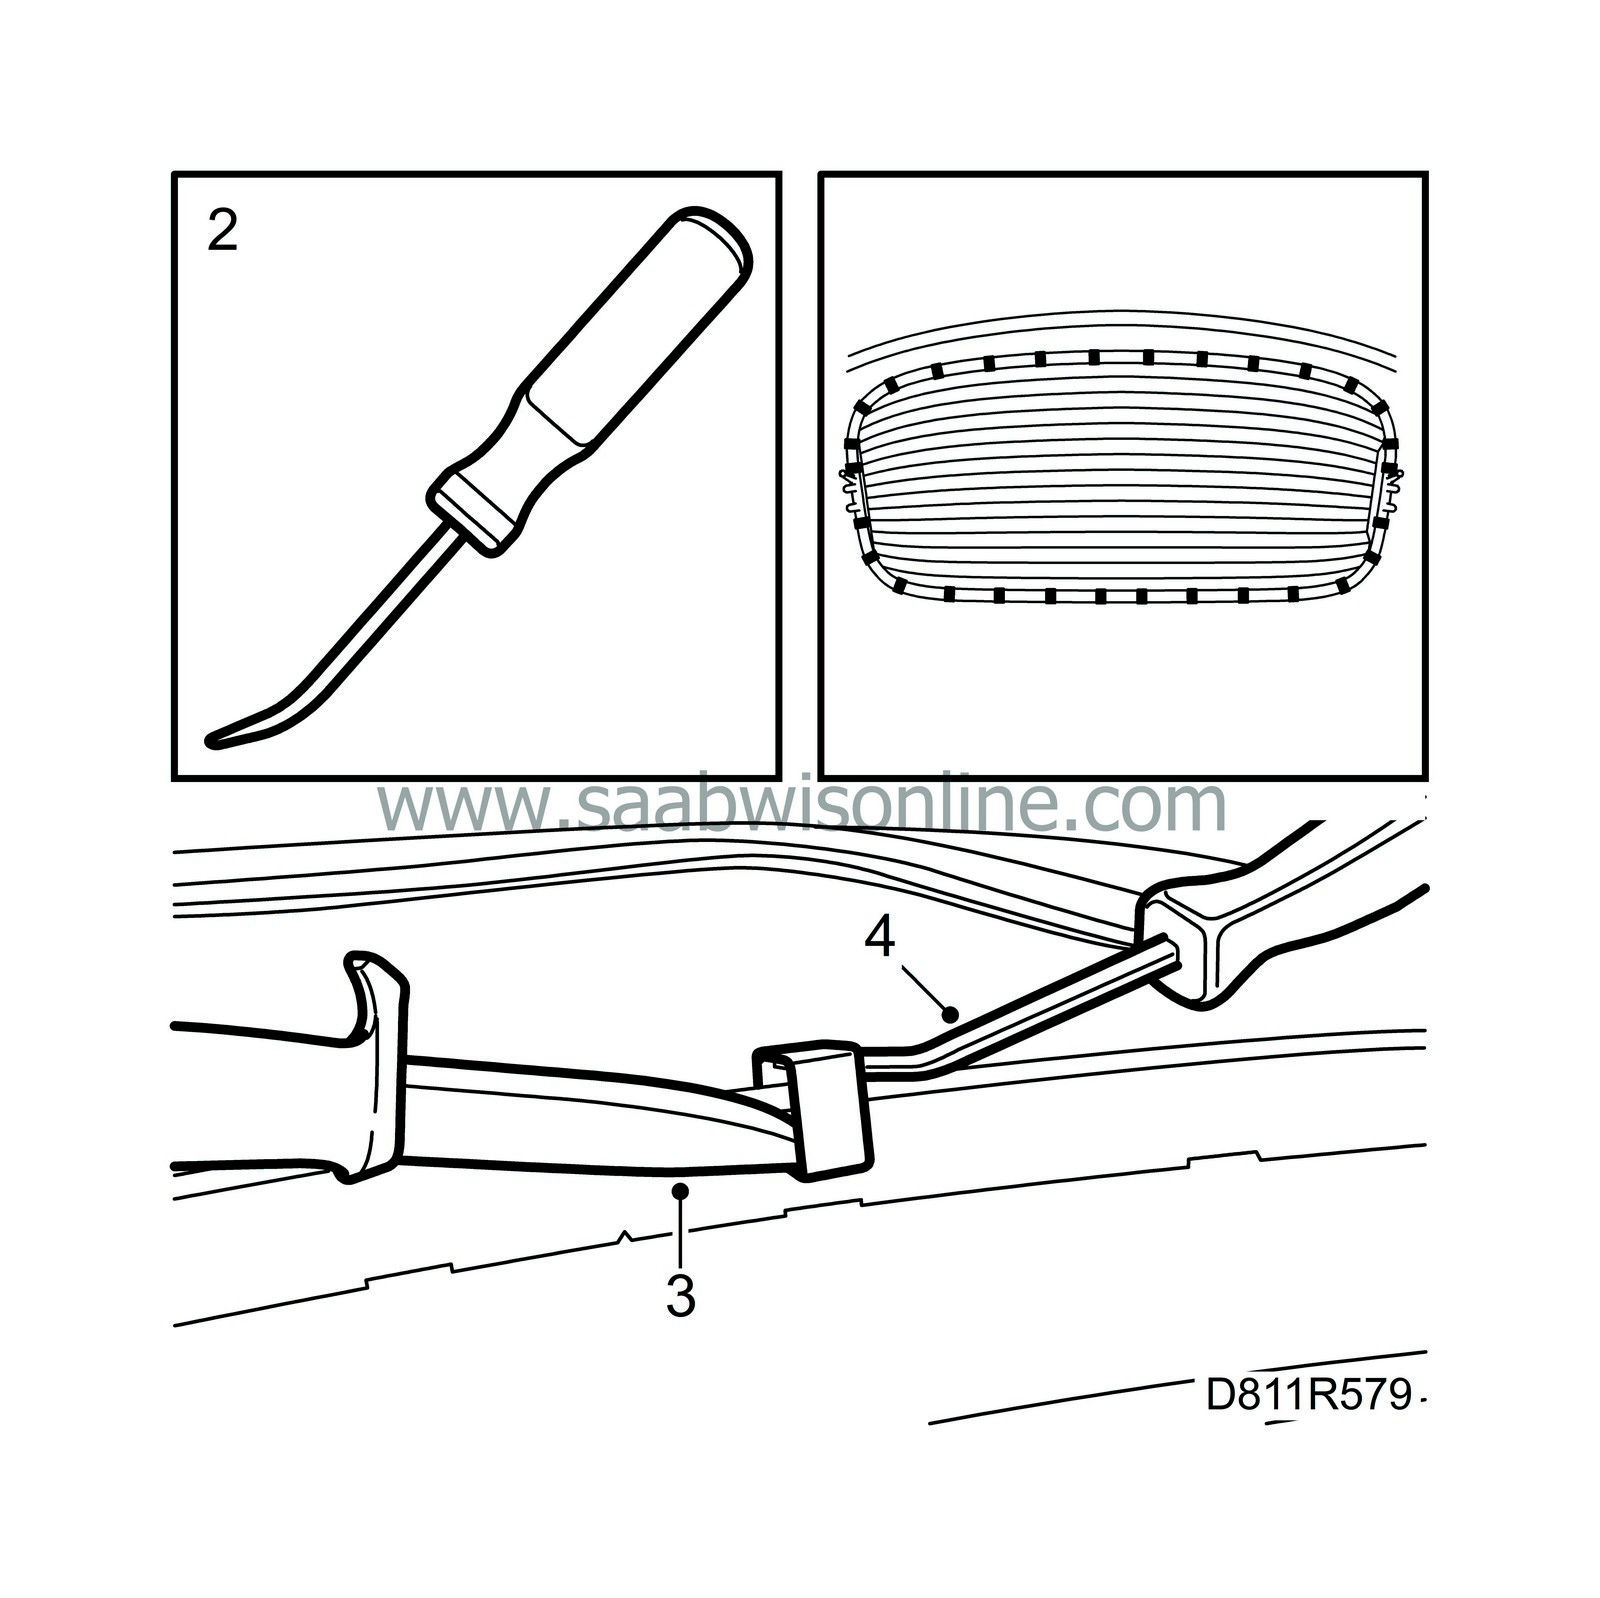
Manufacture a tool as shown in the illustration.
|
|
3.
|
Lift up the clip with the tool and position a knife underneath.
|
|
4.
|
Pull out the clip using the tool and follow up with the knife so that the windscreen frame is not damaged.
|
Note
|
|
If only the inner roof is to be replaced, there is no need to remove the clip. Lift it sideways slightly away from the window frame as shown.
|
|
|
5.
|
Continue in the same manner with the rest of the clips around the rear window until the window is removed.
|
|
6.
|
Fold aside the connector for the rear screen heating. Remove the screen and replace the outer roof, inner roof, rear window or springs as required.
|
|
Assembling soft top cover, headlining and rear window
|
|
Note
|
|
Replace or touch up the paint the windscreen frame if it is damaged.
|
|
1.
|
Place the back window against the outer roof frame. Refit the spring. Place it on the loose frame and press the inner roof against the rear window seal.
|
|
2.
|
Fix the frame, inner roof and outer roof at their centre markings. Refit the connector for the rear window heating.
|
Note
|
|
If only the inner roof was removed and the clip moved sideways, there is no need to perform the entire method below.
|
|
Instead place the new inner roof against the window frame and guide the inner roof edge below the inner frame. Press the clip back against the window frame.
|
|
If the inner roof is to be fitted to a new outer roof, proceed in the same way.
|
|
|
3.
|
Fit a clip on each side of the markings. Use special tool pliers (16) 30 12 598 to open the clips. Then fit the clip on the frame.

 Warning
|
|
Use safety glasses since the clips can release from the pliers.
|
|
|
|
|
|
|
|
4.
|
Fold back the headlining and fixate it against the marking at the front edge. Fit a clip on each side of the marking.
|
|
5.
|
Then fit clips in the same manner on the sides of the frame.
|
|
6.
|
Fit the remaining clips around the windscreen frame.
|
When replacing the soft top outer cover, the cables must be transferred to the new roof.
Before fitting, remove the clips on the inner roof tabs for the side springs.
|
1.
|
Fit the roof in position on the soft top mechanism.
|
|
2.
|
Hang the rear window in the fifth bow.
|
|
3.
|
Centre the rear window marking against the fifth bow centre marking.

|
|
4.
|
Sit on the member for the backrest and relieve the rear window with your knees. Centre the top fabric and fold it around the fifth bow and into the groove.
|
|
5.
|
Start in the centre and fit the fifth bow seal. Use the centre marking made on removal. Fit the rest of the seal.
|
Note
|
|
Cars up to VIN X7020925
: Do
not
refit the four rivets.
|
|
|
6.
|
Screw the seal in place. Fit the seal screws.
|
|
7.
|
Fit the spring and window controls. Fit new cable holders.
|
Note
|
|
Fit the cable holders so they do not touch the inner roof.
|
|
|
8.
|
Plug in the connectors for electric rear window heating.
|
|
9.
|
Fit the rod for the inner roof and tighten the three inner roof screws in the fifth bow.
|
|
10.
|
Refit the spring around the fifth bow latches. Pop-rivet the spring to the fourth bow.
For cars with adjustable closers:
Adjust the window controls so that the measurement on the rod between the ends of the ball fixings is 102 mm.
|
|
11.
|
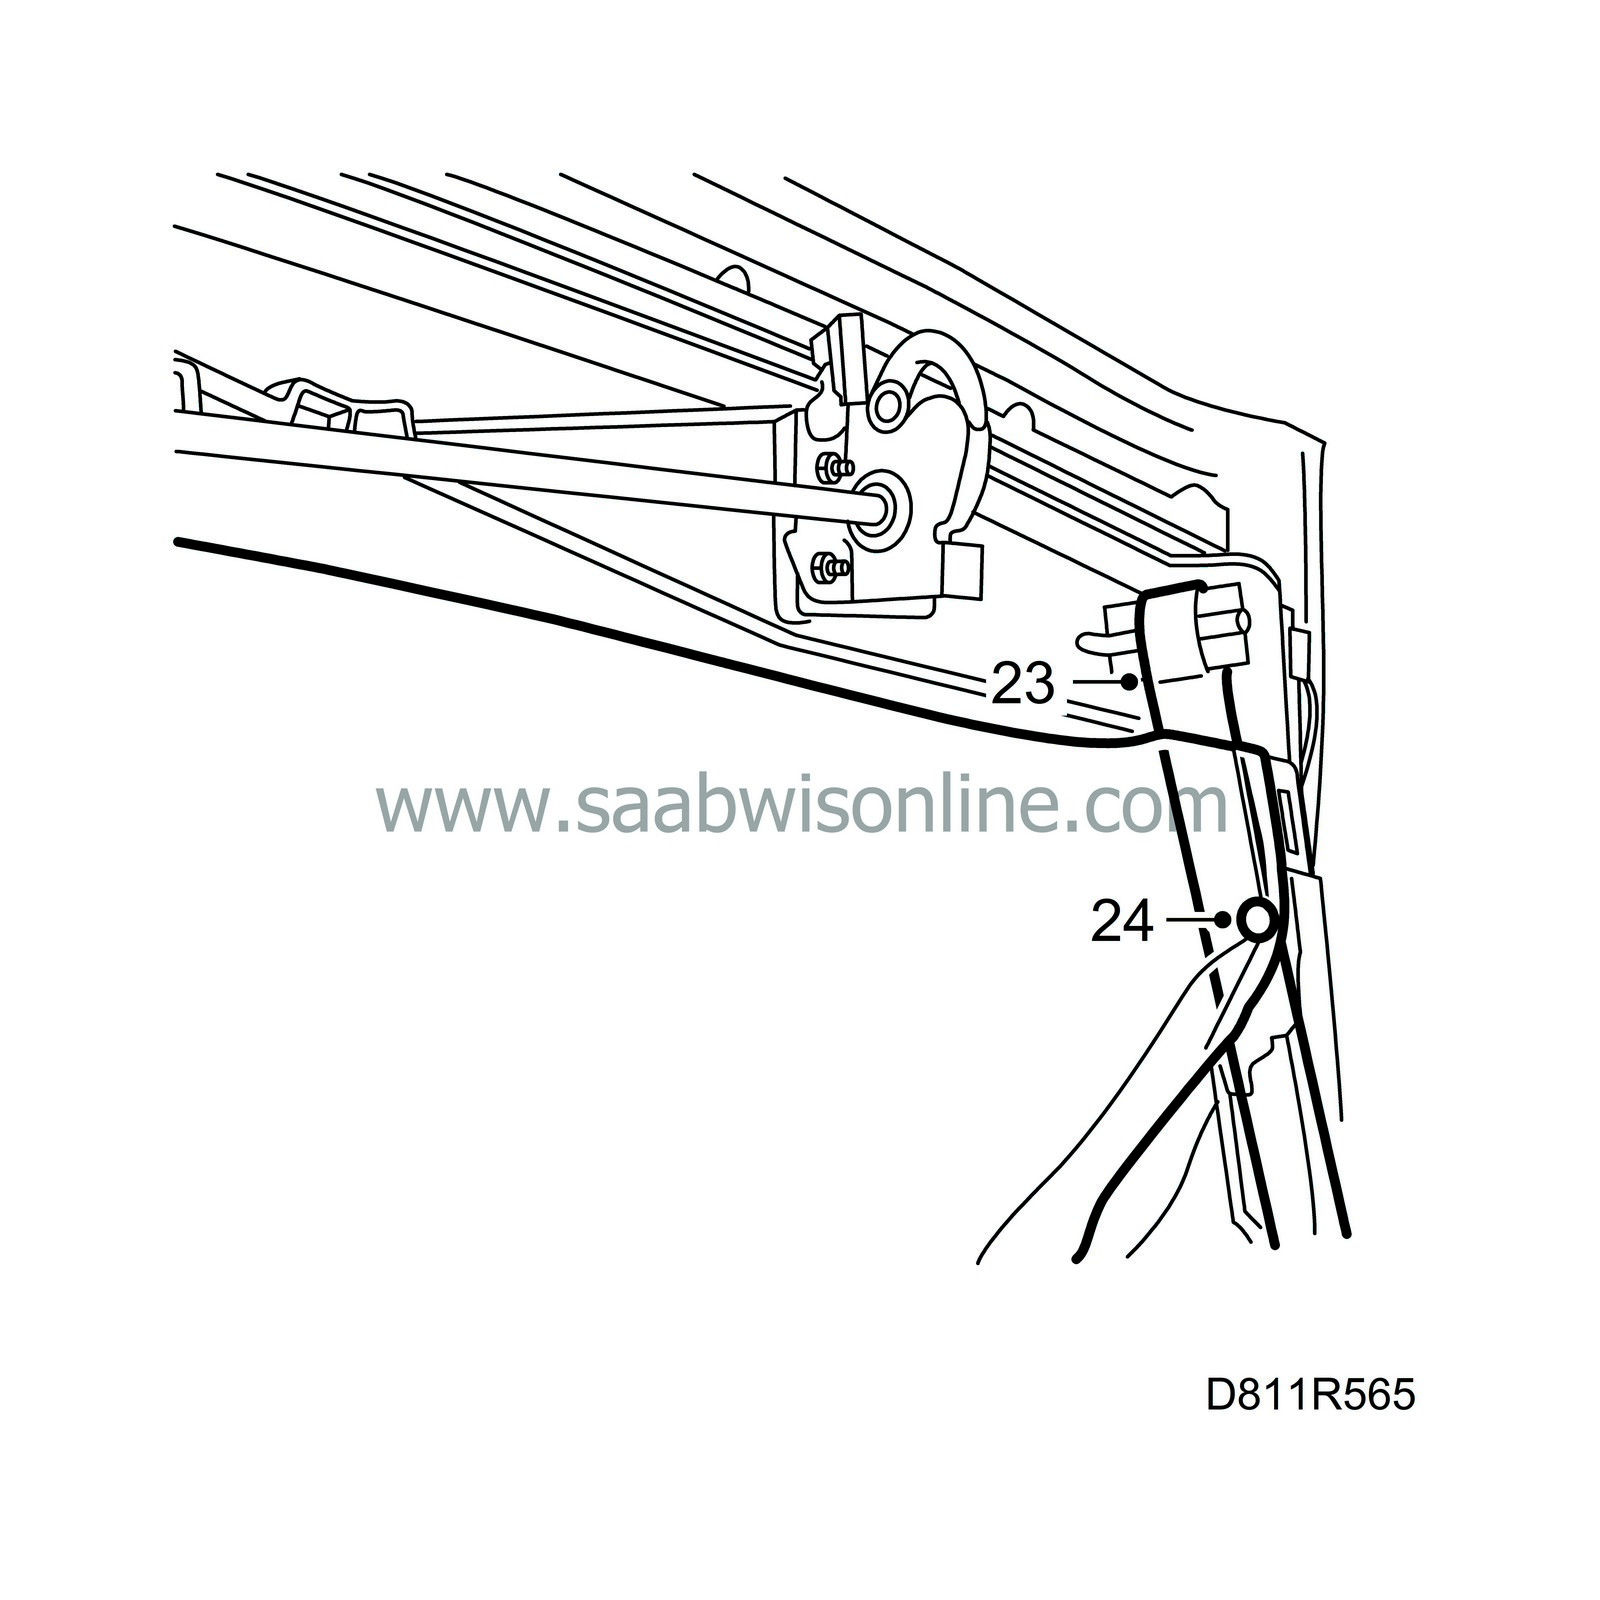
Pop rivet the cable to the first bow.
|
|
12.
|
Operate the soft top to half open position and balance it.
|
|
13.
|
Fit the wire to the rear screen and twist the fixing eye back as far as possible so that the bolt lies against the front end of the fixing eye groove. Tighten the bolt.
Tightening torque:
12 Nm
Open bolt 120°-170°.

|
|
14.
|
Fit new double-sided tape to the first bow.
Stretch the top cover fabric and fold it over the first bow.
Fit new double-sided tape to the side seam bands and fold it down over the first bow.
|
|
15.
|
Operate the hood to a closed position.
|
|
16.
|
Tighten the bolt for the wire to the rear rail.
Tightening torque
: 12 Nm
|
Note
|
|
The wire can be adjusted using a spring balance. Close and lock the hood. The bolt should be loose. Adjust the wire to 6 kg and tighten the wire fixing.
|
|
|
17.
|
Operate the soft top to half open position and balance it.
|
|
18.
|
Fit new double-backed tape on the third bow. Stretch the top cover fabric towards the third bow and fold the fabric edge around the bow. Fit the plastic retainer for the headlining in the third bow. Make sure that the headlining and top cover midlines are directly lined up.
Fit two new screws or rivets on both sides of the plastic holder to secure it to the third bow.
|
Note
|
|
The screws for securing the plastic holder to the third bow were introduced from VIN X7024951 and the rivets introduced from VIN 7050383.
|
|
|
19.
|
Fit new double-backed tape on the second bow. Stretch the top cover fabric towards the second bow and fold the fabric edge around the bow. Fit the plastic retainer for the headlining in the second bow. Make sure that the headlining and top cover midlines are directly lined up.
Fit rivets on both sides of the plastic holder to secure it to the second bow.
|
|
20.
|
Fit new double-sided tape to the rear screen. Stretch the outer roof and fold it over the first bow.
Screw down the seal for the rear rail.

|
|
21.
|
Fasten the headlining in the rear rail.
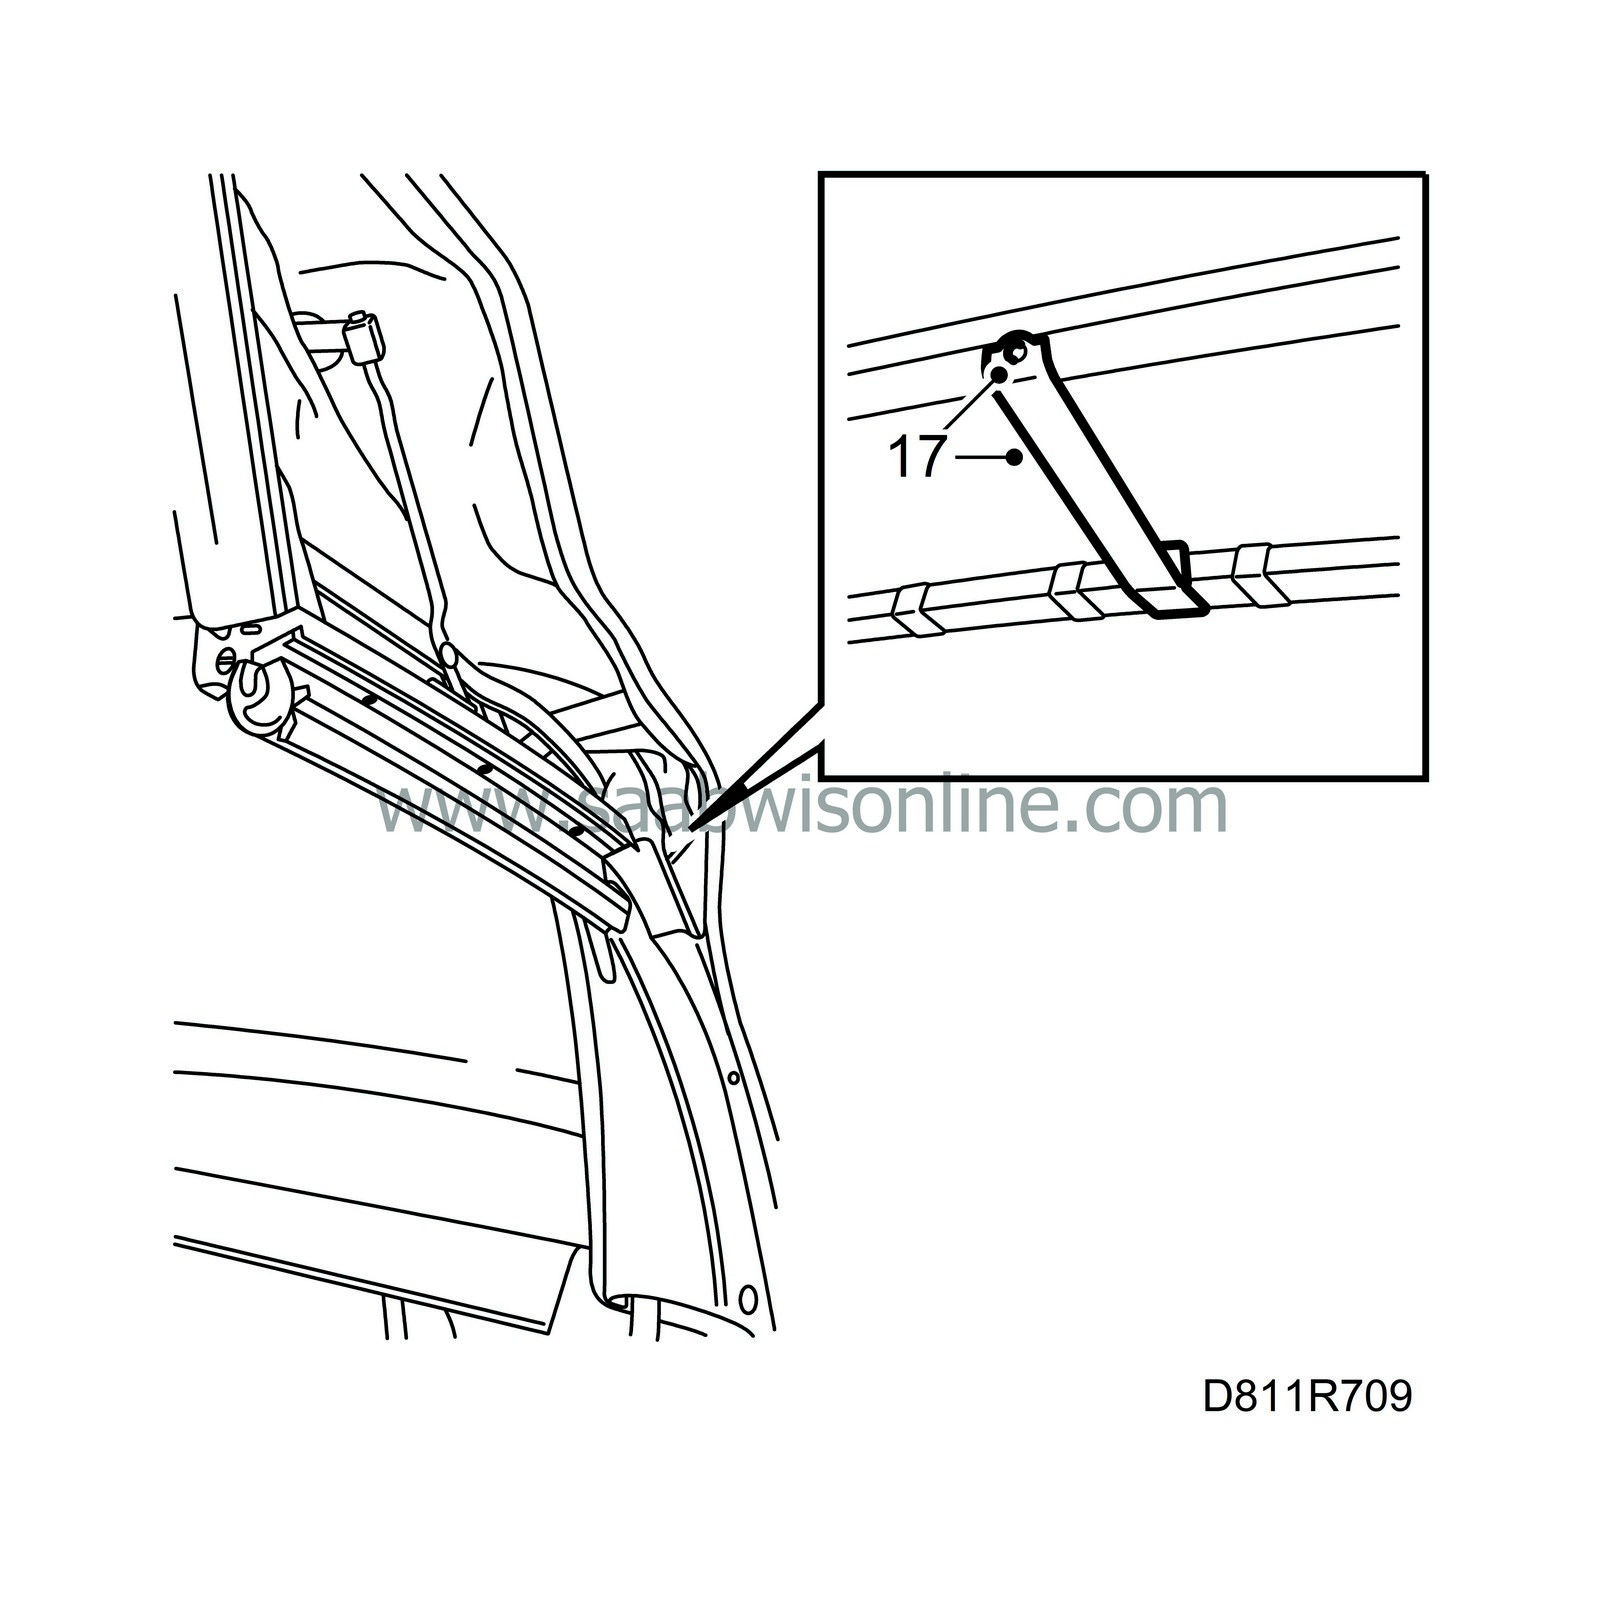
Fit the metal clip to the lower part of the plastic reinforcement on the rear rail.
|
Note
|
|
The metal clip for securing the inner roof to the rear rail was introduced from VIN X7050069/X7000050.
|
|
|
22.
|
Pop-rivet the springs to the centre rail.
|
|
23.
|
Fit the headlining elastic bands in the first bow.
|
|
24.
|
Remove special tool (16) 82 93 144. Operate the hood to the closed position with the tonneau cover in a vertical position.
Fit the inner roof to the first bow. The spring must be fitted under the plastic reinforcement and the screw should be fitted through the spring.
|
|
25.
|
Operate the hood to the half-open position. Fit the plastic cover to the first bow.
|
|
26.
|
Fit the special tool (16) 82 93 144. Fit the handle, also refit the upholstery by the handle.
|
|
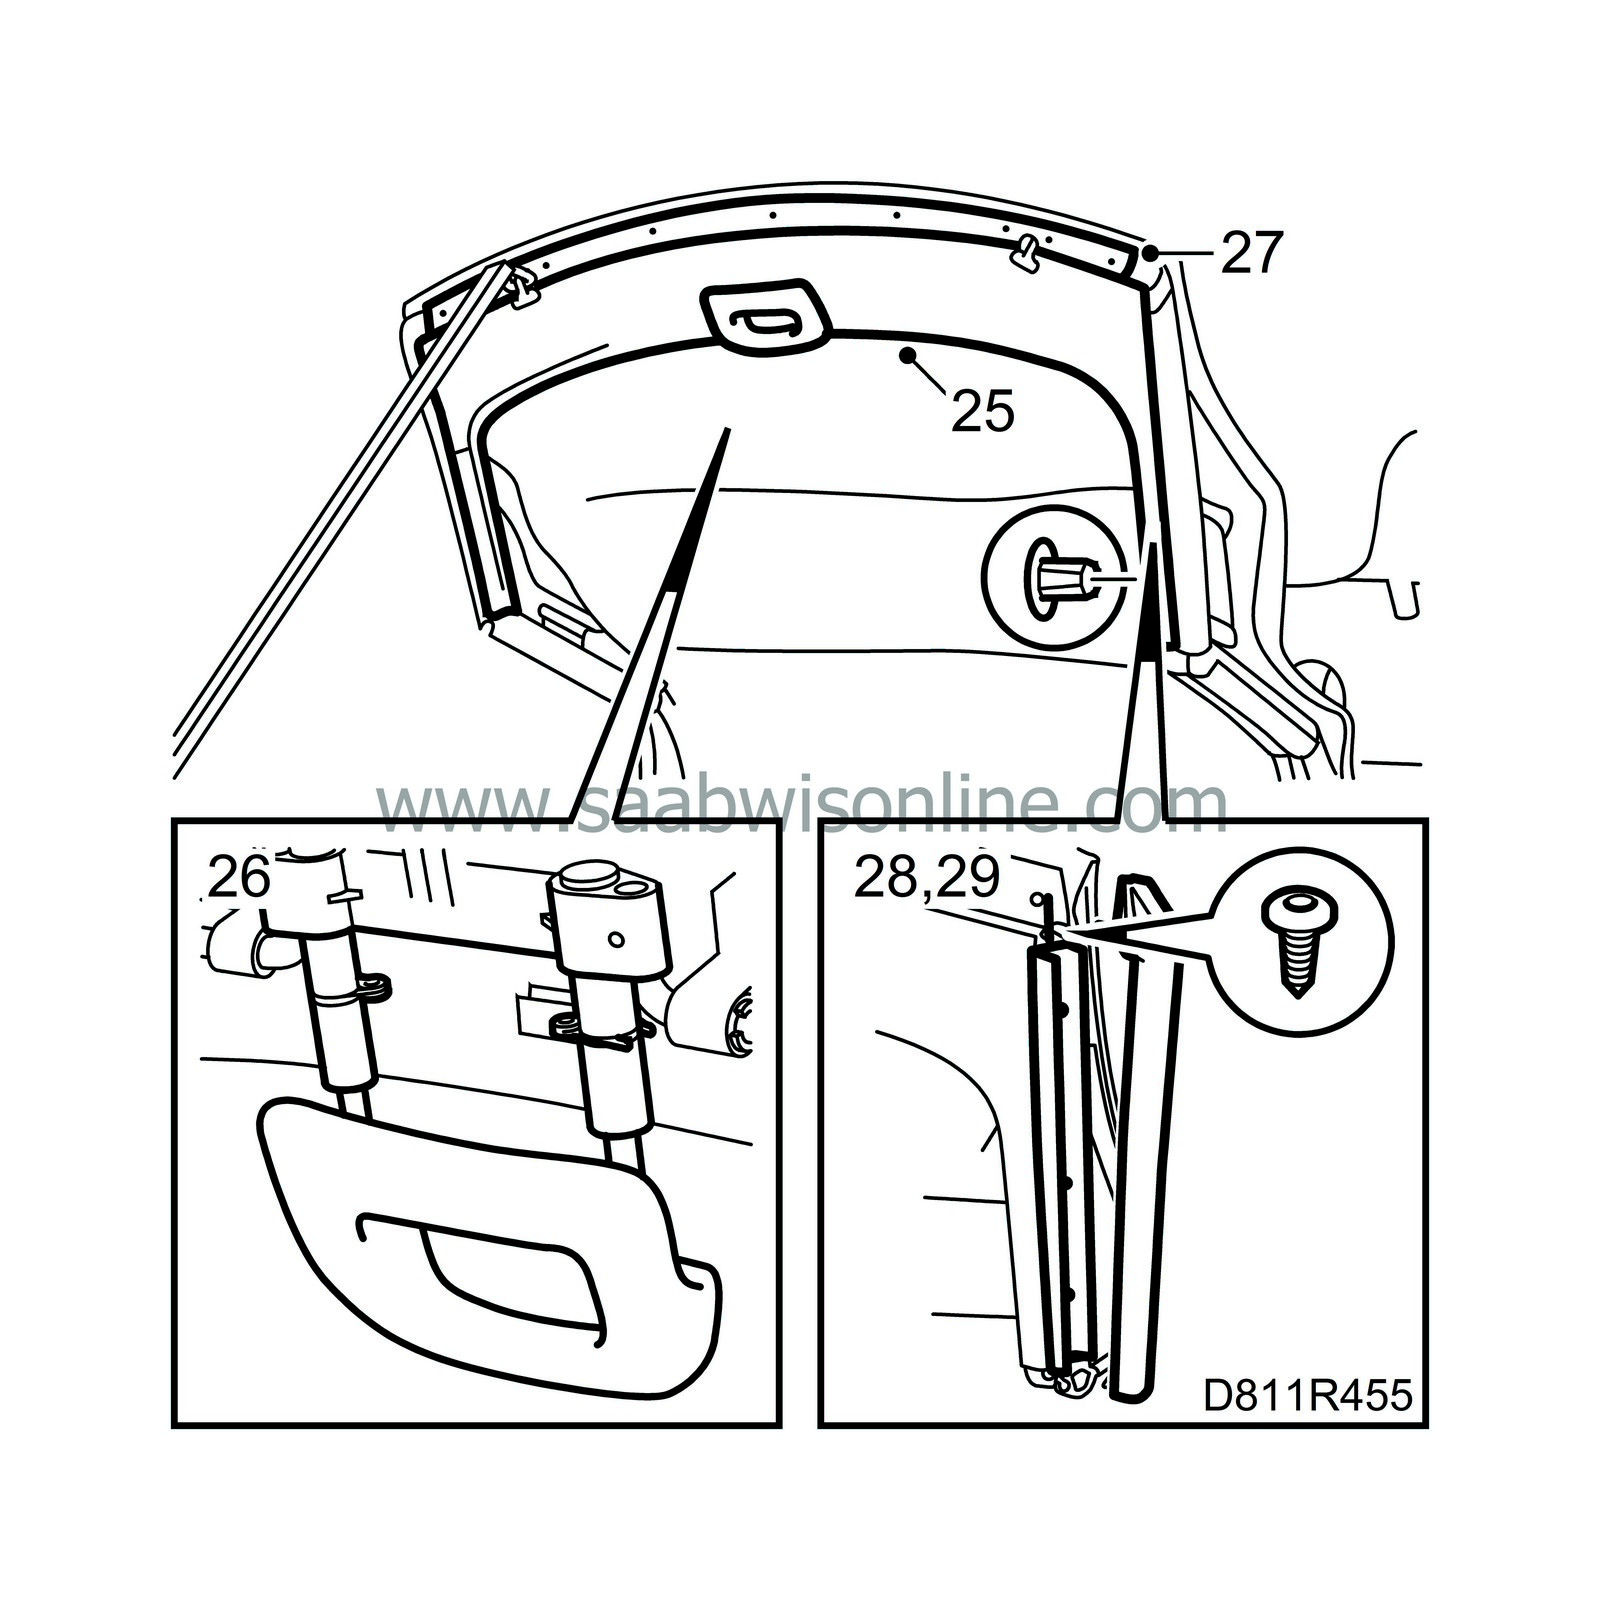
27.
|
Refit the retainer strip on the first bow.
|
Important
|
|
Take care so that the magnets for the lock are not damaged.
|
|
|
|
|
28.
|
Fit the front seal retainers.
|
|
29.
|
Lubricate the seals with soapy water. Position the outer edge in the groove and press in the seal. Start from the back and work towards the front. Fit the front screw.
|
|
30.
|
Remove special tool (16) 82 93 144. Operate the hood to the closed position and lock the hood to the windscreen frame.
|
|
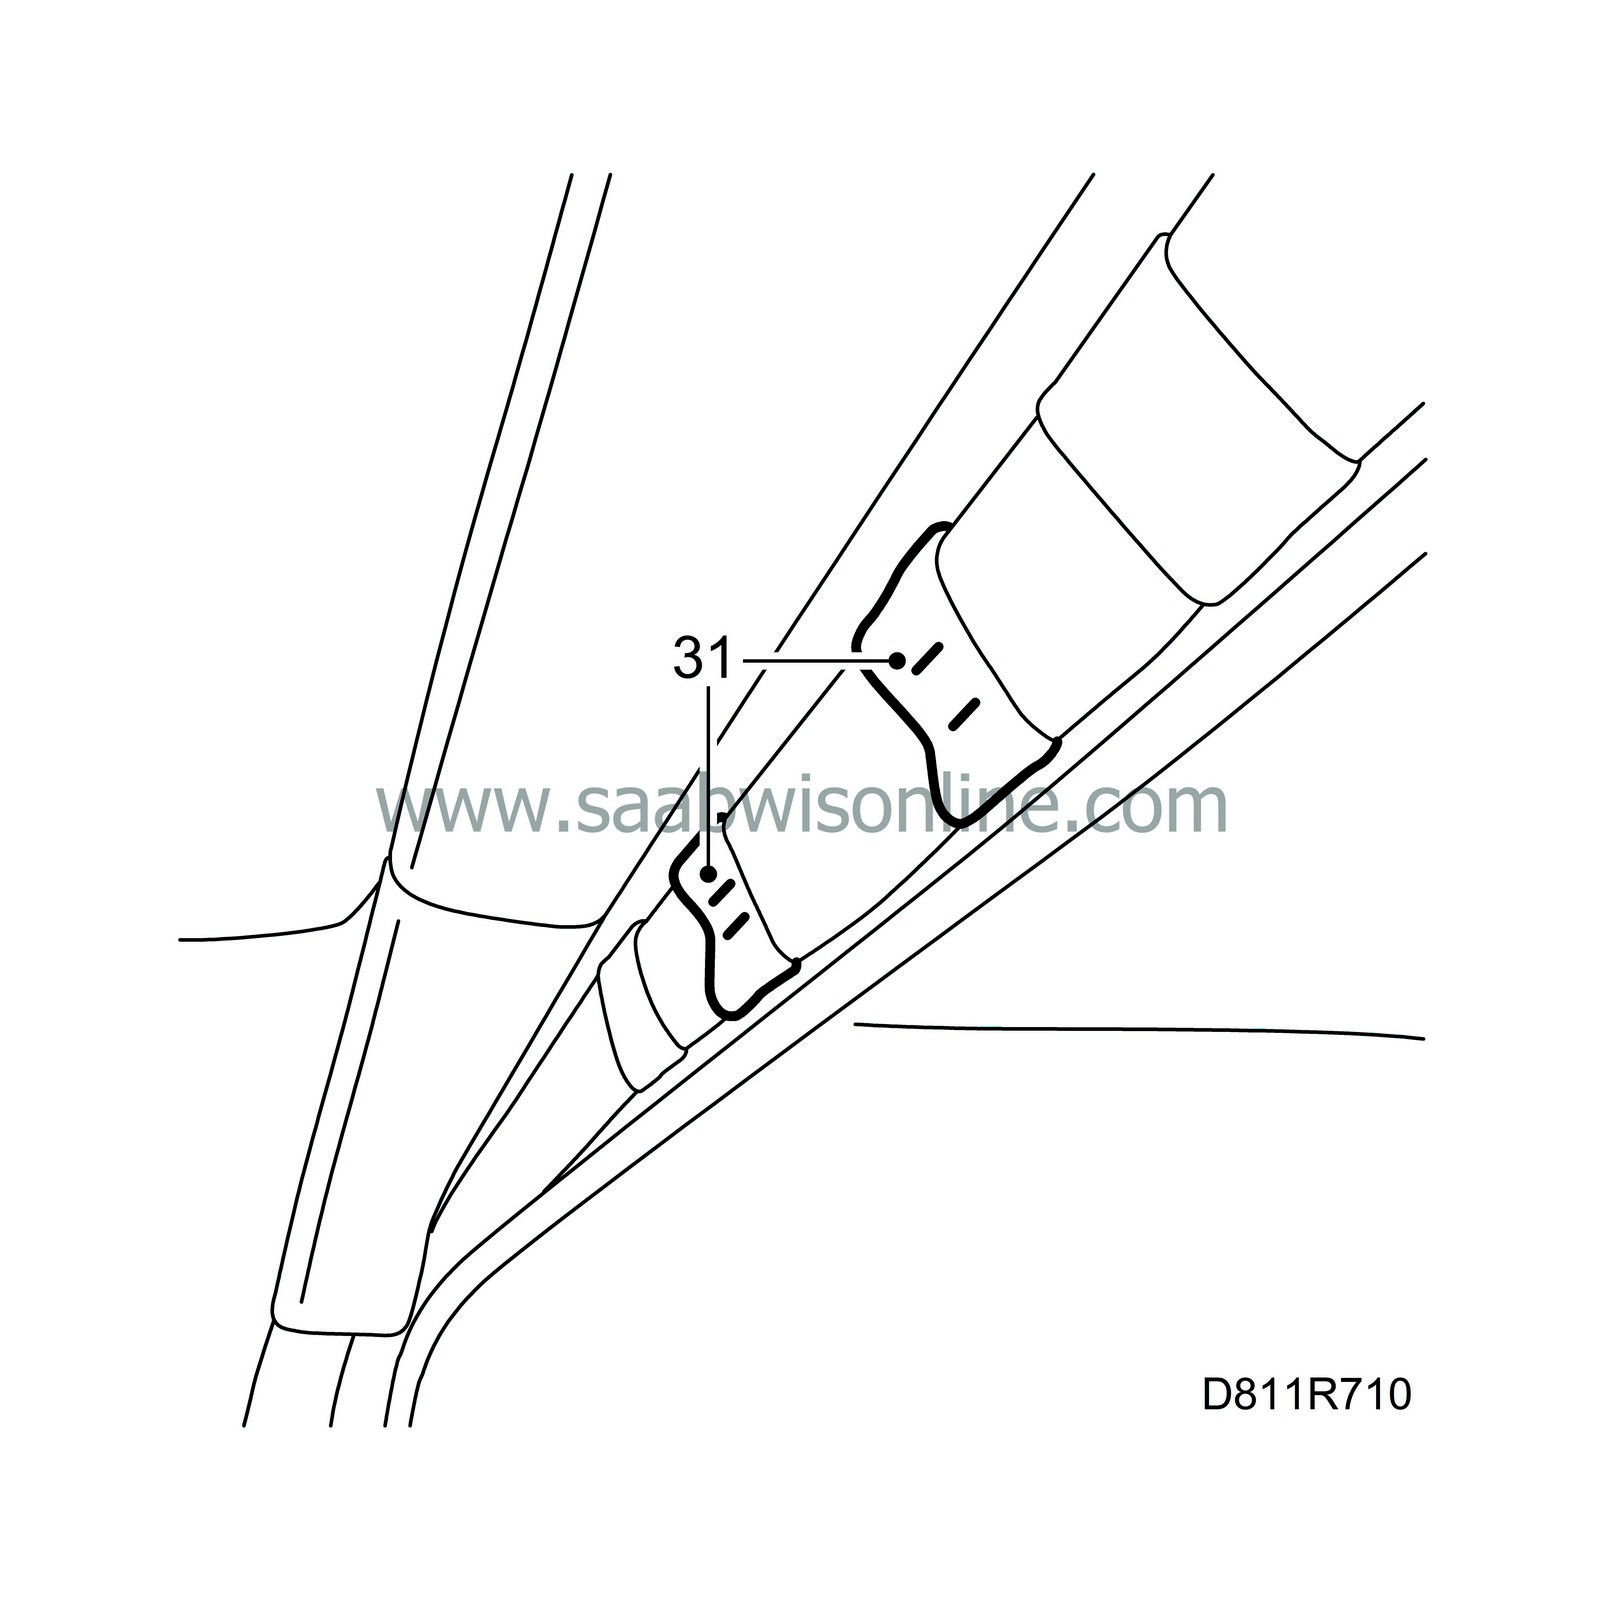
31.
|
Re-attach the side springs to the inner roof tabs on both sides. Do not pull on the springs when attaching. Attach two clips to each spring as shown.
|
Note
|
|
Cars
from VIN 37001994
: have four tabs on each side. Only attach the two centre tabs.
|
|
|
32.
|
Connect the diagnostics tool and erase any diagnostic trouble code.
|
|
33.
|
Check so that there is no water leakage by spraying water from above at an angle.
Never use high pressure.
|


