Fitting cylinder head (in-car) B235R, B205L/R
|
|
Fitting cylinder head (in-car) B235R, B205L/R
|
|
1.
|
Before fitting, the surface for the gasket must be thoroughly cleaned and bolt holes around cylinder bores vacuumed clean from oil. Wipe out the combustion chambers and make sure no dirt enters the water or oilways. Clean the seats for the bolts in the cylinder head. Clean the surfaces for the gaskets.
|
|
2.
|
Fit a new gasket between the exhaust manifold and the turbo unit.
|
|
3.
|
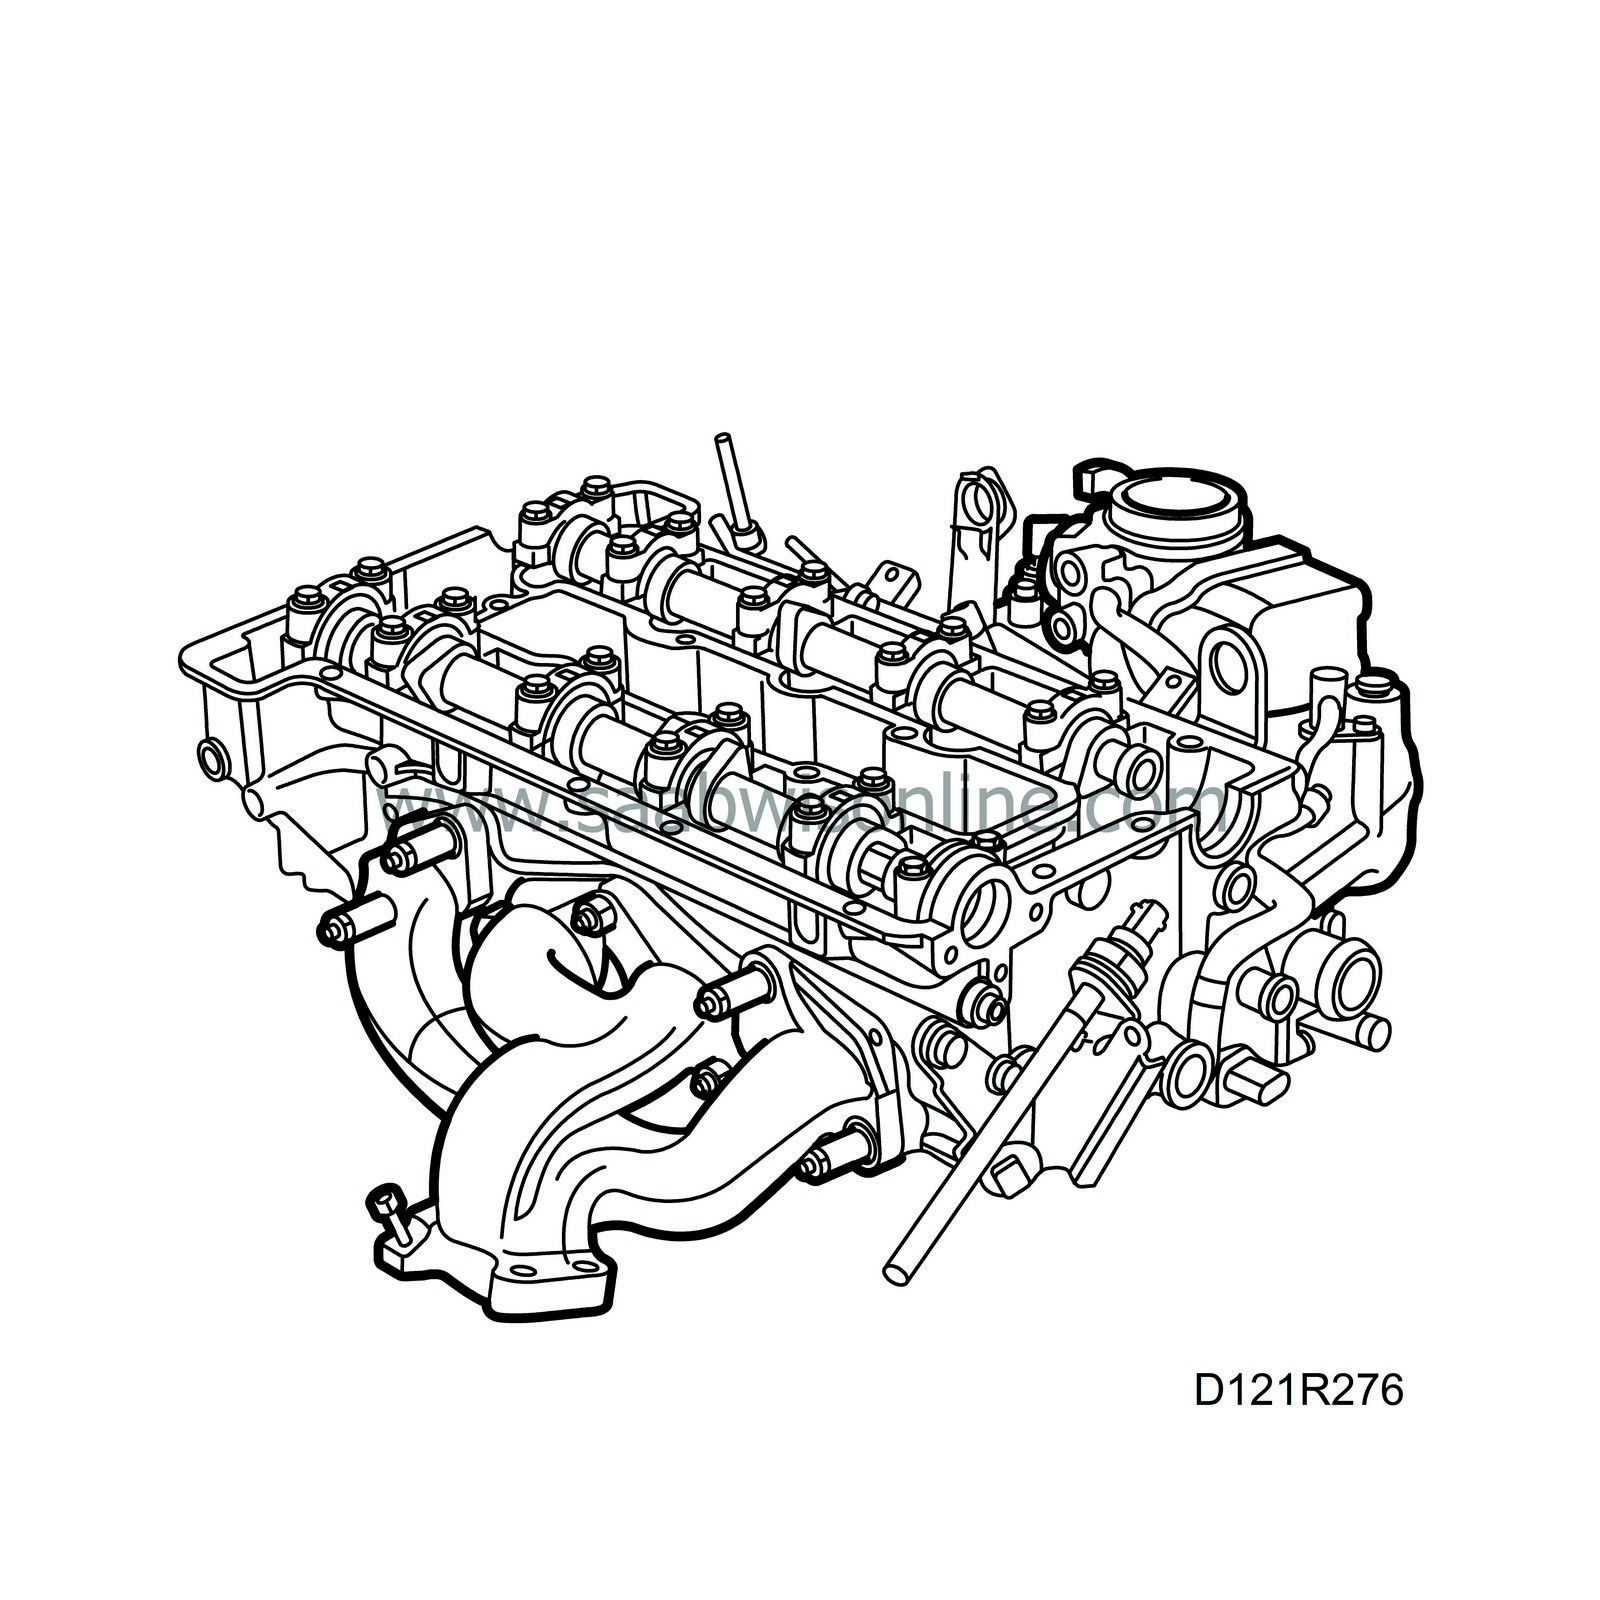
Carefully clean all sealing surfaces. Apply a 2 mm thick and 10-20 mm long bead of Loctite 518, part no. 93 21 795, to the inner part of the upper contact surface of the timing cover (against the cylinder head). Turn the engine in the stand, turning the crankshaft 45° to lower the pistons.
Fit a rubber band round the chain guides and fit the cylinder head with a new gasket. Check that it is correctly seated on the locating sleeves and that the chain runs freely.
|
|
4.
|
Fit and tighten the cylinder head bolts.
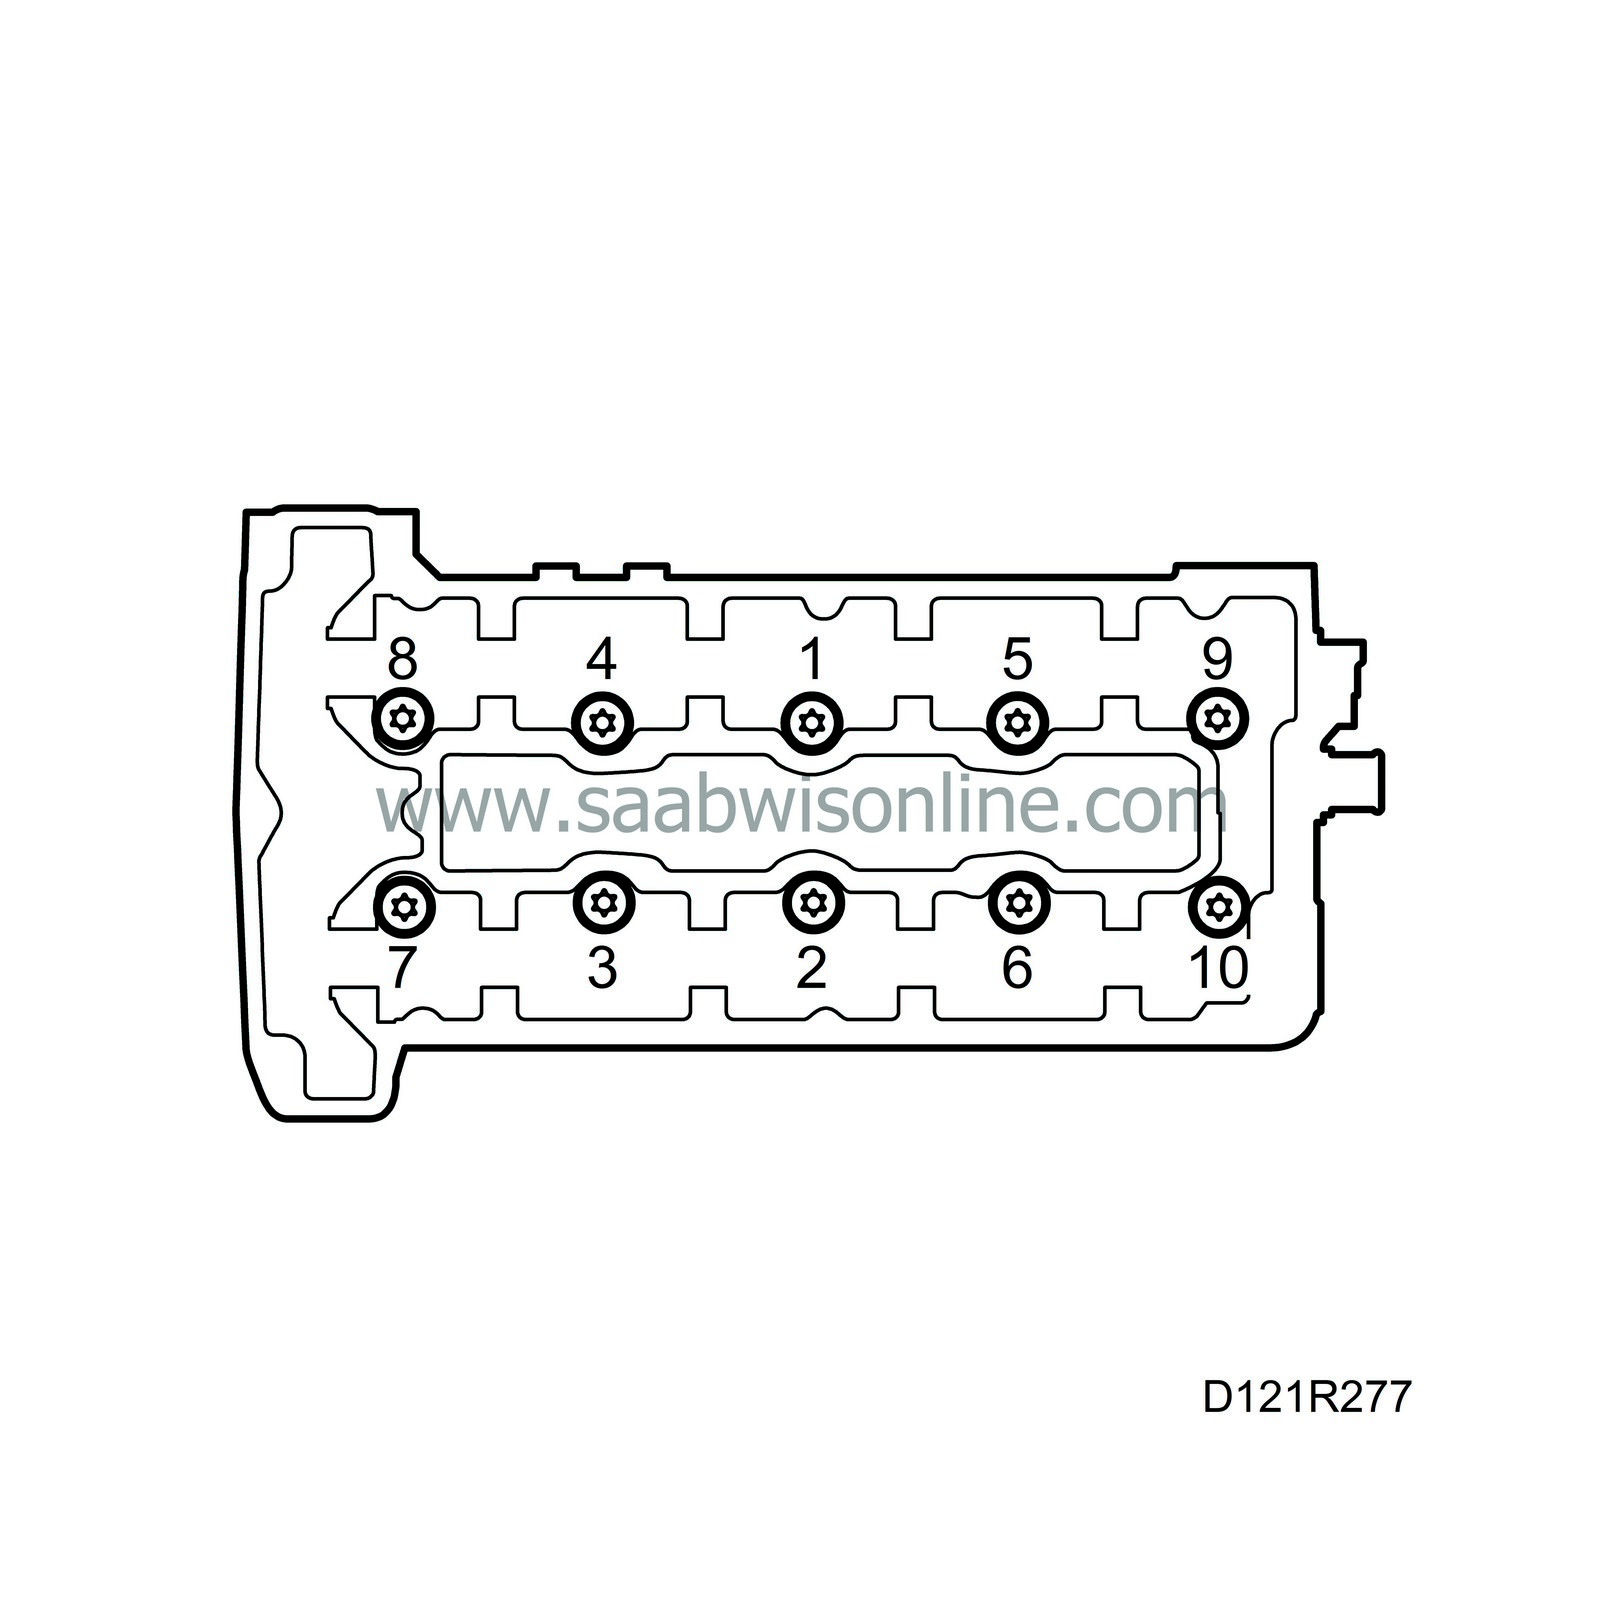
The tightening sequence is shown in the illustration.
Tighten in three stages:
Step I: 40 Nm (30 lbf ft)
Step II: 60 Nm (44 lbf ft)
Stage III: A further 90°
|
|
5.
|
Fit the two bolts between the timing cover and cylinder head.
Tightening torque: 24 Nm (18 lbf ft)
|
|
6.
|
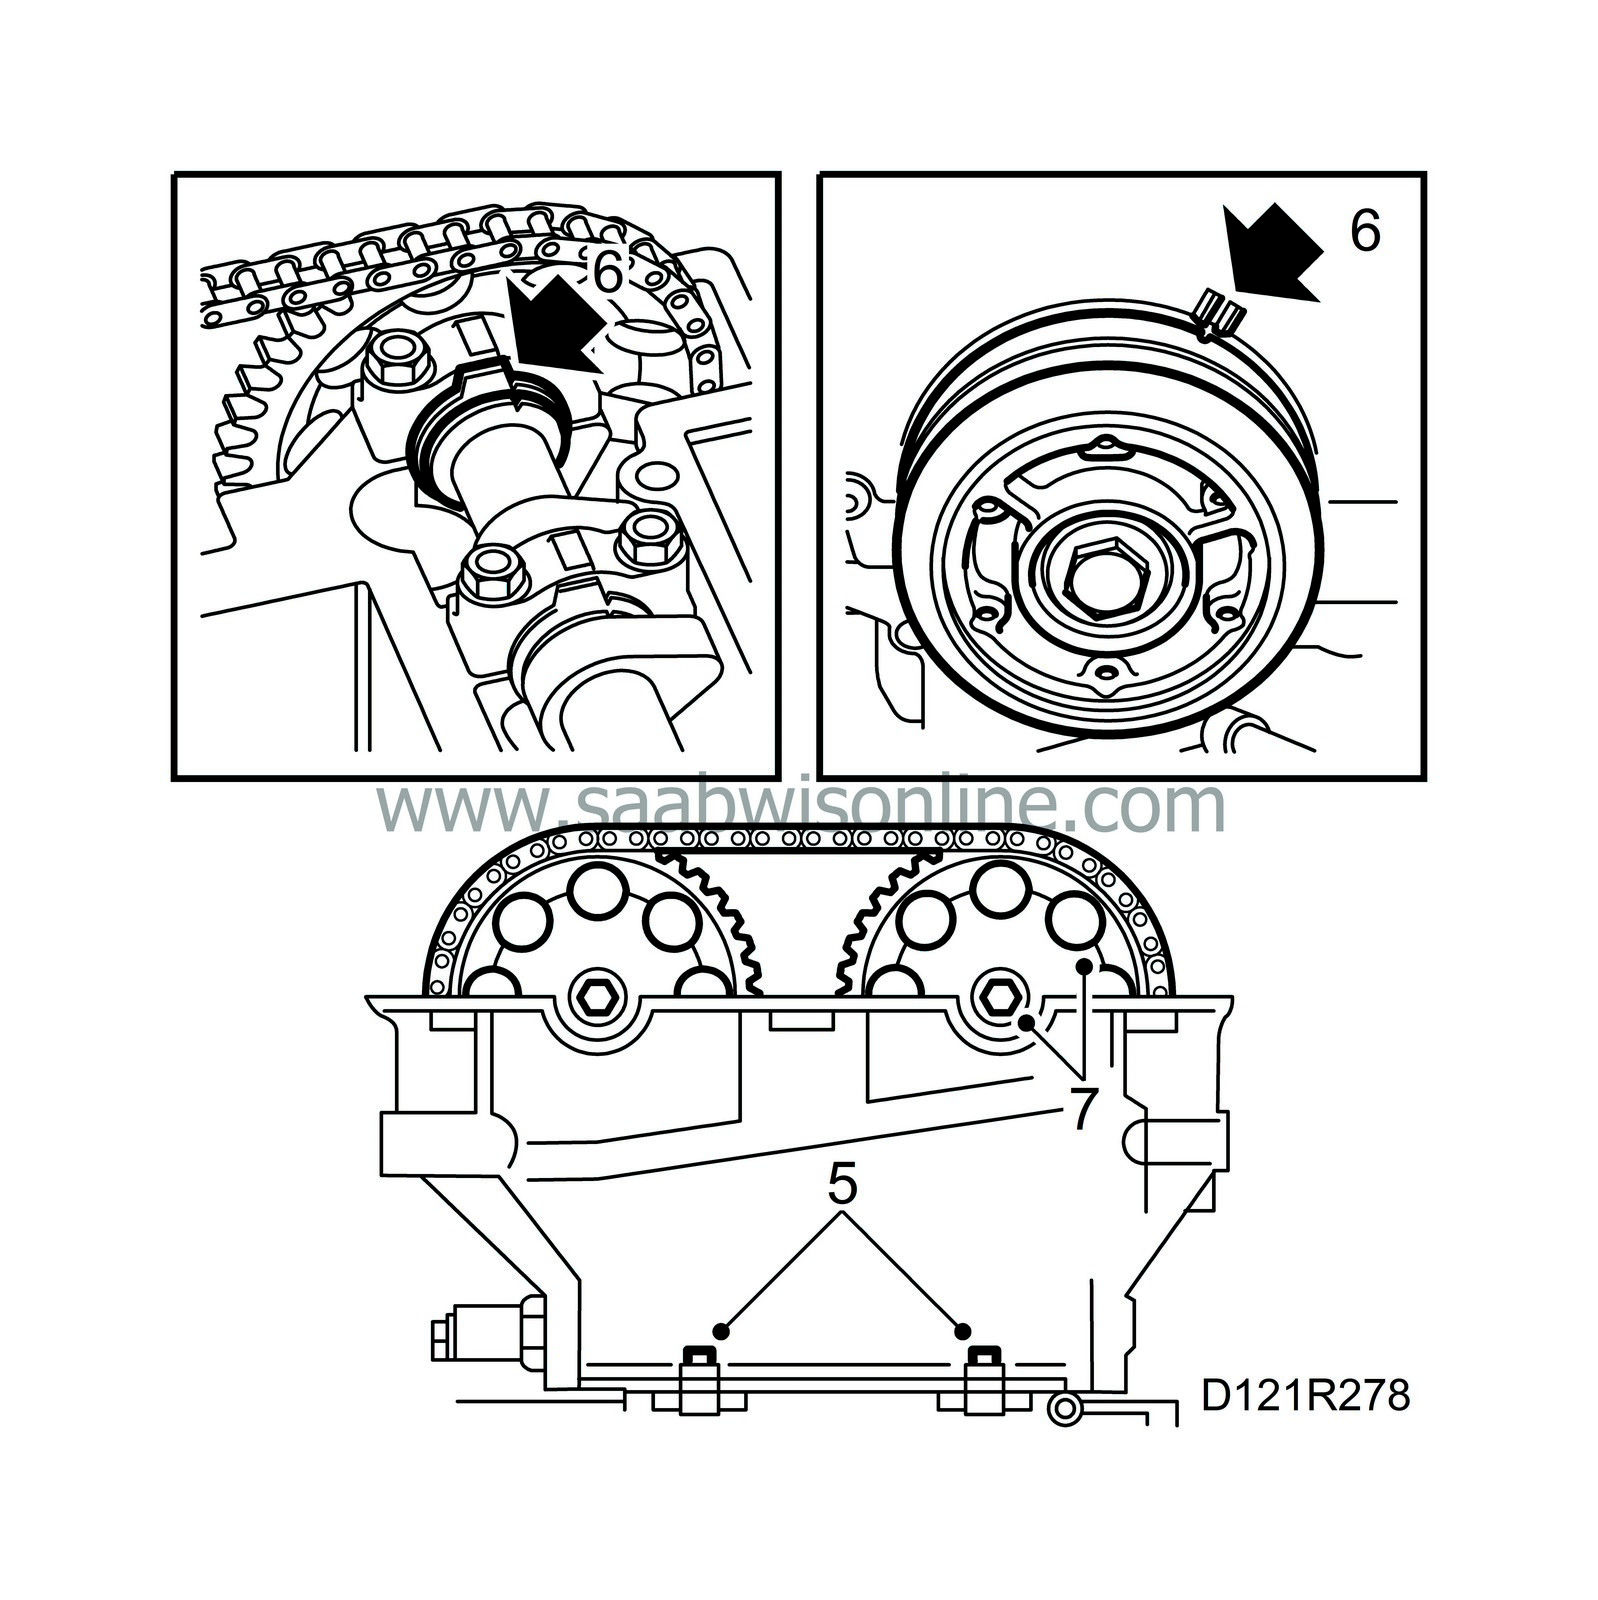
Make sure the camshafts are aligned with their setting marks and carefully return the crankshaft to its 0-marking.
|
|
7.
|
Remove the rubber band and fit the camshaft sprockets and camshaft chain. Start with the exhaust camshaft.
|
Note
|
|
Do not tighten the bolts.
|
|
|
8.
|
Prepare the chain tensioner for mounting by pressing down the catch and pressing in the chain tensioner.
|
|
9.
|
Fit the chain tensioner with a 27 mm socket. If necessary, change the gasket on the chain tensioner
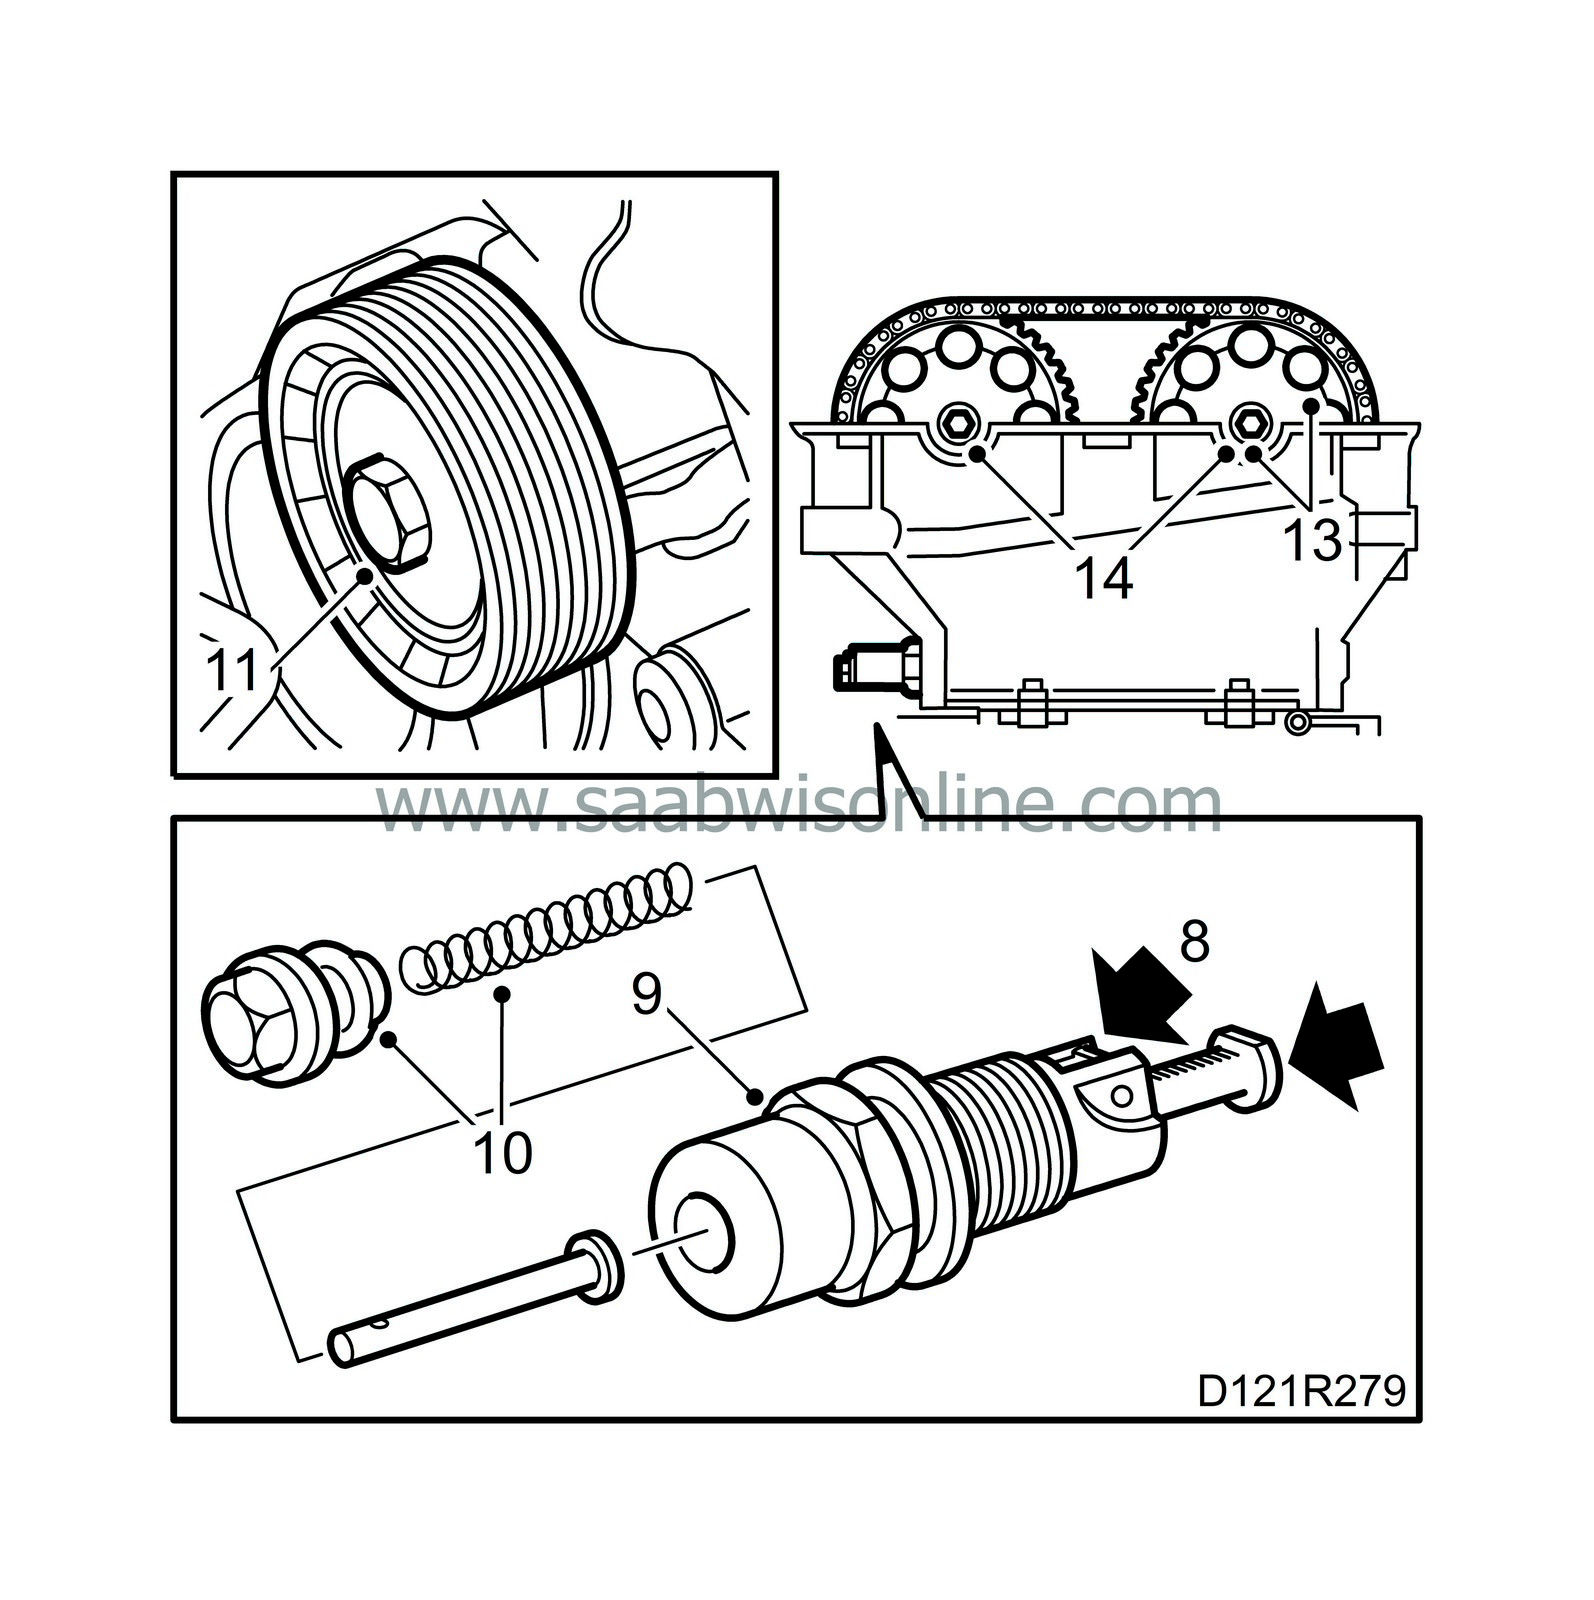
Tightening torque: 63 Nm (47 lbf ft)
|
|
10.
|
Fit the chain tensioner plug with push rod and spring.
Tightening torque: 22 Nm (17 lbf ft)
|
|
11.
|
Tighten the idler sprocket.
Tightening torque: Nm ( lbf ft)
|
|
12.
|
Tighten the top bolt on the intake manifold stay
|
|
13.
|
Make sure the chain is positioned correctly on the chain guards. Rotate the crankshaft two revolutions and check the setting of the flywheel and camshafts.
|
|
14.
|
Tighten the camshaft sprocket bolts.
Tightening torque: 63 Nm (47 lbf ft)
|
|
15.
|
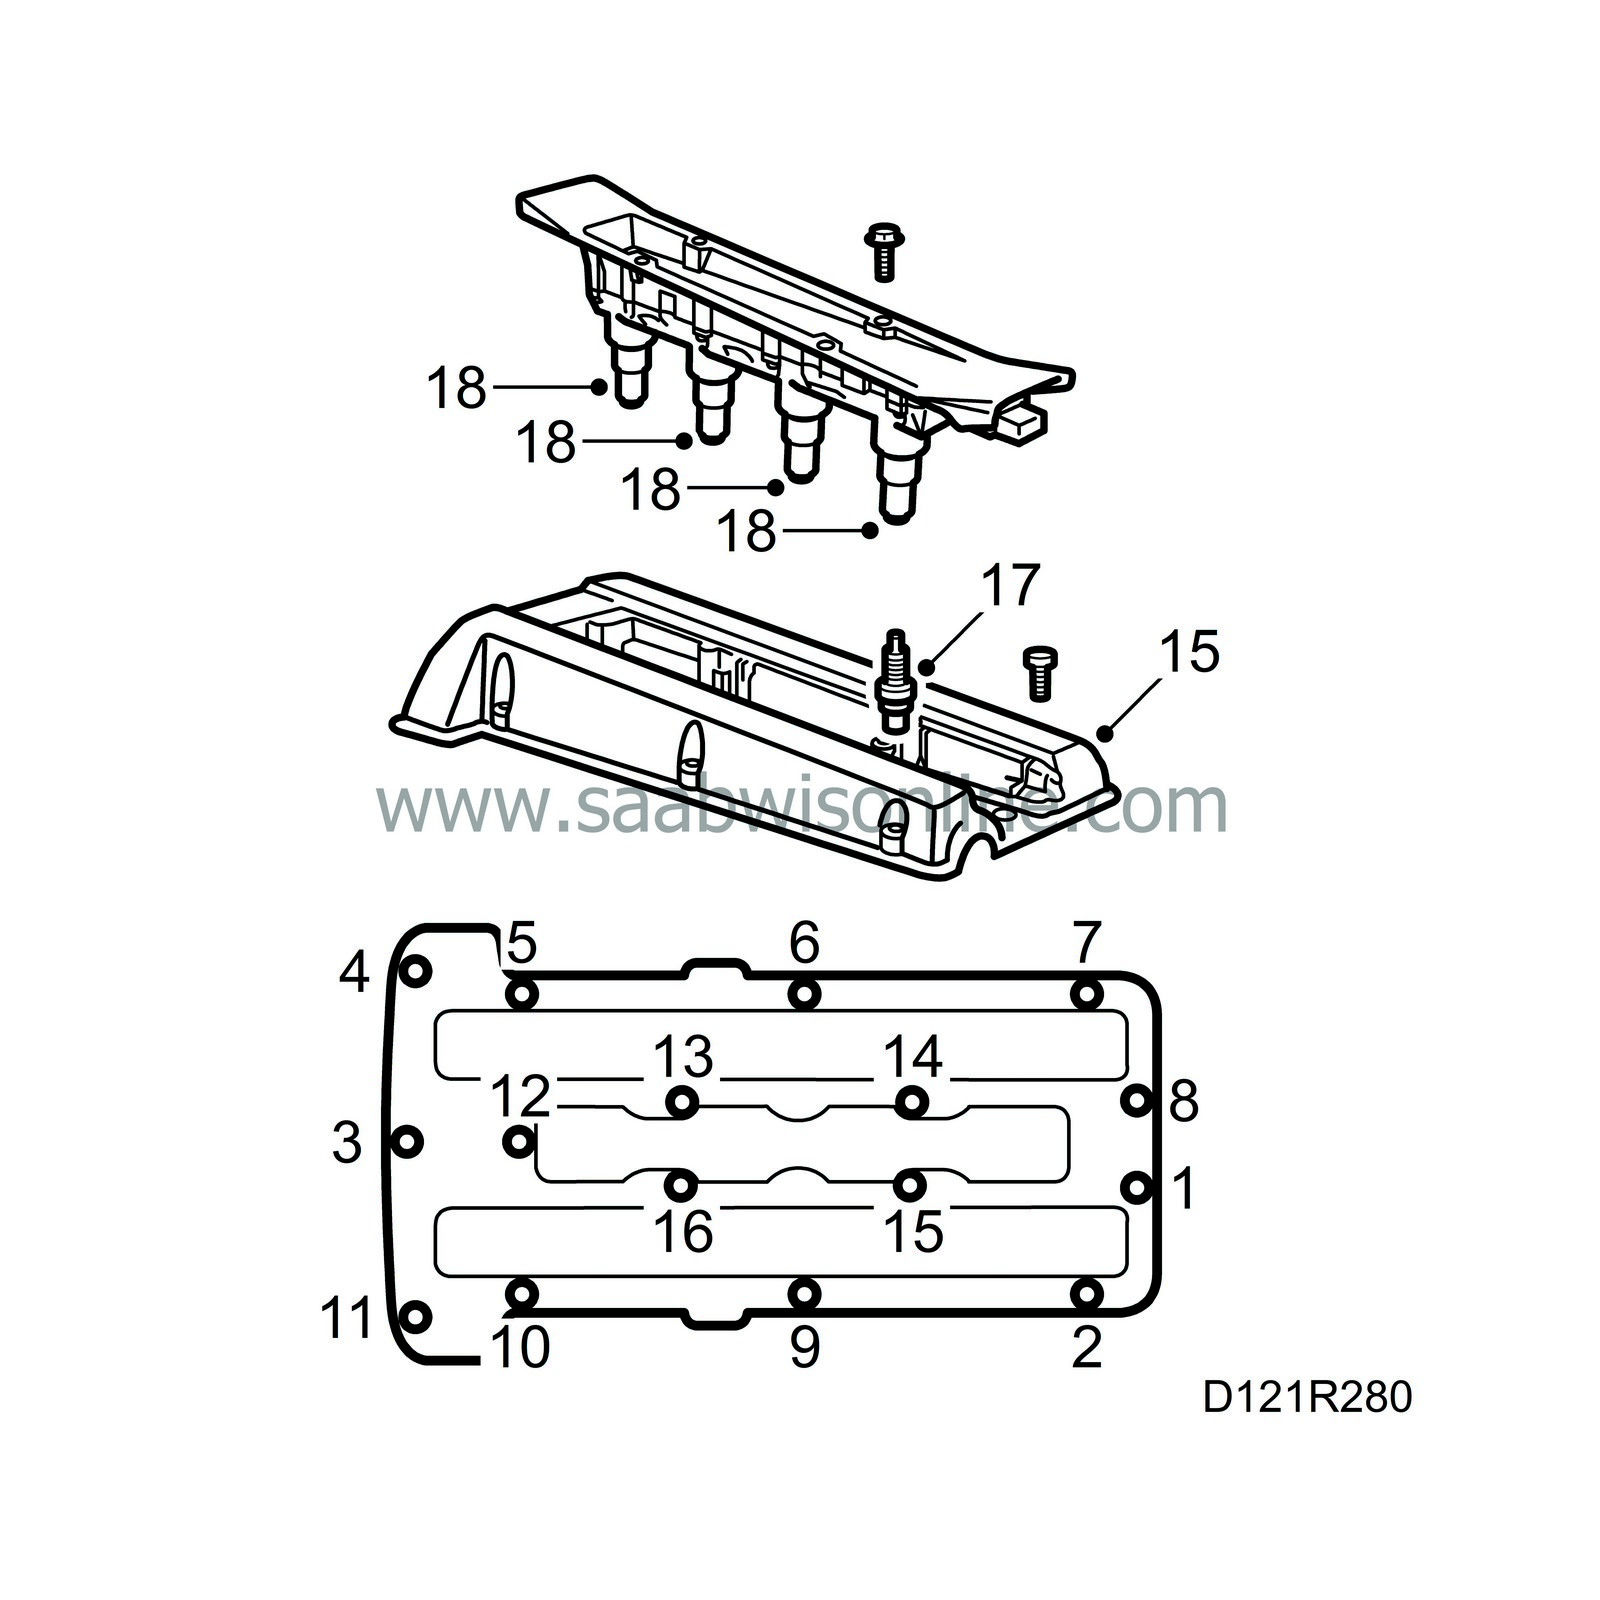
Clean the sealing surface of the camshaft cover with benzine.
|
|
16.
|
Apply soap to the opening in the camshaft cover and fit the cover, starting at the opening. Then, tighten the bolt located furthest to the front at the timing chain end. Continue all the way round the outside and inside.
Tightening torque: 15 Nm (11 lbf ft)
|
|
17.
|
Fit the spark plugs.
Tightening torque: 28 Nm (21 lbf ft)
|
|
18.
|
Apply Krytox, part no. 30 19 312, to the rubber seal on the ignition discharge module and fit the module.
Tightening torques:
Ignition discharge module: 11 Nm (8 lbf ft)
|
|
19.
|
Fit the belt loosely on belt pulleys.
|
|
20.
|
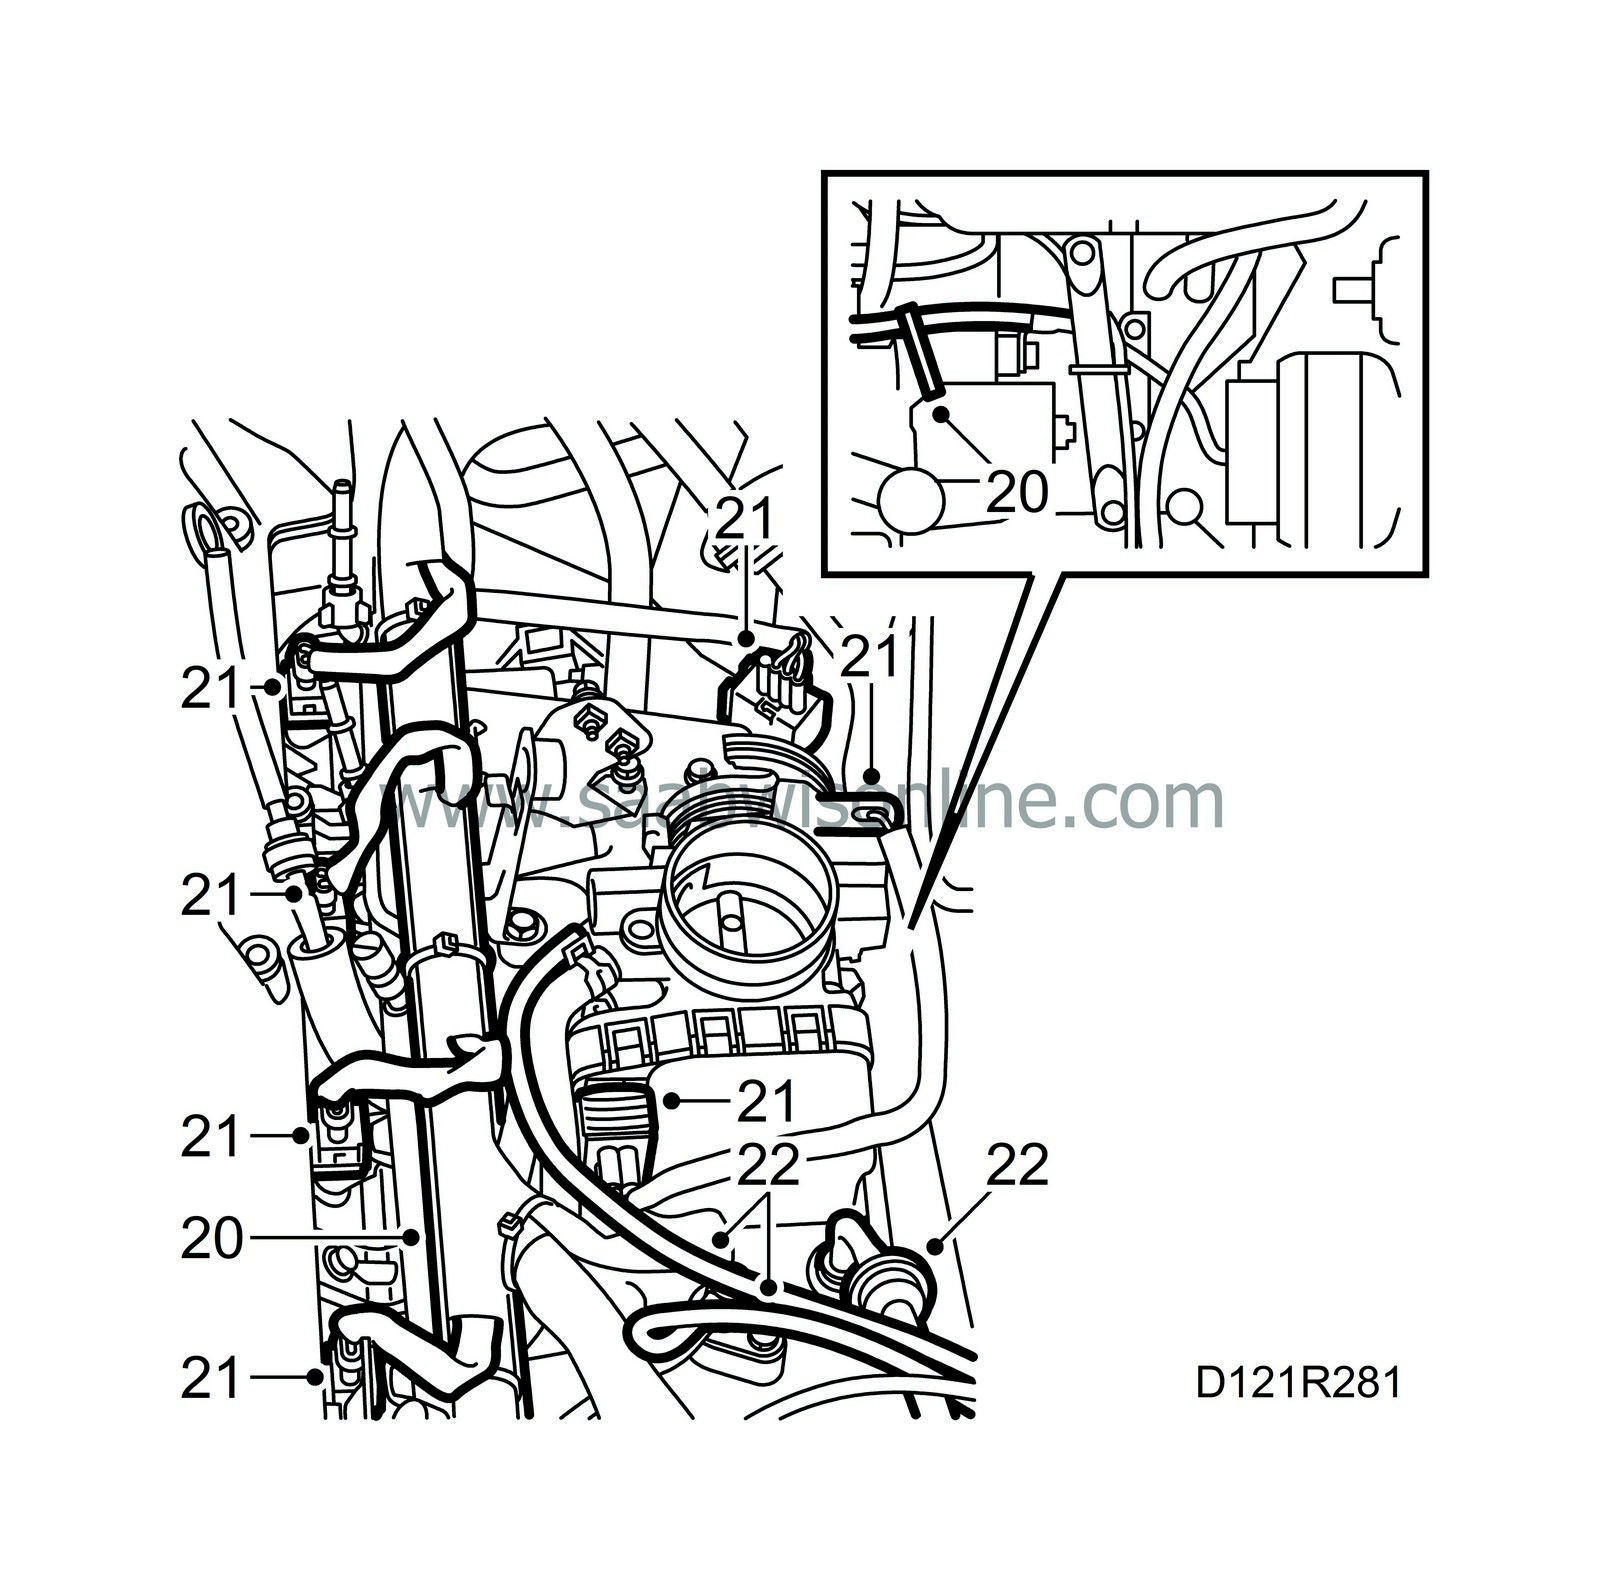
Fit the cable channel and fasten the cable tie on the cables for the starter motor solenoid.
|
|
21.
|
Plug in the connectors for the oxygen sensor, timing sensor, limp-home solenoid, throttle body, manifold absolute pressure sensor and injectors.
|
|
22.
|
Fit the vacuum hoses to the throttle body and the hose between the intake manifold and the brake servo.
|
|
23.
|
Connect the grounding points.
|
|
24.
|
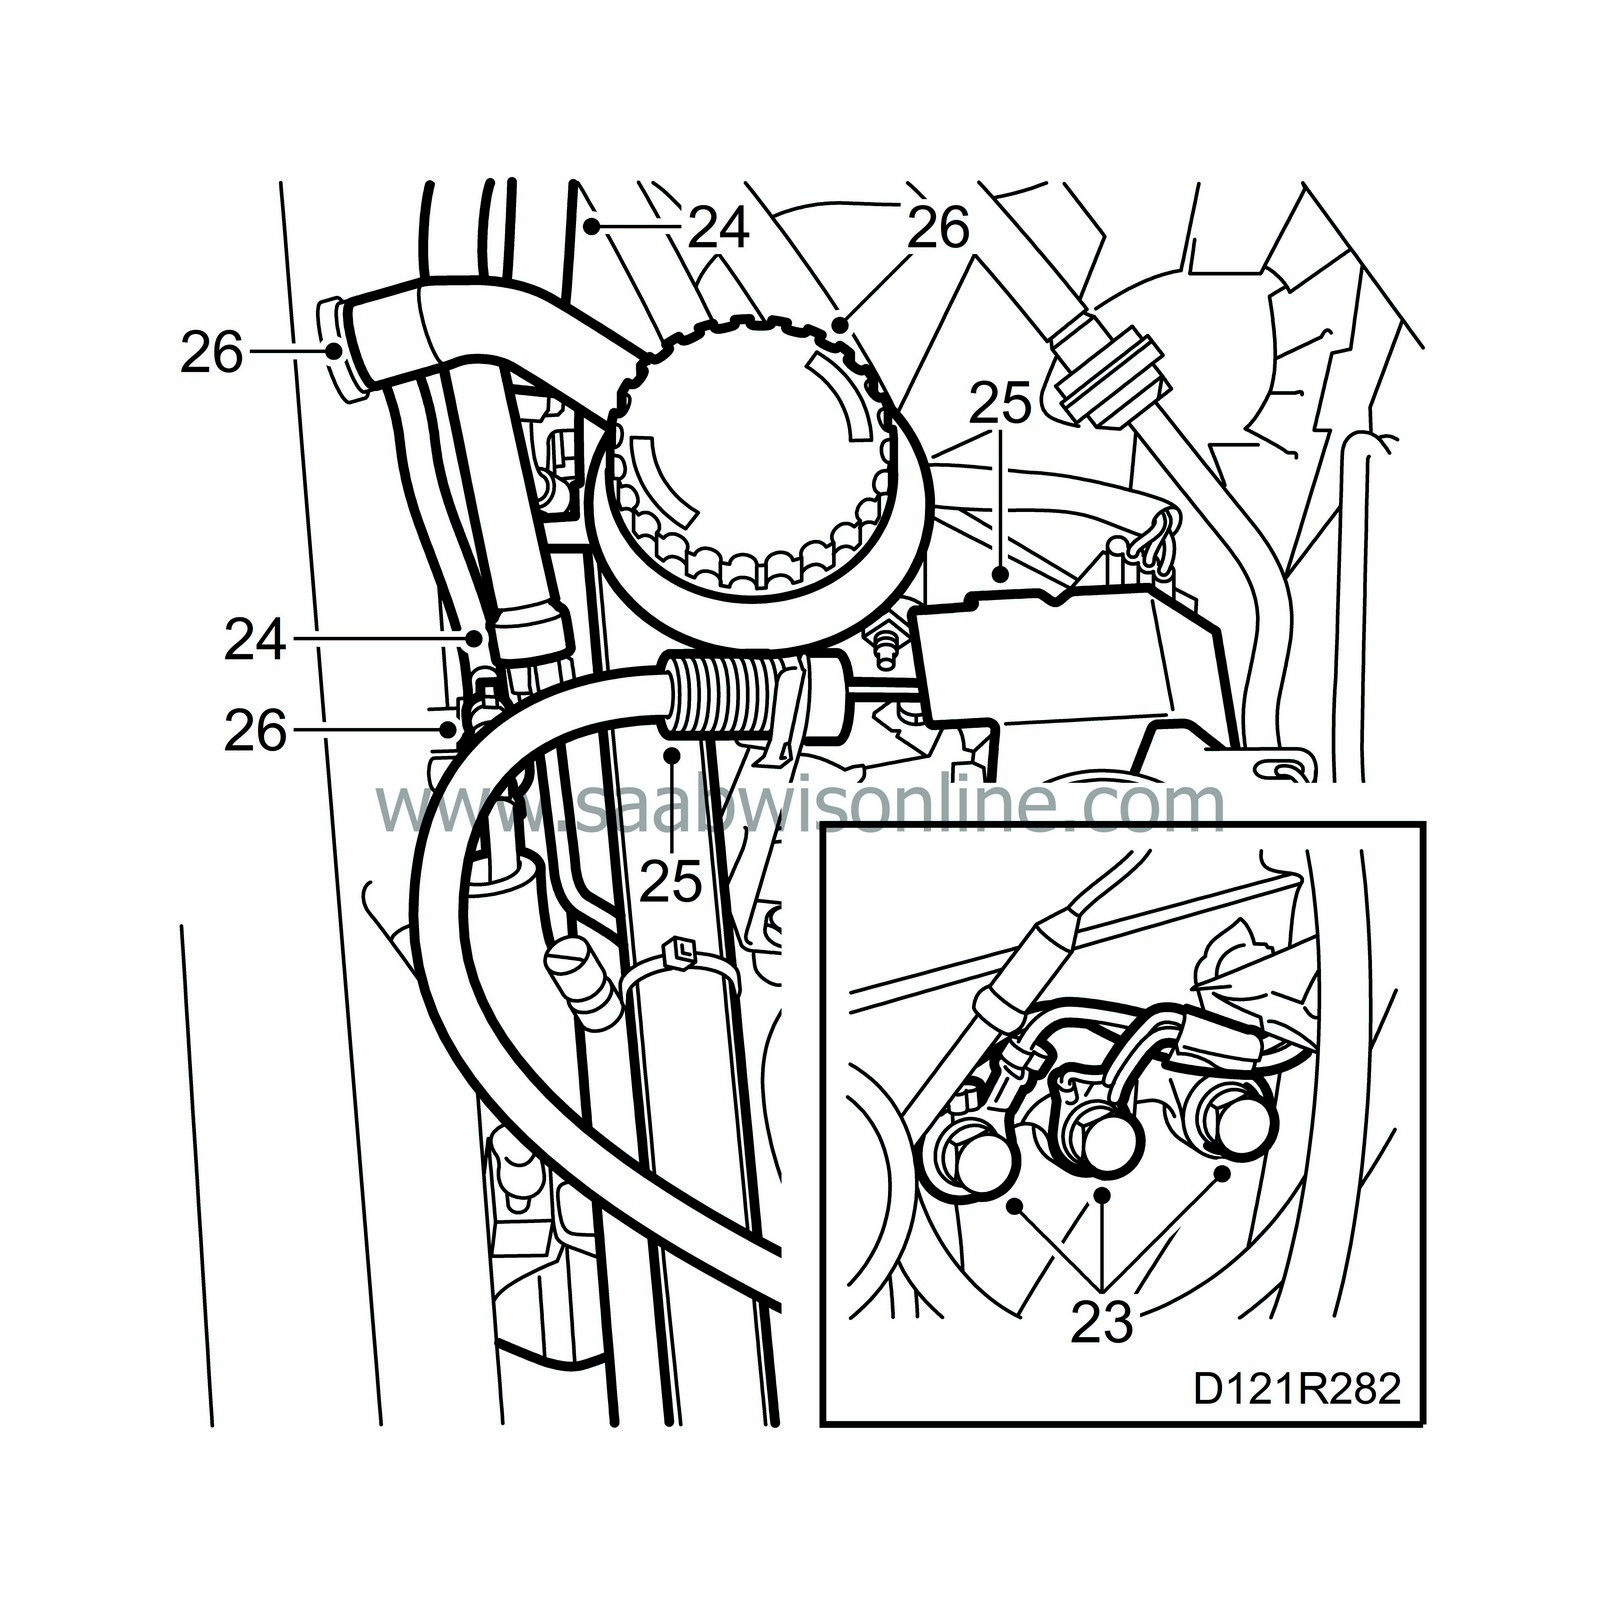
Fit the fuel lines with couplings and seals. (Replace if necessary).
|
|
25.
|
Fit the accelerator cable and adjust if necessary. Refit the protective cap. See 2: Adjusting accelerator cable.
|
|
26.
|
Fit the hose for the crankcase ventilation and the vacuum hose for the camshaft cover. Remove the plug and fit the dipstick pipe. Refit the cable ties on the camshaft cover by the non-return valve.
|
|
27.
|
Fit the lower and upper hoses to the throttle body and each coolant pipe. Fit the coolant pipe from the water pump by the cylinder block and the hose from the cooler to the thermostat housing.
|
|
28.
|
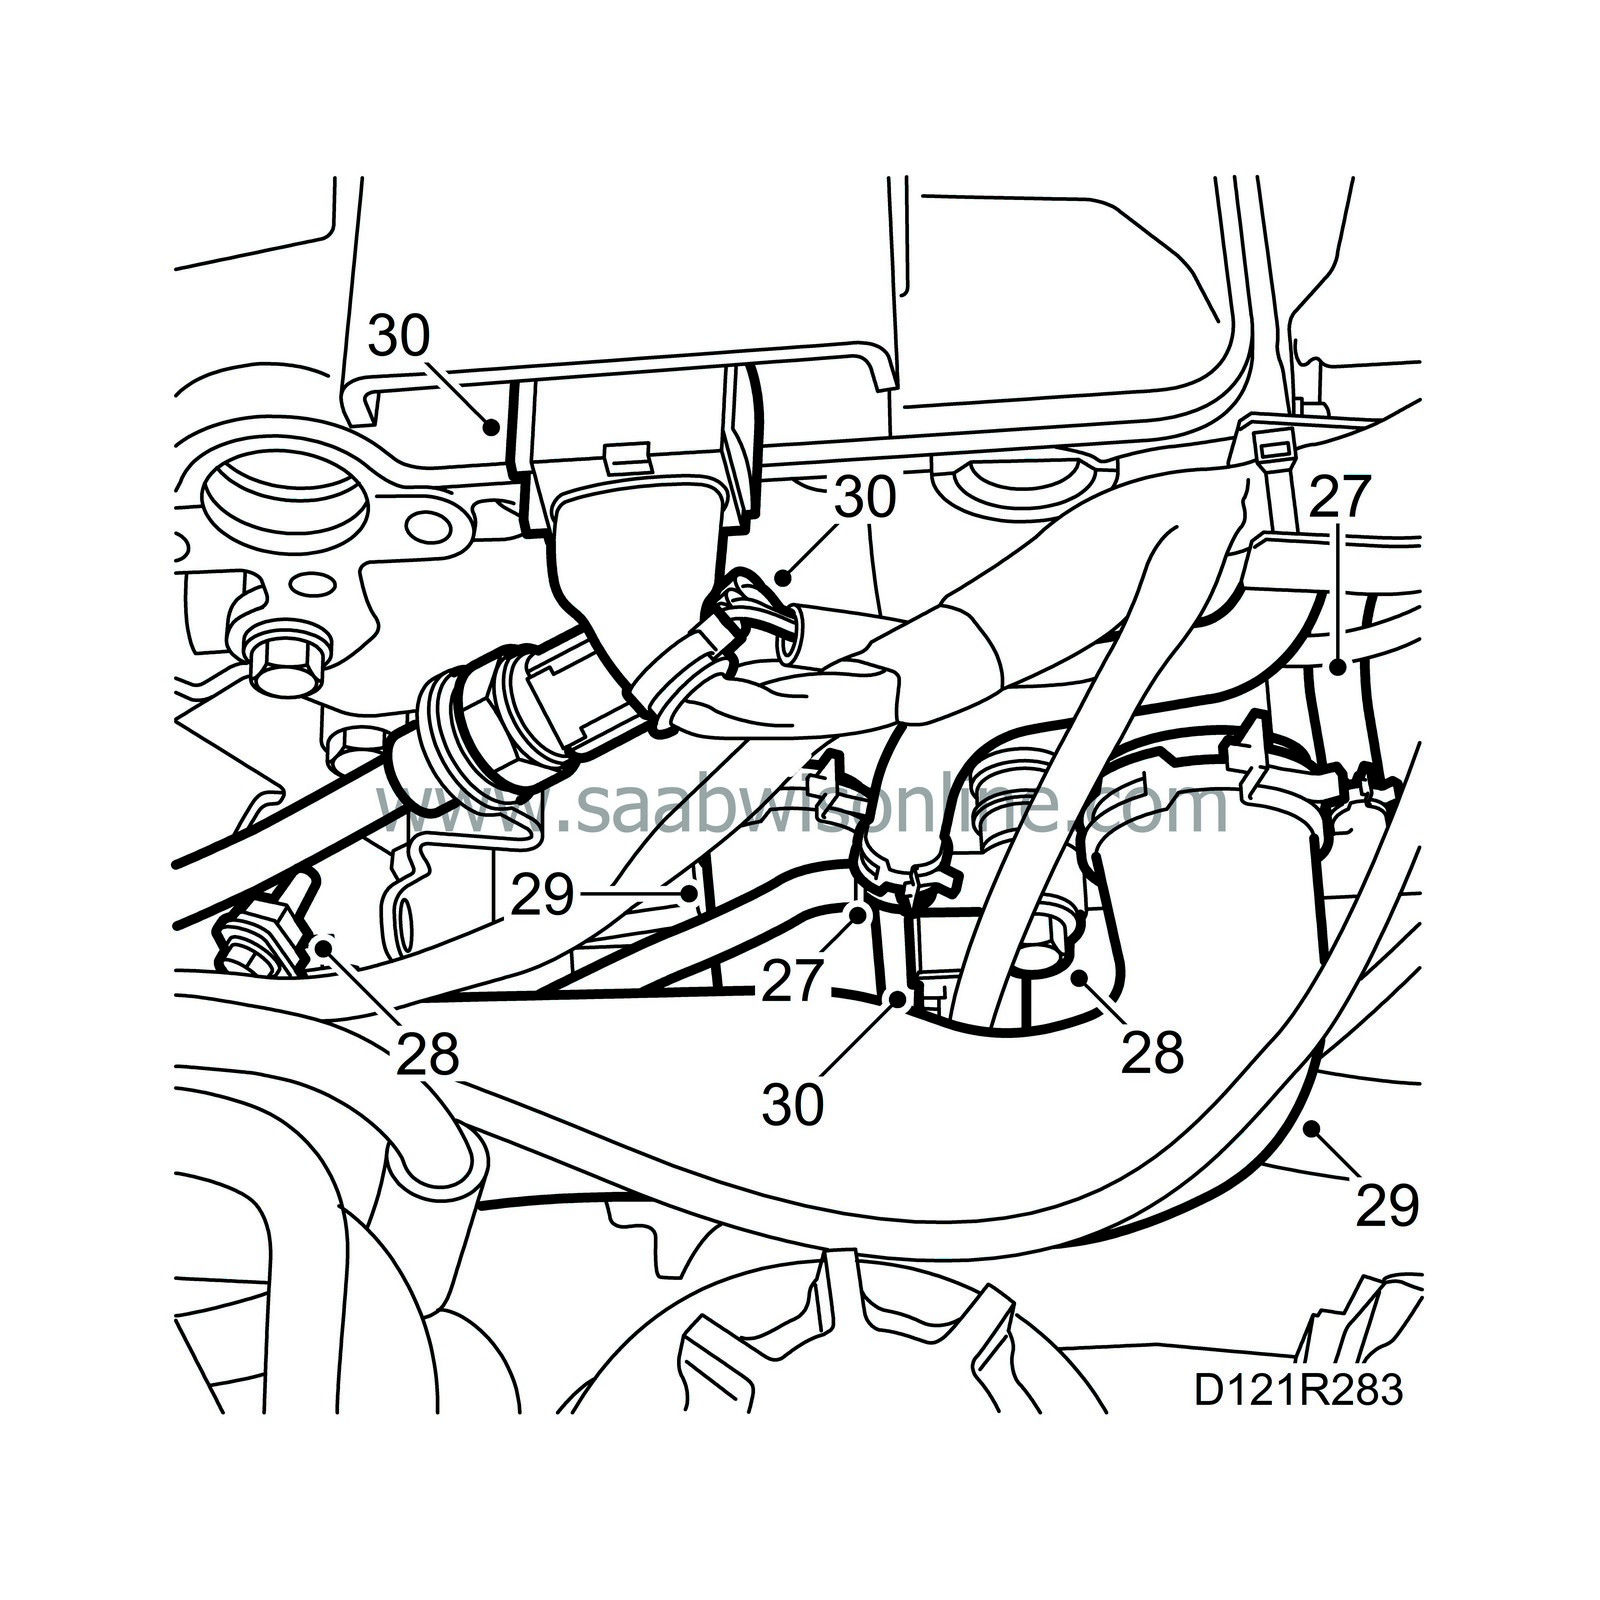
Fit the pipe with the banjo coupling from the turbo cooler to the thermostat housing. Use new gaskets.
Tightening torque: 25 Nm (19 lbf ft)
|
|
29.
|
Fit the coolant hoses to the cylinder head and thermostat housing.
|
|
30.
|
Plug in the connectors to the turbo pressure sensor and coolant temperature sensor as well as the ignition discharge module connector.
|
|
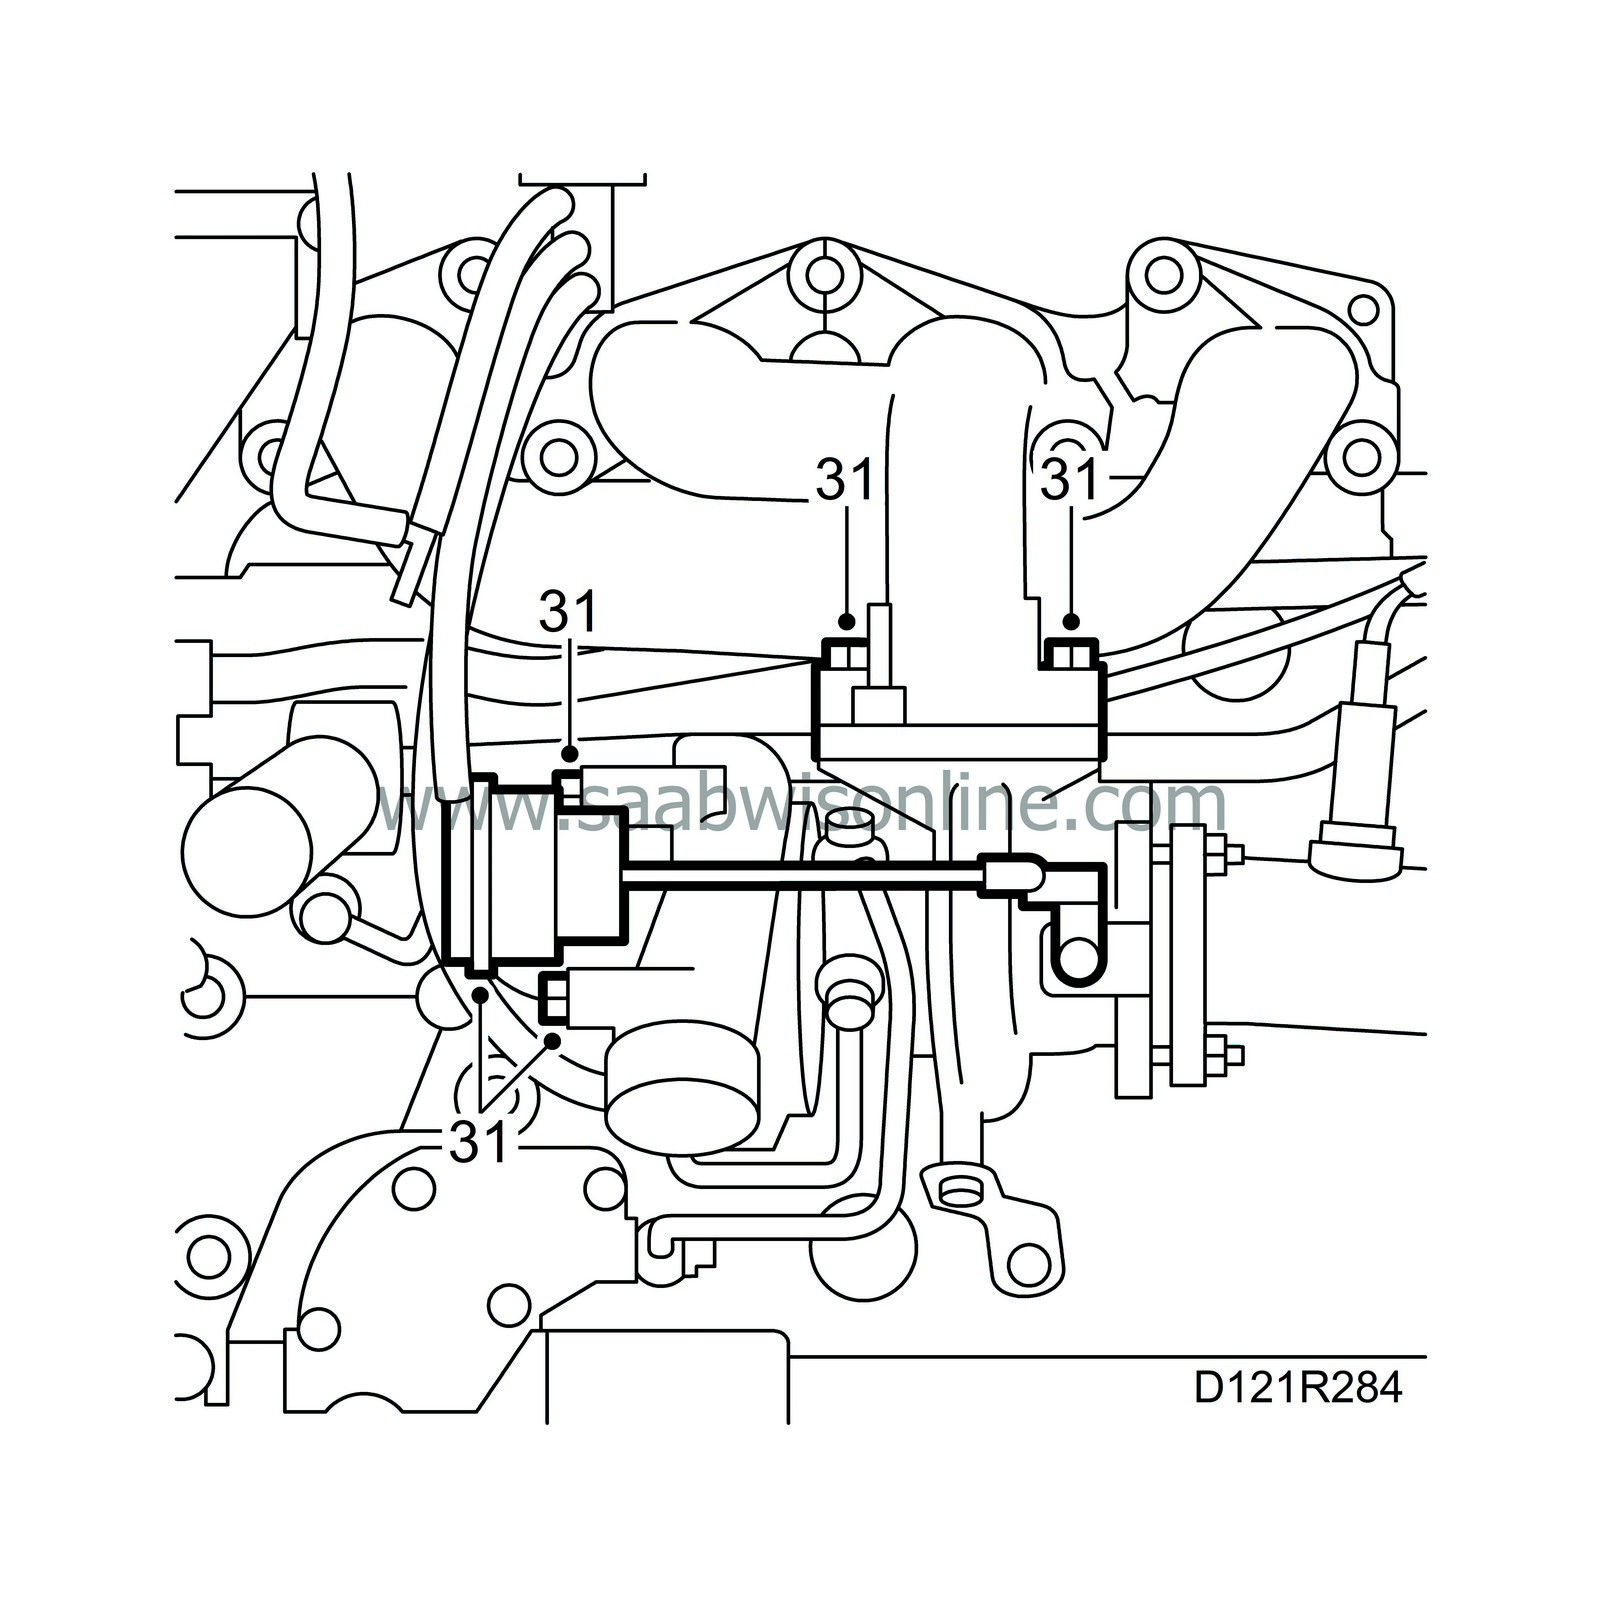
31.
|
Fit the exhaust manifold to the turbo unit. Apply Molycote 1000 or equivalent to the studs. Fit the vacuum unit to the turbo unit.
|
|
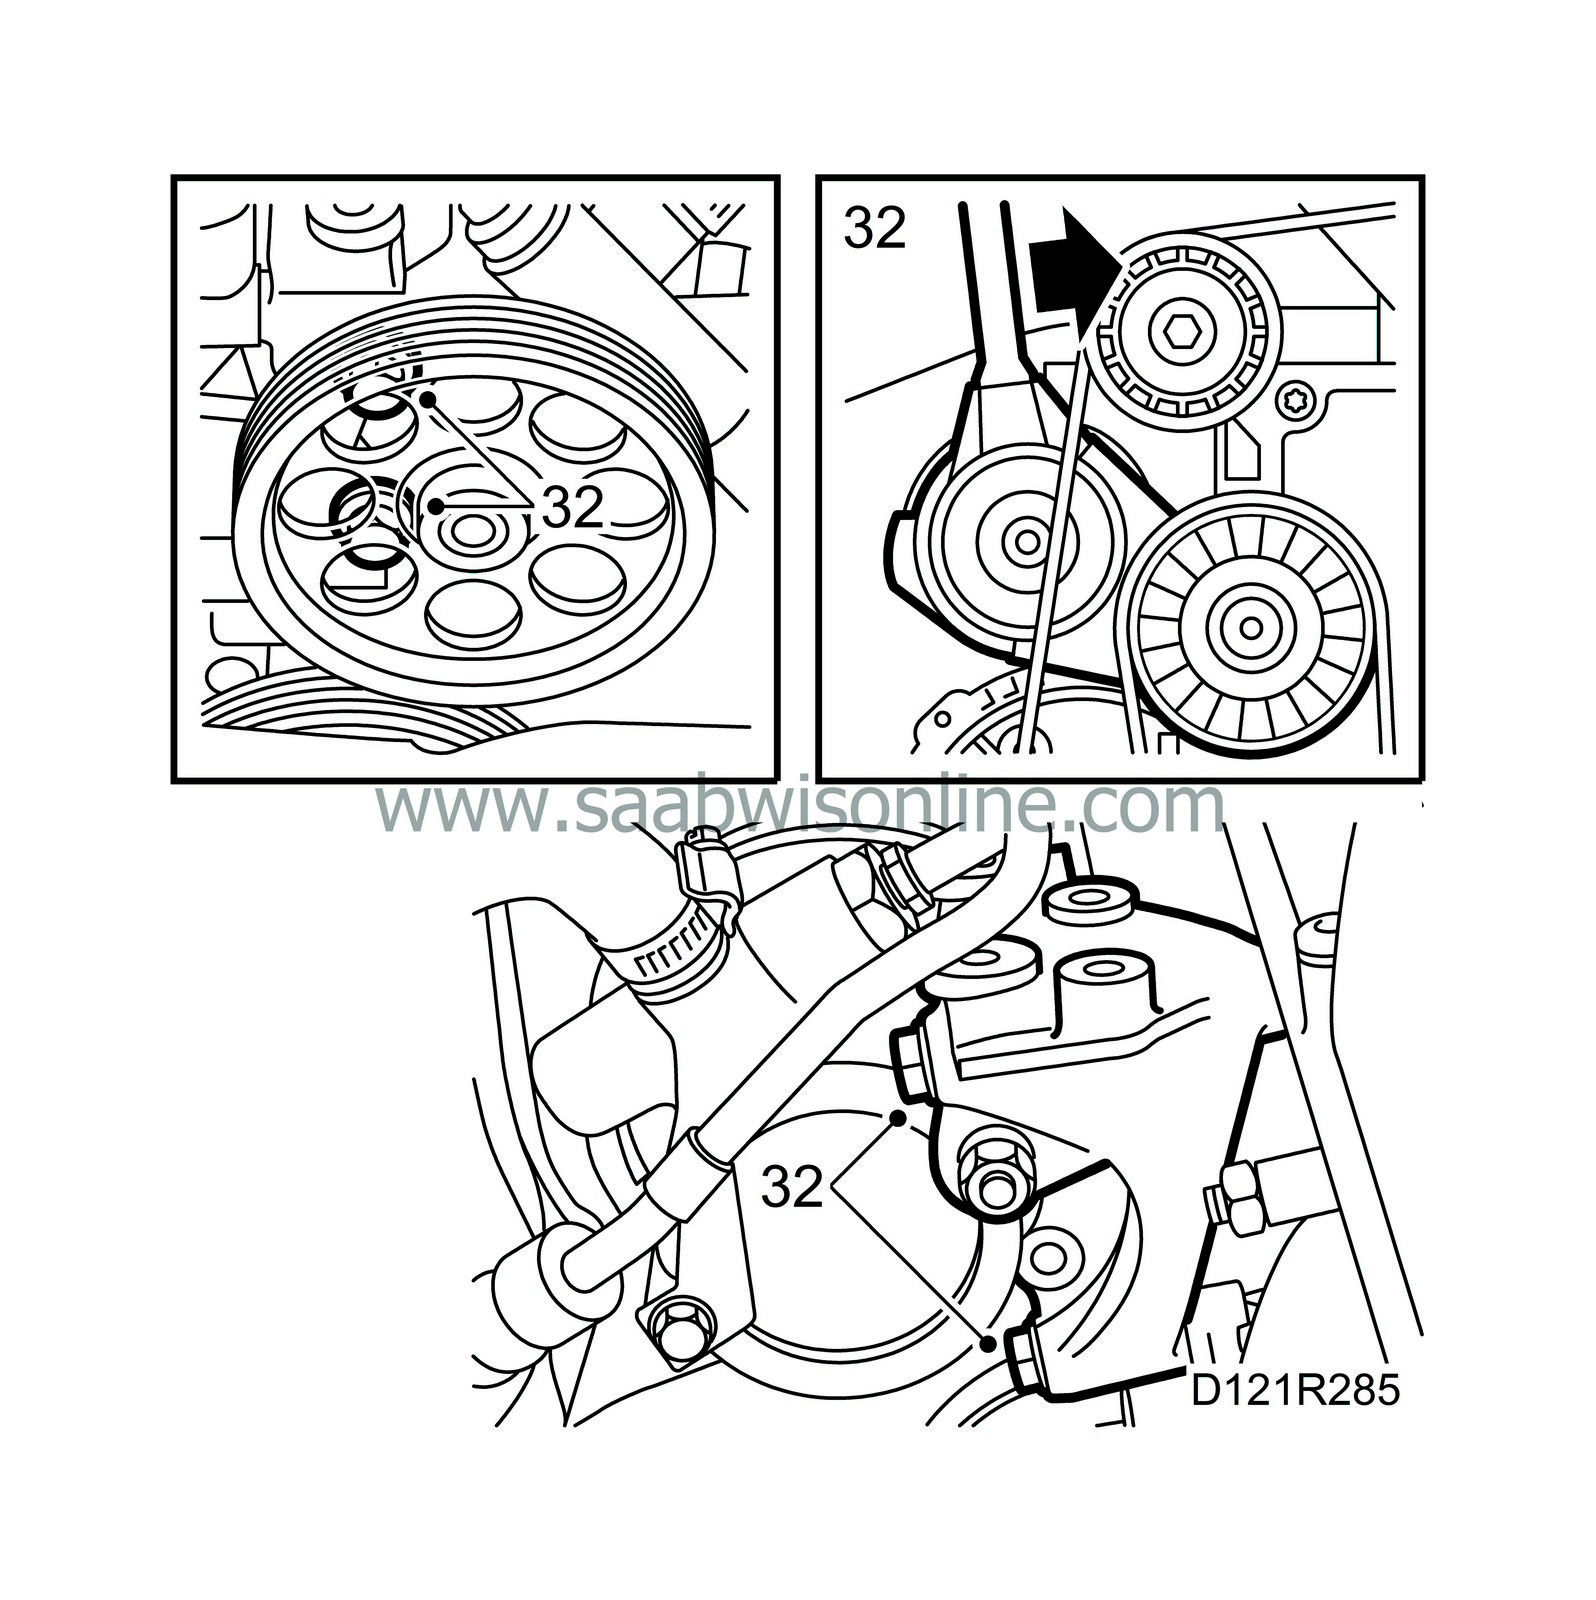
32.
|
Fit the power steering pump with bracket. Position the belt and release the belt tensioner.
|
|
33.
|
Fit the turbo inlet pipe with bracket. If necessary, lubricate the O-ring with petroleum jelly. Tighten the V-clamp. Fit the control valve on the bracket and its connector. Fit the evap purge hose.
|
|
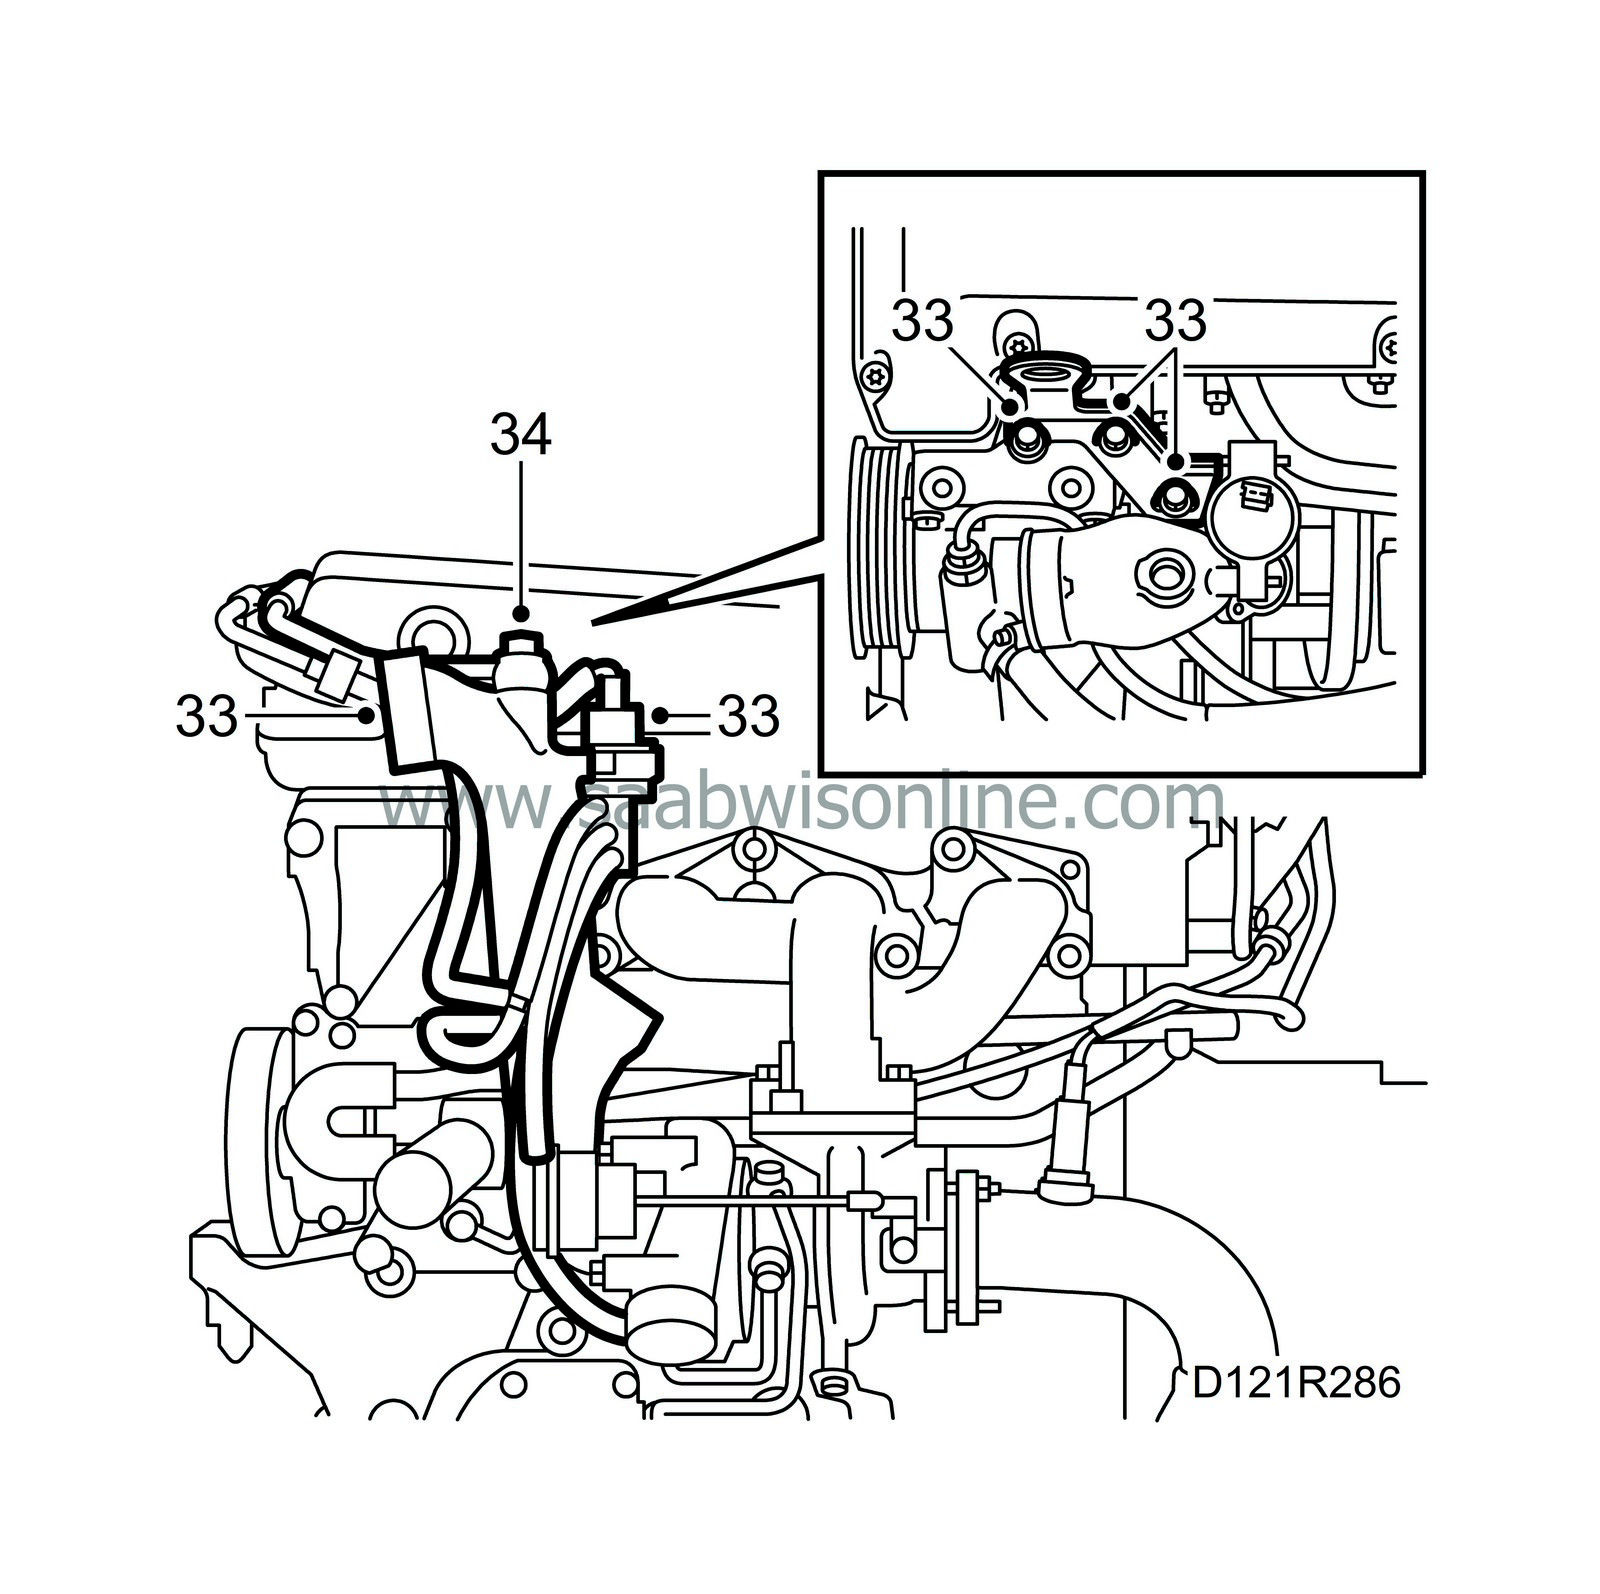
34.
|
Fit the pipe for the crankcase ventilation with the banjo screw.
Tightening torque: 24 Nm (18 lbf ft)
|
|
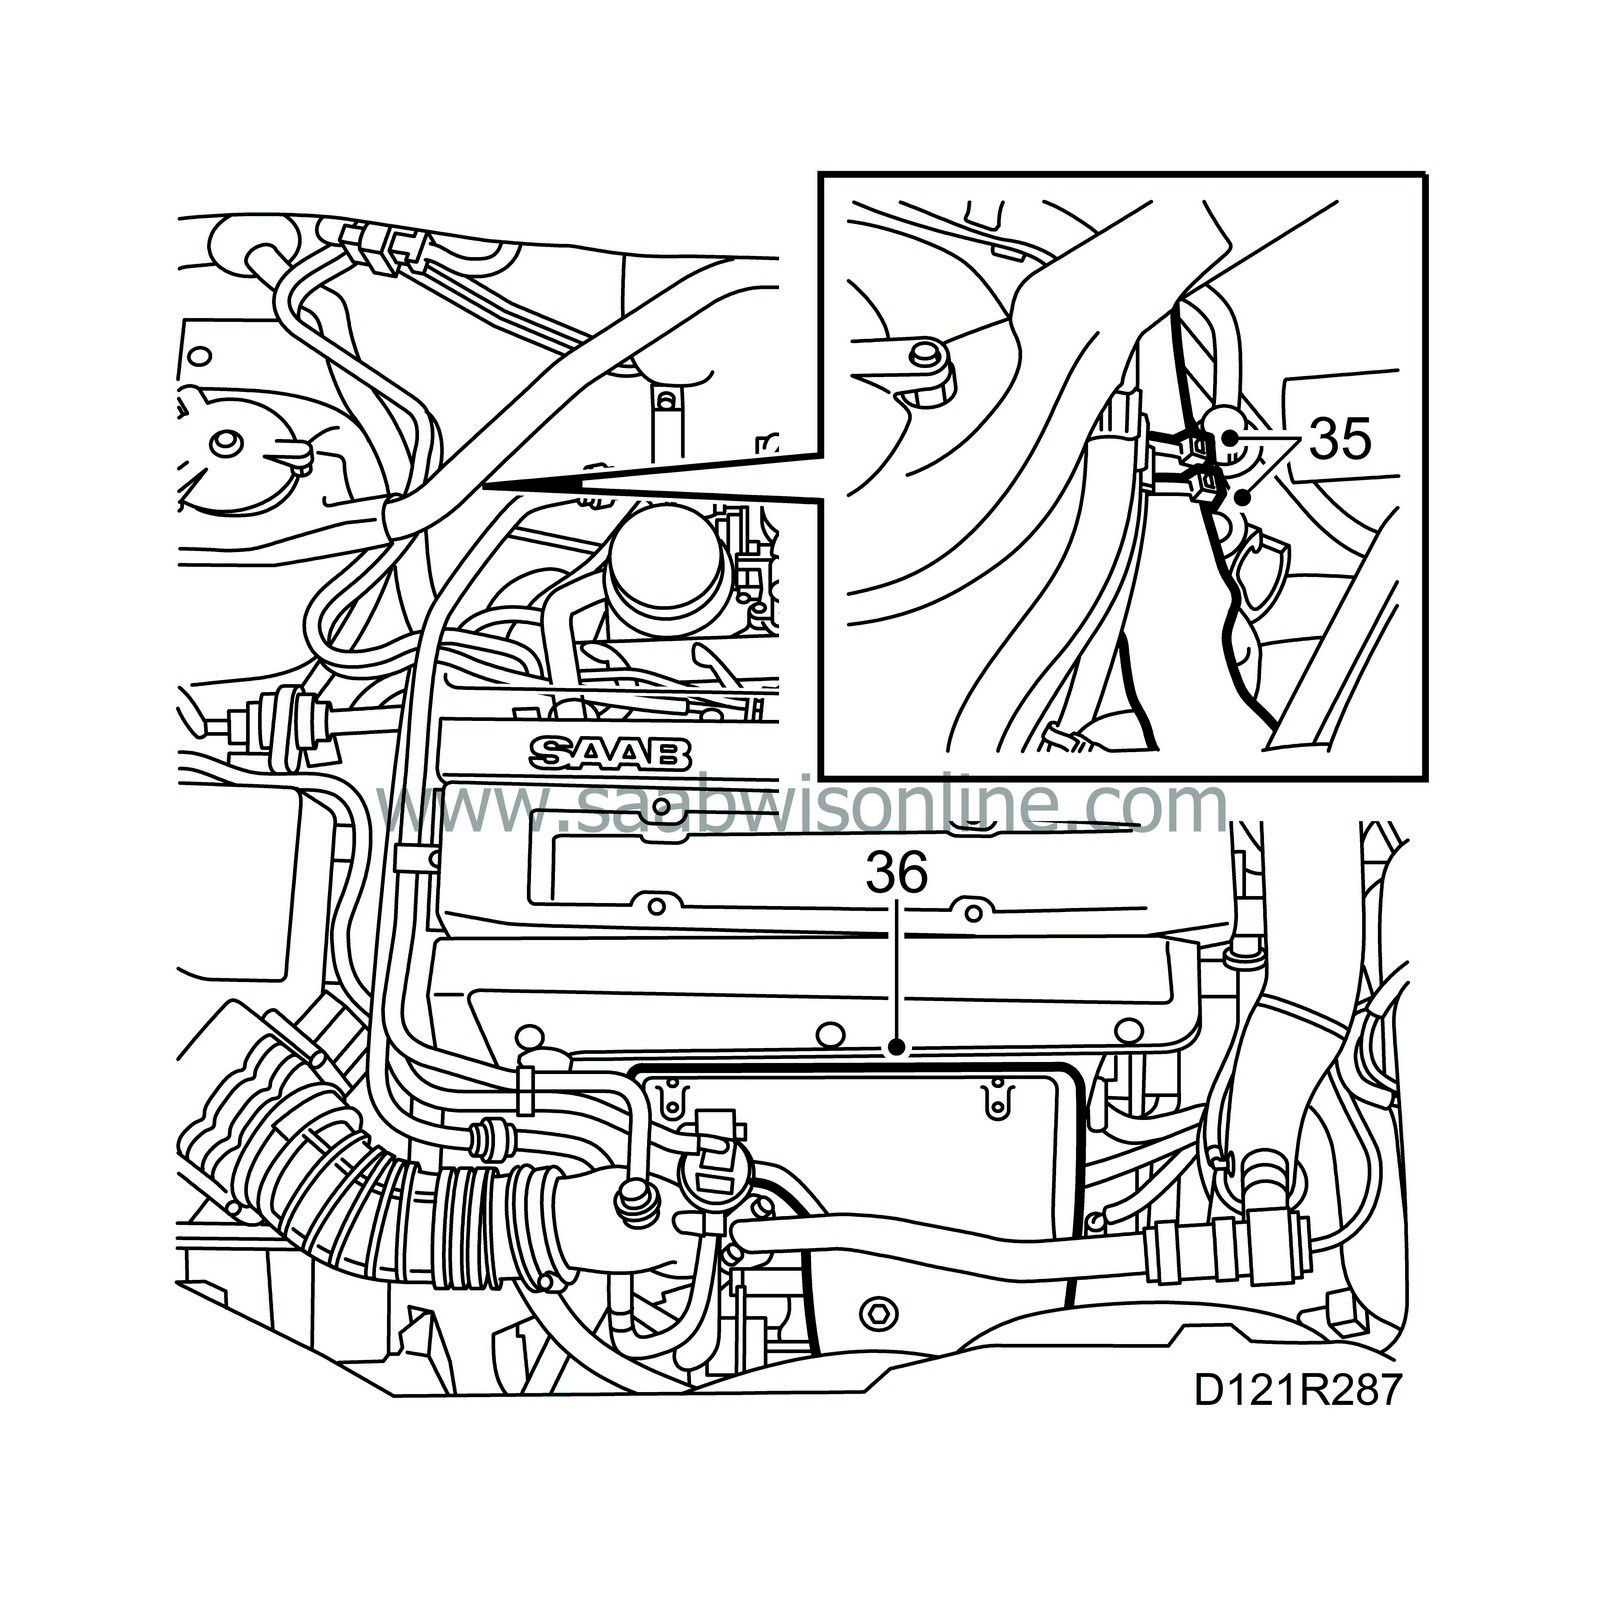
35.
|
Fit the cable ties at the MacPherson strut.
|
|
36.
|
Fit the heat shield over the exhaust manifold.
|
|
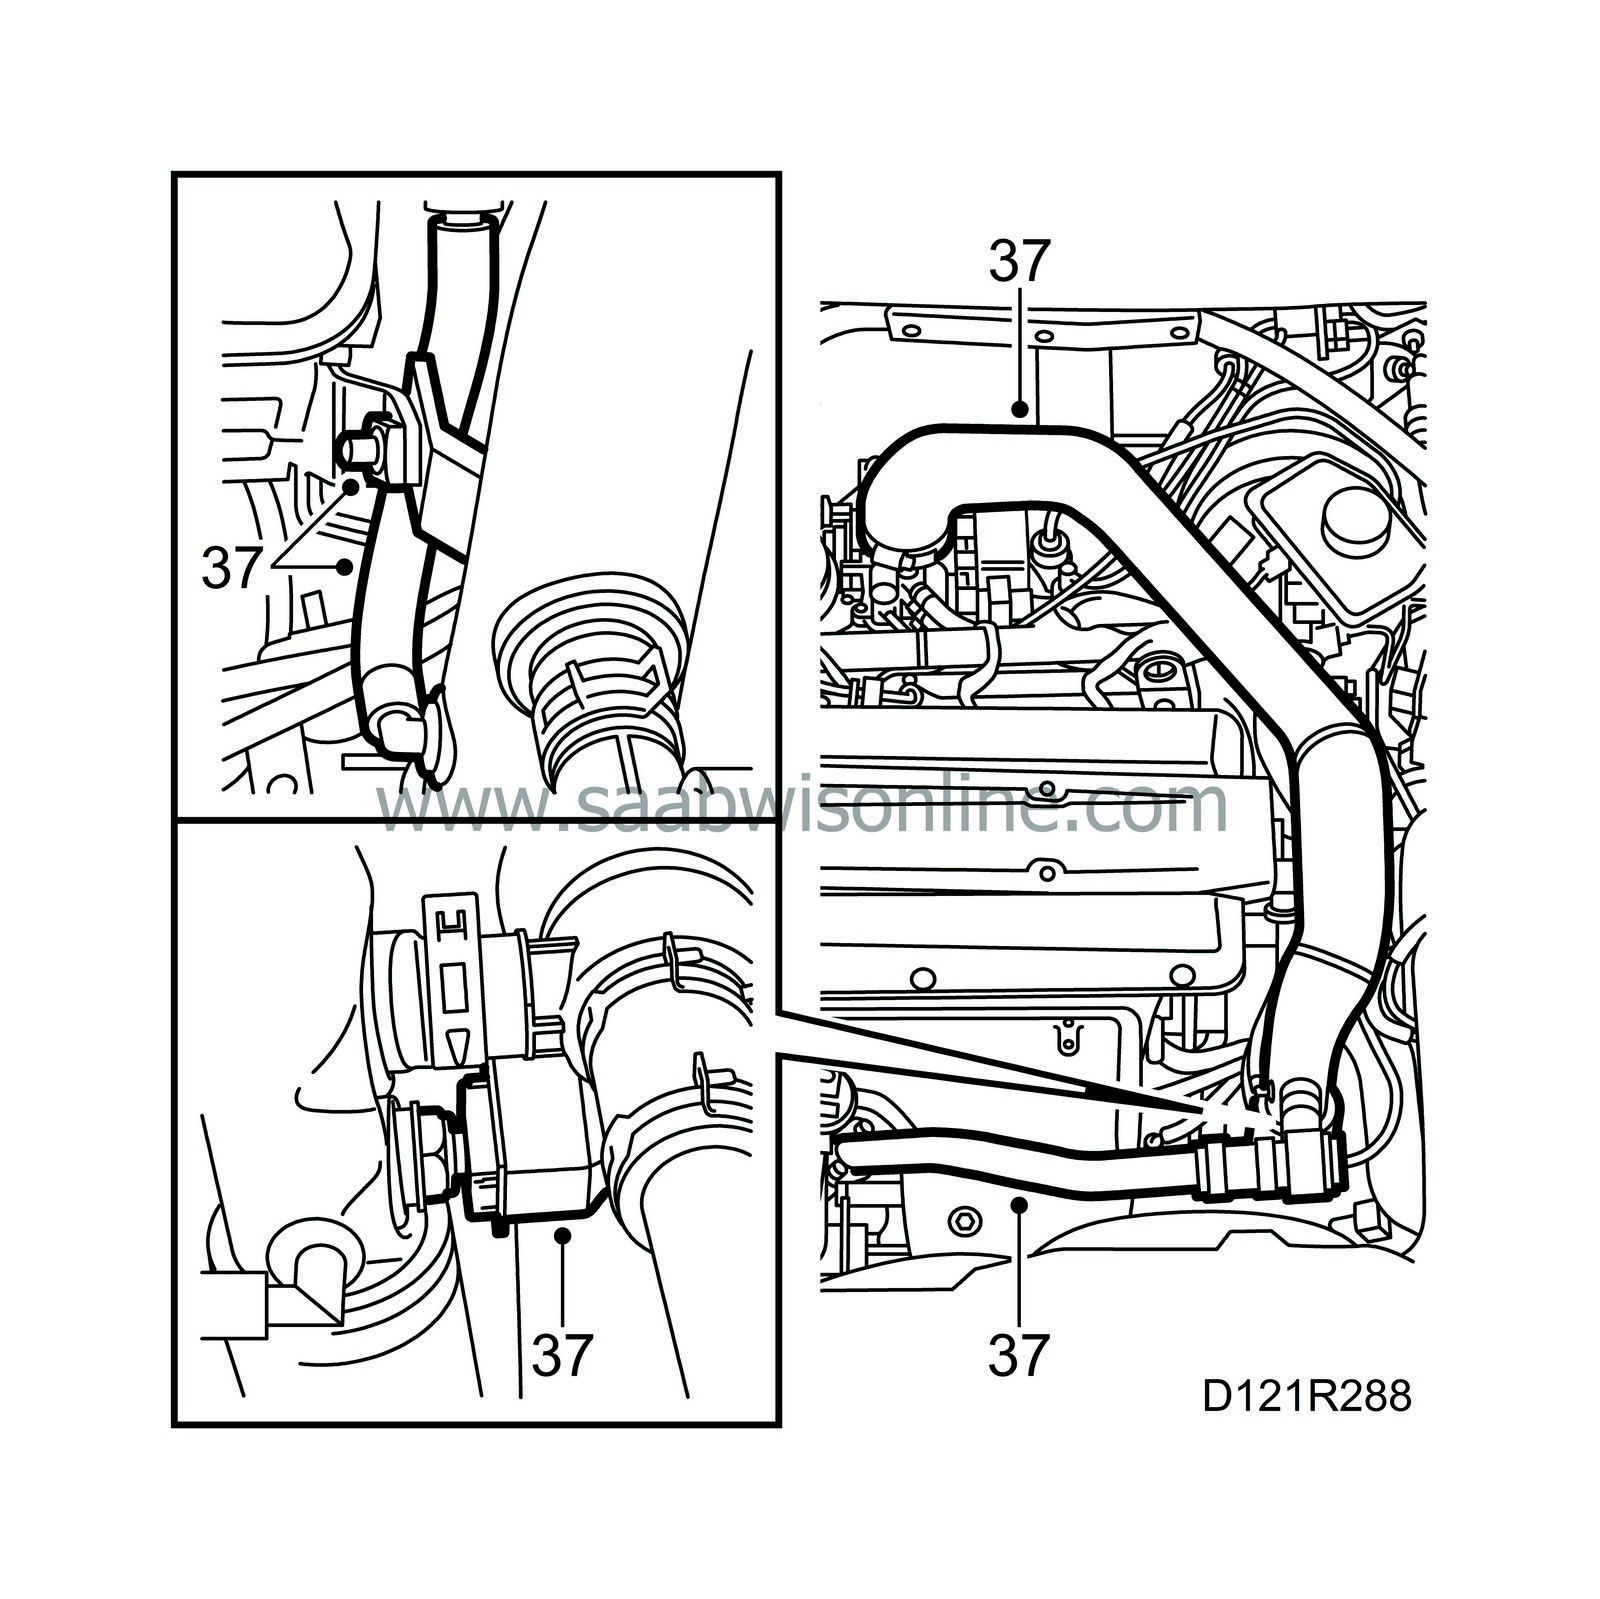
37.
|
Remove the plugs and fit the charge air pipe. Plug in the connector to the temperature sensor, connect the hose to the bypass valve and the hose to the turbo pressure sensor.
|
|
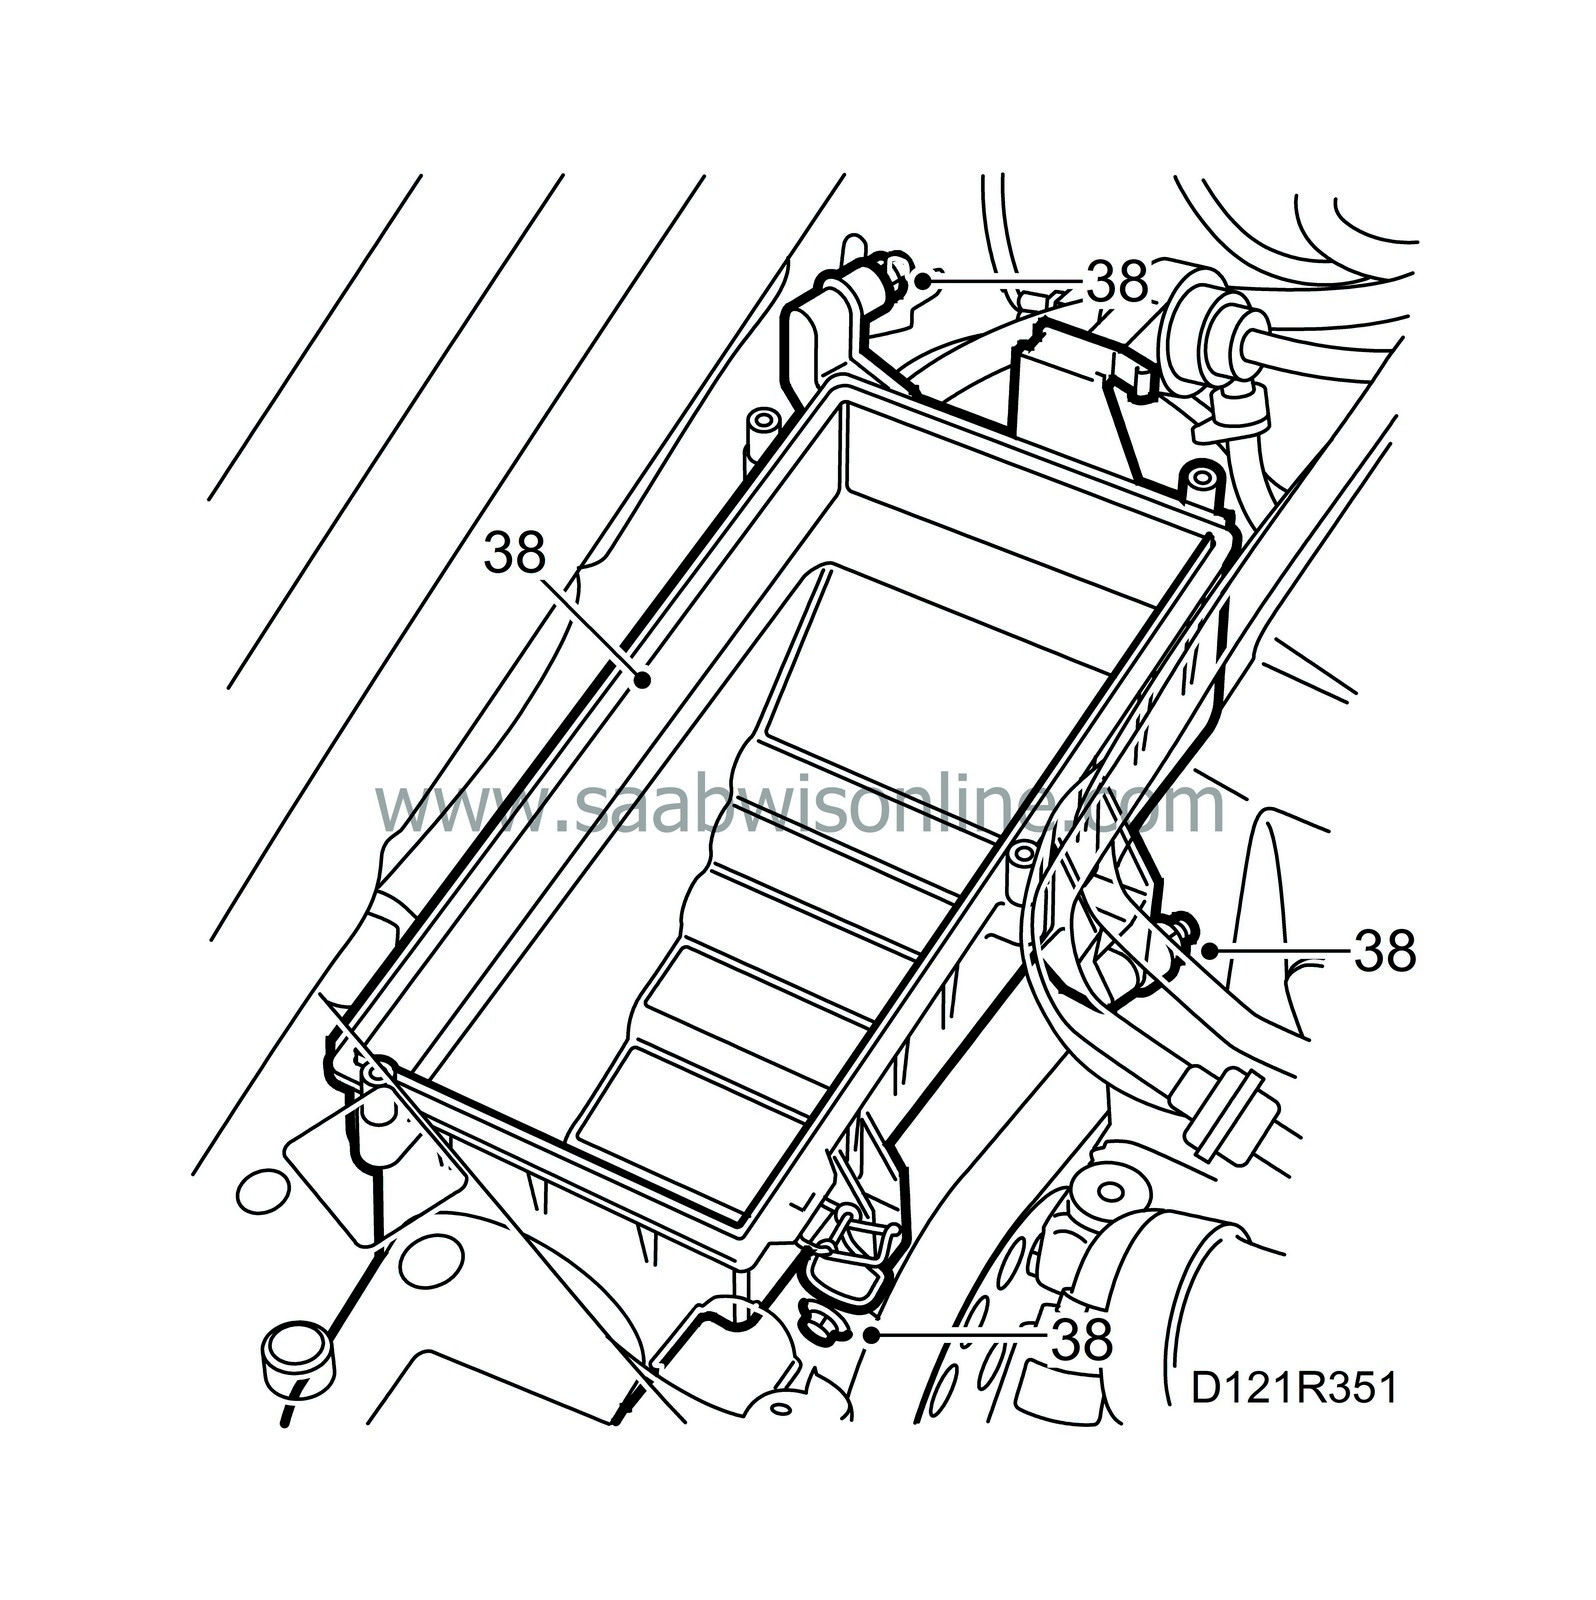
38.
|
Tighten the 3 nuts fastening the rubber bushes.
|
|
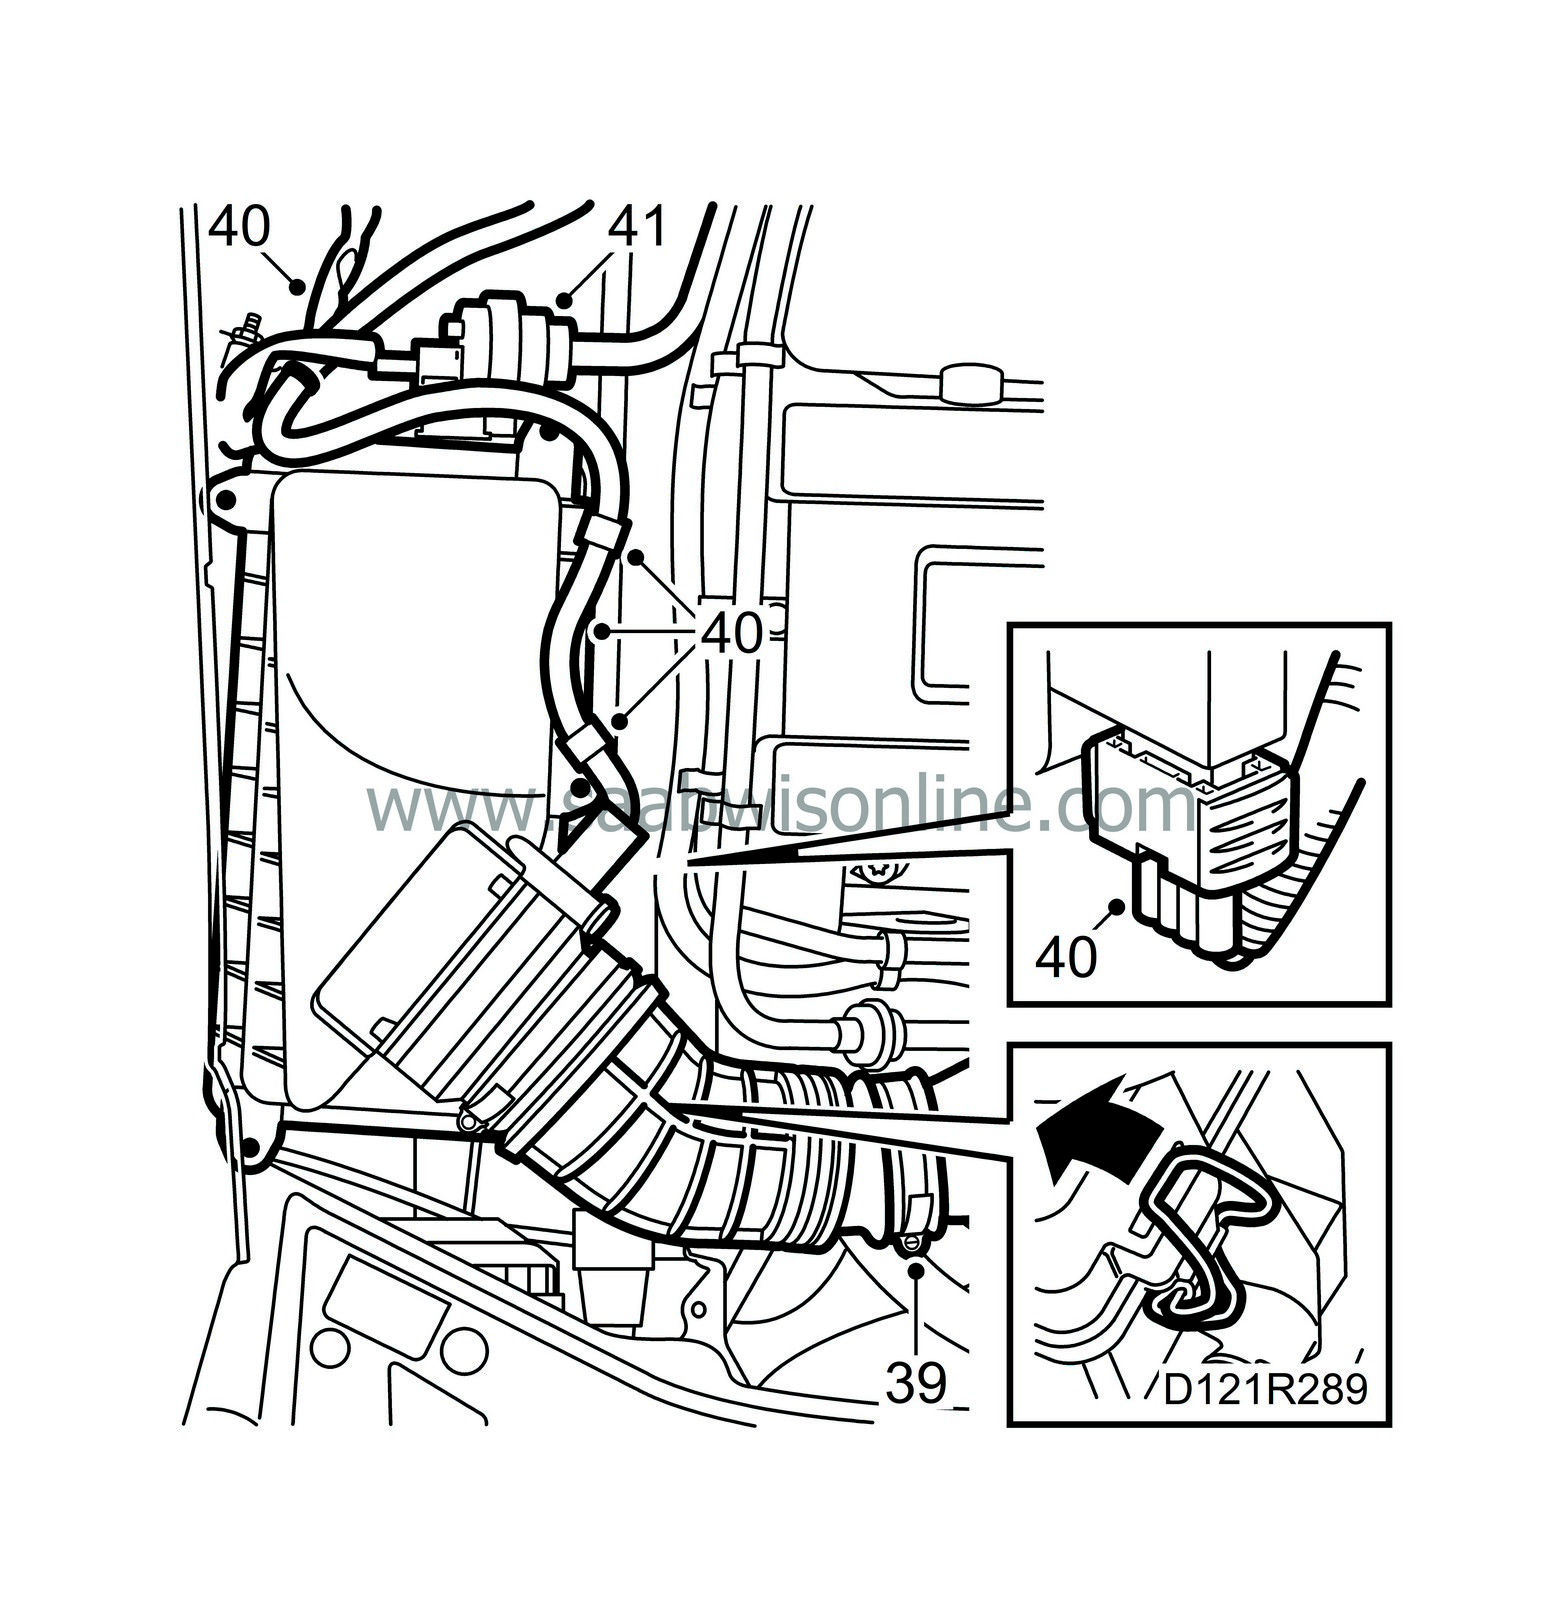
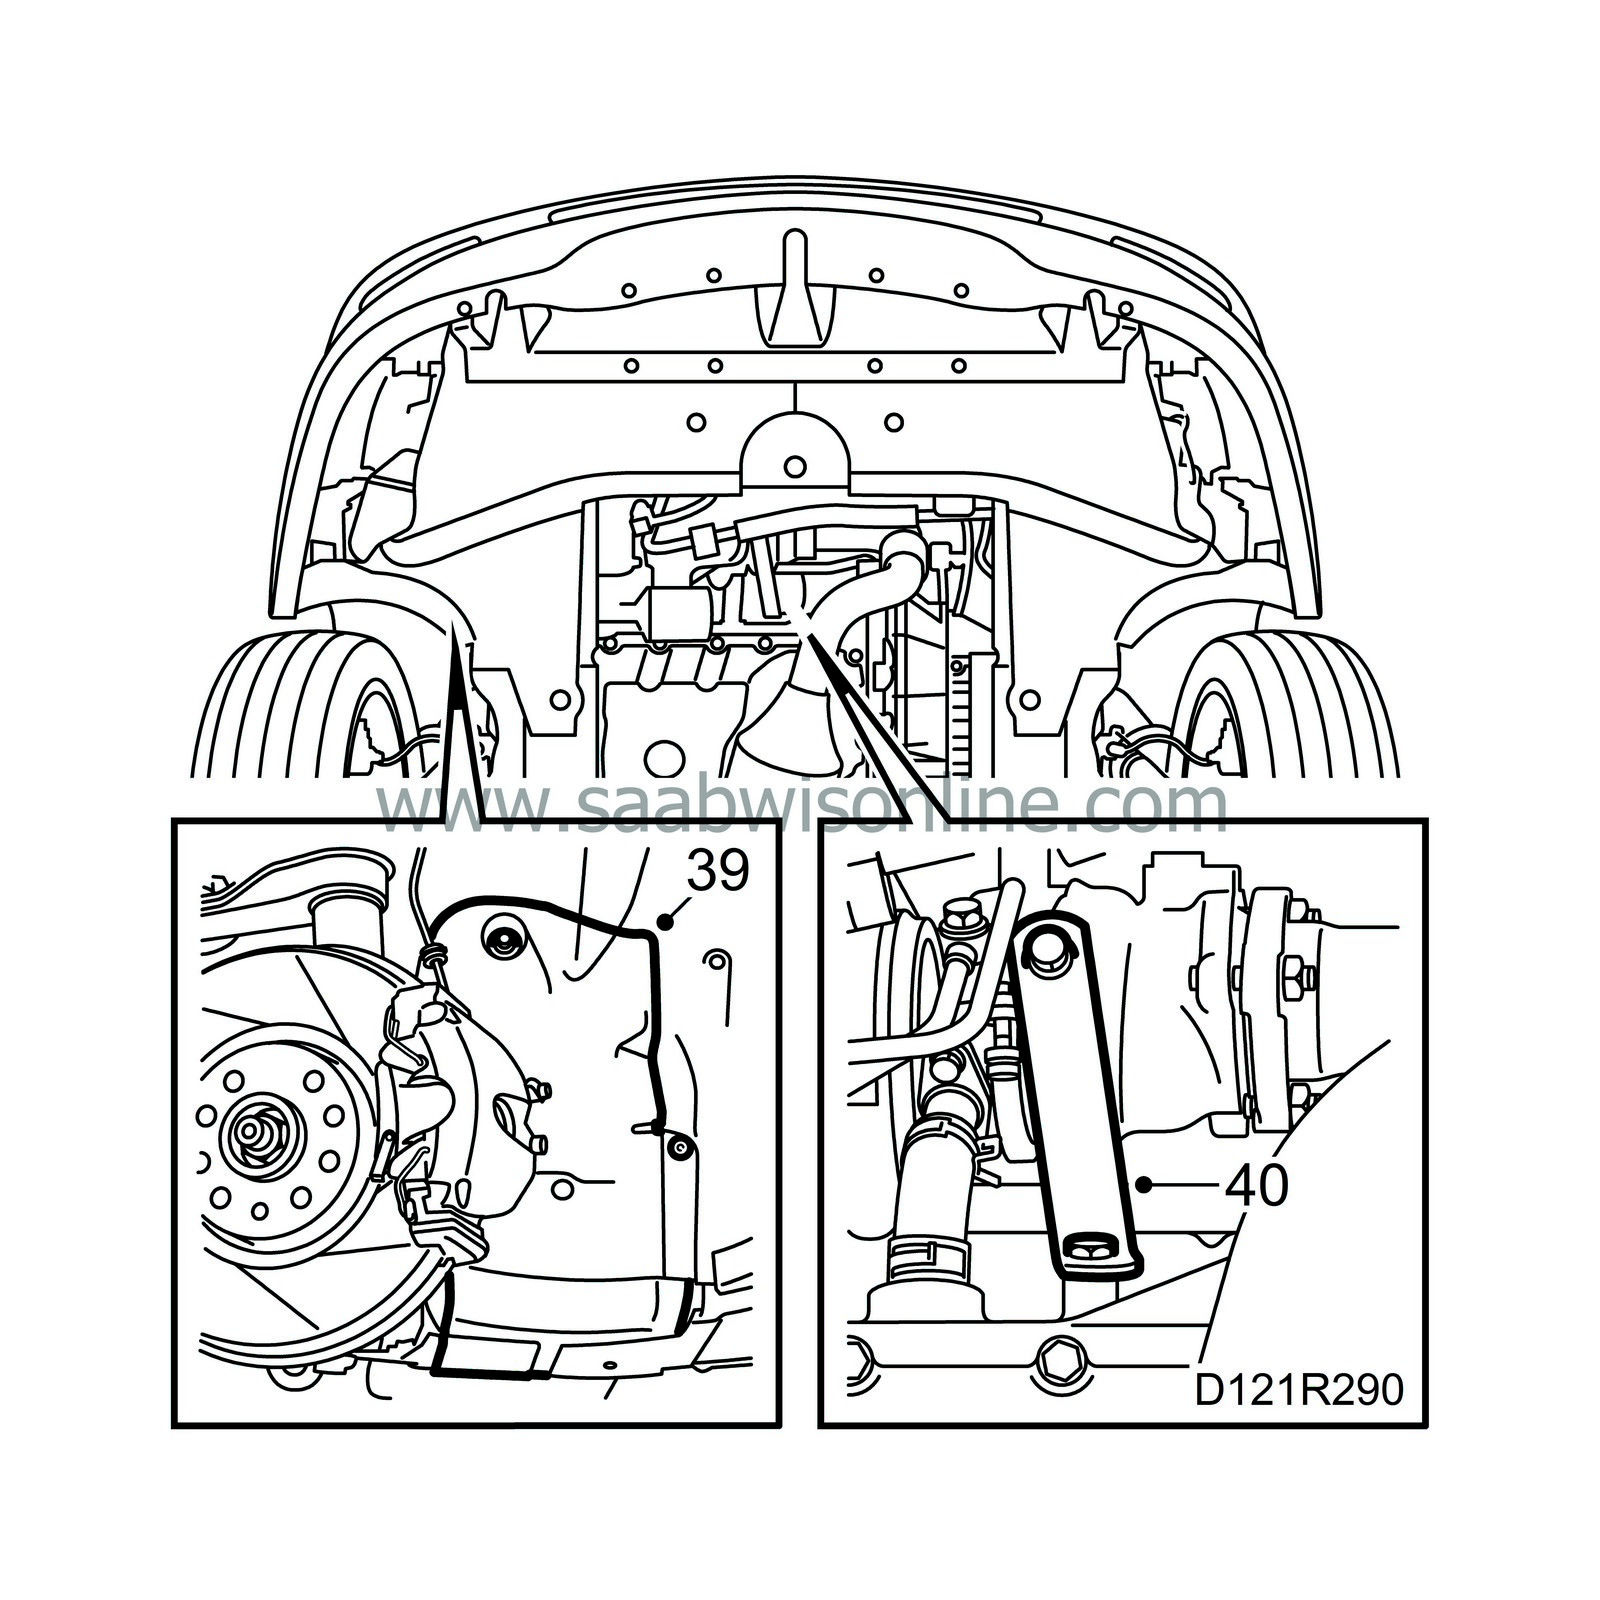
39.
|
Fit the connecting hose to the turbo inlet pipe.
|
|
40.
|
Fasten the mass air flow sensor cable to the cable clamps on the top of the air collection box and the cable clip by the rubber bush. Spray the mass air flow sensor connector with Kontakt 61, part no. 30 21 763 and plug it in.
|
|
41.
|
Fasten the evap canister purge valve to its mounting on the air collector box.
|
|
42.
|
Connect the negative battery cable and fit the engine cover.
|
|
43.
|
Raise the car and make sure the coolant drain plug is tight. Tighten the bottom bolts on the intake manifold stay and tighten the turbocharger stay. Make sure the belt is positioned correctly on the belt pulleys. Fit the air shields and lower the car.
|
|
44.
|
Bleed the cooing system in the following way:
|
Note
|
|
AC/ACC should be OFF.
|
Fill the system to MAX level. Check for leaks. Close the cap on the expansion tank, start the engine and run it warm at varying speeds until the radiator fan cuts in. Open carefully and top up to MAX level.
|
|
45.
|
Start the engine and warm it up until the thermostat opens. Turn off the engine and check the coolant and oil levels, top-up if necessary.
|
|
46.
|
Set the clock and radio code if necessary. Start the engine and check all functions. Calibrate the ACC and test drive the car.
|


