Removing the cylinder head (in car) B235R, B205L/R
|
|
Removing the cylinder head (in car) B235R, B205L/R
|
|
1.
|
Protect the wings and disconnect the negative battery cable.
|
|
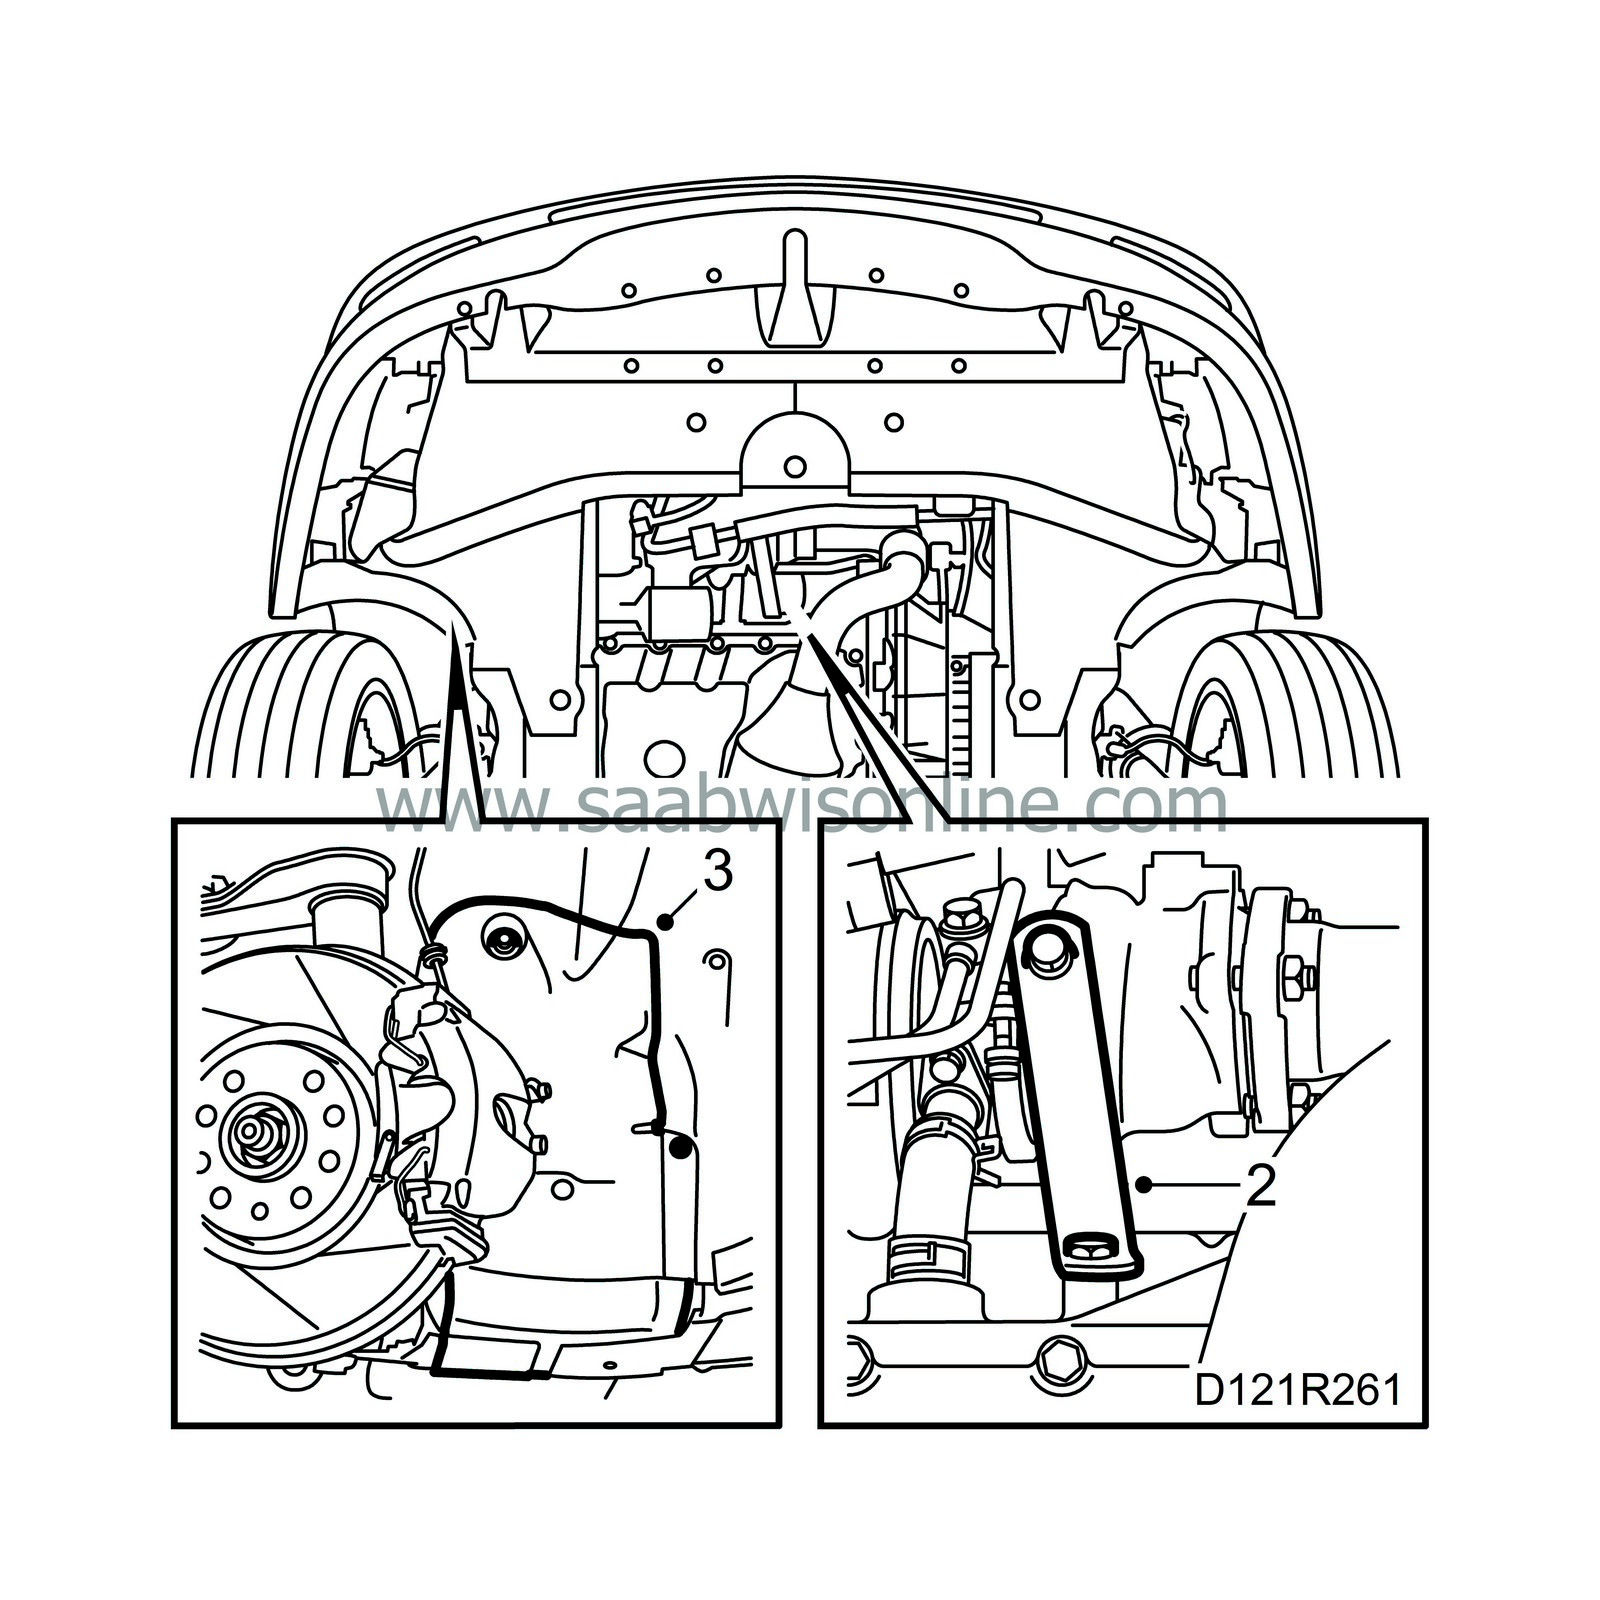
2.
|
Raise the car, undo the turbocharger stay.
|
|
3.
|
Remove the belt circuit cover.
|
|
4.
|
Take a receptacle and drain the coolant.
|
|
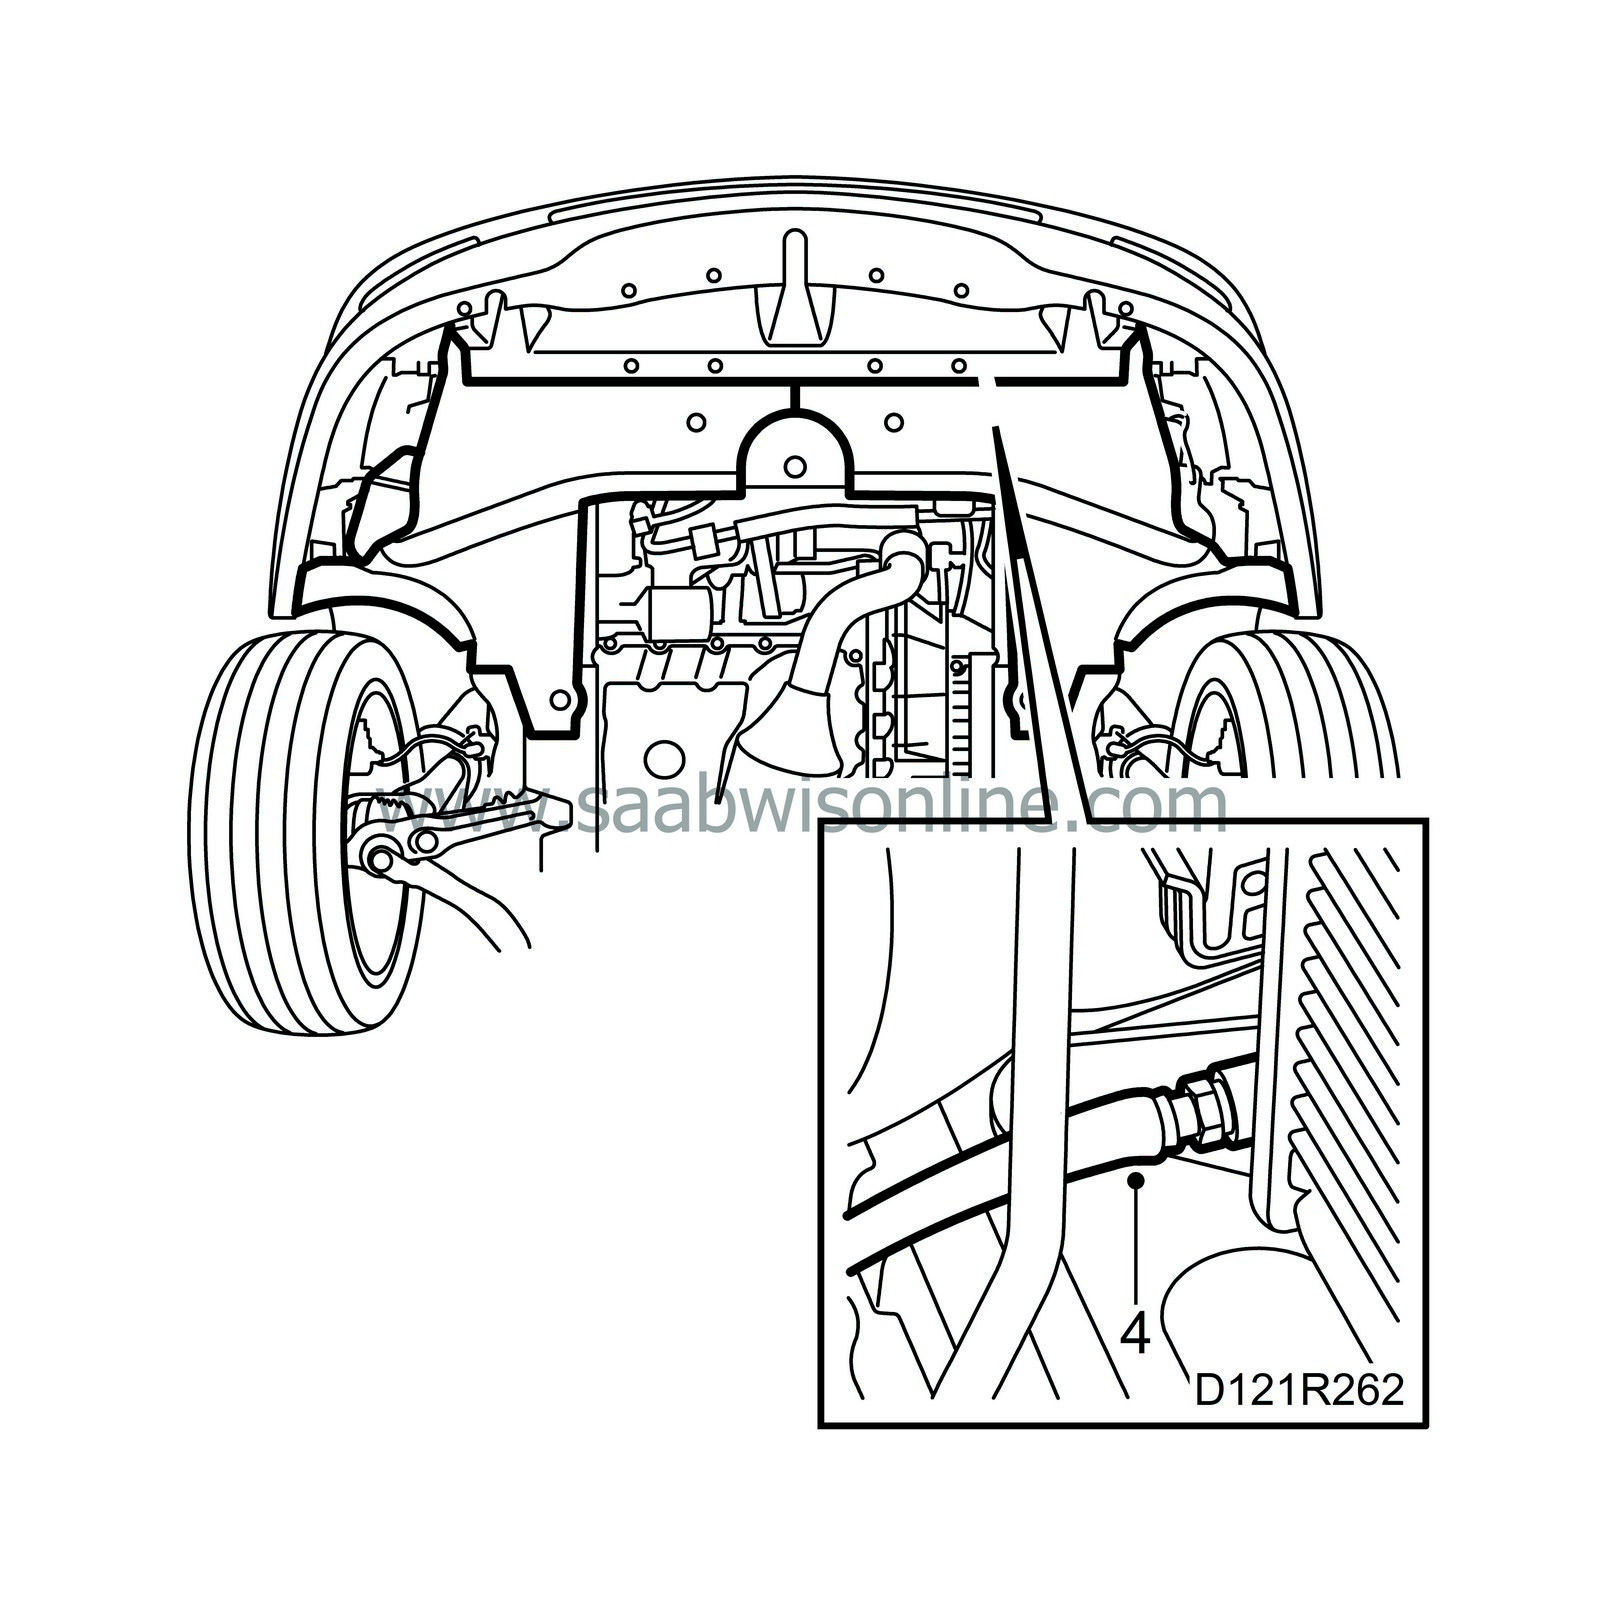
5.
|
Lower the car and undo the hose clip between the connecting hose and the turbo inlet pipe.
|
|
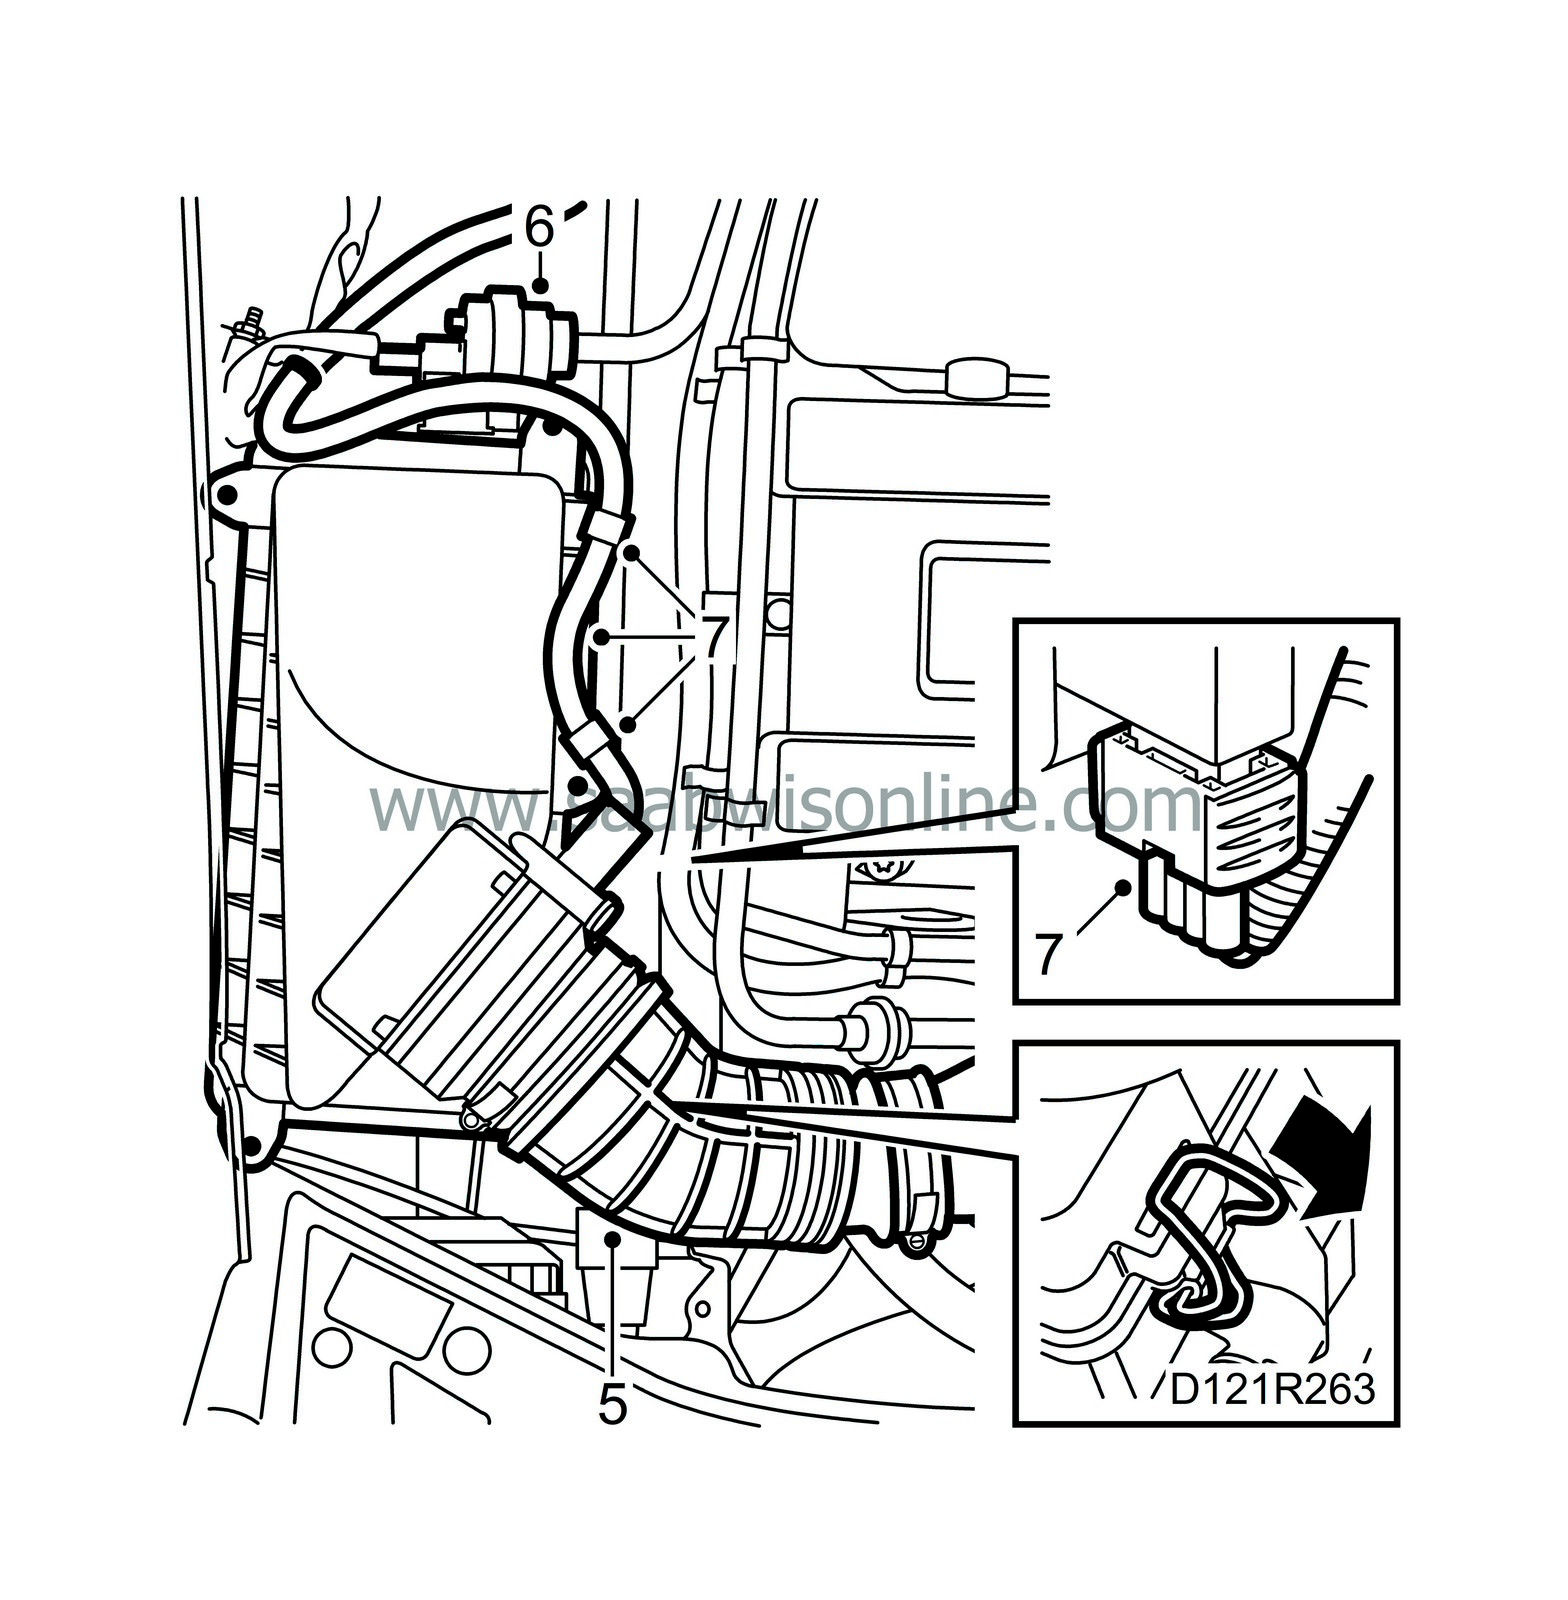
6.
|
Undo the evap canister purge valve from its mounting by the air collection box.
|
|
7.
|
Unplug the connector from the mass air flow sensor and detach the mass air flow sensor cable from the cable clamps on the top of the air collection box and the cable clips by the rubber bush.
|
|
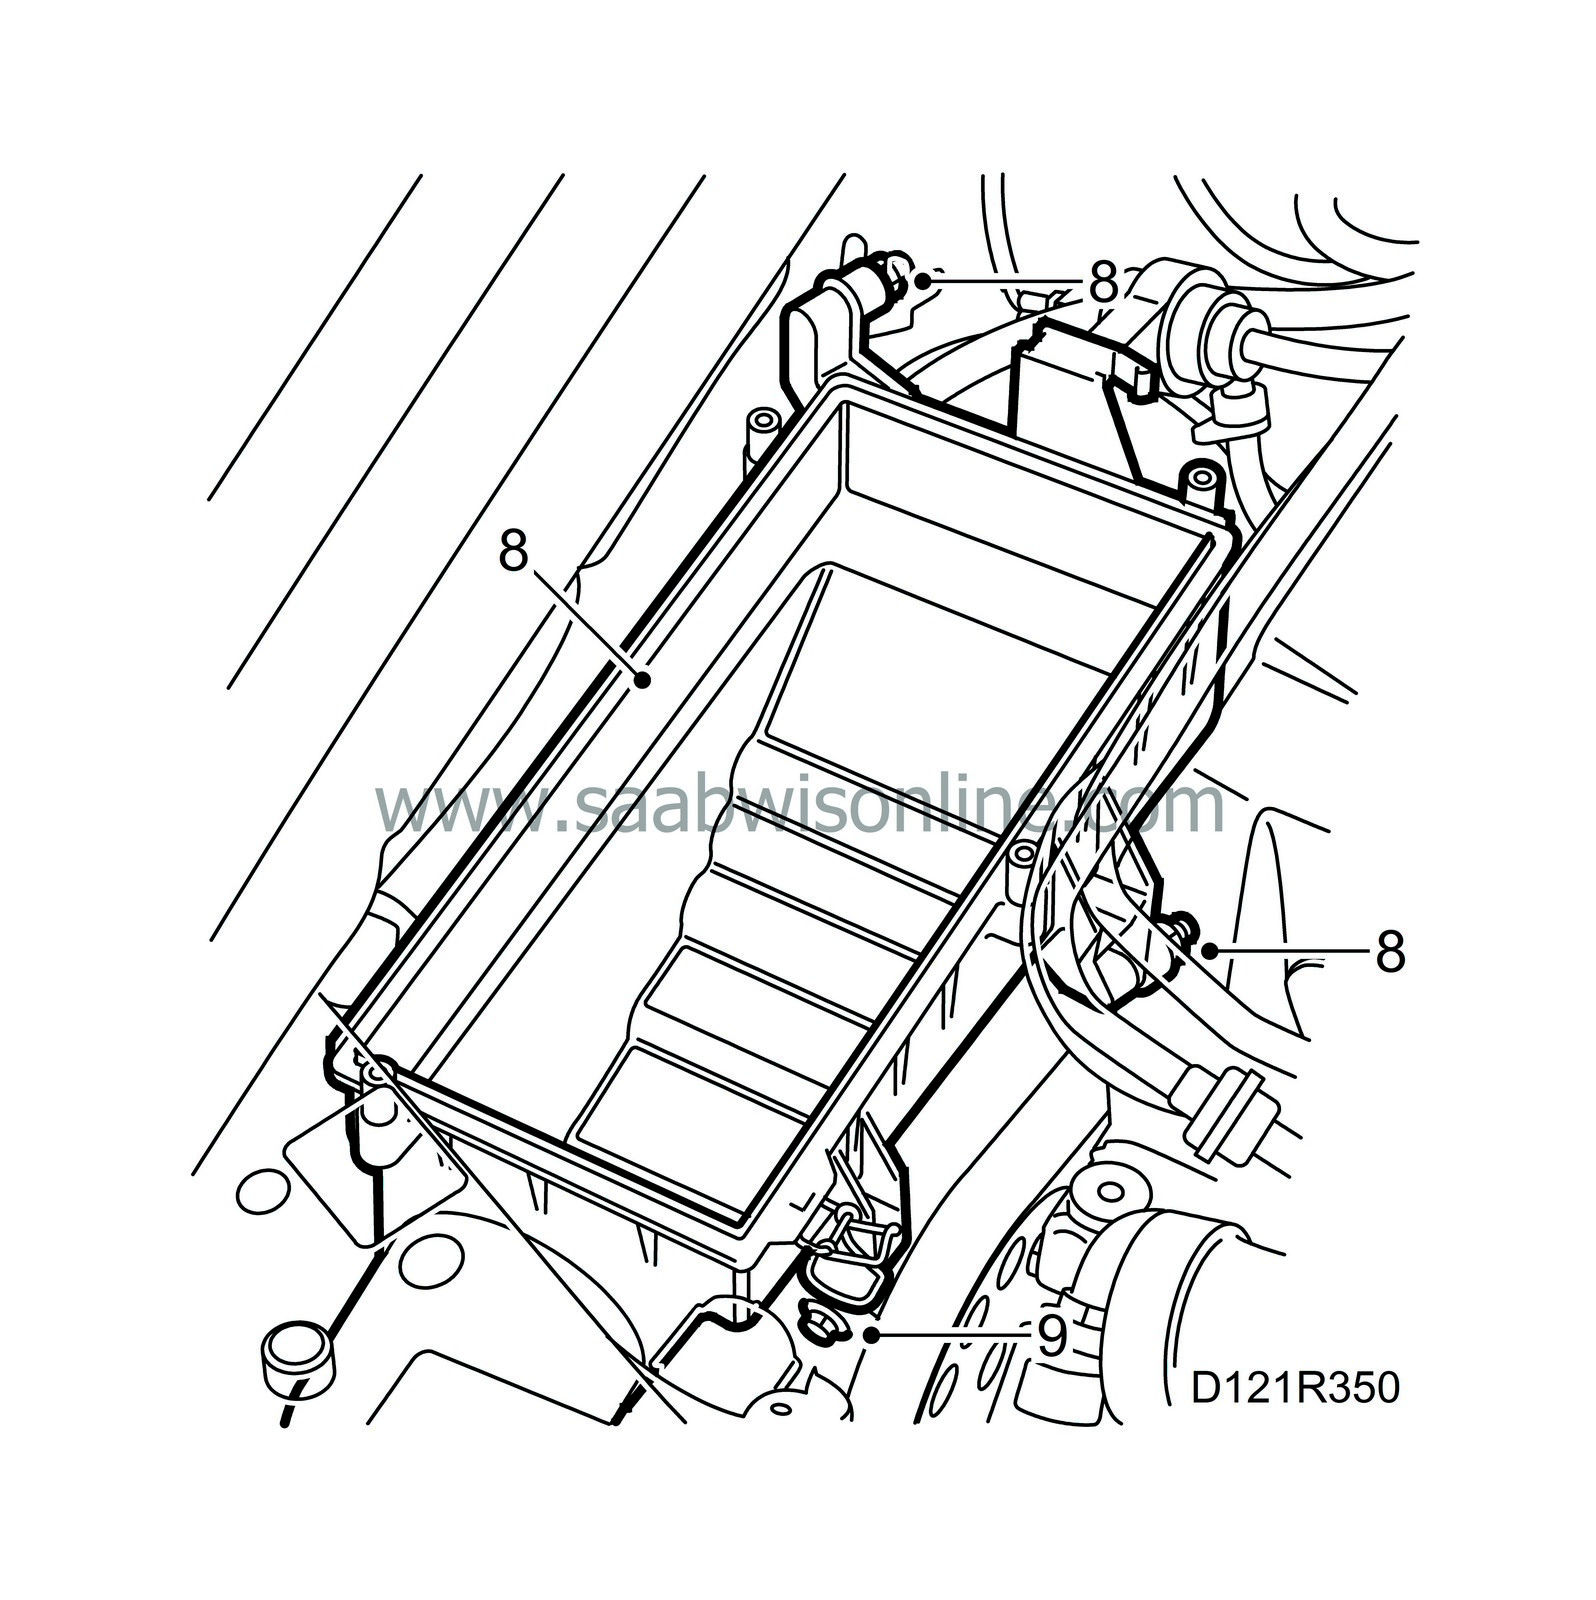
8.
|
Undo the 3 nuts securing the box to the rubber bushes and lift our the air collection box.
|
|
9.
|
Remove the engine cover.
|
|
10.
|
Remove the heat shield.
|
|
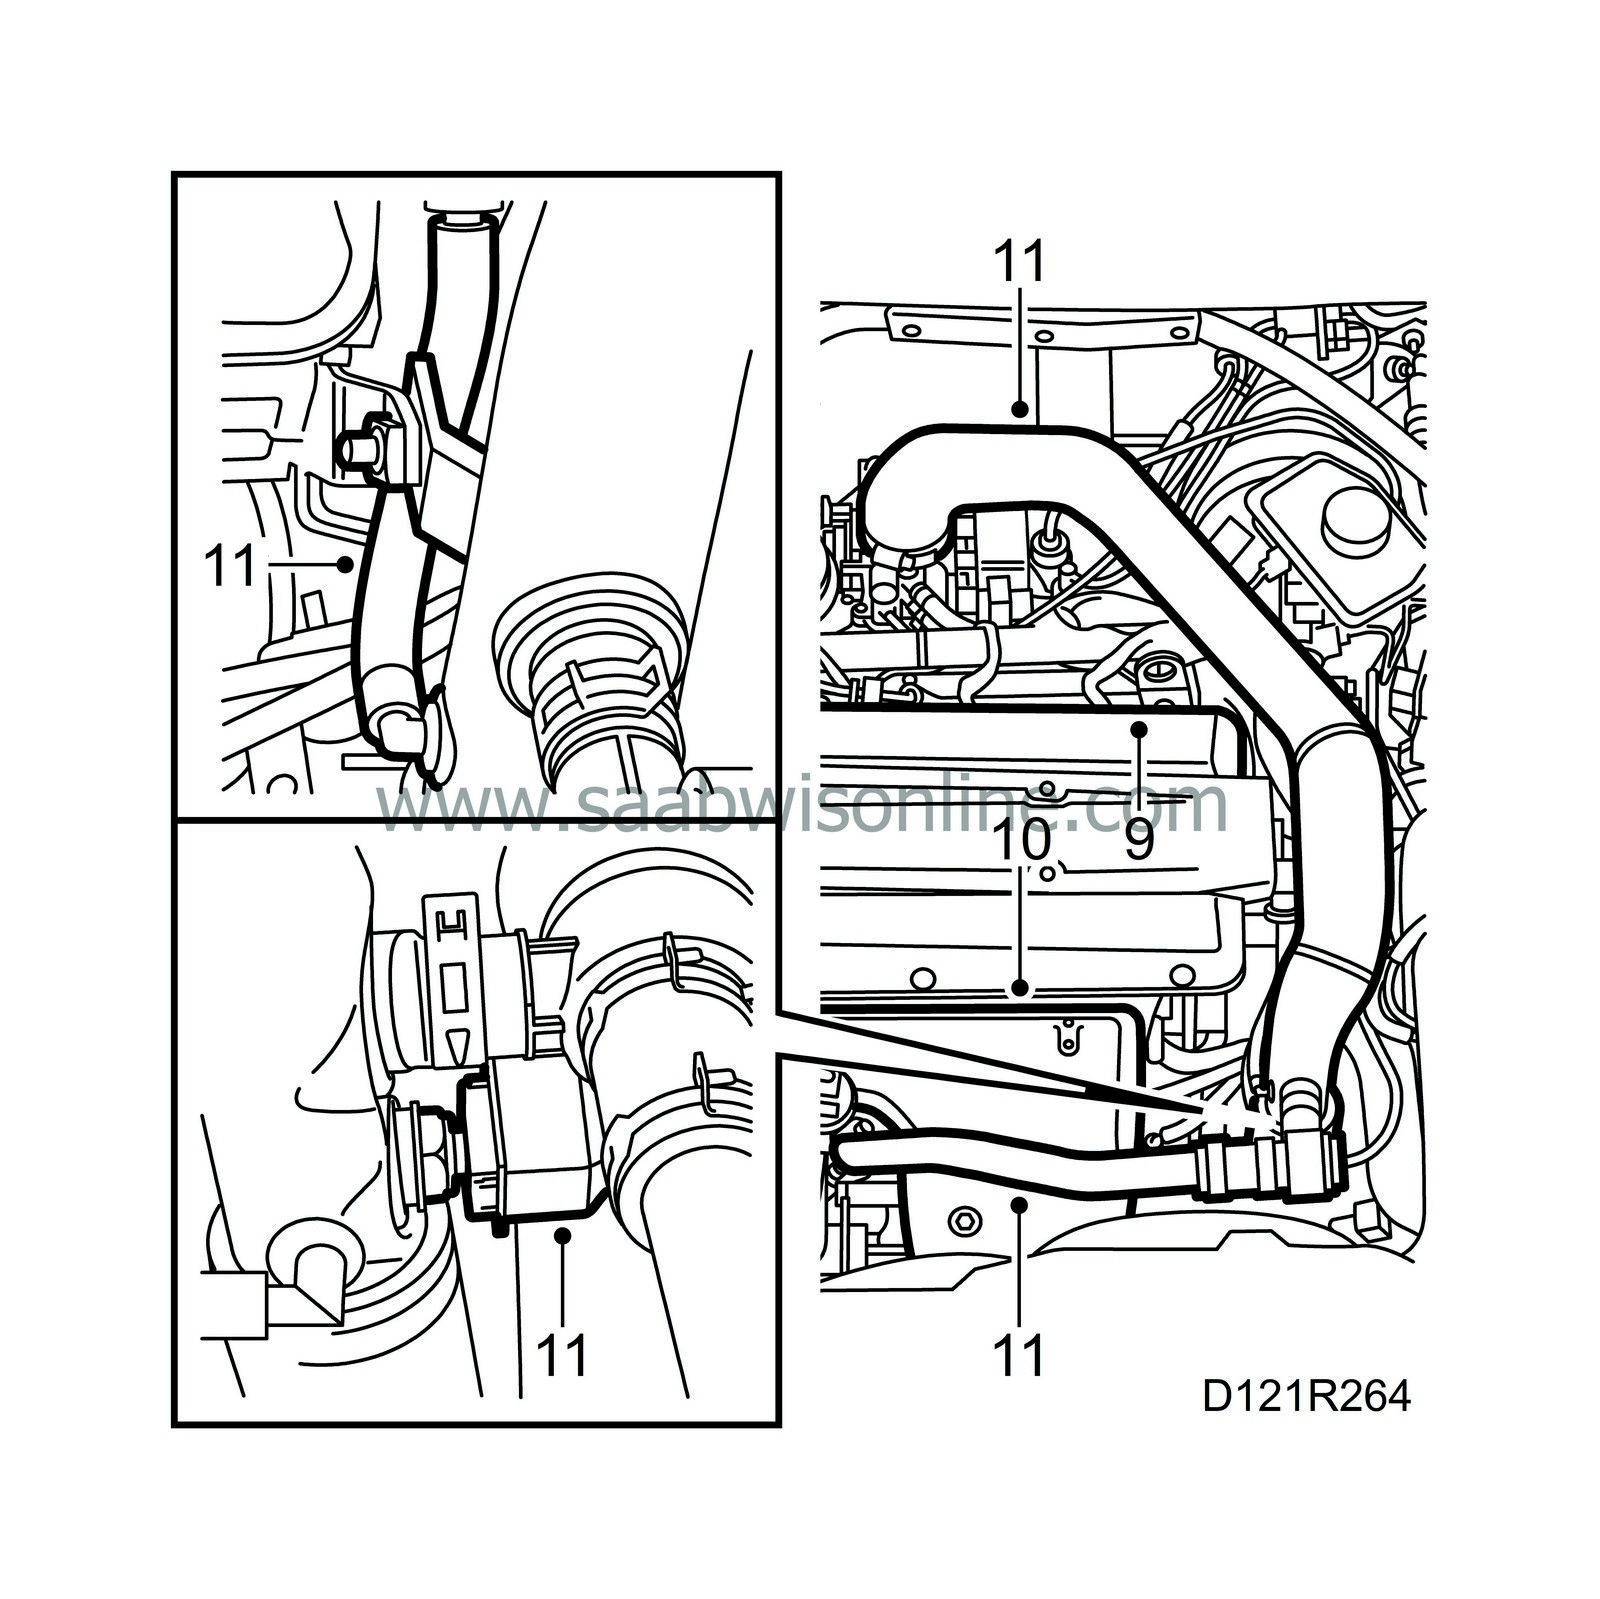
11.
|
Remove the turbocharger delivery pipe with bypass pipe. Detach the vacuum hose to the bypass valve. Undo the hose to the turbo pressure sensor.
|
|
12.
|
Undo the signal hose to the wastegate.
|
|
14.
|
Cut the cable ties securing the cables at the MacPherson strut tower.
|
|
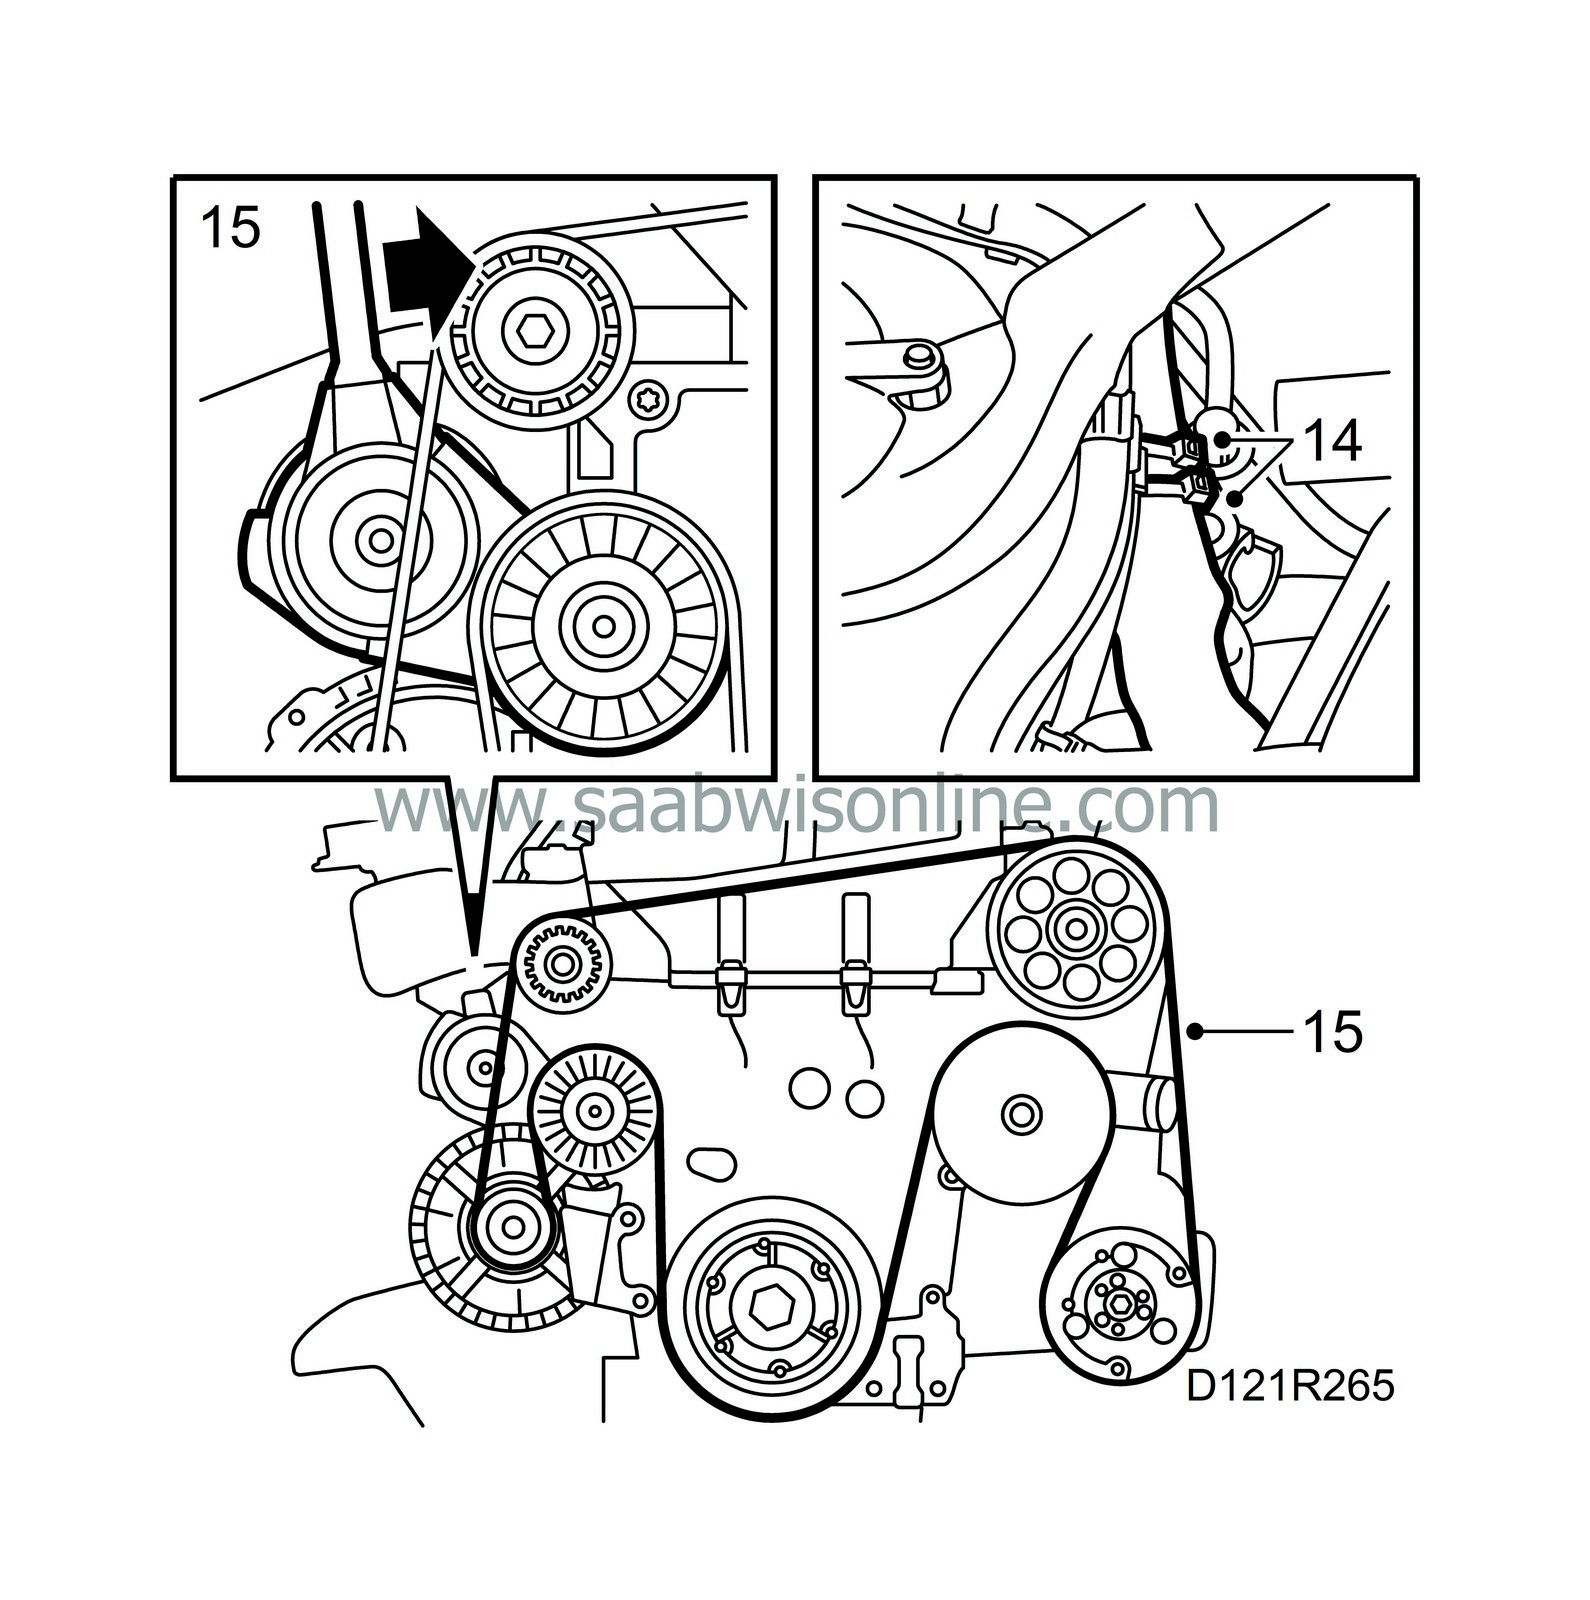
15.
|
Relieve the tension on the belt tensioner with an ratchet handle extension piece and insert a 3.5 mm drill bit in the hole. Lift off the belt.
|
Important
|
|
Exercise the utmost care to ensure that the belt tensioner does not break at its end position!
|
|
|
|
|
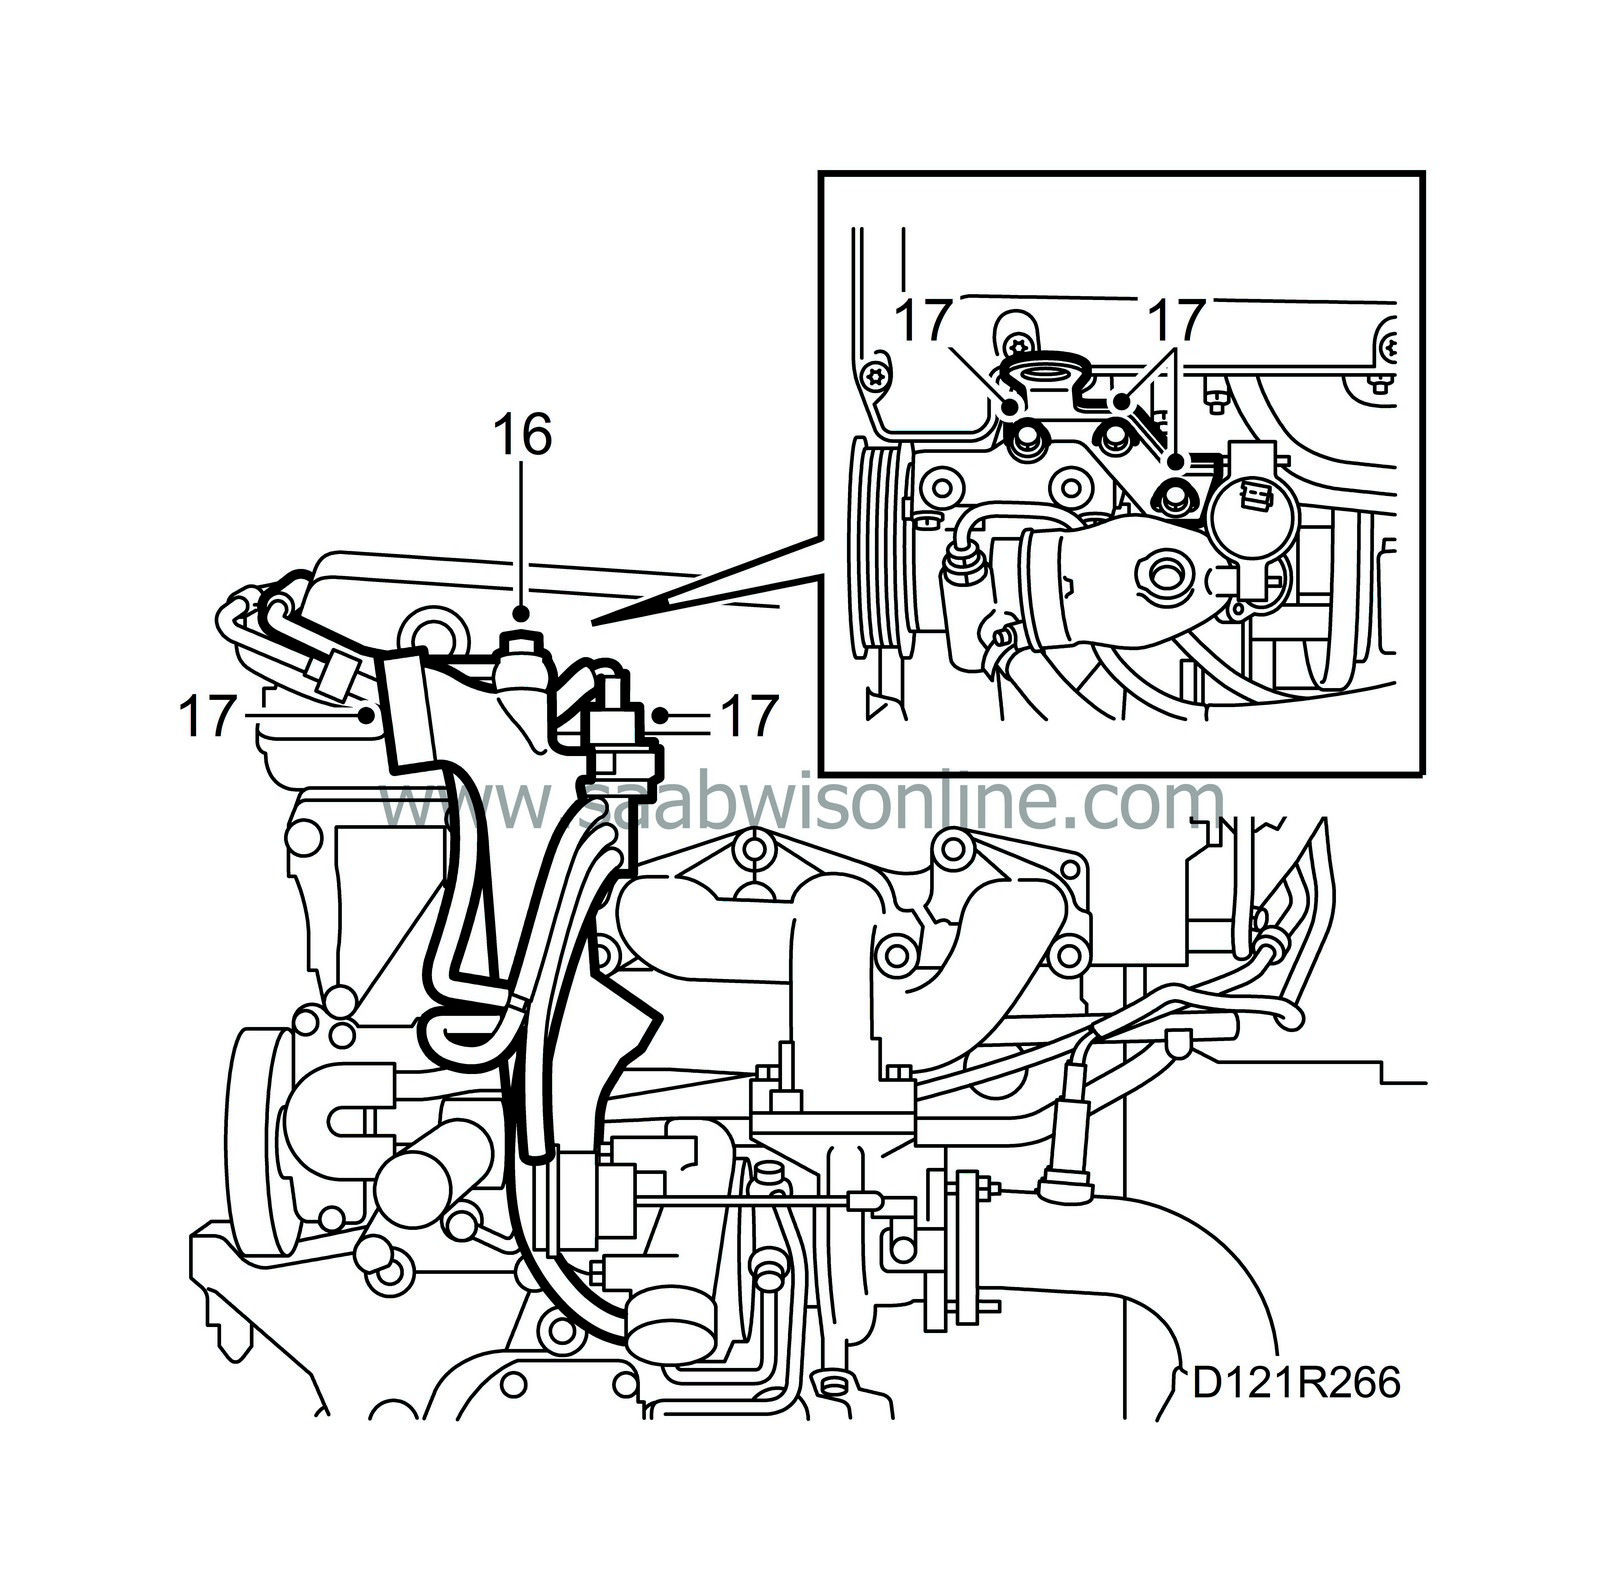
16.
|
Remove the crankcase ventilation pipe and put it to one side. Unplug the connector and evap purge hose.
|
|
17.
|
Undo the bracket with lifting eye and the lower v-clamp for the turbo inlet pipe. Remove the pipe, leaving the control valve.
|
|
18.
|
Remove the power steering pump with bracket and put them to one side.
|
|
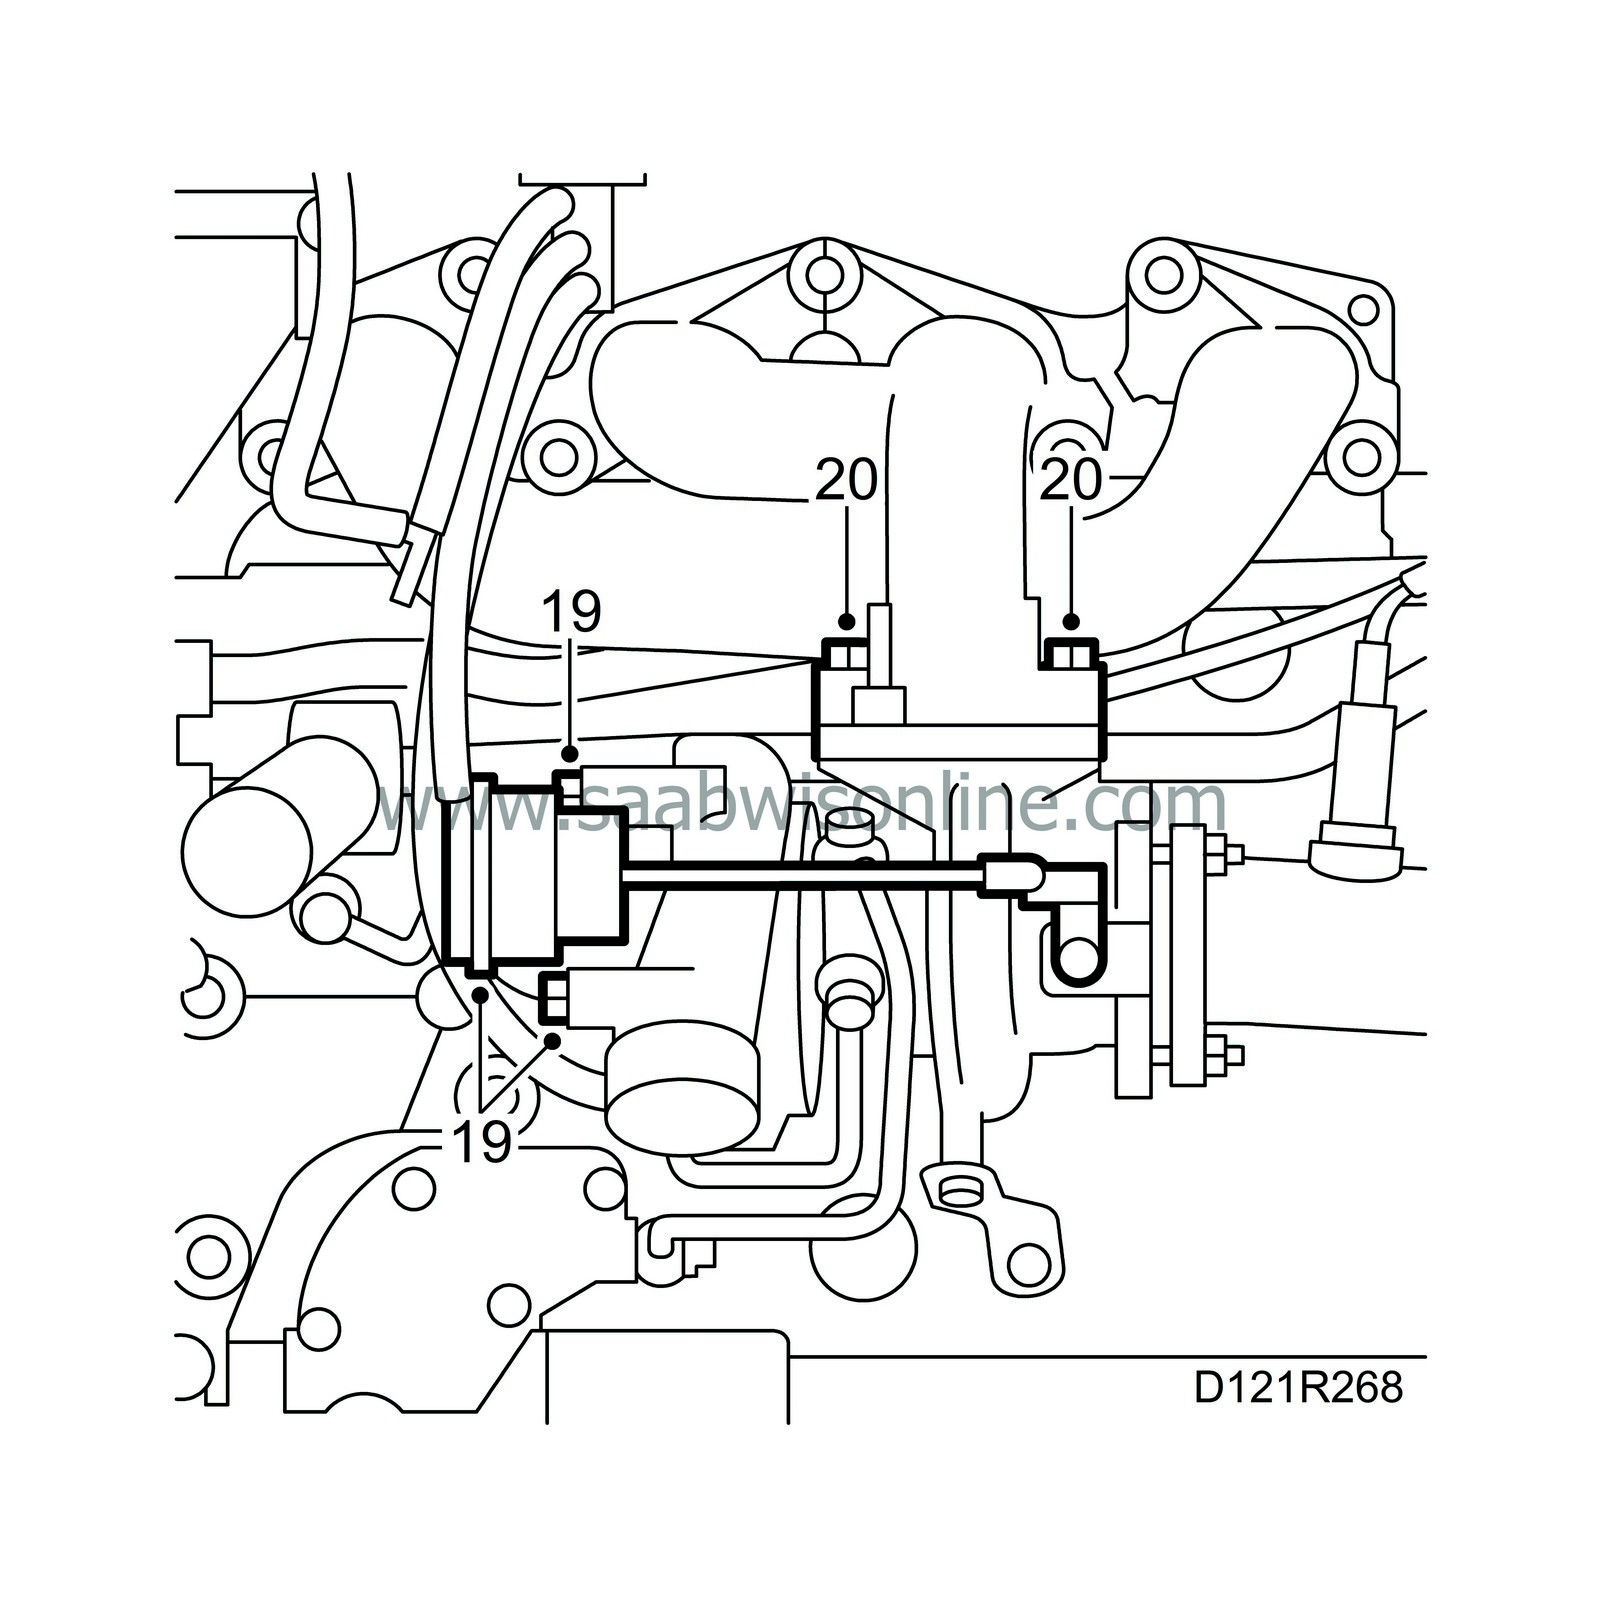
19.
|
Undo the two screws securing the vacuum unit.
|
|
20.
|
Undo the lock nuts securing the turbocharger to the exhaust manifold.
|
|
21.
|
Unplug the connector for the ignition discharge module, the turbo pressure sensor and the coolant temperature sensor.
|
|
22.
|
Remove the coolant hose to the cylinder head, the screw securing the coolant pipe from the turbo to the pressure sensor mounting. Remove the banjo connection to the cylinder head. Detach the hose from the coolant thermostat. Undo the screw securing the coolant pipe from the water pump to the cylinder block.
|
|
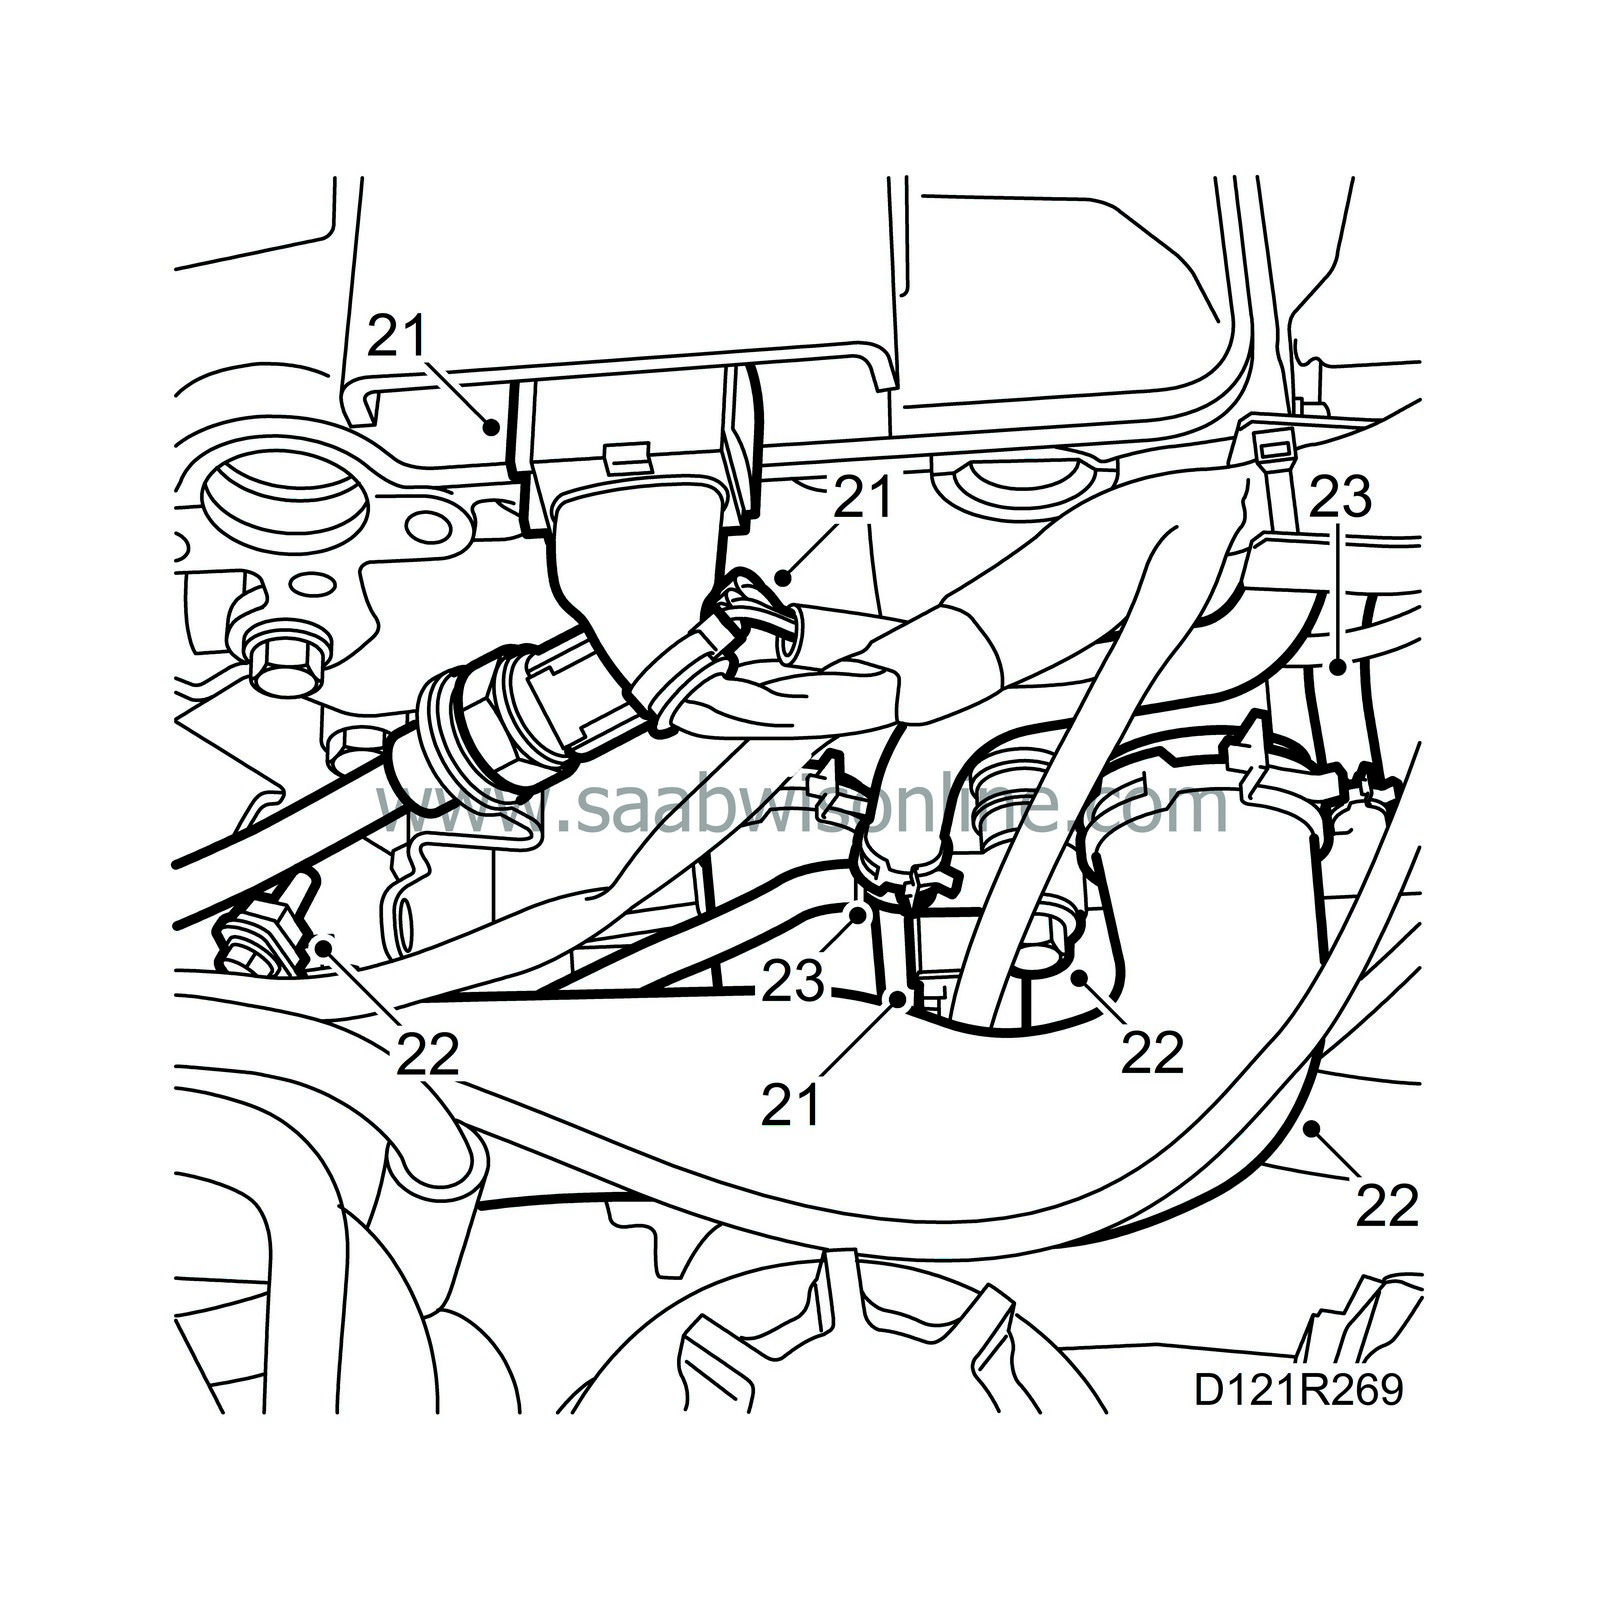
23.
|
Detach the upper throttle body hose at the coolant pipe. Detach the lower throttle body hose at the coolant pipe.
|
|
24.
|
Remove the bracket for the dipstick pipe and remove the pipe. Plug the hole. Detach the crankcase ventilation hose and the vacuum hose from the camshaft cover. Cut the cable ties to the camshaft cover at the non-return valve.
|
|
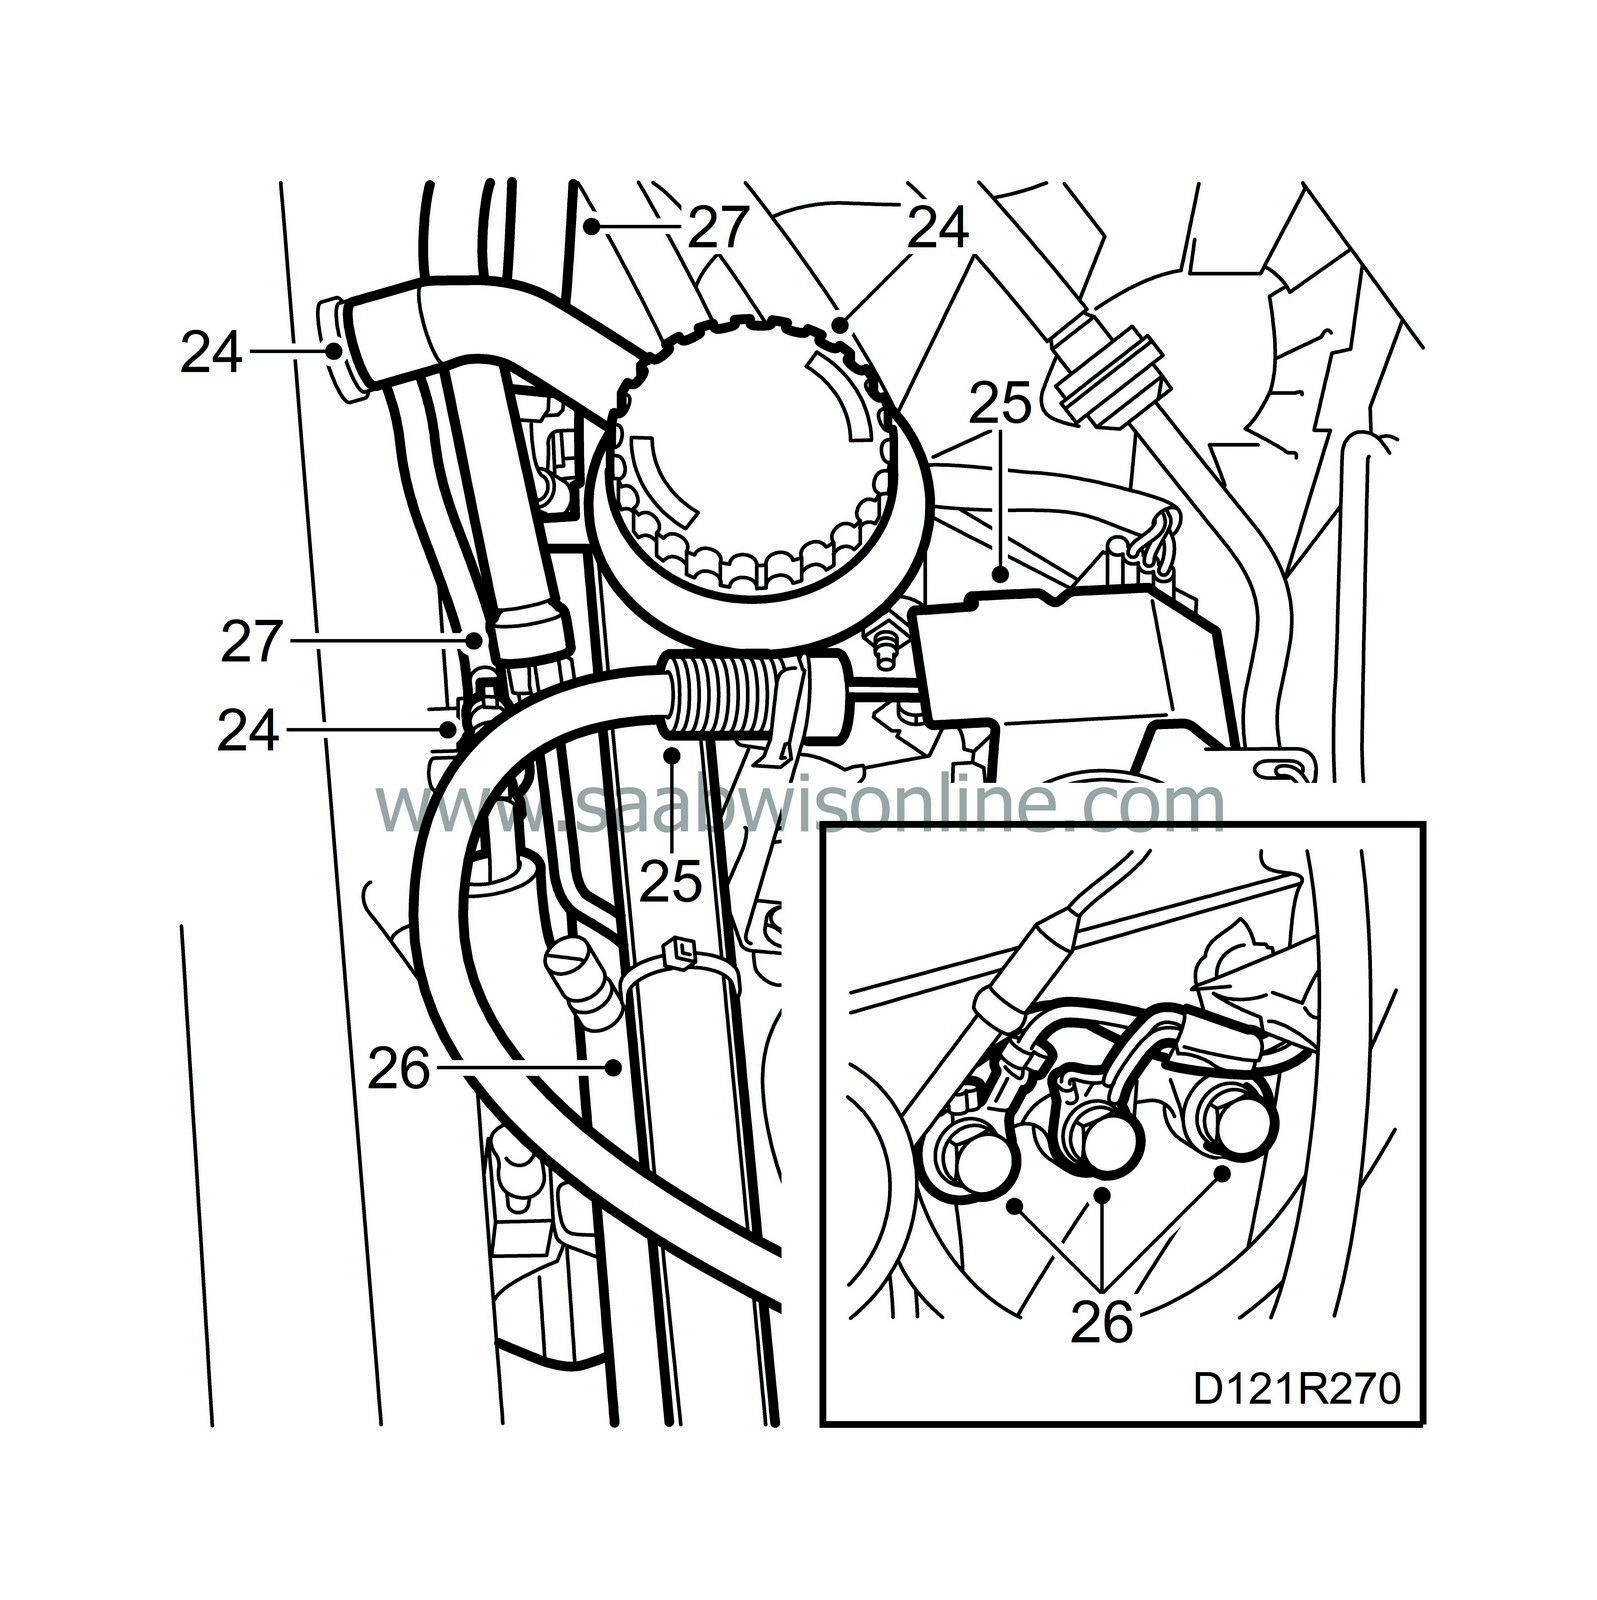
25.
|
Remove the cover at the pedal arm, detach the accelerator cable and put it to one side.
|
|
26.
|
Undo the screws on the cable channel and the grounding points.
|
|
27.
|
Separate the fuel lines with tool 83 95 261
 and a pair of flat nose pliers for dismantling the rubber seal in the quick-release coupling. Wipe up any fuel spill with a cloth.
|
|
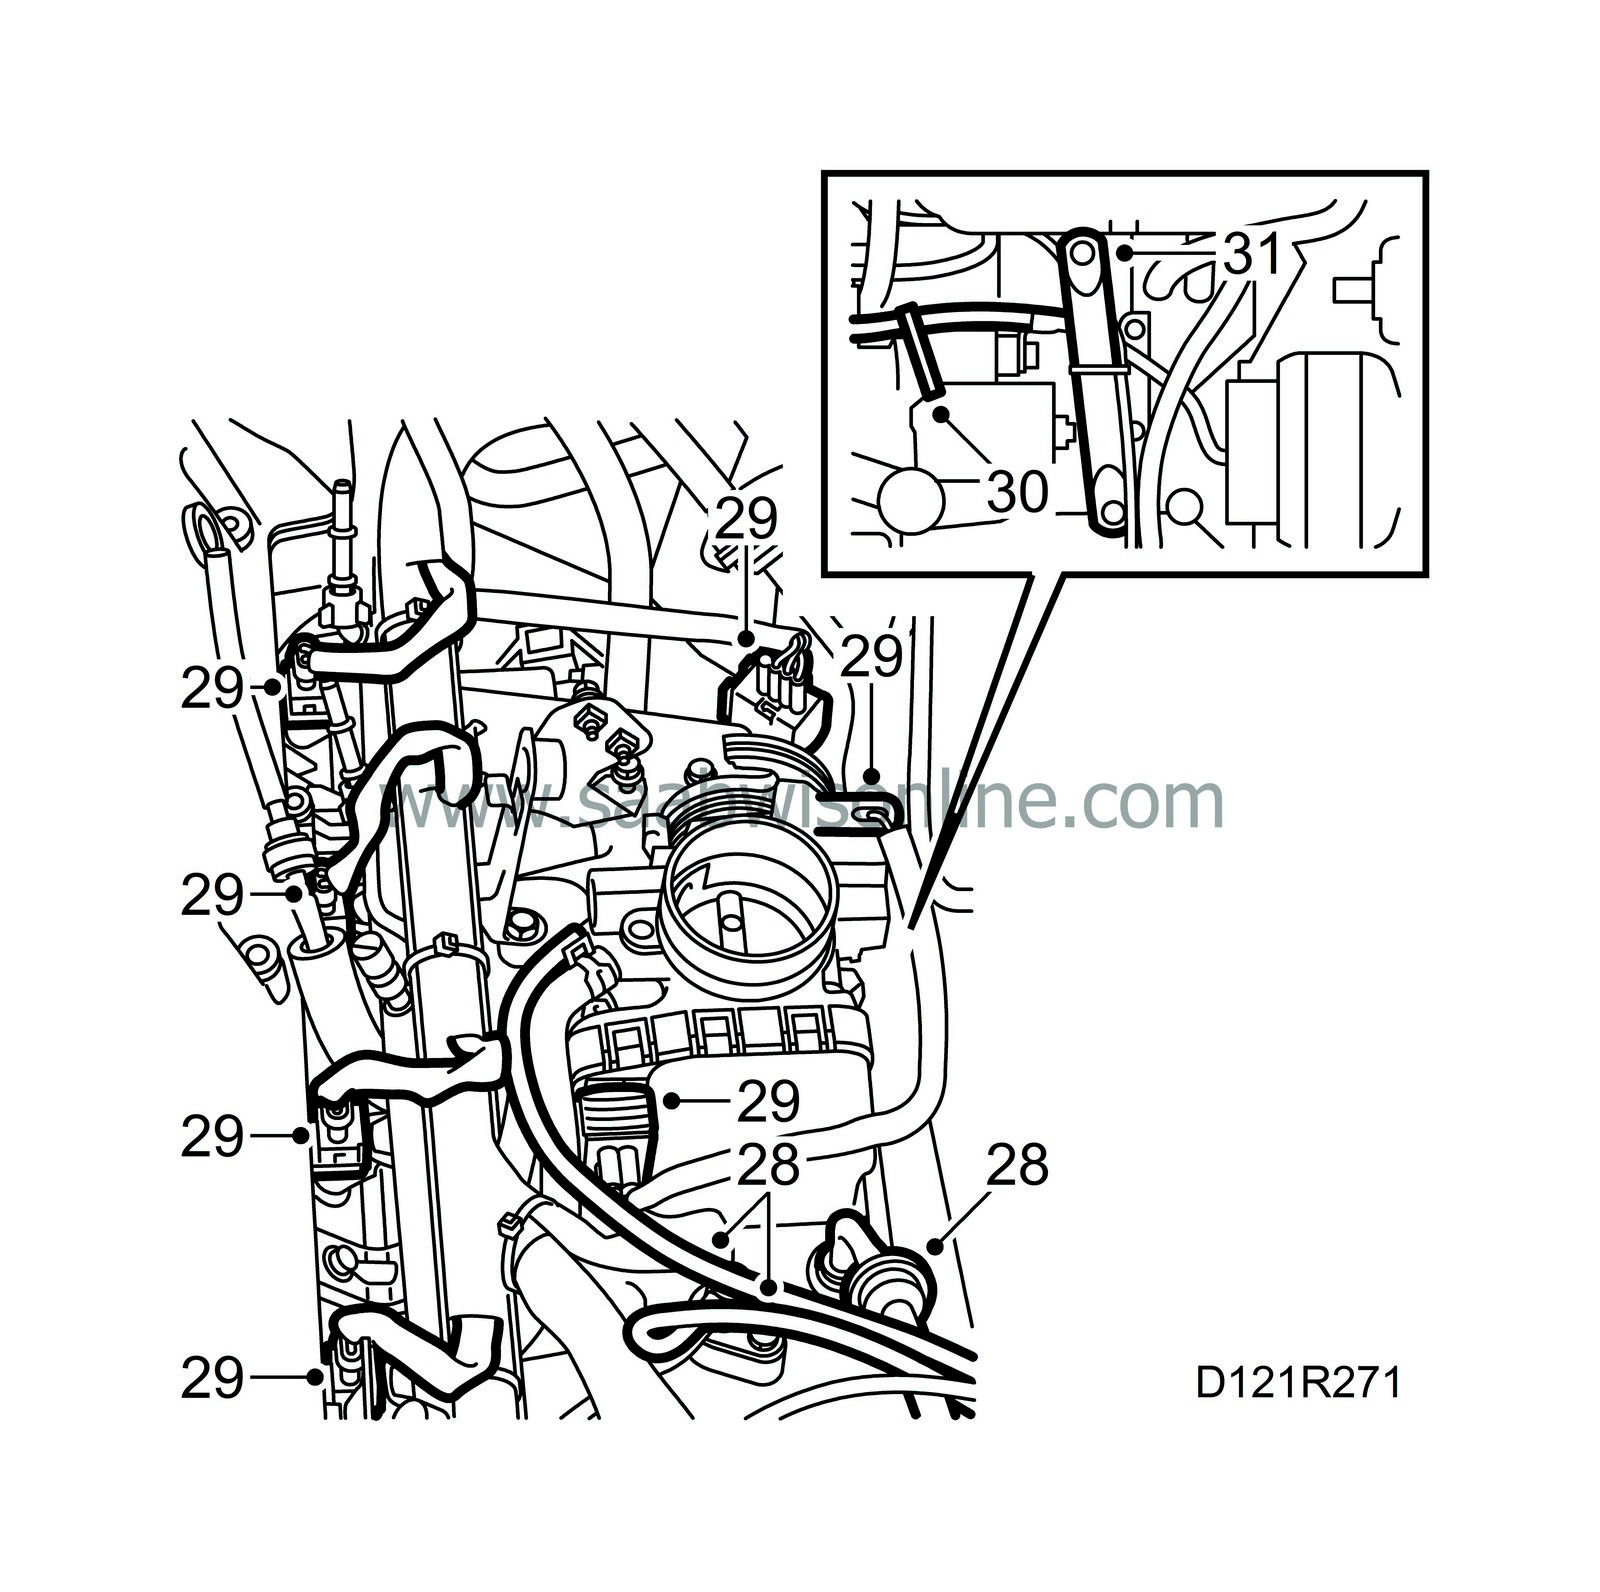
28.
|
Detach the vacuum hoses to the throttle body, intake manifold and brake servo.
|
|
29.
|
Unplug the connectors for the oxygen sensor, timing sensor, limp-home solenoid, throttle body, manifold absolute pressure sensor and injectors.
|
|
30.
|
Cut the cable tie securing the cables to the starter motor solenoid and put the cable channel to one side.
|
|
31.
|
Undo the top bolt on the intake manifold stay.
|
|
32.
|
Remove the ignition discharge module. Remove the spark plugs.
|
|
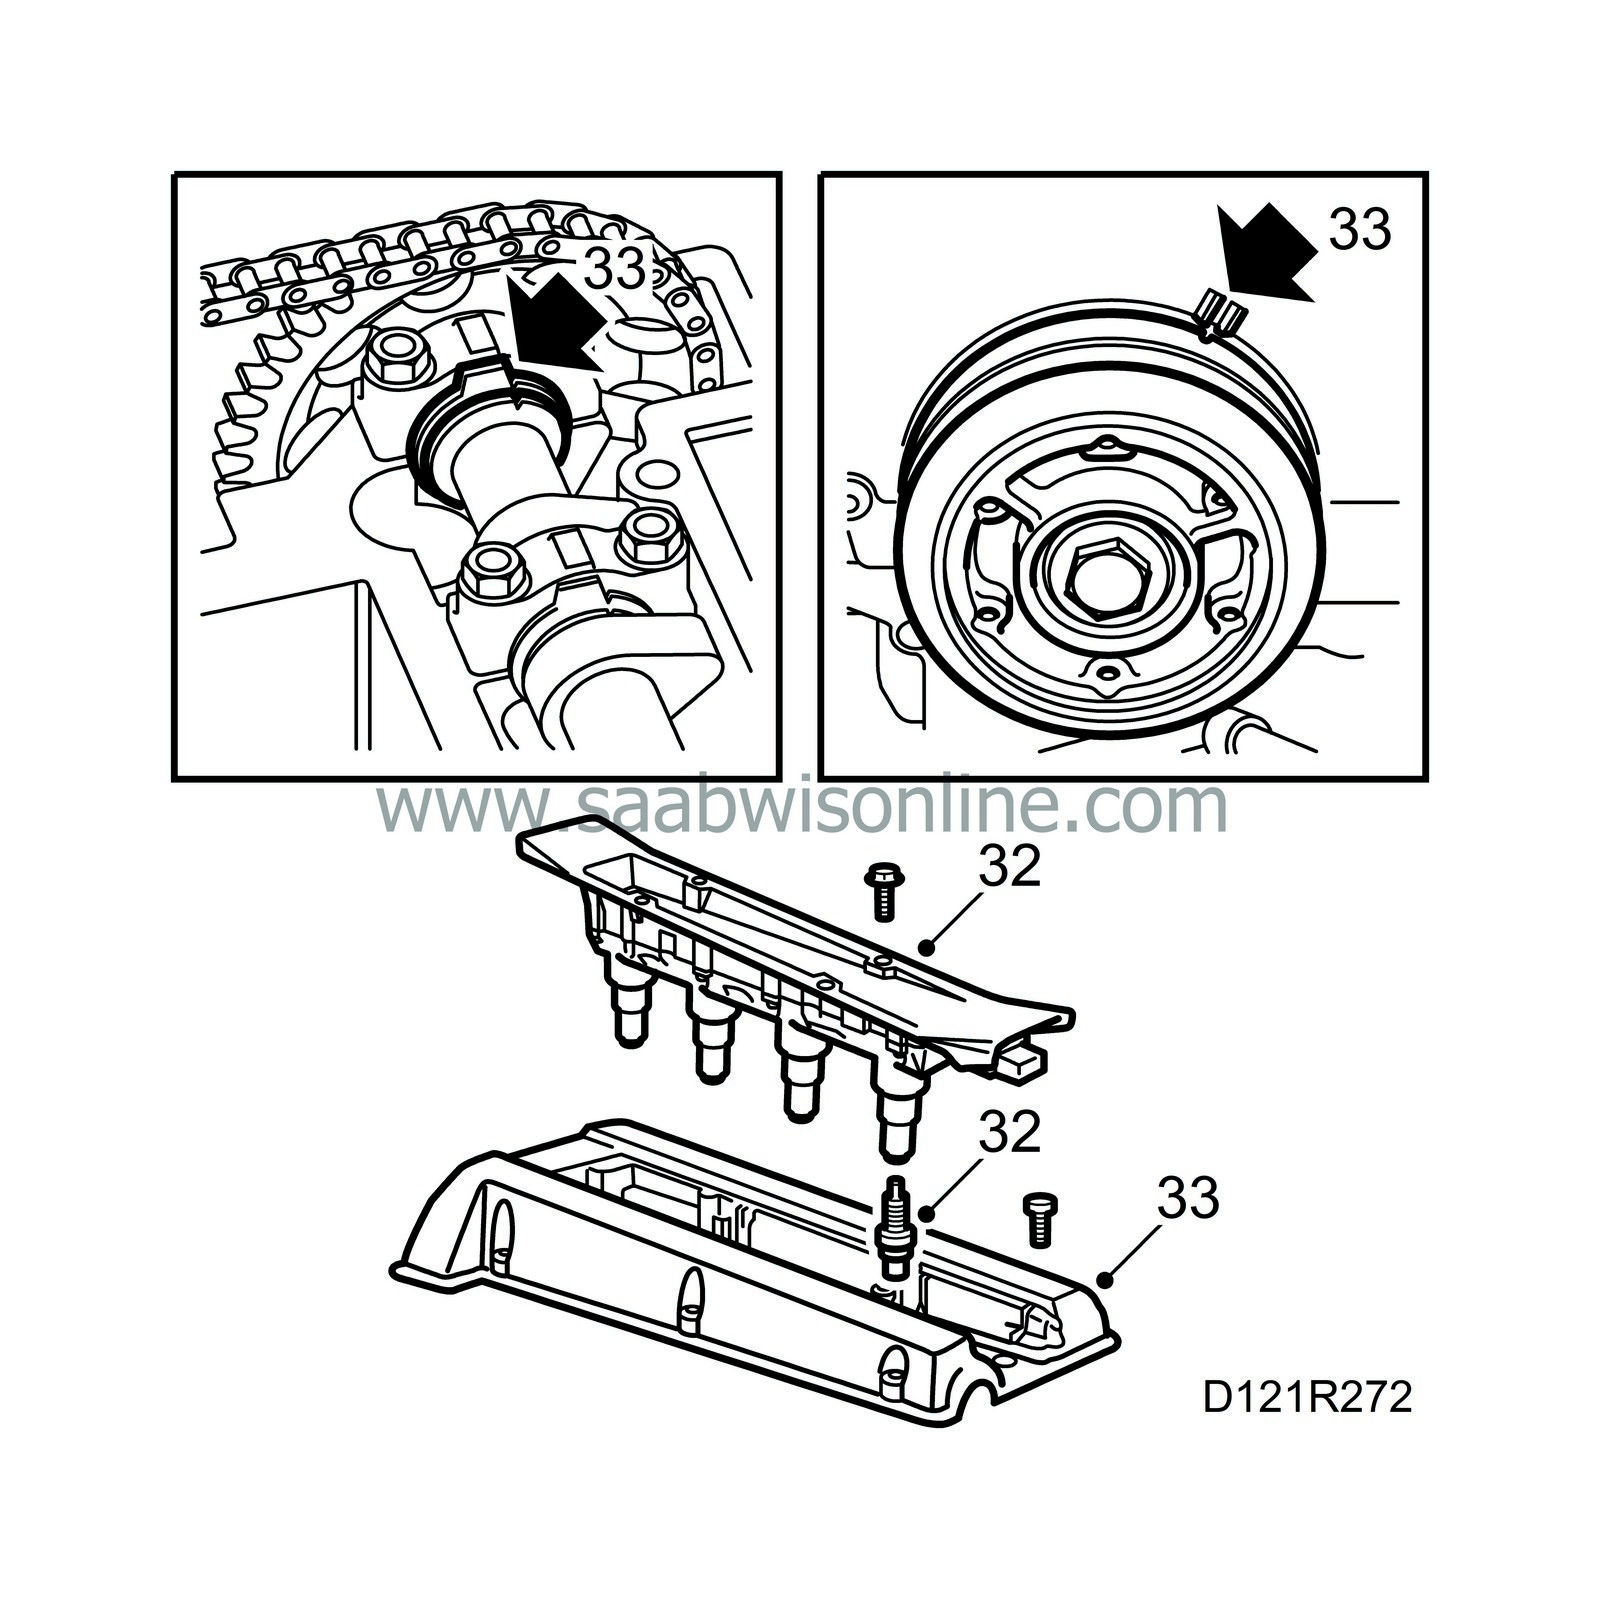
33.
|
Remove the camshaft cover. Zero the engine by turning the crankshaft in its direction of rotation until the mark on the belt pulley is aligned with the mark on the timing cover. Make sure the camshafts are aligned with their setting marks.
|
|
34.
|
Undo the bolts on the camshaft sprockets. Use a wrench on the rear end of the camshaft as a counterstay. The camshaft must not be turned as there is risk of damaging the valves and pistons.

|
|
35.
|
Undo the bolt on the idler sprocket so it will be possible to insert a socket to the chain tensioner.
|
|
36.
|
Remove the chain tensioner. Start by removing the plug, pin and spring. Then, use a 27 mm socket to loosen the chain tensioner.
|
|
37.
|
Remove the sprocket and use a rubber band or similar to keep the chain guides together.
|
|
39.
|
Vacuum up any oil spill. Make sure the timing chain is not preventing removal.
|
|
40.
|
Lift off the cylinder head with the intake and exhaust manifold.

|


