Removing the power train, B235R, B205L/R
|
|
Removing the power train, B235R, B205L/R
|
 Warning
|
|
A large number of hoses, cables, etc., are secured with cable ties. After tightening, the ties are cut off and leave more or less sharp edges at the fastening point. Watch out for the risk of cuts due to these sharp ends on the cable ties!
|
|
|
|
|
|
|
1.
|
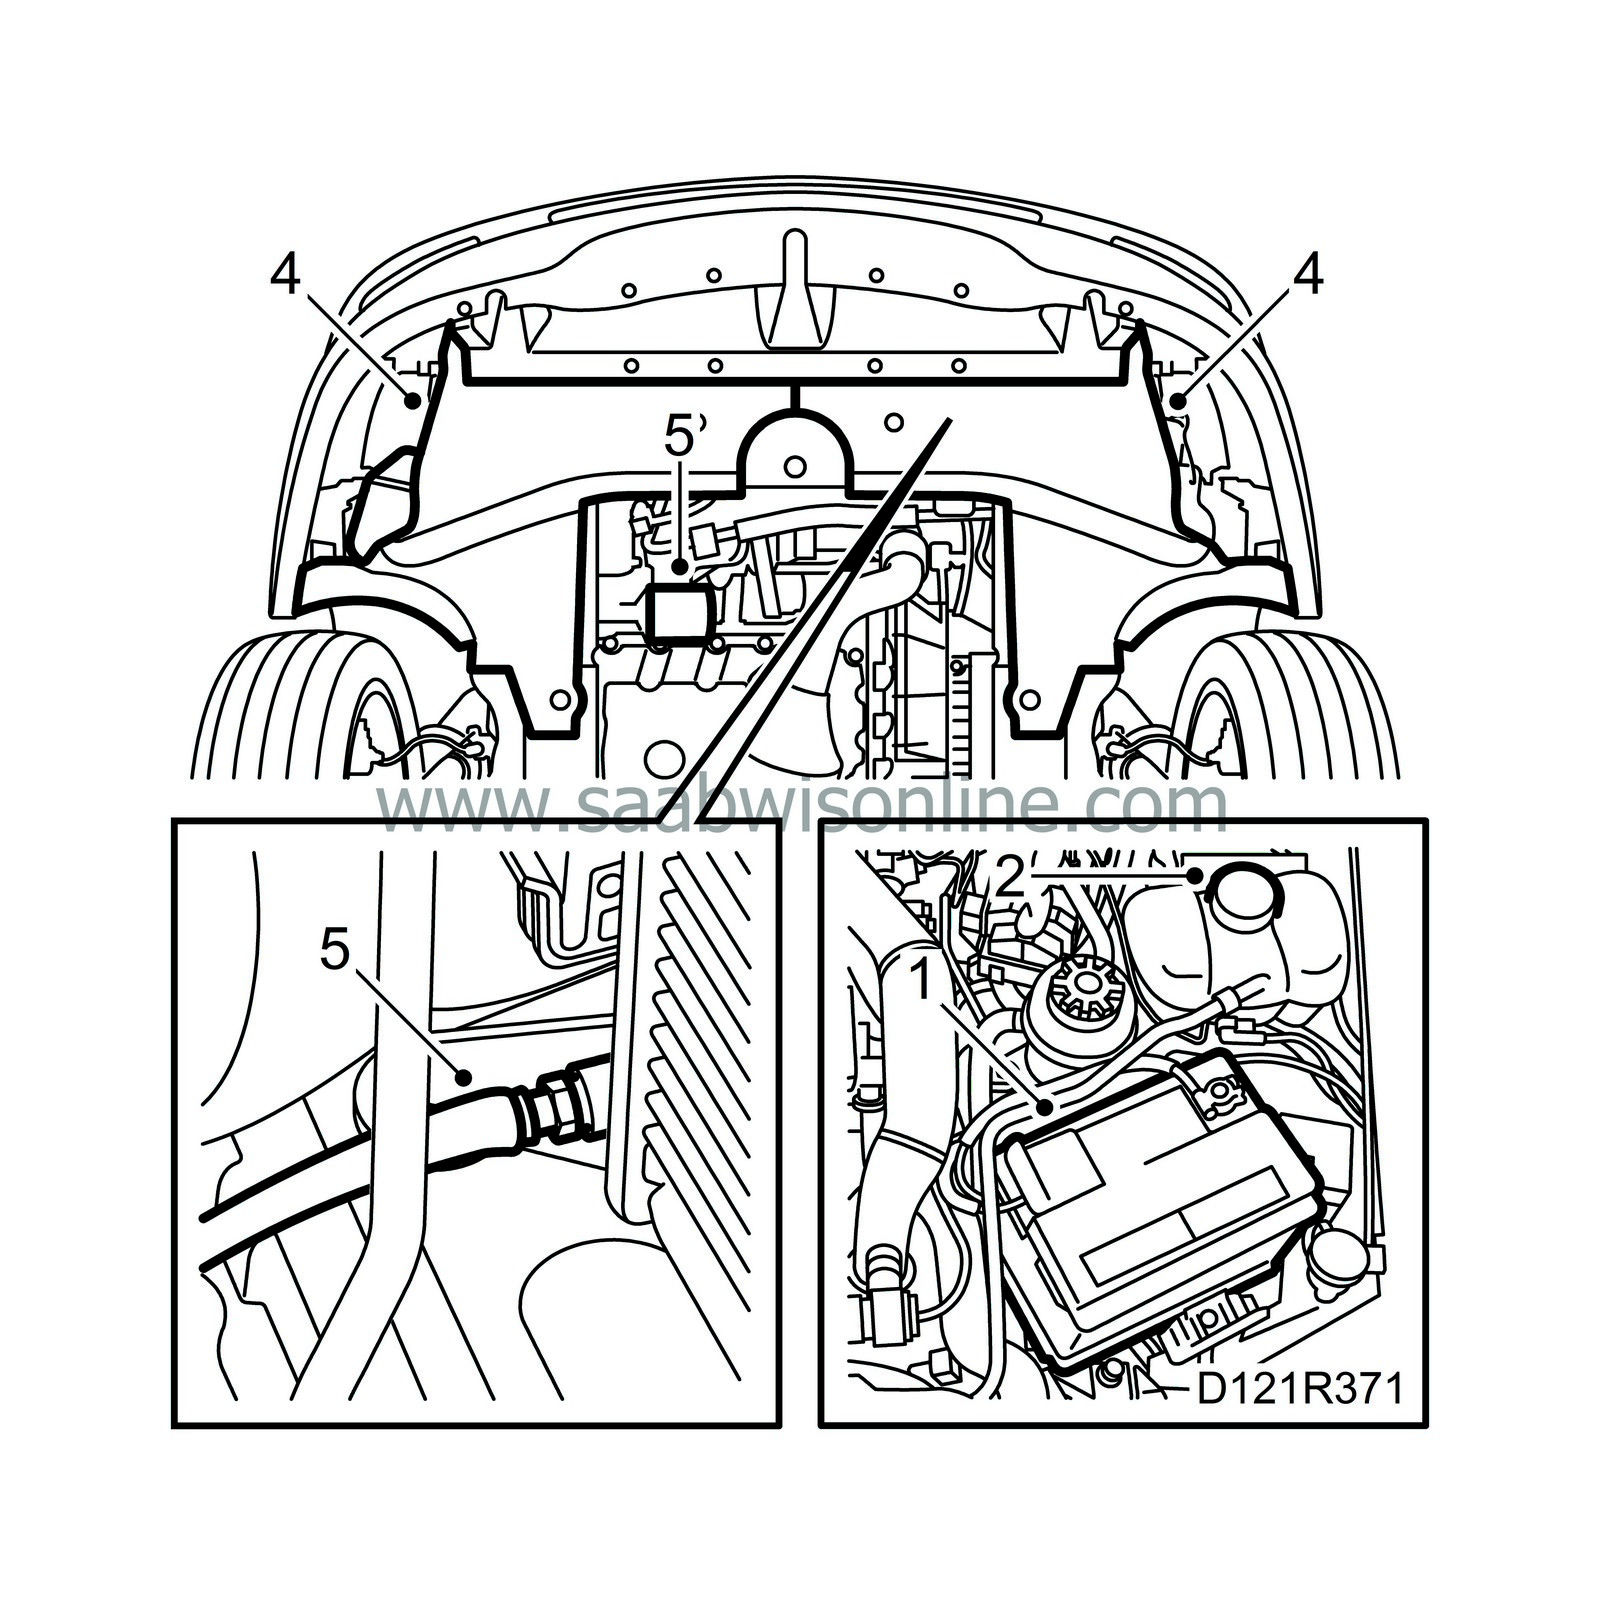
Cover the wings and remove the battery. Make a note of the radio code if necessary.
|
|
2.
|
Remove the cap from the expansion tank to speed up draining the coolant.
|
|
4.
|
Remove the lower engine cover.
|
|
5.
|
Take a receptacle and open the drain plug to drain the coolant. If the engine is to be dismantled, drain the oil and remove the oil filter.
|
|
6.
|
Remove the coolant hoses from the heater unit.
|
|
8.
|
Remove the upper engine cover.
|
|
9.
|
Detach the protective cap on the accelerator wire. Detach the accelerator wire and place it to one side.
|
|
10.
|
Remove the hose and vacuum hose from the crankcase ventilation.
|
|
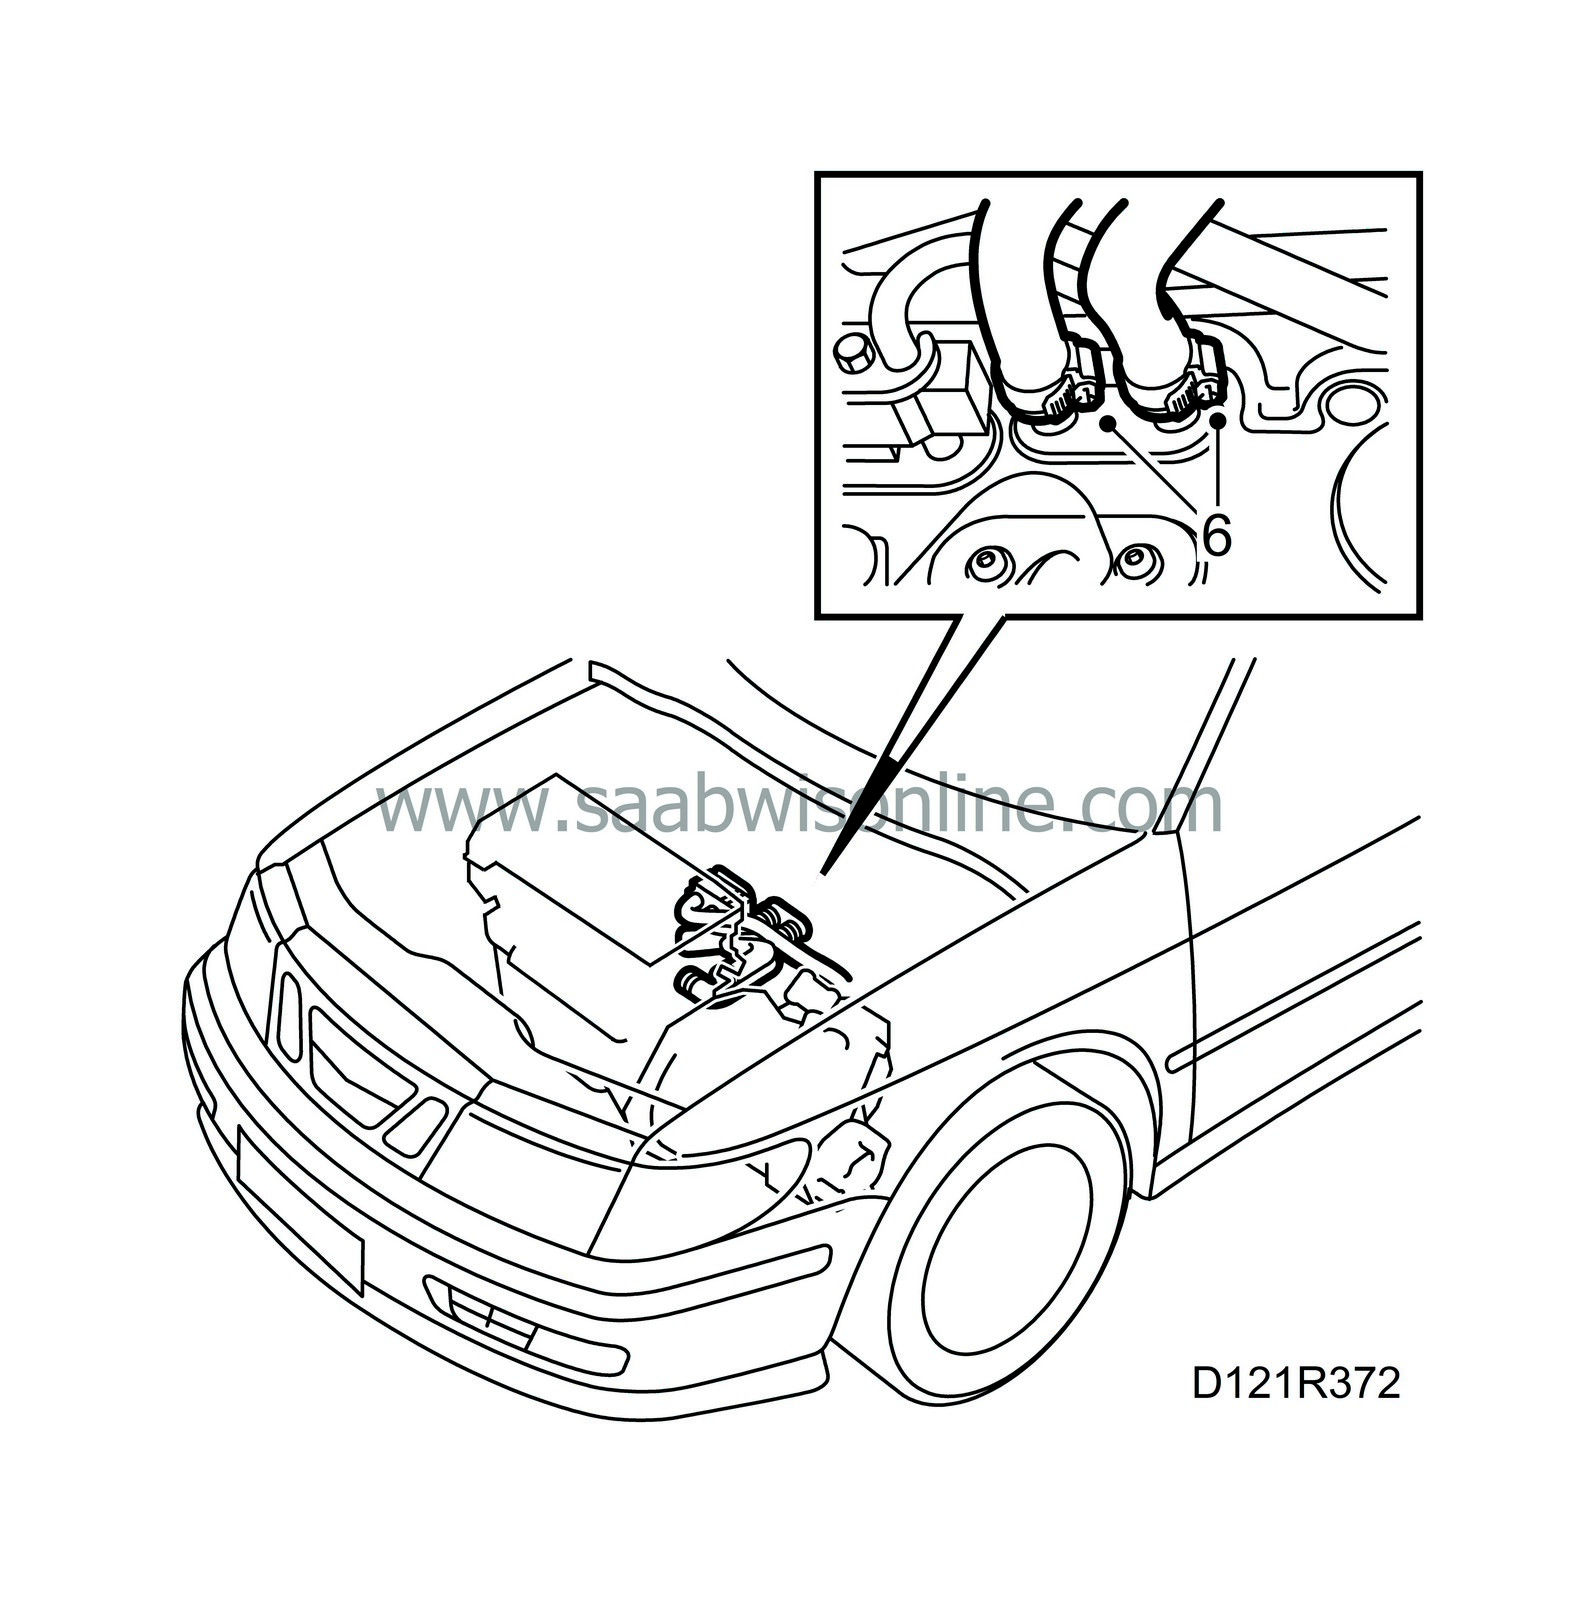
11.
|
Separate the fuel lines with tool
Fuel line tool
83 95 261 and a pair of flat nose pliers for dismantling the rubber seal in the quick-release coupling. Wipe up any fuel spill with a cloth.
|
|
12.
|
Detach the tank ventilation hose and bend it to one side.
|
|
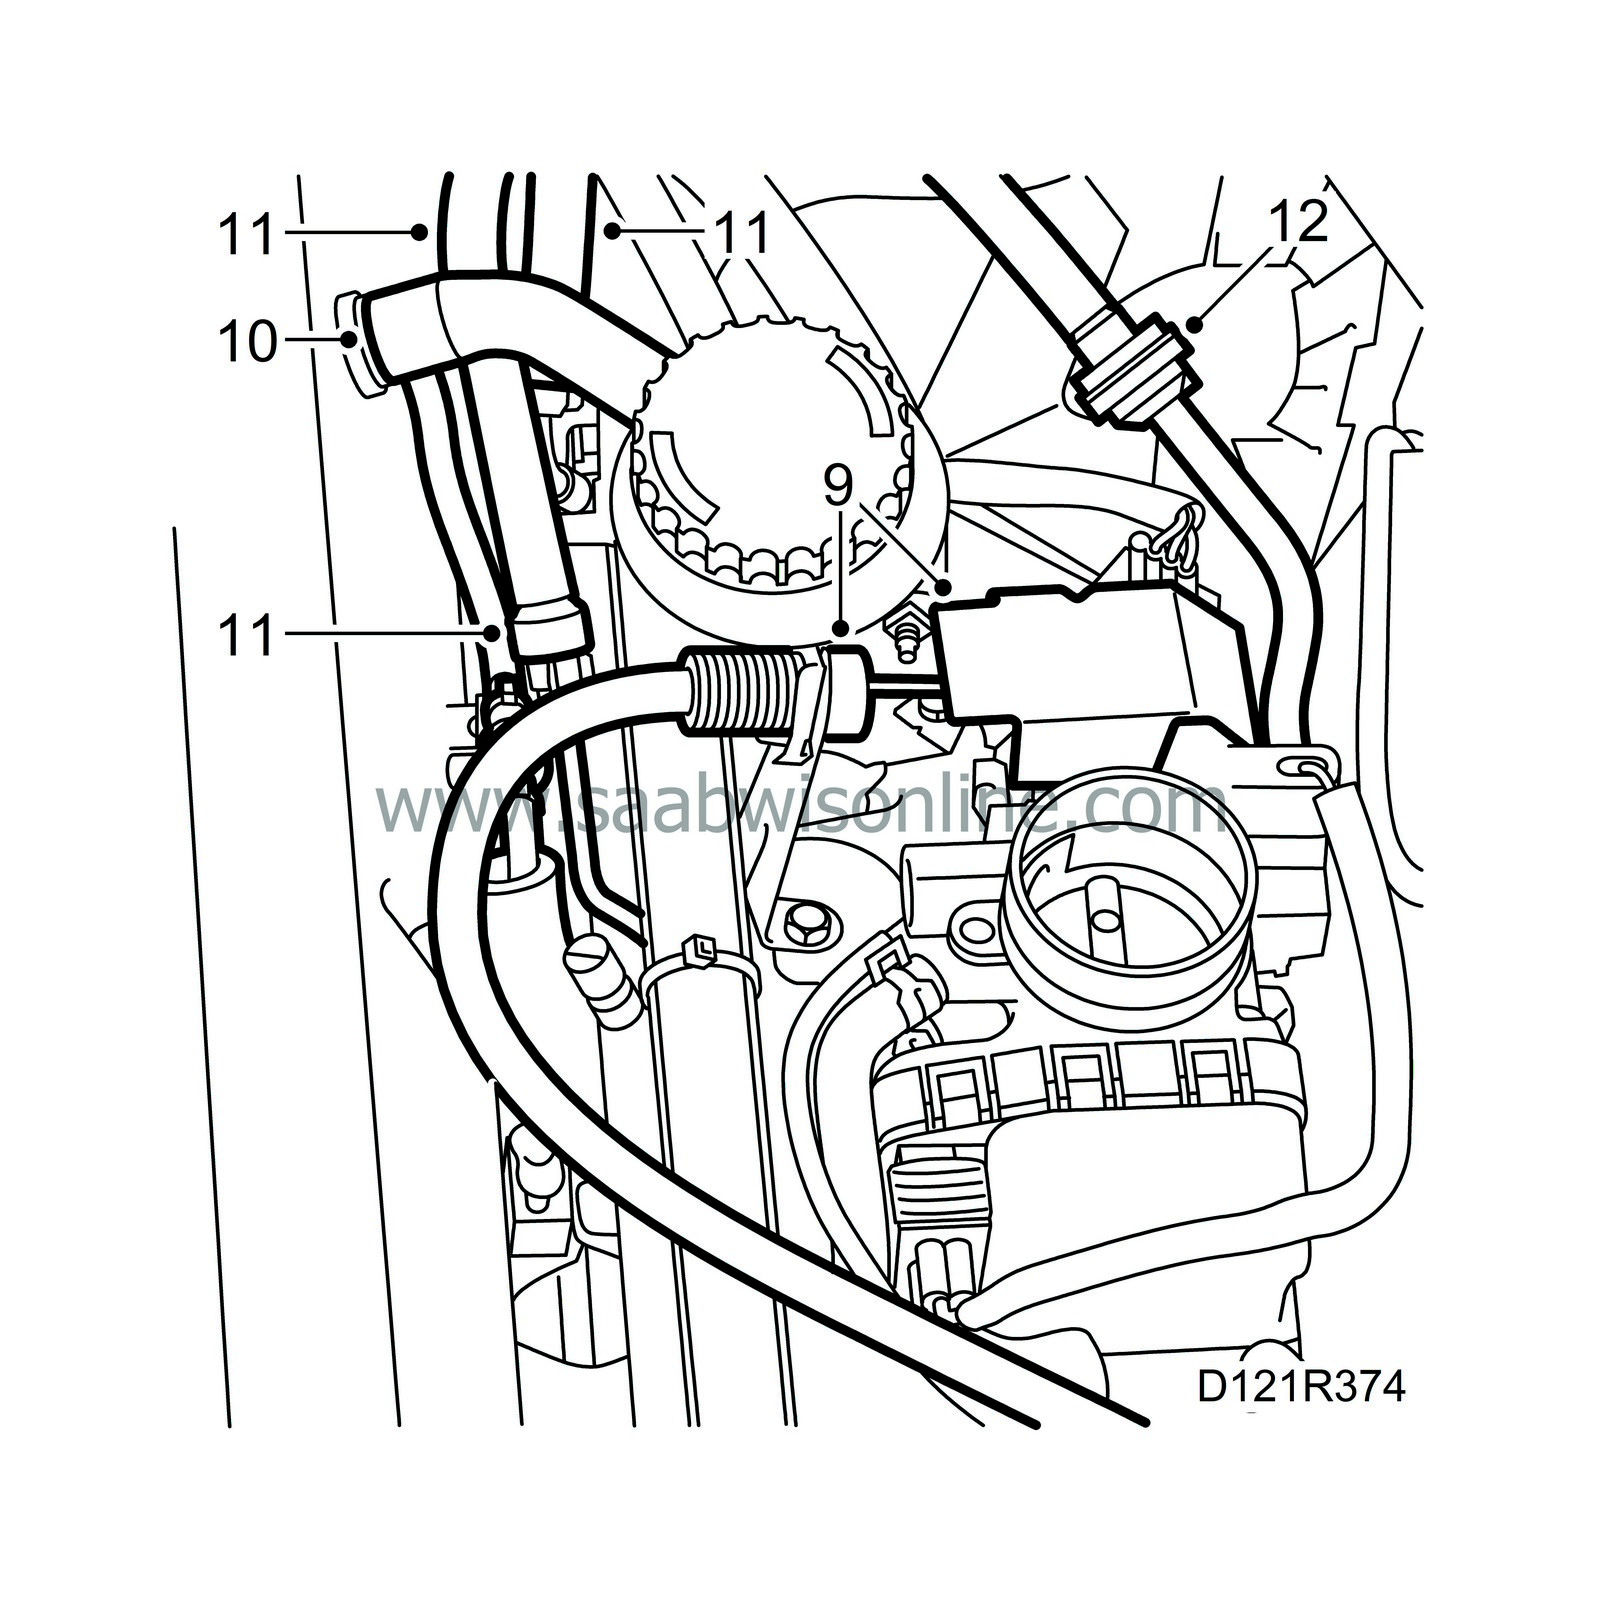
13.
|
Undo the hose clips on the charge air pipe.
|
|
14.
|
Unplug the temperature sensor.
|
|
15.
|
Detach the hoses to the pressure sensor and bypass pipe and undo the screw to the bypass pipe. Remove as one unit. Plug the hoses and connecting pieces.
|
|
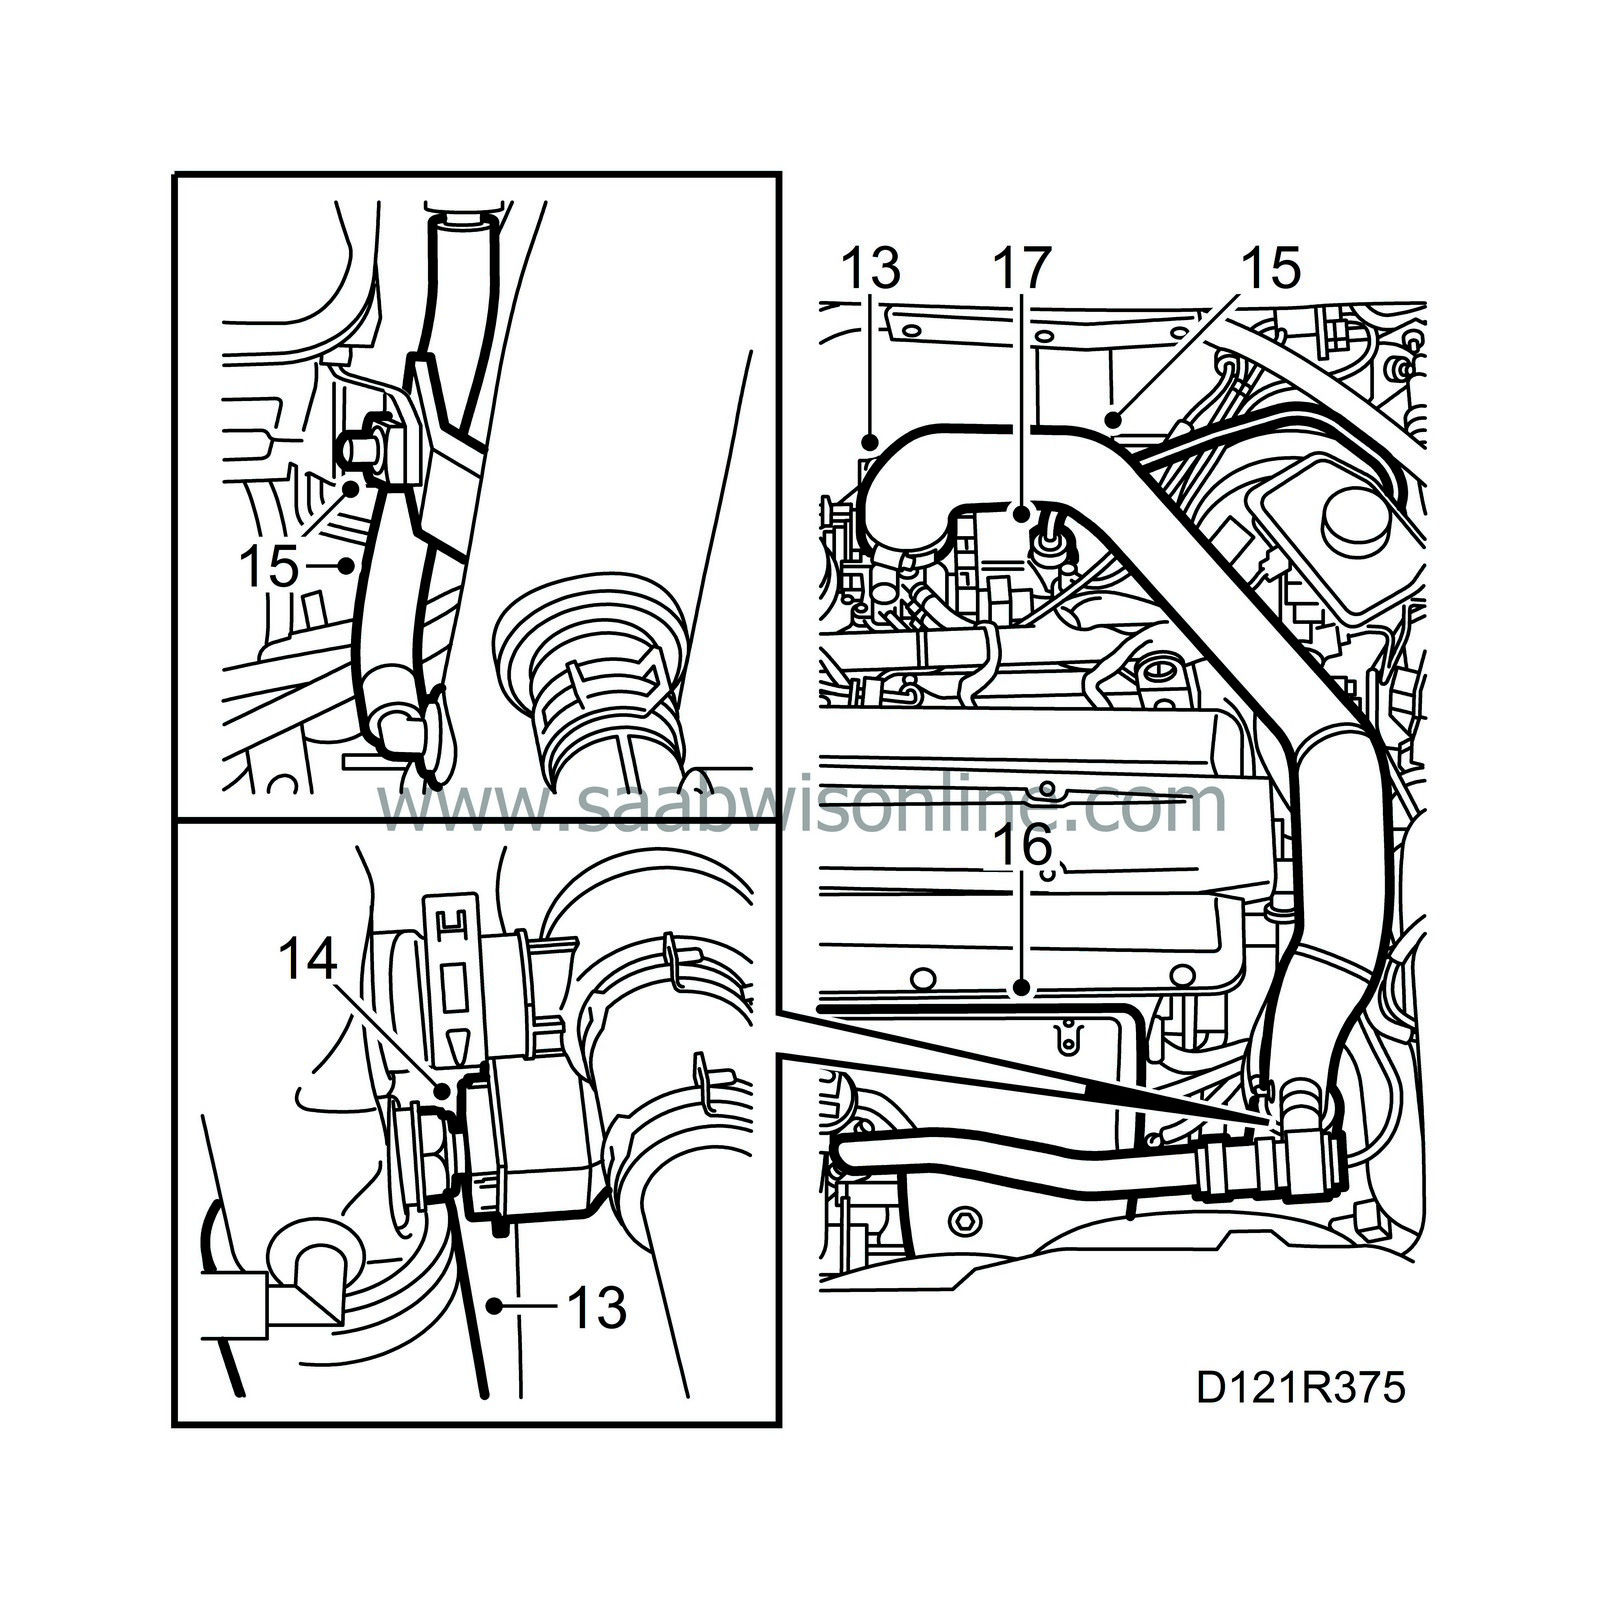
16.
|
Remove the heat shield over the exhaust manifold.
|
|
17.
|
Detach the vacuum hose to the brake servo from the intake manifold.
|
|
18.
|
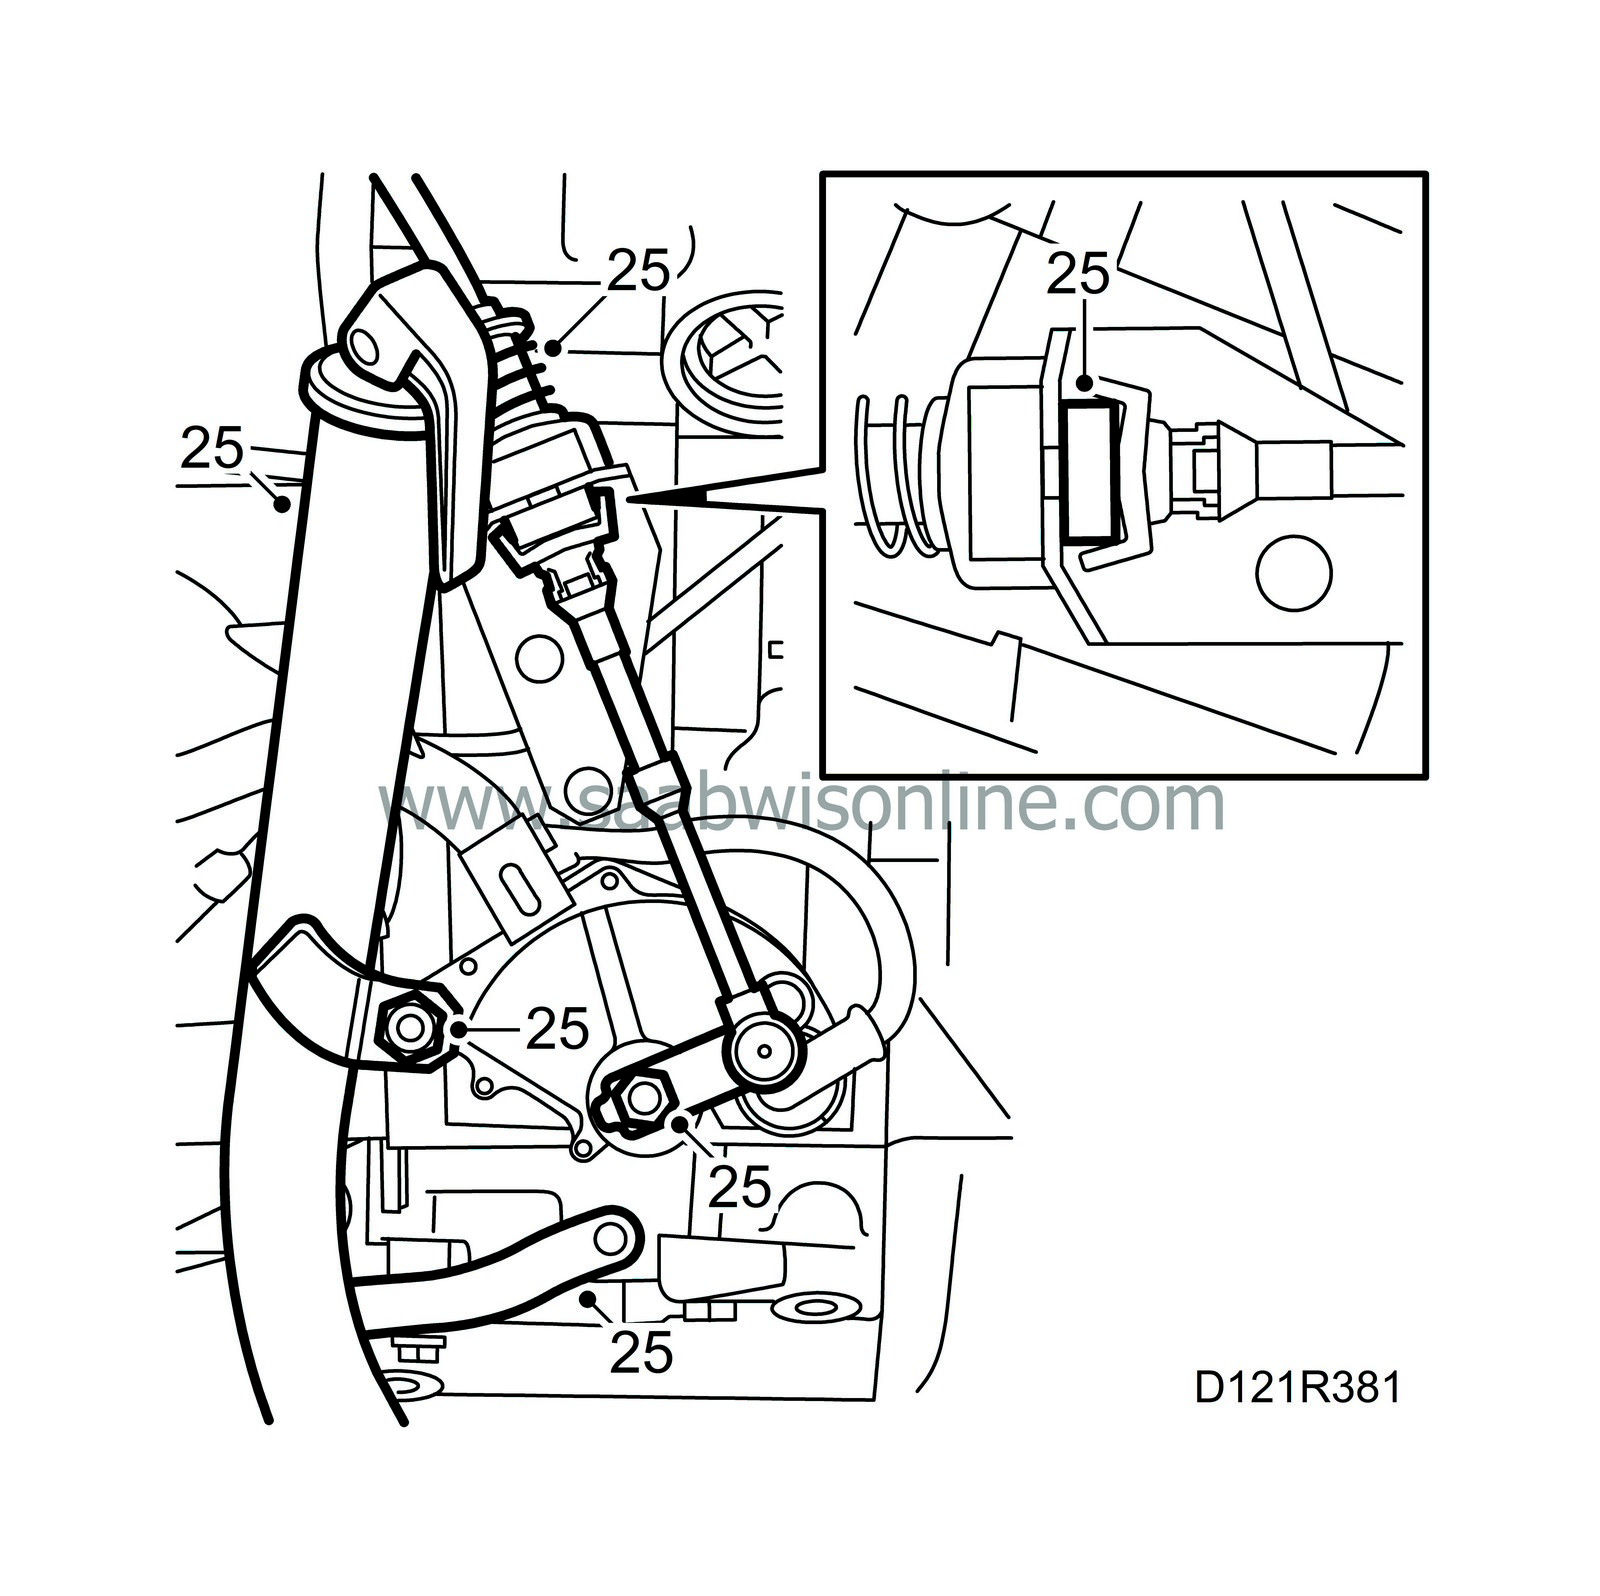
Cut the cable ties on the cables by the MacPherson strut.
|
|
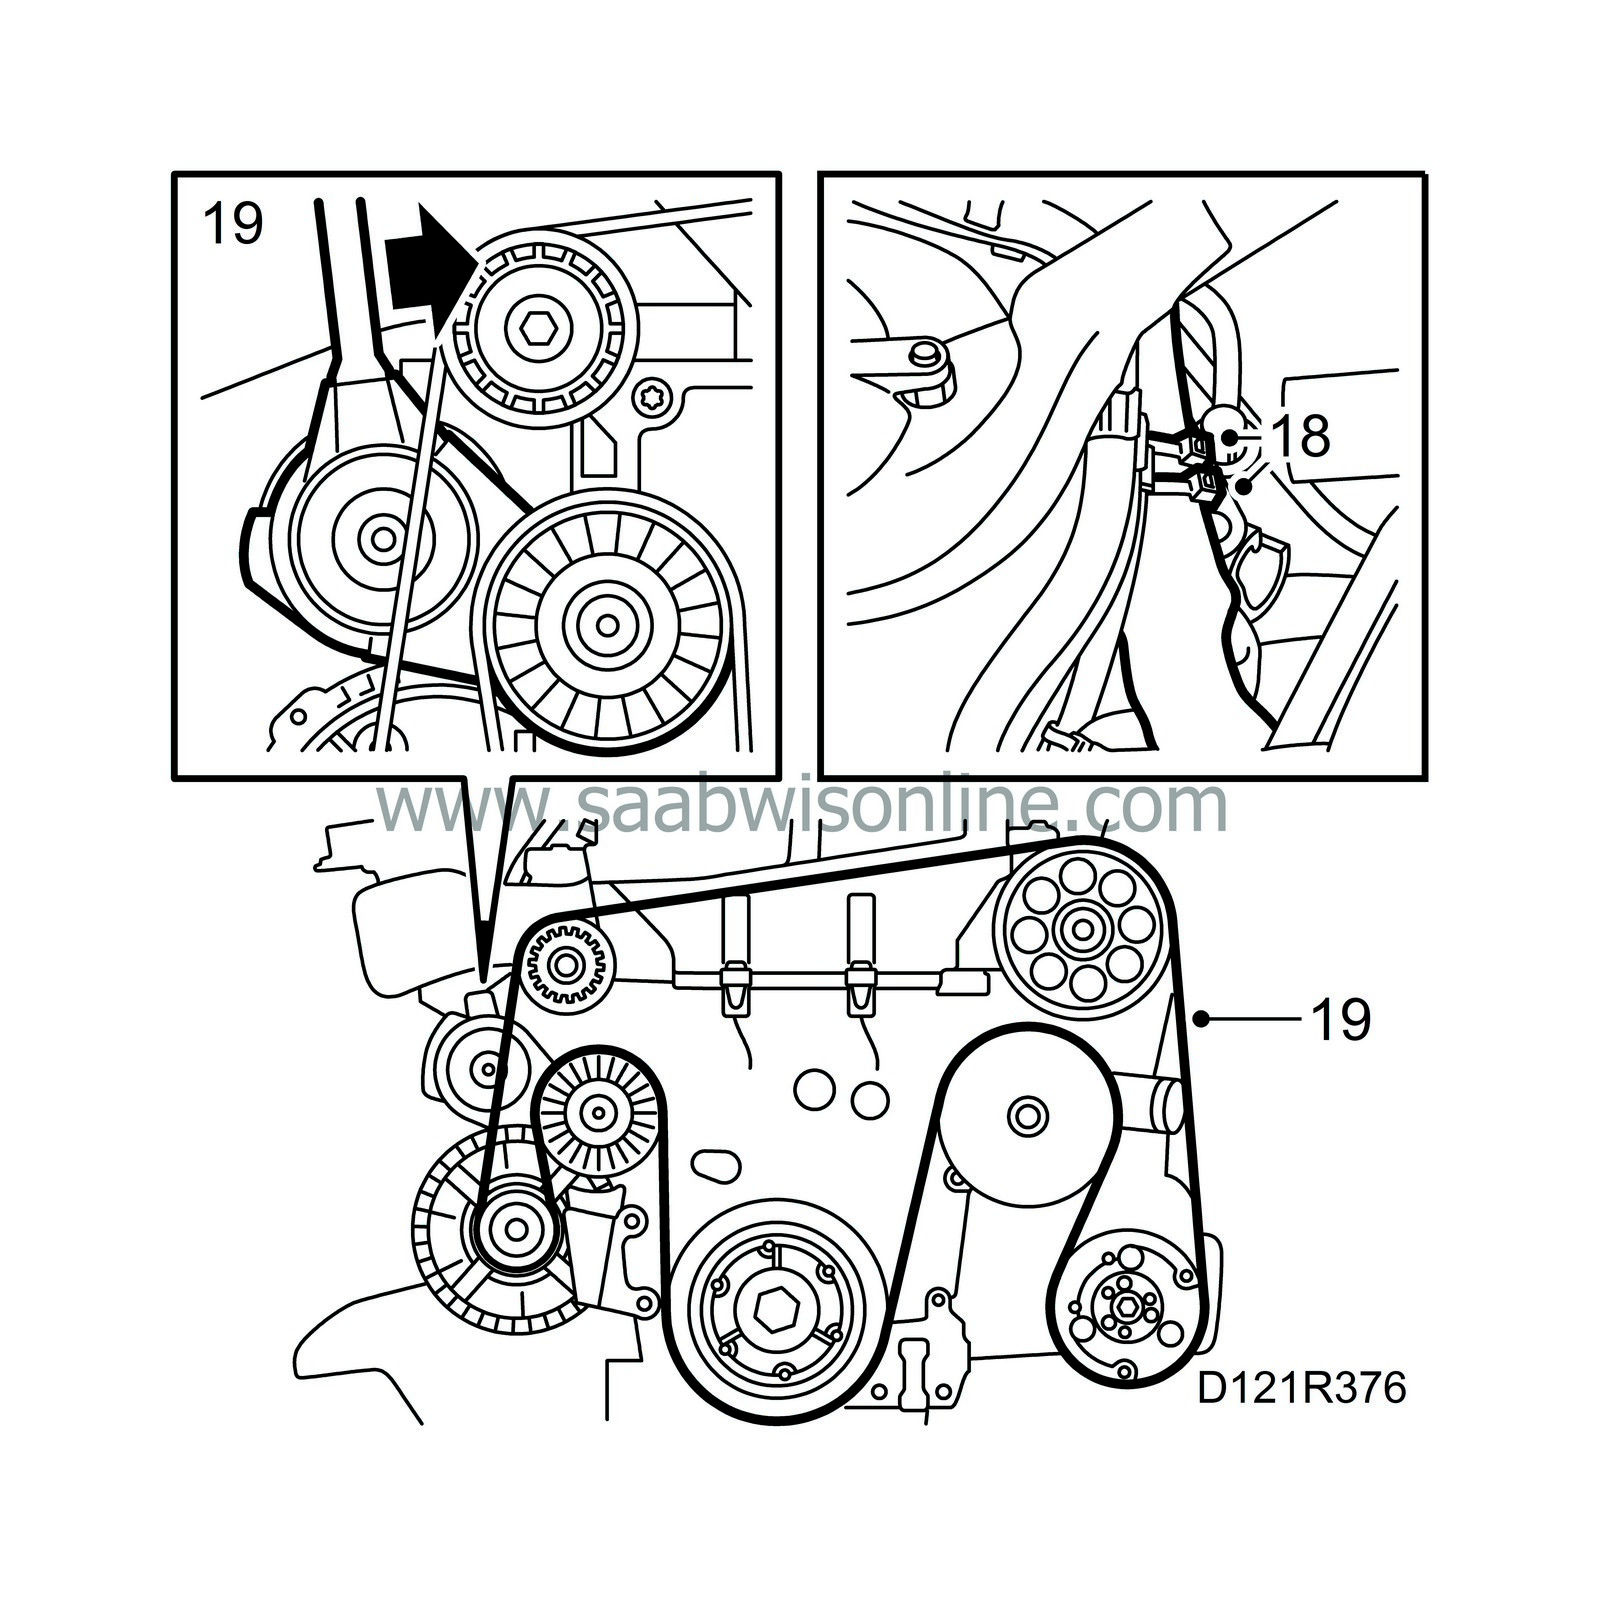
19.
|
Relieve the tension on the belt tensioner with an ratchet handle extension piece and insert a 3.5 mm drill in the hole. Lift off the belt.
|
Important
|
|
Exercise the utmost care to ensure that the belt tensioner does not break at its end position!
|
|
|
|
|
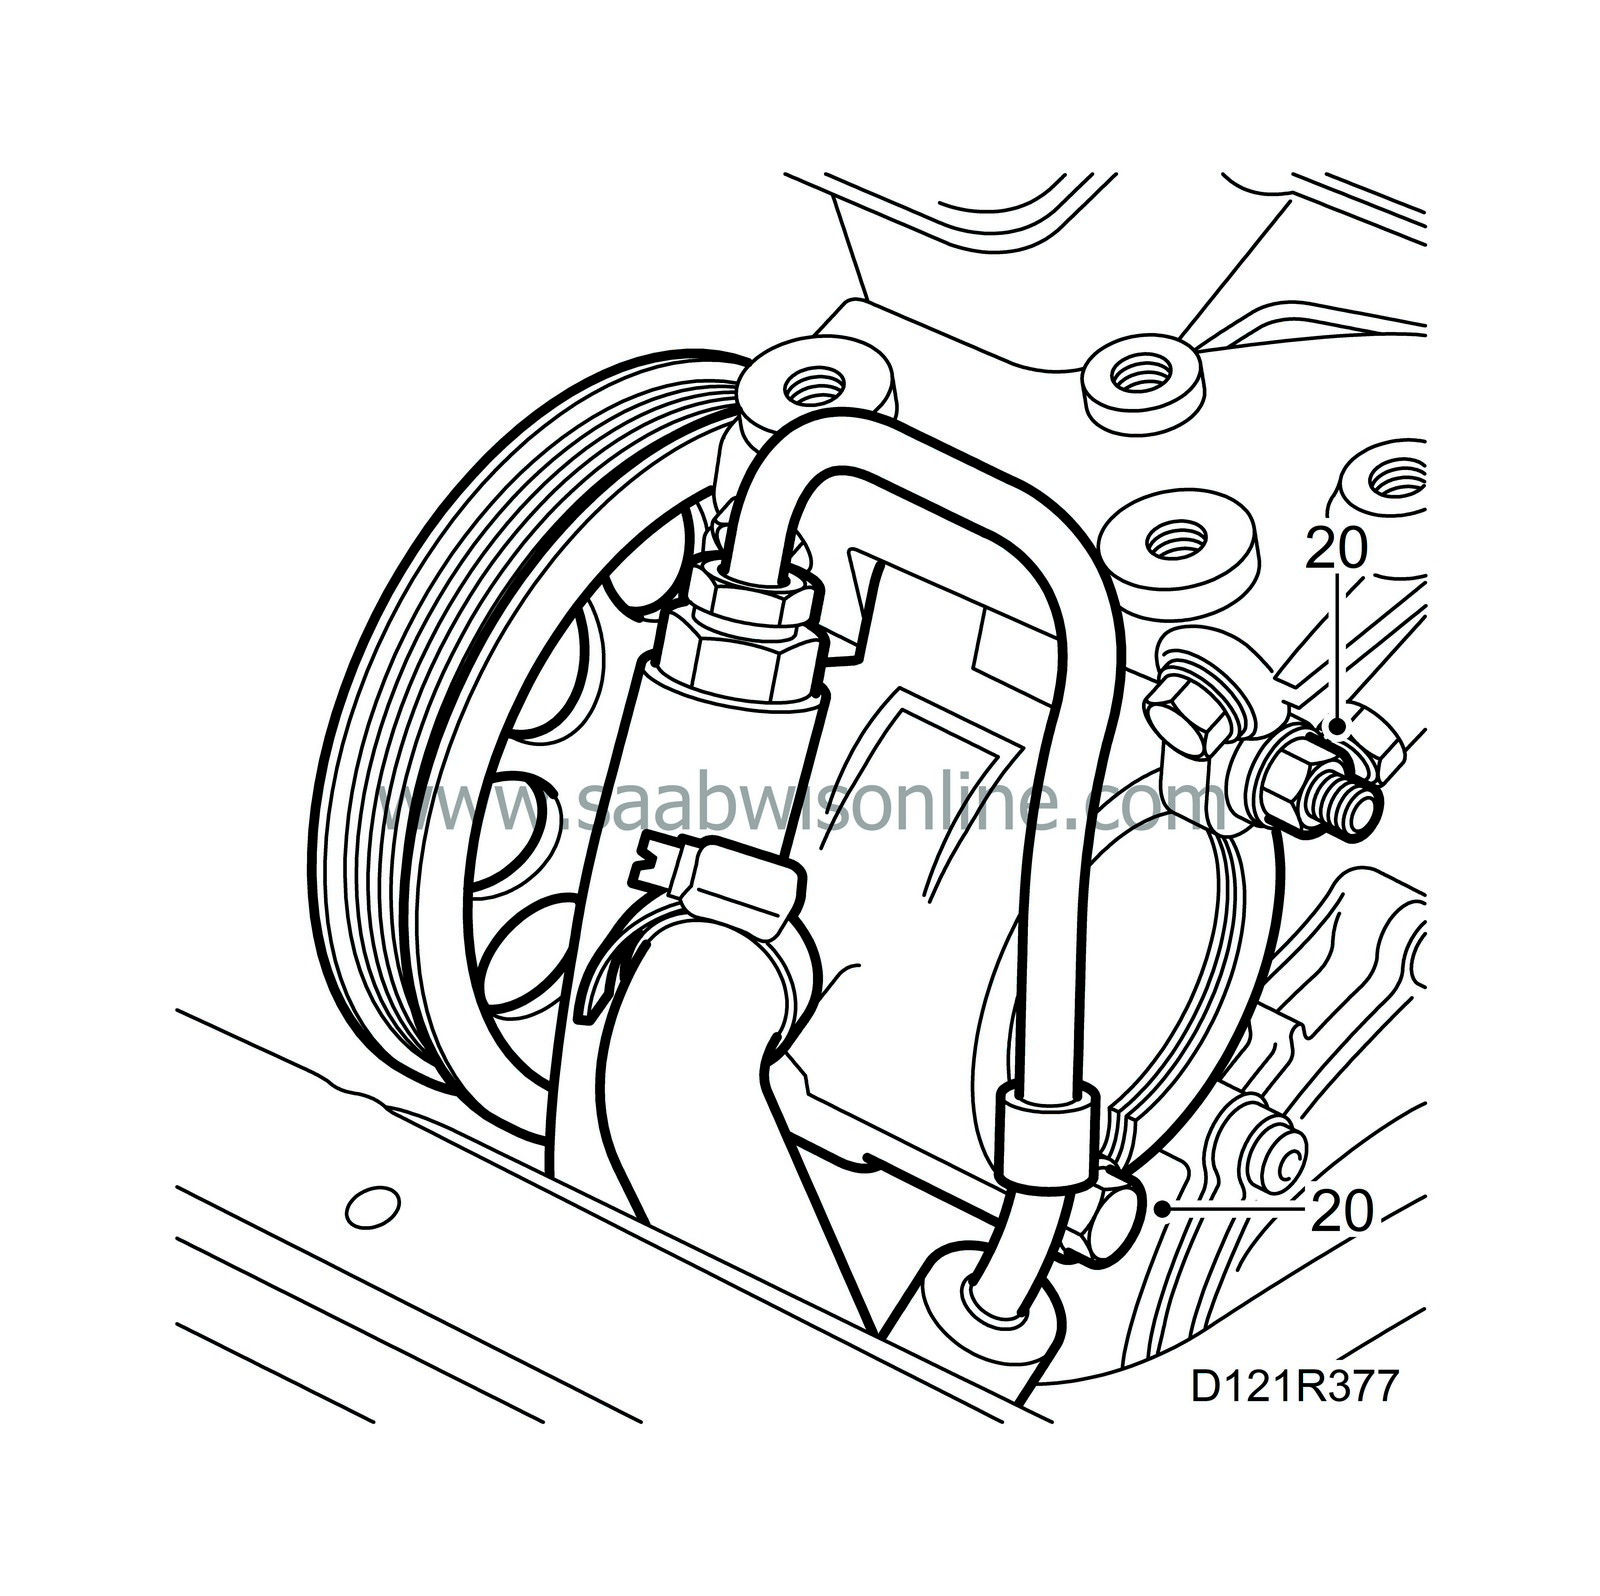
20.
|
Remove the power steering pump from its bracket and place it out of the way.
|
|
21.
|
Detach the coolant hoses from the radiator, water pump, expansion tank - cylinder head, and the hoses to the bypass valve.
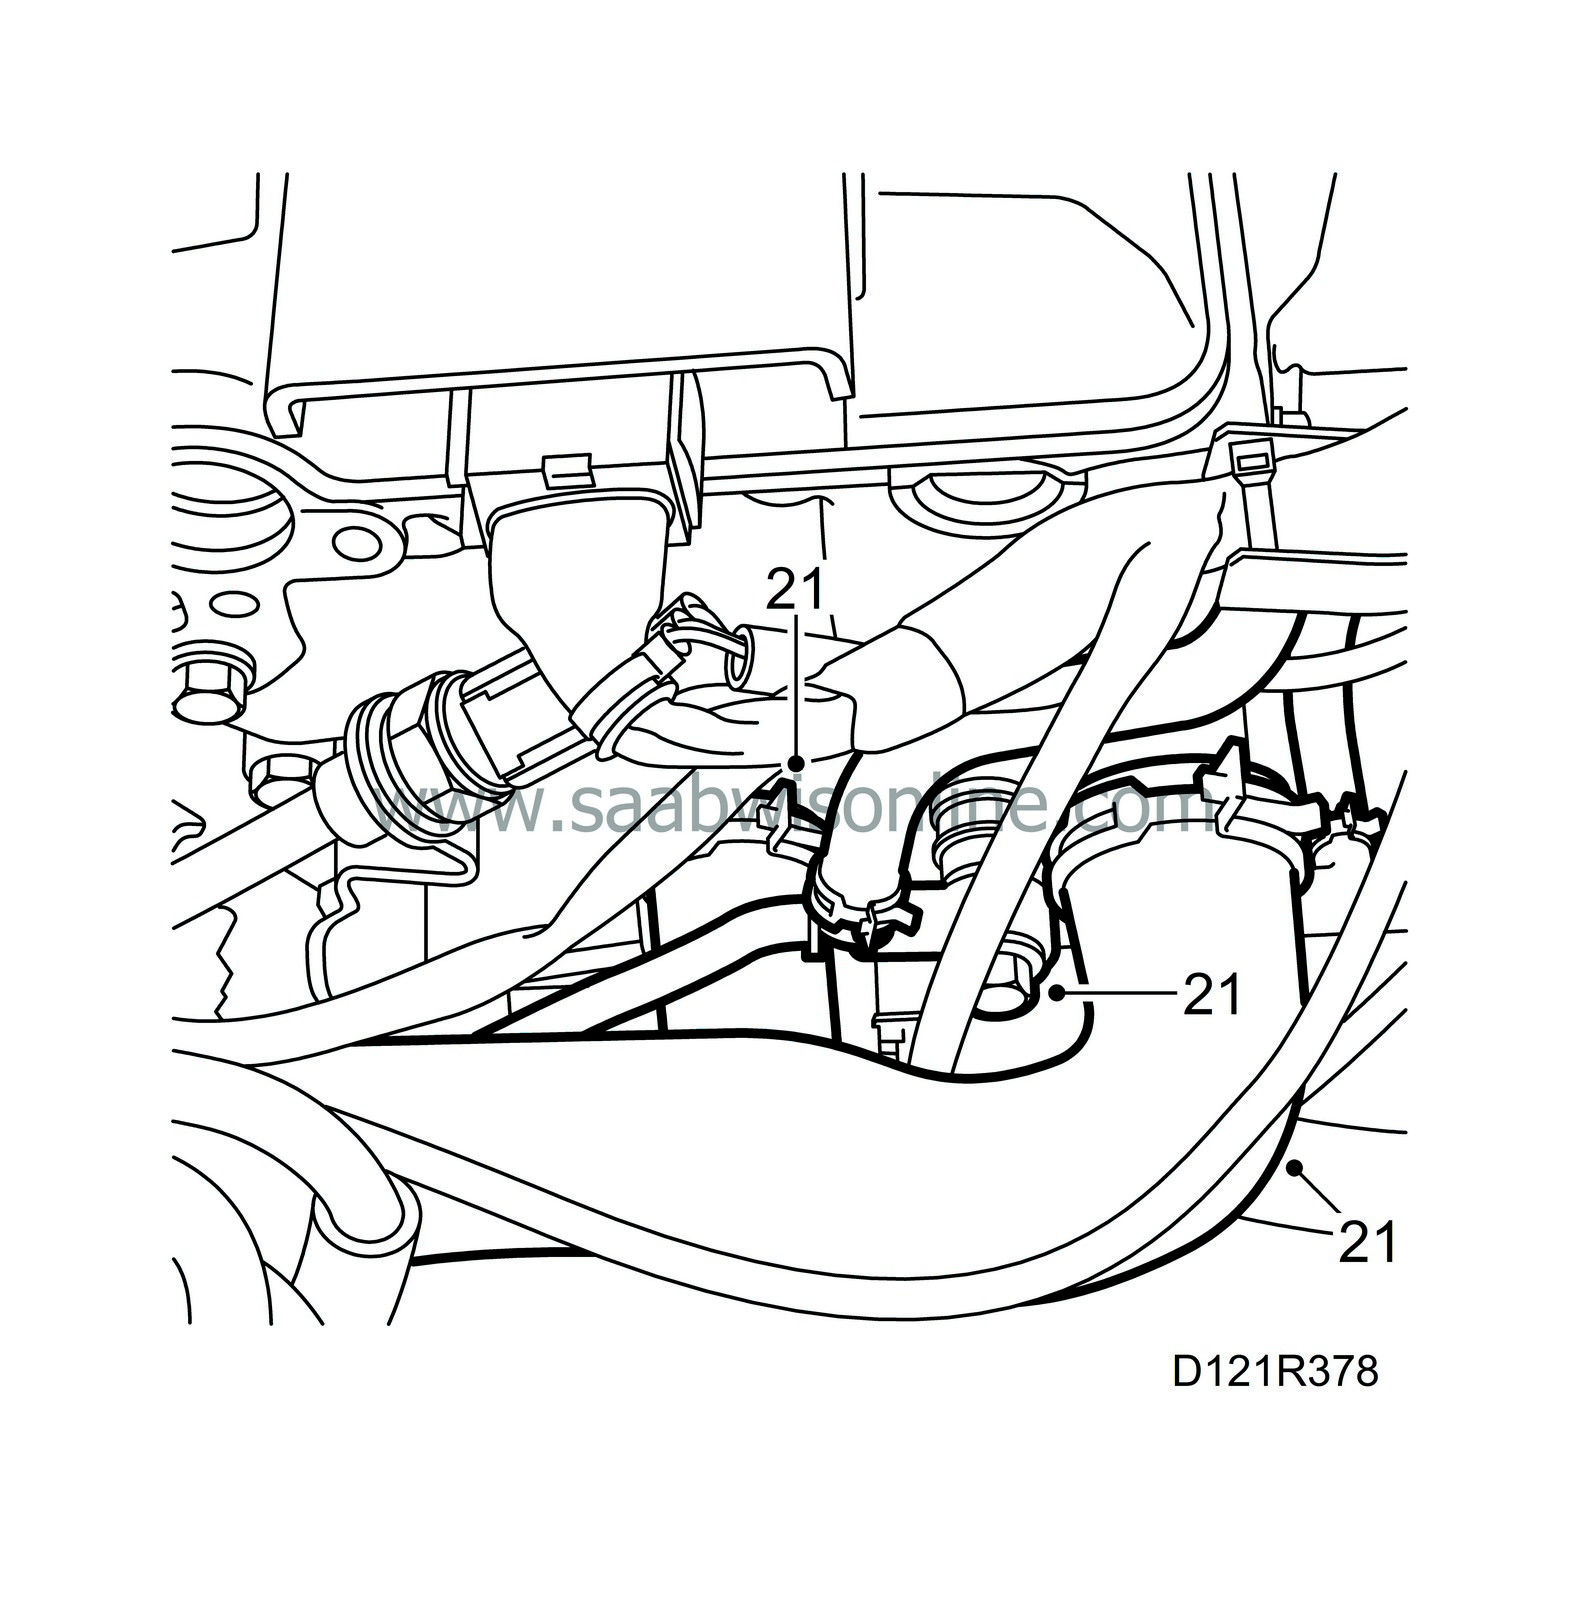
|
|
22.
|
Undo the hoses to the turbo and remove the hose to the charge air cooler.

|
|
23.
|
Disconnect the A/C compressor signal cable and undo the top retaining bolt on the A/C compressor.
|
|
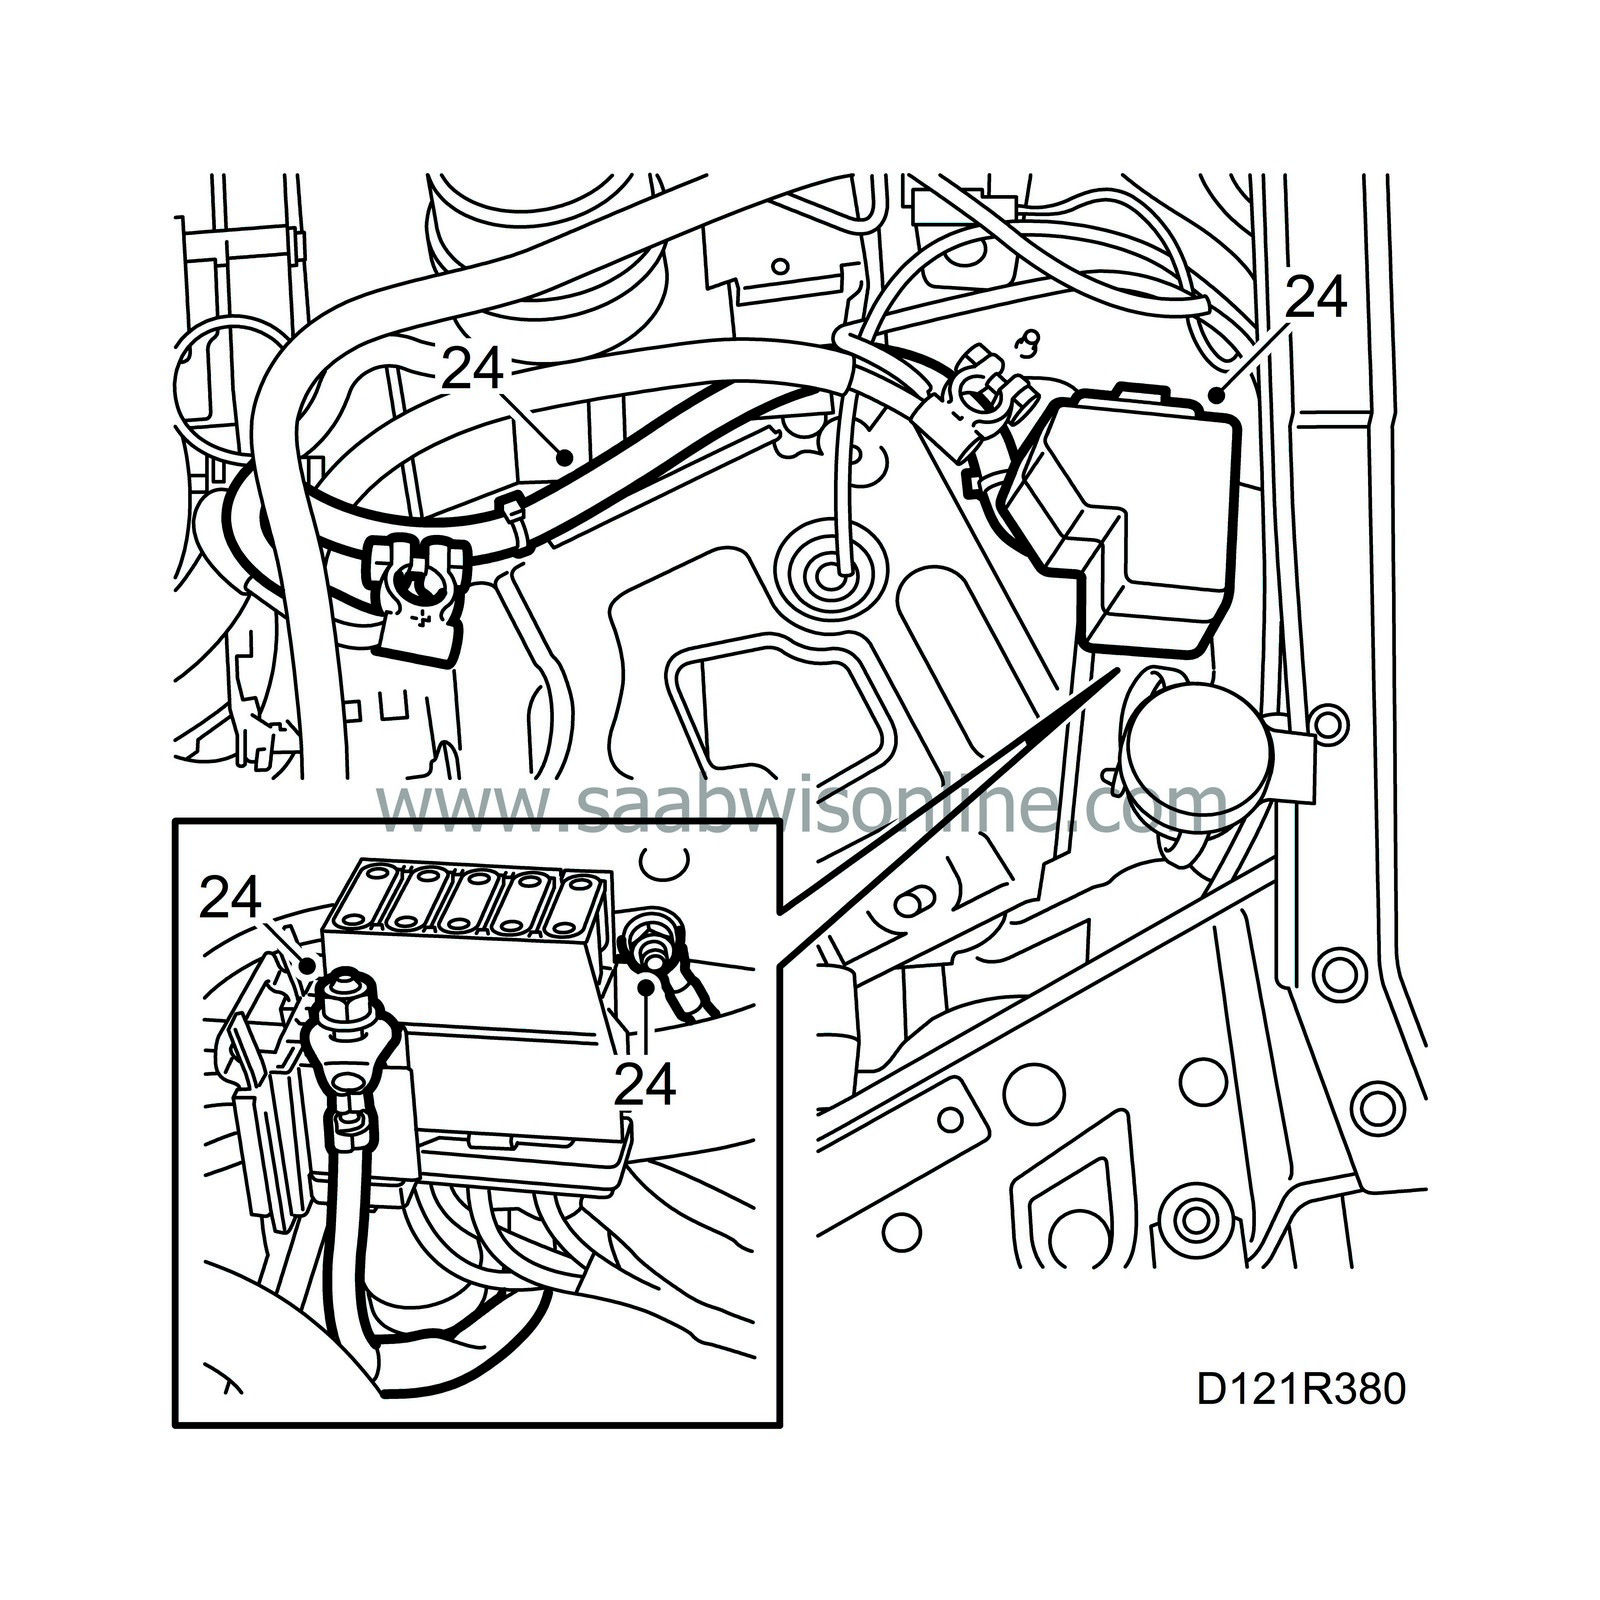
24.
|
Take off the lid on the maxi fuse board, disconnect the positive cable from the plus terminal (follows with the engine) and undo the ground cable on the gearbox (behind the maxi fuse board). Undo the clips and cable ties.
|
|
25.
|
Aut:
Remove the nut securing the lever and remove the lever from the gearbox.
|
|
|
•
|
Undo the retaining clip by the bracket holding the wire. Detach the wire sheath by the bracket on the gearbox.
|
|
|
•
|
Press in the catches with a screwdriver.
|
|
|
•
|
Unplug the connectors linked to the gearbox (located on a bracket behind the battery).
|
|
|
•
|
Remove the oil cooler pipe from the gearbox. Plug the hole.
|
|
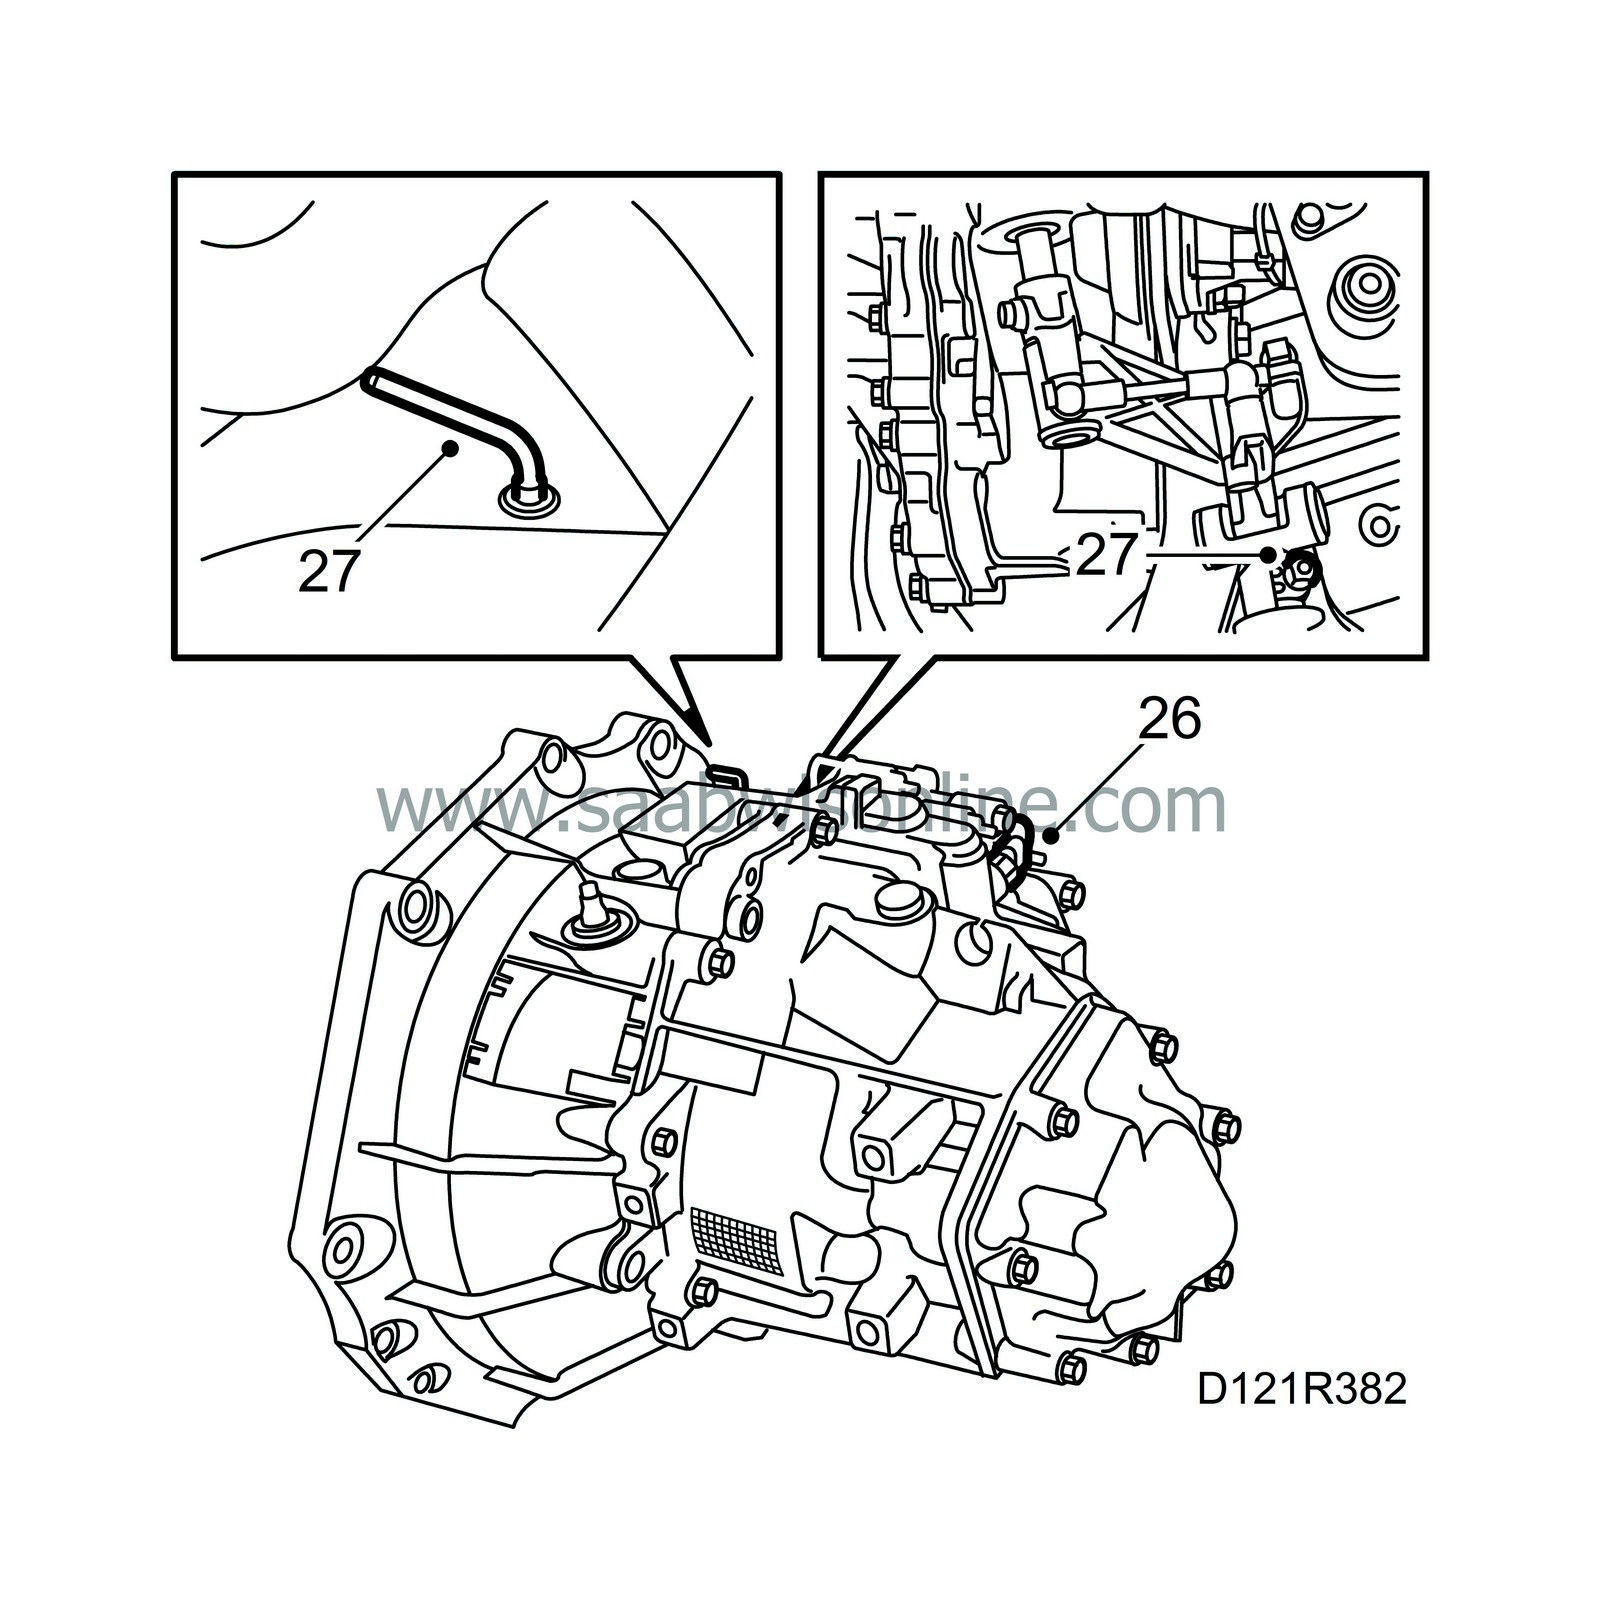
26.
|
Man:
Unplug the reverse gear sensor on the gearbox.
|
|
27.
|
Engage 4th gear. Remove the plastic plug from the gearbox and insert a locking pin. Separate the selector lever. Engage 3rd gear and secure the gear lever with a locking pin.
|
|
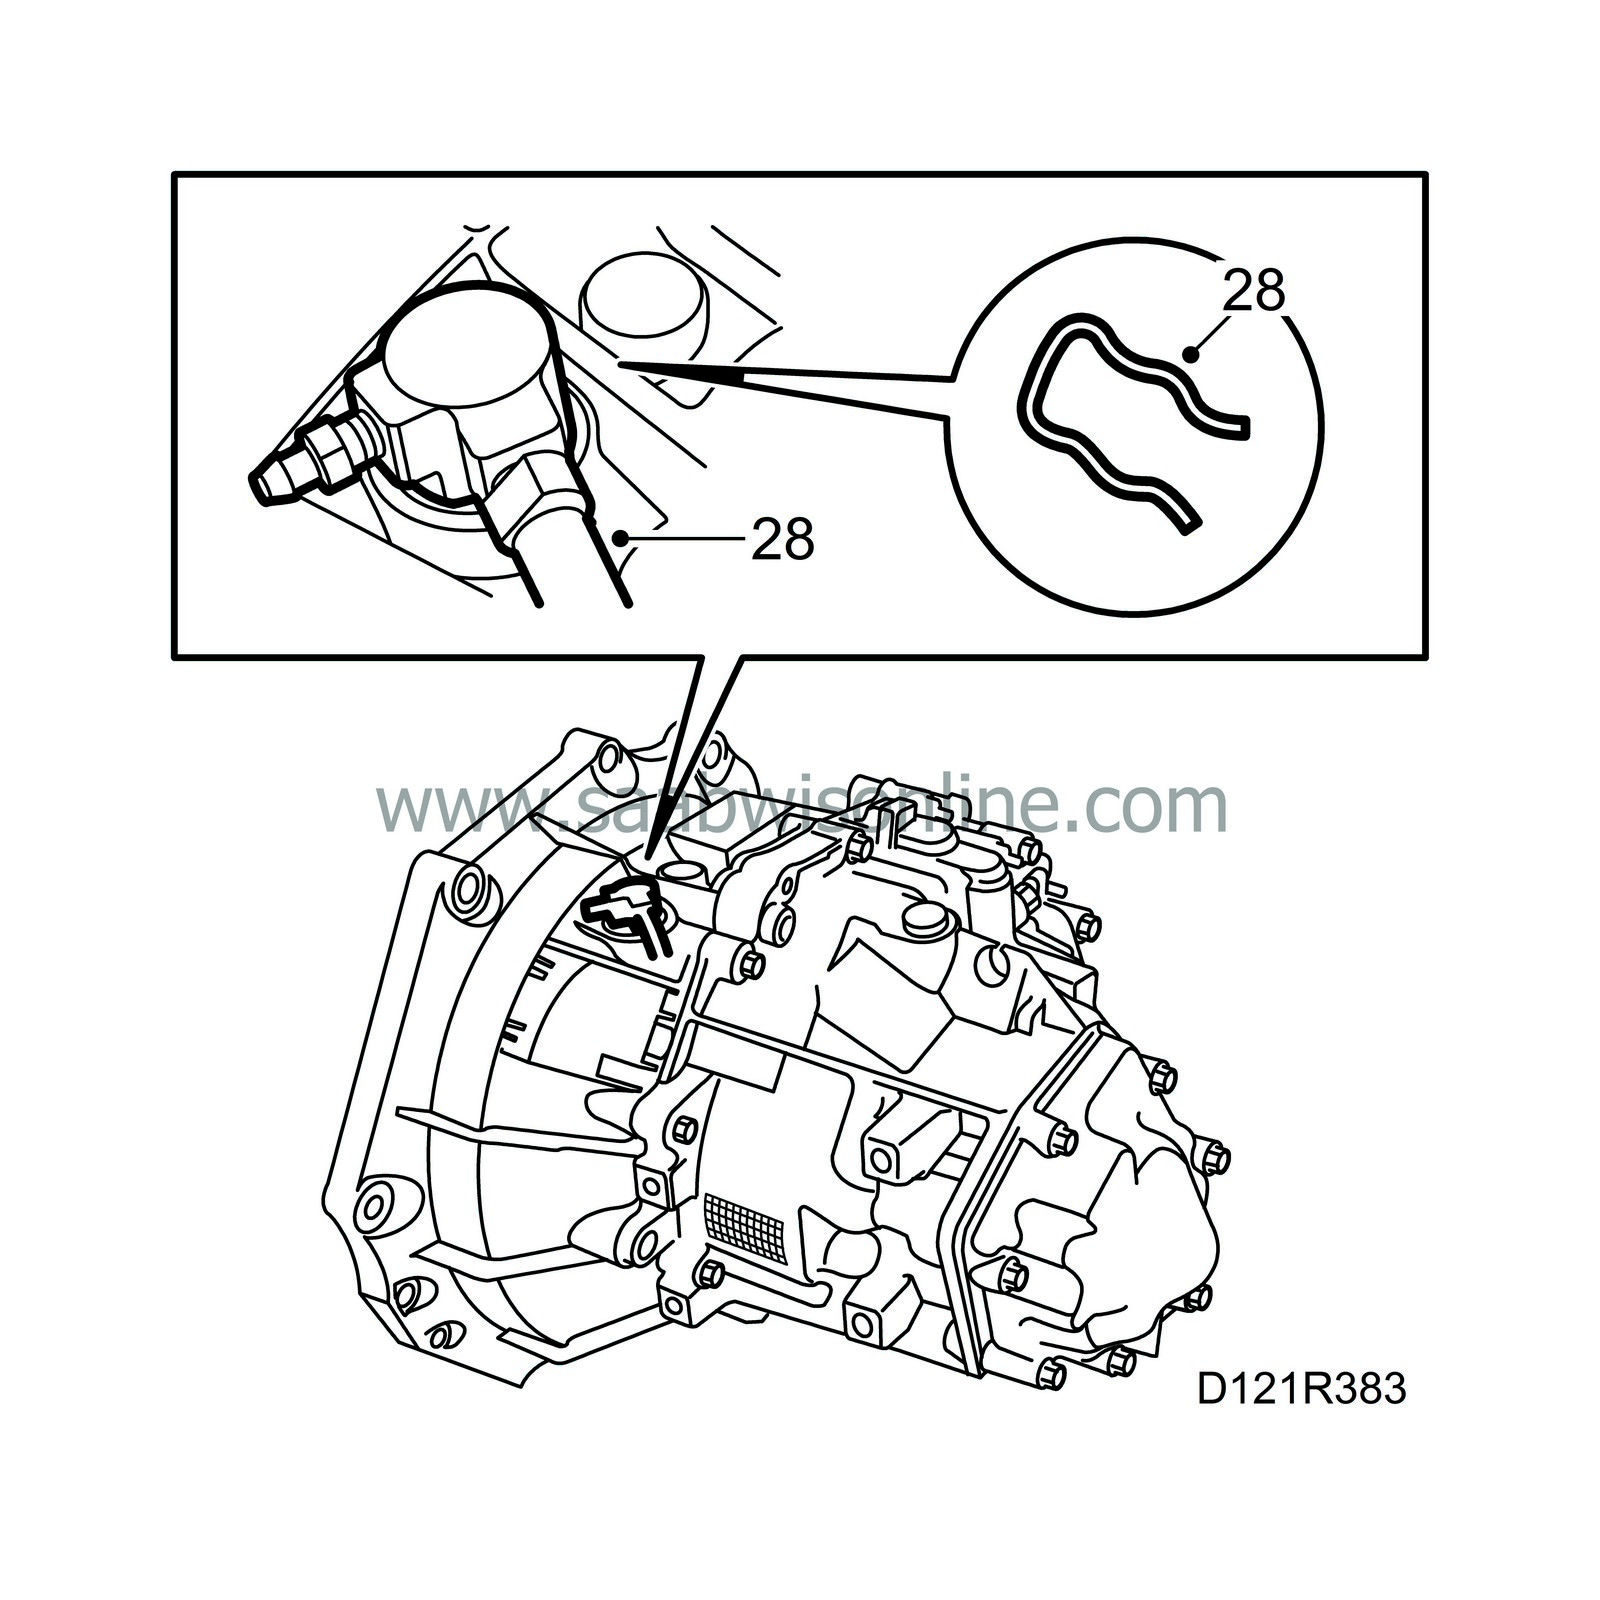
28.
|
Depress the clutch pedal approx. 50 mm with a brake pedal clamp. This will prevent brake fluid from running out of the reservoir. Remove the retaining clip from the slave cylinder and disconnect the pressure pipe. Replace the retaining clip.
|
Note
|
|
There is risk of hydraulic fluid leaking out. Keep a cloth handy.
|
|
|
29.
|
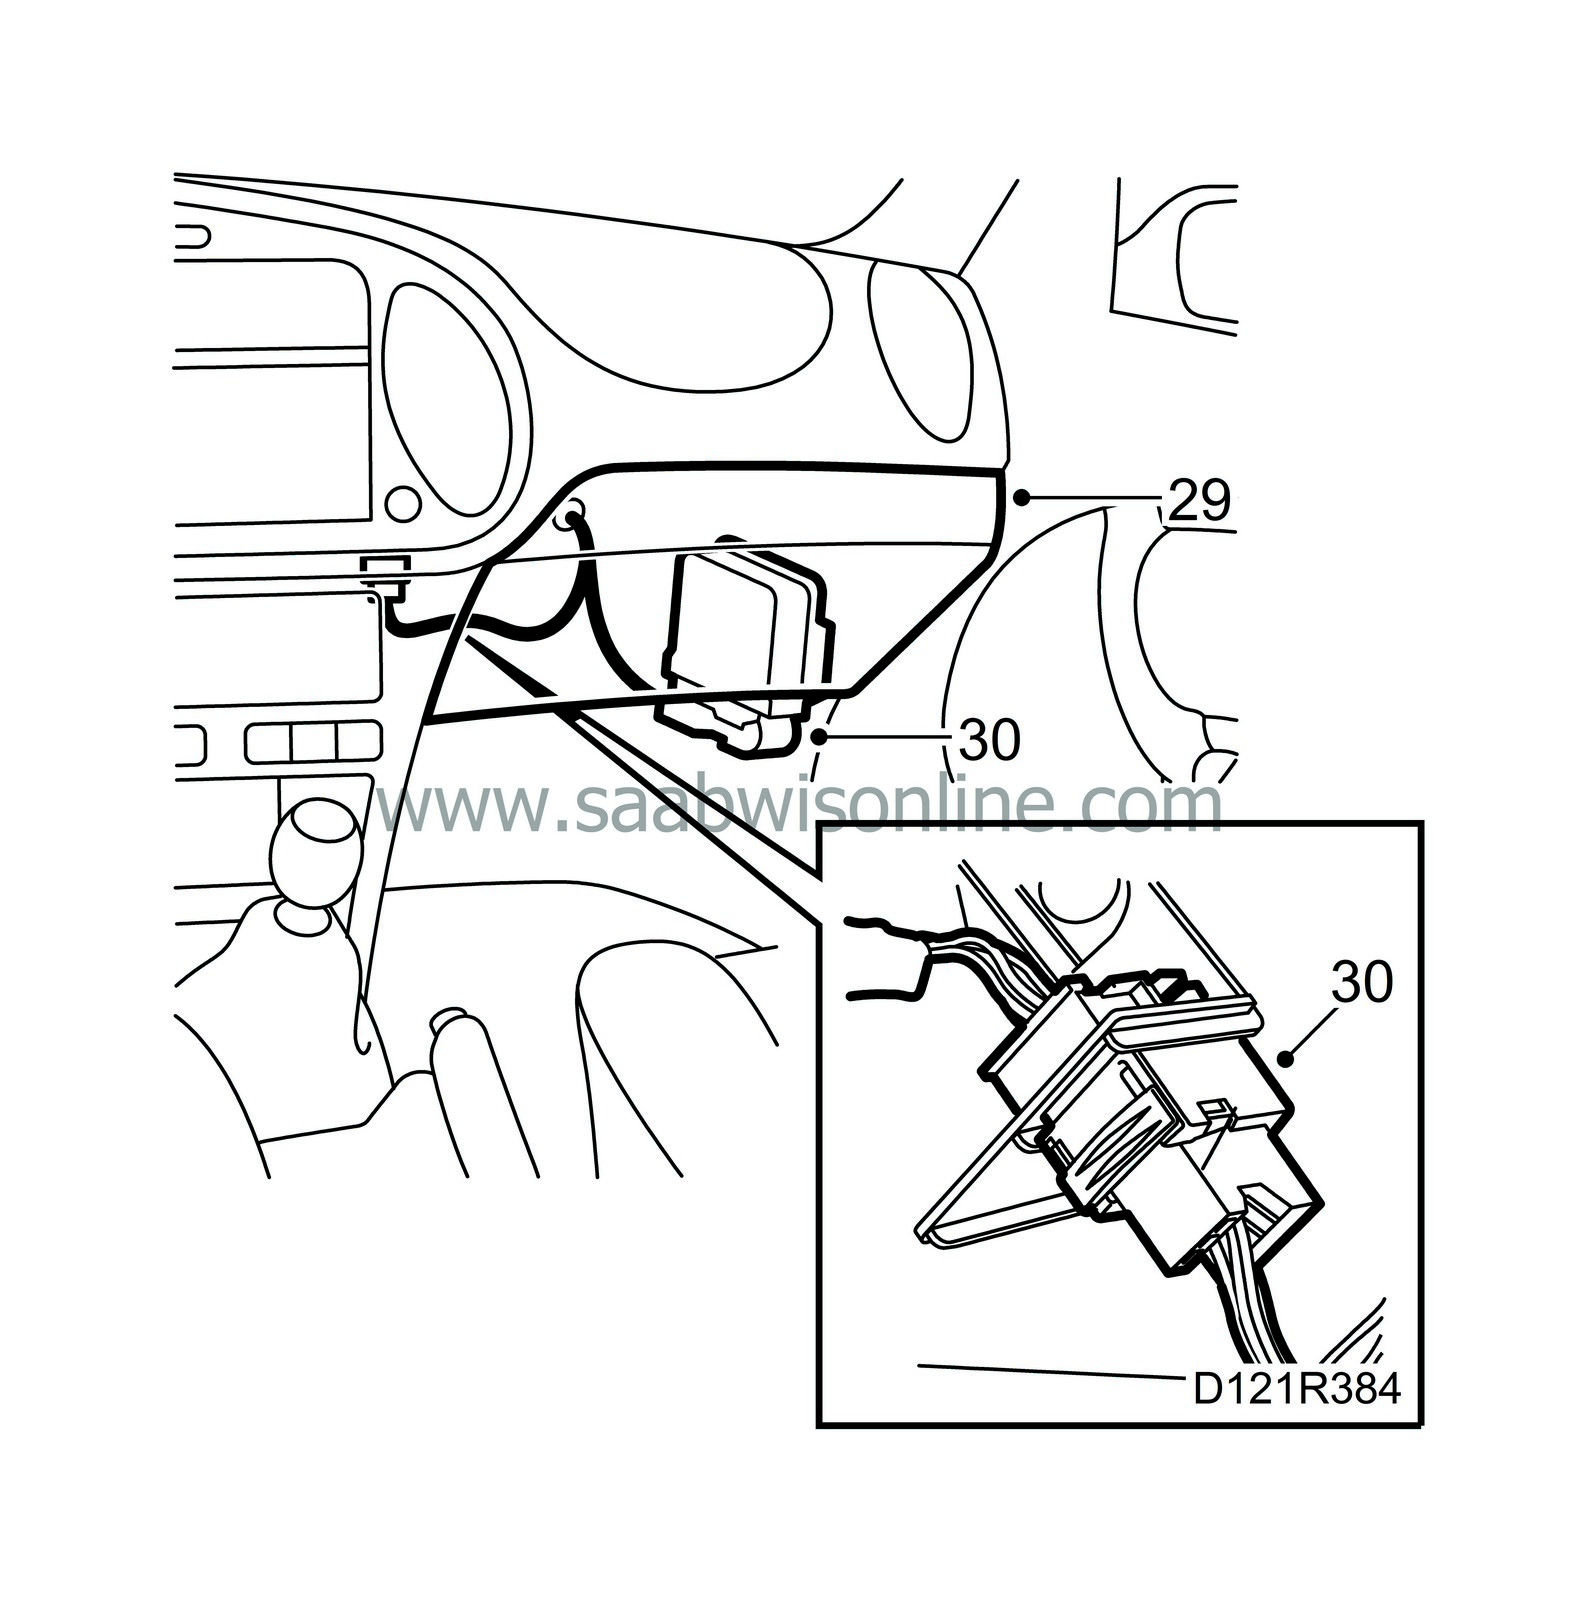
Remove the glove box (LHD) or, alternatively, the lower section of the dashboard on the right-hand side (RHD). Fold back the floor mat. Remove the air duct and unplug the connector for the instrument wiring harness. Detach the wiring harness to the engine.
|
|
30.
|
Unplug the connector above the grommet in the engine bay. Pull out the wiring harness through the grommet and lay it on the engine.
|
|
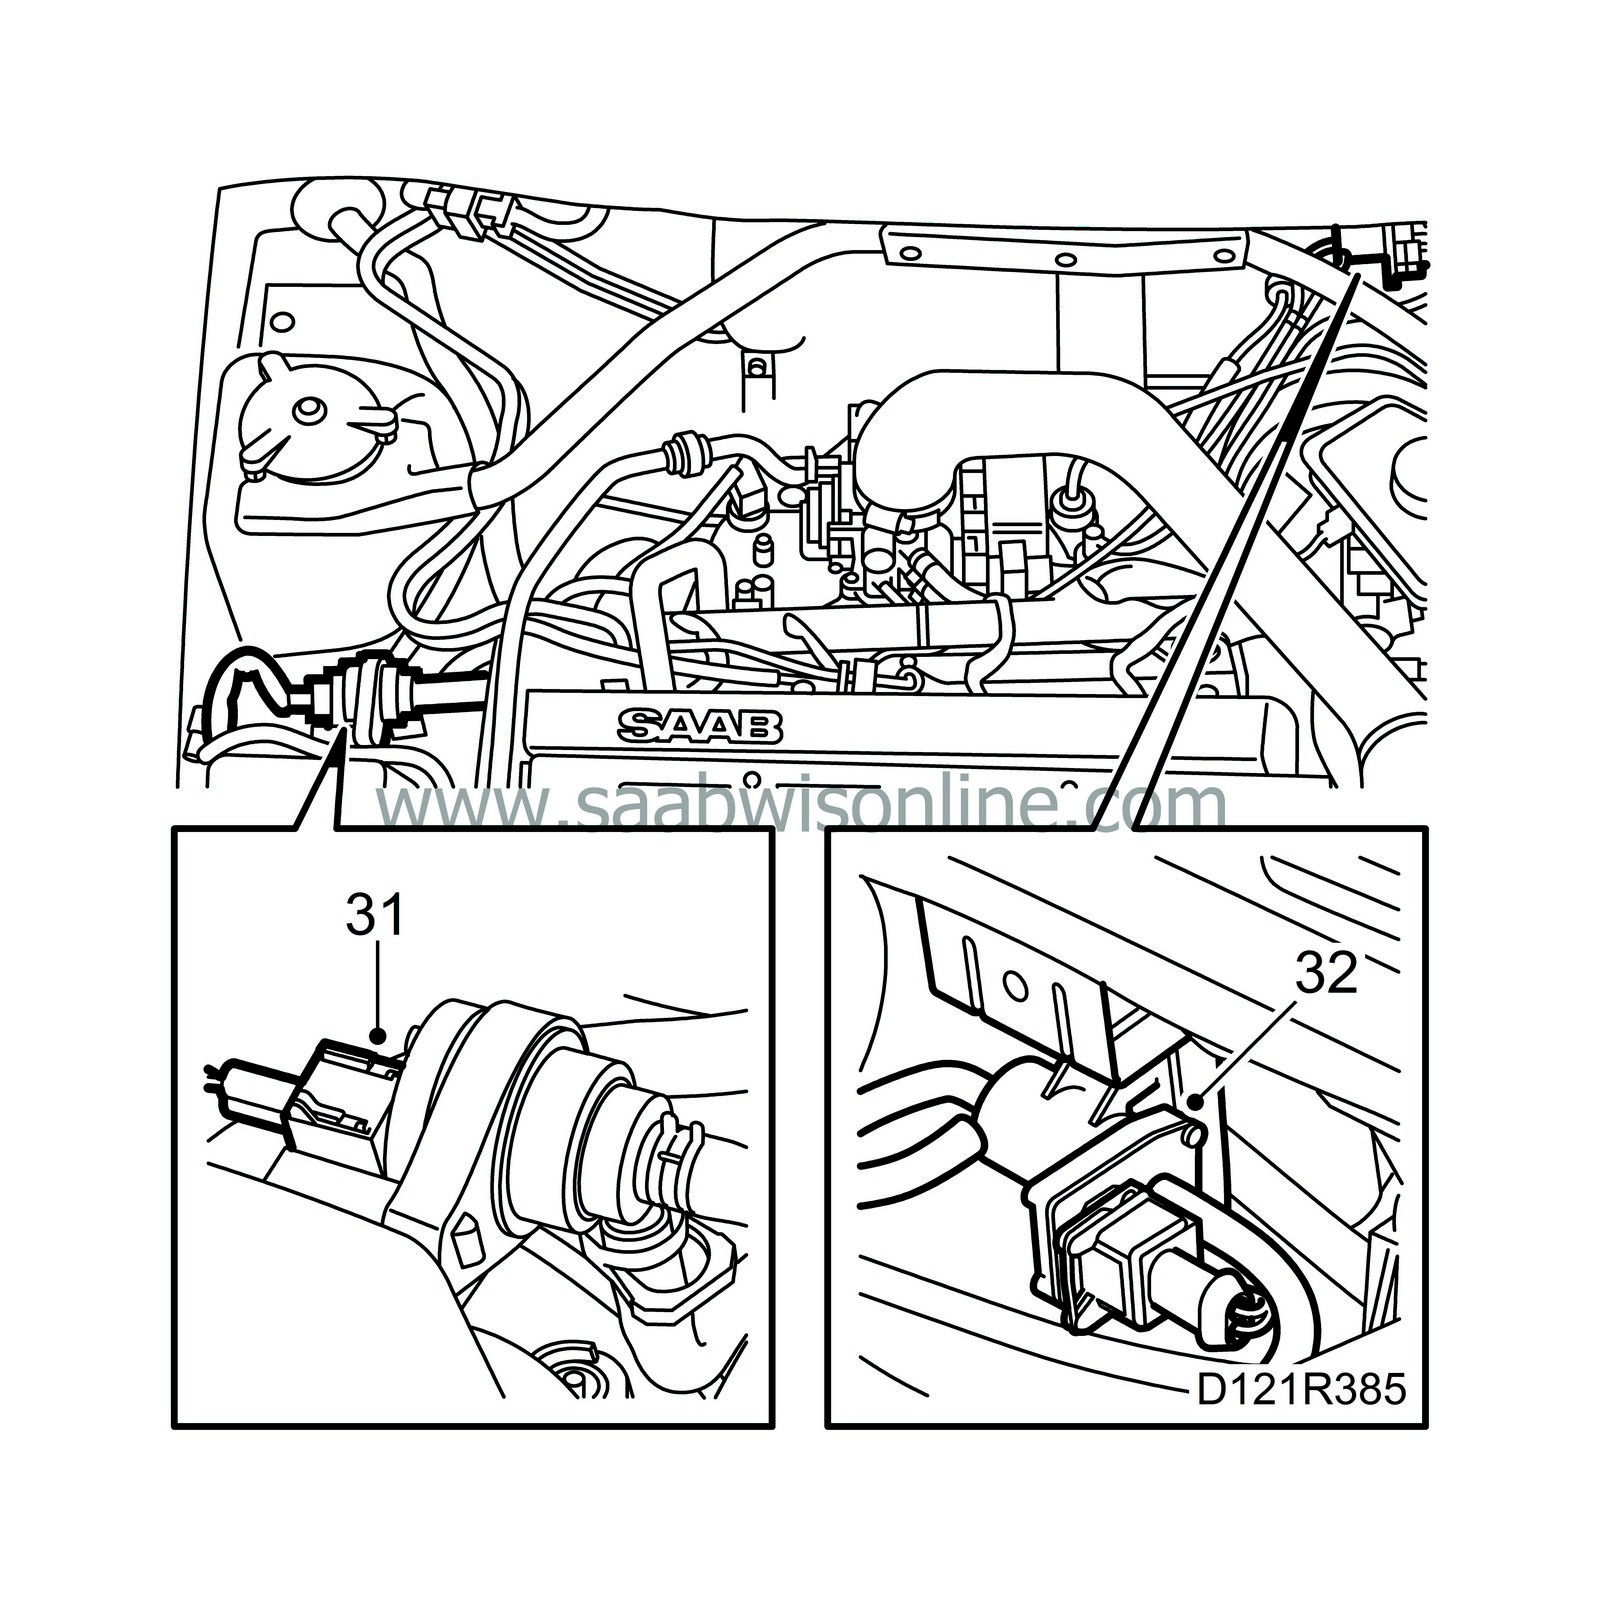
31.
|
Unplug the EVAP canister purge valve connector.
|
|
32.
|
Remove the bypass valve from the bulkhead and lay the valve and hoses on the engine.
|
|
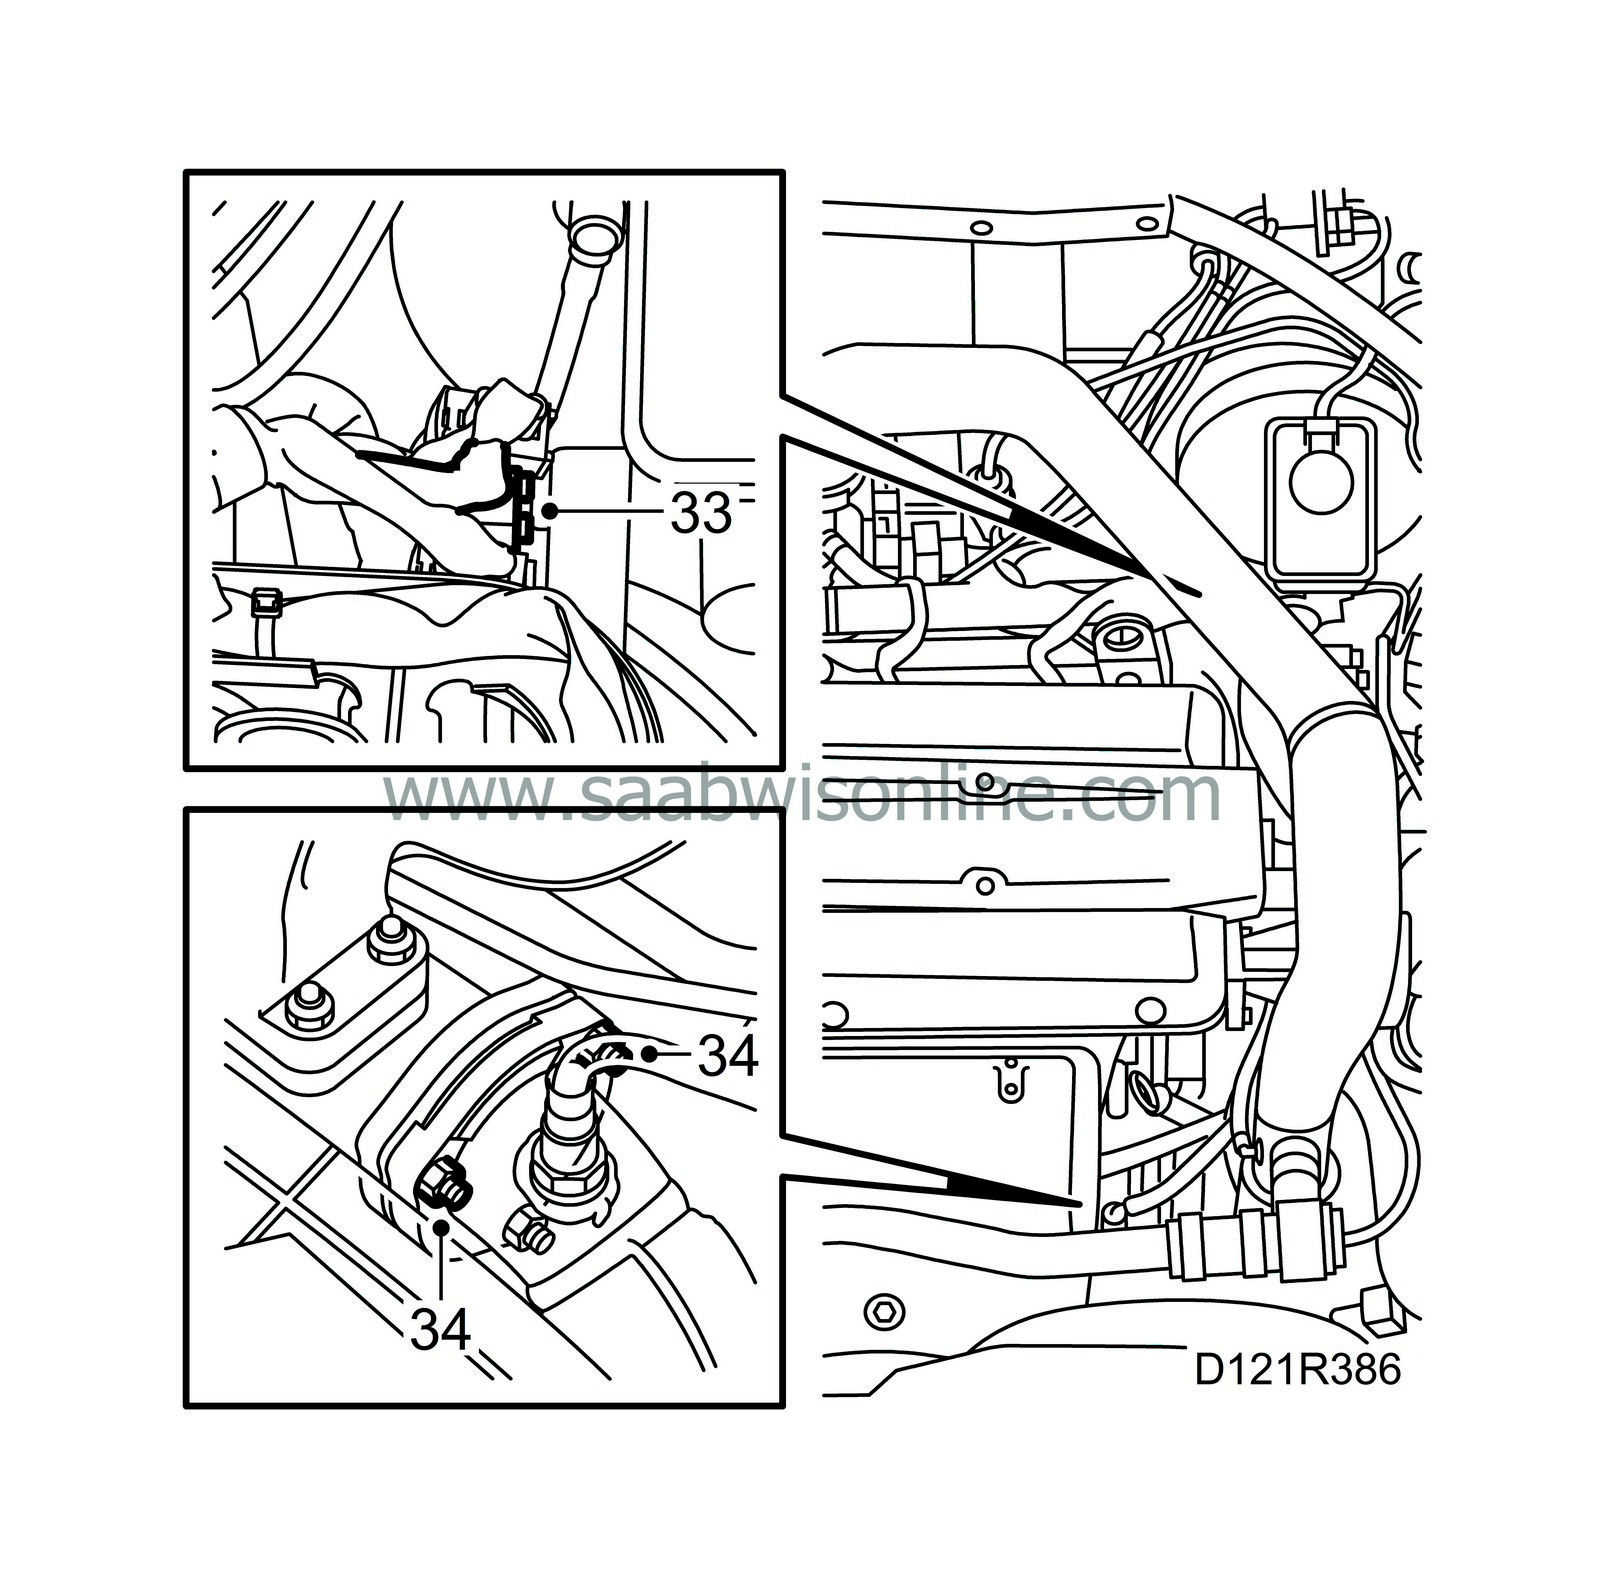
33.
|
Unplug the oxygen sensor.
|
|
34.
|
Remove the two upper nuts securing the exhaust pipe to the turbocharger.
|
|
35.
|
Undo the hub centre-nuts on both sides and raise the car to a comfortable working height.
|
|
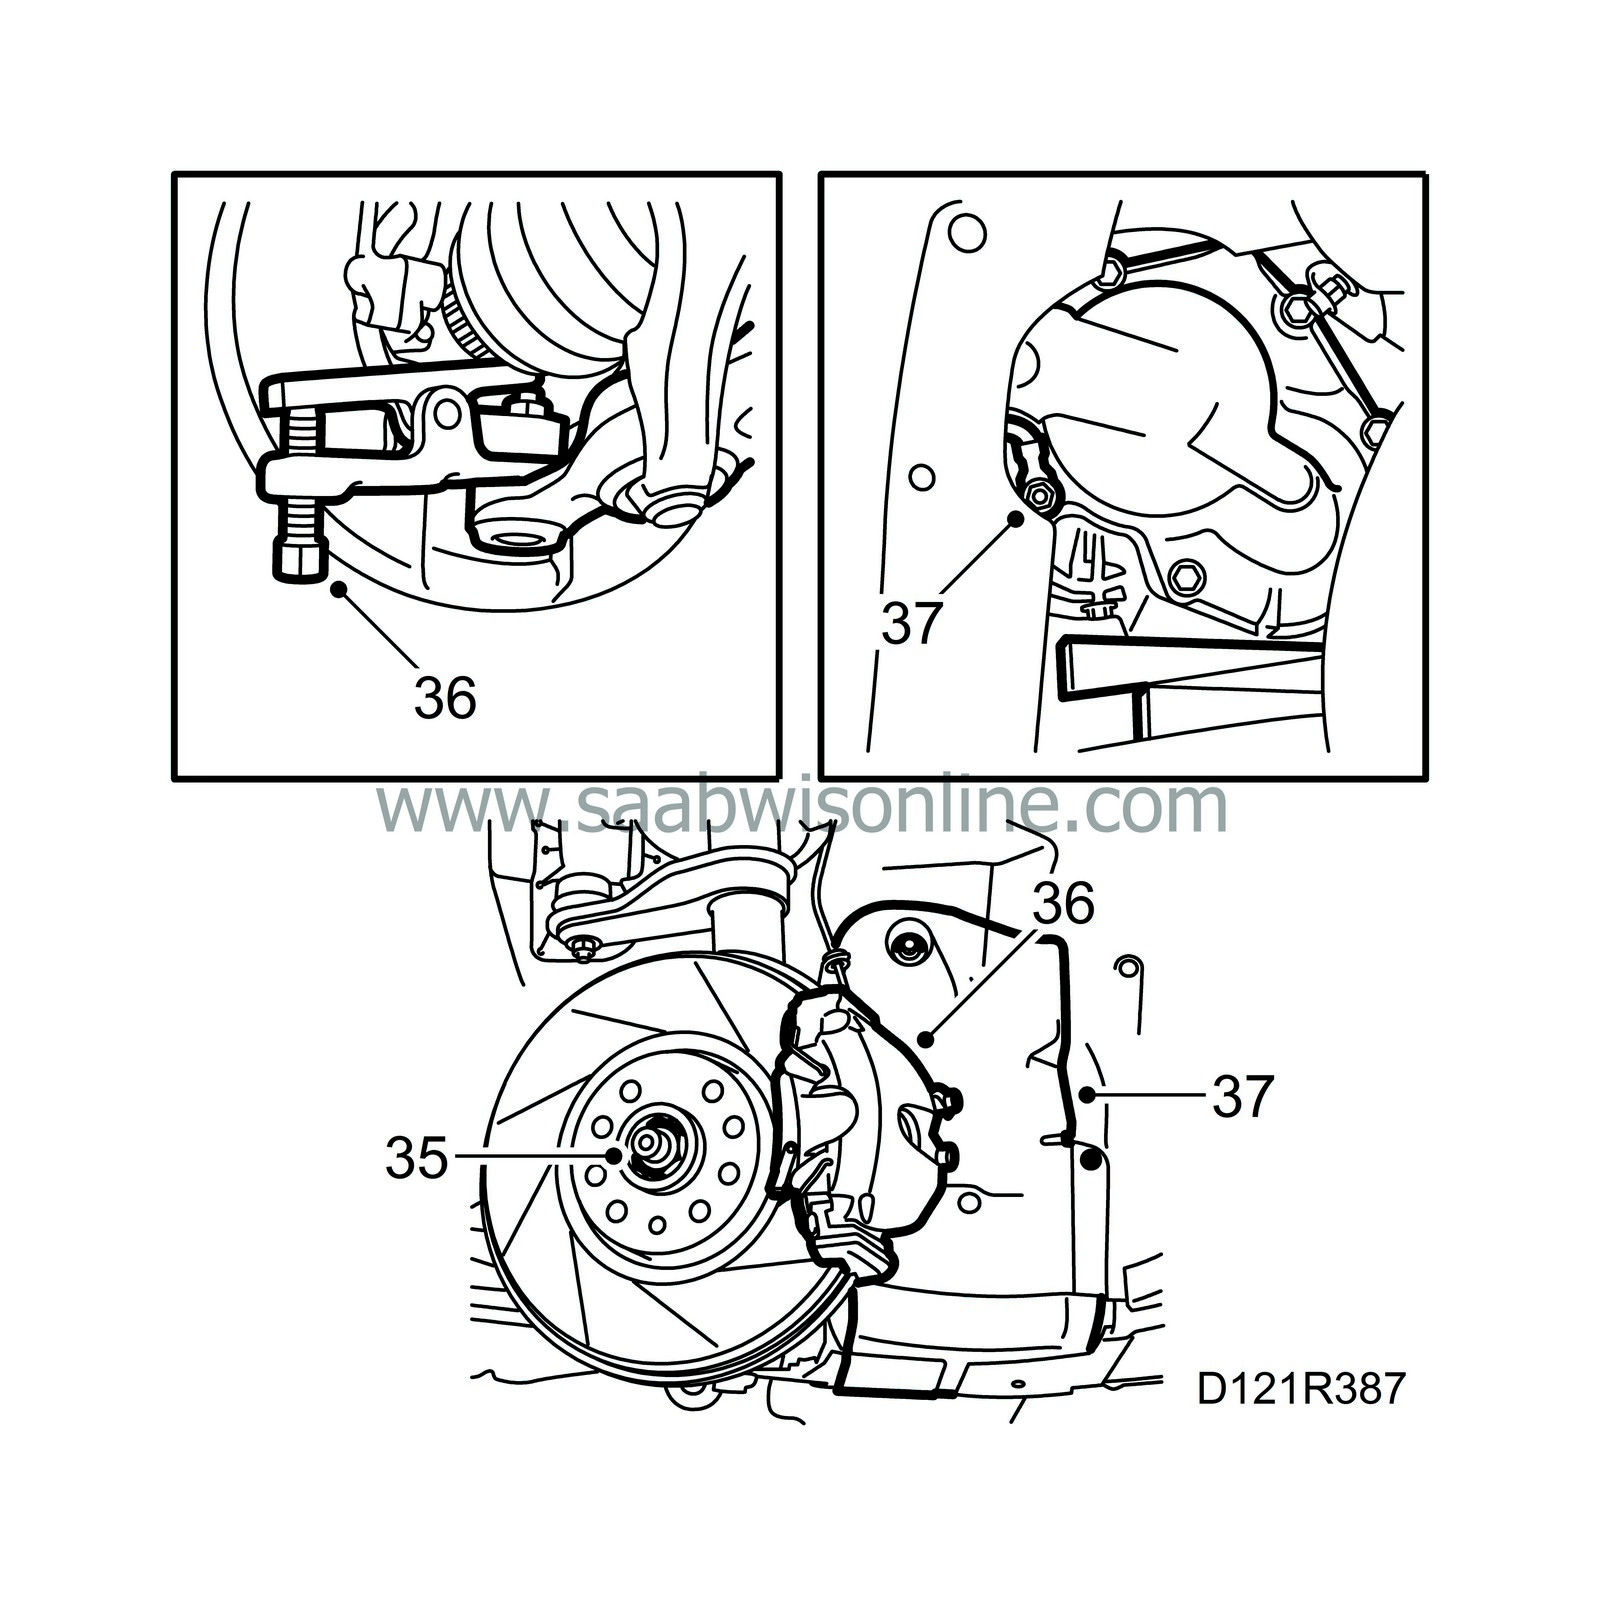
36.
|
Remove both the front wheels and remove the hub centre-nuts. Undo the brake calipers and hang them from the MacPherson struts. Undo the suspension arm nuts on both sides and lower the suspension arms. Use
89 96 696 Puller
. If it is difficult to insert the puller, grind it down slightly.
|
|
37.
|
Remove the belt circuit cover. Remove the grounding point between the gearbox and body.
|
|
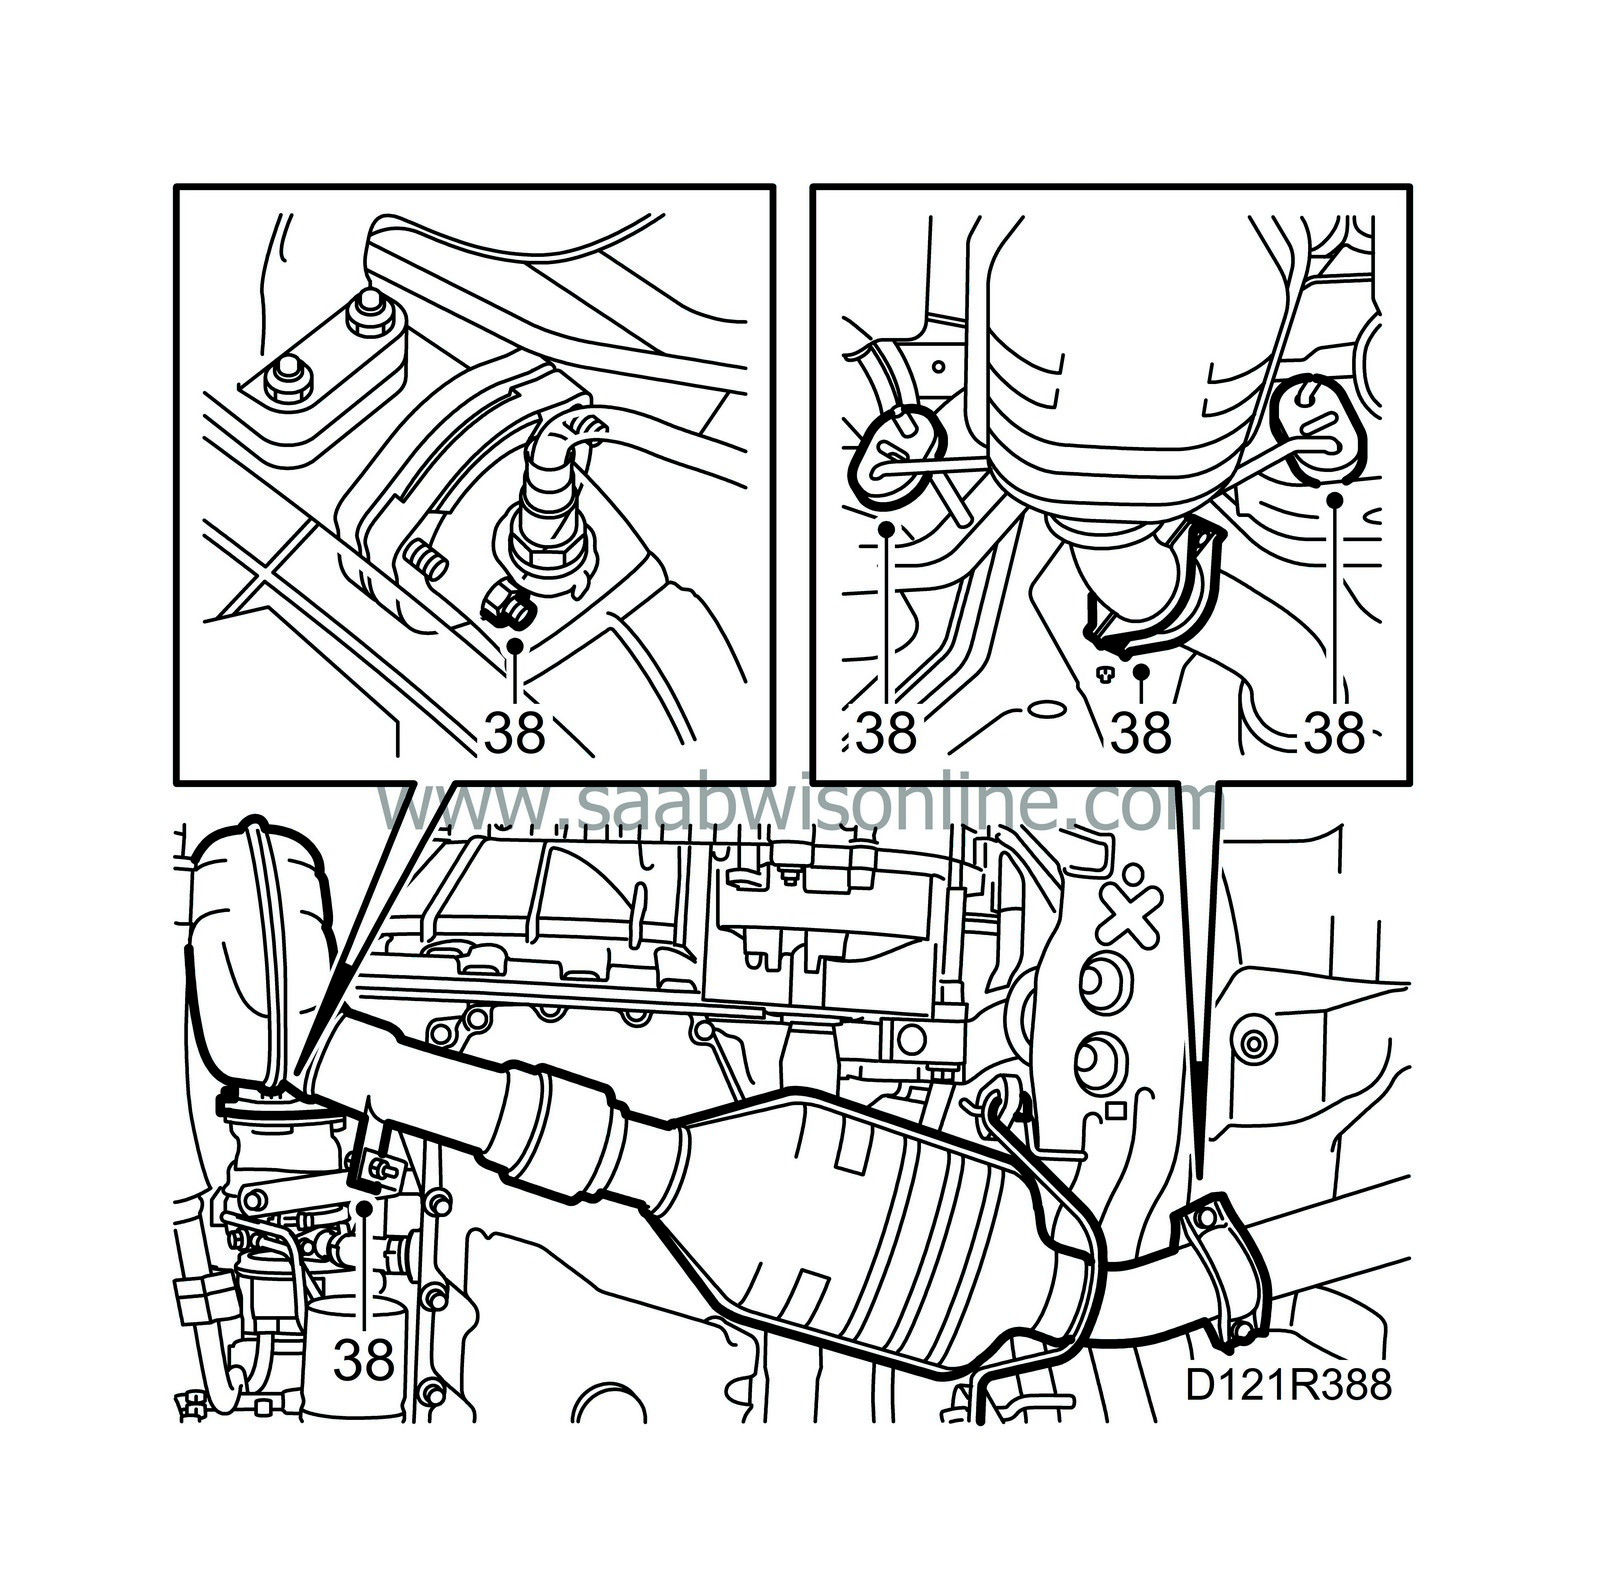
38.
|
Remove the lower nut and holder from the exhaust pipe. Undo the joint between the front exhaust pipe and the intermediate pipe. Lower the front exhaust pipe.
|
|
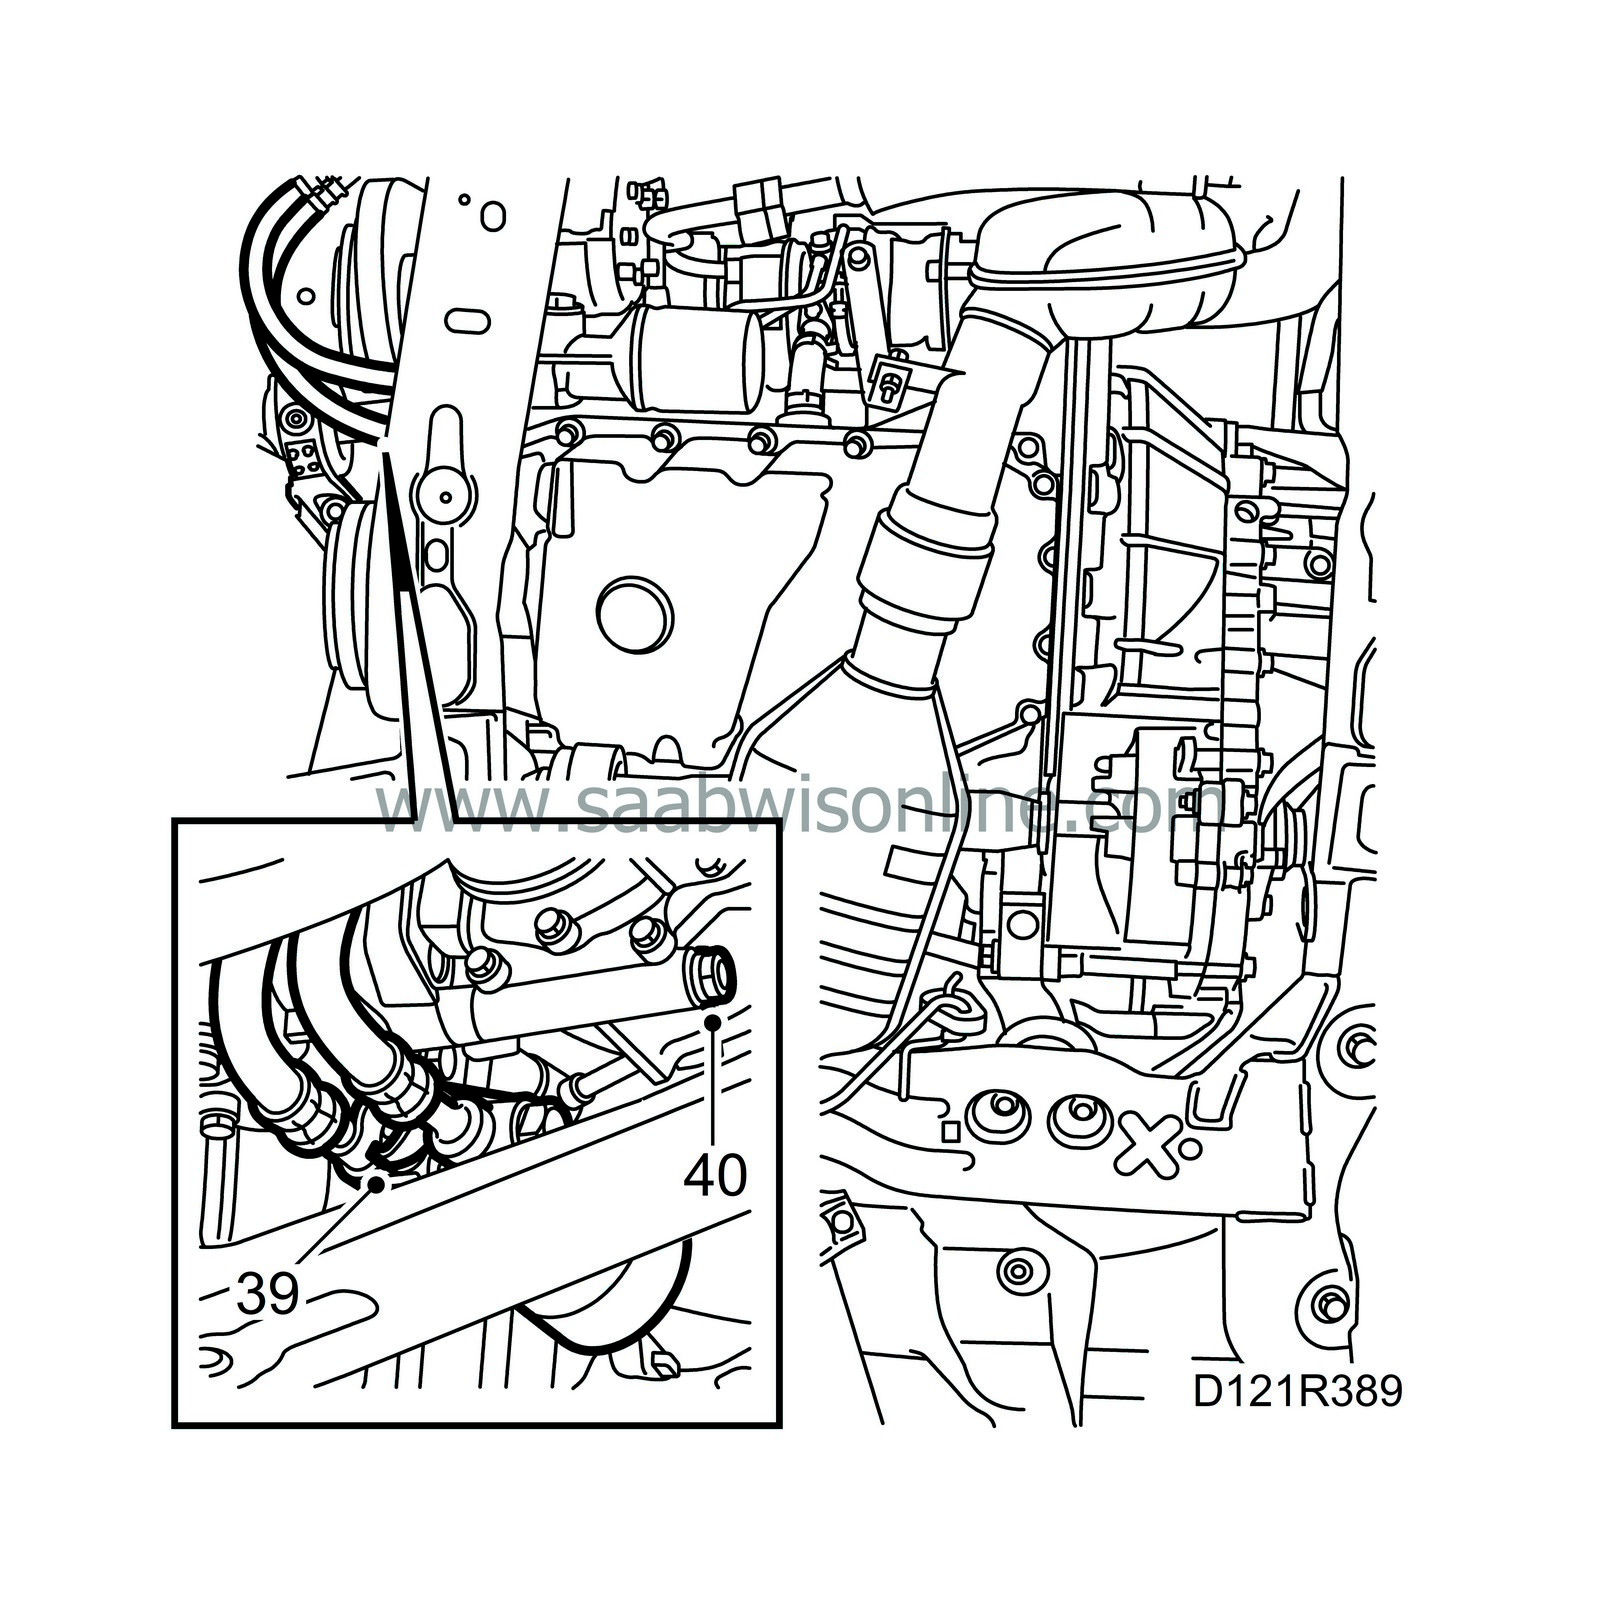
39.
|
Detach the oil hoses leading to the oil cooler and plug the hoses. Place a suitable receptacle underneath to collect any oil that leaks out.
|
|
40.
|
Slacken the lower bolt securing the A/C compressor.
|
|
41.
|
Place a lifting trolley under the car so that the supports are centred under the front engine mountings and the gearbox. Remove the bolts on the subframe and the front engine mountings.
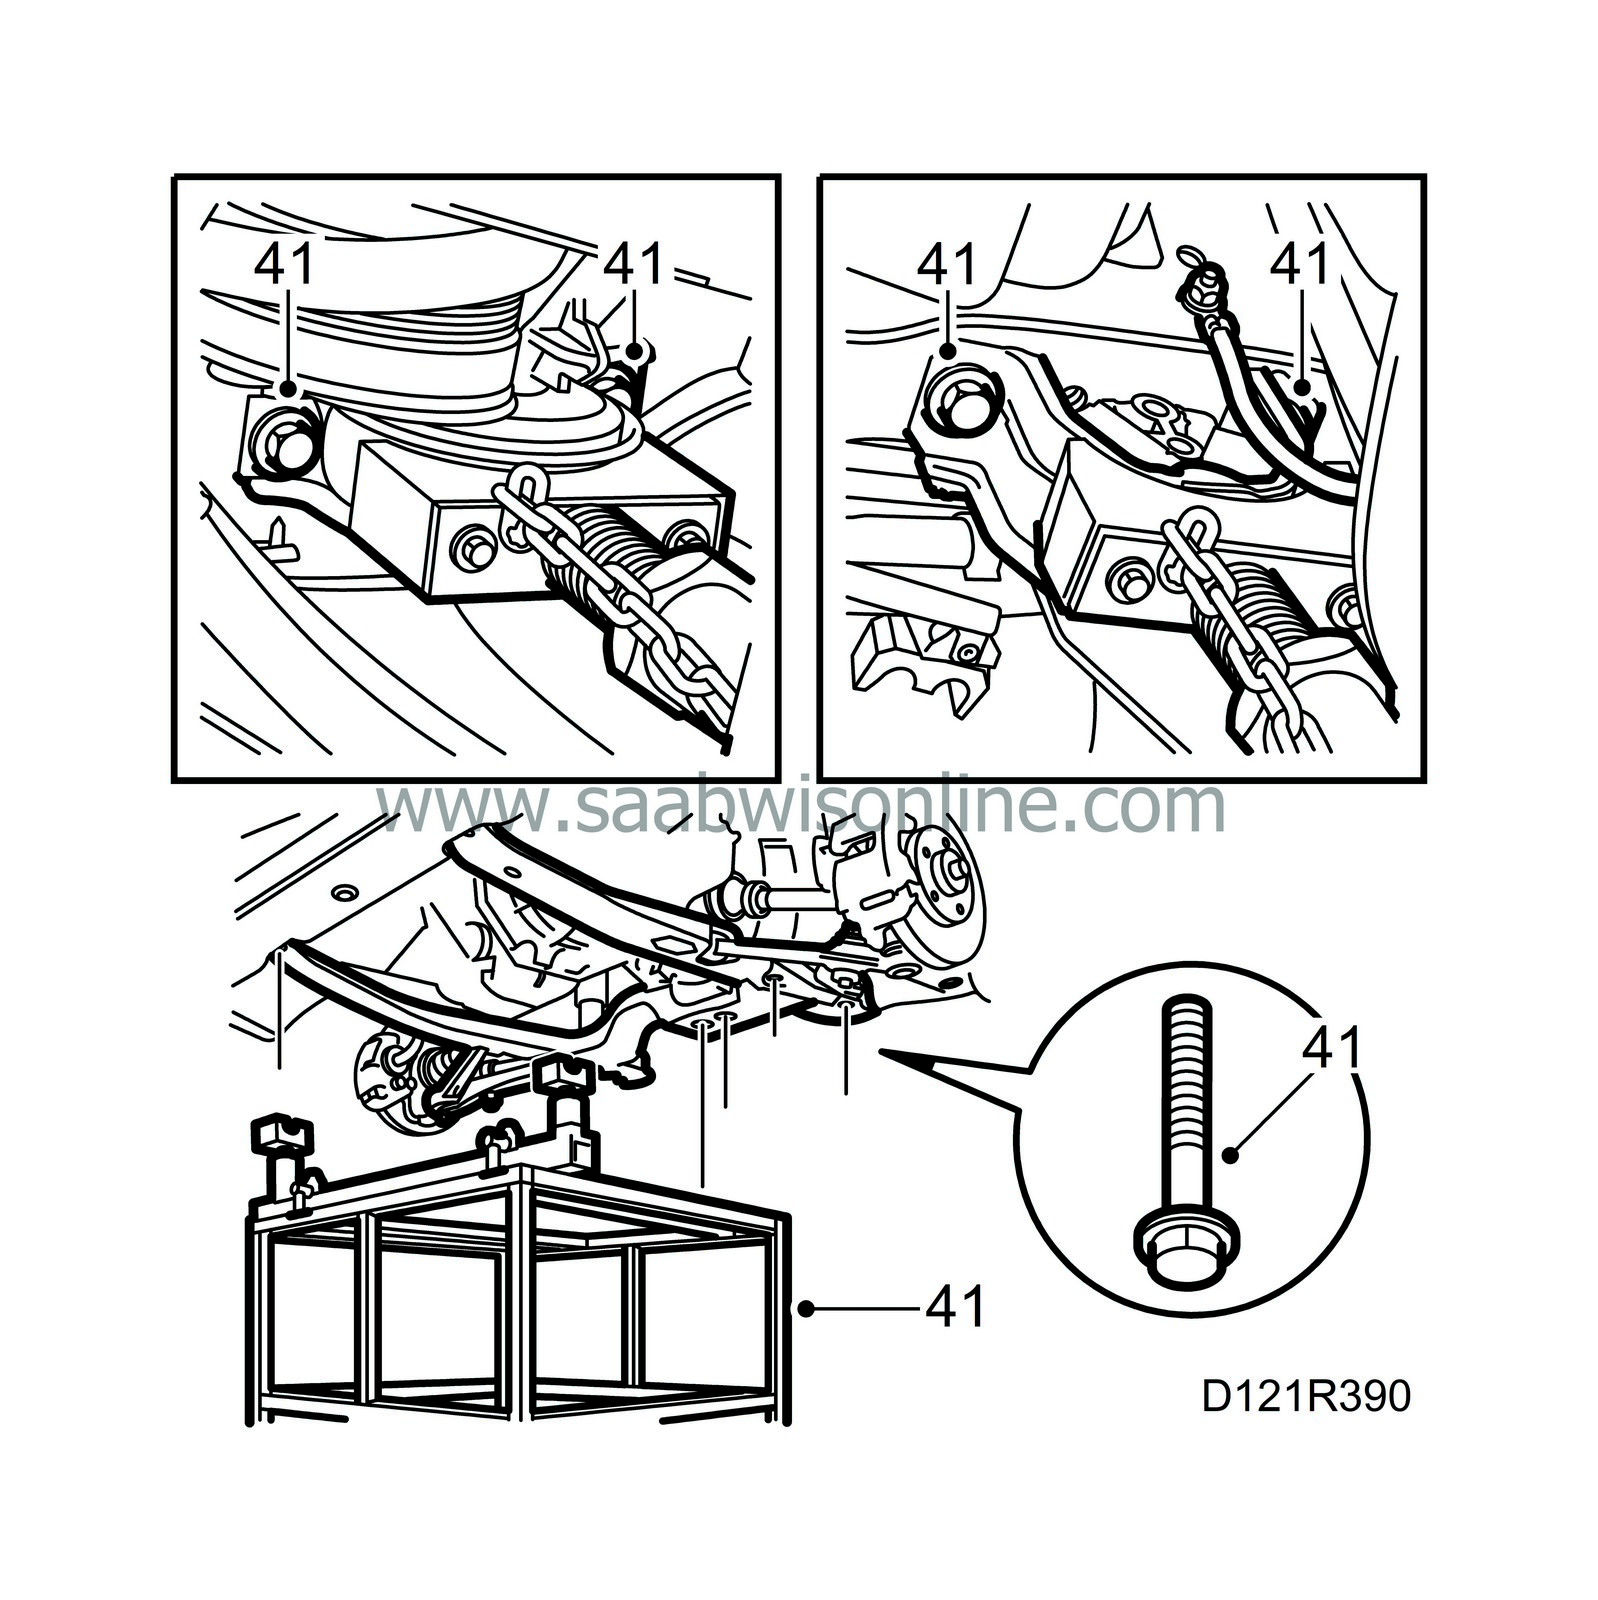
|
|
42.
|
Lower the lifting trolley slightly and with it the drive train and subframe. Remove the drive shaft from the hub on both sides.
|
|
43.
|
Suspend the A/C compressor from the front crossmember. Check that all electrical connectors between the engine and car have been unplugged. Lower the lifting table completely.
|


