PRE-RELEASE
Steering gear, LHD
| Steering gear, LHD |
| 1. |
Slightly lift the front assembly.
|
|
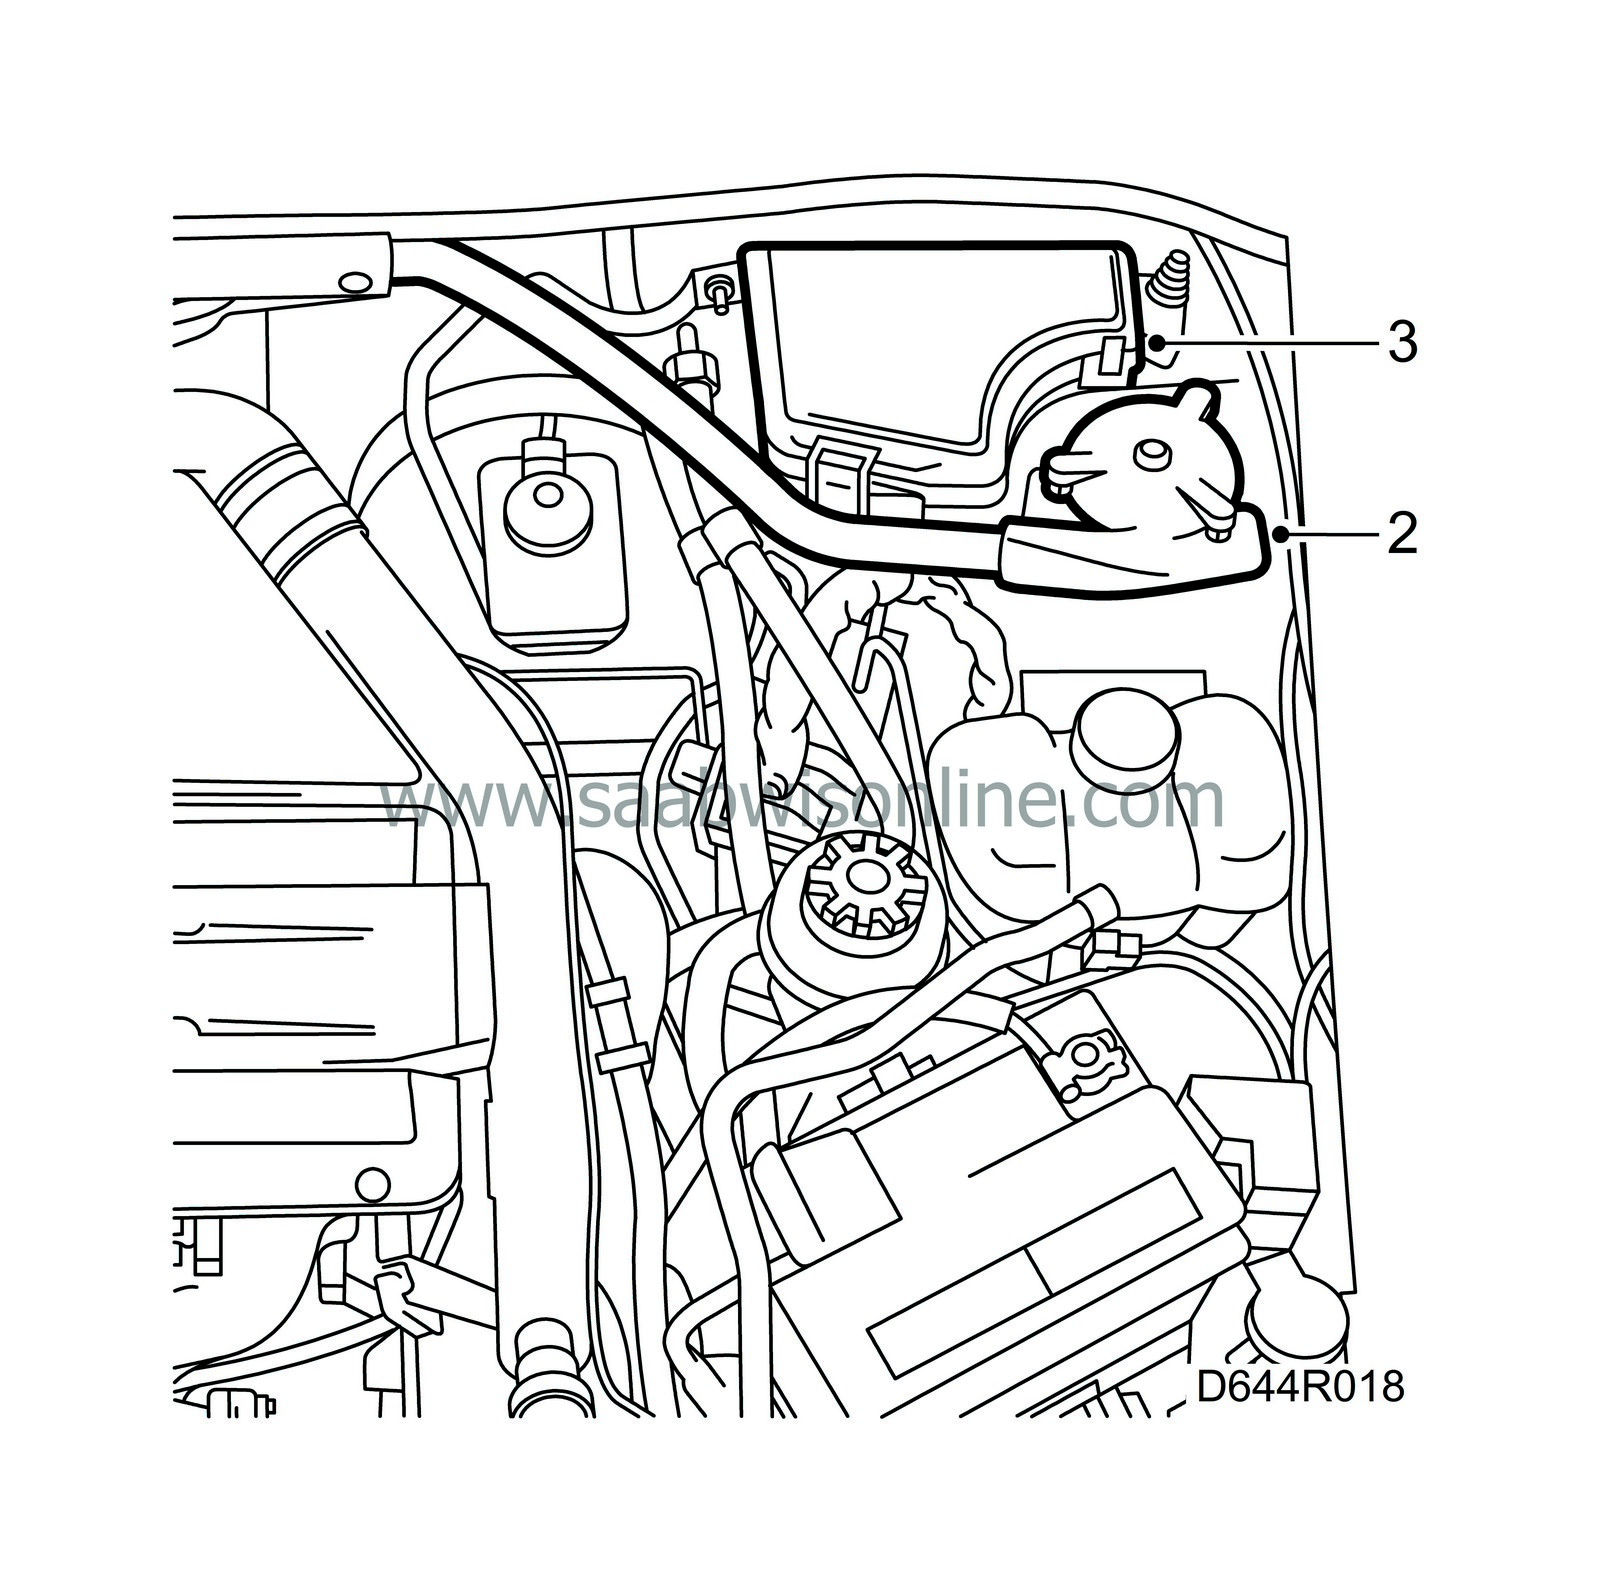
| 2. |
Remove the brace between the MacPherson struts.
|
|
| 3. |
Undo the main fuse box and put it to one side.
Diesel: |
|
| • |
Remove the mass air flow sensor, complete with hoses and air cleaner cover.
|
| • |
Undo the pedal position sensor and put it to one side.
|
| • |
Undo the clamps on the exhaust and intake pipes to the heater.
|
| • |
Undo the heater and put it to one side.
|
| 4. |
Unhook the resonator and put it to one side (not turbo).
|
|
| 5. |
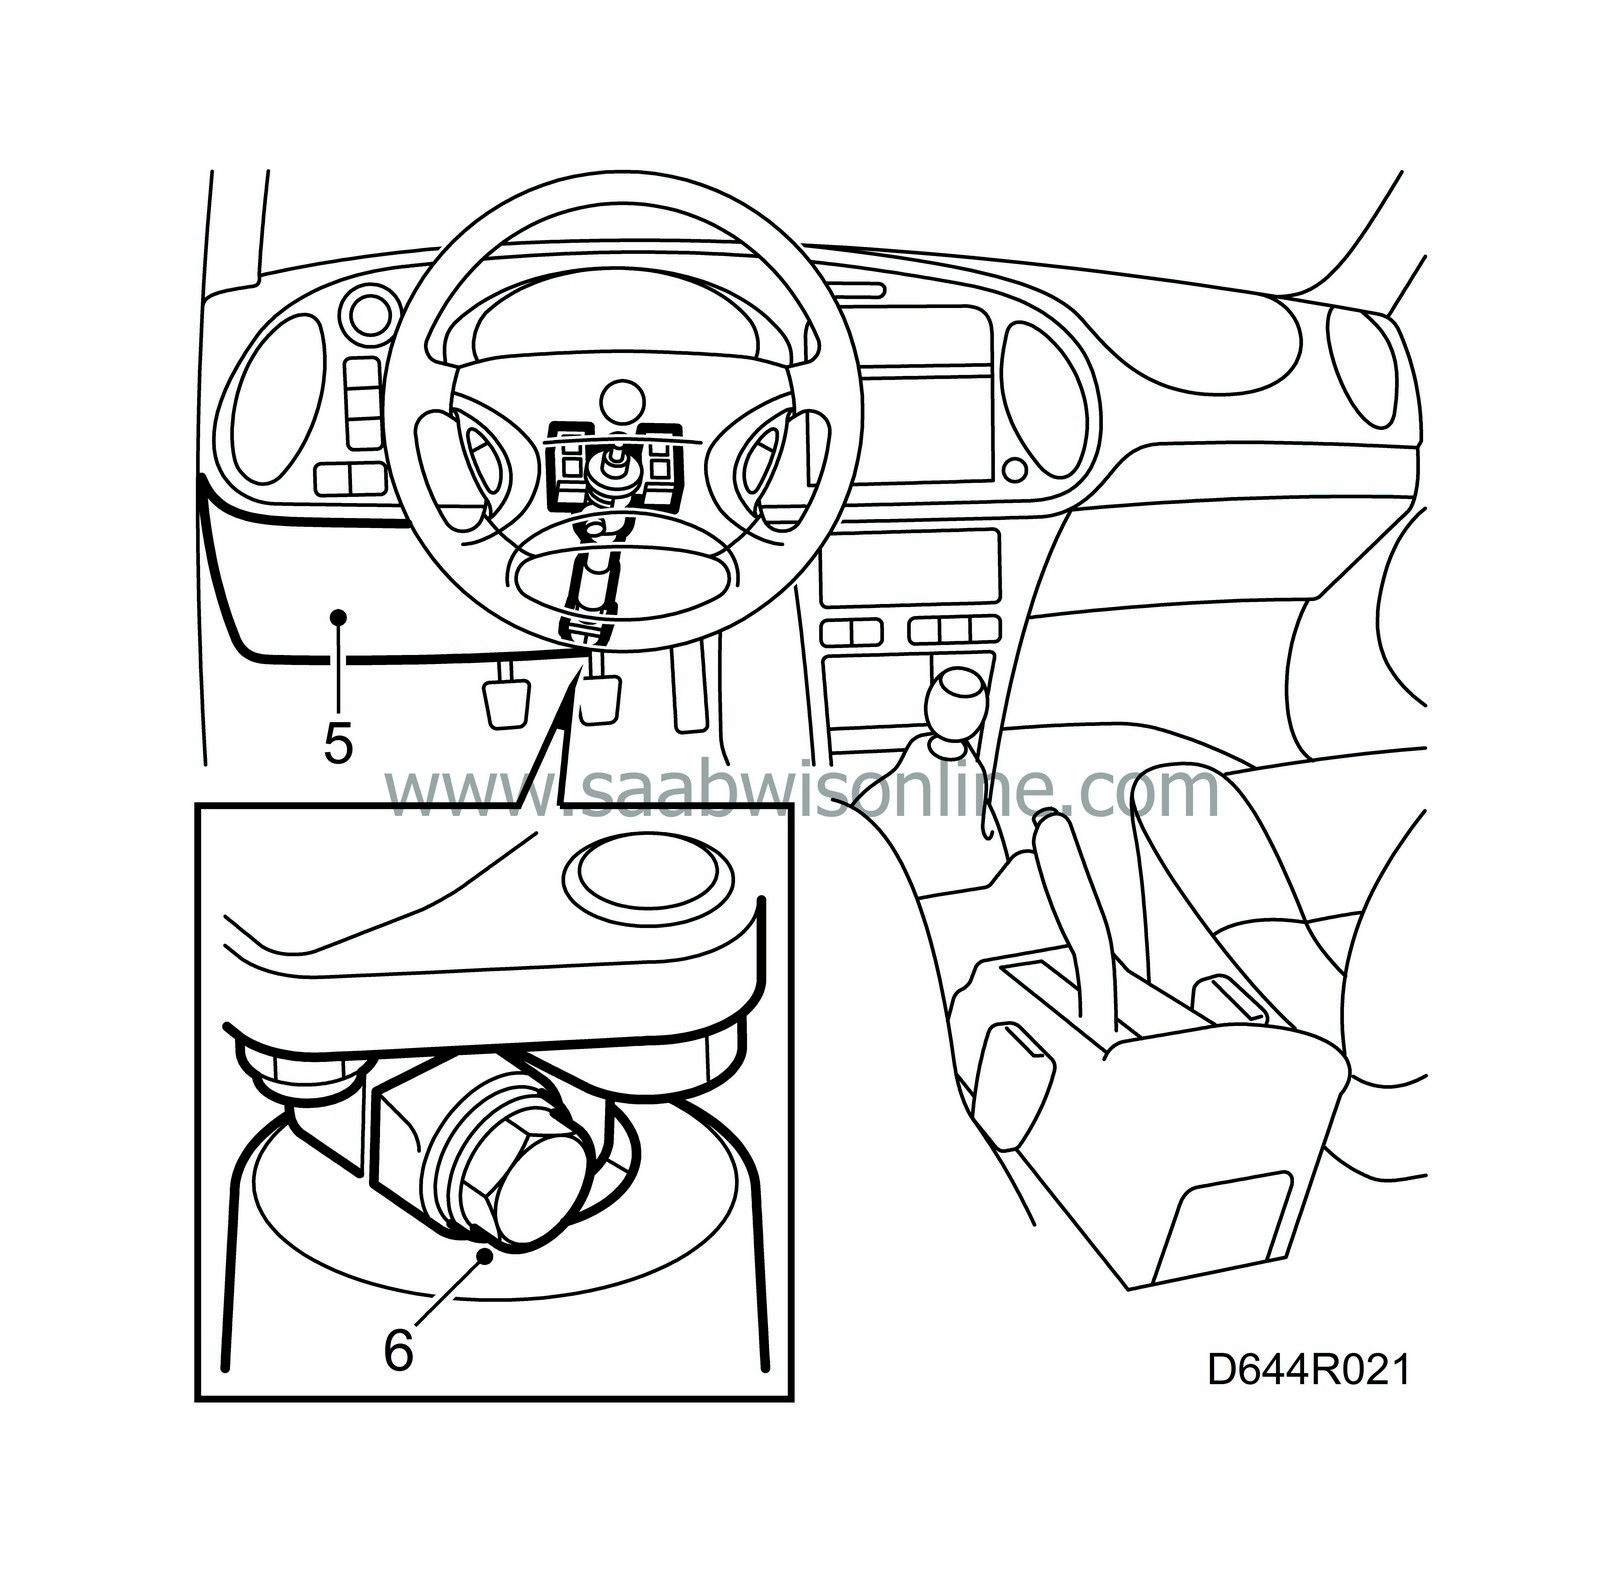
Remove the lower dashboard panel including the data link connector on the driver's side.
|
|
| 6. |
Remove the steering shaft lock bolt.
|
||||||||||||||||||
| 7. |
Turn the steering wheel to the straight-ahead position.
|
|
| 8. |
Lift off the steering shaft from the pinion shaft.
|
|
| 9. |
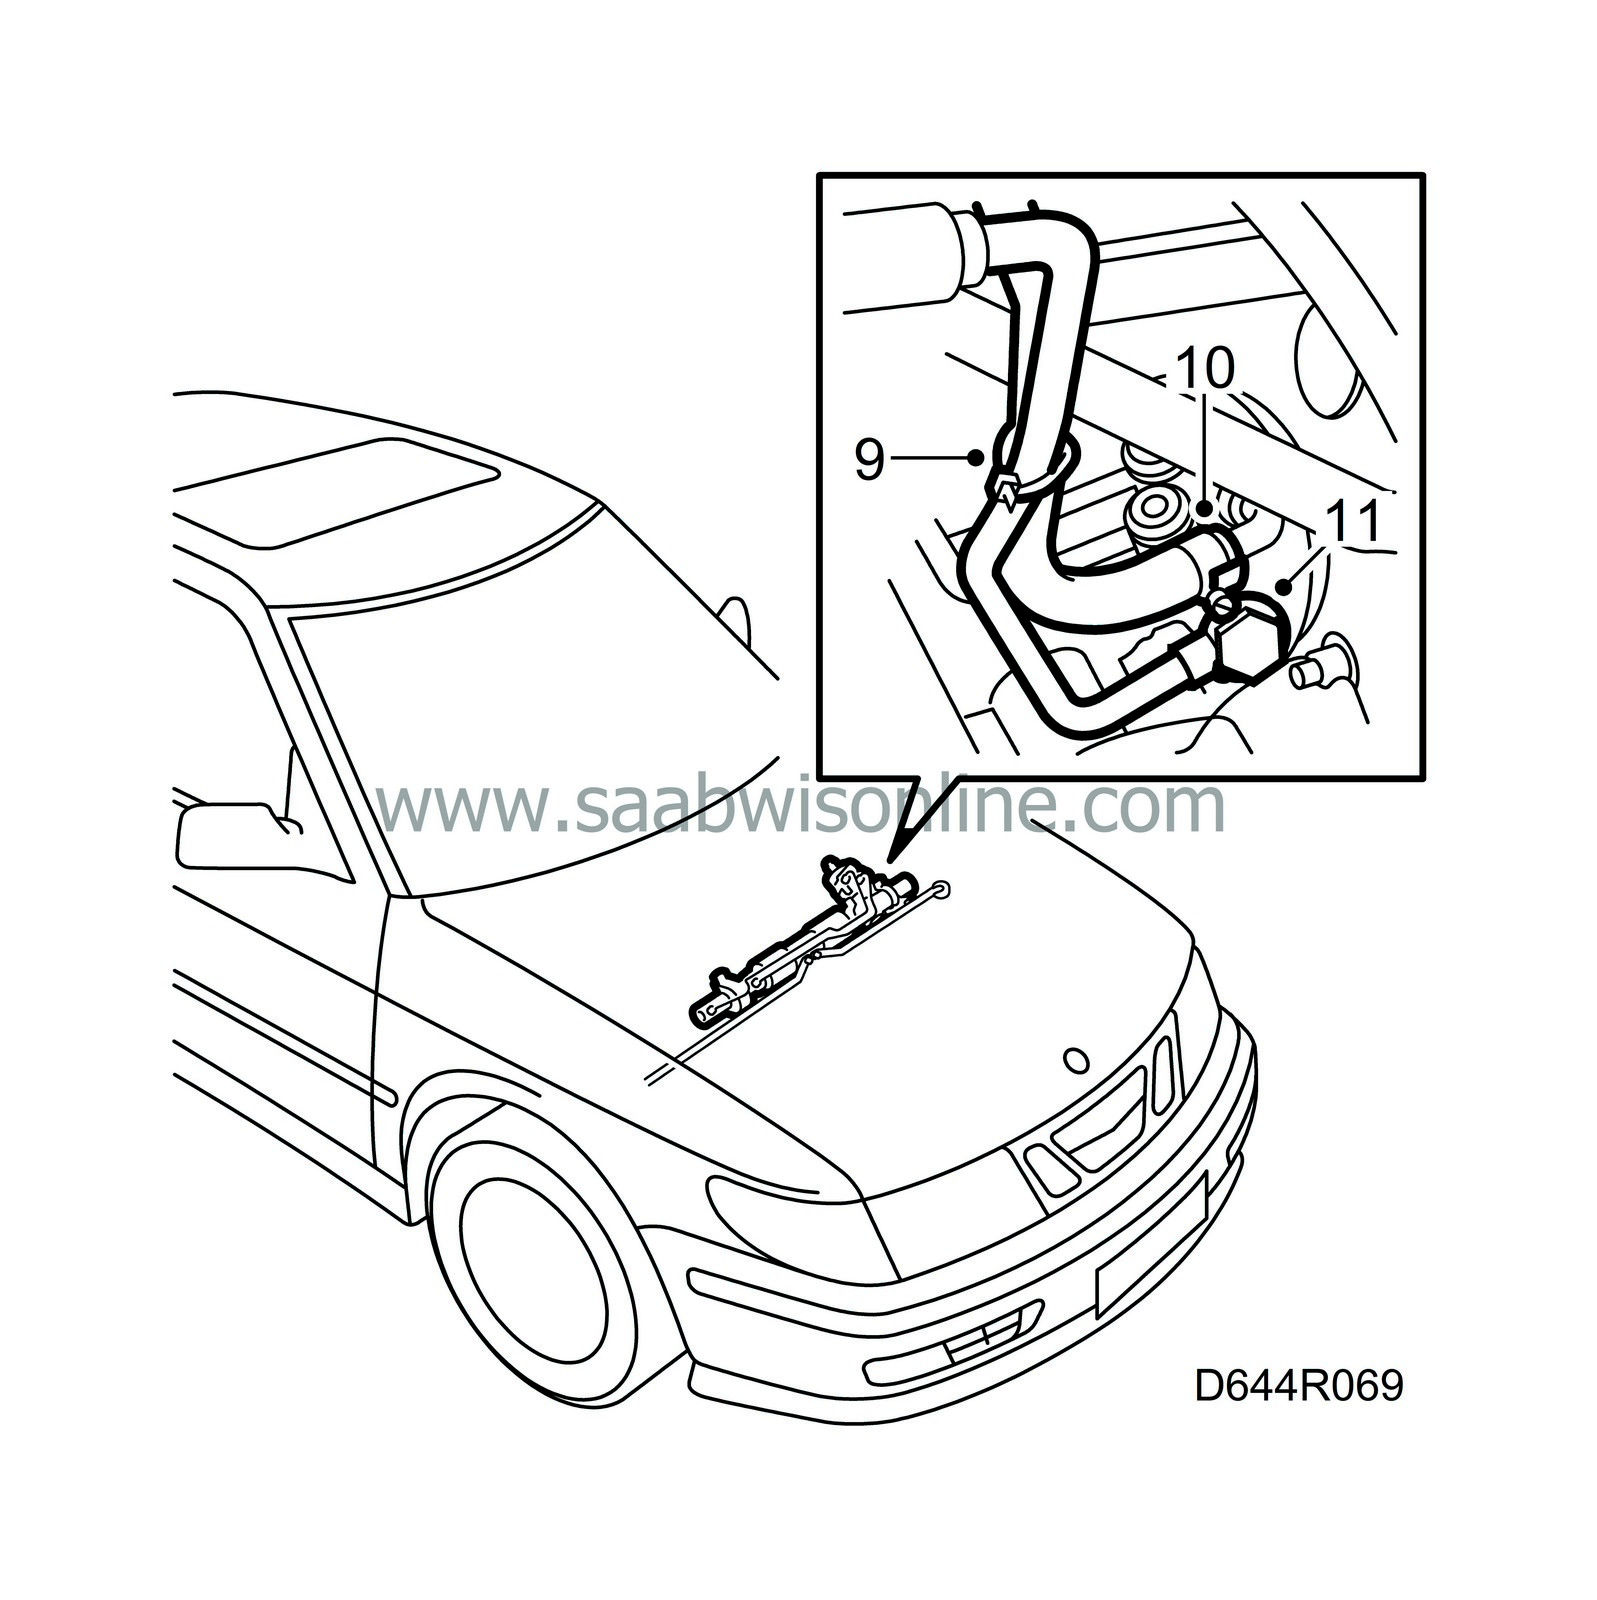
Cut the cable tie between the return hose and the pressure hose and separate the two hoses.
|
|
| 10. |
Detach the return hose from the steering gear and plug it. Pinch together the hose with
30 07 739 Hose pinch-off pliers
. Bend the hose to one side.
|
|
| 11. |
Remove the delivery pipe from the steering gear. Use
Spanner 89 96 852
. Plug the hole in the steering gear. Wipe up any oil spill with a rag.
|
|
| 12. |
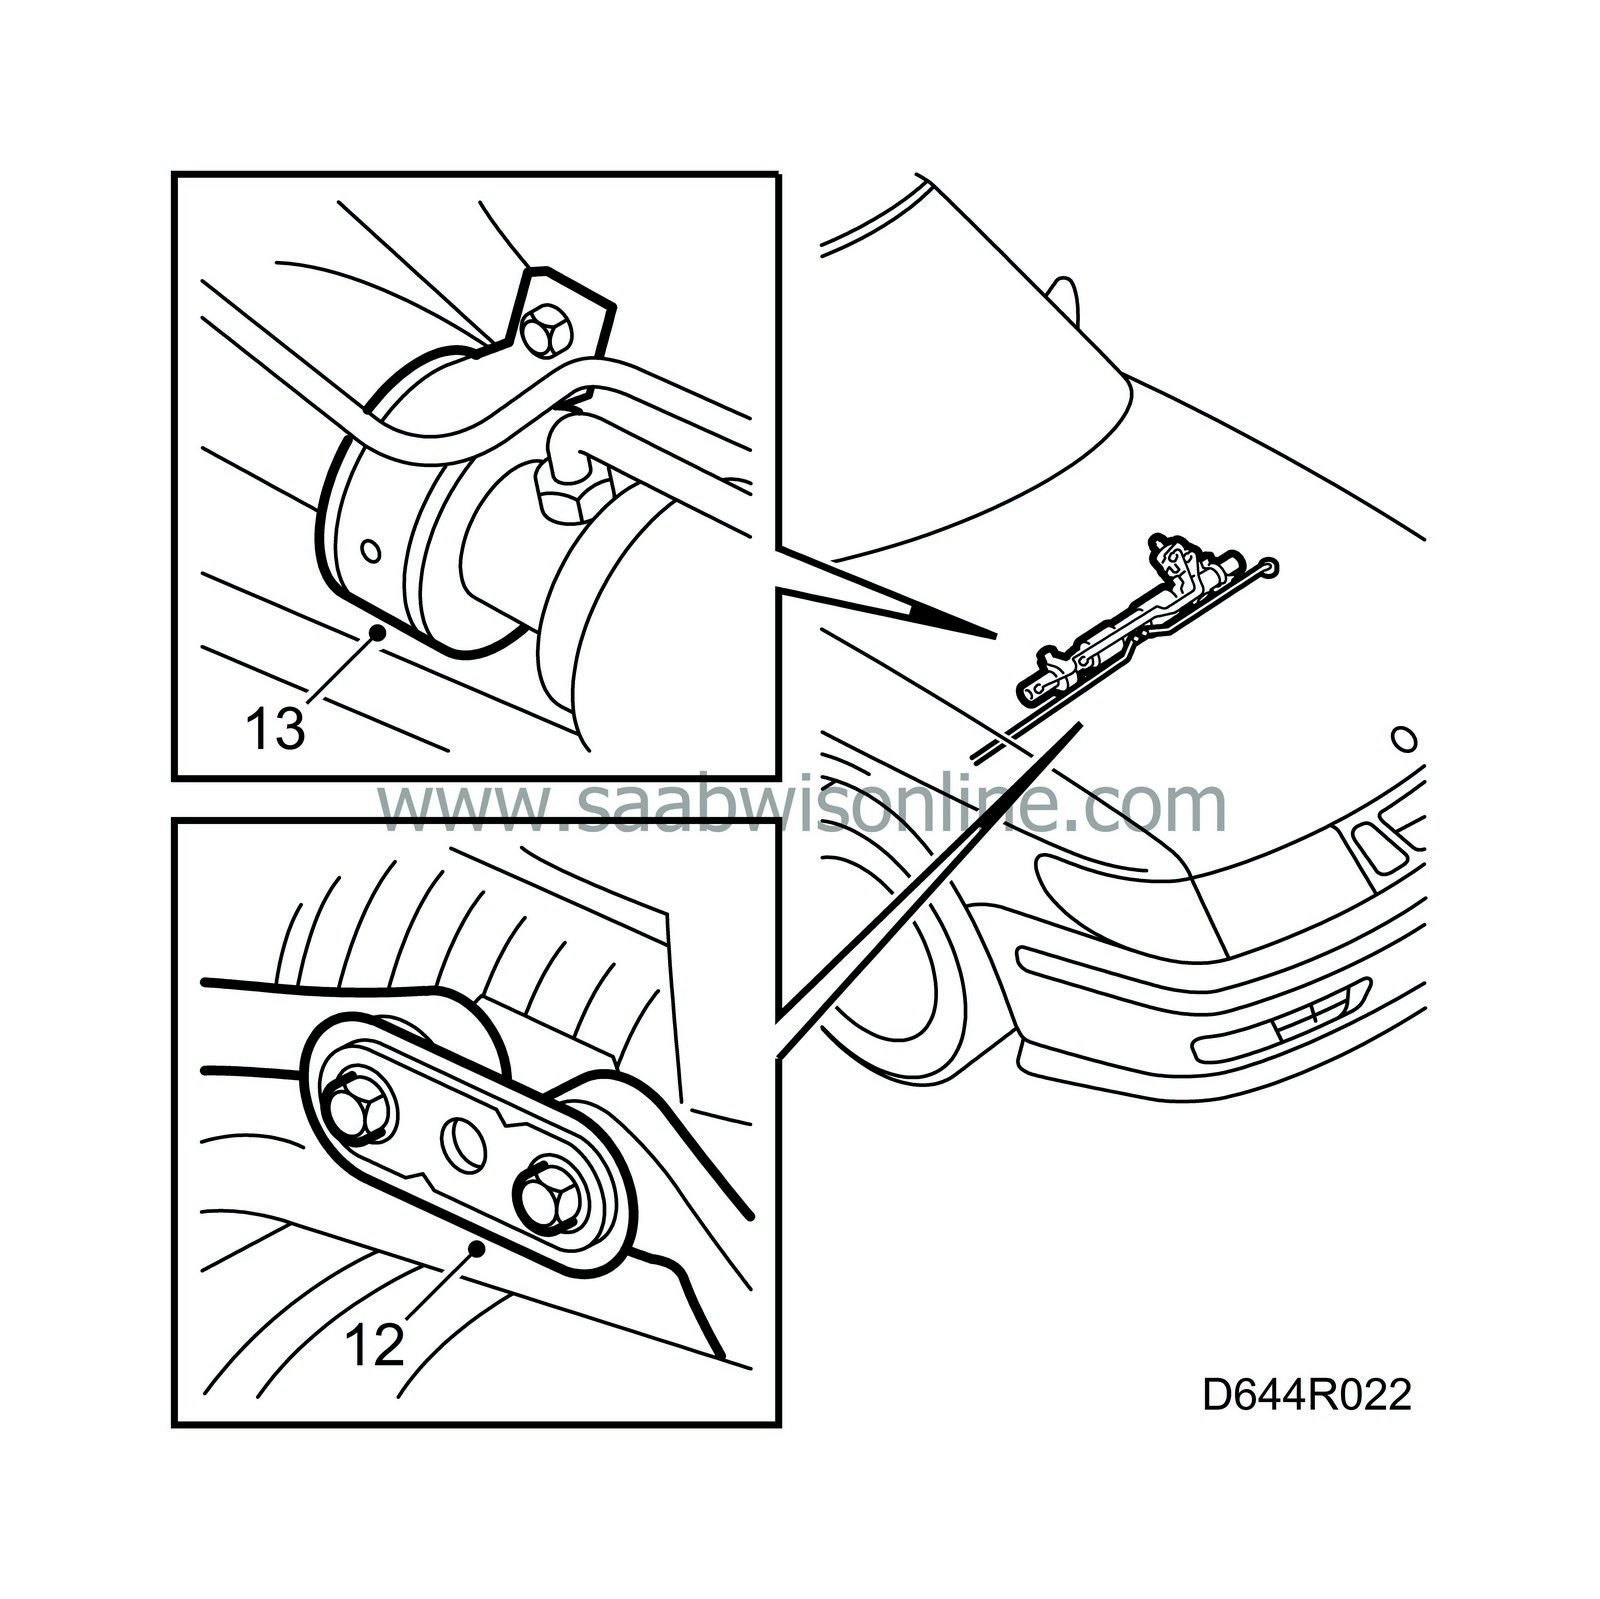
Remove the lock plate and undo the steering arm on the steering gear.
|
|
| 13. |
Remove right and left mounting brackets.
|
|
| 14. |
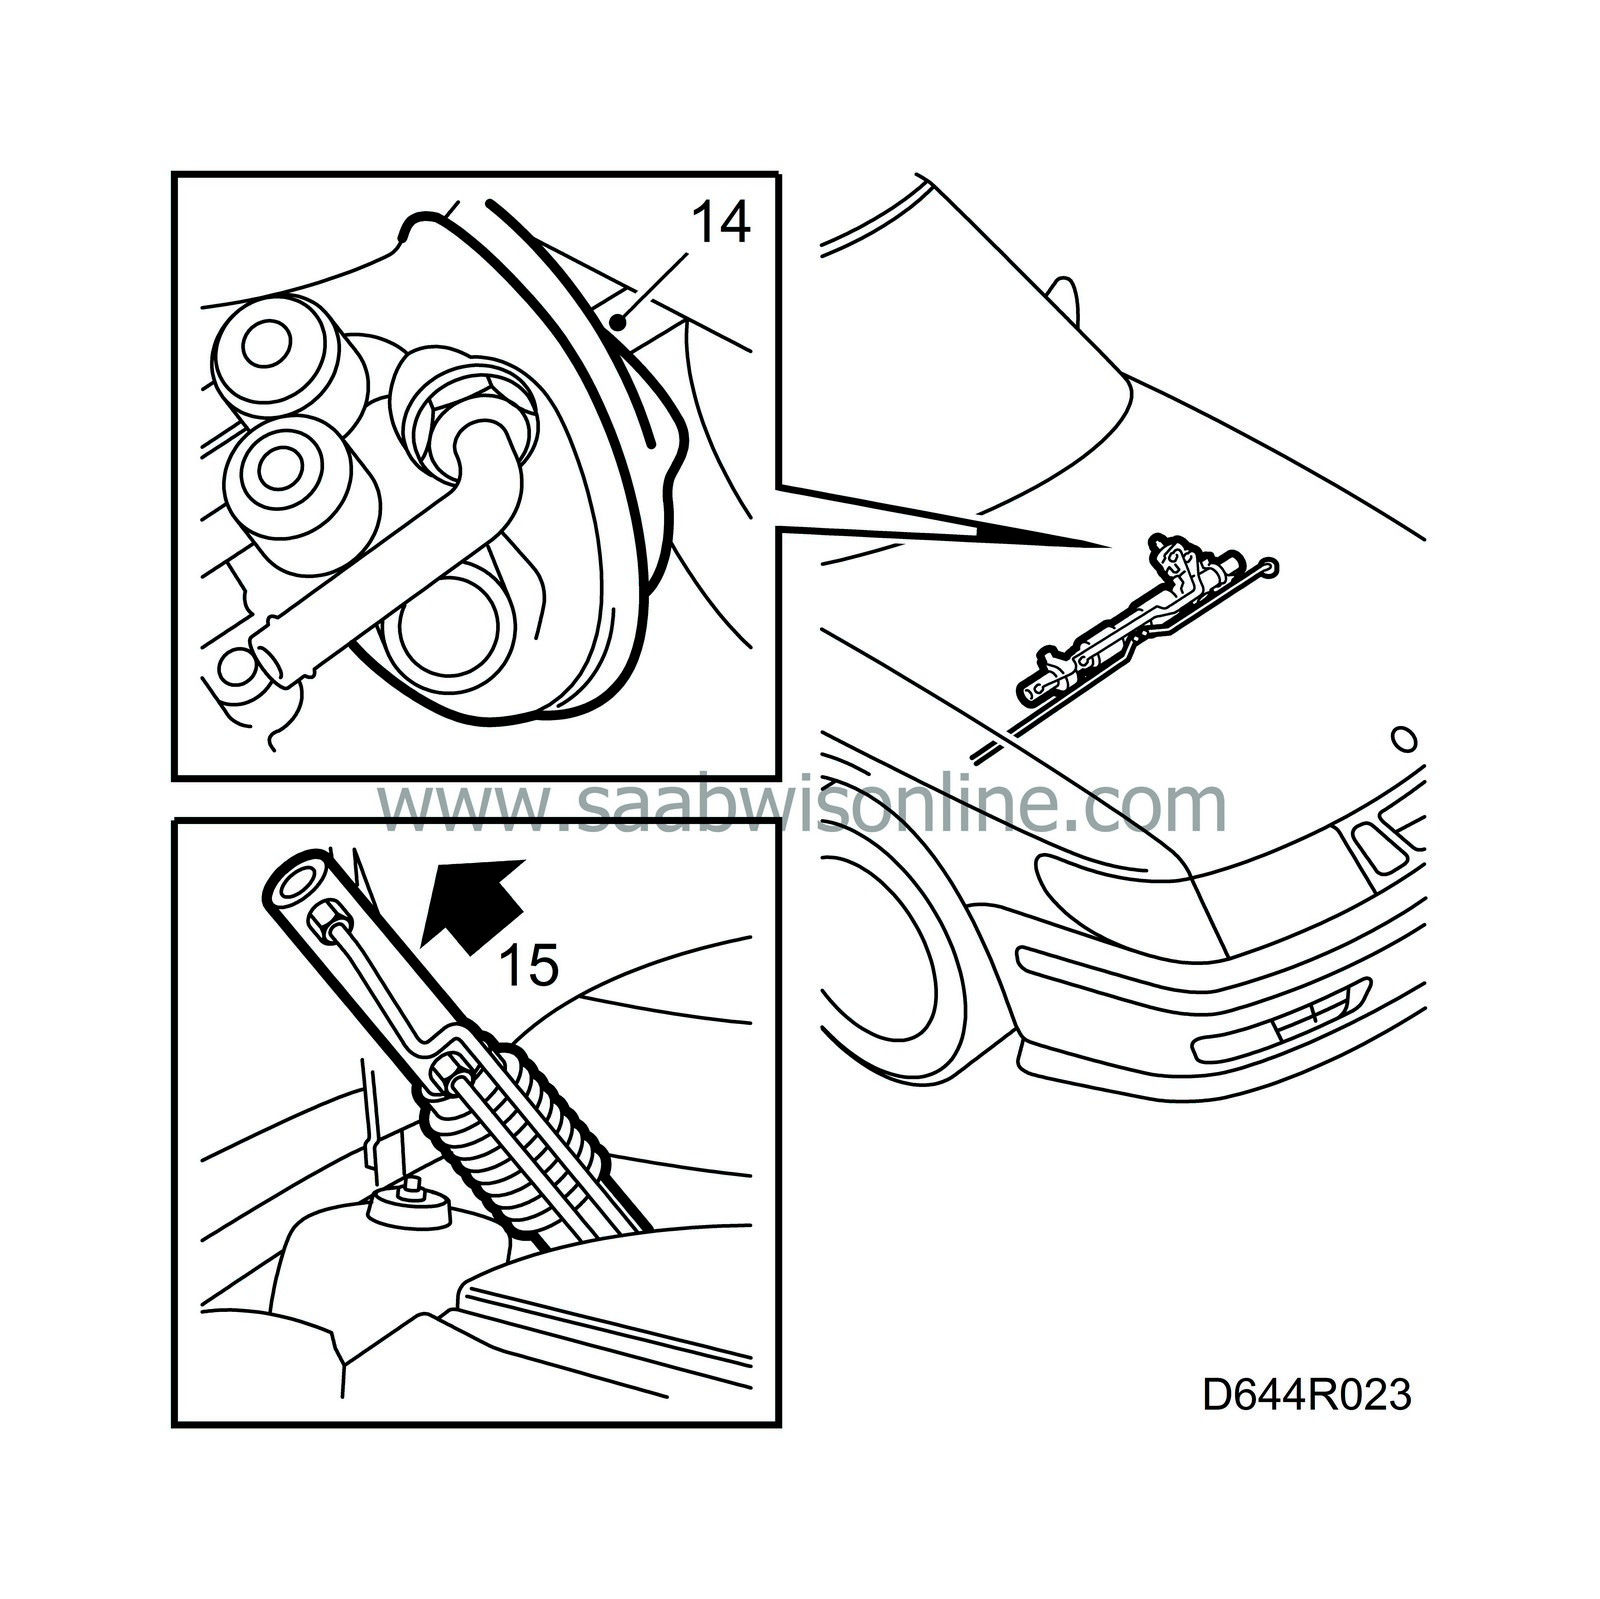
Remove the bulkhead seal.
|
|
| 15. |
Lift up the steering gear through the engine bay.
|
|
| To fit |
| 1. |
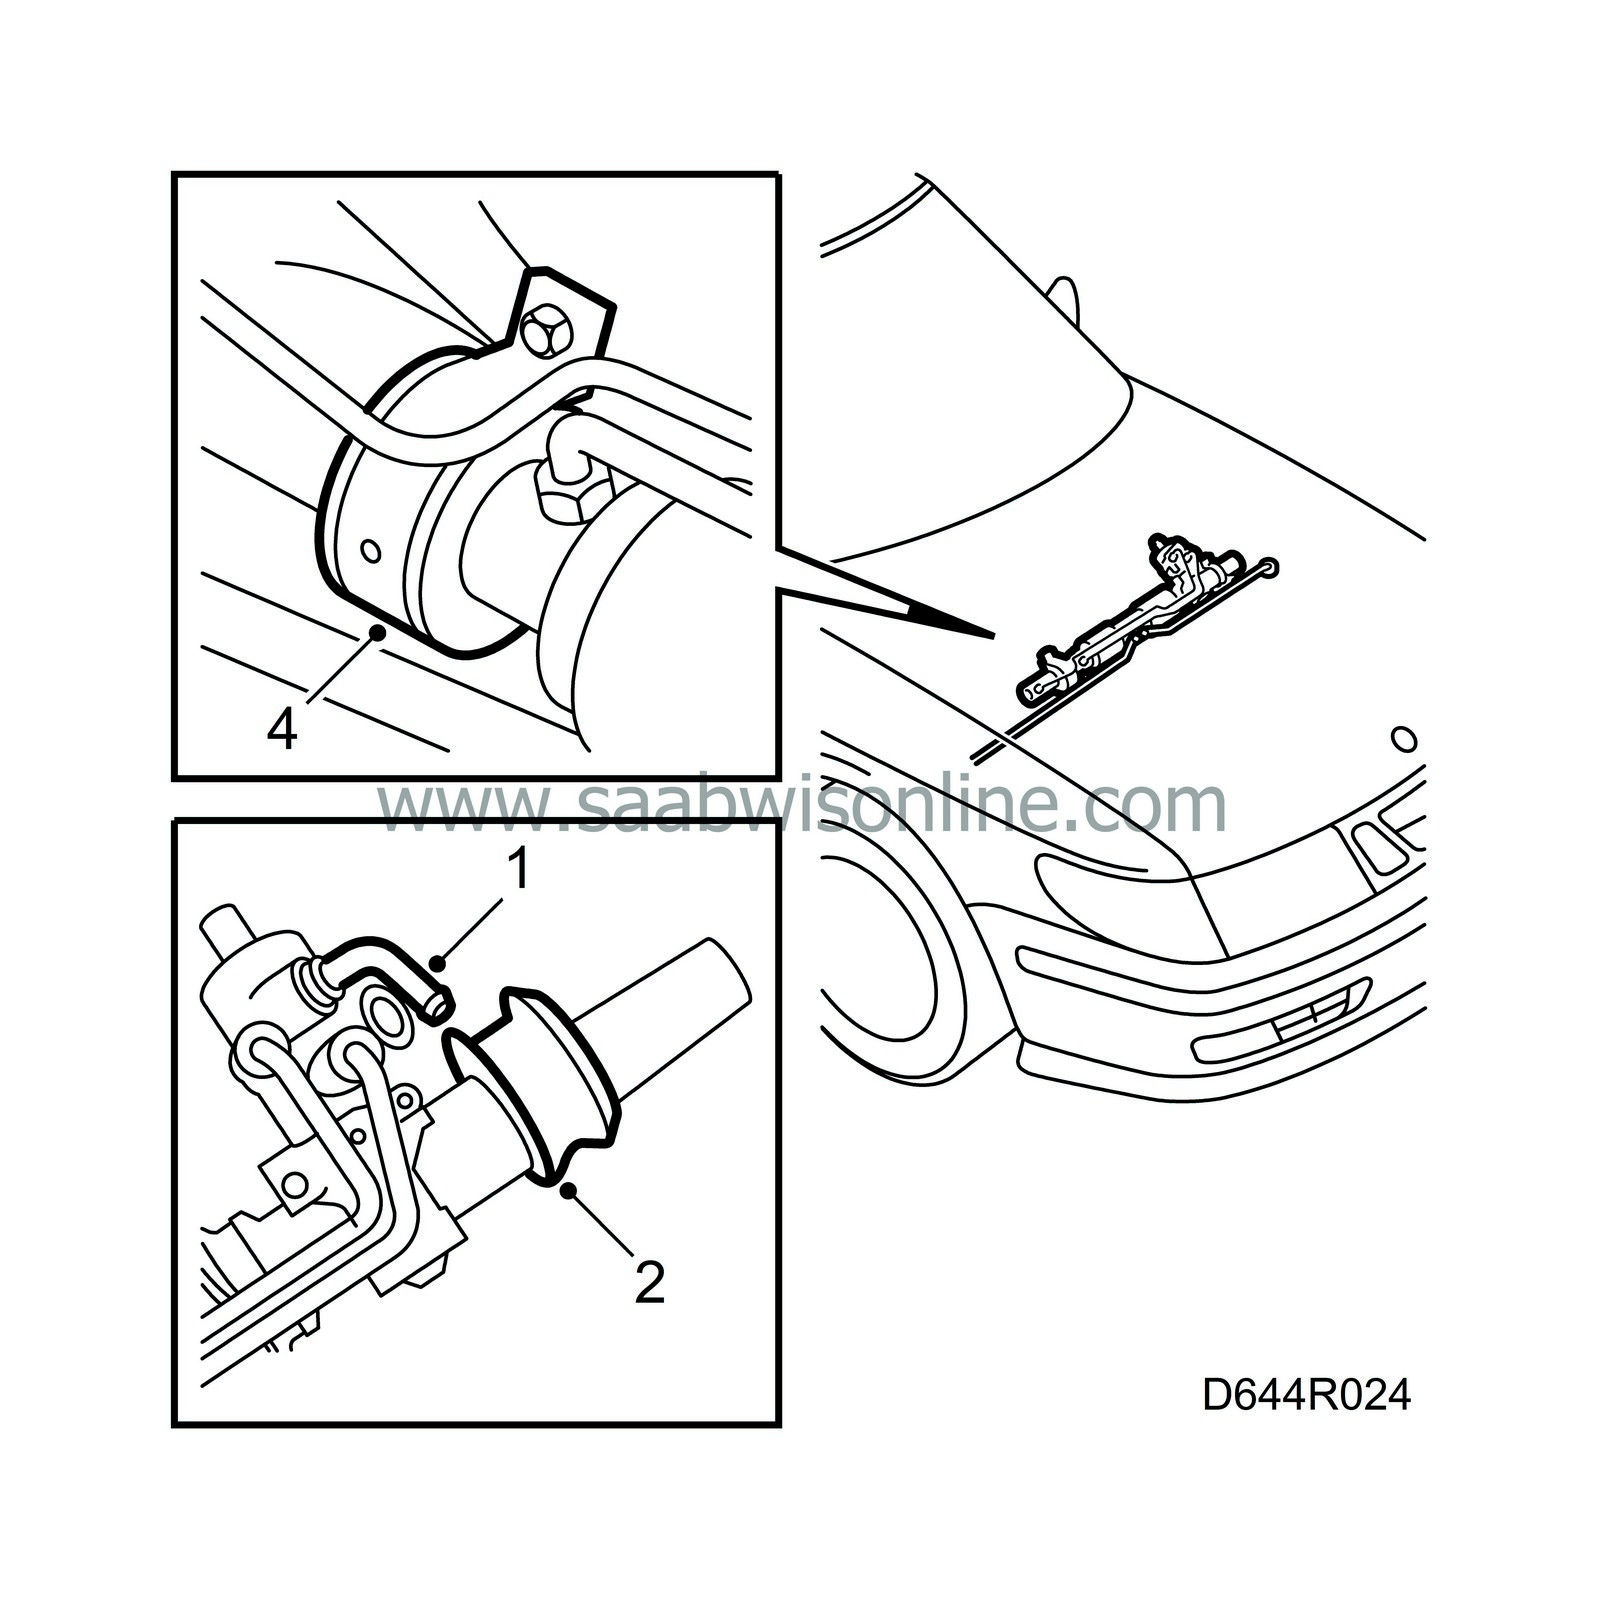
Transfer the return pipe to the new steering gear.
|
|
| 2. |
Fit the rubber bushing (lubricated with petroleum jelly) to the left mounting bracket.
|
|
| 3. |
Position the steering gear in the engine bay.
|
|
| 4. |
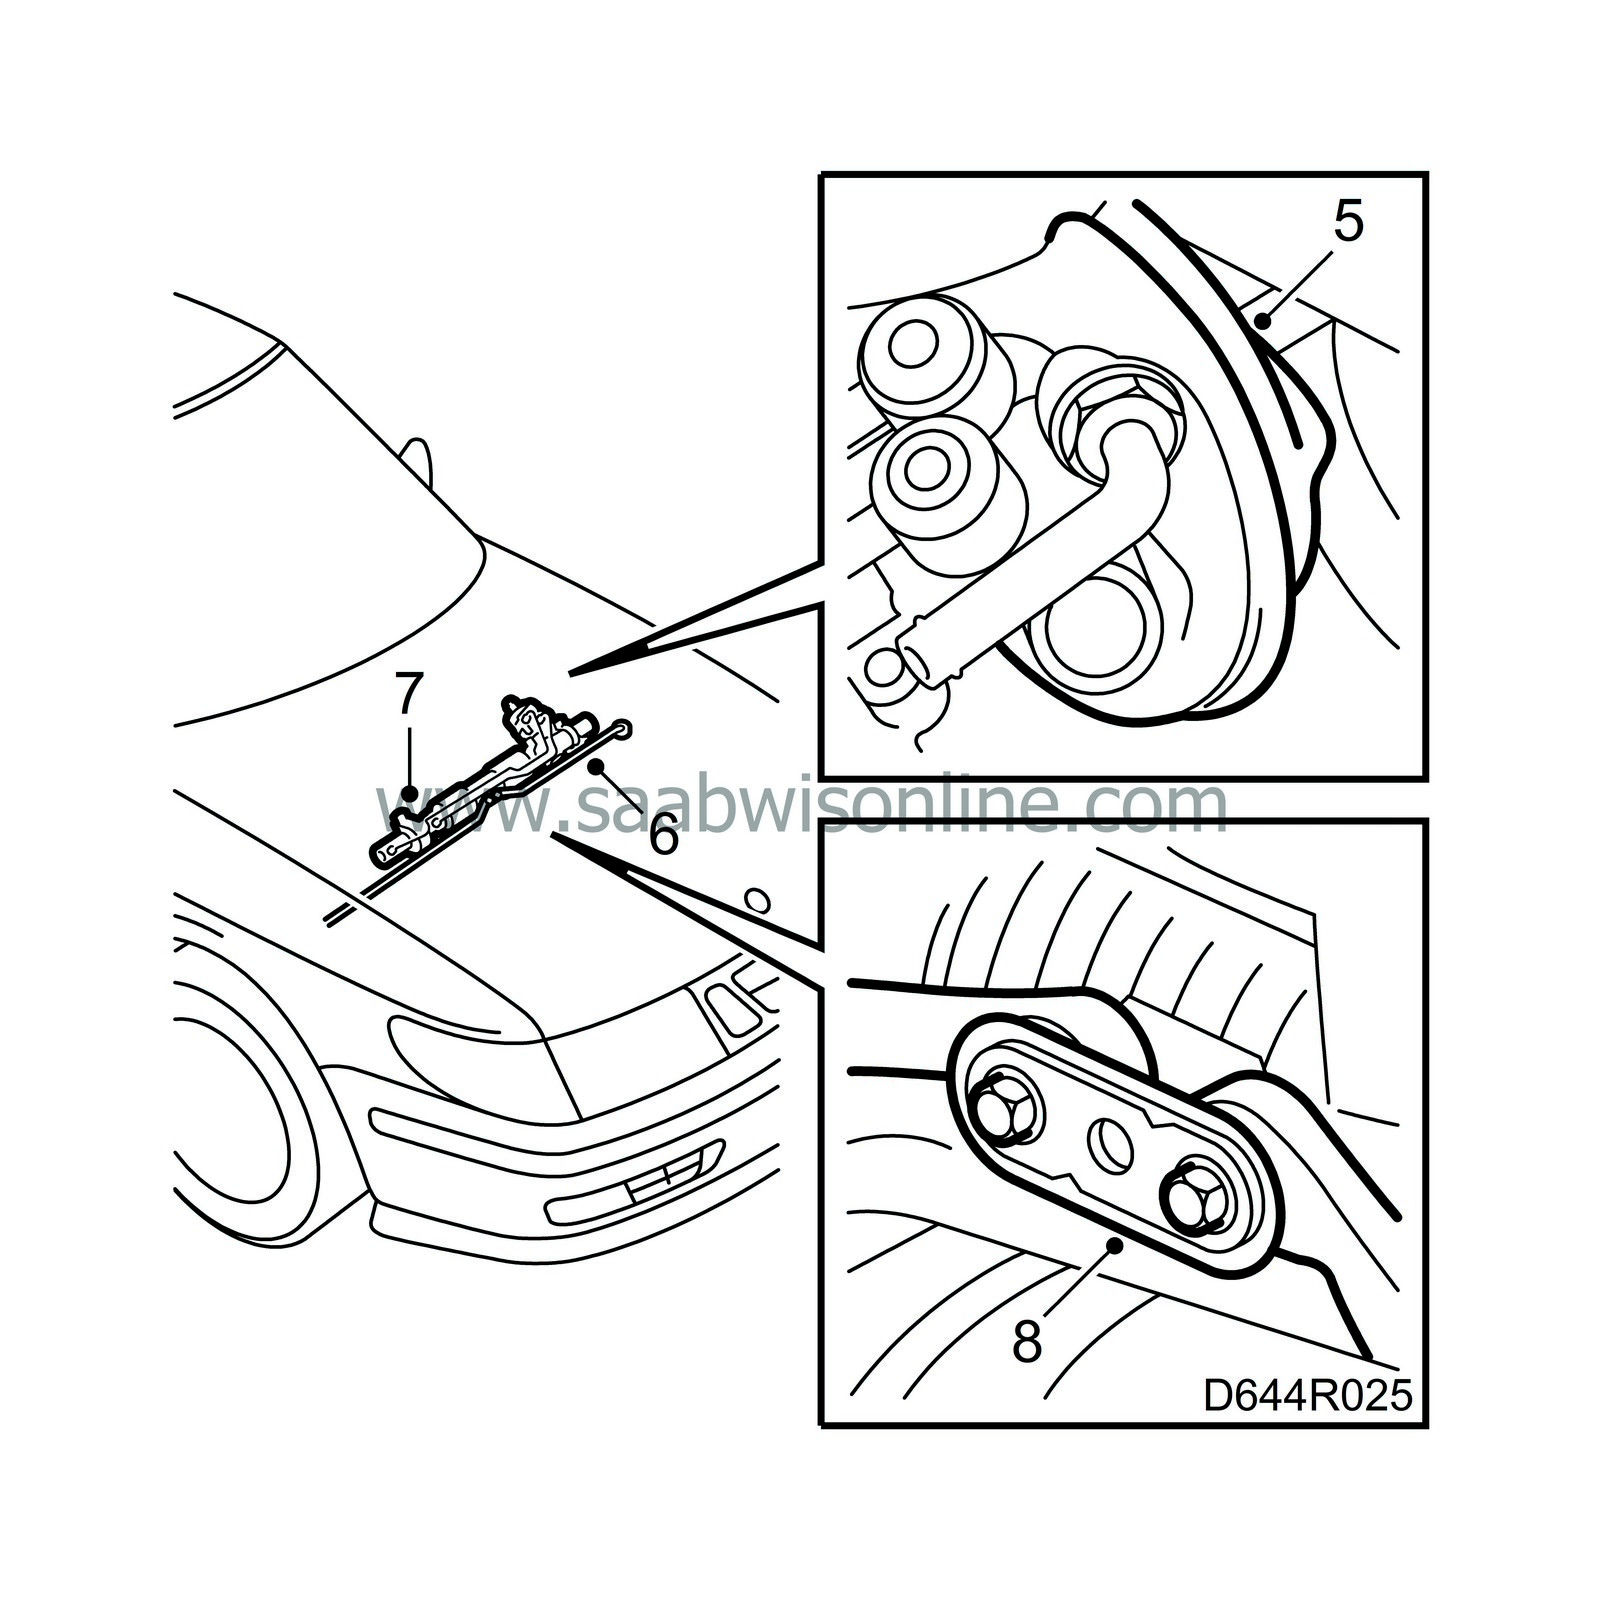
Fit the right mounting bracket with rubber bushing loosely to the bulkhead.
|
|
| 5. |
Fit the bulkhead seal. Position the groove in the seal against the groove in the steering gear.
|
|
| 6. |
Fit the left mounting bracket first. Make sure the smooth surface of the steering gear is against the bulkhead partition. Tighten the bolts (apply Loctite 242, part no. 749 6268, to the mounting bracket bolt).
Tightening torque: 24 Nm (18 lbf ft)
|
||||||||||
| 7. |
Tighten the right mounting bracket with a torque wrench (apply Loctite 242, part no. 749 6268, to the mounting bracket bolt).
Tightening torque: 24 Nm (18 lbf ft) |
|
| 8. |
Fit the suspension arms to the steering gear and tighten them. A new lock plate must be fitted each time the steering gear has been removed from the car.
Tightening torque: 93 Nm (69 lbf ft) |
|
| 9. |
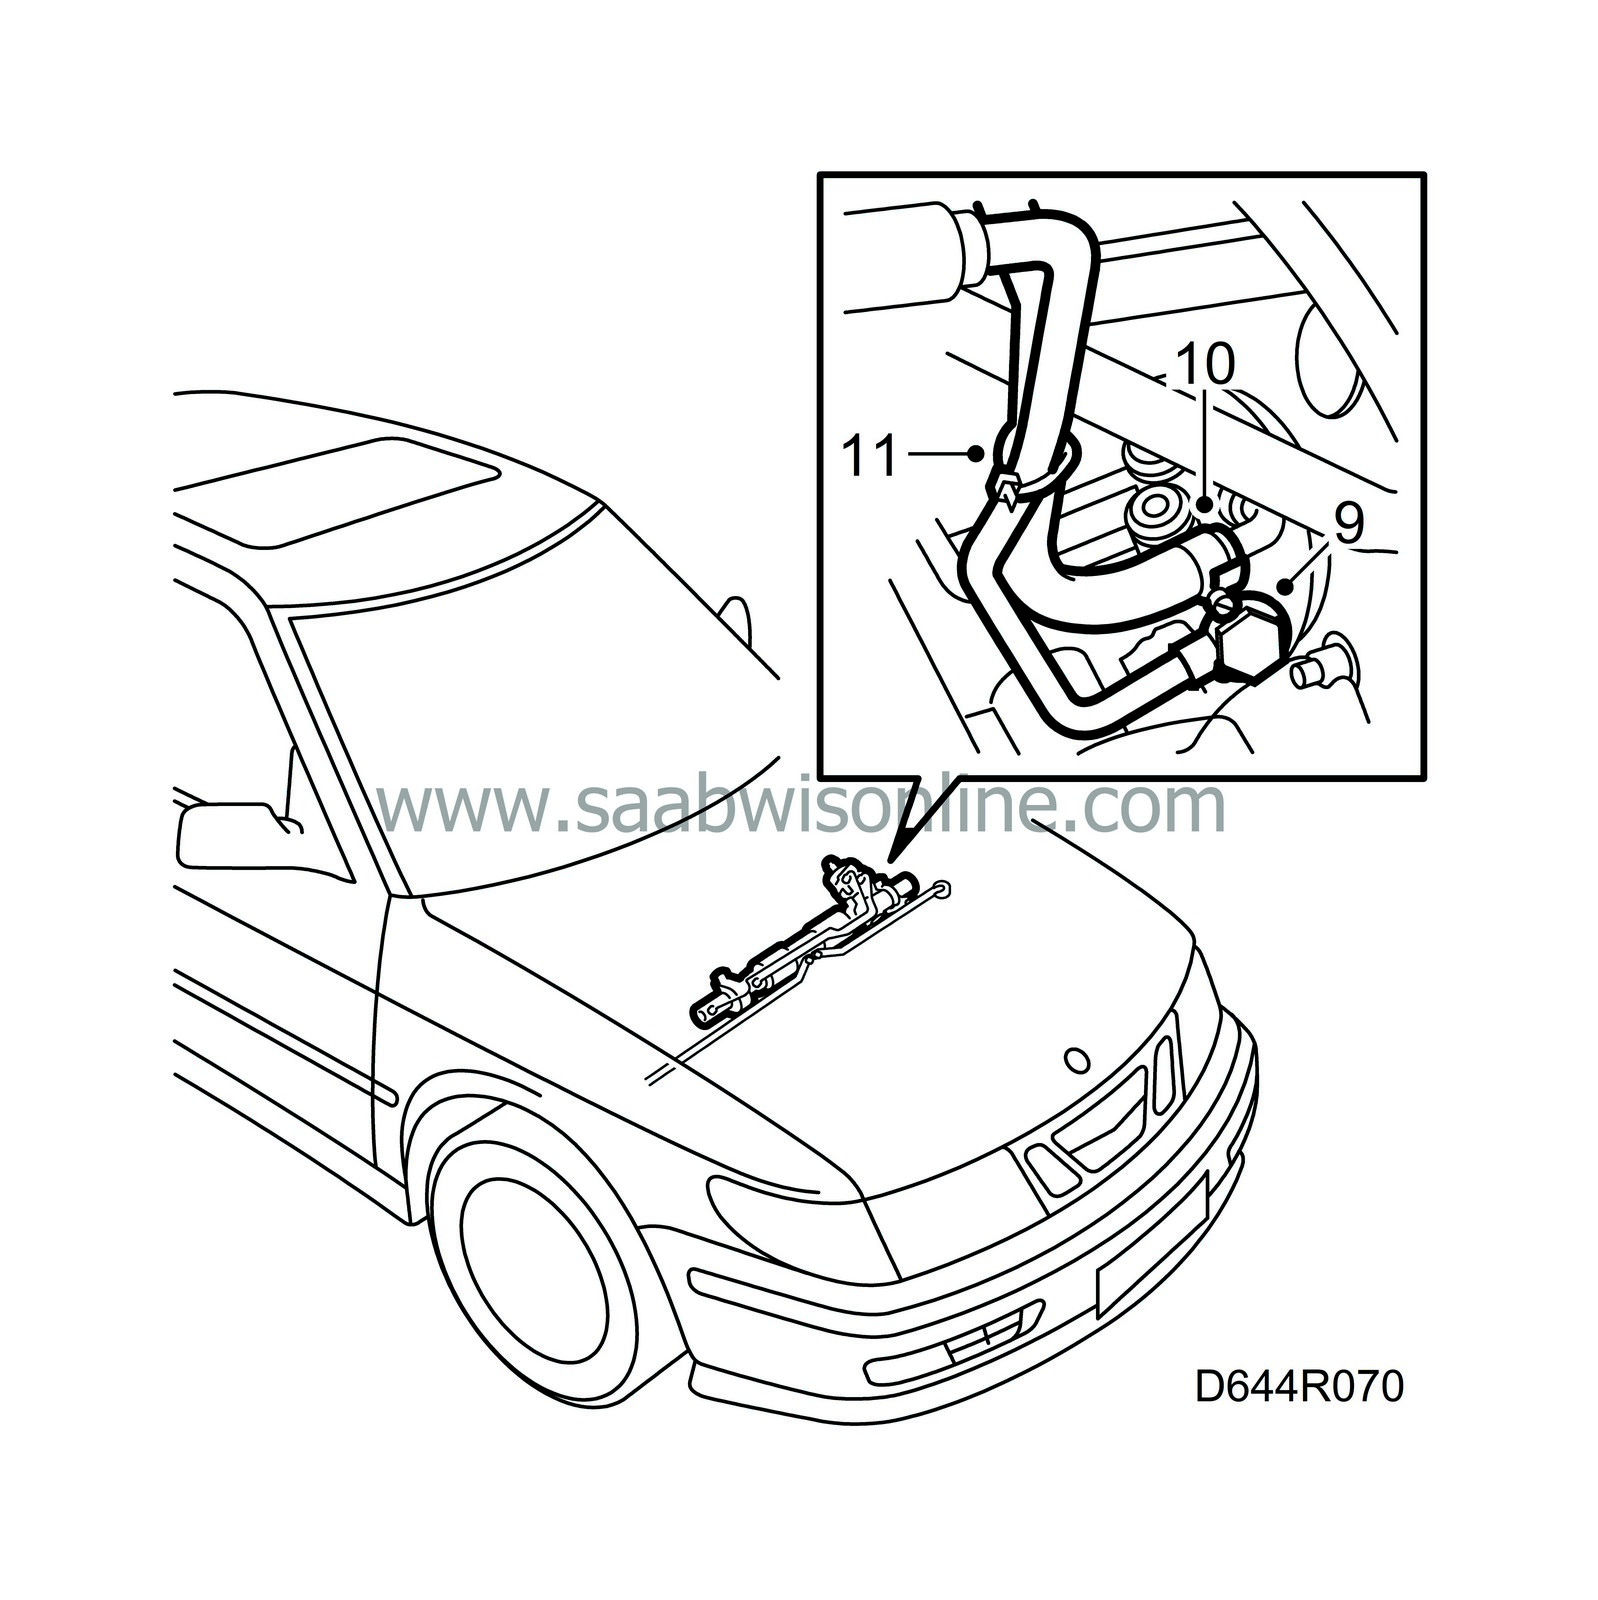
Remove the plug and fit the delivery pipe to the steering gear and tighten it. Use
Spanner, 89 96 852
.
Tightening torque: 28 Nm (21 lbf ft) |
|
| 10. |
Remove the plug from the return hose and fit it to the steering gear.
|
|
| 11. |
Fit a new cable tie between the return hose and the pressure hose and fix them together.
|
|
| 12. |
Fit the main fuse box.
|
|
| 13. |
Fit the resonator (not turbo).
Diesel: |
|
| • |
Fit the heater.
|
| • |
Tighten the exhaust pipe and intake pipe.
|
| • |
Fit the pedal position sensor.
|
| • |
Fit the mass air flow sensor and air cleaner cover.
|
| 14. |
Fit the brace between the MacPherson struts.
|
|
| 15. |
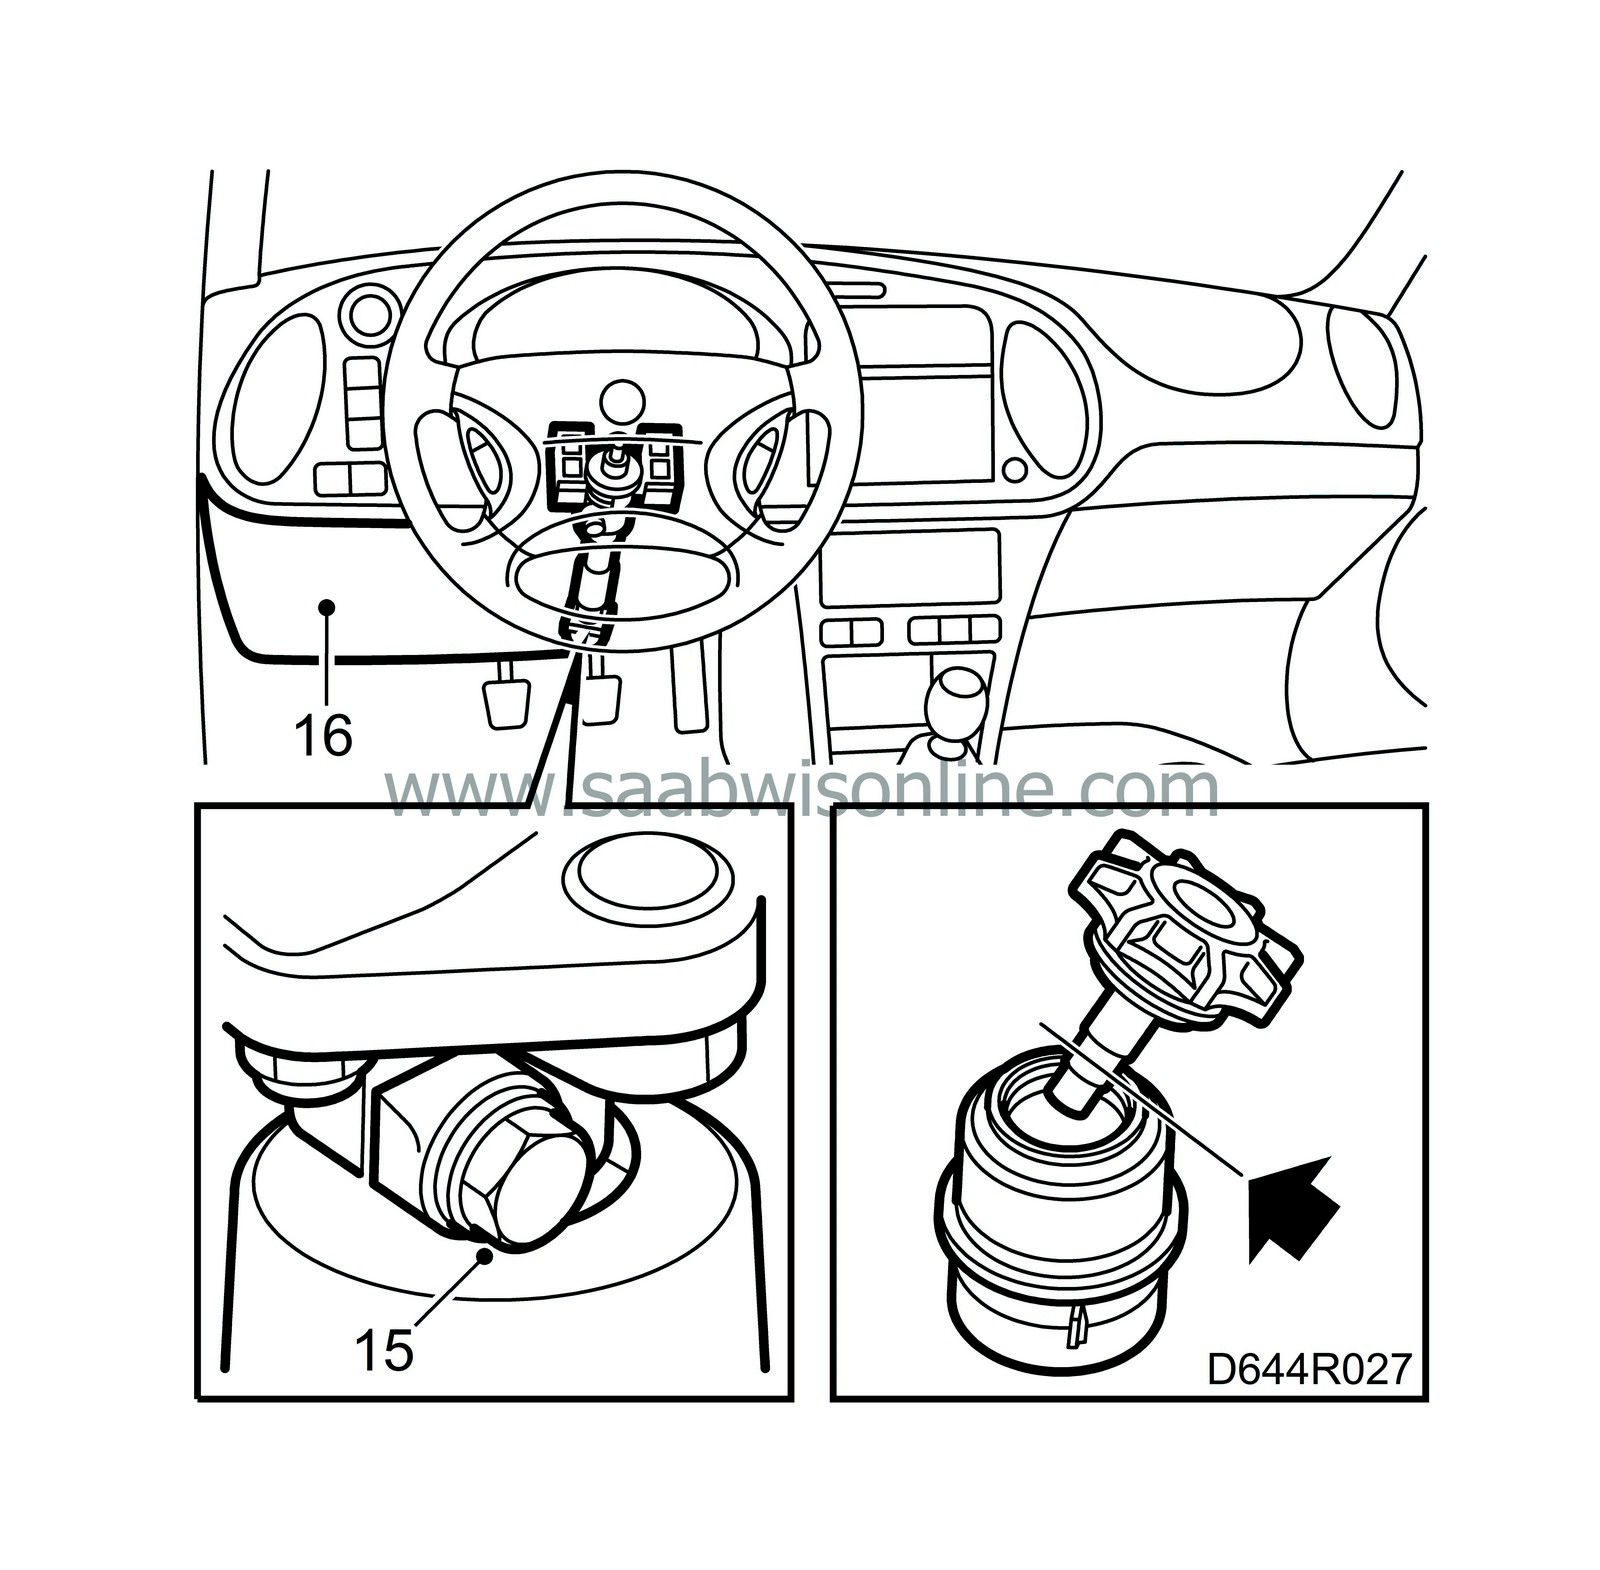
Remove the tape securing the steering wheel and fit the steering shaft to the pinion shaft. Tighten the lock bolt.
Tightening torque: 24 Nm (18 lbf ft)
For adjusting the contact roller, see To fit for the contact roller. |
|||||||||
| 16. |
Fit the lower dashboard panel including the data link connector on the driver's side.
|
|
| 17. |
Lower the car and turn the wheels to point straight ahead.
|
|
| 18. |
Fill the hydraulic fluid reservoir with the specified fluid. Start the engine, turn the steering wheel to the right and left lock positions 2-3 times. Turn off the engine and correct the fluid level. At 20 C, it should be in between the MAX and MIN markings on the dipstick in the hydraulic fluid reservoir.
|
|
| 19. |
Check for leaks at the control valve couplings.
|
|
| 20. |
Make sure the steering wheel is positioned “straight ahead” when the car is steering straight ahead on a level road.
|
|

 Warning

