A-pillar assembly, front outer sill reinforcement, CV
|
|
A-pillar assembly, front outer sill reinforcement, CV
|
|
1.
|
Mount the car in an alignment bench with measuring fixture and cross-measure as necessary.
|
|
2.
|
Place a support or measuring fixture between the floor and the windscreen member so that the windscreen frame does not bend when the A-pillar is removed.
|
|
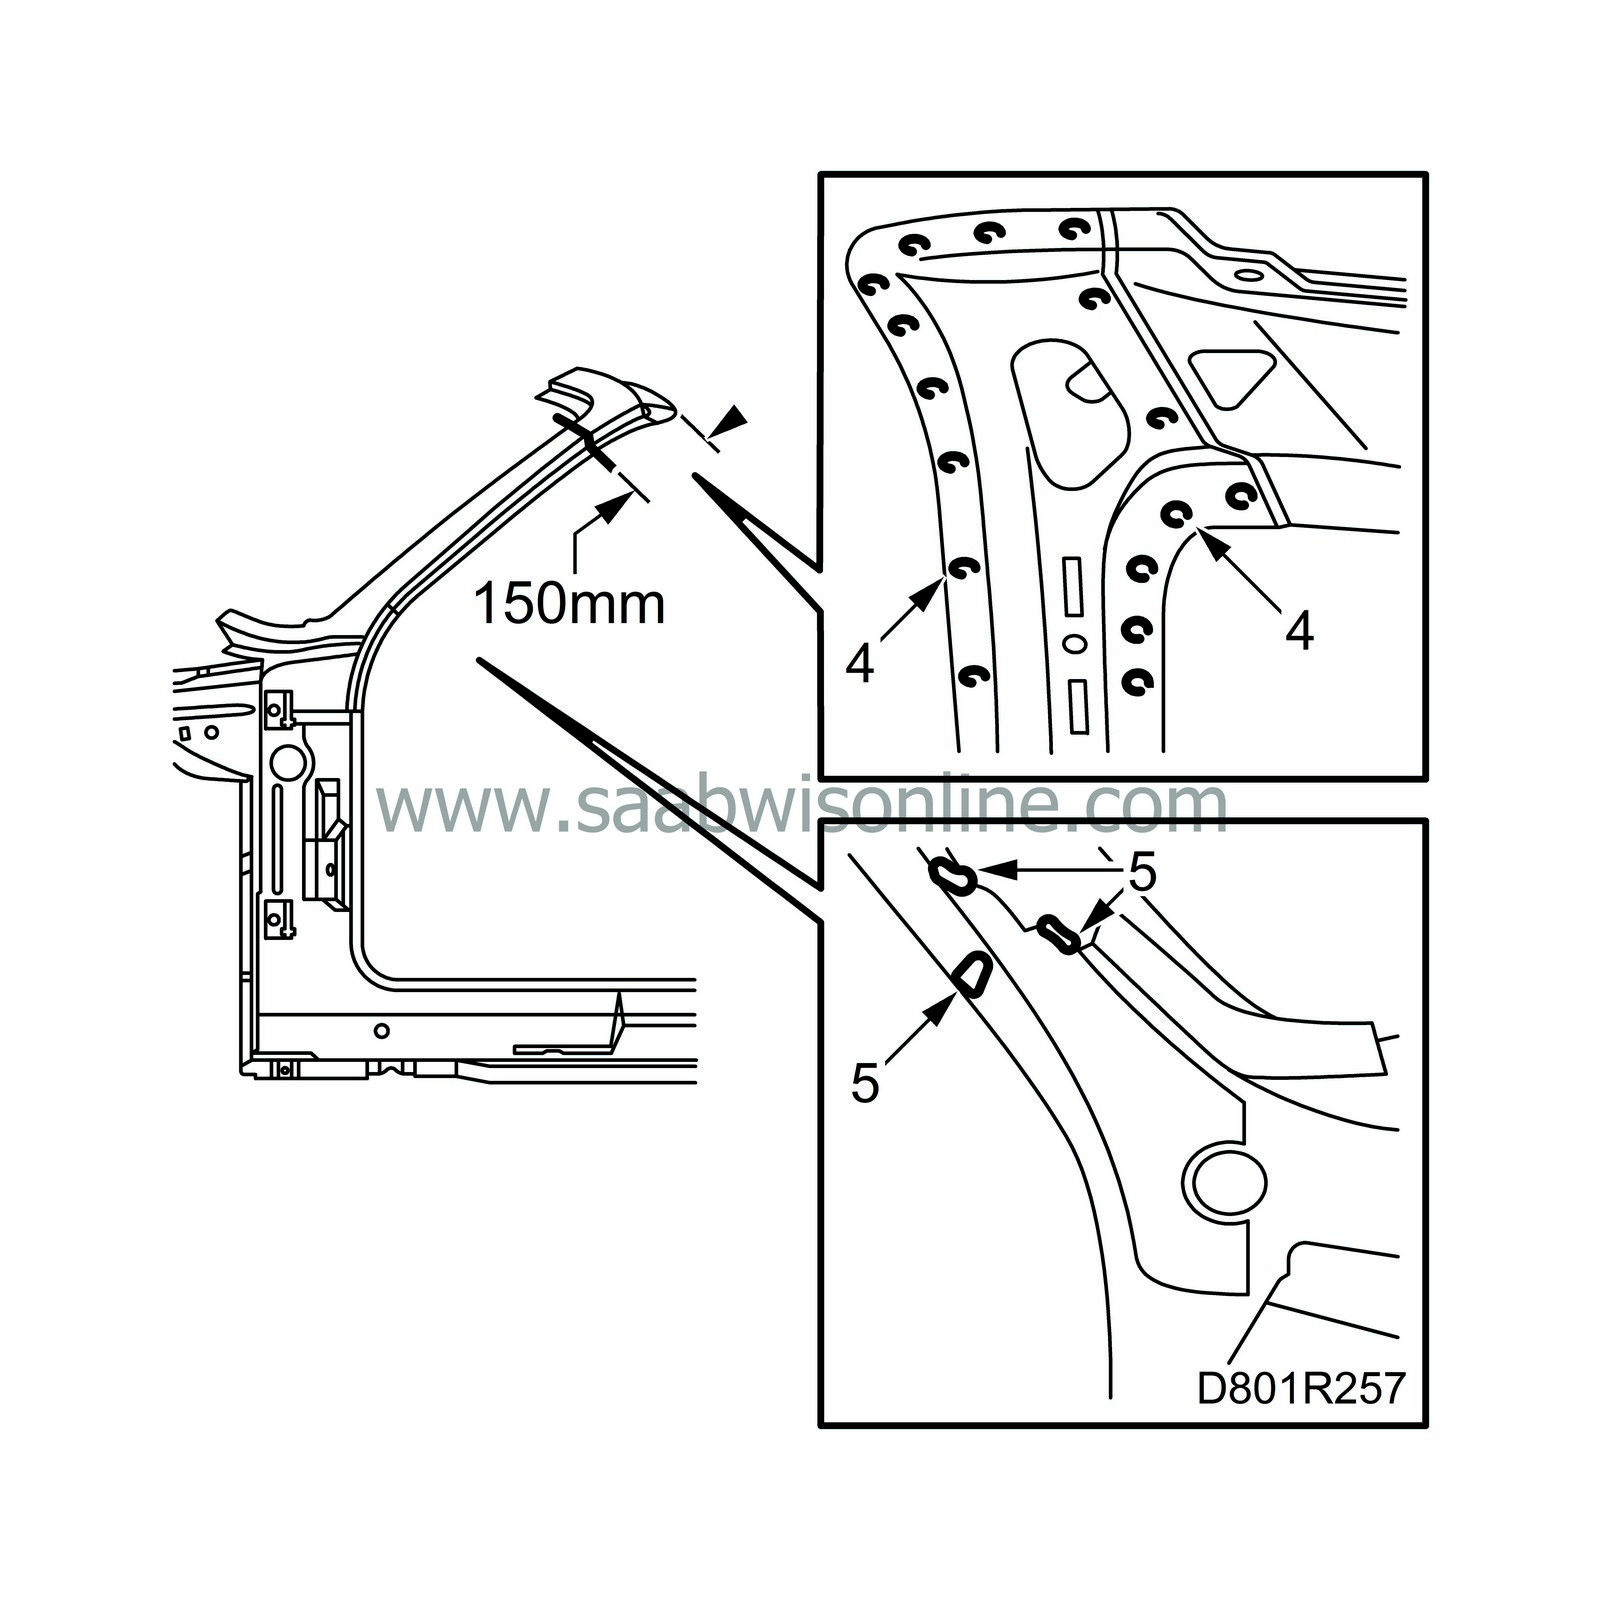
3.
|
Cut the outer panel on the A pillar, 150 mm from the edge of the windscreen frame.
|
|
4.
|
Drill out the spot welds securing the inner section of the A-pillar at the top.
|
|
5.
|
Grind away the seam welds securing the bottom of the inner section to the A-pillar.
|
|
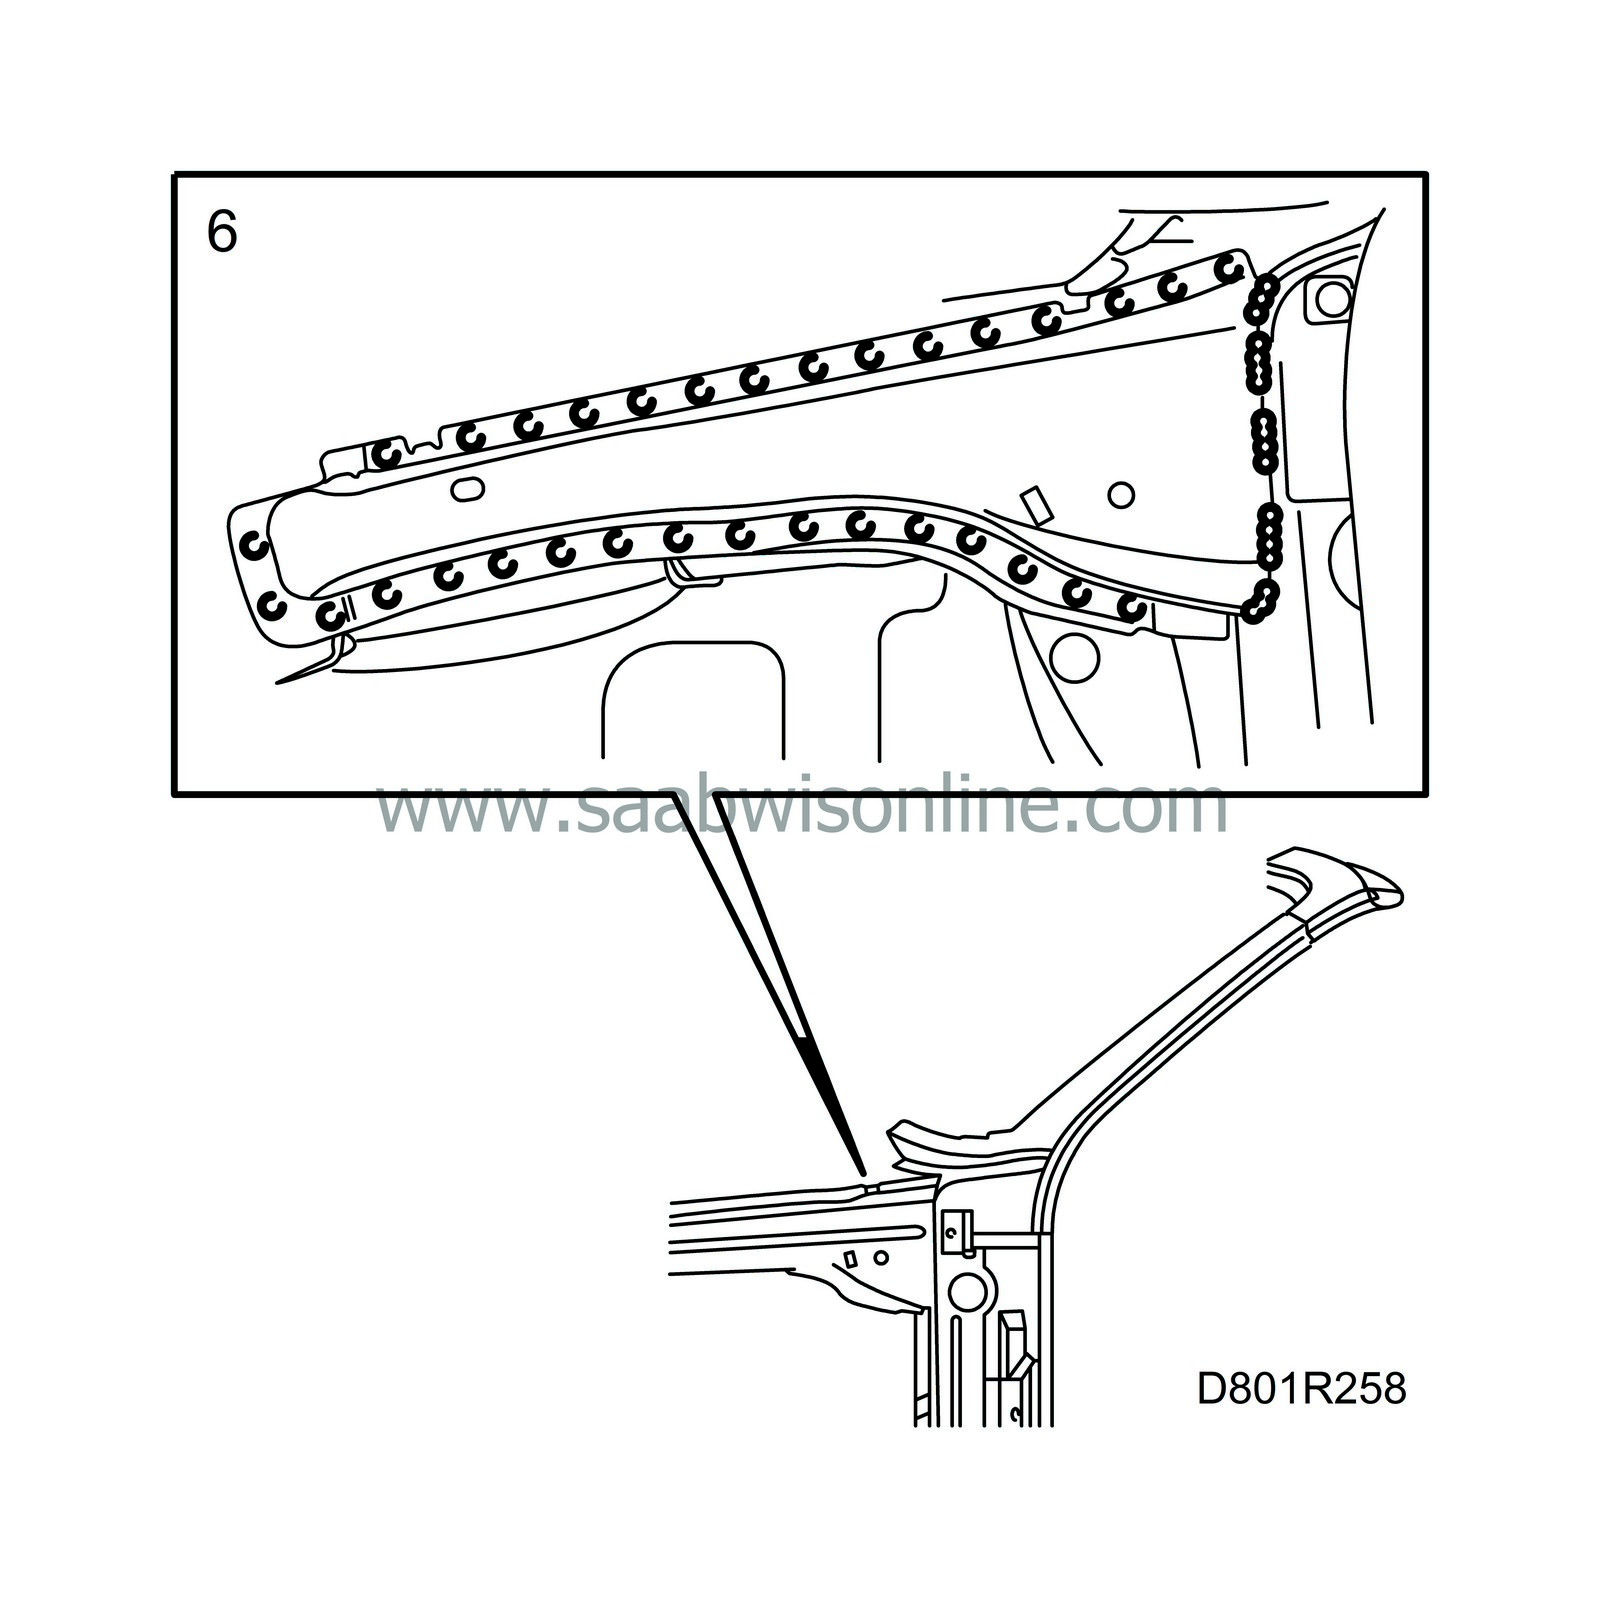
6.
|
Remove the reinforcement on the outside of the front wheel housing. If the reinforcement is not damaged, it can be refitted.
|
|
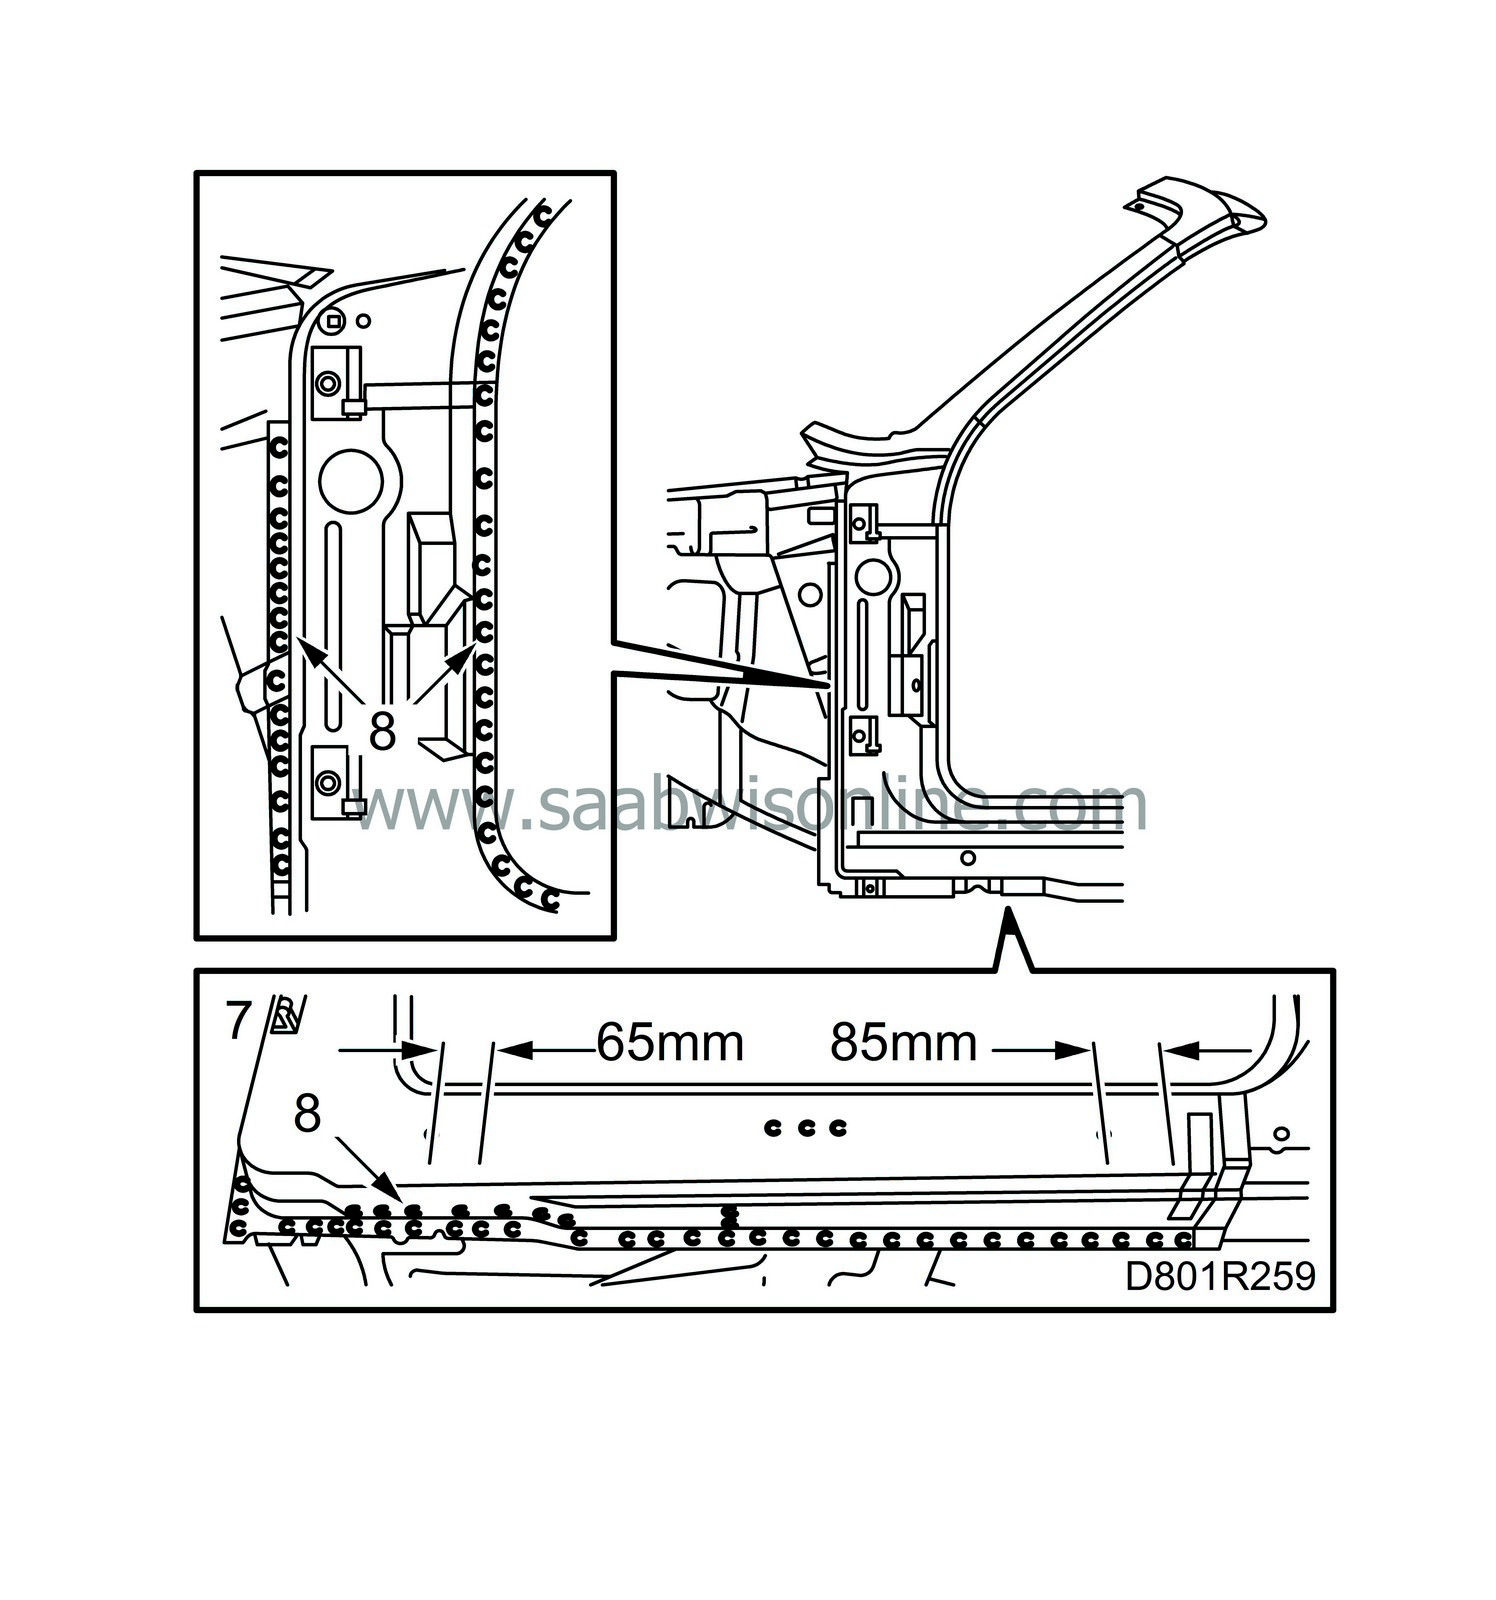
7.
|
Cut the sill and reinforcement 65 mm in front of the foremost mark or 85 mm in front of the rear mark, depending on the amount of damage.
|
|
8.
|
Drill out the spot welds at the bottom of the sill and the spot welds to the wheel housing and door aperture. Grind down the seam weld in the door aperture.
|
|
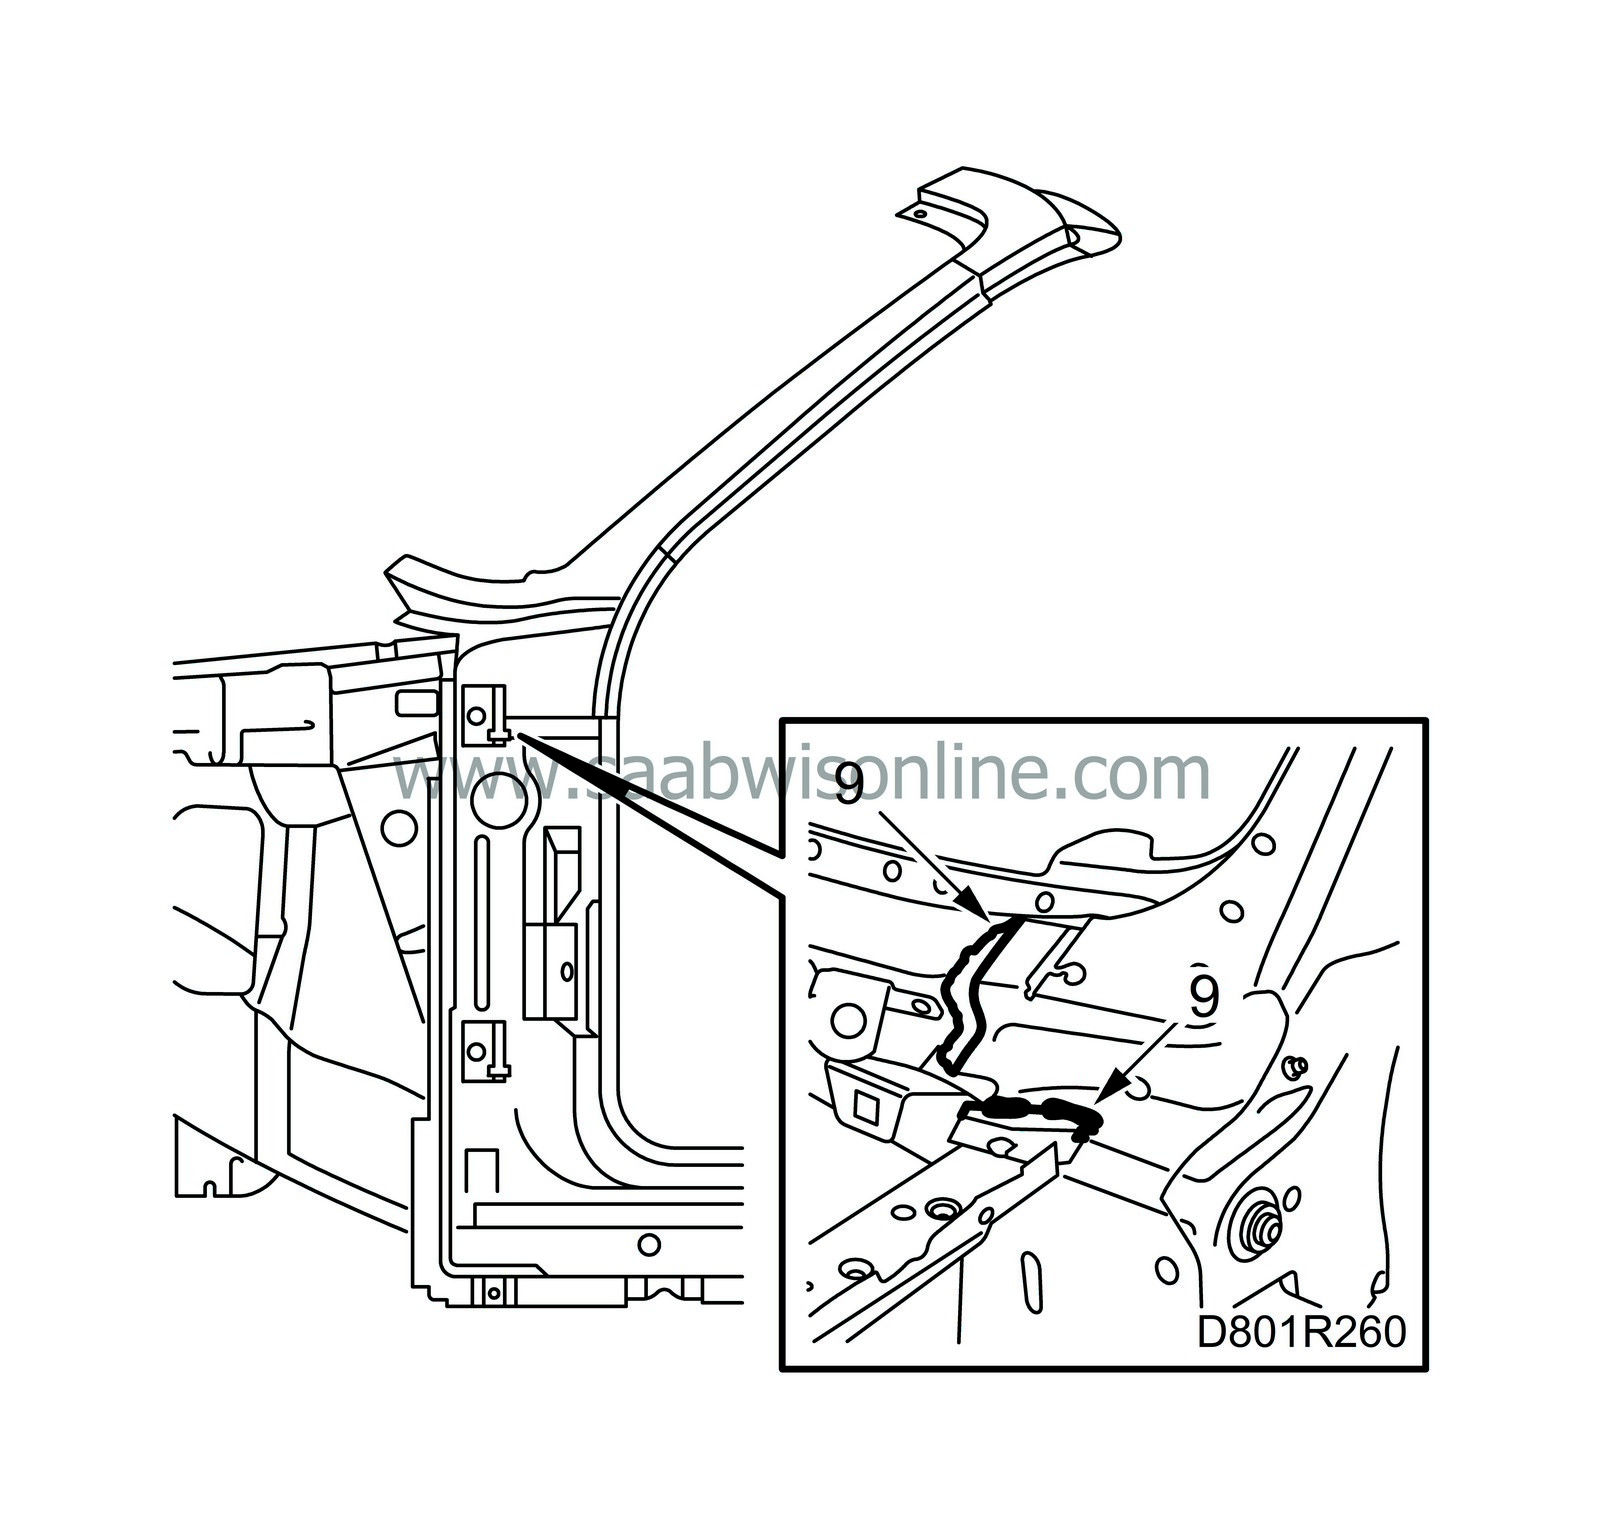
9.
|
Grind down the seam welds securing the reinforcement to the windscreen member and wheel housing.
|
|
10.
|
Knock loose the A-pillar assembly with reinforcement and inner section and align any deformed sheet metal or panels.
|
|
11.
|
Cut the new door frame approx. 5 mm behind the front mark or 5 mm behind the rear mark, depending on where it has been cut on the body.
|
|
12.
|
Grind the surfaces to be welded on the body
|
|
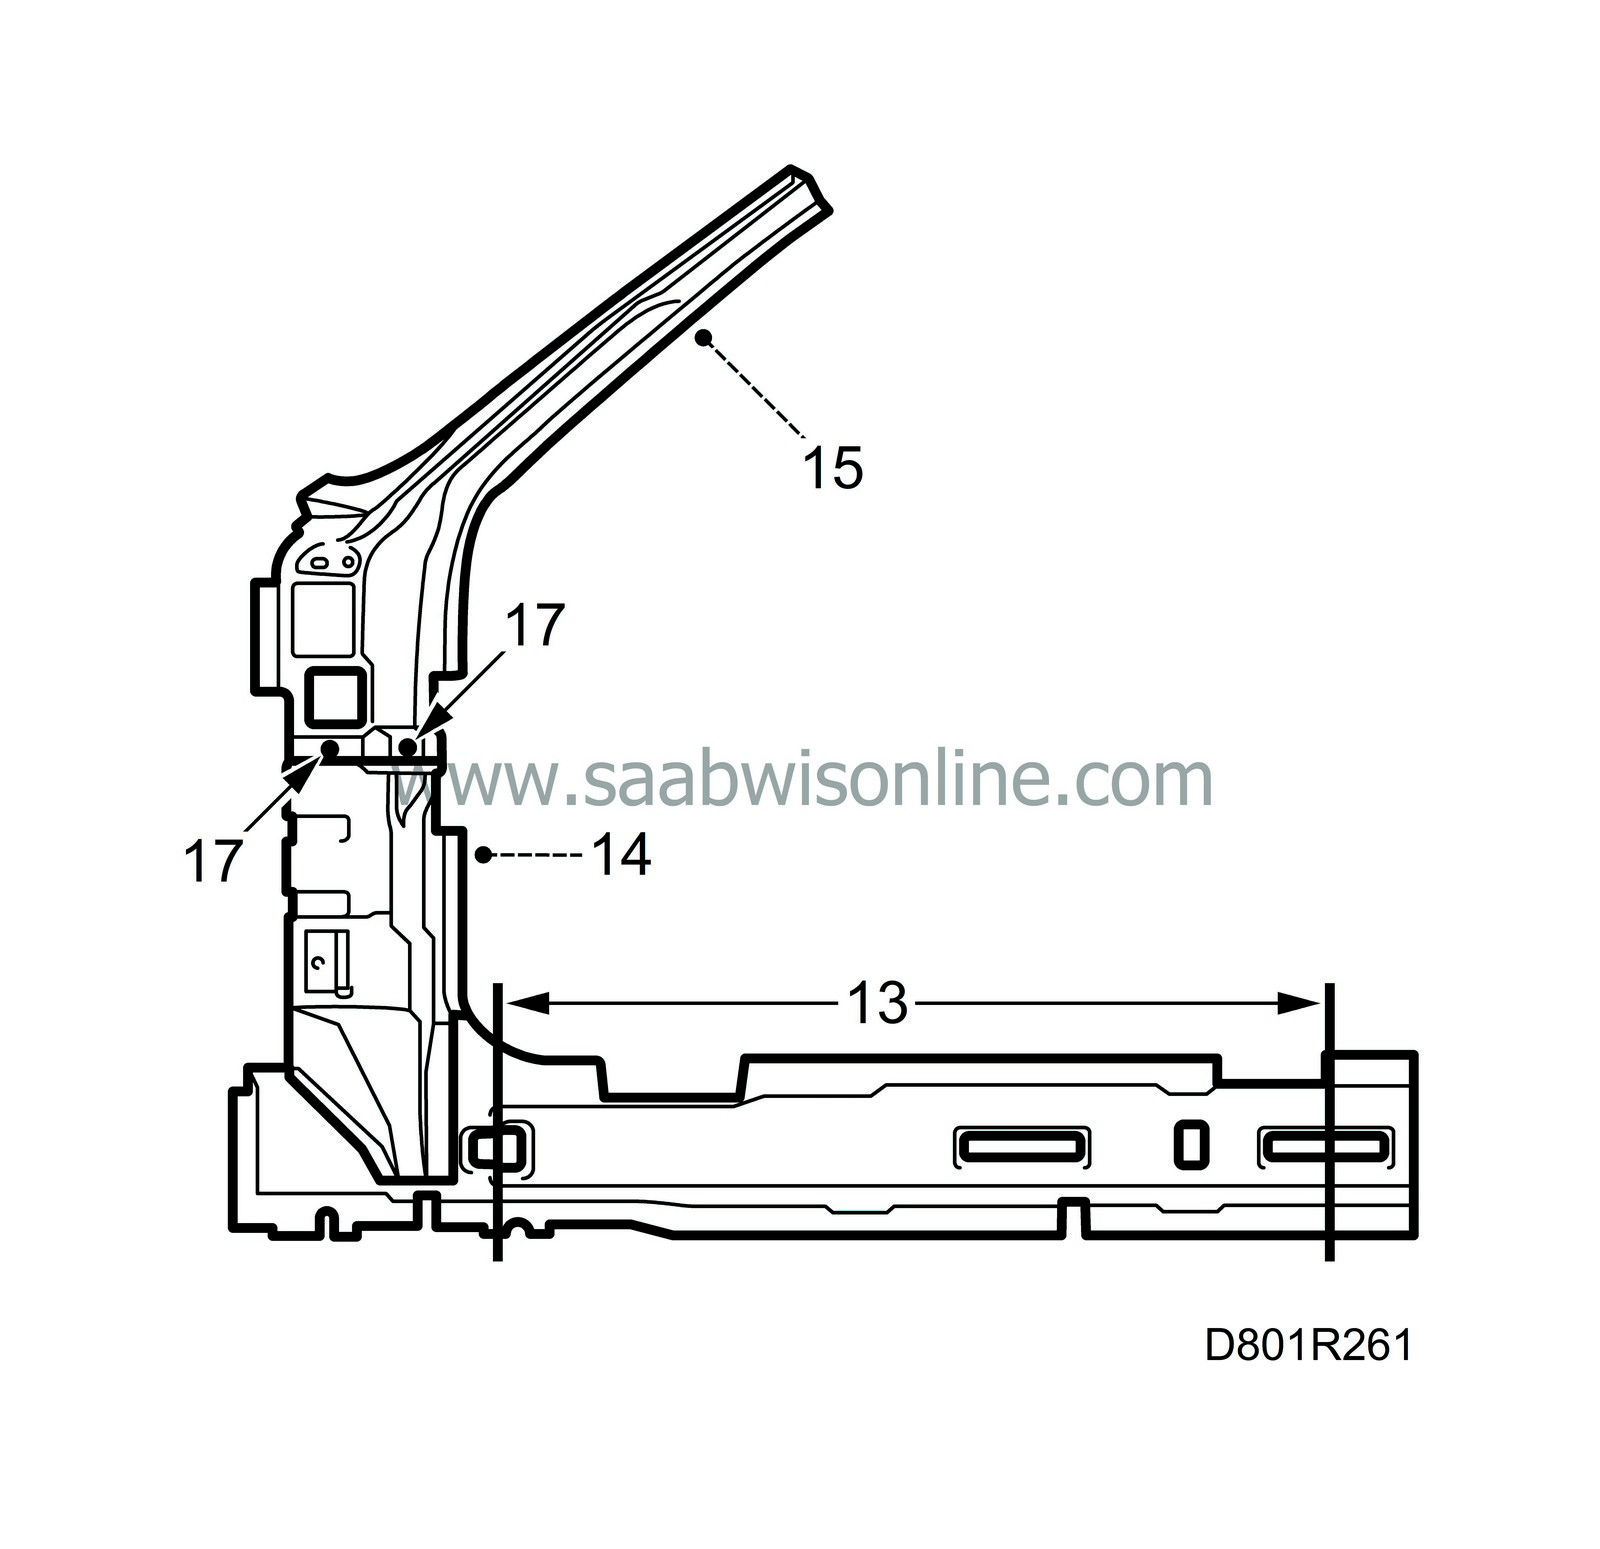
13.
|
Measure out where to cut the sill reinforcement and cut the reinforcement.
|
|
14.
|
Put the lower A-pillar reinforcement in place on the body and secure it with some welding clamps.
|
|
15.
|
Put the upper inner A-pillar in place on the windscreen member and secure it with some welding clamps.
|
|
16.
|
Secure the outer A-pillar reinforcement to the inner A-pillar with welding clamps, two on the inner and two on the outer.
|
|
17.
|
Drill two holes in the flanges between the upper and lower reinforcements and secure them with pop rivets.
|
|
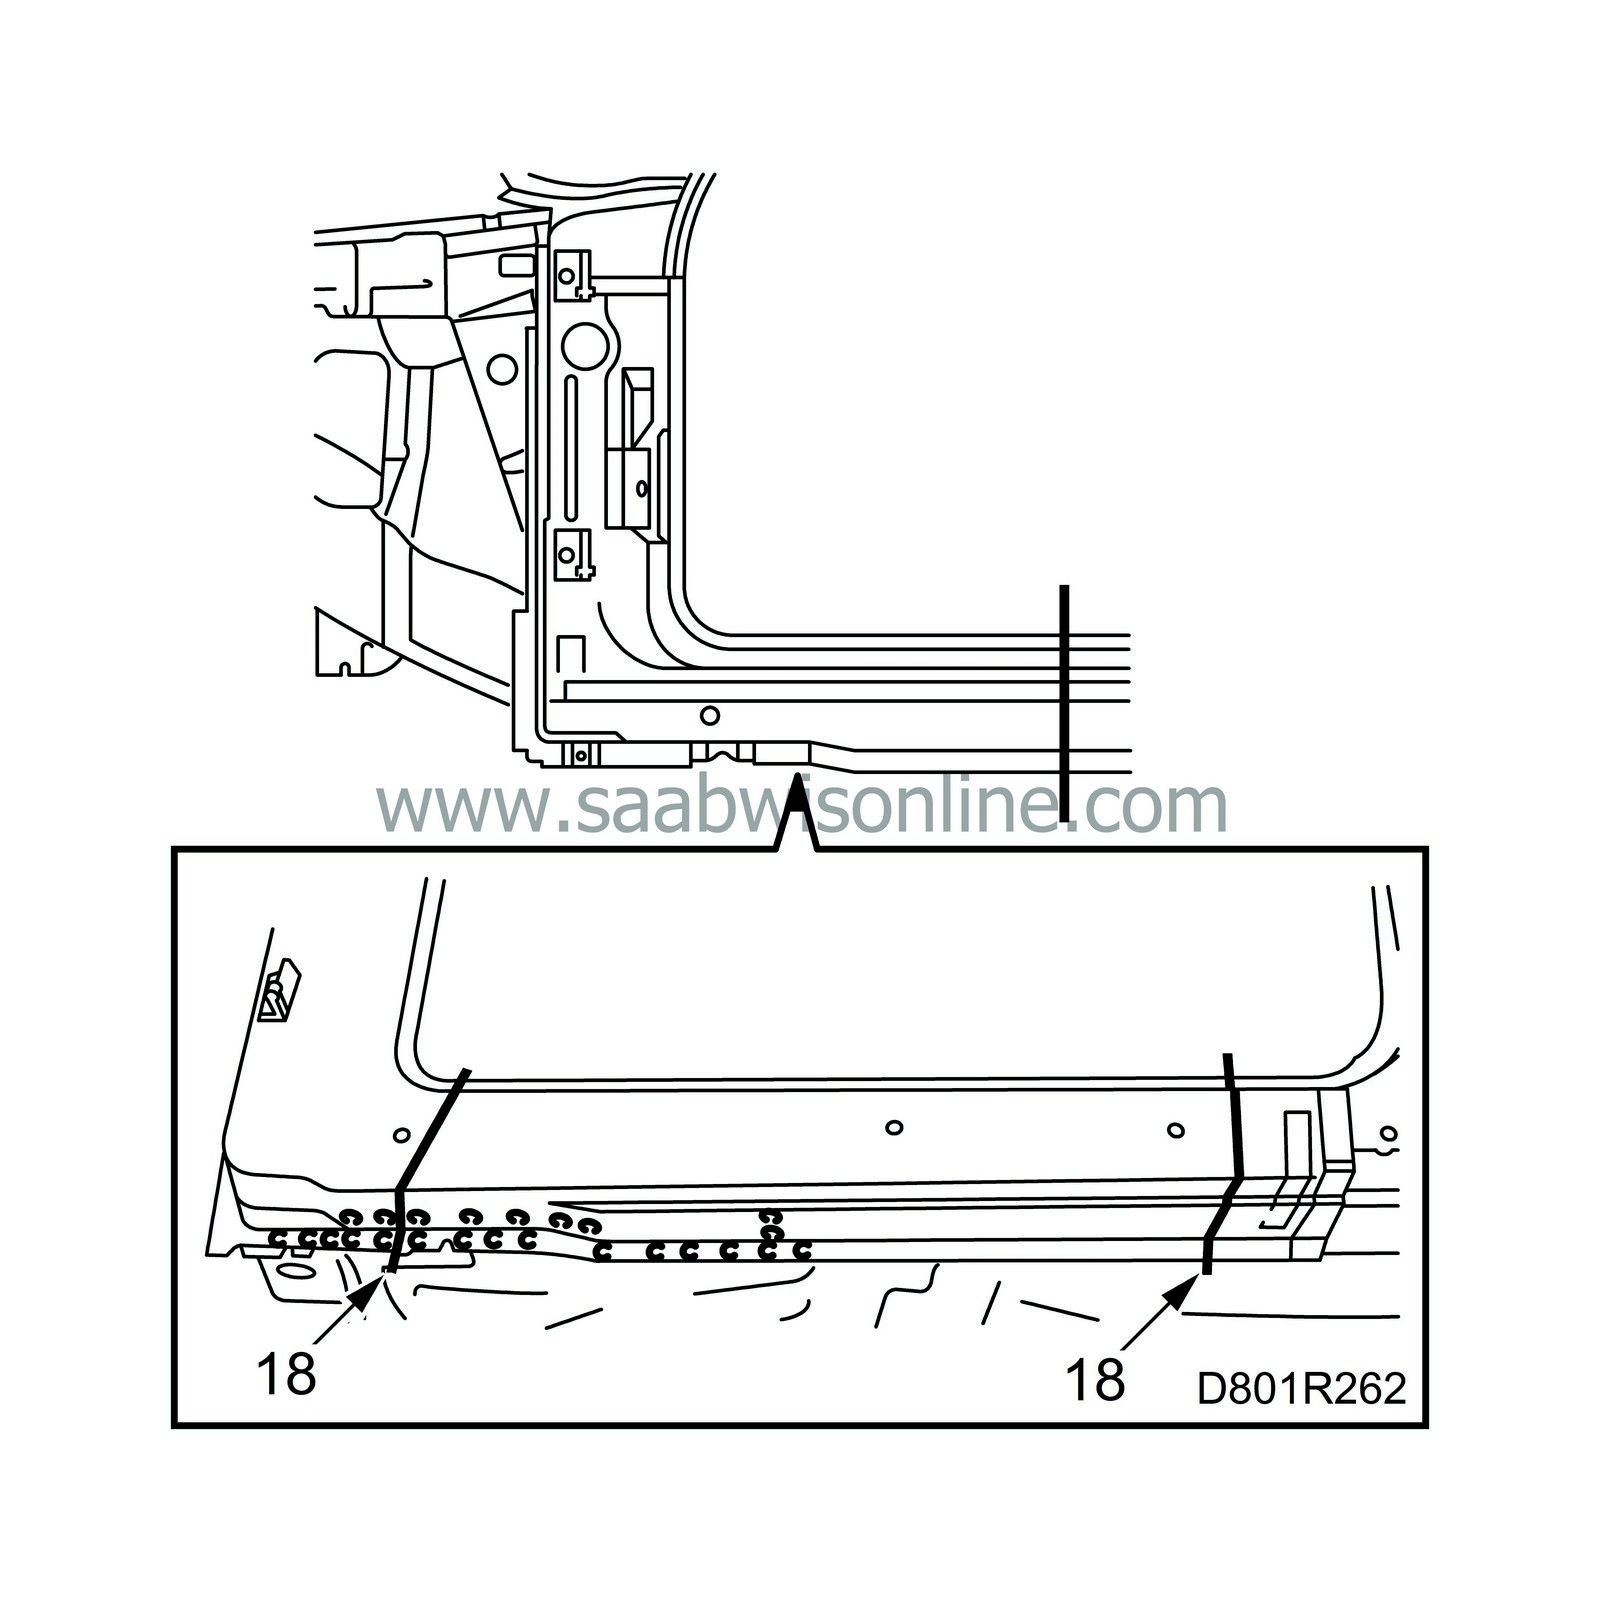
18.
|
Cut the door frame so that it fits against the sill.
|
|
19.
|
Put the outer panels in place.
|
|
20.
|
Screw on the hinges with one screw. Check the fit by putting the door, front wing and windscreen in place.
|
|
21.
|
Remove the windscreen, front wing, door, hinges and outer panels of the A-pillar.
|
|
22.
|
Mark out the position of the panels and remove the welding clamps on the windscreen member and sill.
|
|
23.
|
Take down the complete A-pillar reinforcements and lay them fastened together with welding clamps on a bench or other suitable place.
|
|
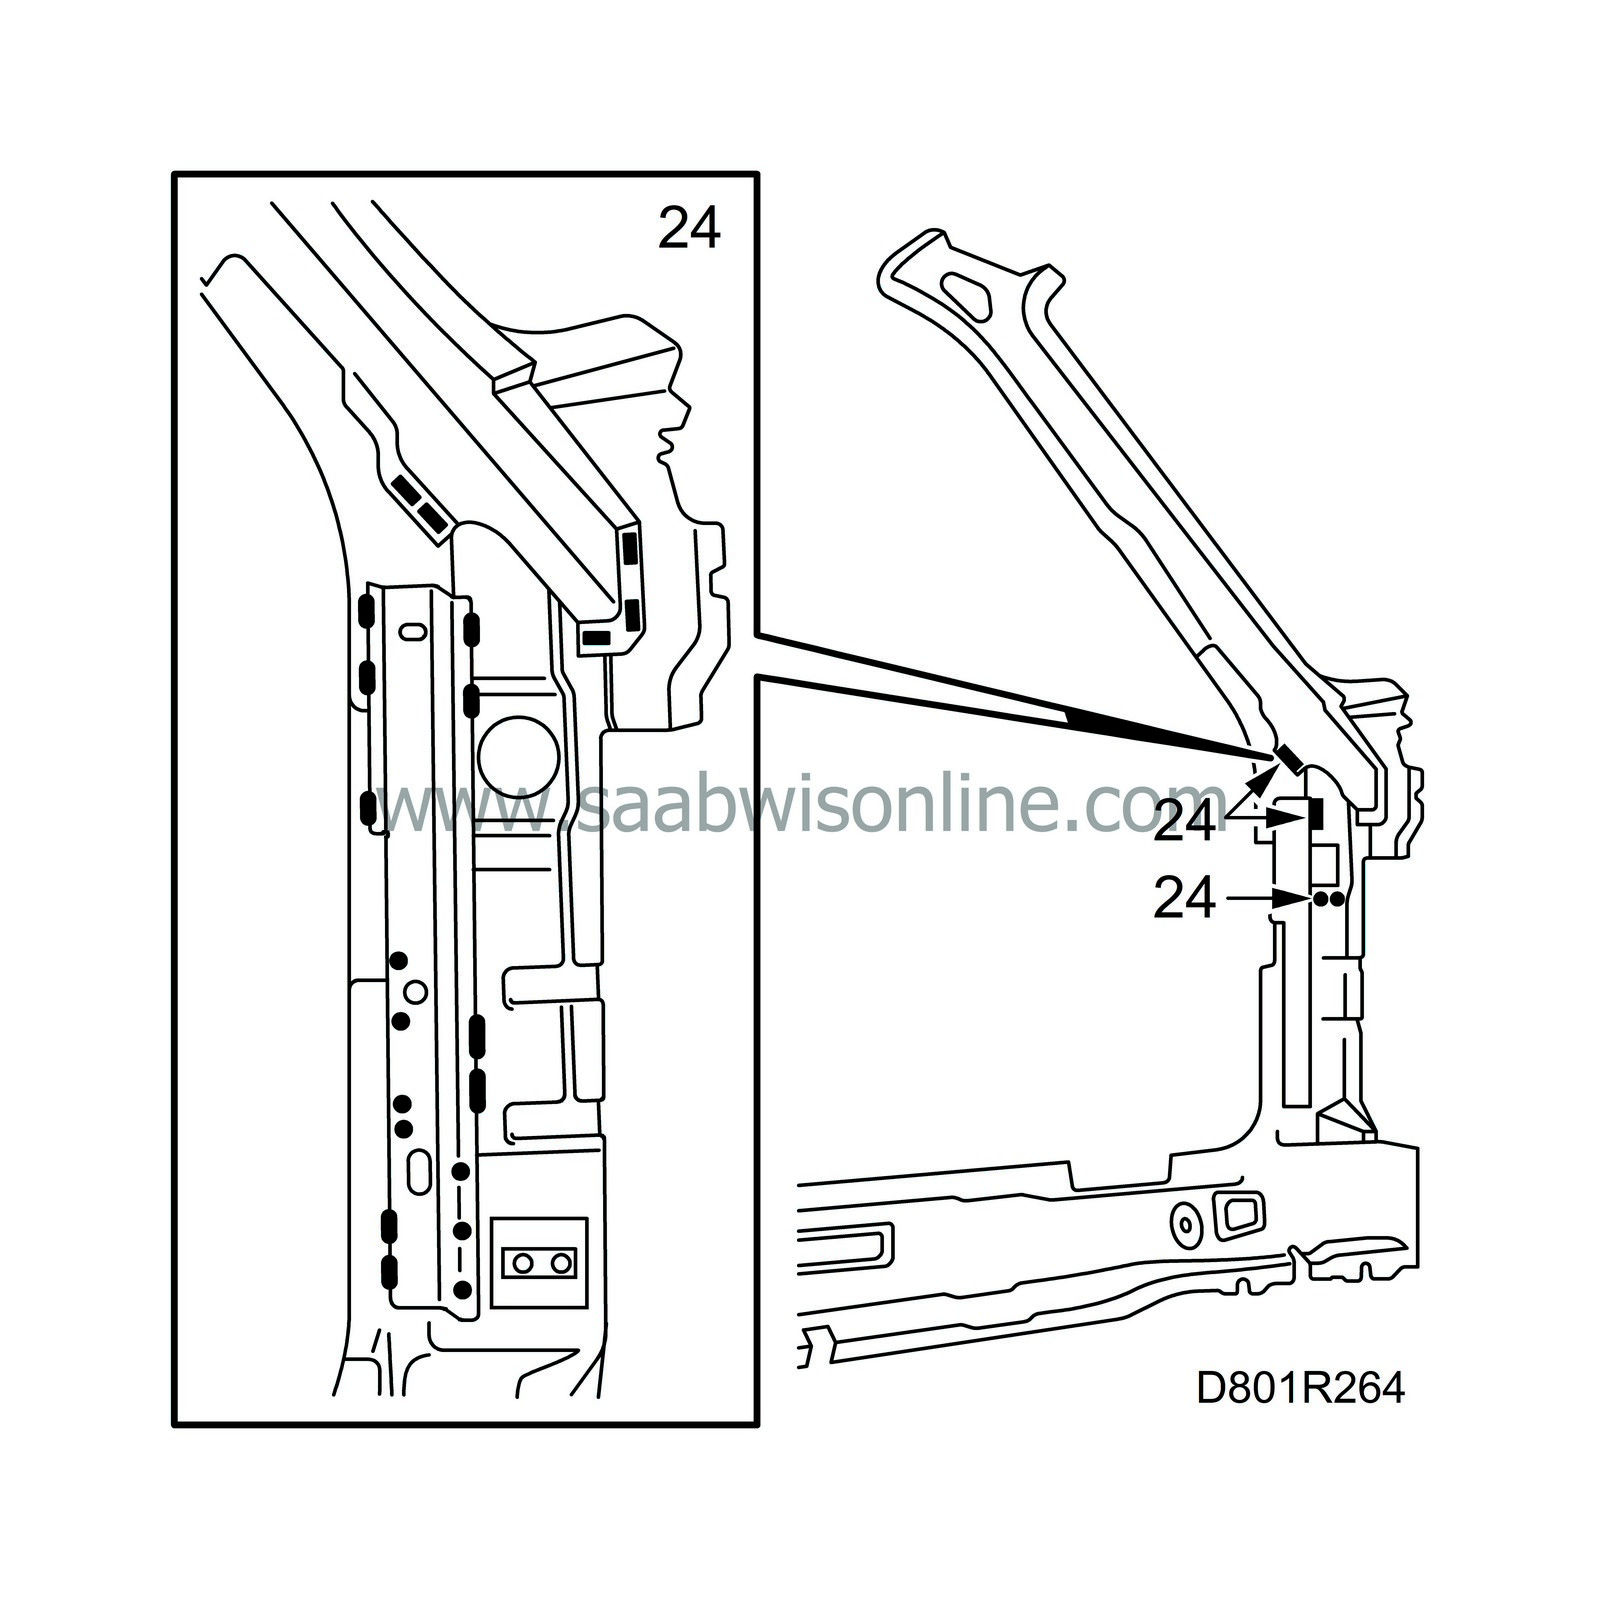
24.
|
Weld the inner reinforcements as illustrated. Remove the pop rivets and plug welds.
|
|
25.
|
Put the complete reinforcement in place and secure it with welding clamps at the windscreen member and the sill.
|
|
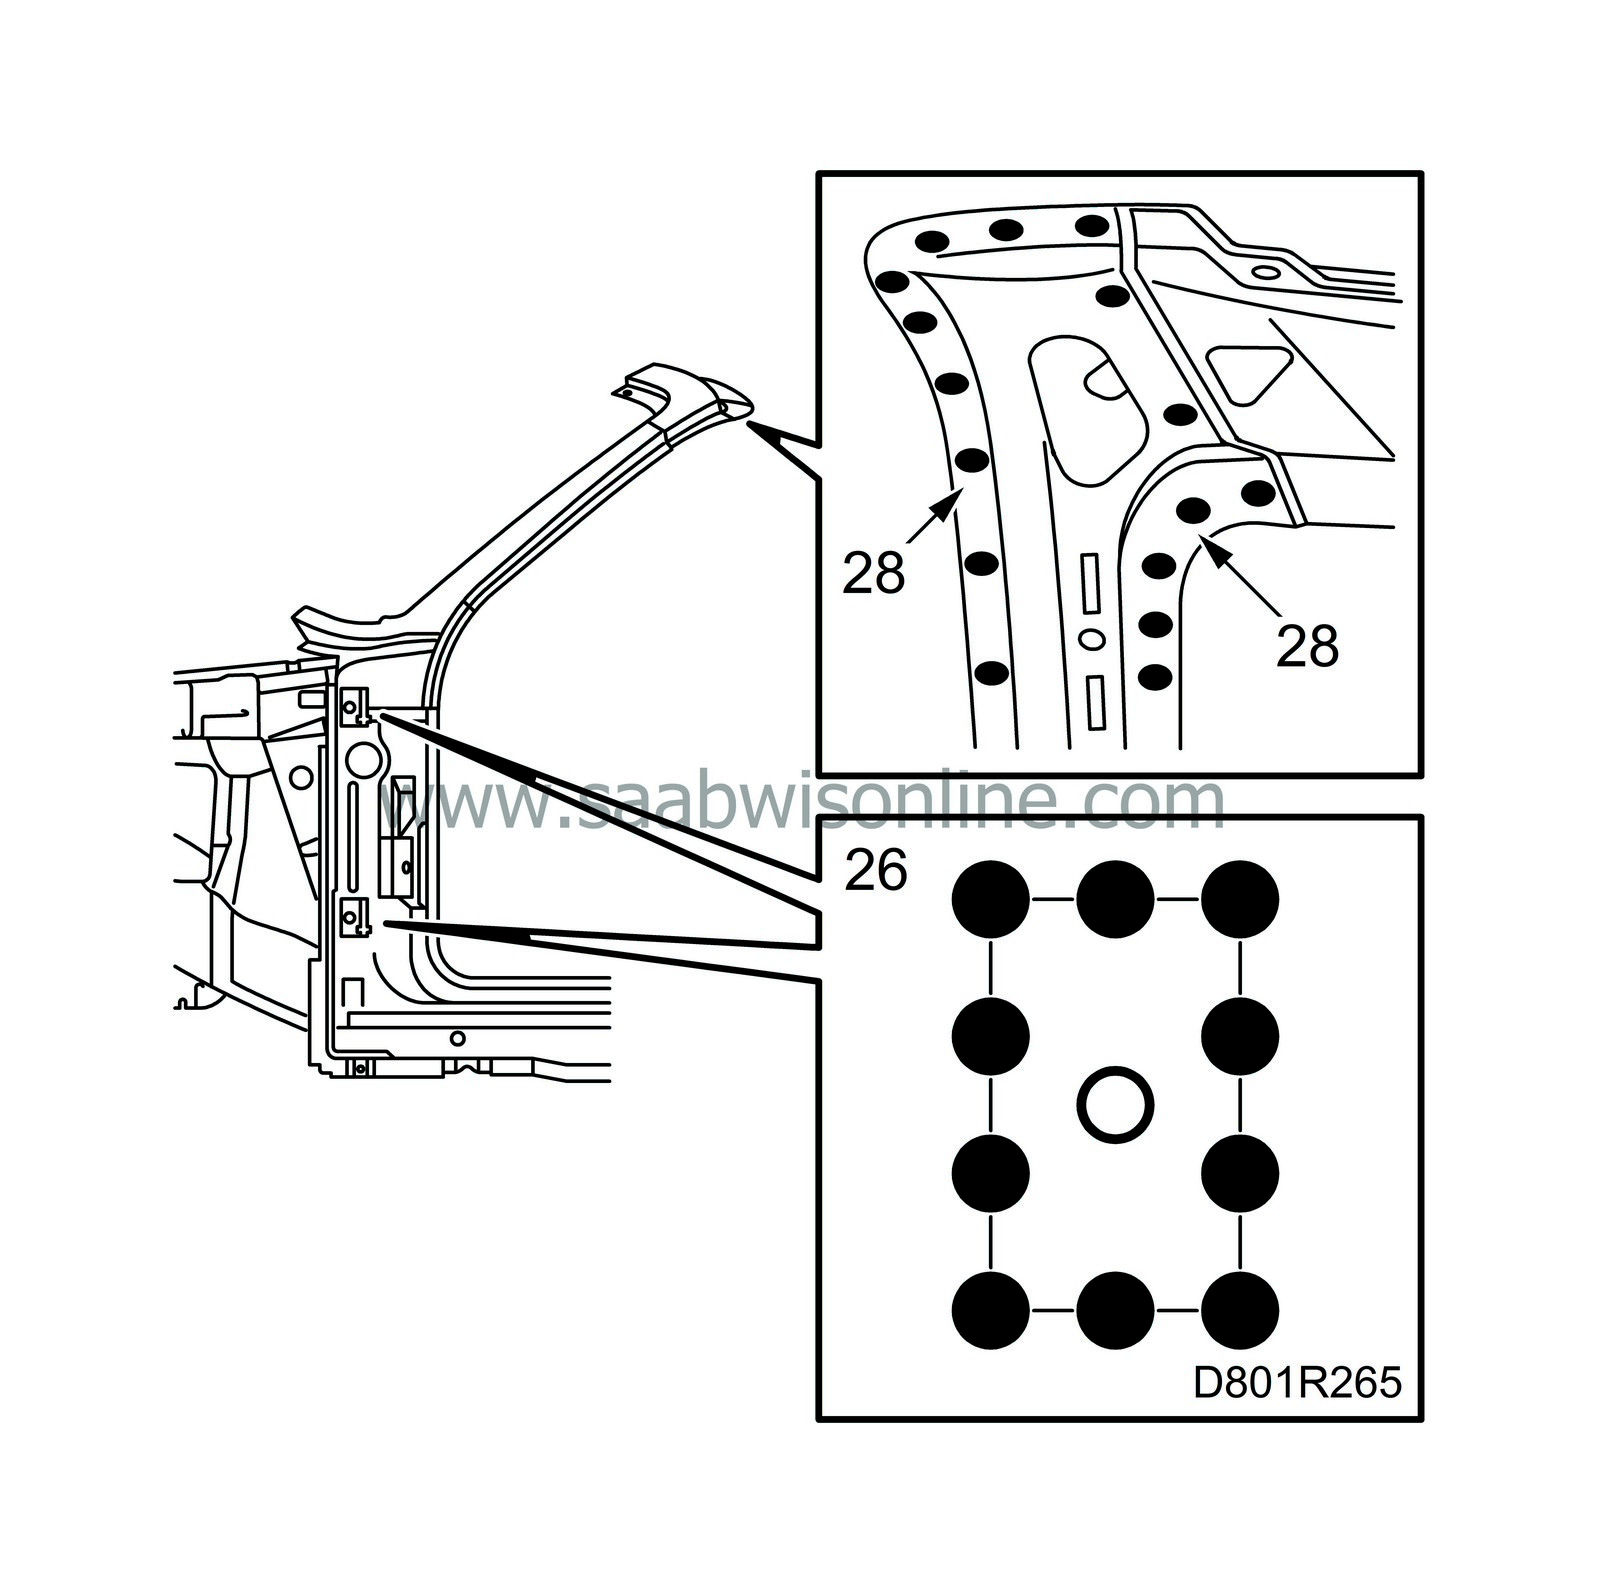
26.
|
Put the outer upper A-pillar panel and the lower door frame in place and secure them with welding clamps. Fit the hinges with screws. Score around the hinges to mark out their position on the outer panels.
|
|
27.
|
Check the fit by putting the door, the front wing and the windscreen in place.
|
|
28.
|
Tack on the upper A-pillar reinforcement with a few welds.
|
|
29.
|
Remove the windscreen, front wing, door, hinges, lower door frame and outer upper A-pillar panel.
|
|
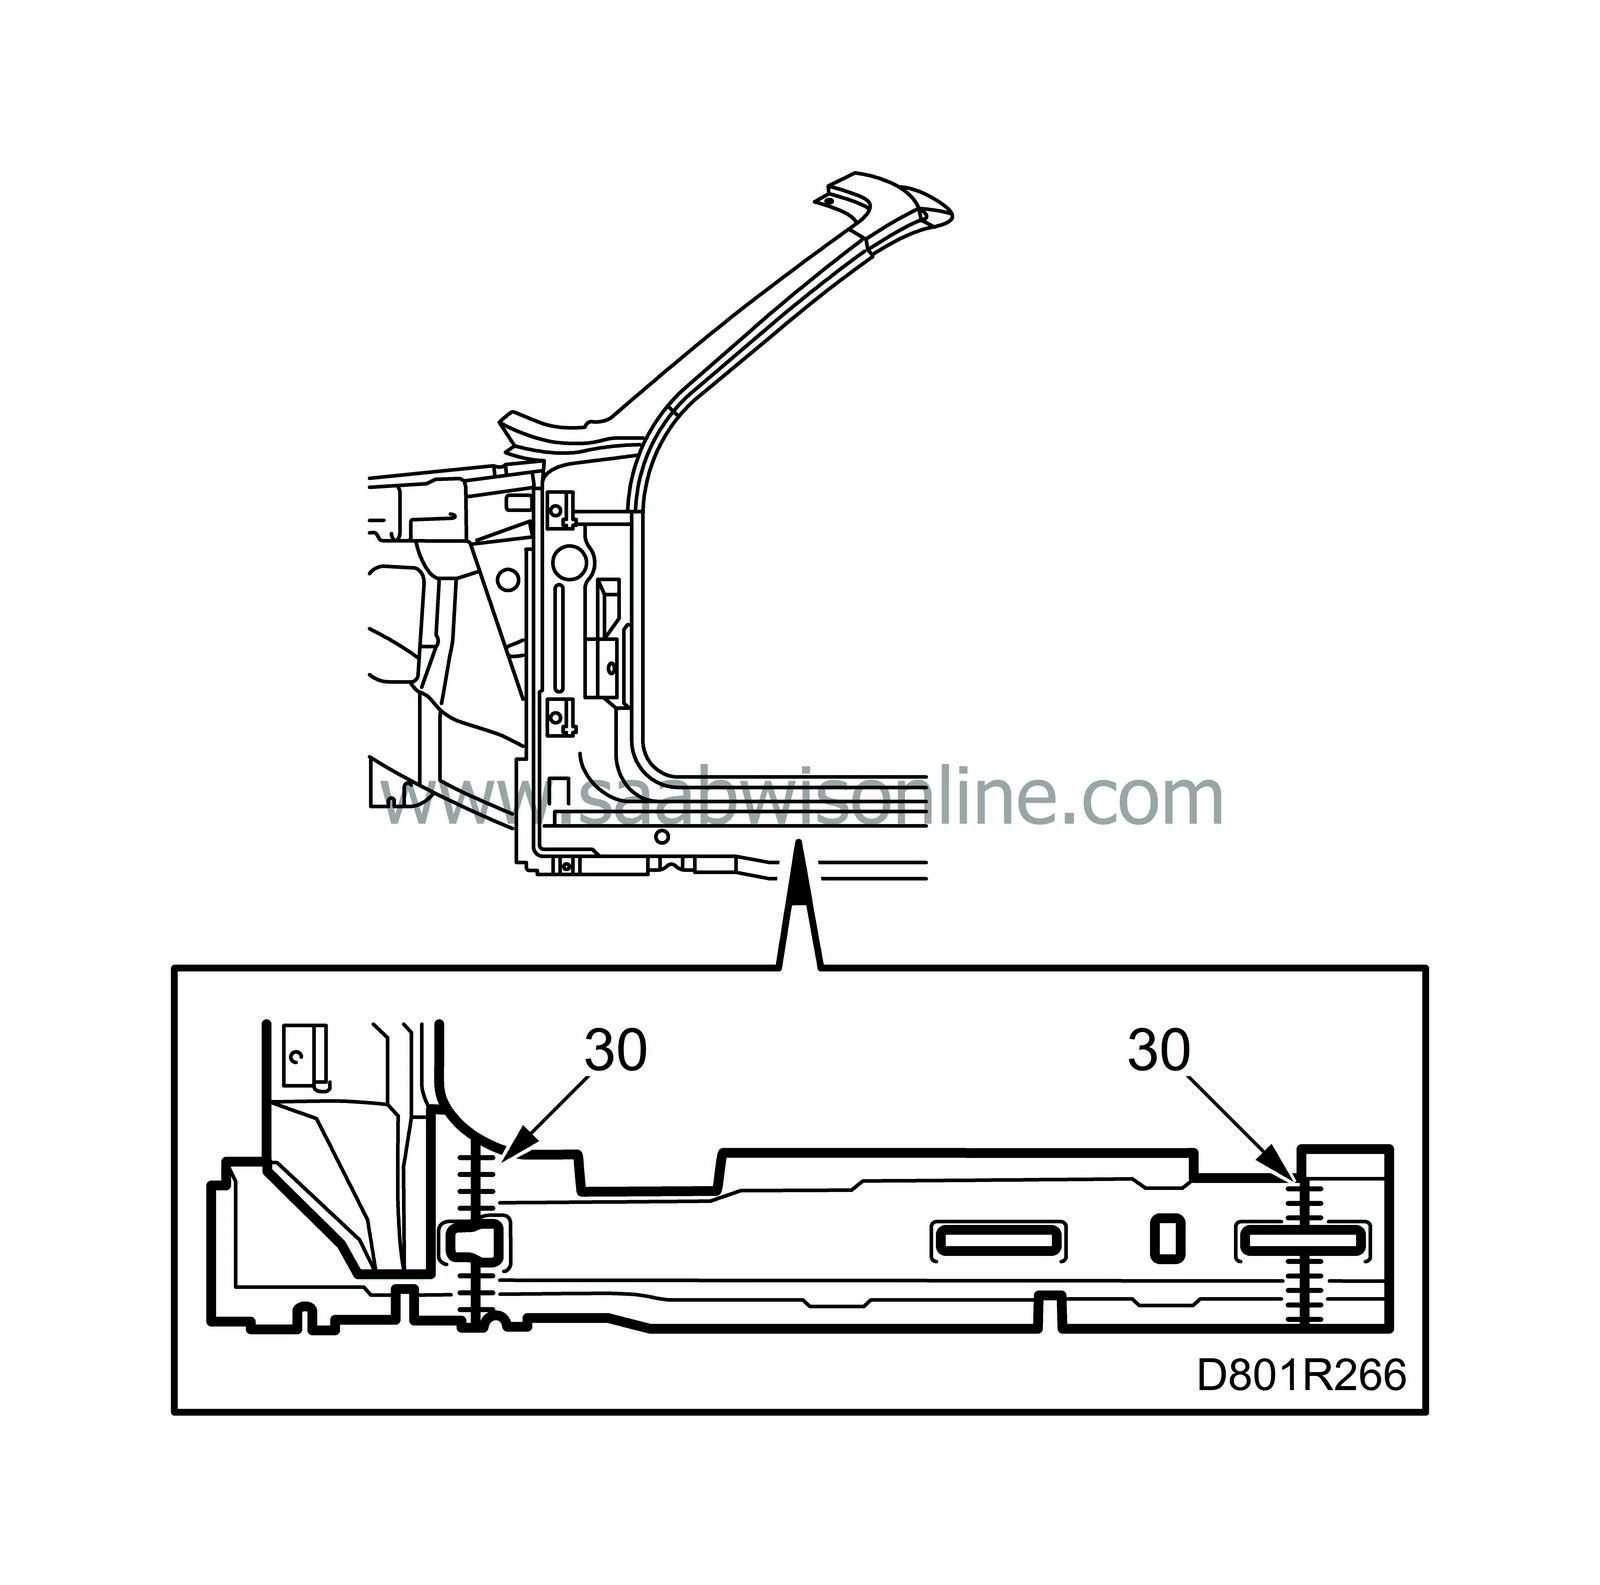
30.
|
All-weld together the joint in the sill reinforcement.
|
|
31.
|
Drill holes for plug-welding the upper A-pillar panel and the lower door frame in the scored marks for the hinges. Plug weld the outer panel to the reinforcement so that the hinges can then be welded to both the outer panel and the reinforcement.
|
|
32.
|
Grind clean the areas to be welded on the outer panel and the body.
|
|
33.
|
Apply welding primer to the surfaces to be spot and plug welded. Use Teroson Zinkspray.
|
|
34.
|
Put the lower door frame in place.
|
|
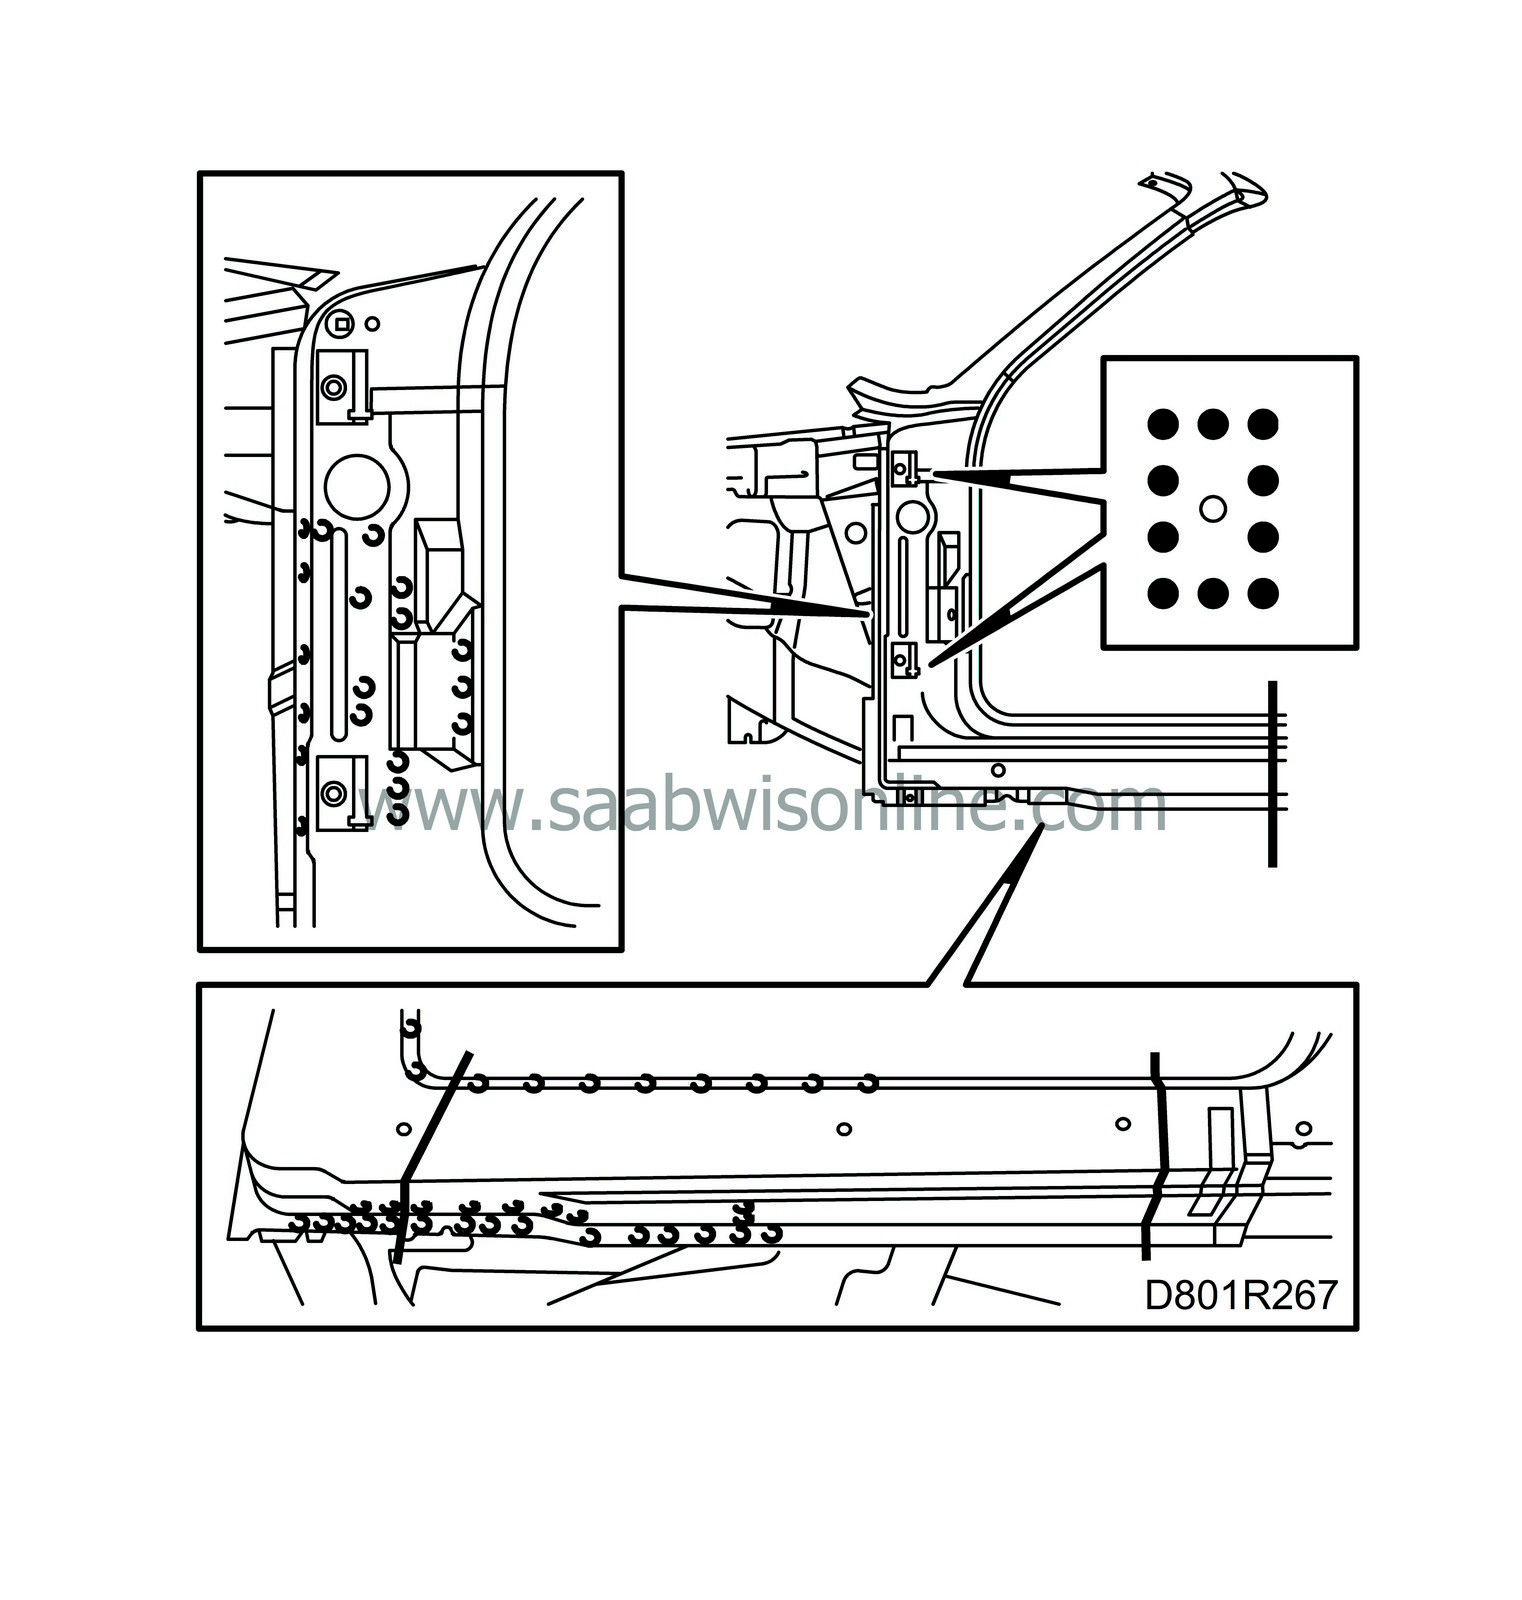
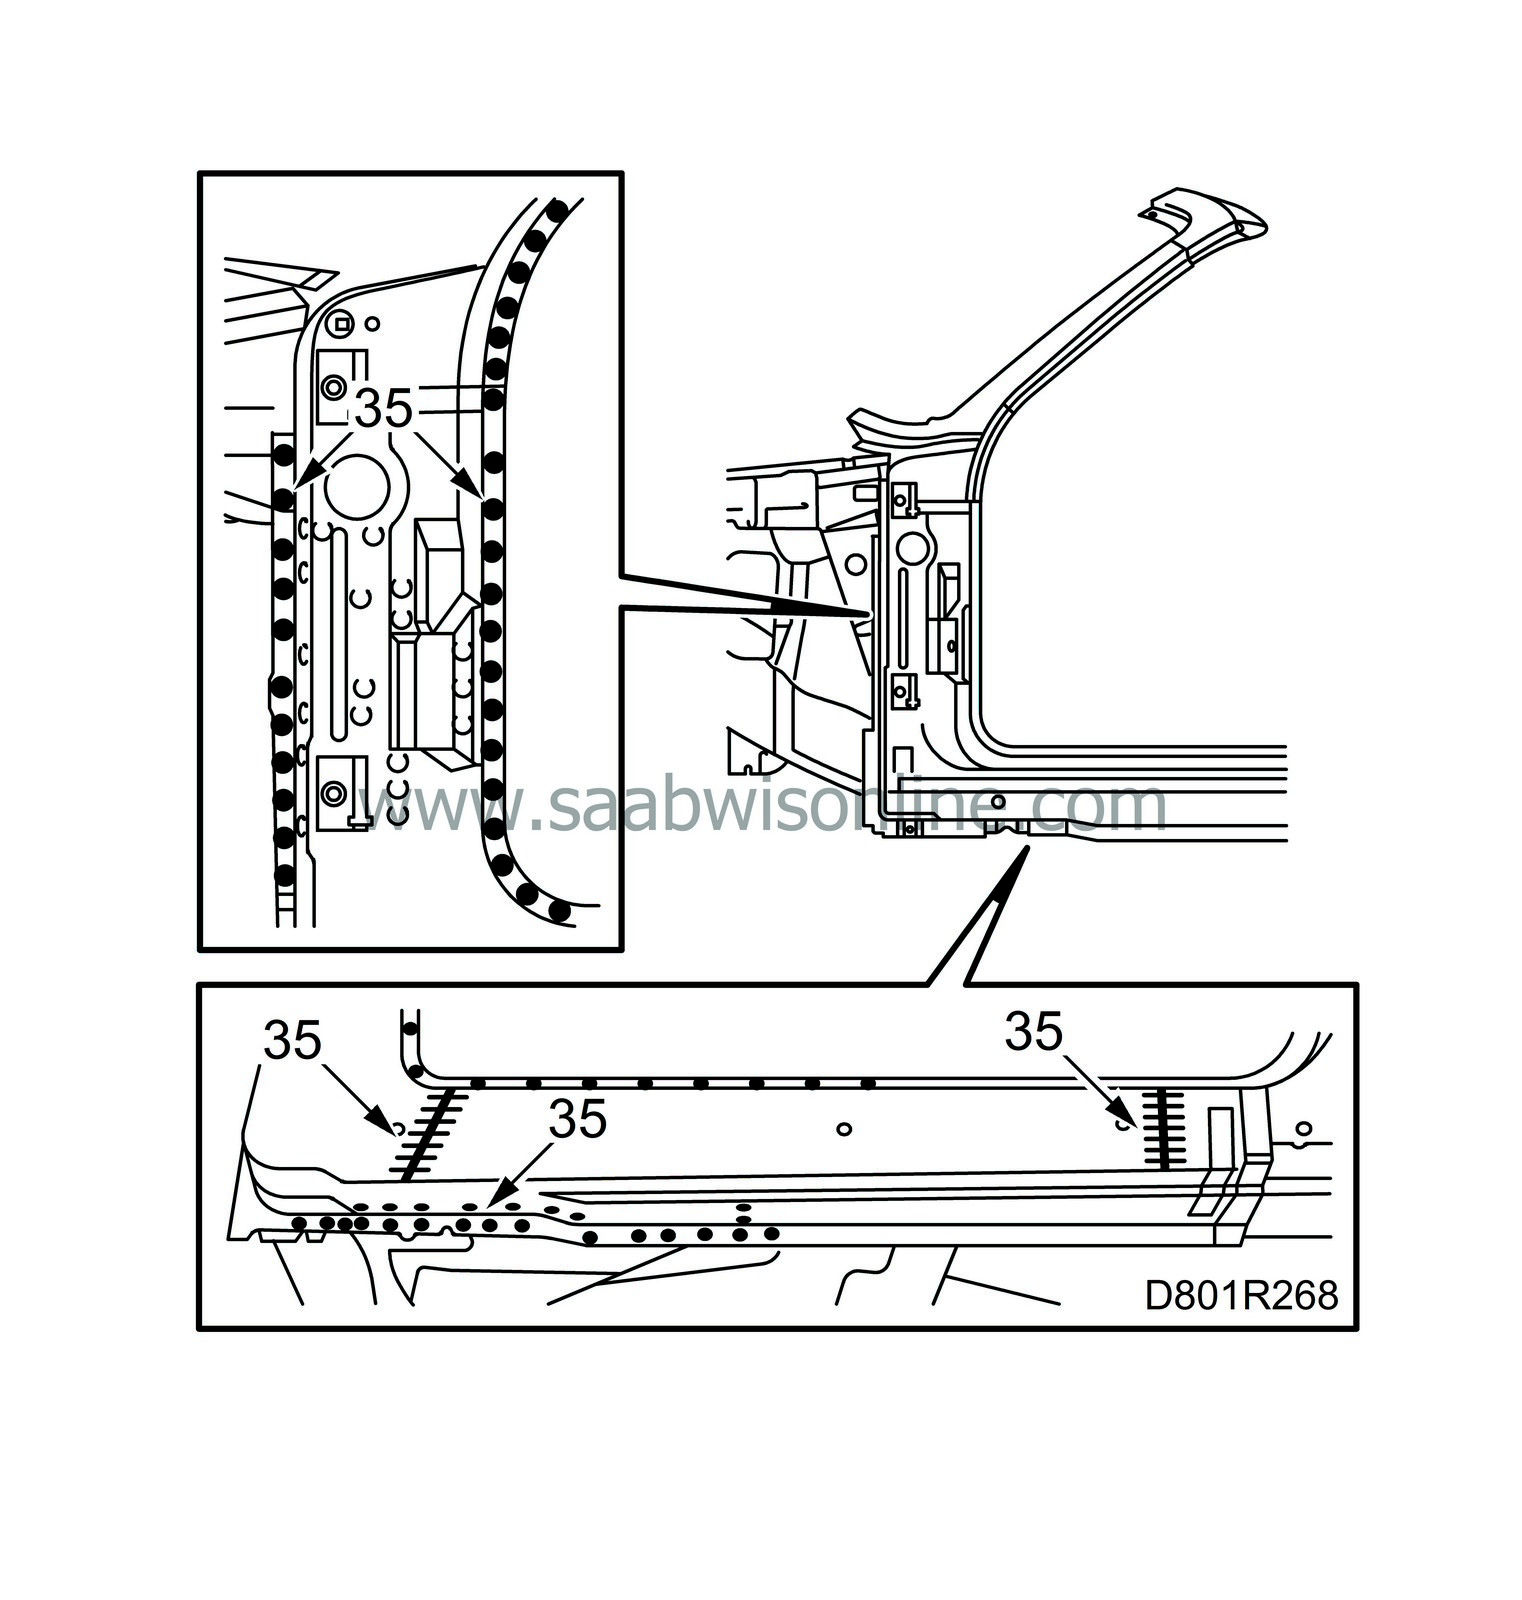
35.
|
Spot and plug weld on the A-pillar lower door frame and reinforcement, and all weld the joint to the sill.
|
|
36.
|
Grind the plug welds.
|
|
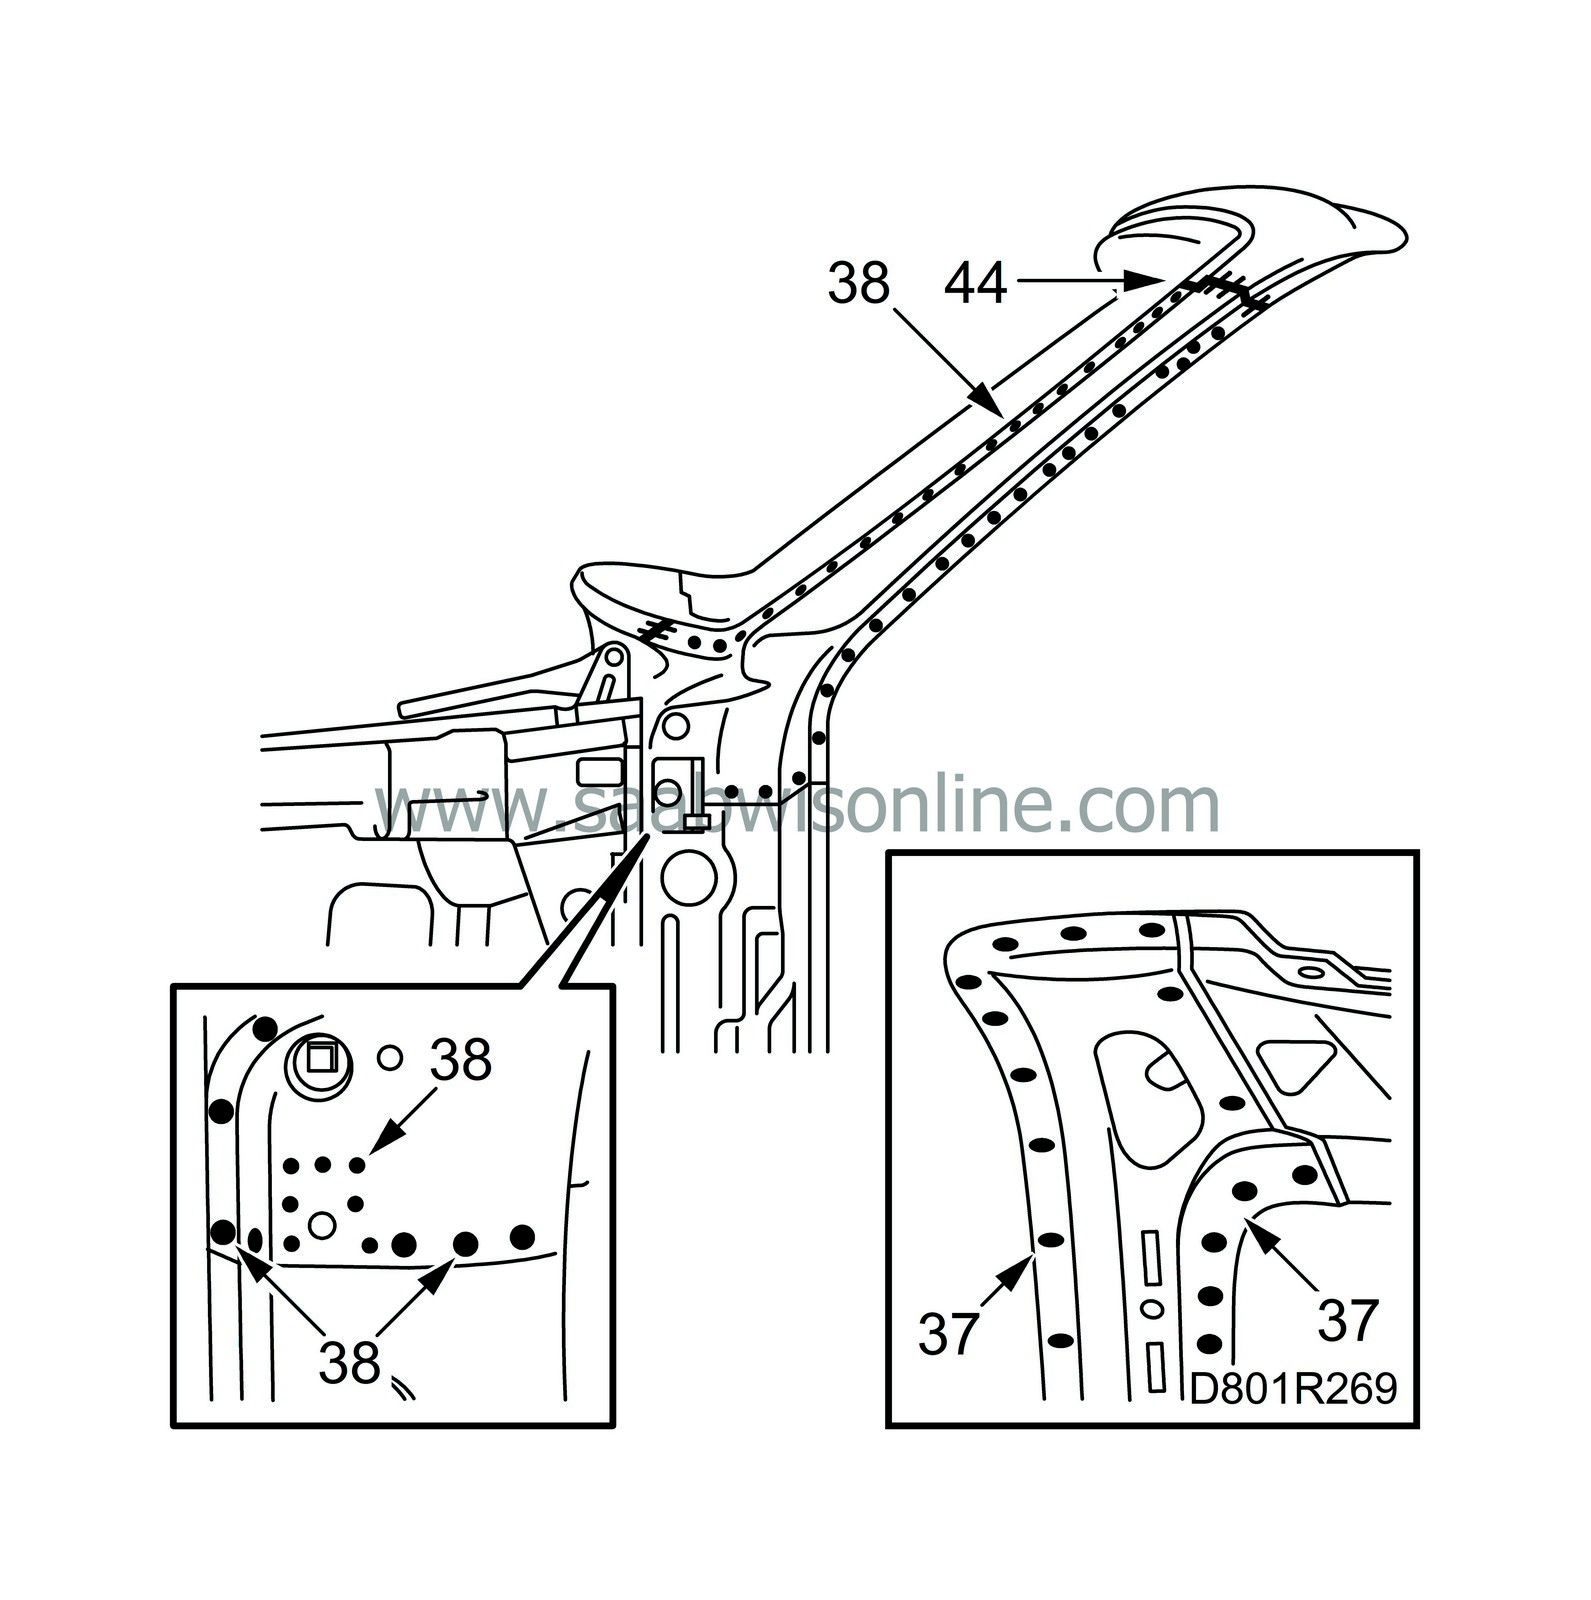
37.
|
Plug and spot weld the inner A-pillar reinforcement to the windscreen member.
|
|
38.
|
Put the upper outer panel in place and secure it with plug and spot welds.
|
|
40.
|
All-weld the joint at the top of the A pillar.
|
|
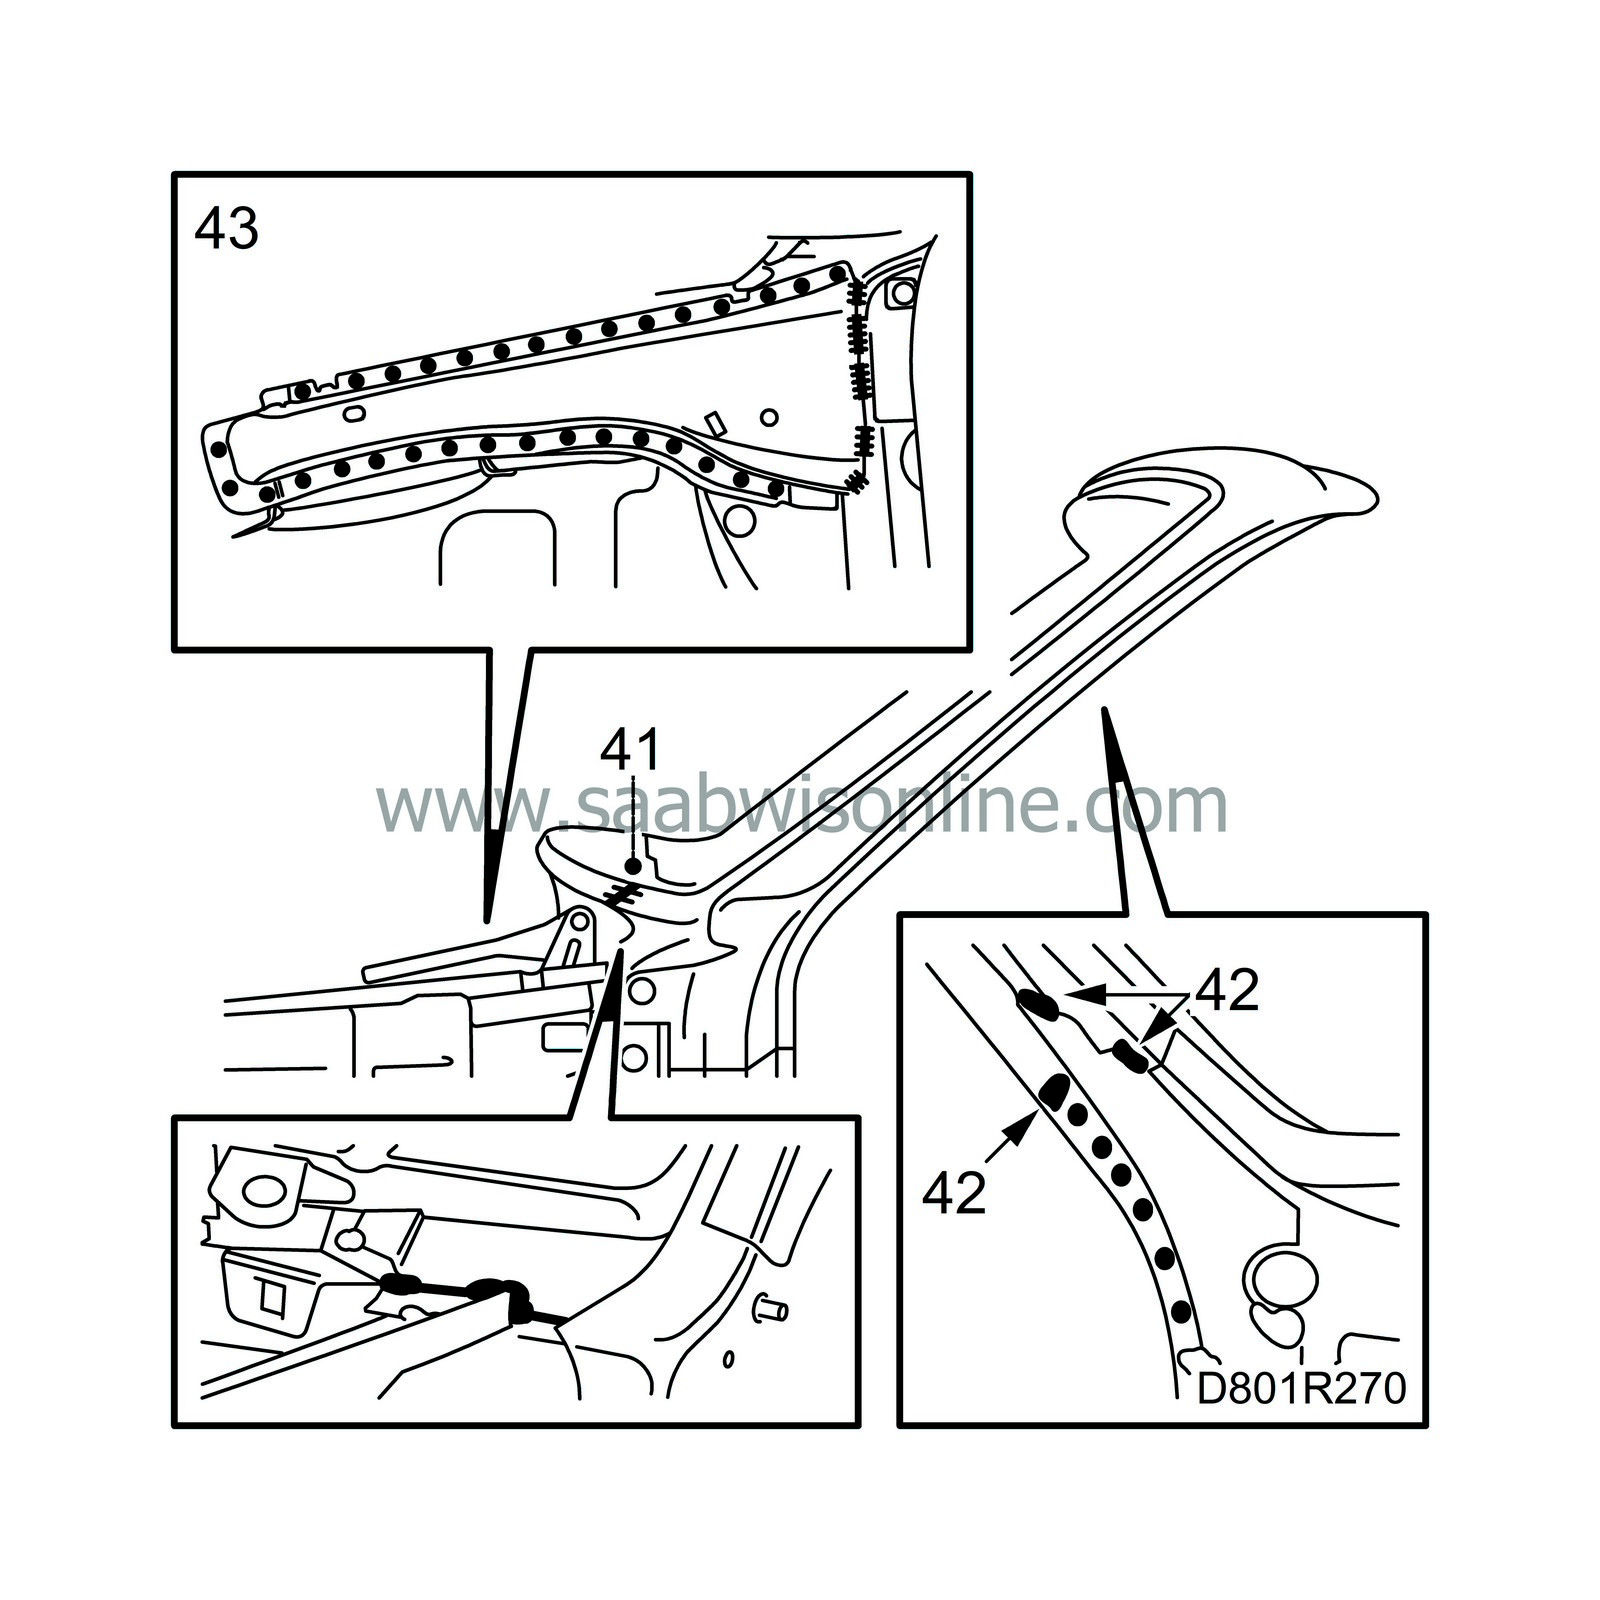
41.
|
All-weld the upper A pillar to the bulkhead and wheel housing.
|
|
42.
|
Seam weld the junction plate to the inner A-pillar and the access panel to the A-pillar.
|
|
43.
|
Weld on the reinforcement on the outside of the front wheel housing.
|
|
45.
|
Put the hinges in place and screw them on with one screw in each hinge.
|
|
46.
|
Check the fit by putting in place the front wing, bonnet and door and adjusting the exact location of the hinges.
|
|
47.
|
Fasten the hinges with a couple of welds.
|
|
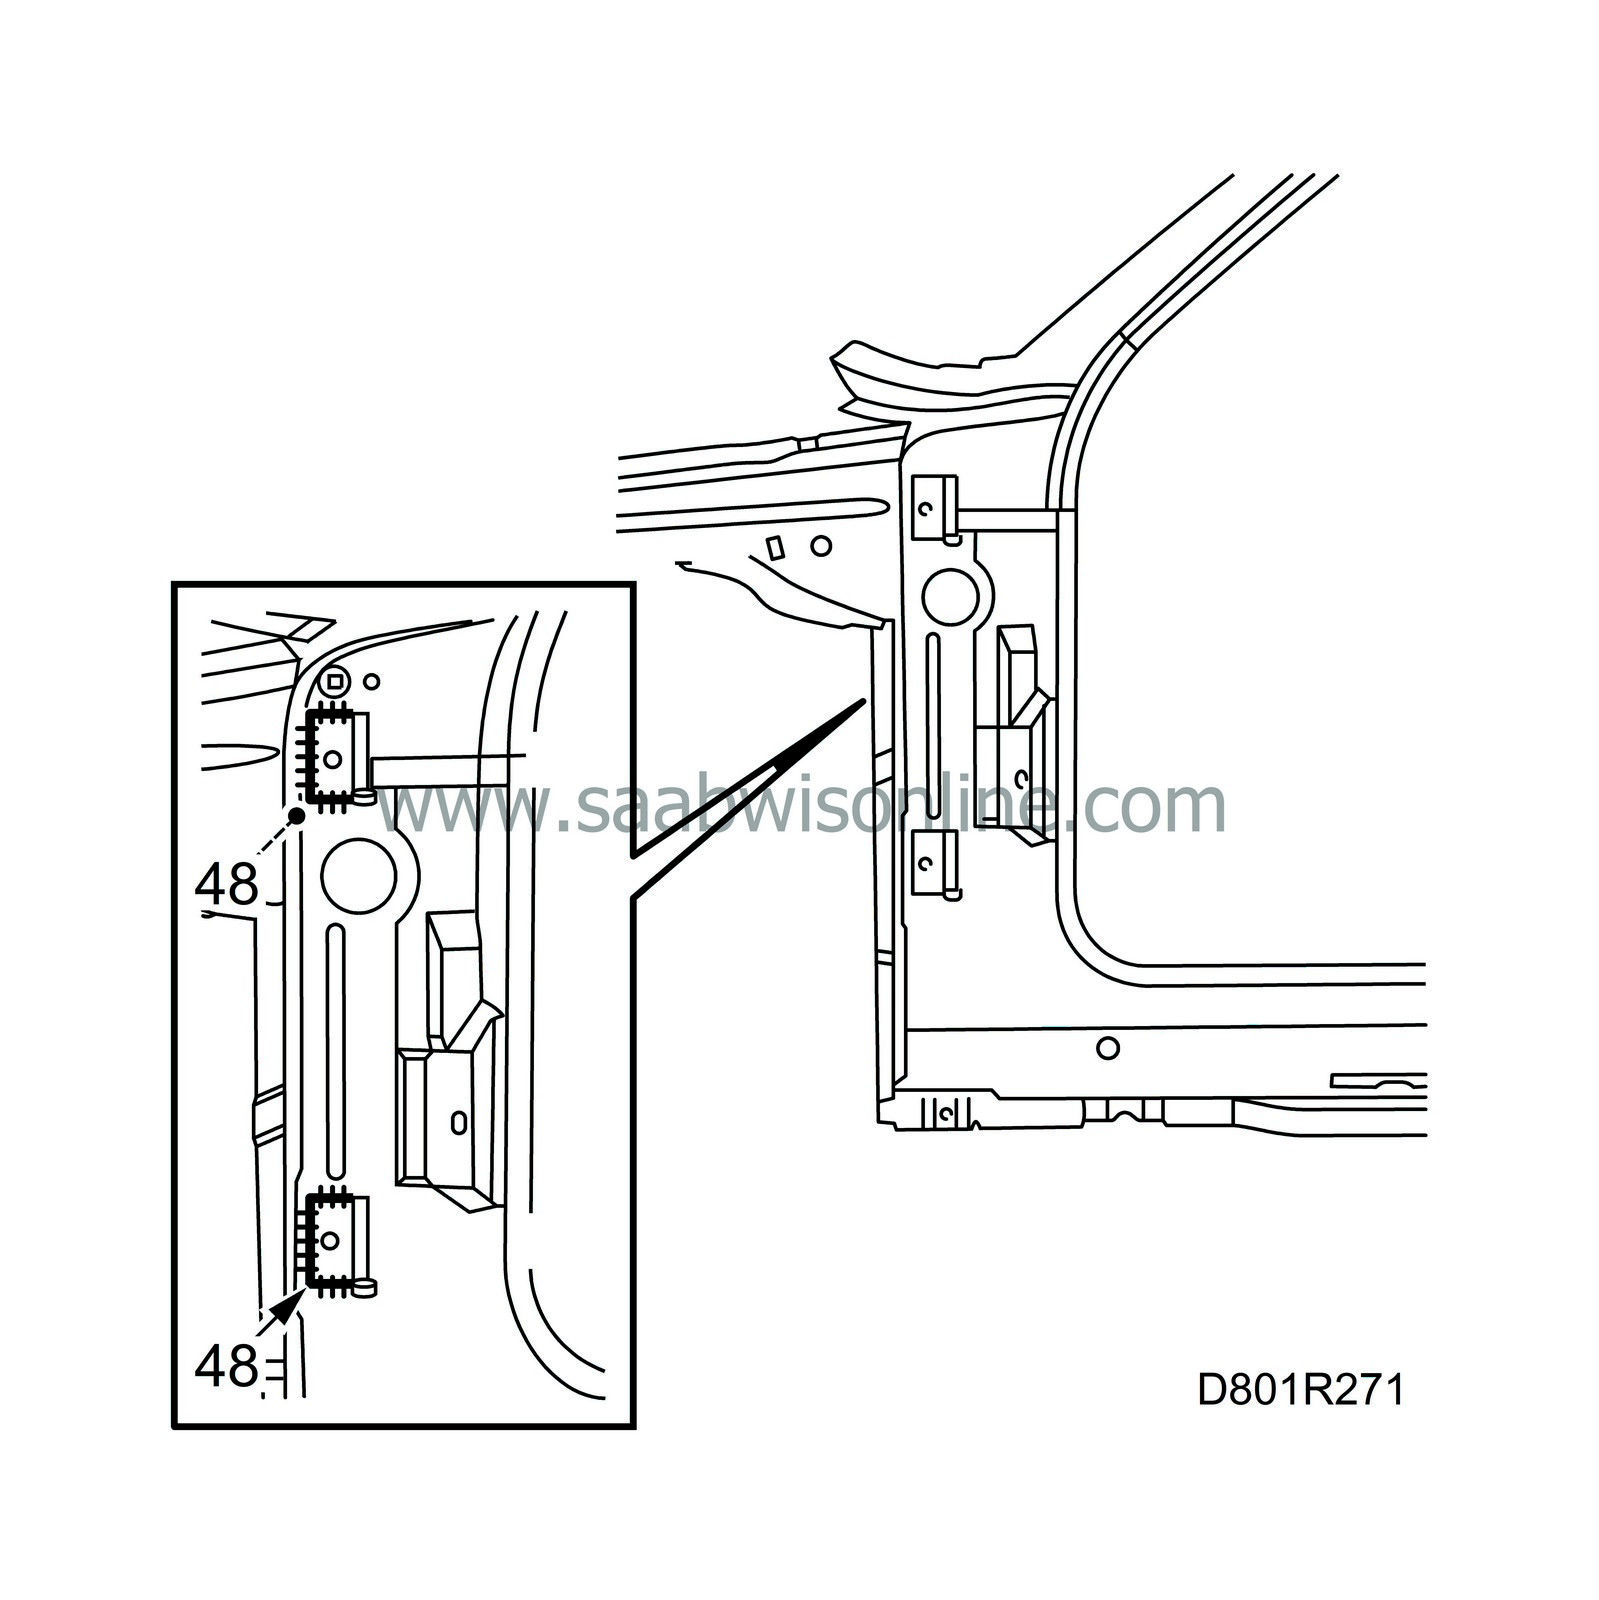
48.
|
Remove the door, front wing and bonnet, and all-weld the hinges.
|
|
50.
|
Remove any remaining welding primer. Welding primer reduces adhesion of paint, filler and sealant.
|
|
51.
|
Apply primer to all ground surfaces. Use Standox 1K Füllprimer.
|
|
52.
|
Seal joints and panel edges with sealant. Use Terostat 1K-PUR.
|
|
53.
|
Apply paint in the same colour as the car's finishing paint and then apply anti-corrosion agent to the inside surfaces and the A-pillar reinforcements. Use Terotex HV400.
|


