Rear outer wheel housing, 3D
|
|
Rear outer wheel housing, 3D
|
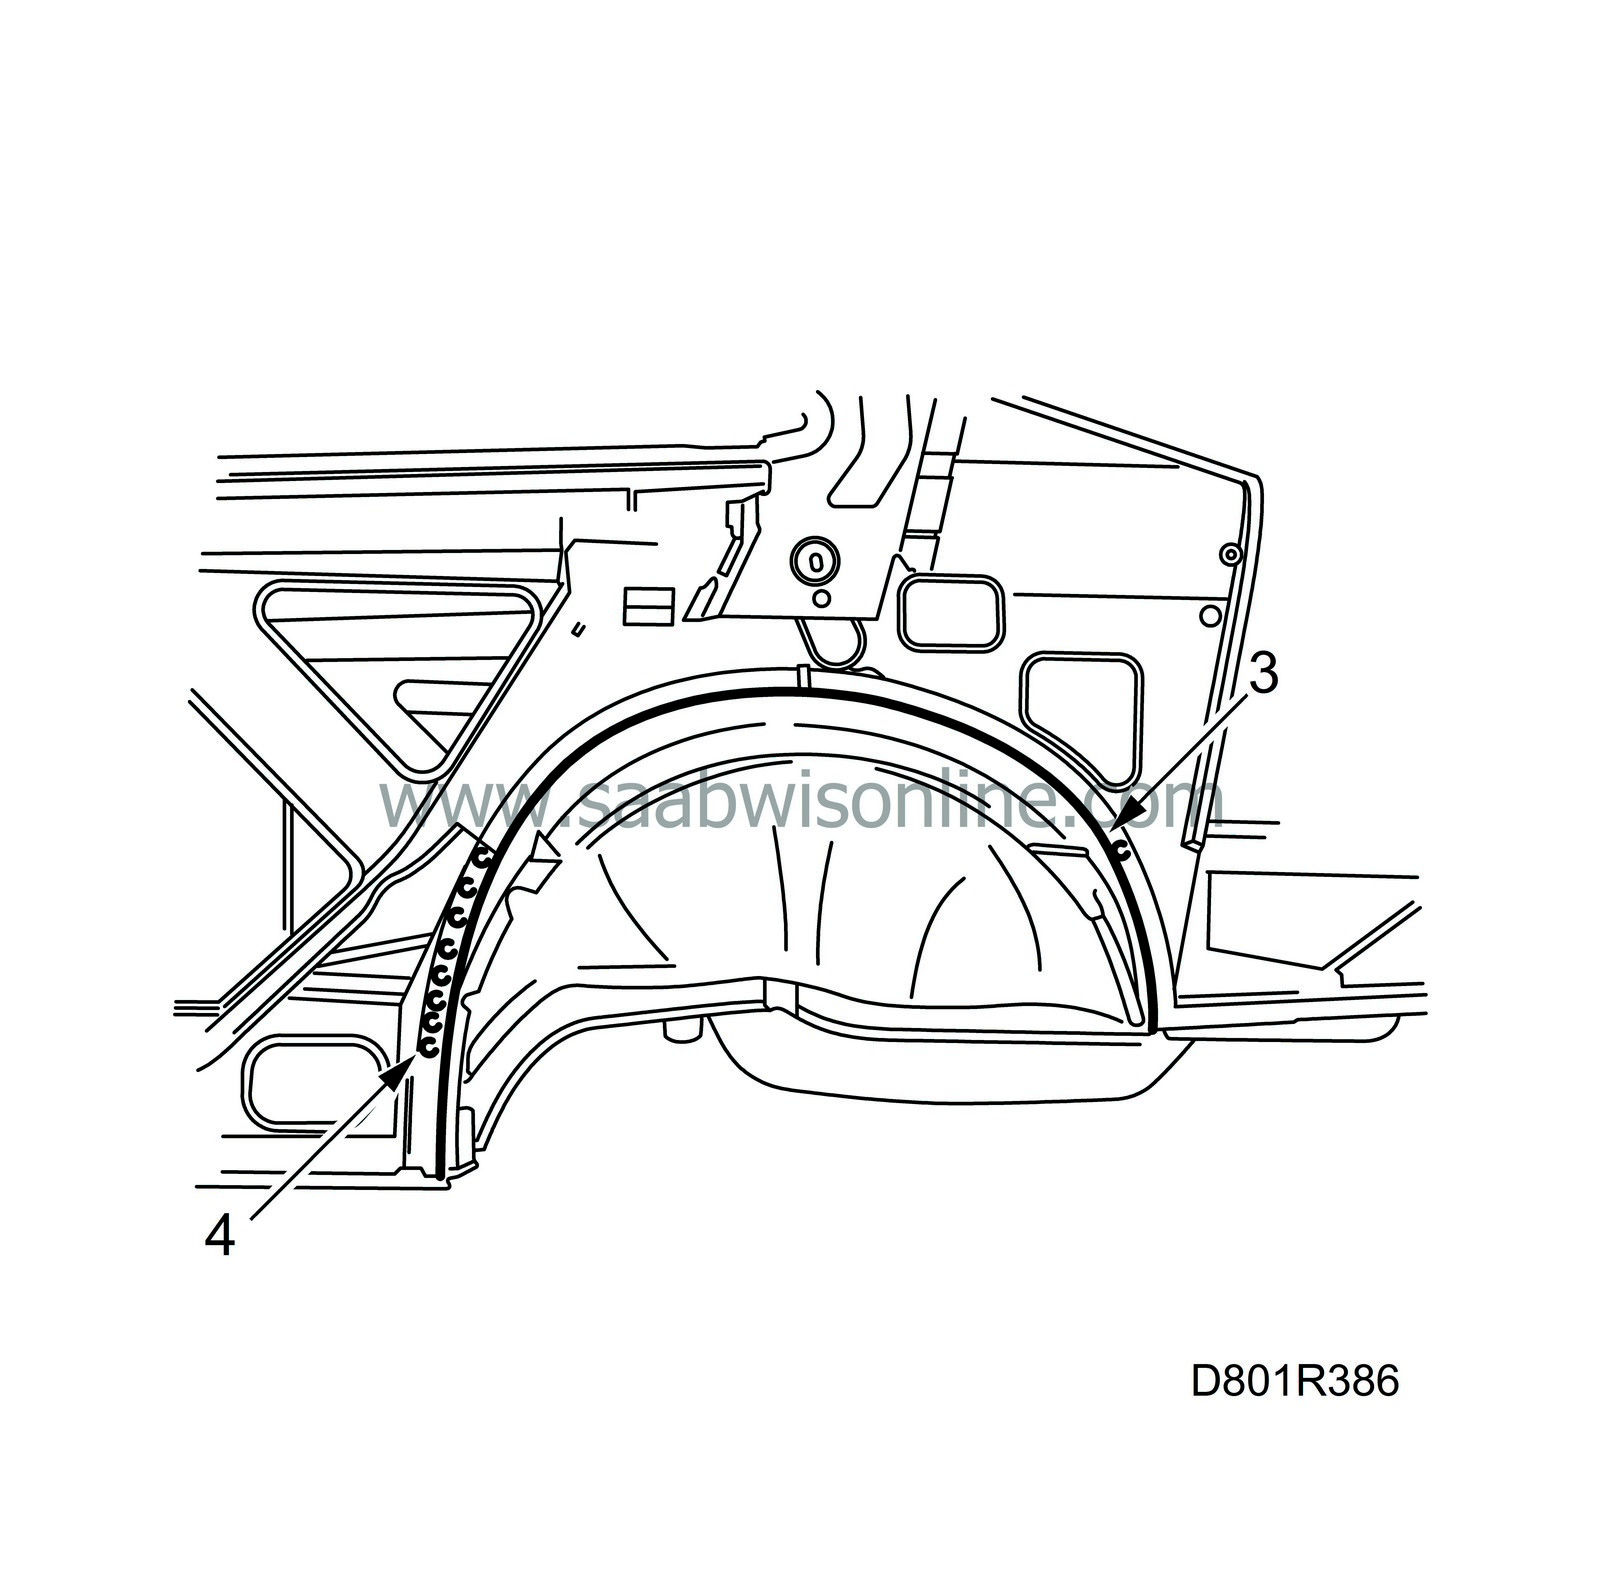
The rear outer wheel housing is an integrated part of the inner side panel. When replacing, the wheel housing is cut away from the inner side panel. Then cut the new wheel housing away from the spare part and spot-weld to the inner side plate.
|
1.
|
Position the car in an aligning bench and cross-measure if necessary.
|
|
3.
|
Cut the damaged wheel housing free. Cut as close to the inner wheel housing as possible.
|
|
4.
|
Drill out the spot-welds in the corner of the reinforcement closest to the wheel housing. Slightly bend out the reinforcement.
|
|
5.
|
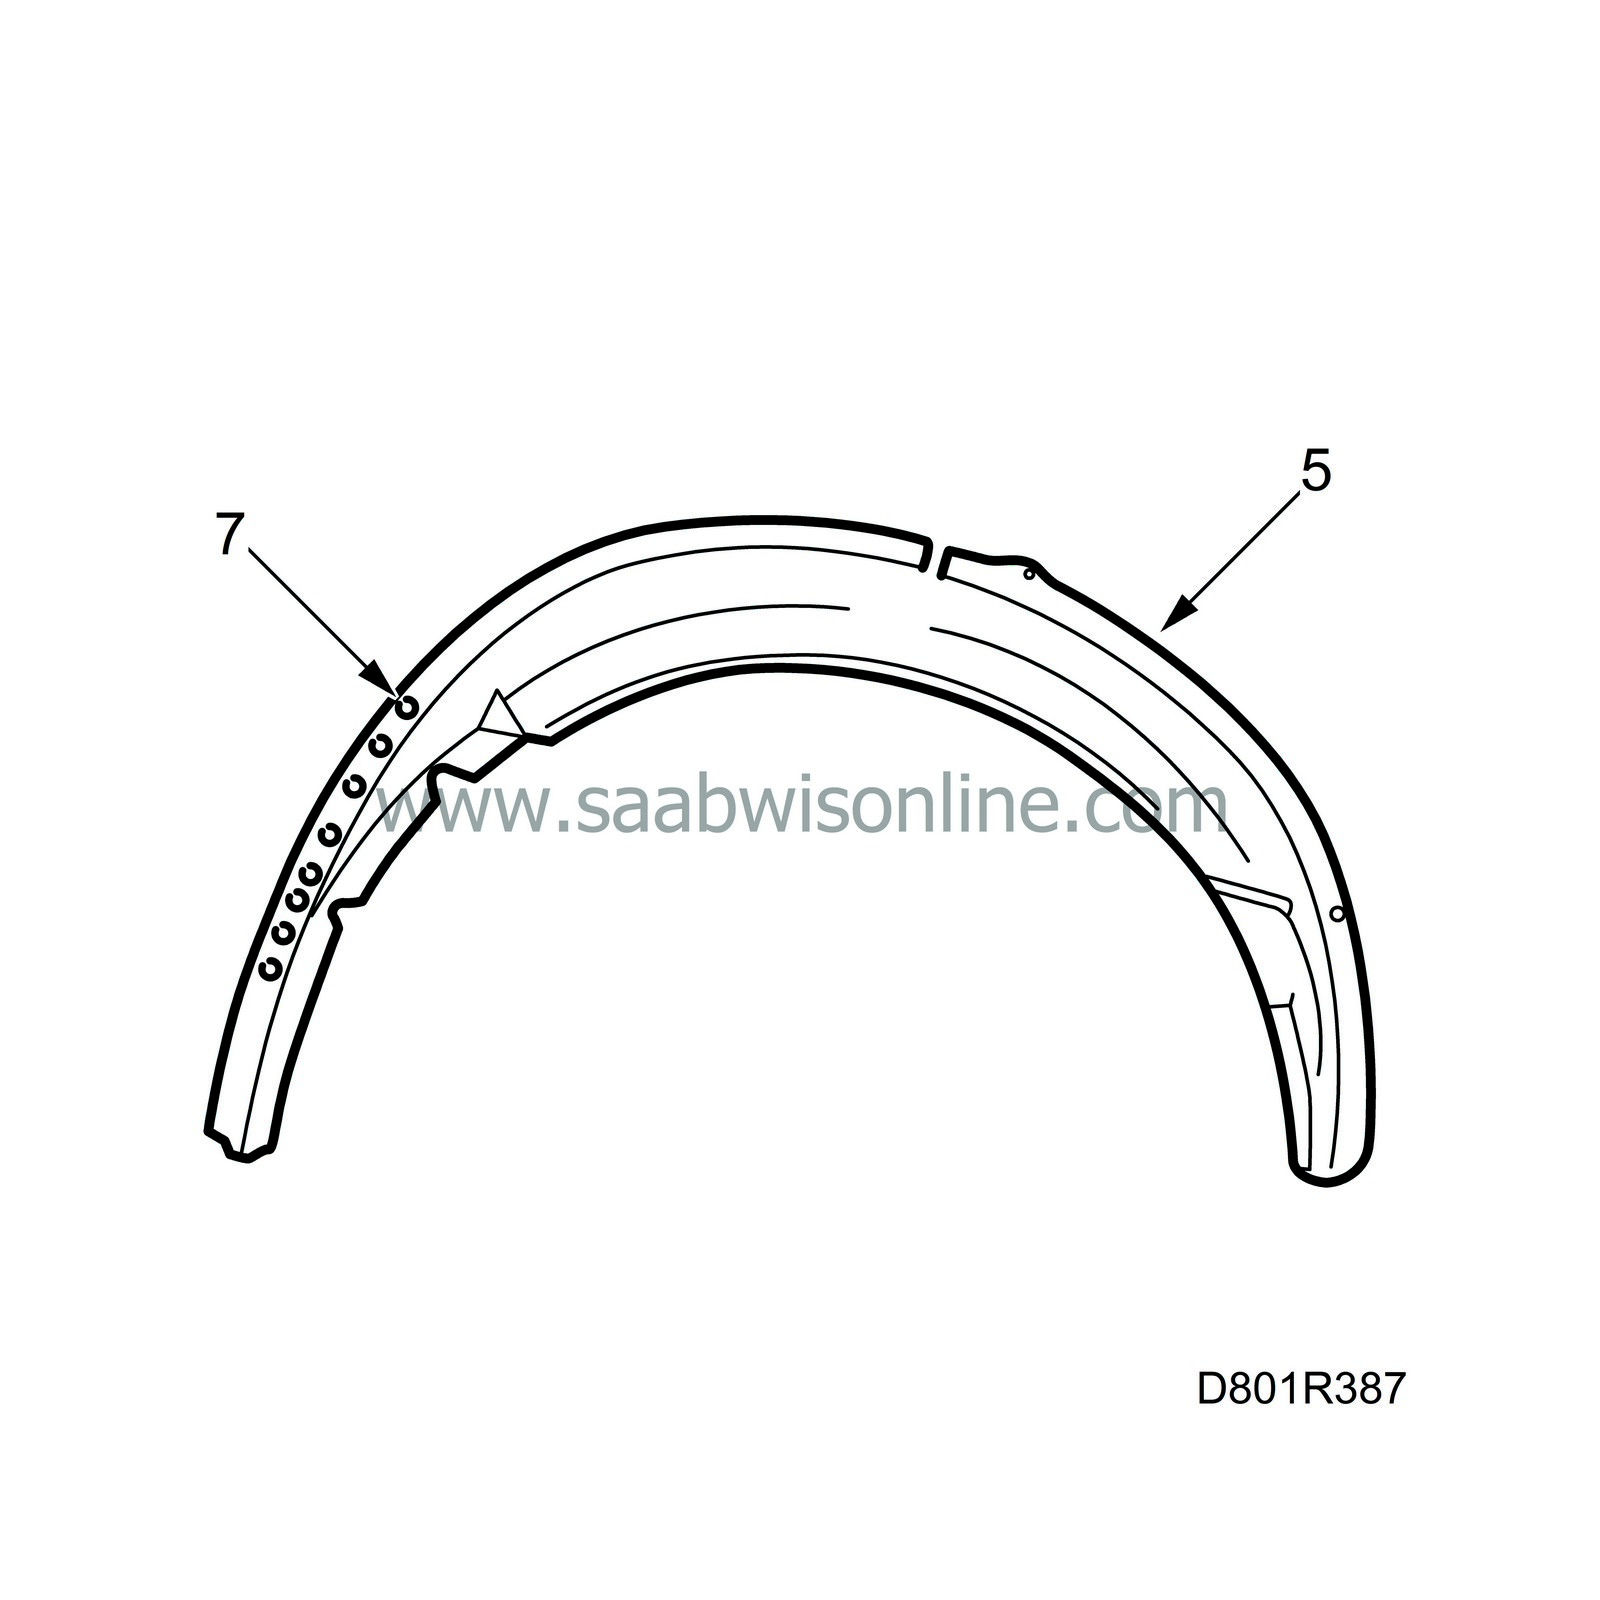
Cut the spare part as shown.
|
|
6.
|
Grind the surfaces to be welded on the spare part and on the body.
|
|
7.
|
Drill holes for plug-welds in the front edge of the spare part, so that it can be plug welded with the reinforcement in front of the wheel housing and inner side panel.
|
|
8.
|
Apply welding primer on the surfaces to be plug and spot-welded. Use Teroson Zinkspray.
|
|
9.
|
Fit the spare part inside the reinforcement in front of the wheel housing.
|
|
10.
|
Spot-weld the wheel housing.

|
|
11.
|
Plug-weld the reinforcement and wheel housing.
|
|
12.
|
Remove any remaining welding primer. Welding primer reduces adhesion of paint, filler and sealant.
|
|
13.
|
Apply primer to all ground surfaces. Use high-quality primer, for example, Standox 1K Füllprimer.
|
|
14.
|
Seal joints and sheet metal flanges with sealant. Use Terostat 1K-PUR.
|
|
15.
|
Apply underbody sealant in the wheel housing. Use Terostat 9320.
|
|
16.
|
Apply anti-corrosion agent to the wheel housing after painting. Use Terotex HV 400 or Mercasol 1.
|


