Rear outer wheel housing, 5D
|
|
Rear outer wheel housing, 5D
|
The rear outer wheel housing is an integrated part of the inner side panel. When replacing, cut away the damaged wheel housing from the inner side panel. Then cut away the new wheel housing from the spare part and spot-weld to the inner side panel. Note that the joint on the fuel filling pipe must be welded edge-to-edge to eliminate the risk of the filler pipe collapsing in case of a collision.
|
1.
|
Position the car in an aligning bench and cross-measure if necessary.
|
|
2.
|
Remove the side panel and the rear door frame.
|
|
3.
|
Drill out the spot-welds.
|
|
4.
|
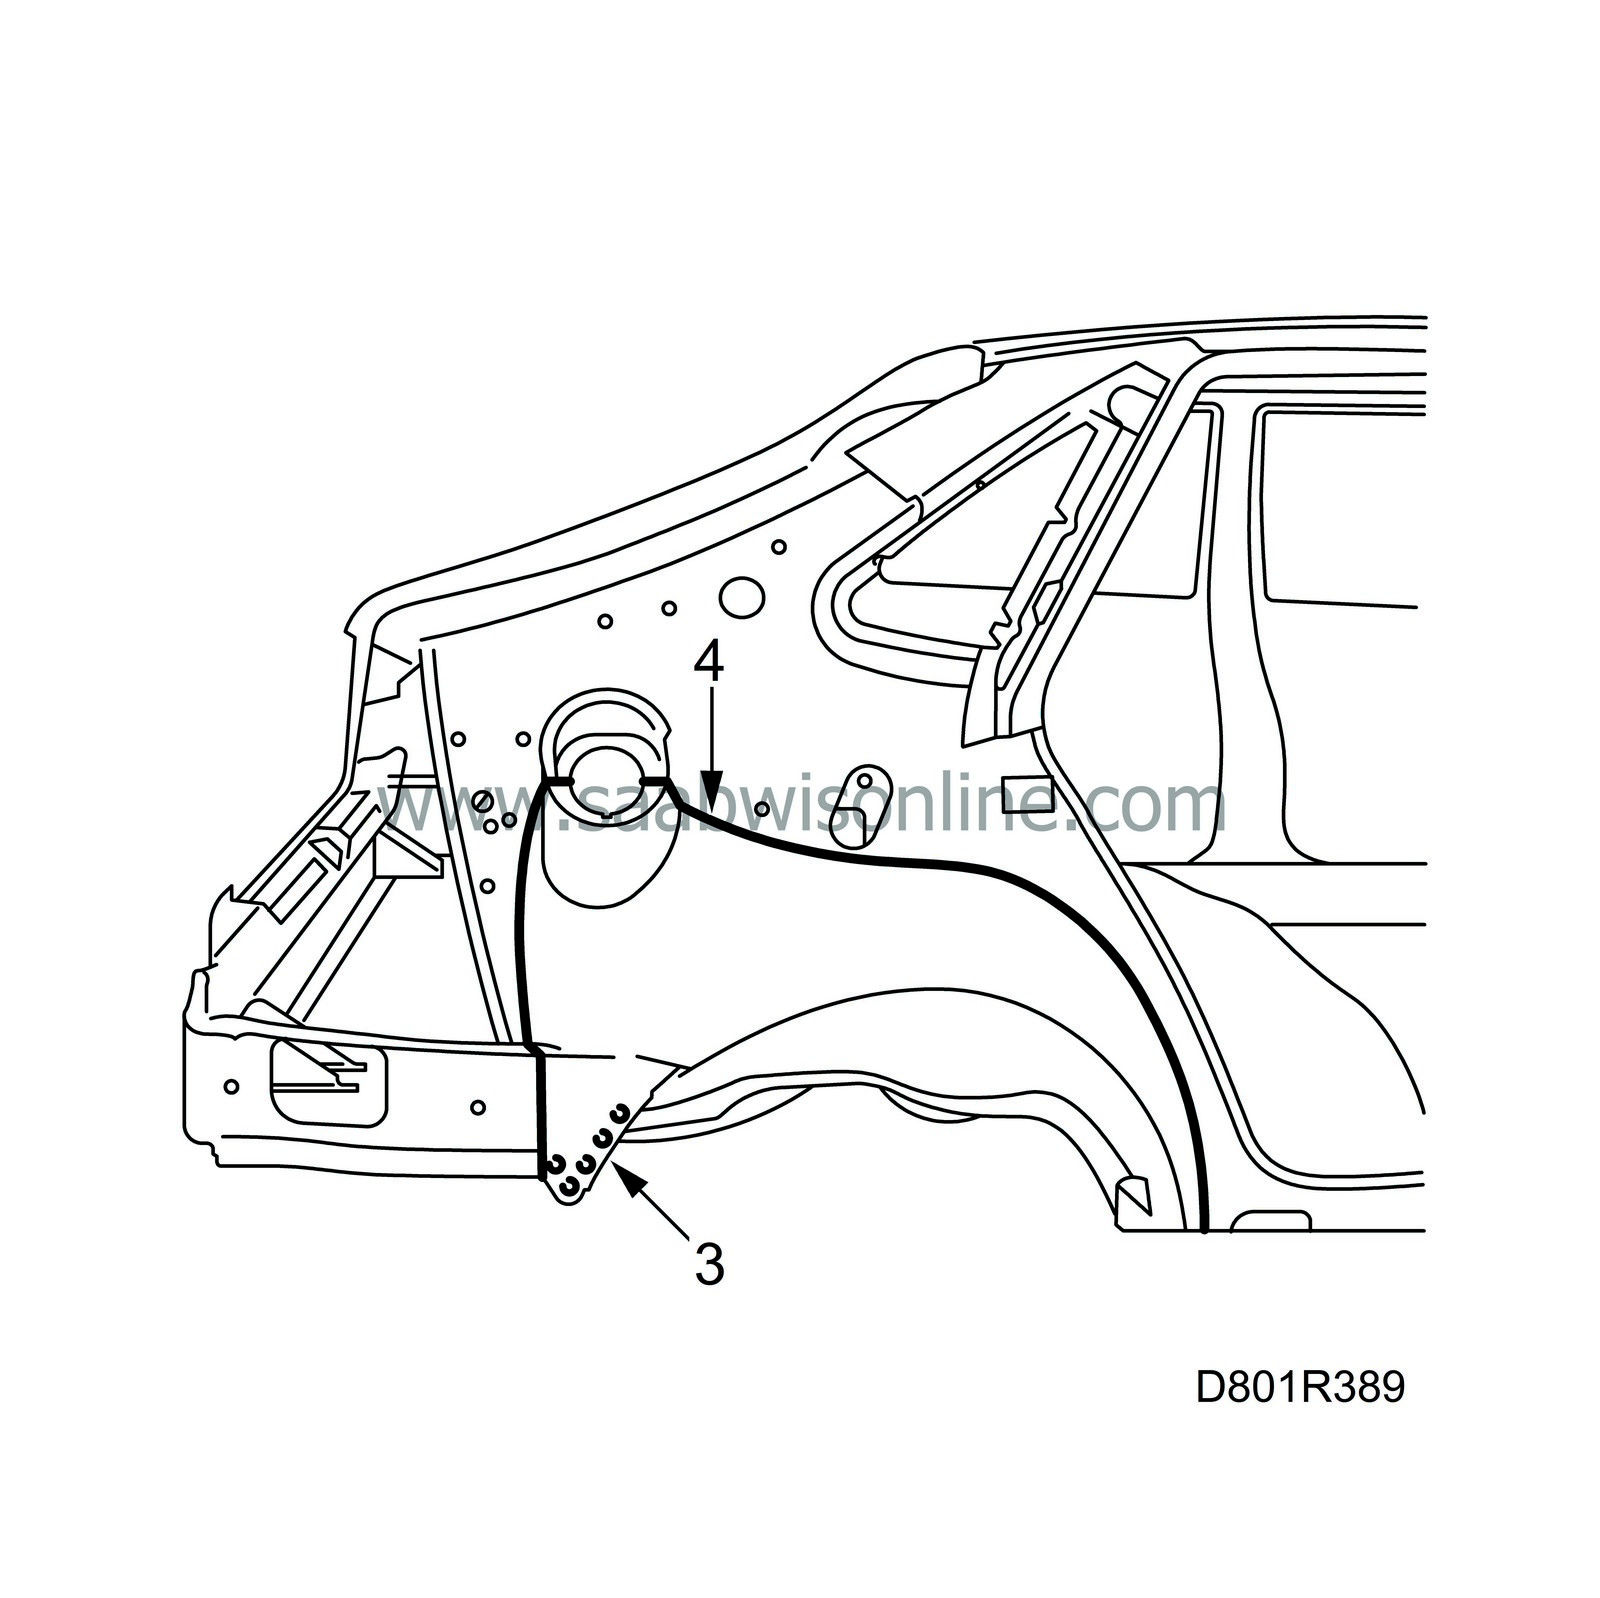
Cut away the damaged wheel housing.
|
|
5.
|
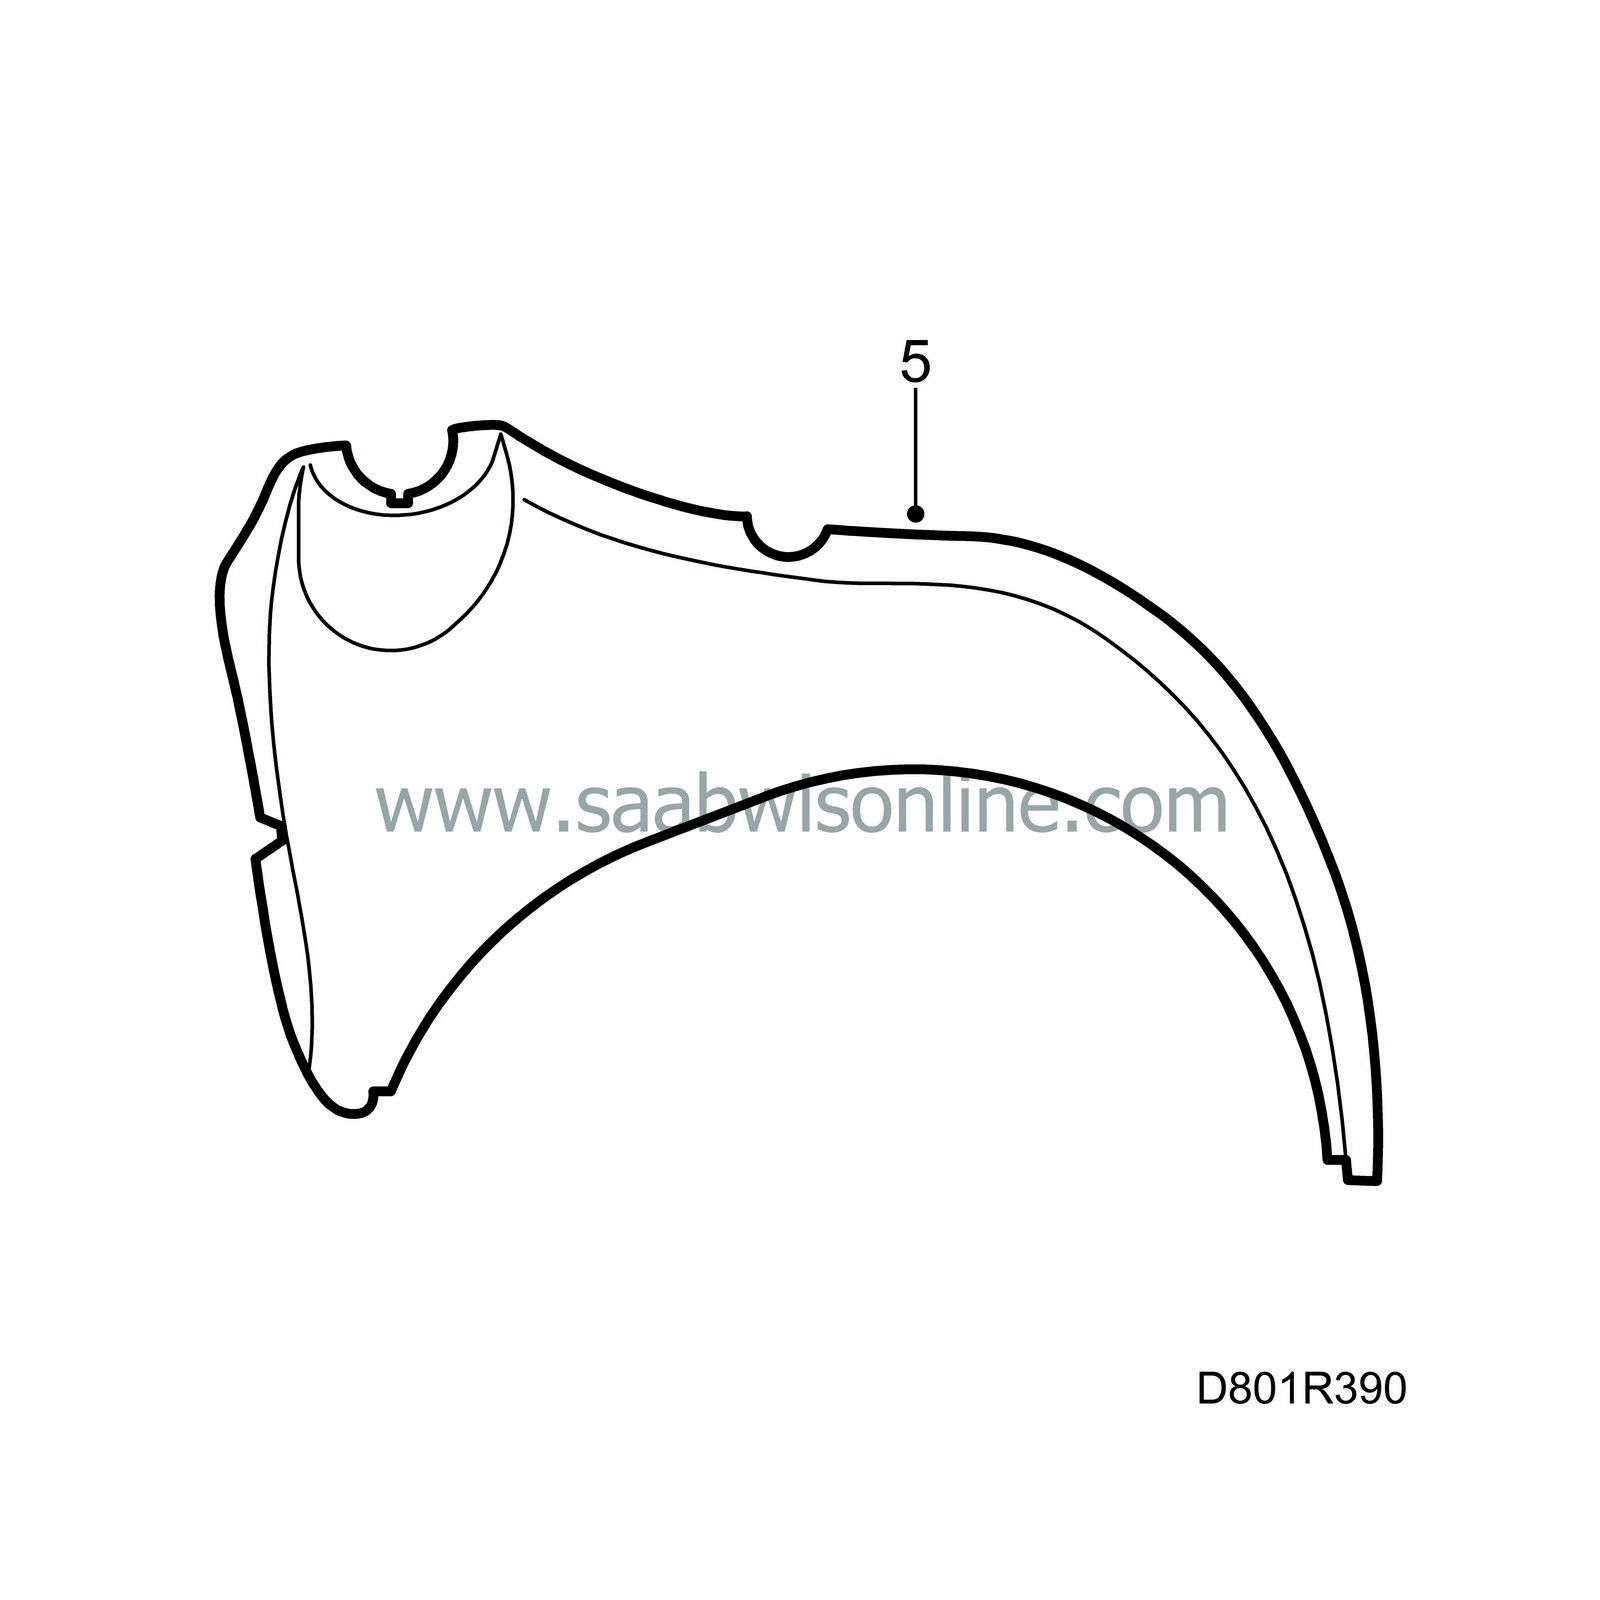
Cut the new wheel housing. Cut some way above the actual wheel housing so it is possible to spot weld on the new wheel housing to the inner side panel. The new wheel housing must be cut at the fuel filler pipe so that it can be butt welded.
|
|
6.
|
Fit the new wheel housing and fixate with a few welding clamps.
|
|
7.
|
Drill holes for plug welding where it is not possible to access for spot welding.
|
|
8.
|
Remove the new wheel housing and grind the surfaces to be welded on the wheel housing and the body.
|
|
9.
|
Apply welding primer on the surfaces to be plug and spot-welded. Use Teroson Zinkspray.
|
|
10.
|
Fit the new wheel housing and fixate with a few welding clamps.
|
|
11.
|
Spot and plug-weld the housing into place.

|
|
12.
|
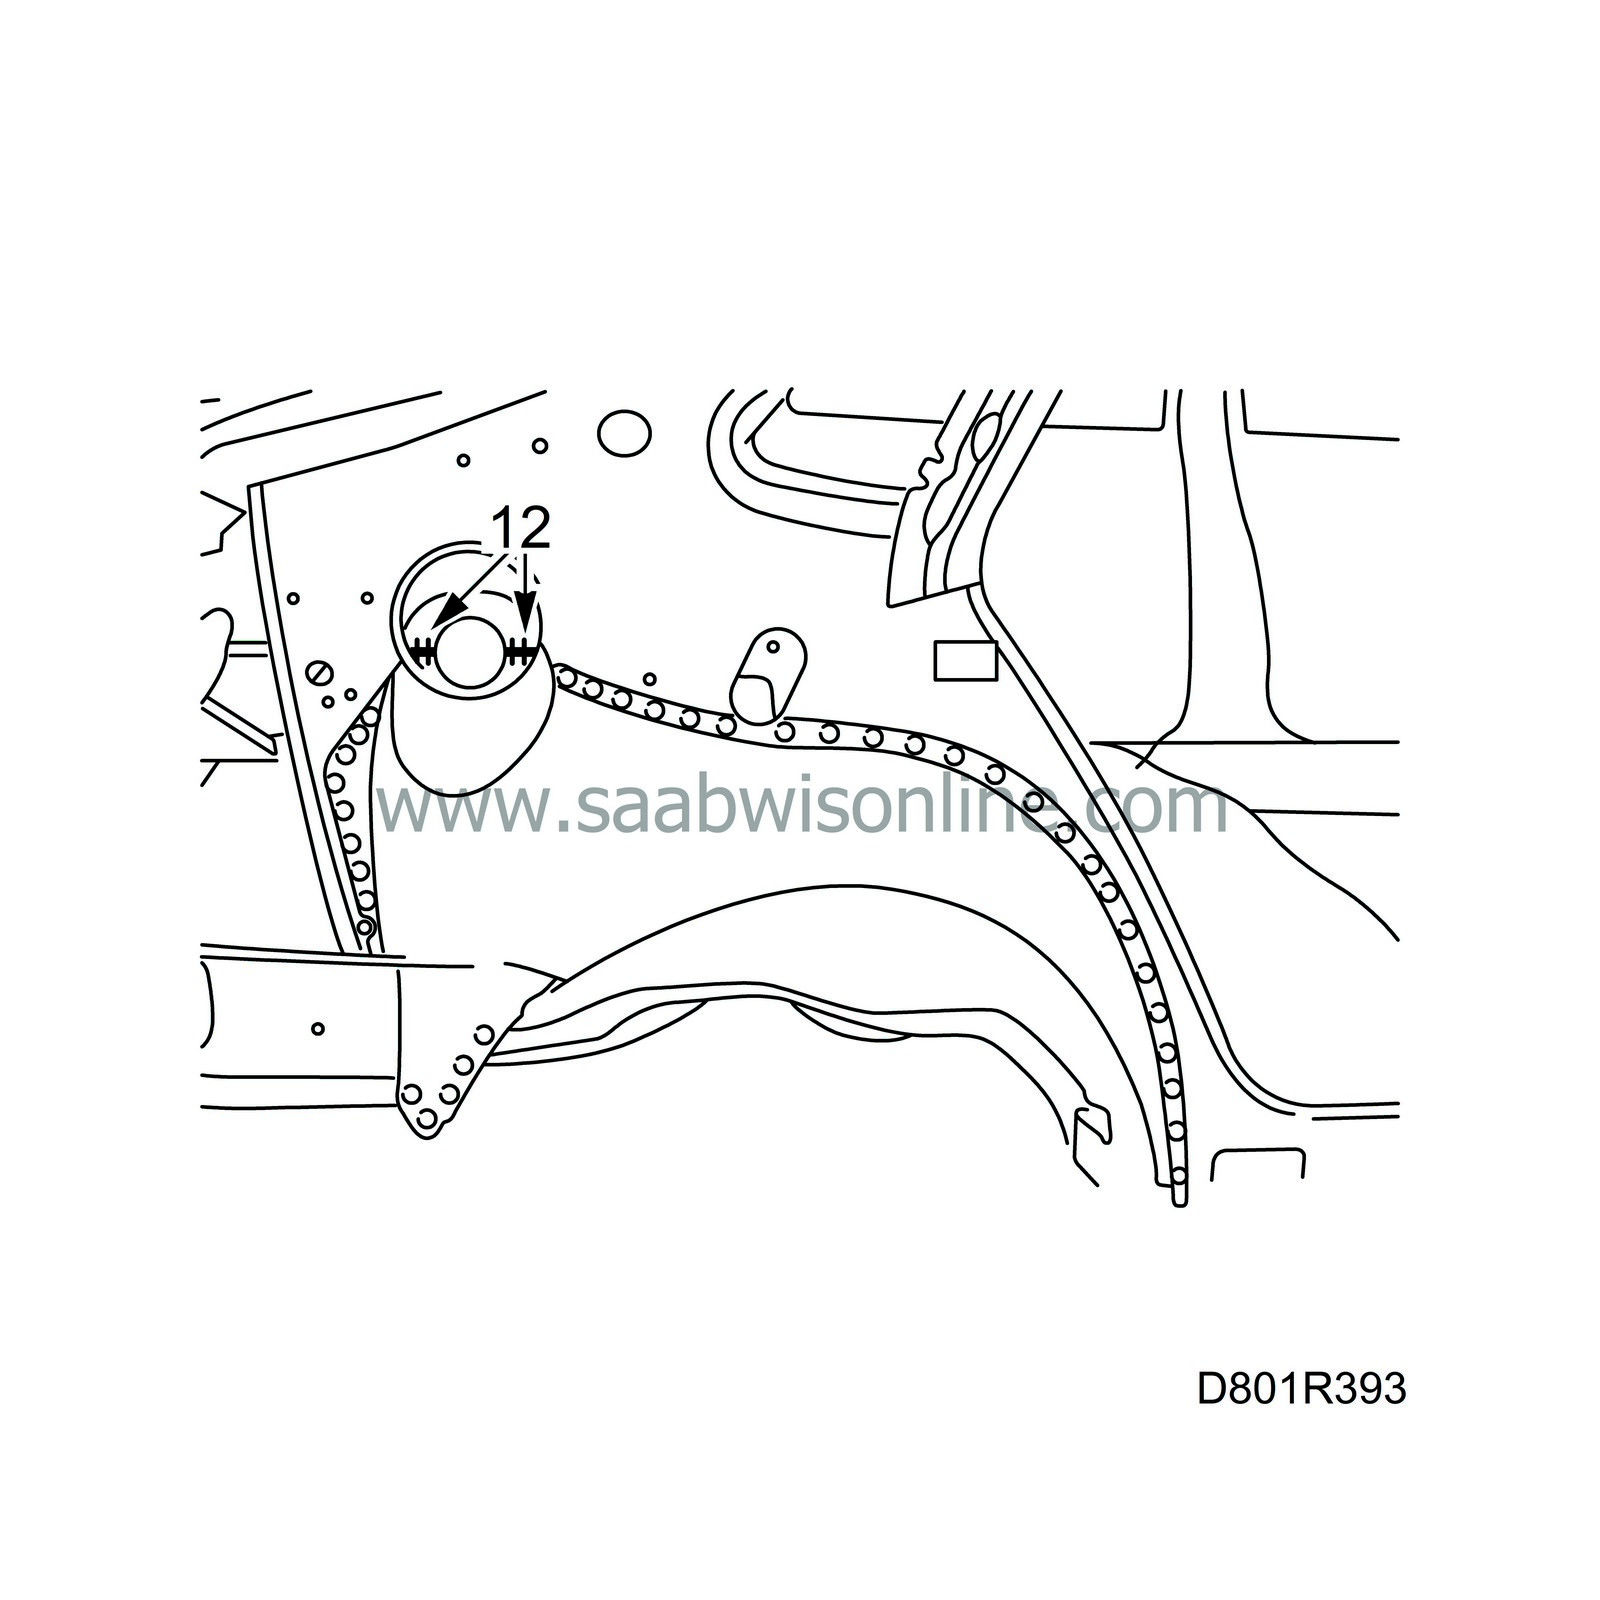
All-weld the joint on the fuel filler pipe.
|
|
13.
|
Remove any remaining welding primer. Welding primer reduces adhesion of paint, filler and sealant.
|
|
14.
|
Apply primer to all ground surfaces. Use high-quality primer, for example, Standox 1K Fullprimer.
|
|
15.
|
Seal joints and sheet metal flanges with sealant. Use Terostat 1K-PUR.
|
|
16.
|
Apply underbody sealant in the wheel housing. Use Terostat 9320.
|
|
17.
|
Apply anti-corrosion agent to the wheel housing after painting. Use Terotex HV 400 or Mercasol 1.
|


