Section of inner side panel, 5D
|
|
Section of inner side panel, 5D
|
|
1.
|
The side panel and rear section of the door frame must be removed.
|
|
2.
|
Position the car in an aligning bench.
|
|
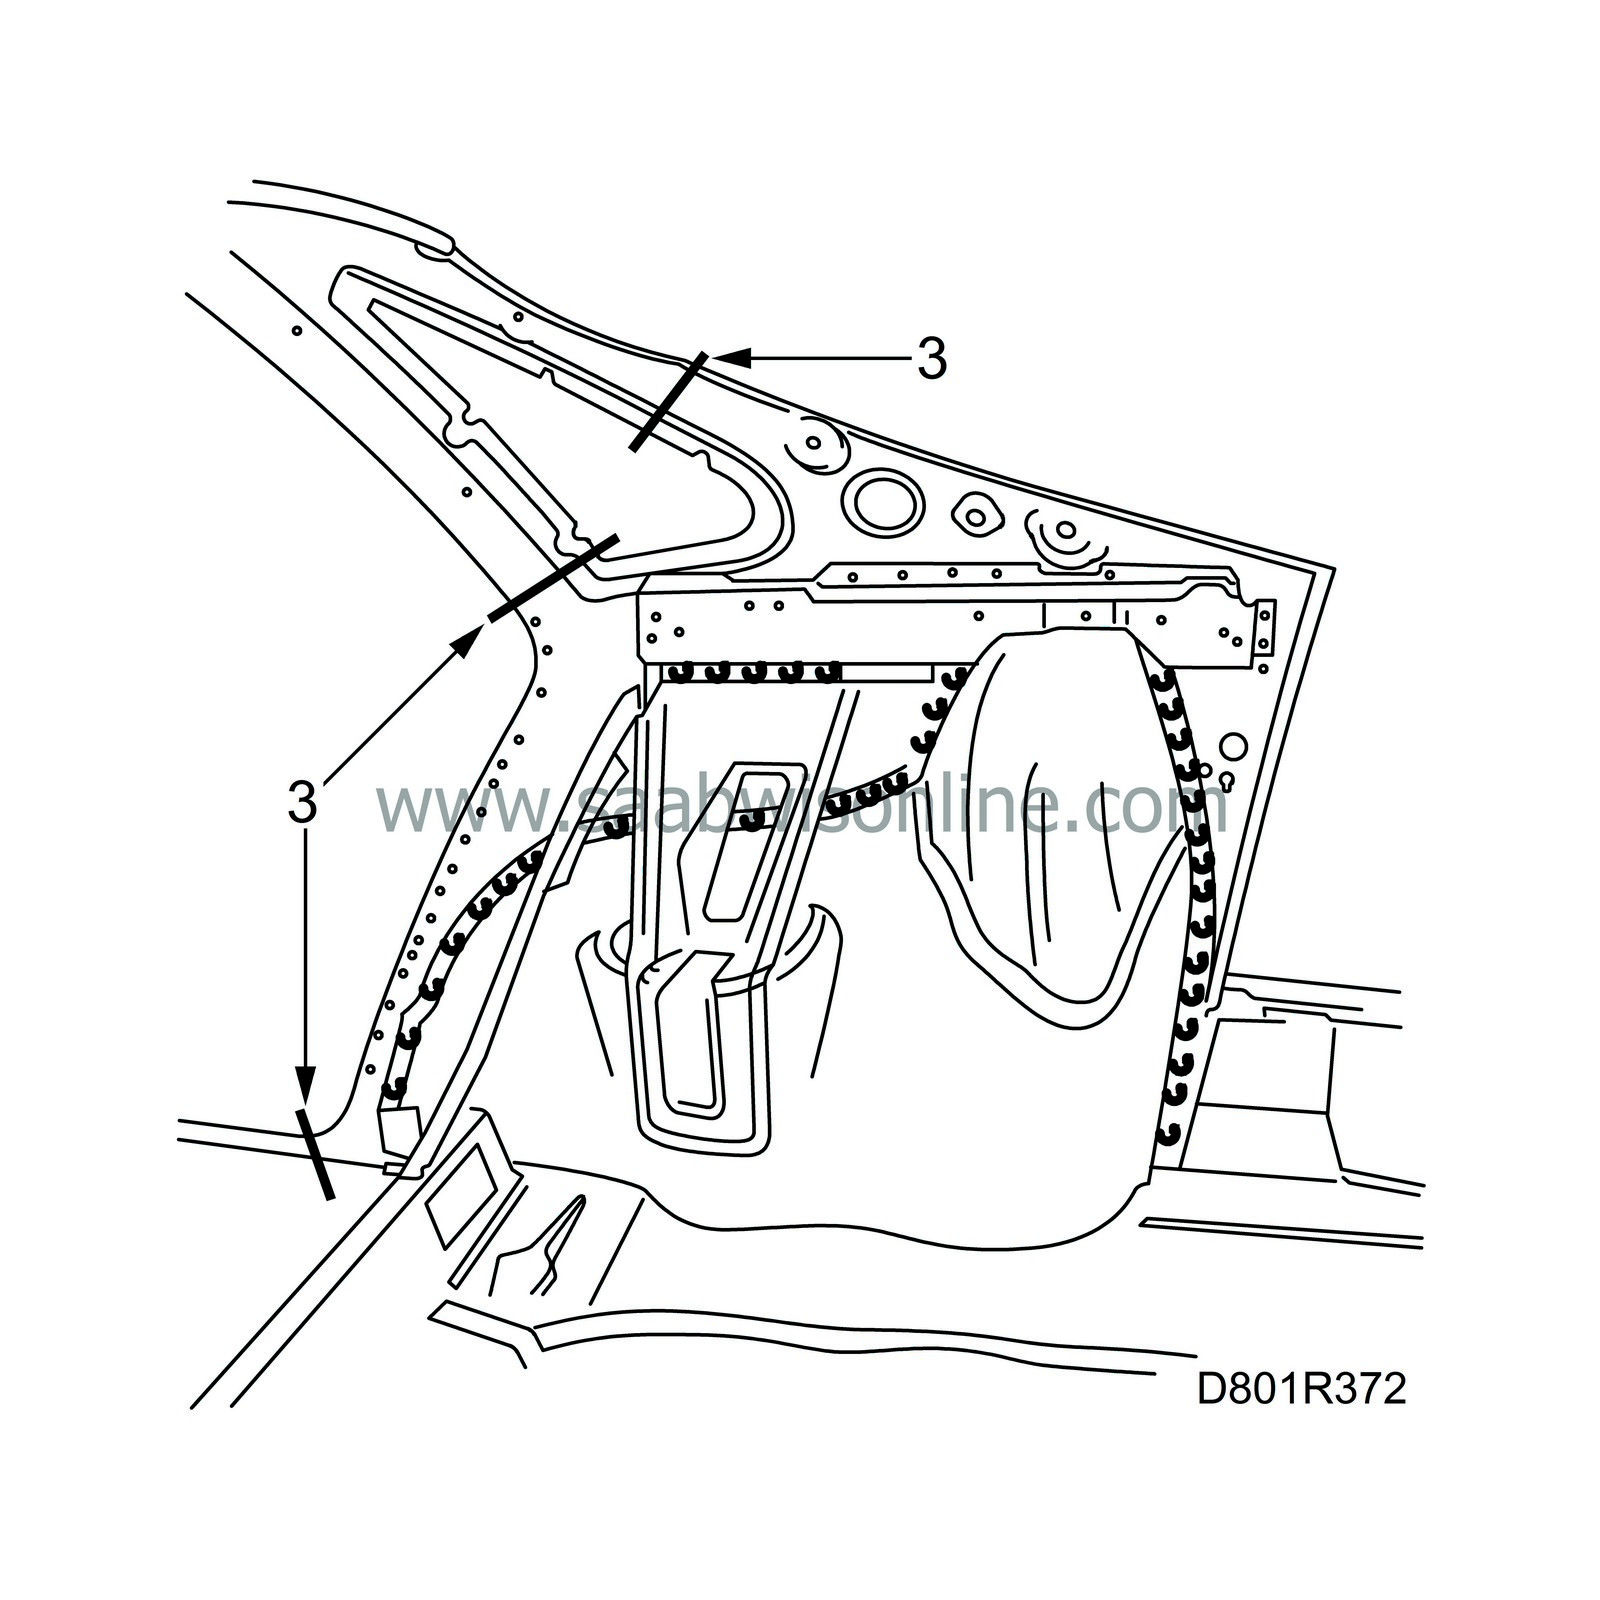
3.
|
Cut the inner side panel as shown. Be careful not to damage the reinforcement on the C-pillar.
|
|
4.
|
Drill out the spot-welds that secure the inner side panel. Grind down the seam welds in the wheel housing.

|
|
5.
|
Tap loose the inner side panel and align any damaged sheet metal or panels.
|
|
6.
|
Cut the spare part so that it overlaps the intended joint line by approximately three centimetres.
|
|
7.
|
Fit the spare part and fixate with a couple of welding clamps. Adjust the exact position using the aligning bench measuring system.
|
|
8.
|
Cut through the spare part and body at the same time so that the joints can be welded edge-to-edge.
|
|
9.
|
Grind the surfaces to be welded on the spare part and the body.
|
|
10.
|
Apply welding primer on the surfaces to be spot-welded. Use Teroson Zinkspray.
|
|
11.
|
Fit the spare part and fixate with a couple of welding clamps.
|
|
12.
|
Put the outer side panel and door frame in place and check the fit.
|
|
13.
|
Remove the side panel and door frame.
|
|
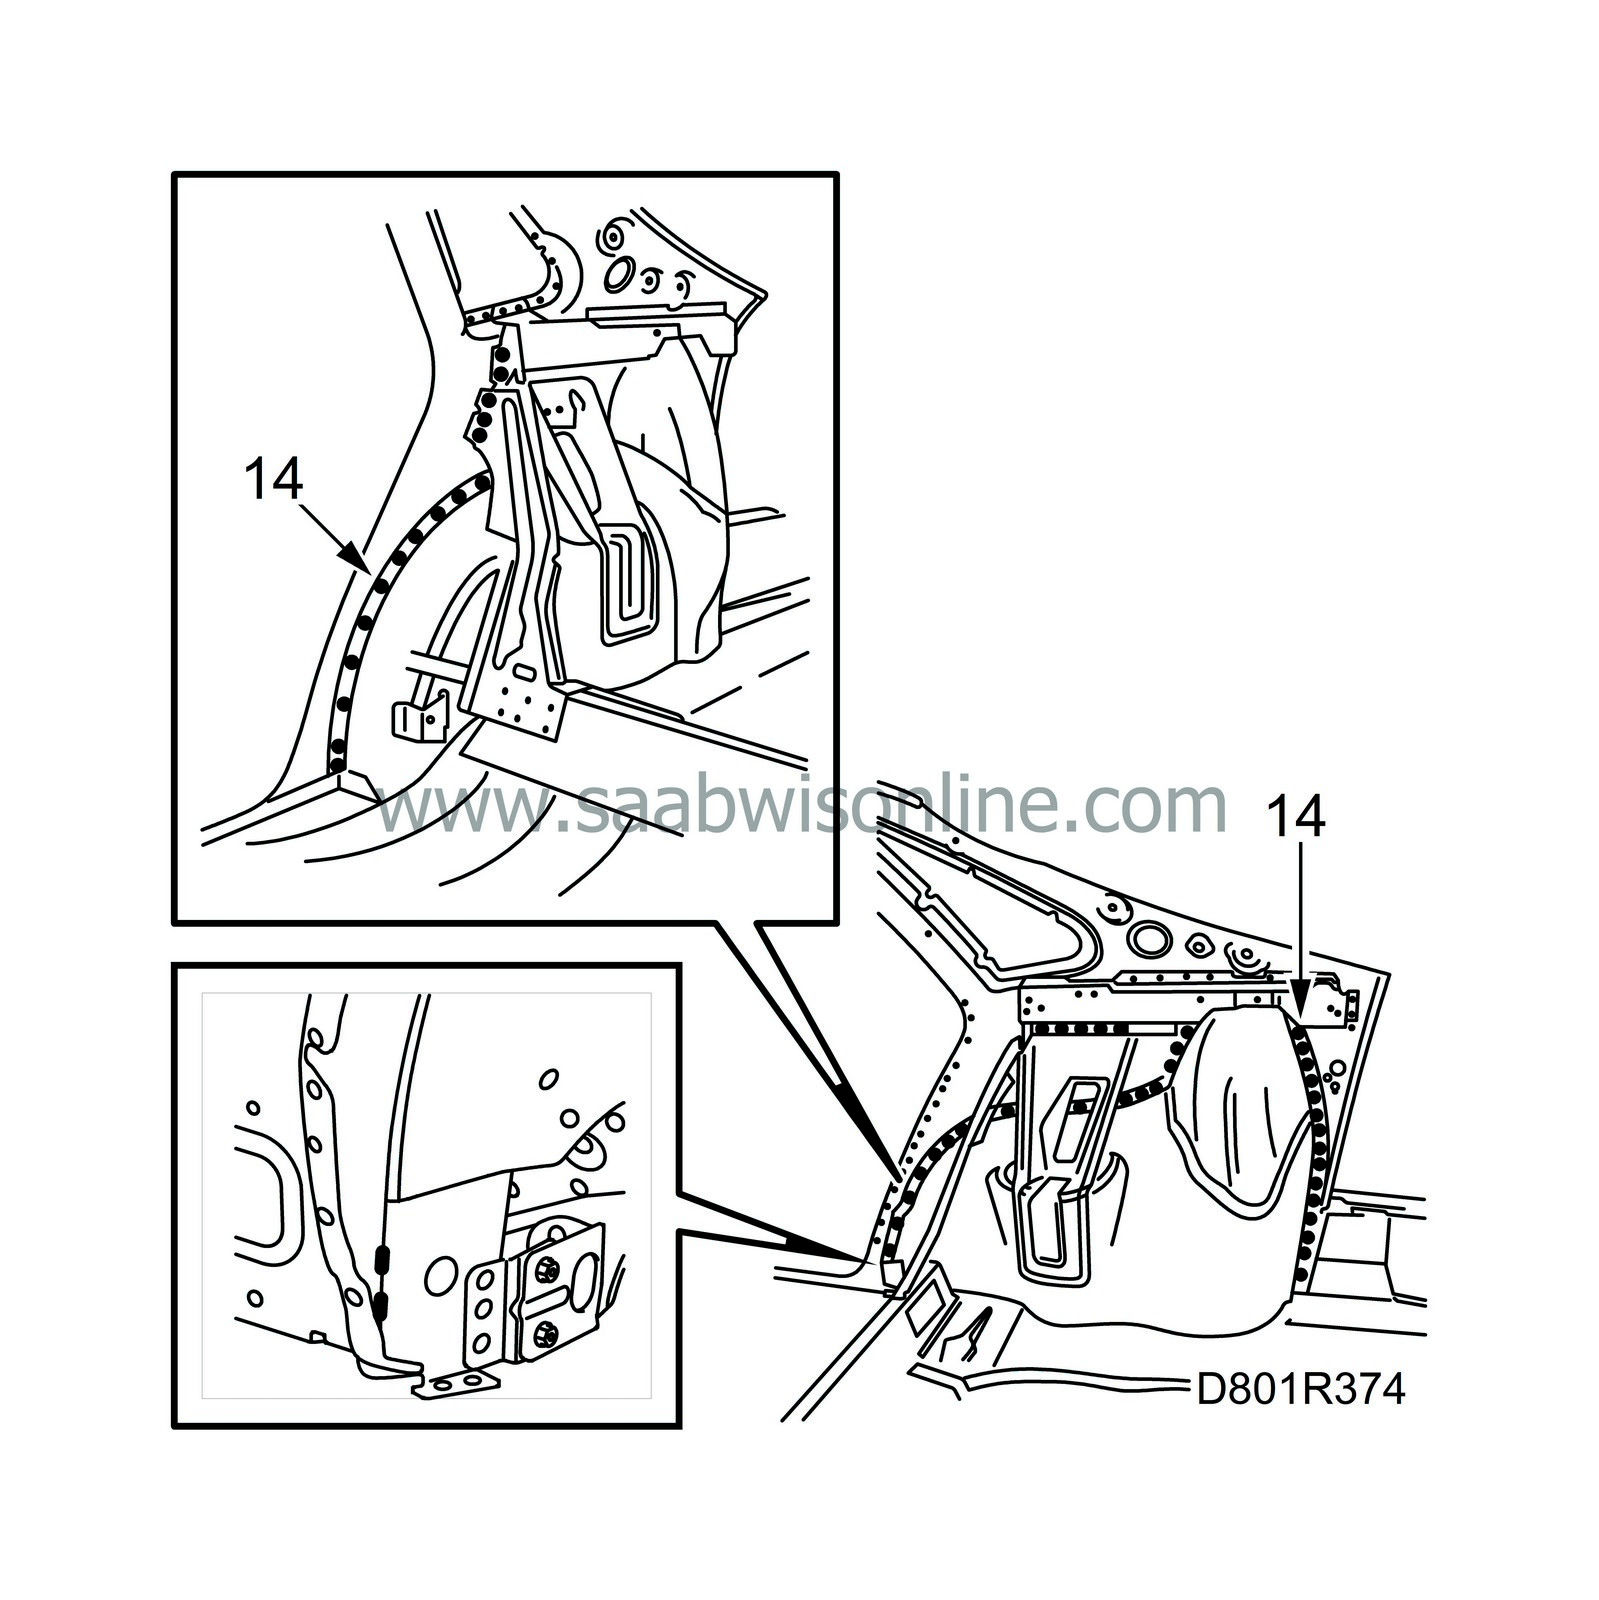
14.
|
Weld on the inner side panel.
|
|
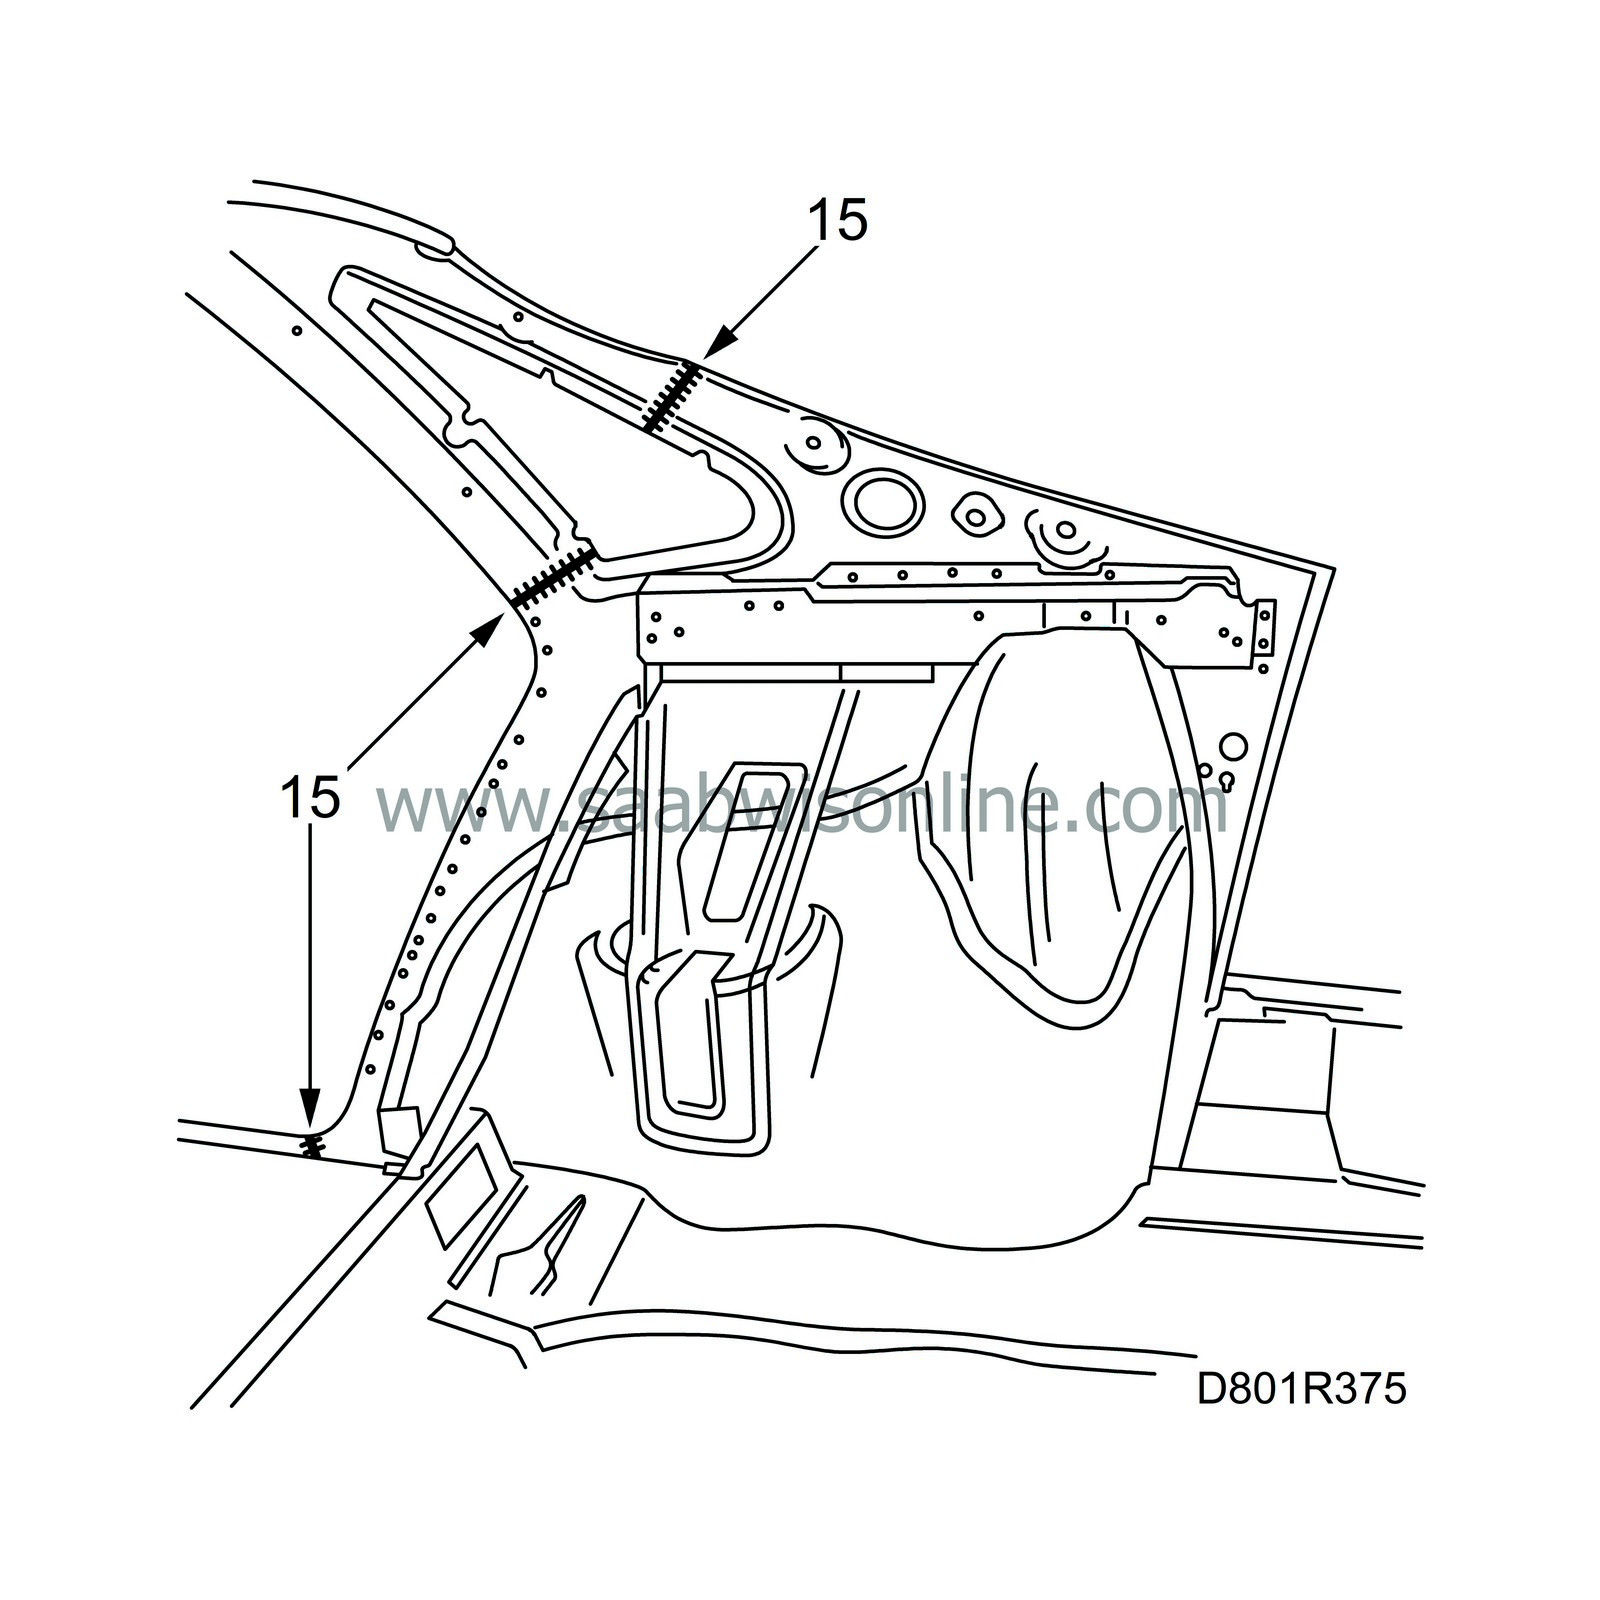
15.
|
All-weld the joints.
|
|
17.
|
Remove any remaining welding primer. Welding primer reduces adhesion of paint, filler and sealant.
|
|
18.
|
Apply primer to all ground surfaces. Use Standox 1K Primer.
|
|
19.
|
Fit the door frame and rear wing.
|


