Drive clutch, hydraulic unit
|
|
Drive clutch, hydraulic unit
|
|
1.
|
Operate the hood to the open position to increase the light and make working easier.
|
Note
|
|
This task can be performed with the hood closed.
|
If it is not possible to operate the soft top via the electric controls proceed as follows:
|
|
|
1.a.
|
Release the rear seat backrest and fold it forward.
|
|
|
1.b.
|
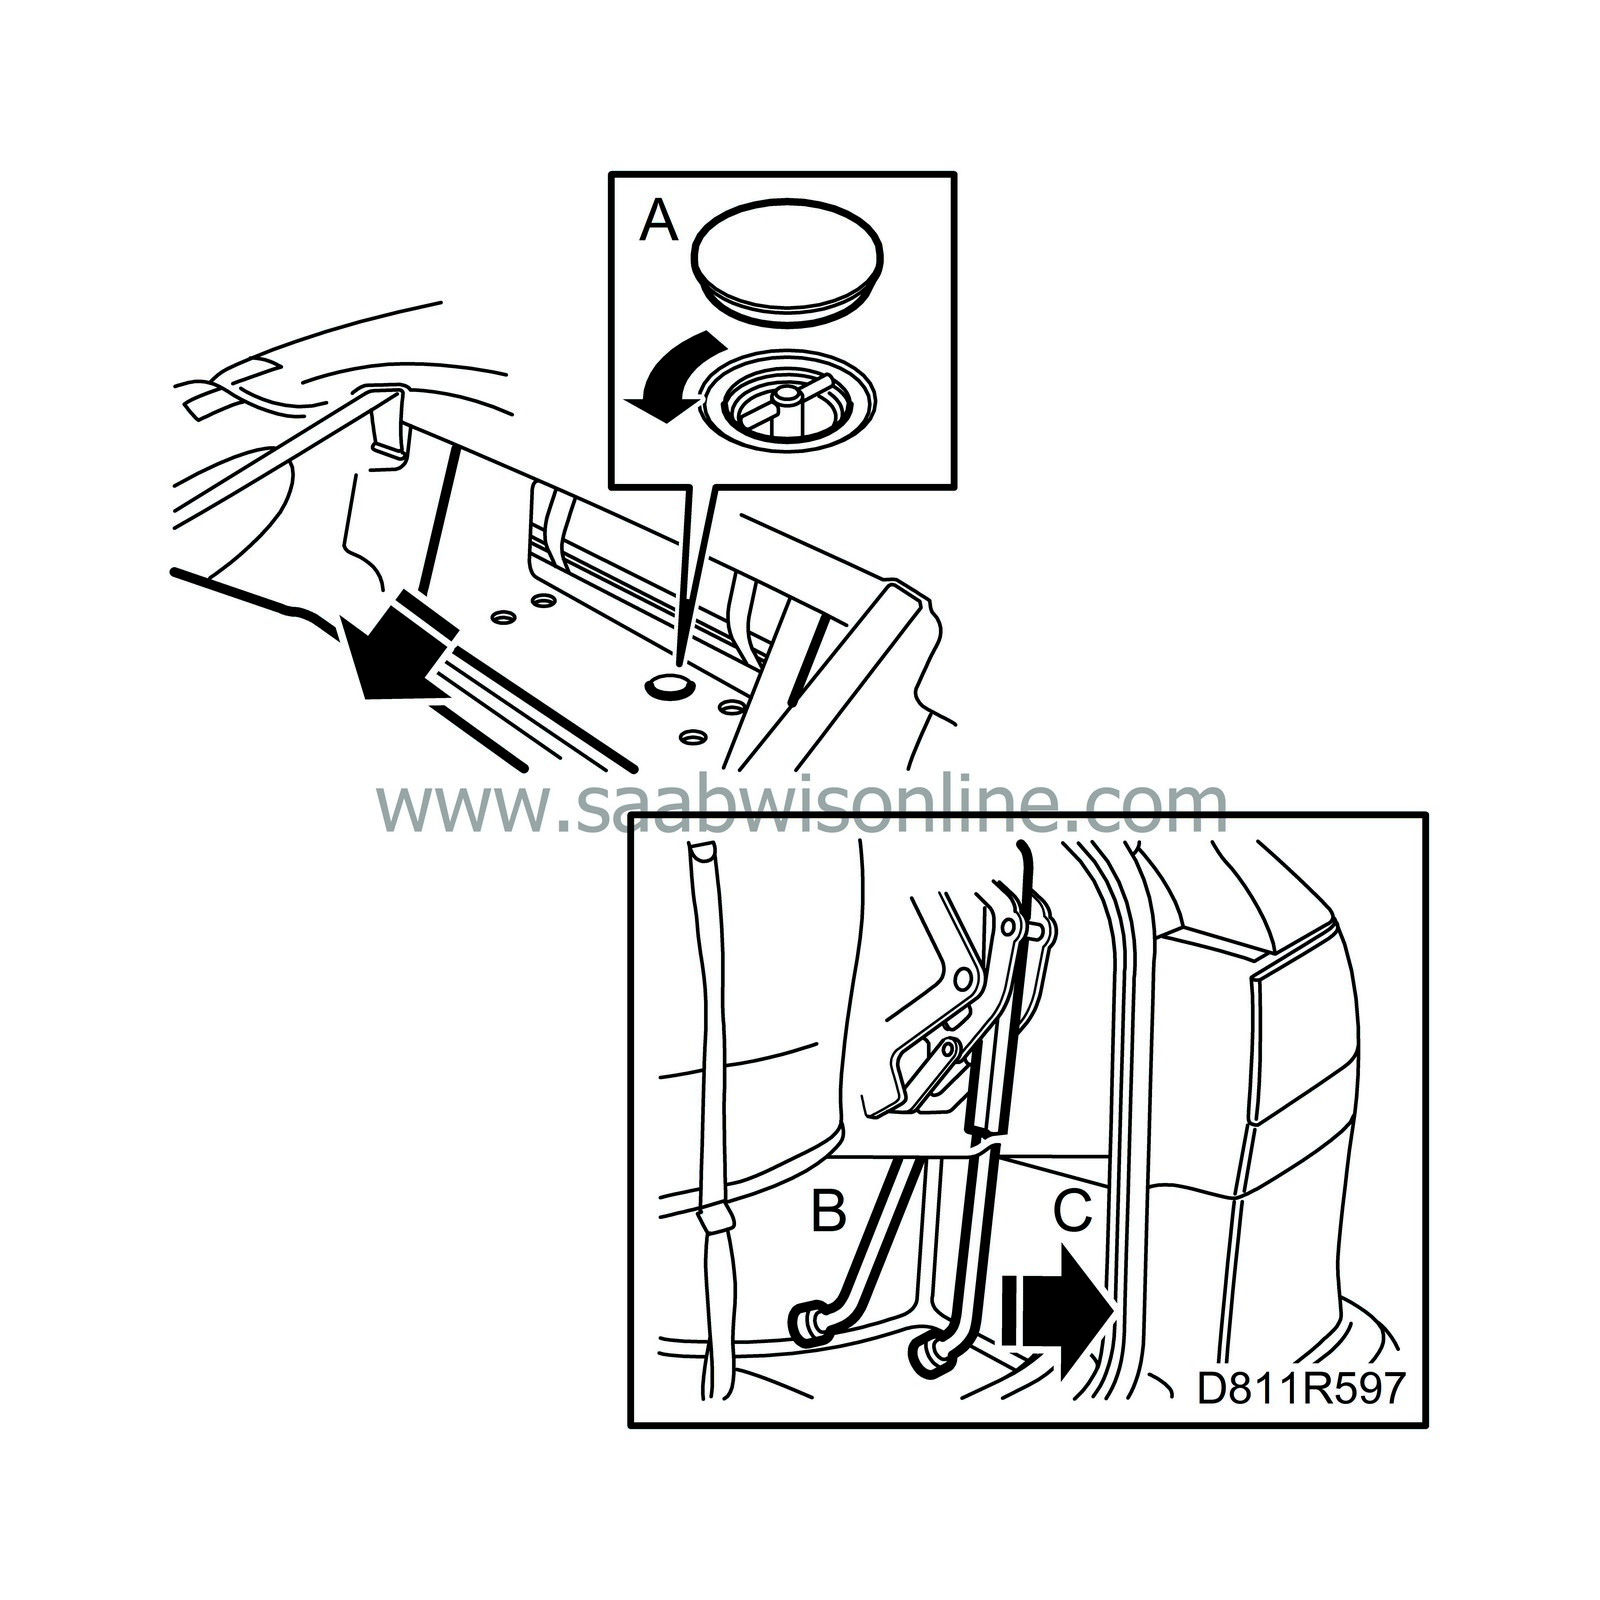
Remove the cover over the emergency valve and open the valve approx. one half turn
(A)
.
|
|
|
1.c.
|
Unlock the soft top from the windscreen frame.
|
|
|
1.d.
|
Activate the fifth bow lock using the diagnostic tool set to UNLOCK and fold up the fifth bow.
|
|
|
1.e.
|
Push the wheel bolt tool through the hole in the covering on the right-hand side of the luggage compartment and into the link arm of the operating mechanism
(B)
.
|
|
|
1.f.
|
Unlock the soft top cover by pulling the tool backwards until the soft top cover lifts up a few centimetres
(C)
.
|
|
|
1.g.
|
Remove the tool, close the boot lid and open the soft top cover.
|
|
|
1.h.
|
Carefully fold down the soft top.
 Warning
|
|
There is a pinch hazard and danger of crushing if you let go of the soft top in the half-open position (when vertical). It will fall backwards or forwards, depending on its centre of gravity.
|
|
|
|
|
|
|
|
|
1.i.
|
Close the soft top cover.
|
|
2.
|
Release the rear seat backrest and fold it forward.
|
|
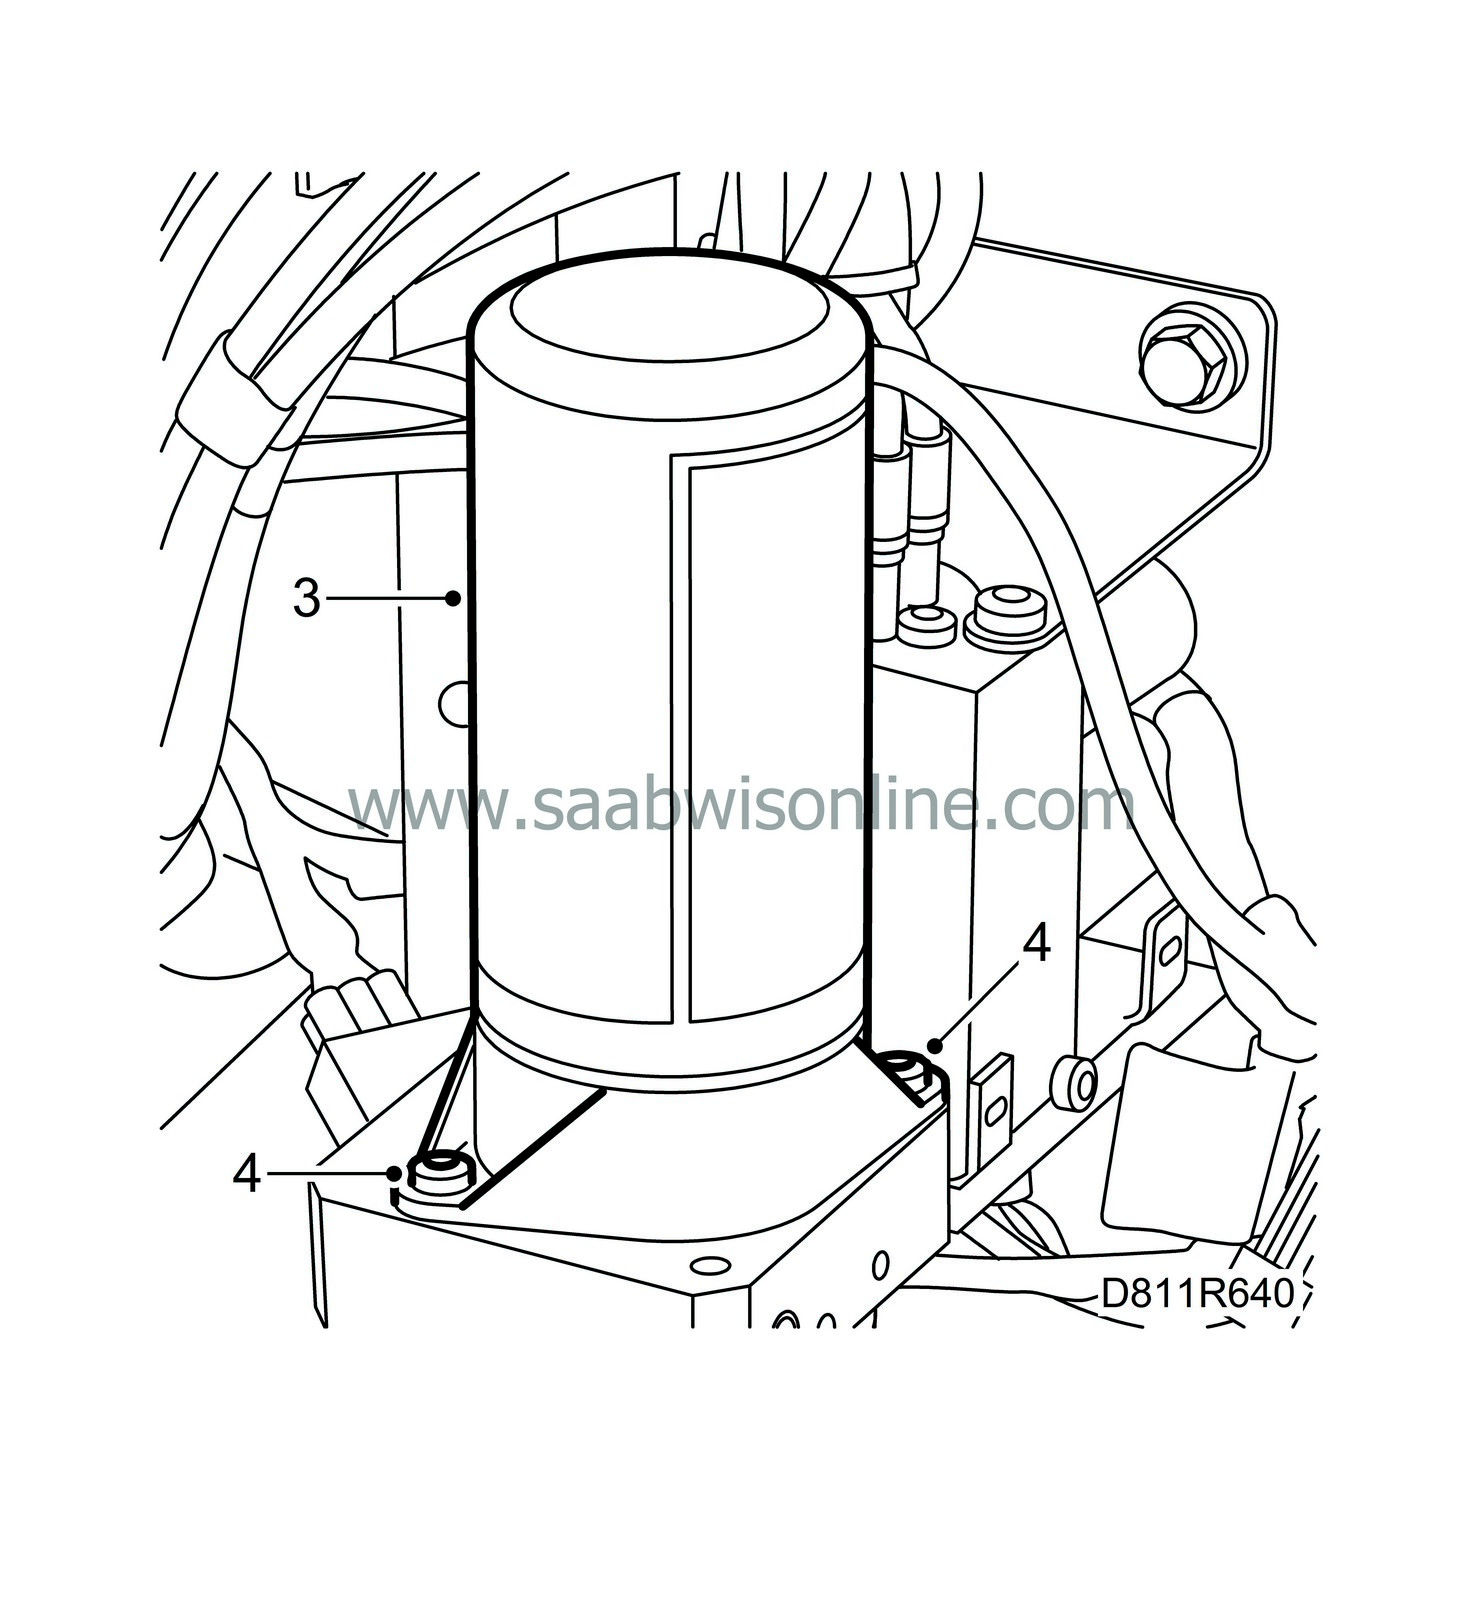
3.
|
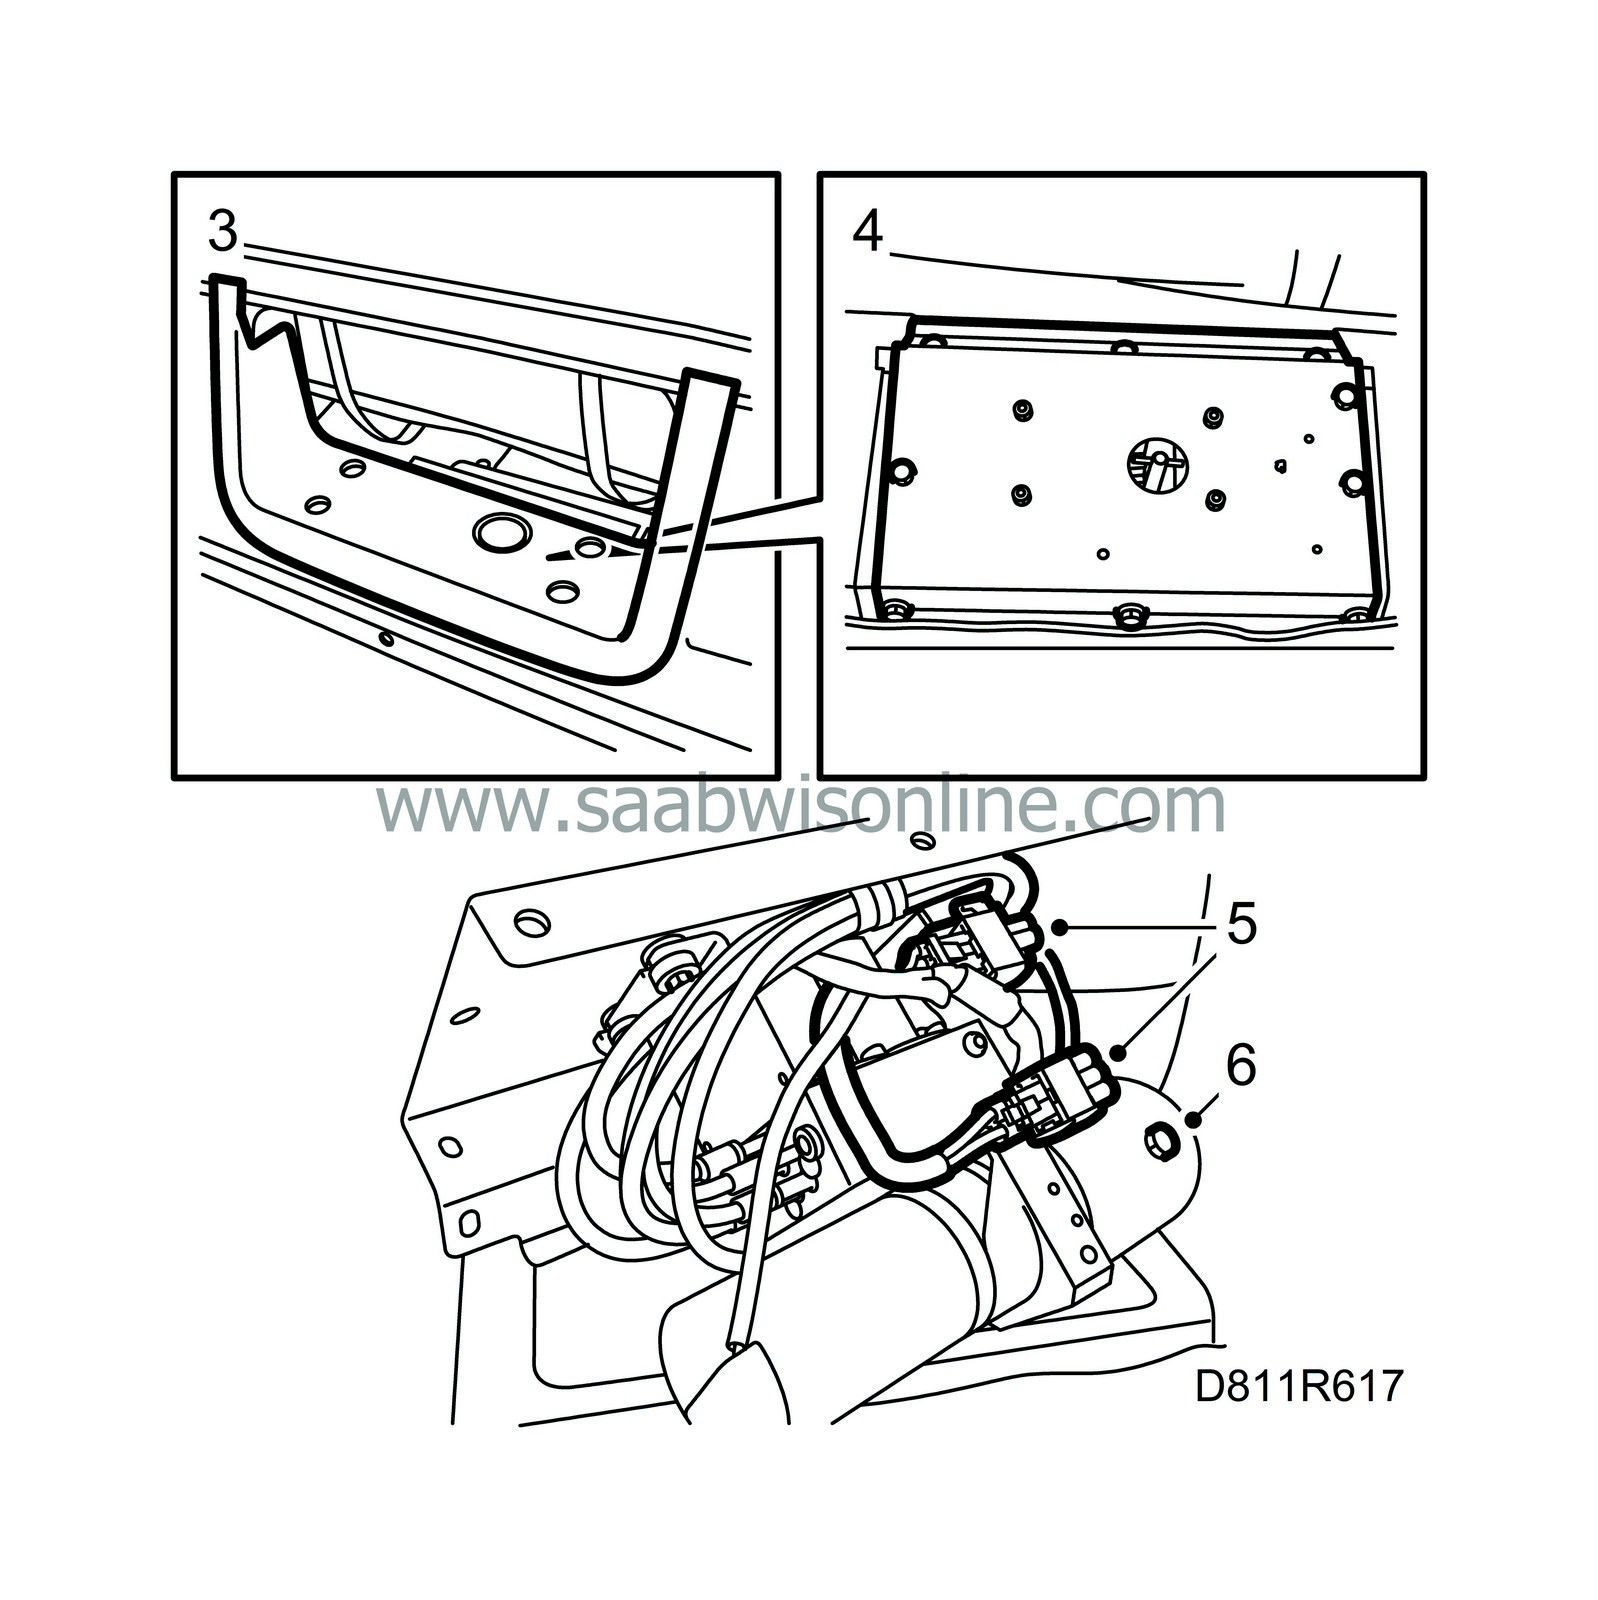
Remove the cover from the hydraulic unit.
|
|
4.
|
Fold aside the luggage compartment mat and unscrew the hydraulic unit mounting bolts.
|
|
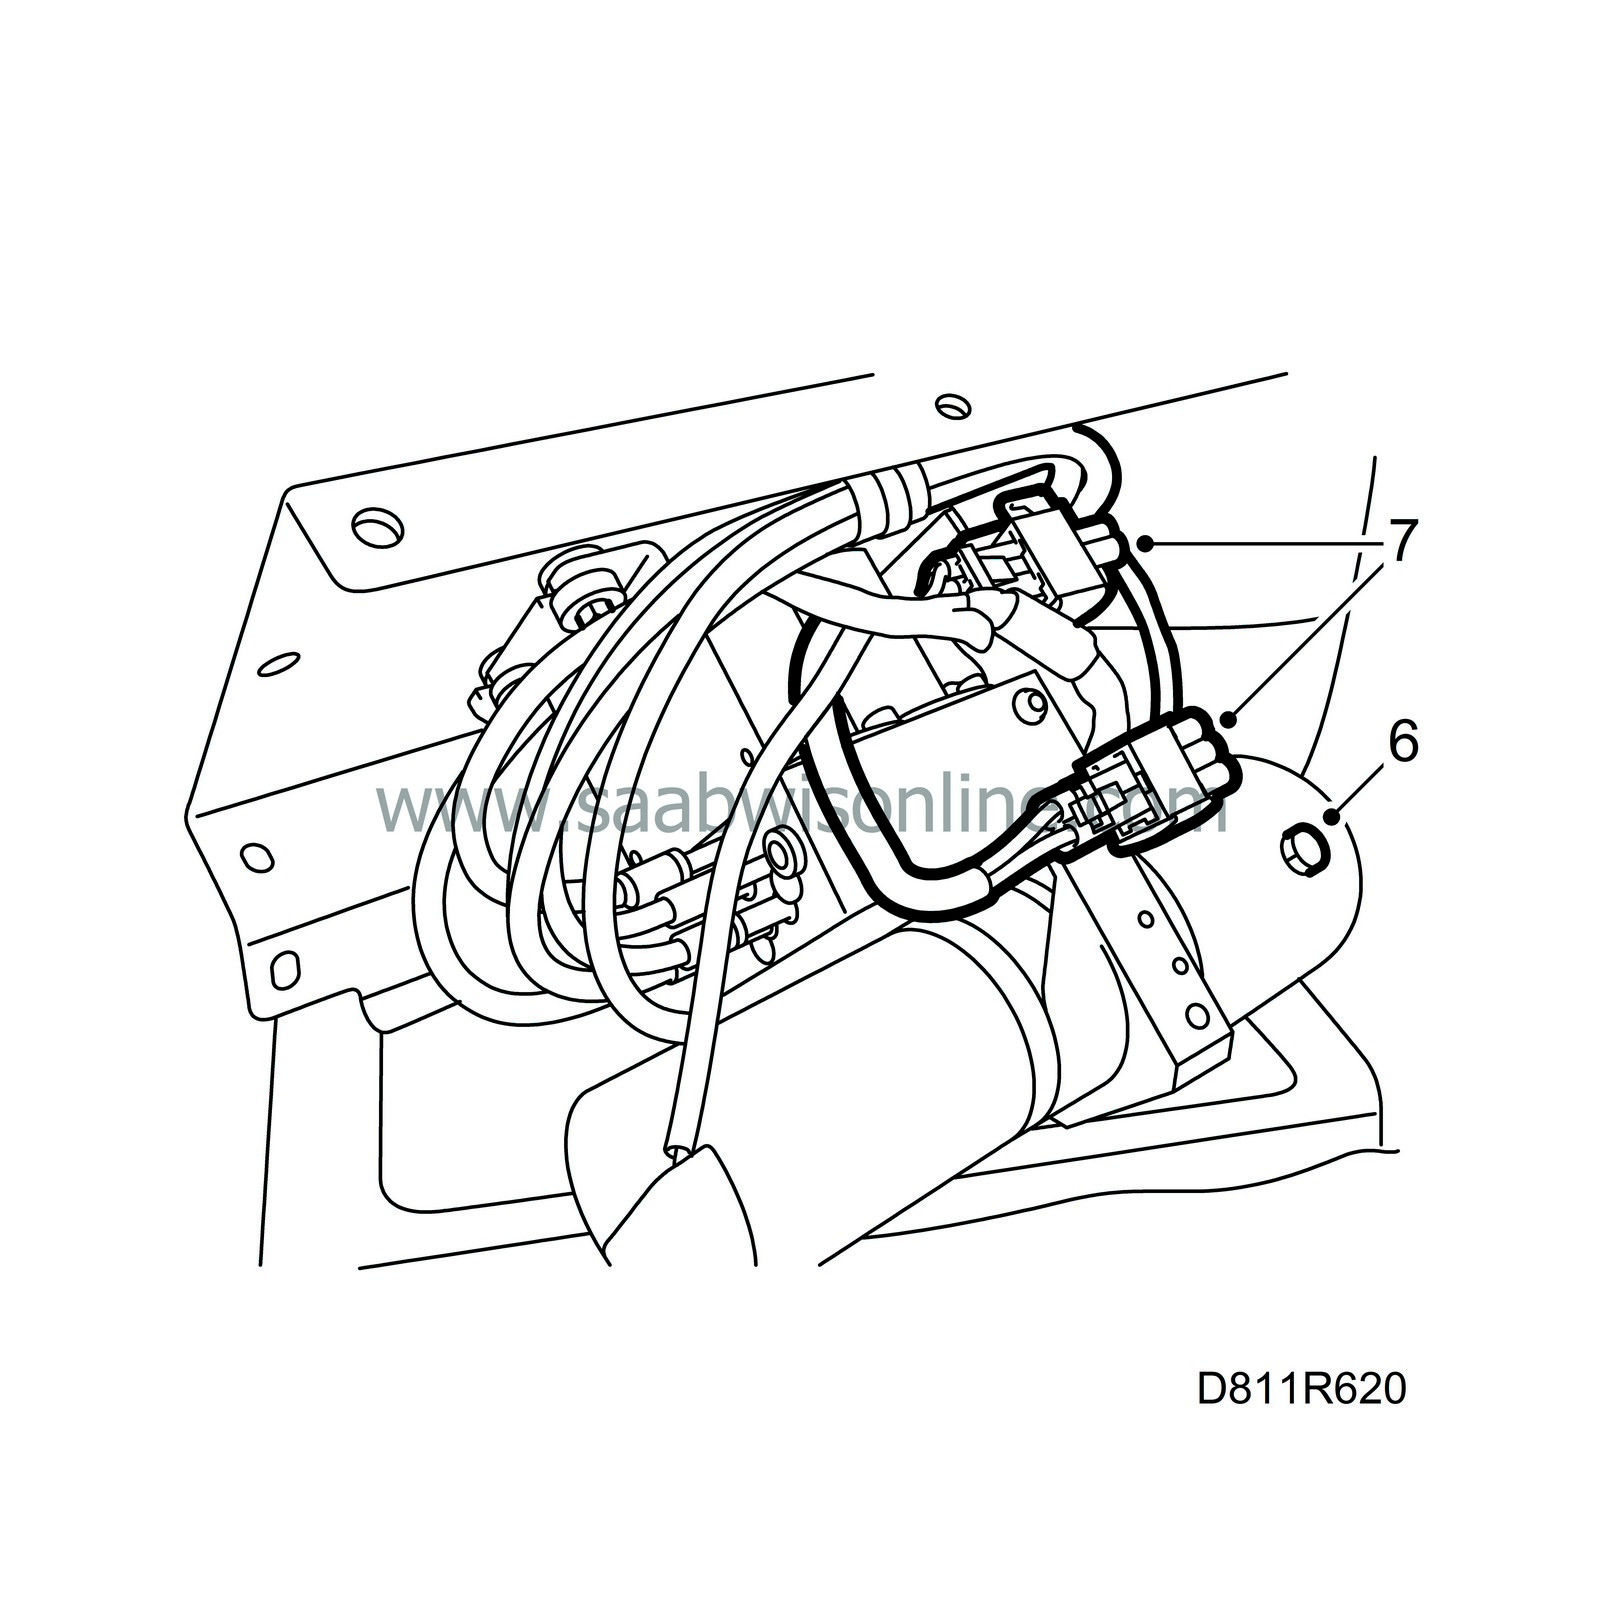
5.
|
Lift up the hydraulic unit and unplug the connectors. Loosen the holders for the hydraulic hoses to make it easier to lift the unit.
|
|
6.
|
Open the emergency valve. Unscrew the reservoir oil plug and then retighten it to even out the pressure.
|
Note
|
|
This prevents unnecessary oil spill when hydraulic unit components are replaced.
|
|
|
7.
|
Place rags under the hydraulic unit it turn it so that the oil reservoir points down and the electric motor points up.
|
Important
|
|
It is very important that the unit remains in this position throughout the replacement operation.
|
|
|
|
|
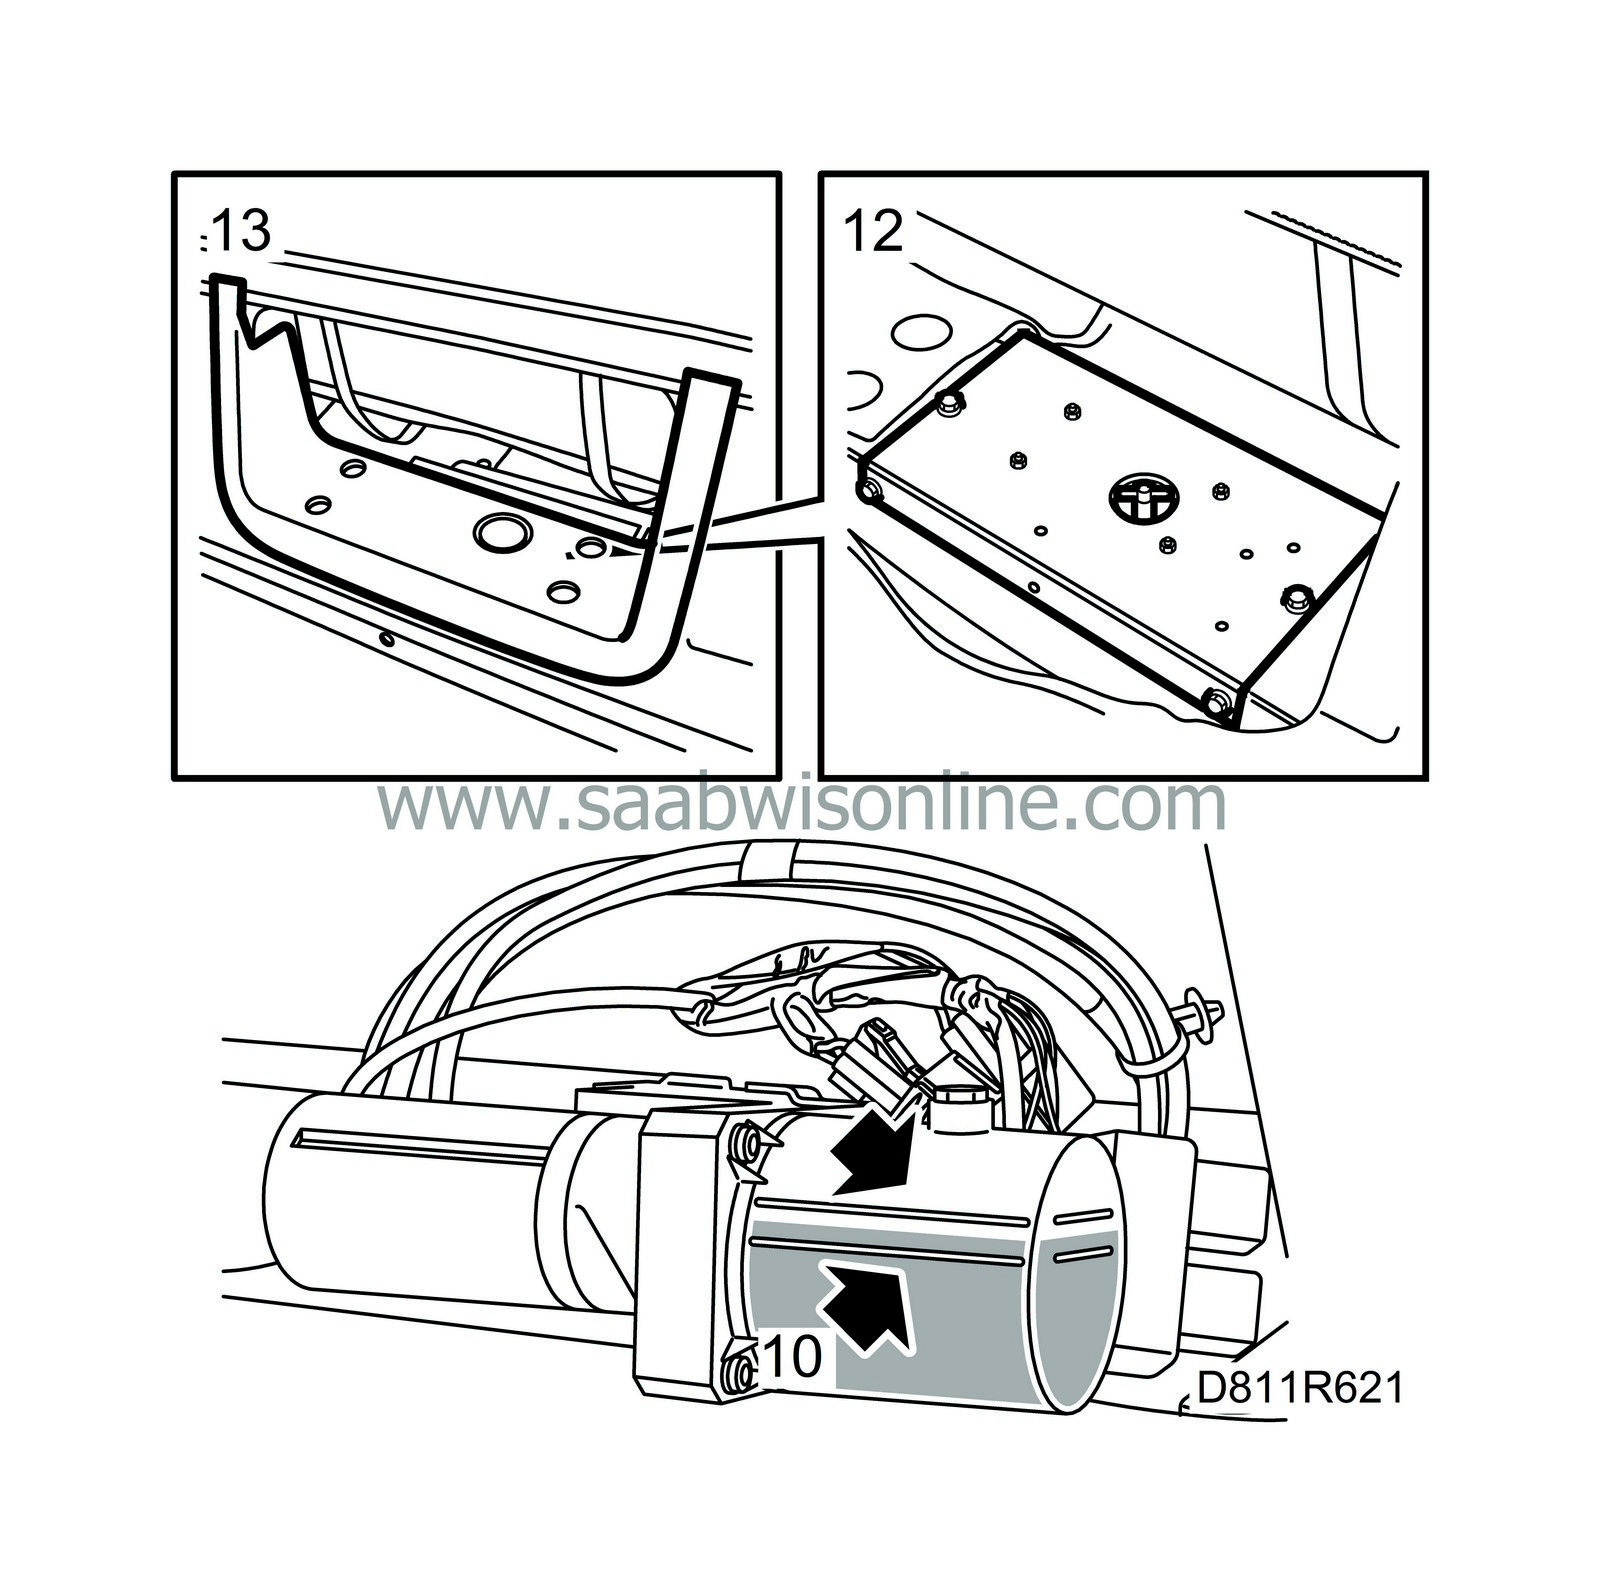
8.
|
Remove the two screws of the electric motor.
|
Note
|
|
Screws should always be replaced.
|

|
|
9.
|
Remove the electric motor from the hydraulic unit by lifting it out. Oil may be spilled when the electric motor is removed.
|
|
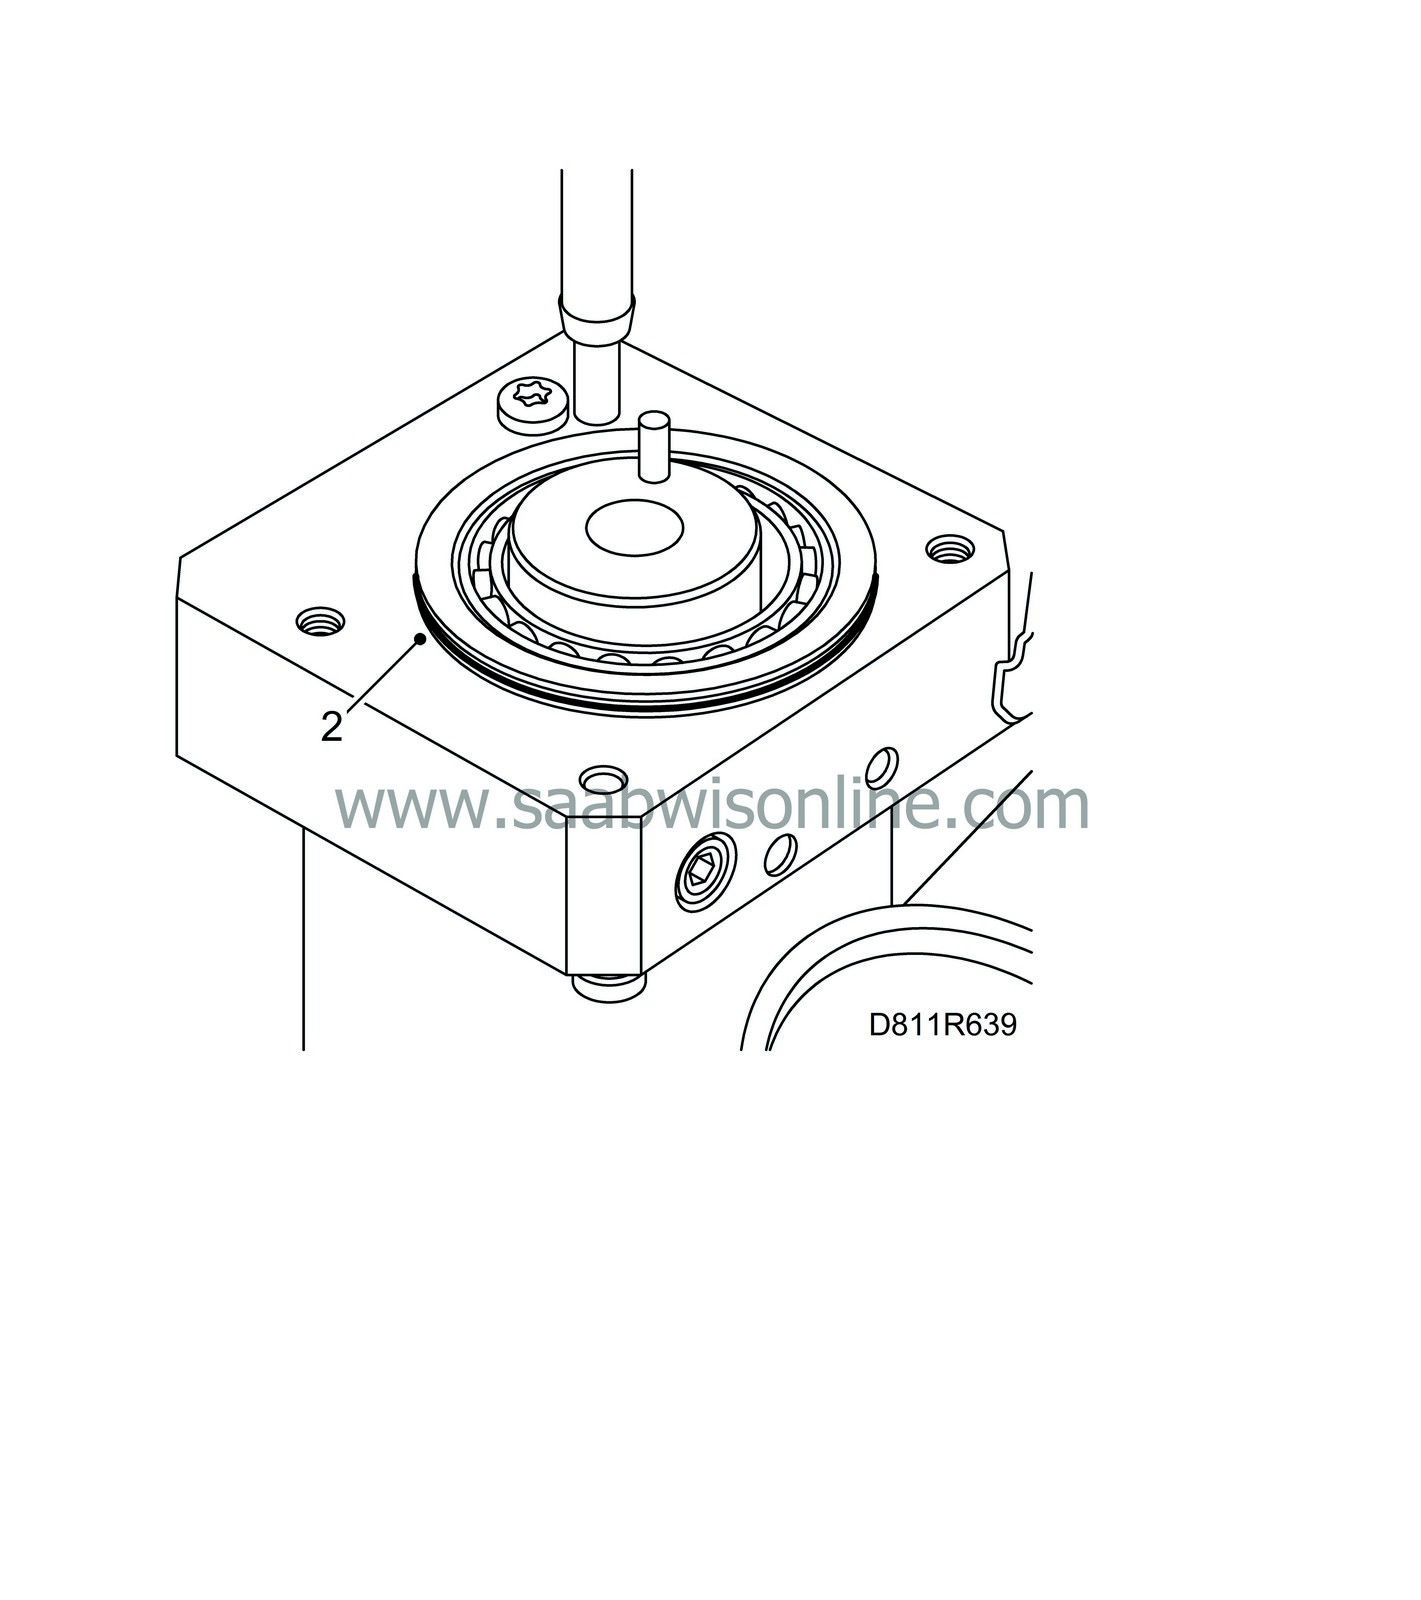
10.
|
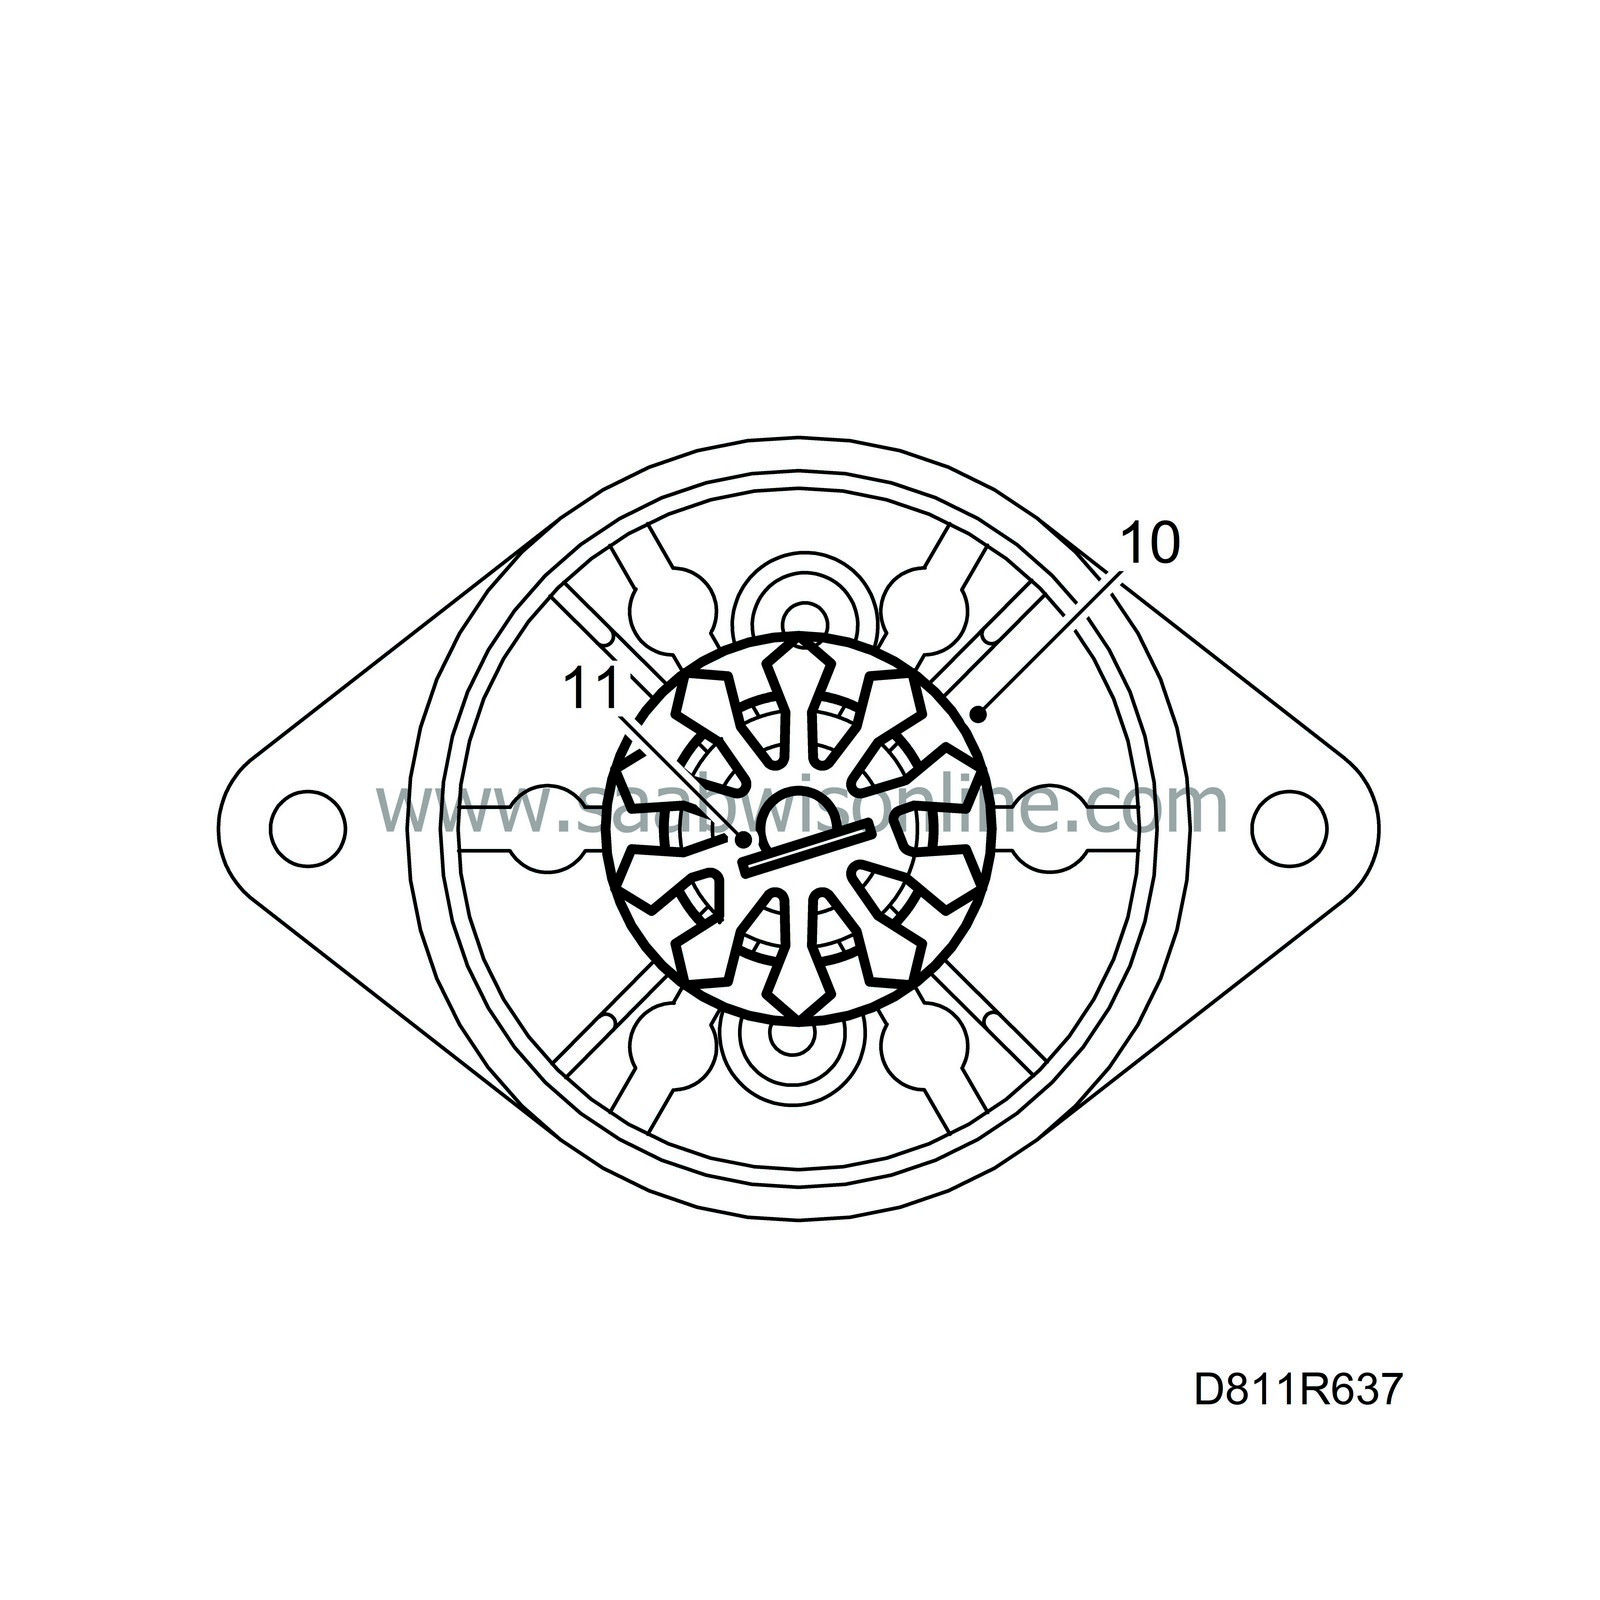
Remove the drive clutch from the electric motor.
|
|
11.
|
Remove the metal clip if it is still on the pump housing. The metal clip will not be used again.
|
Important
|
|
The hydraulic unit can be damaged if the metal clip is left in place.
|
|
|
|
|
1.
|
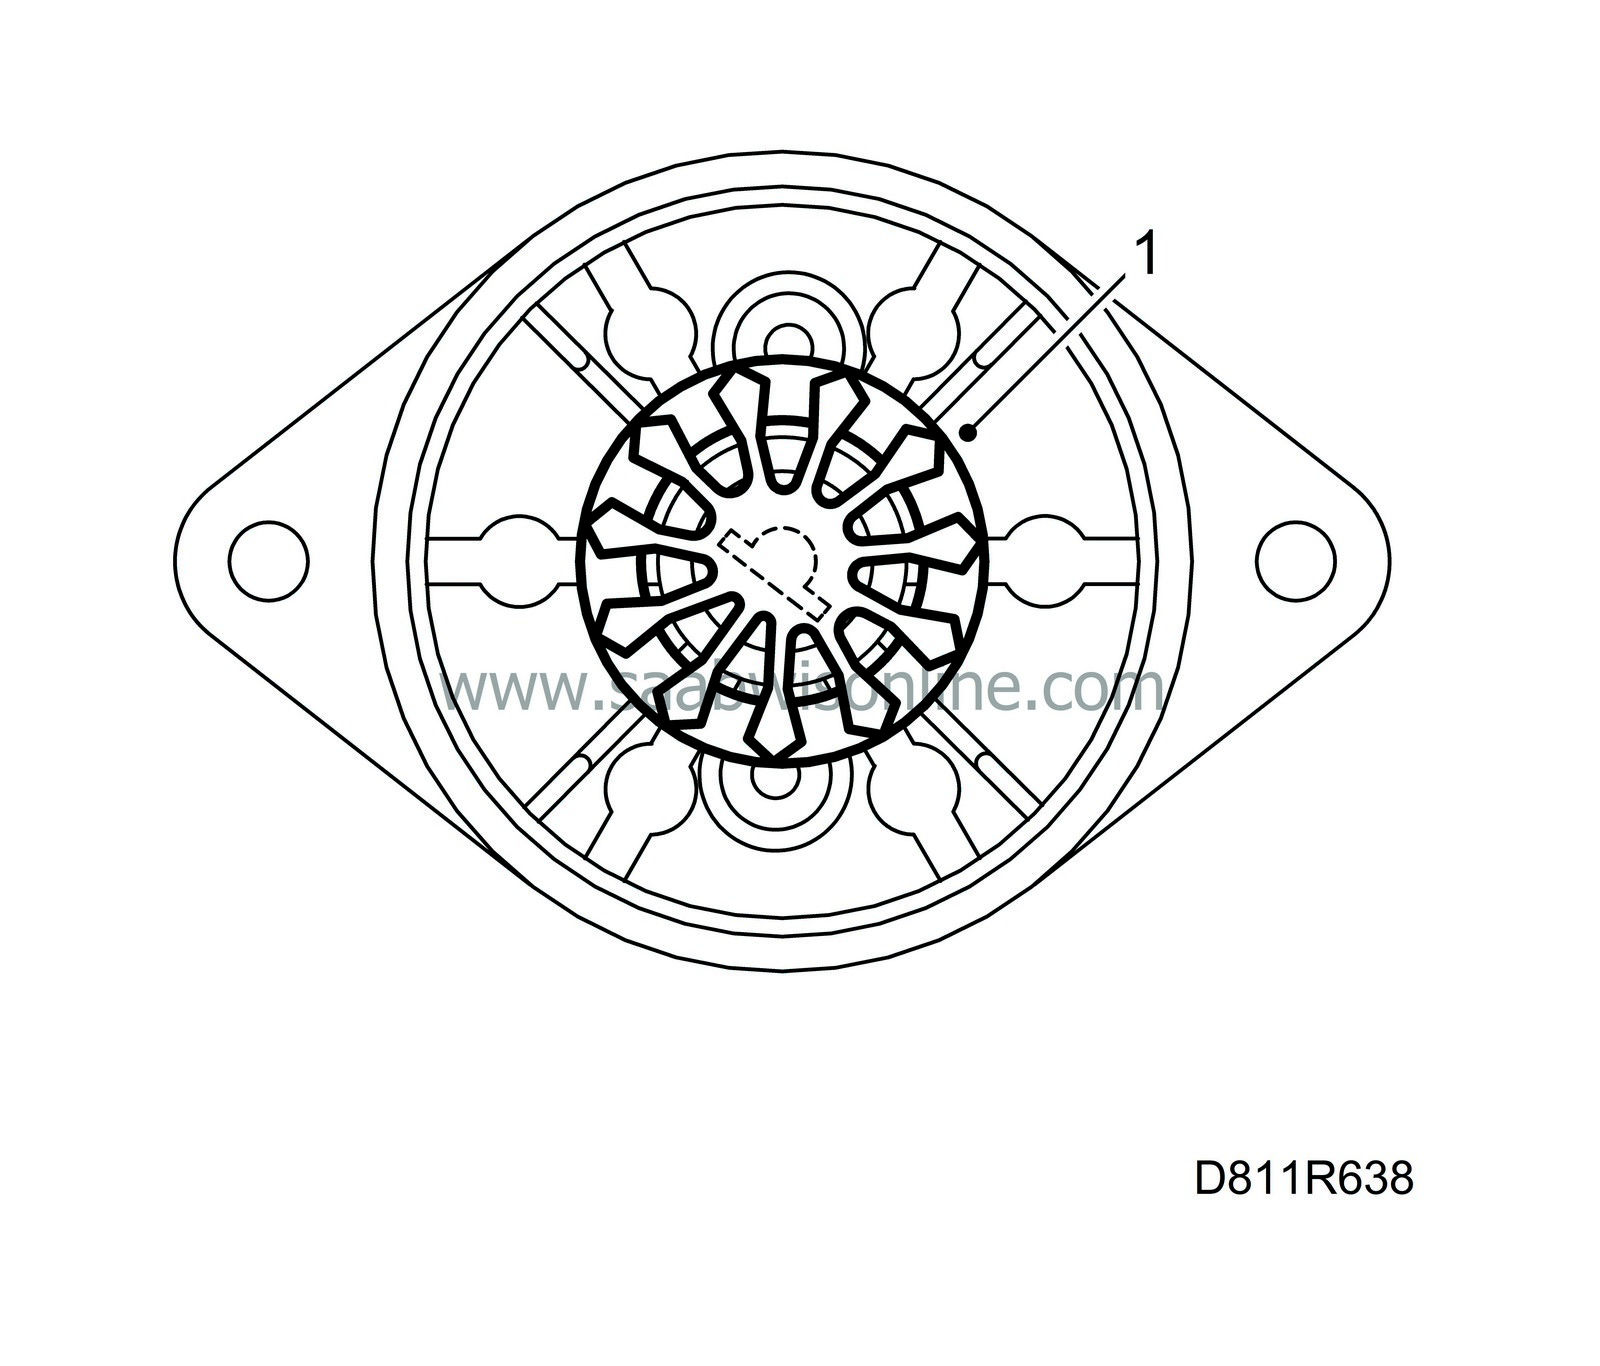
Fit the new drive clutch to the electric motor. The drive clutch only fits in one position. Press the drive clutch down on the electric motor shaft.
|
|
2.
|
Fit the pump housing with a new O-ring. Lubricate the O-ring with hydraulic oil.
|
|
3.
|
Fit the electric motor. The pin in the pump housing should pass between the drive clutch flanges.
|
|
4.
|
Fit new screws on the electric motor.
|
|
5.
|
Turn the unit horizontal with the filler hole up and check the oil level. If needed, top up with new oil to the MAX mark.
|
|
7.
|
Plug in the connectors to the hydraulic unit. Lift the hydraulic unit back into place.
|
|
8.
|
Close the emergency valve. Operate the soft top with the ROOF button a few times.
|
|
9.
|
Manoeuvre the soft-top to the up (closed) position.
|
|
10.
|
Check the oil level by turning the hydraulic unit until the oil plug is pointing straight upwards.
Check that the oil level is between the two marks.
|
|
11.
|
Clean up any oil spills.
|
|
12.
|
Fit the hydraulic hose holders. Fit the hydraulic unit in the torsion box.
|
|
13.
|
Re-position the luggage compartment mat and fit the cover.
|
Important
|
|
Check that the emergency operation valve is completely closed.
|
|
|
|
|
15.
|
Manoeuvre the soft-top up and down through 5 complete cycles. Check for correct operation and any DTCs.
|
|
16.
|
Fold back the rear seat backrest.
|


