PRE-RELEASE
(351-2526) Halogen headlamp dipped beam not coming on
Symptom: Halogen headlamp dipped beam not coming on
| TECHNICAL SERVICE BULLETIN | |
| Bulletin Nbr: | 351-2526 |
| Date: ........... | Februari 2005 |
| Market: | all |
| Halogen headlamp dipped beam not coming on |
| Cars affected |
Saab 9-3 (9440) with halogen headlamps within the following Vehicle Identification Number ranges:
31000001 - 41056598 (M03-04)
46000001 - 46017150 (M04 CV)
| Background |
In a small number of cars the wiring harness in the halogen headlamp may be inadequately crimped. This can result in the dipped beam not coming on.
In the case of customer complaint, the following procedure must be carried out.
Symptom description
Halogen headlamp dipped beam not coming on| Parts required |
12 762 390 Repair kit (2 per car) (CA: 12762390)
| Procedure |
| Note | ||
|
The procedure must be carried out on both of the car's headlamps. |
| 1. |
Remove the headlamp, see WIS 3. Electrical System - Lighting and signalling systems - Exterior lighting - Adjustment/Replacement - Headlamps.
|
|
| 2. |
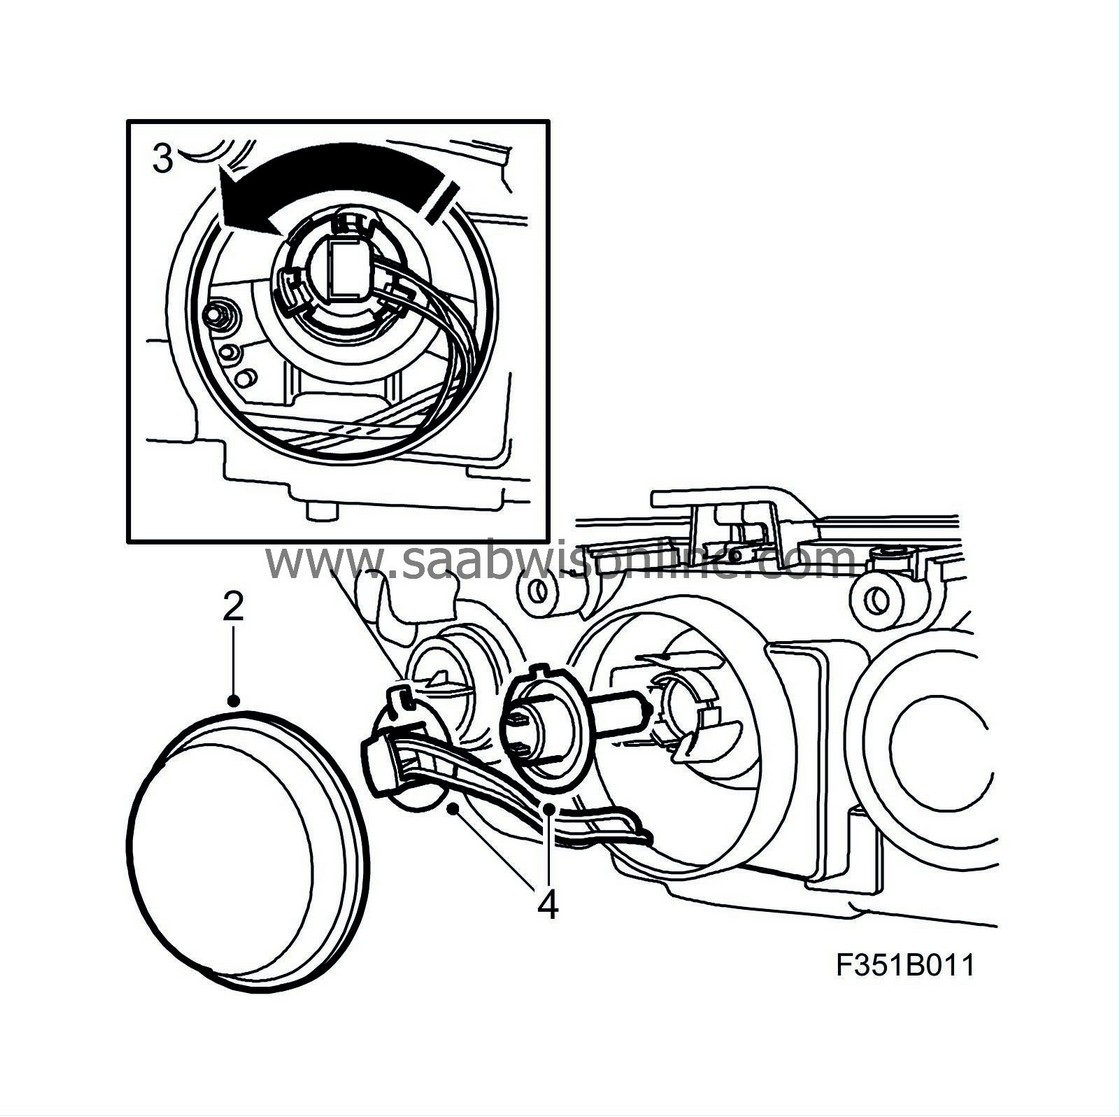
Remove the headlamp's protective cover.
|
|
| 3. |
Remove the bulb holder by turning it anticlockwise slightly and pulling it from the reflector.
|
|
| 4. |
Remove the bulb.
|
|
| 6. |
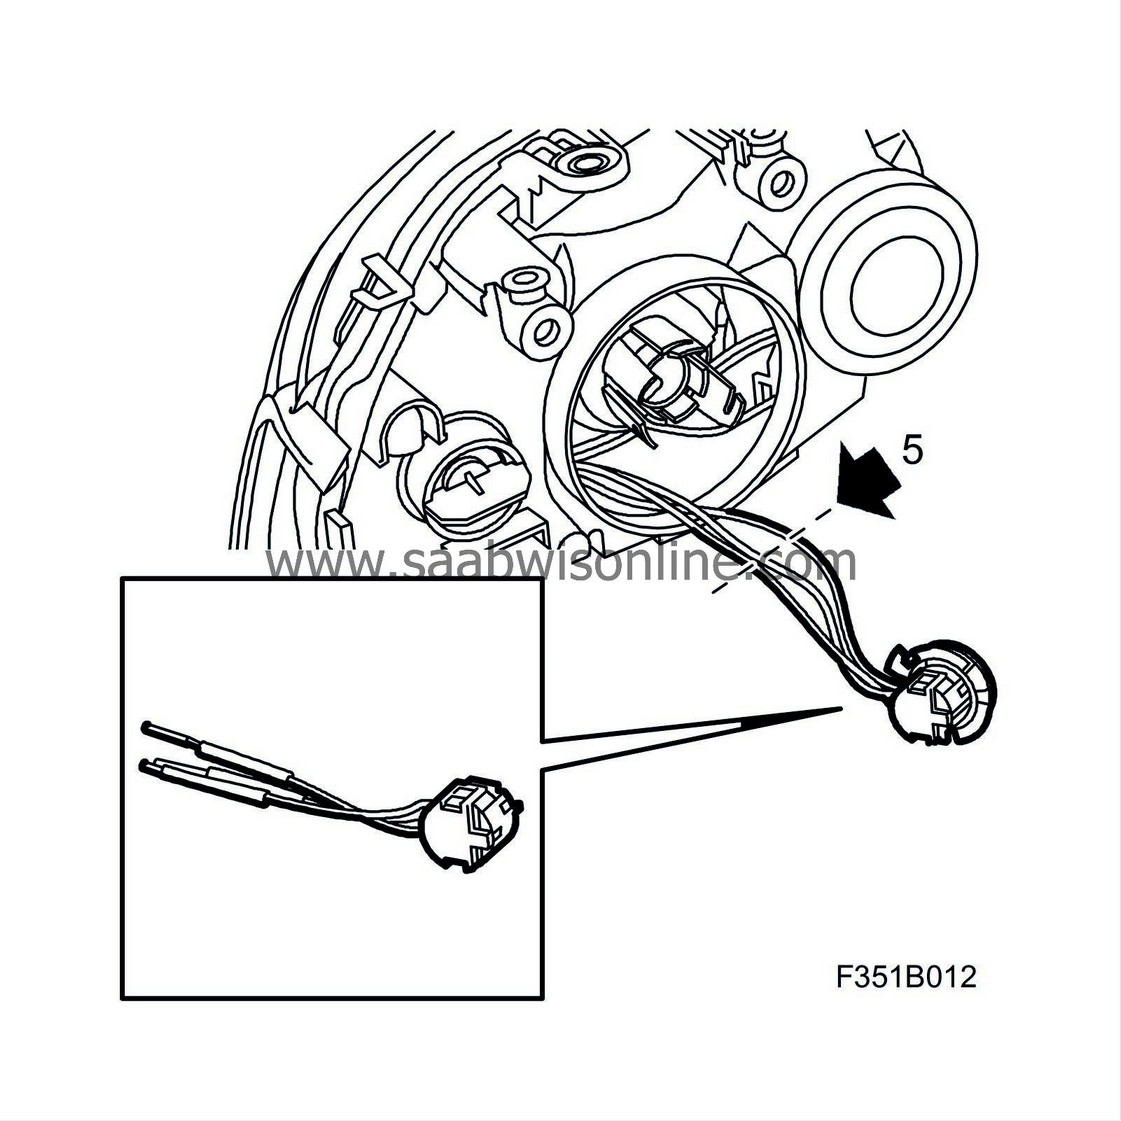
Strip the cables (approx. 6 mm) and fit the repair kit's wiring harness, use the blue pliers (1 mm² cable) from 86 12 939 Toolbox, wiring harness
|
|
| 7. |
Secure the shrink tubes over the joints by heating with a hot-air gun.
|
|
| 8. |
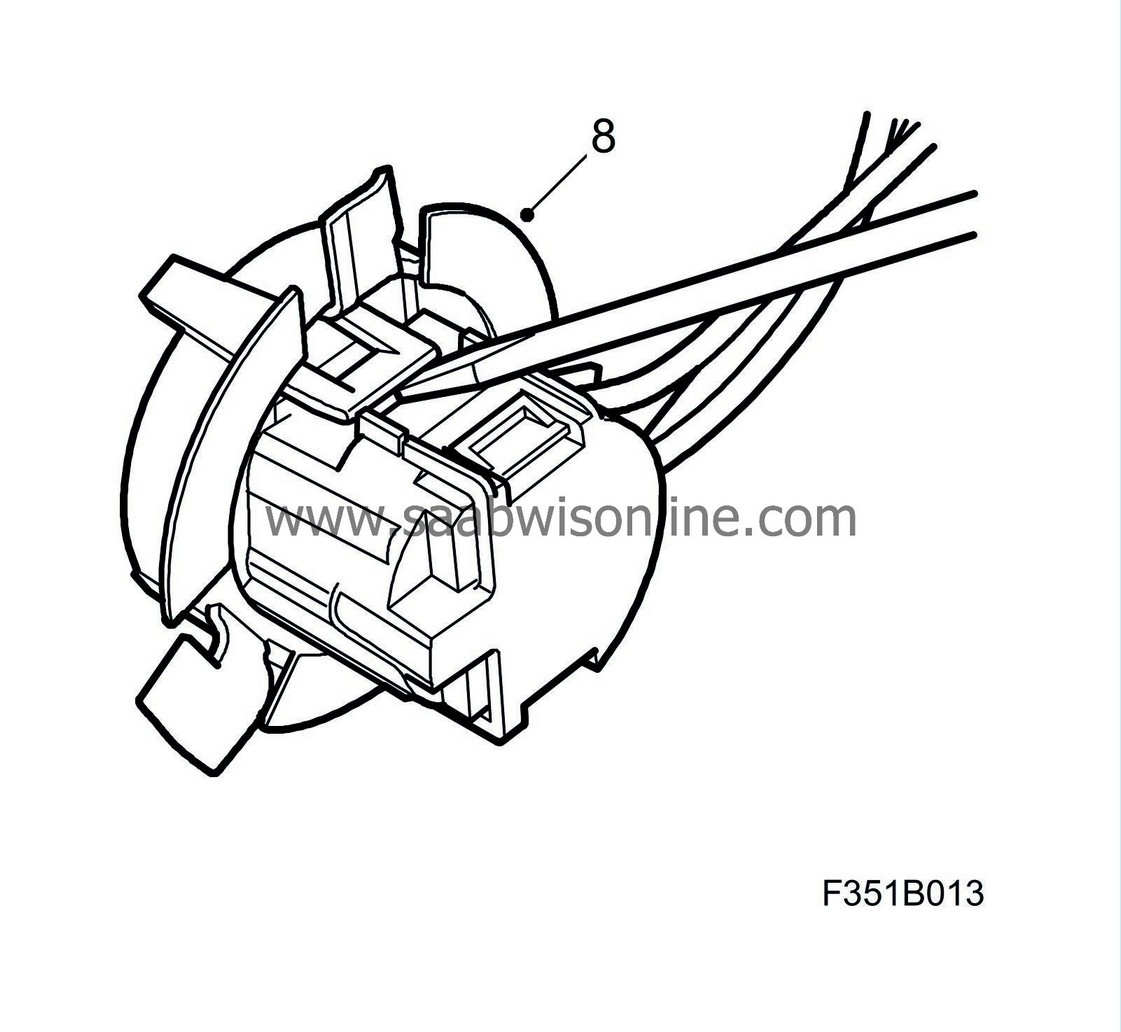
Remove the bulb holder from the detached connector by loosening both clips with a screwdriver.
|
|
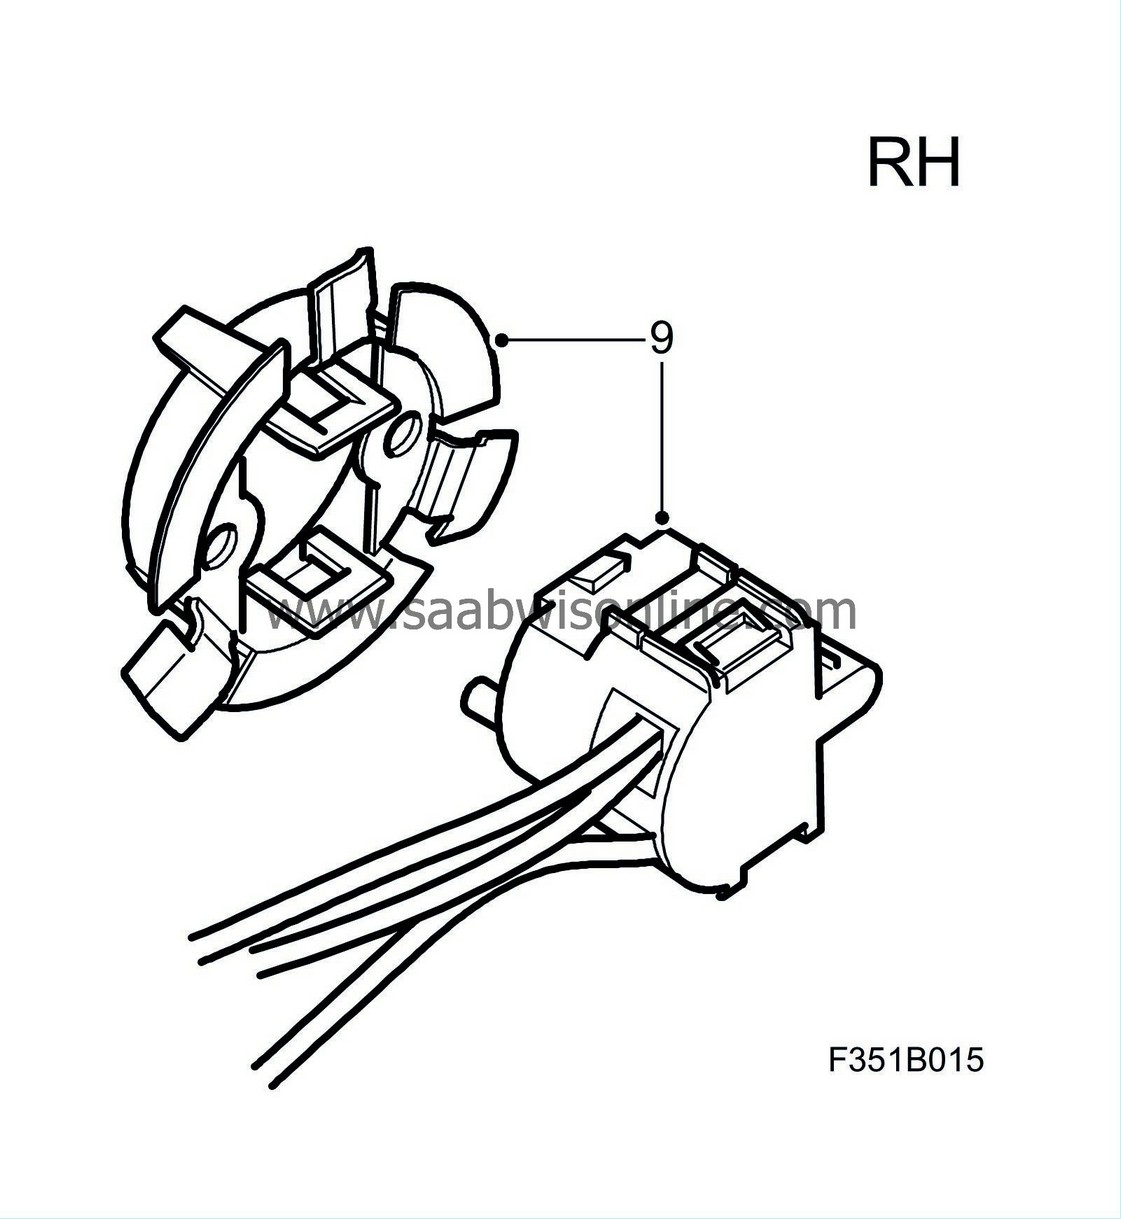
| 9. |
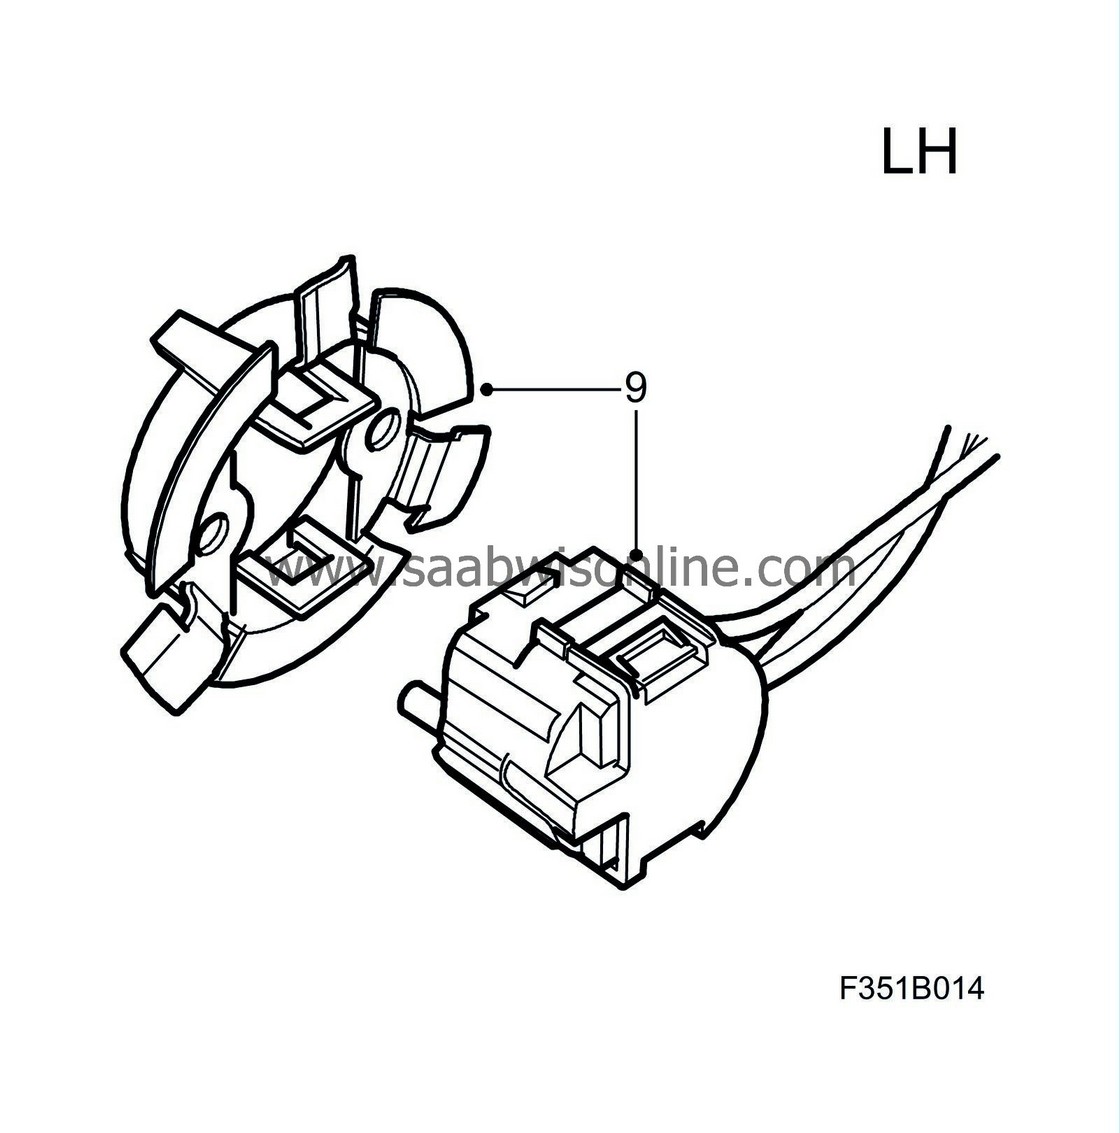
Fit the bulb holder on the new connector in the correct position, as illustrated.
|
|
| 10. |
Fit the bulb in the bulb holder.
|
|
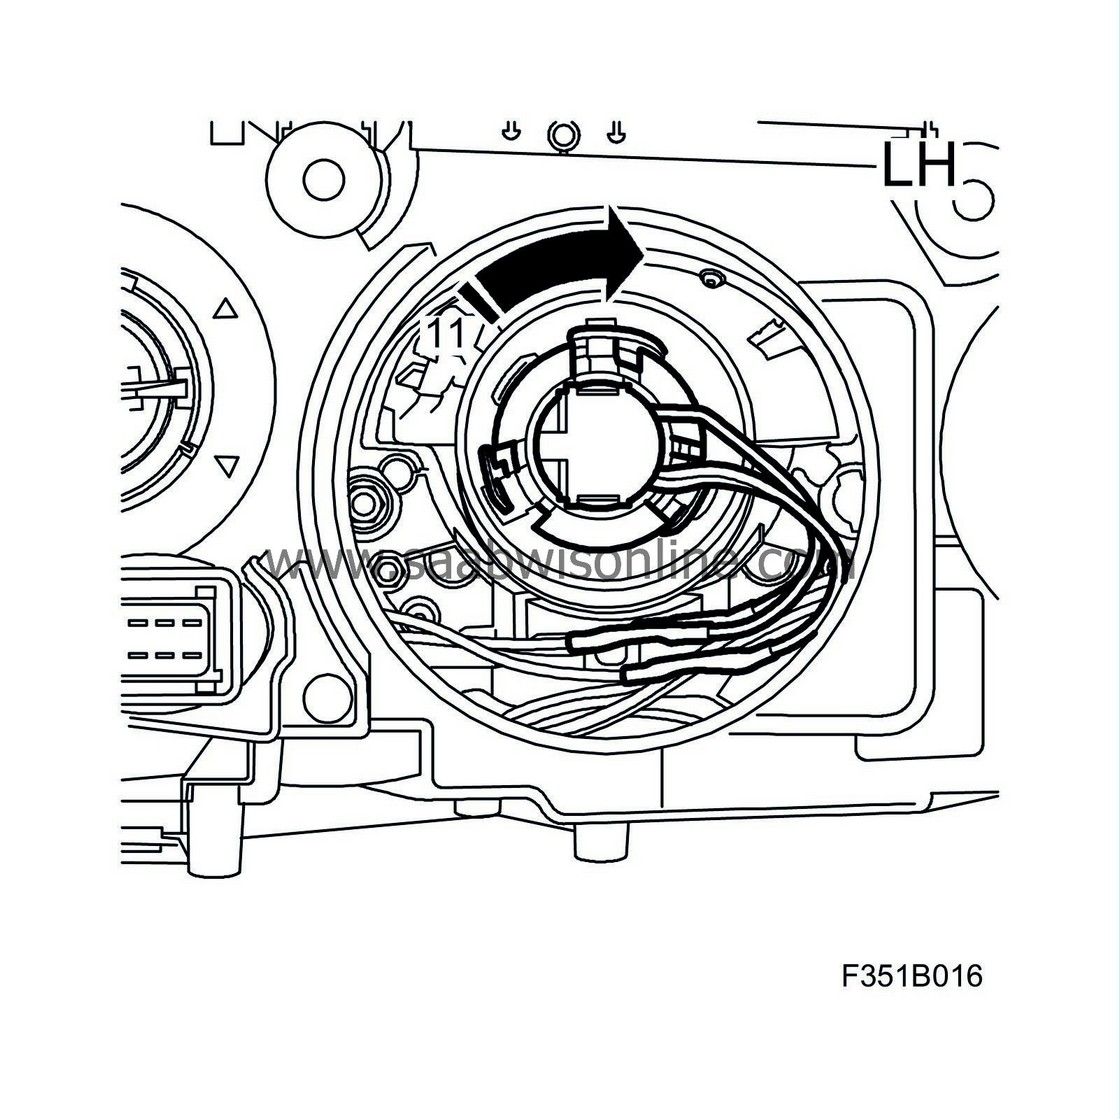
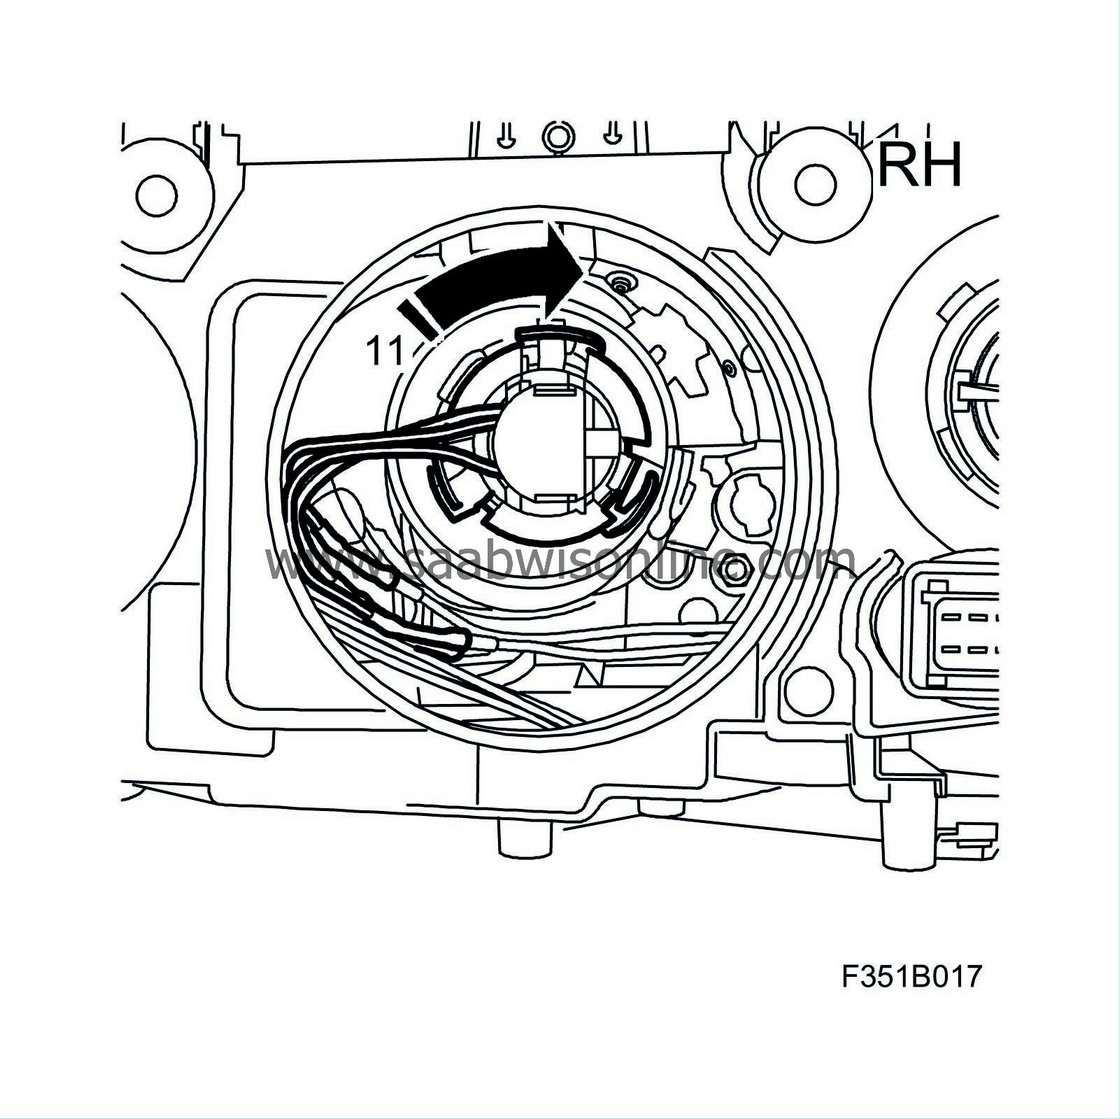
| 11. |
Fit the bulb holder by turning it in clockwise into the headlamp.
|
|
| 12. |
Fit the headlamp's protective cover.
|
|
| 13. |
Fit the headlamp, see WIS 3. Electrical System - Lighting and signalling systems - Exterior lighting - Adjustment/Replacement - Headlamps.
|
|
| 14. |
Carry out steps 1 to 13 on the other headlamp.
|
|
| Warranty/Time Information |
In the case of customer complaint and if the car is within the warranty period , use the following information to fill out the claim:
Failed Object: 35110
Fault/Reason code: 62
Location code: 09 (US=9)
Warranty Type (US): 01
Repair/Action code: 01
Labour Operation (US): 3511002
Labour operation (CA): N0918 (right) 0.4 hr, N0919 (left) 0.4 hr
Time: 0.8 hr

