(260-2634 ed. 2) Replacing the oil cooler quick couplings
Symptom: Coolant enters the automatic transmission fluid.
|
MODIFICATION INSTRUCTION
|
|
Bulletin Nbr:
|
260-2634 ed. 2
|
|
Date:
...........
|
September 2006
|
|
Market:
|
all
|
|
|
Replacing the oil cooler quick couplings
|
|
Customer Satisfaction Program 154 46
|
Cars in stock must be rectified before delivery.
A personal communication must be sent to the owners of cars already delivered requesting them to get in touch with the nearest Saab garage as soon as possible to have the fault rectified.
Saab 9-3 (9440) M03-04 4D with engine alternative B207 and automatic transmission within Vehicle Identification Number range 31000003 - 41025886.
Saab 9-3 (9440) M04 CV with engine alternative B207 and automatic transmission within Vehicle Identification Number range 46000003 - 46008365.
When fitting the oil cooler's quick coupling the O-ring may move to an incorrect position and sustain damage. This may result in leakage and coolant entering the automatic transmission fluid.
Symptom description
Coolant enters the automatic transmission fluid.
93 190 331 Kit, quick couplings, oil cooler
92 150 191 Cable tie
Brake cleaner or similar
Acid-free Vaseline or similar
If necessary:
93 160 393 ATF fluid
For fitting the modification identity plate (not US/CA):
12 785 148 Modification identity plate
93 160 907 Cleaning agent Motip Dupli, aerosol 400 ml (sufficient for 50-100 cars)
Checking the modification identity plate (not US/CA)
Before proceeding, check box C2 of the modification identity plate. From and including M04, the car's Warranty and Service Book contains the "Table of Modifications". A modification identity plate must be fitted in accordance with the section "Fitting the modification identity plate" where local directives require the marking of the car. If the box is not marked, continue as follows.
|
1.
|
Lift the cover over the radiator and check the date marking. Is the radiator marked with a date prior to 8 Nov 2003 (08/11/03)?

NO:
The cooler's quick couplings must not be replaced.
YES:
Replace the cooler's quick couplings in accordance with the instructions below.
|
|
2.
|
Position protection over the wings to guard against paint damage and dirt.
|
|
3.
|
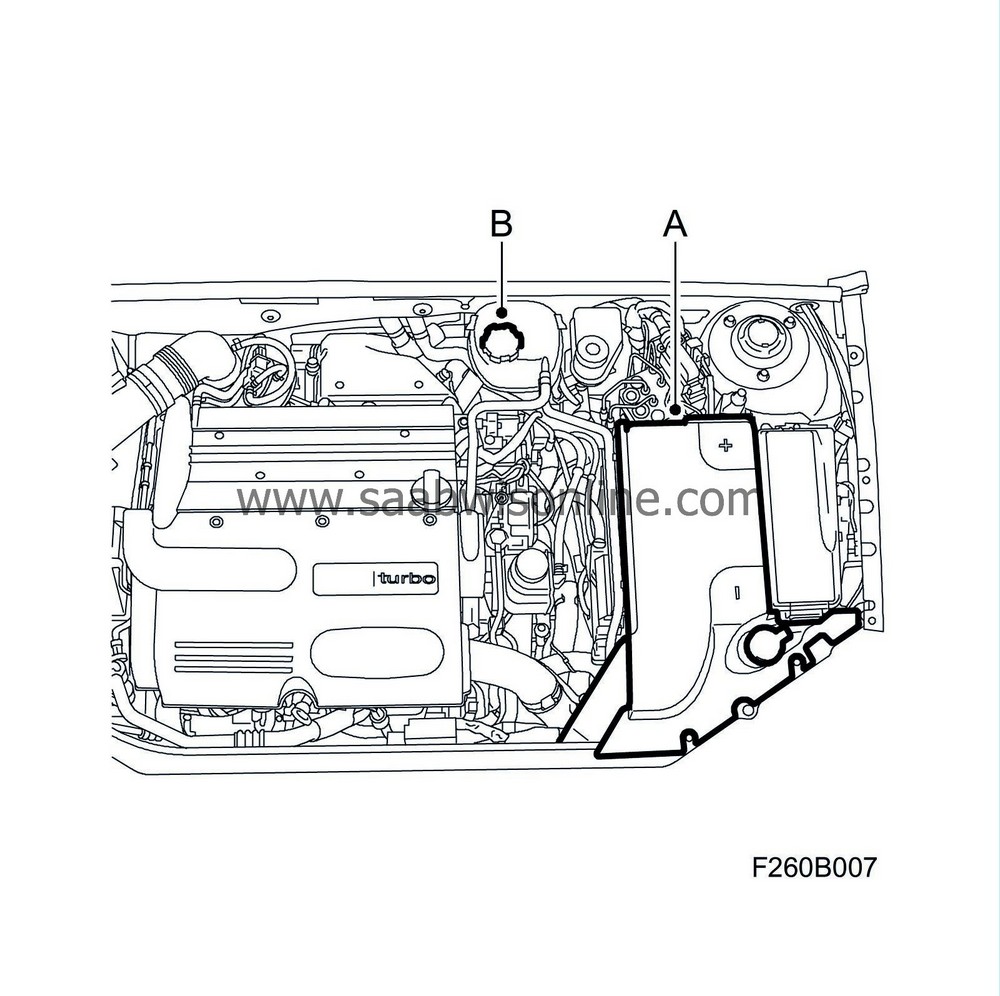
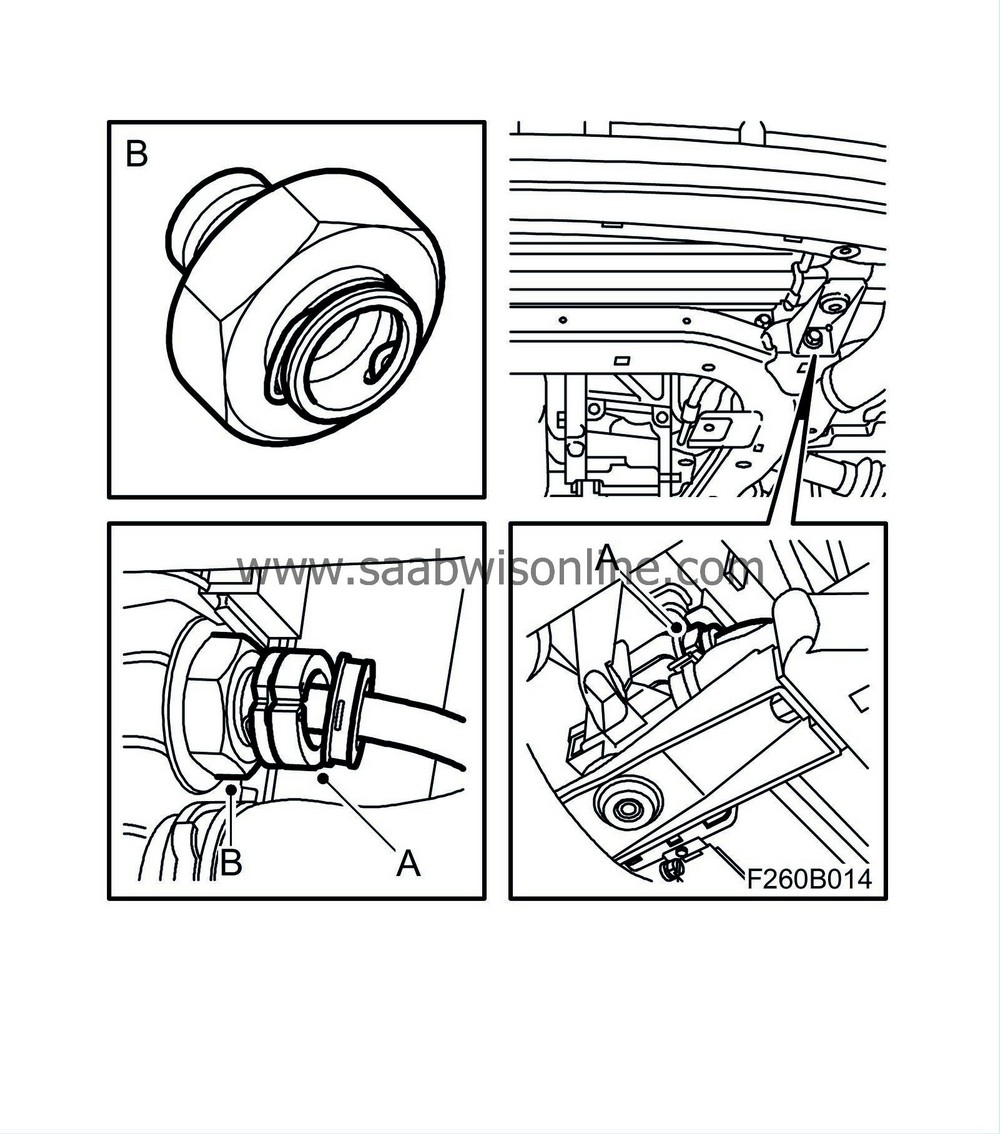
Remove the battery cover (A) and open the expansion tank cap (B).
|
|
4.
|
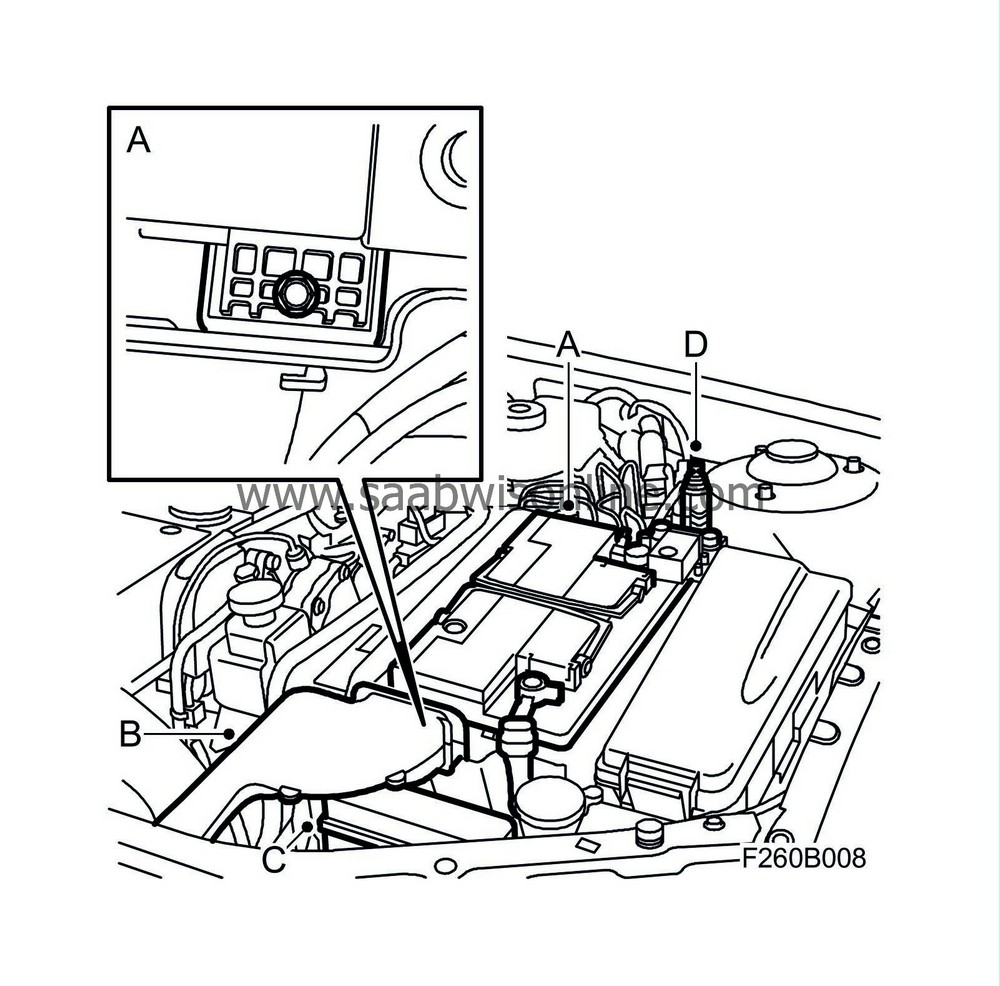
Remove the battery (A), the coolant pipe (B), the fuse box (C) and unplug the bonnet switch connector (D).
|
|
5.
|
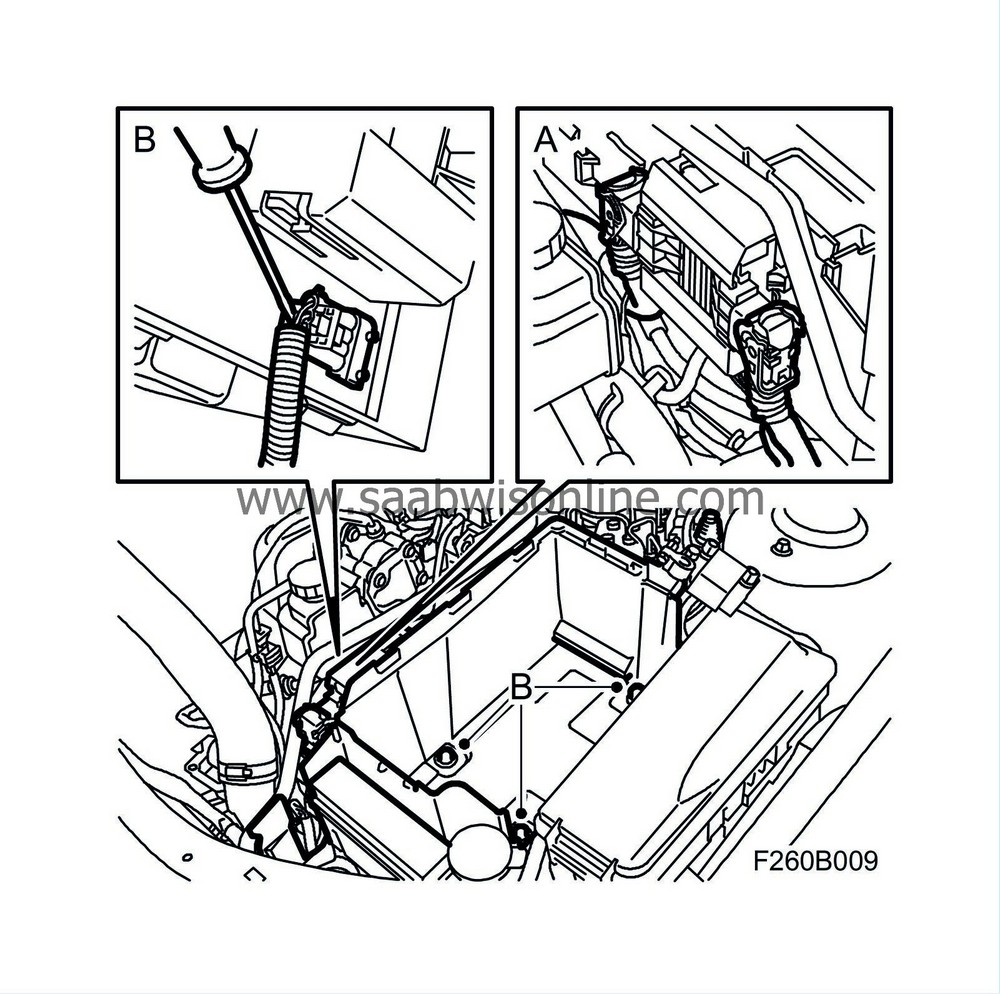
Detach the control module with bracket (A) from the battery tray.
Remove the wiring harness clips and remove the battery tray (B).
|
|
7.
|
Remove the spoiler shield, see WIS - Body - Body - Auxiliaries - Adjustment/Replacement - Front spoiler shield.
|
|
8.
|
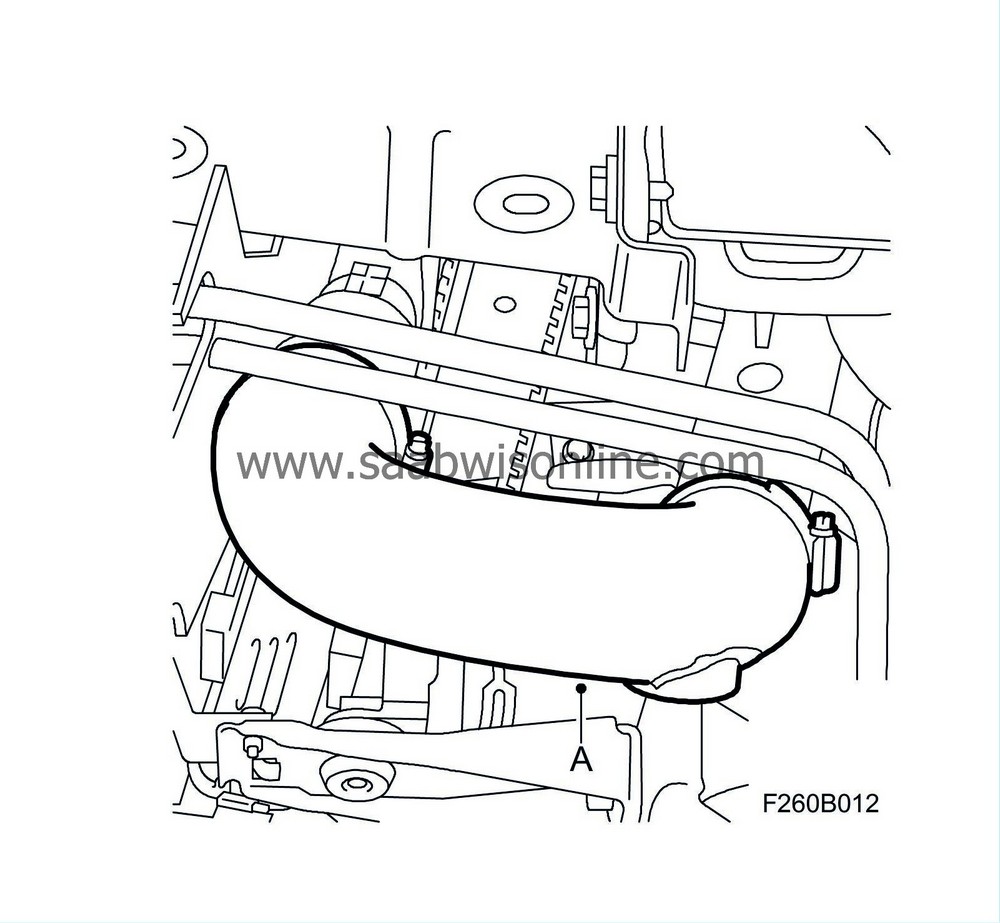
Position a clean collection receptacle under the car, connect a hose (A) to the radiator and drain off the coolant. The coolant shall be re-used.

|
|
9.
|
Remove the turbo pipe hose clip and fold away the turbo hose (A) from the turbo pipe.
|
|
10.
|
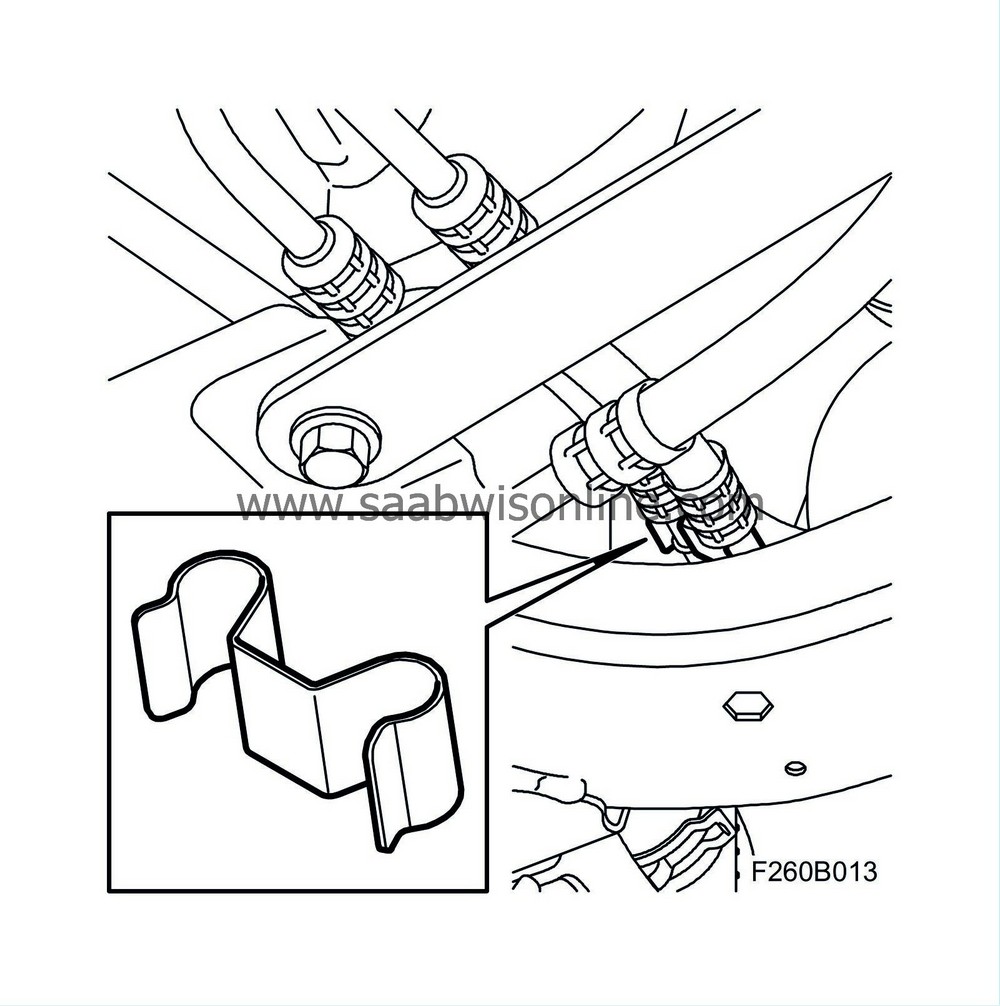
Remove the clip holding the pipes together.
|
|
11.
|
Replace the oil cooler's lower quick coupling:
|
|
|
•
|
Remove the dust cover (A) from the lower pipe.
|
|
|
•
|
Remove the pipe from the quick coupling (B), use 87 92 806 Removal tool, quick coupling, oil pipe, by turning slightly. Keep a rag available to collect any spilled oil.
|
|
|
•
|
Fit a plug in the pipe to minimise spilled oil.
|
|
|
•
|
Remove the oil cooler's lower quick coupling (B).
|
|
|
•
|
Wash the threads in the cooler clean with brake cleaner or similar.
|
|
|
•
|
Fit a new quick coupling (B) to the oil cooler.
Tightening torque 18 Nm (13 lbf ft)
|
|
|
•
|
Apply acid-free Vaseline to the oil pipe to facilitate fitting.
|
|
|
•
|
Fit the lower pipe in the oil cooler. Press until the pipe snaps into position.
|
|
|
•
|
Press in the dust cover (A).
|
|
12.
|
Wipe clean from oil and fit the turbo hose (A).
|
|
14.
|
Replace the oil cooler's upper quick coupling:

|
|
|
•
|
Fit a cable tie onto the pipe under the dust cover in order to prevent the dust cover sliding down on the pipe.
|
|
|
•
|
Remove the dust cover from the upper pipe.
|
|
|
•
|
Remove the pipe from the quick coupling (A), use 87 92 806 Removal tool, quick coupling, oil pipe, by turning slightly. At the same time, undo the pipe from the clip. Keep a rag available to collect any spilled oil.
|
|
|
•
|
Fit a plug in the pipe to minimise spilled oil
|
|
|
•
|
Remove the quick coupling (A) from the oil cooler. Wash the threads in the cooler clean with brake cleaner or similar.
|
|
|
•
|
Fit a new upper quick coupling (B) to the oil cooler.
Tightening torque 18 Nm (13 lbf ft)
|
|
|
•
|
Apply acid-free Vaseline 16-30 06 665 or equivalent product to the oil pipe to facilitate fitting.
|
|
|
•
|
Fit the upper pipe in the radiator. Press until the pipe snaps into position.
|
|
|
•
|
Press in the dust cover.
|
|
15.
|
Fit the control module with the bracket (A).
Press in the wiring harness clips and fit the battery tray (B).
|
|
16.
|
Plug in the bonnet switch connector (D).
Fit the coolant pipe (B), the battery (A) and the fuse box (C). Connect the battery cables.
|
|
17.
|
Fill with coolant and bleed the cooling system. See WIS - Engine - 4-cylinder petrol - Cooling system - Adjustment/Replacement - Bleeding the cooling system when working with the oil cooler. Fit the cap to the expansion tank (B).
|
|
18.
|
Fit the battery cover (A).
|
|
19.
|
Check the fluid level in the transmission and fill as necessary, see WIS - Transmission - Automatic Transmission - Adjustment/Replacement - Checking the transmission fluid level.
|
|
20.
|
Visually inspect for oil leakage at the upper quick coupling.
|
|
22.
|
Visually inspect for oil leakage at the lower quick coupling.
|
|
23.
|
Fit the clip to the pipe.
|
|
24.
|
Fit the spoiler shield, see WIS - Body - Body - Auxiliaries - Adjustment/Replacement - Front spoiler shield.
|
|
25.
|
Remove the wing covers.
|
|
26.
|
Complete the necessary procedures after disconnecting the battery, see WIS - Electrical System - Charging systems - Adjustment/Replacement - Procedures after disconnecting the battery.
|
|
Marking the modification identity plate (not US/CA)
|
After carrying out the procedure, box C2 on the modification identity plate must be marked. From and including M04 the car's Warranty and Service Book contains the "Table of Modifications". Mark the box with the number "7" if the procedure was carried out by the importer or with the number "8" if carried out by the dealer.
|
Fitting the modification identity plate (not US/CA)
|
|
Note
|
|
A modification identity plate must only be fitted where local directives require the marking of the car.
|
Fit the modification identity plate in accordance with WIS - 9-3 (9440) M04 - General - General - Technical data - Plates and labels.
|
Warranty/Time Information
|
See separate information.


