Differential gear, dismantling and assembly
|
|
Differential gear, dismantling and assembly
|
|
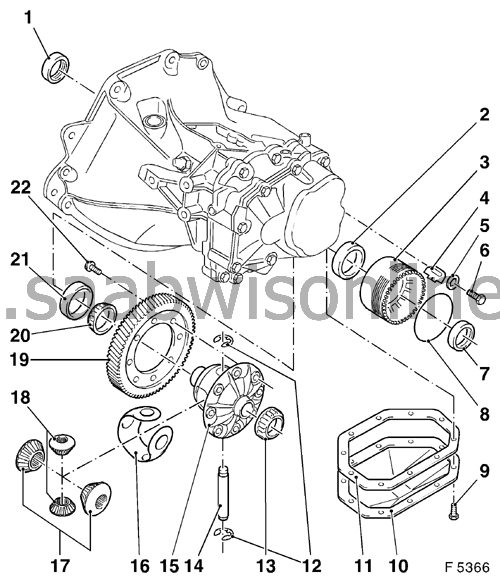
Illustration, differential gear
|
|
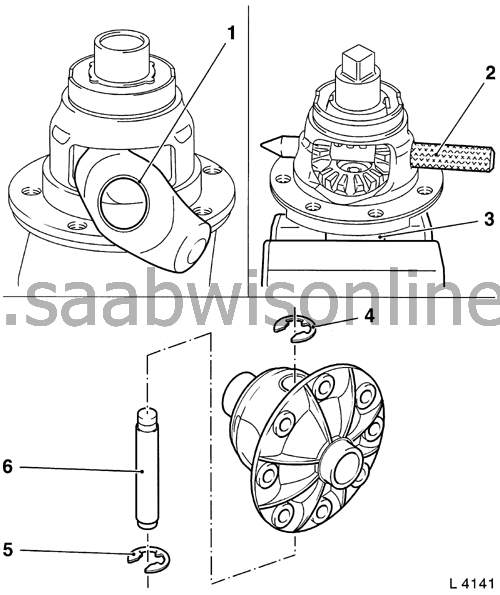
1
|
Drive shaft sealing ring
|
|
2
|
Outer ring, taper roller bearing
|
|
3
|
Bearing ring
|
|
4
|
Locking plate
|
|
5
|
Spring ring
|
|
6
|
Bolt
|
|
7
|
Drive shaft sealing ring
|
|
8
|
Rubber O-ring
|
|
9
|
Bolt
|
|
10
|
Differential cover
|
|
11
|
Gasket
|
|
12
|
Circlips
|
|
13
|
Inner ring, taper roller bearing
|
|
14
|
Differential pinion shaft
|
|
15
|
Differential housing
|
|
16
|
Housing insert
|
|
17
|
Drive shaft pinions
|
|
18
|
Differential pinions
|
|
19
|
Drive gear
|
|
20
|
Inner ring, taper roller bearing
|
|
21
|
Outer ring, taper roller bearing
|
|
22
|
Bolt
|
|
Note
|
|
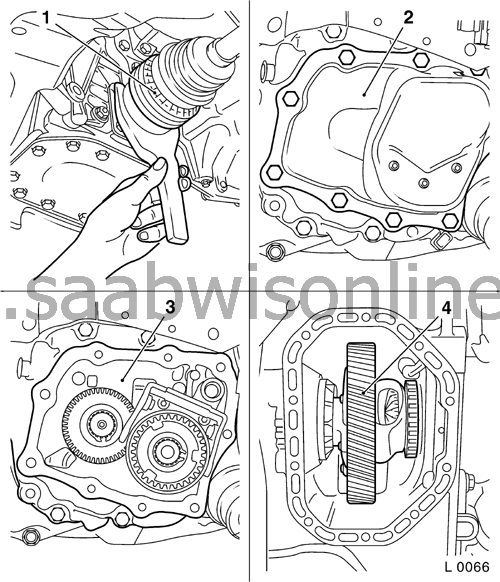
The gearbox remains in place.
|
|
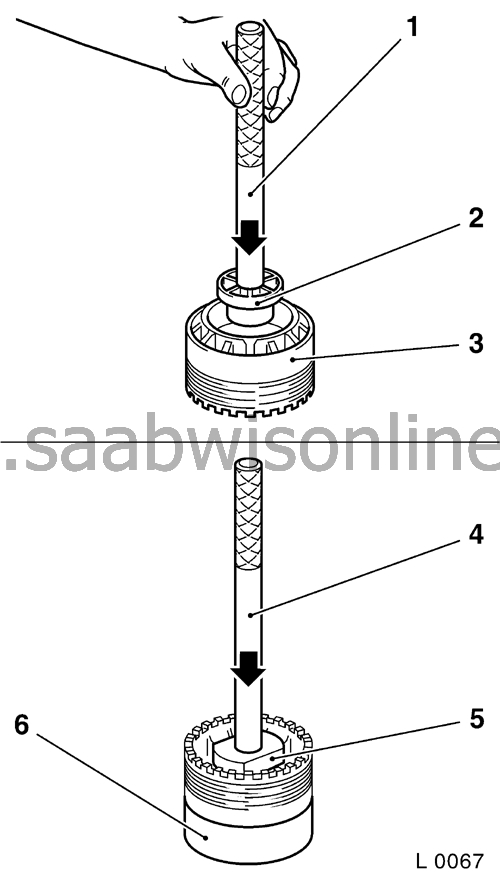
7.
|
Only necessary on replacement: Pull out both the inner taper roller bearing rings (1) with KM-161-B or
87 92 343 Puller, differential bearing 5
(2), KM-161-3 (4) and KM-161-4 (3).
|
Note
|
|
When re-using taper roller bearings the inner and outer rings must not be interchanged.
|
|
|
8.
|
During repairs, if a speedometer pinion (driving) (5) is fitted, it should be discarded. On re-assembly a new pinion should not be fitted.
|
|
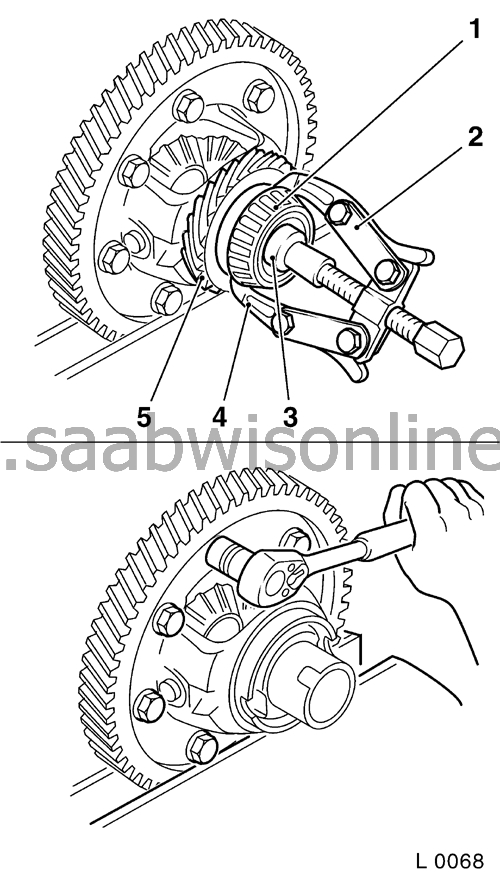
9.
|
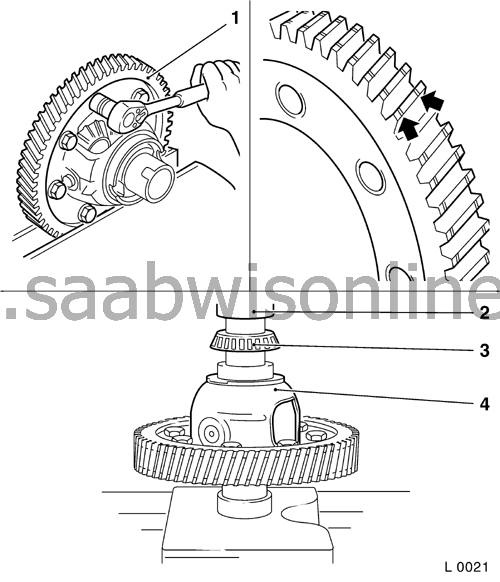
Clamp the differential housing in a vice using protective vice-jaws. Remove the drive gear from the differential housing.
Note
Always replace both the final drive gears (1) (pinion and gear wheel) at the same time. Note the groove (arrowed) around the crown of the gear.

|
|
10.
|
Only necessary on replacement: Remove the circlips (2) from the differential pinion shaft. Remove the differential pinion shaft.
|
|
11.
|
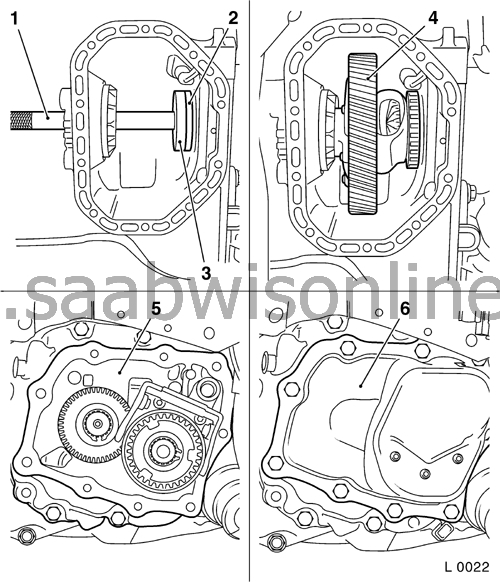
Unscrew the drive shaft pinions and the differential pinions with KM-458-A. Remove the plastic sleeve.
|
|
12.
|
Clean all the dismantled components and the gearcase.
Check all parts for wear, pitting or damage. Replace if necessary. Wet all bearings, contact surfaces and press-fit surfaces on the rotating parts with gearbox oil.
|
Fit the housing insert into the differential housing.
Note
|
1.
|
The edge of the insert (1) must locate in the drive axle pinion seat in the housing.
|
|
2.
|
Locate/screw in the drive shaft pinions and differential pinions in the differential housing.
|
|
3.
|
Clamp the differential housing together with KM-458-A (3) in a vice using protective vice-jaws.
|
|
4.
|
Centralise the differential pinions with KM-456 (2).
|
|
5.
|
Fit the differential pinion shaft (6) and lock with new circlips. (4 and 5).
|
|
6.
|
Fit the drive gear (1) onto the differential housing with new bolts. Tightening torque 80 Nm.
|
Note
|
|
Always replace both the final drive gears (pinion and gear wheel) at the same time. Note the groove (arrowed) around the crown of the gear.
|
|
|
7.
|
Press in the inner taper roller bearing rings (3) into the differential housing (4) with KM-453 (2).
|
|
8.
|
Fit the outer taper roller bearing ring (2) in the gearbox and/or the bearing ring with KM-304 (1) and KM-451 (3).
|
|
9.
|
Tap in the drive shaft seal in the bearing seat with KM-446. See service procedure "Drive shaft seal, replacement F 17".
|