PRE-RELEASE
Evaporator
| Evaporator |
| Important | ||
|
The A/C receiver and the compressor oil absorb moisture from the air, which can then not be removed. Plug all connections that are opened immediately. |
||
| To remove |
| 1. |
Drain the A/C system. See
Draining and filling the refrigerant
.
|
|
| 2. |
Dismantle the cover on the windscreen wipers and dismantle the windscreen wipers. Use the puller
85 80 144 Puller, windscreen wiper arm
.
|
|
| 3. |
Remove the
cover on the bulkhead partition space
.
|
|
| 4. |
Dismantle the
windscreen wiper assembly
.
|
|
| 5. |
Lift out the air filter.
|
|
| 6. |
Dismantle the air filter housing.
|
|
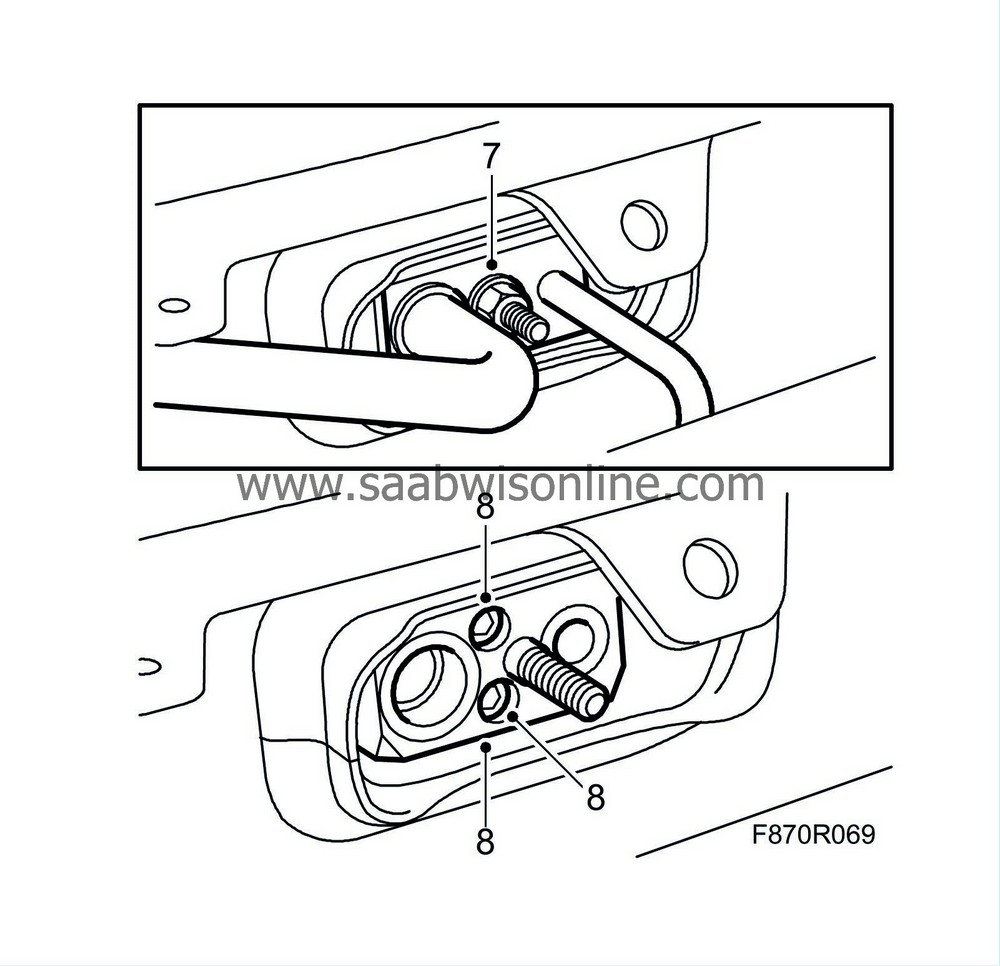
| 7. |
Dismantle the high and low pressure pipe's PAD connection from the expansion valve. Plug the openings.
|
|
| 8. |
Dismantle the expansion valve.
|
|
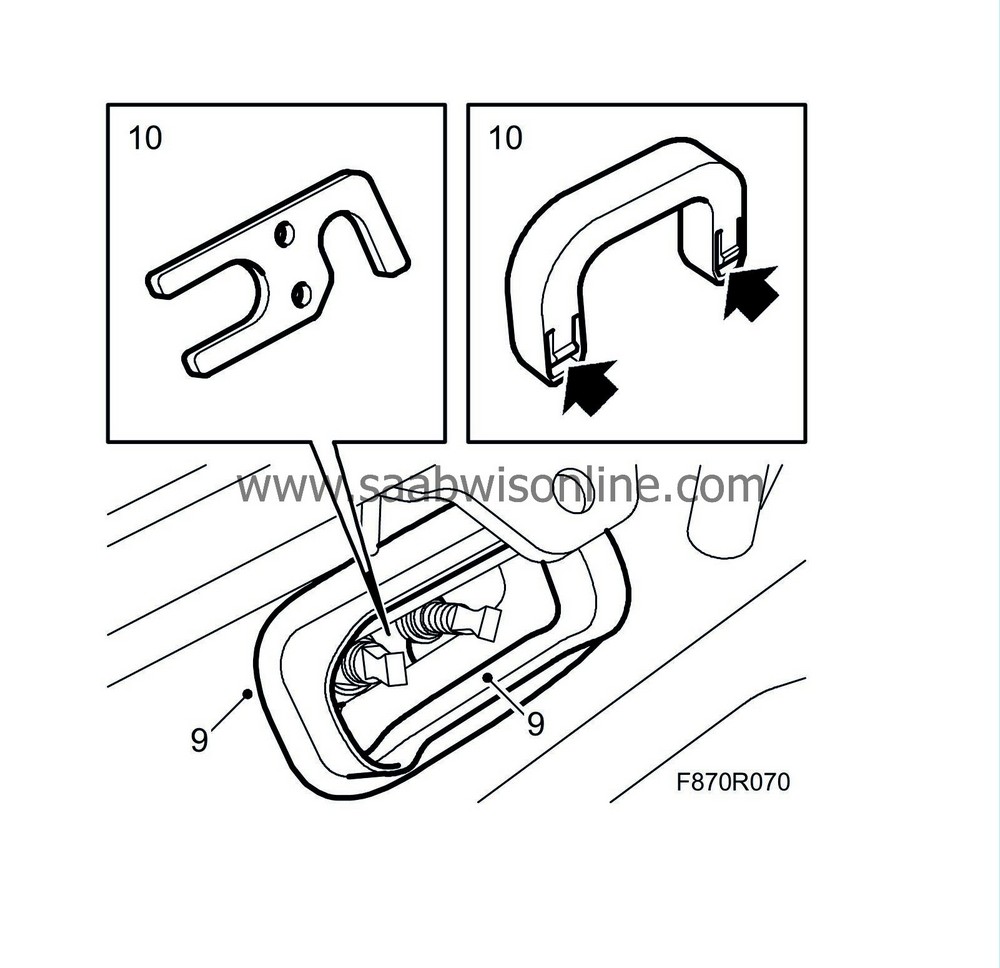
| 9. |
Dismantle the expansion valve's rubber seal and the foam seal.
|
|
| 10. |
Dismantle the locking clasp holding the high and low pressure pipes on the heating and ventilation unit.
|
|
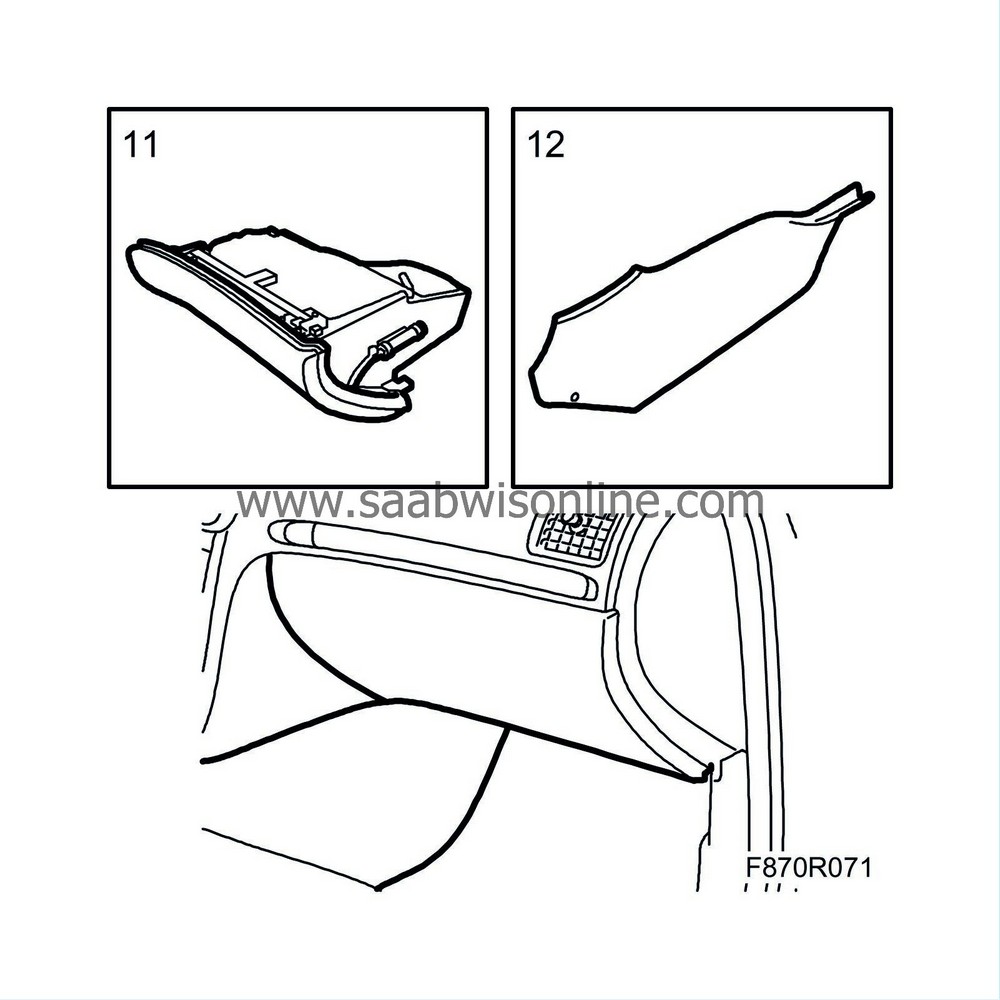
| 11. |
Remove the
glove box
.
|
|
| 12. |
Dismantle the floor console's front side panel on the passenger side.
|
|
| 13. |
Remove the
passenger acoustic insulation
.
|
|
| 14. |
Dismantle the air duct for the floor vent.
|
|
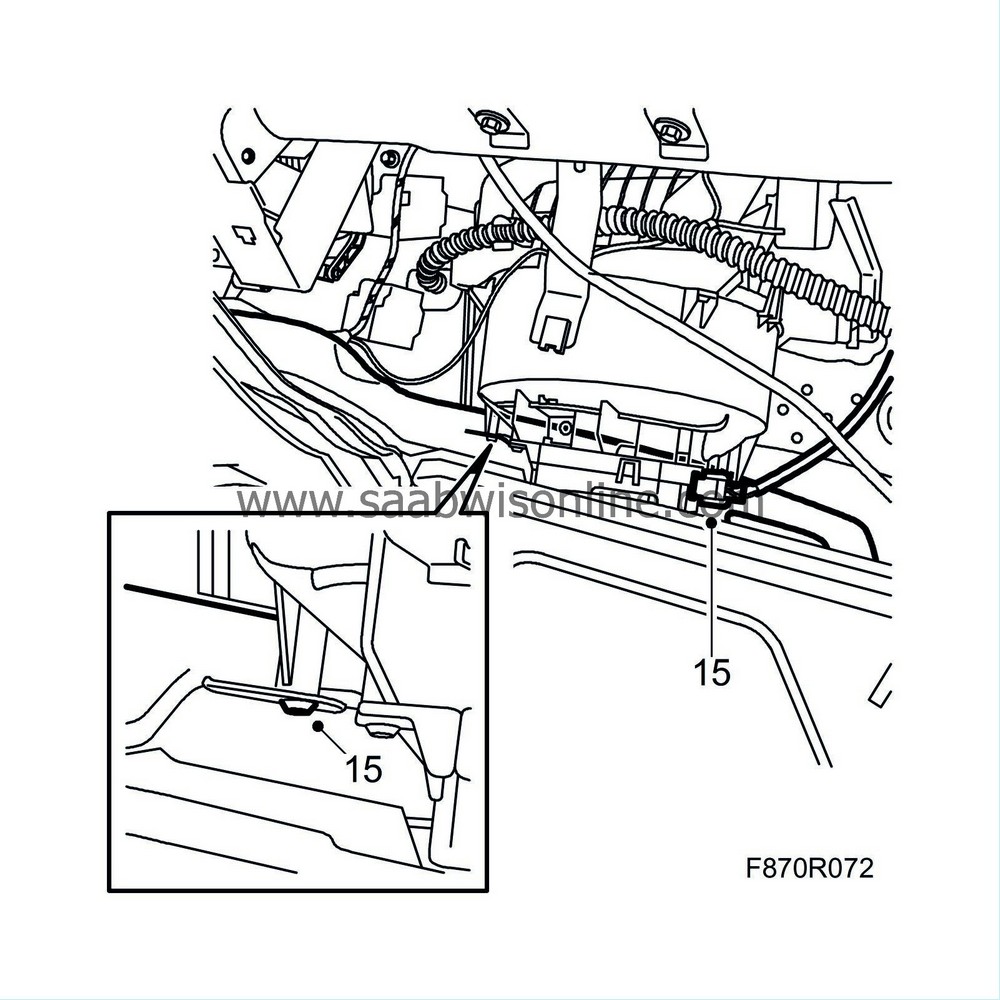
| 15. |
Dismantle the connector from the ventilation fan control.
|
|
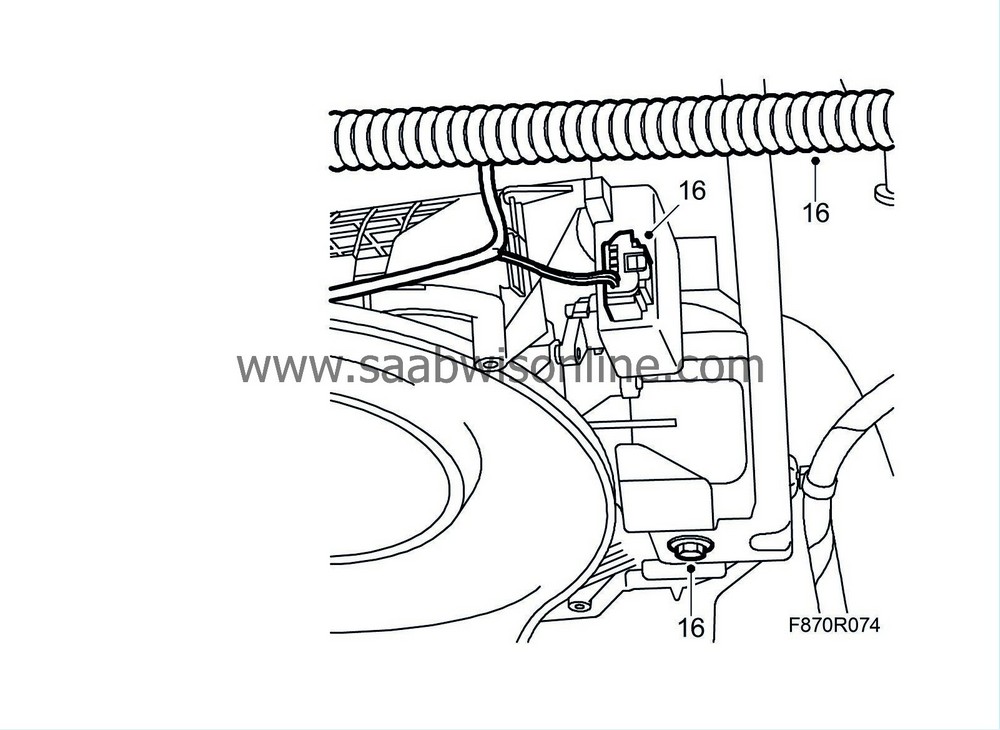
| 16. |
Dismantle the connector from the recirculation motor and the hose from the clips on the fan housing.
|
|
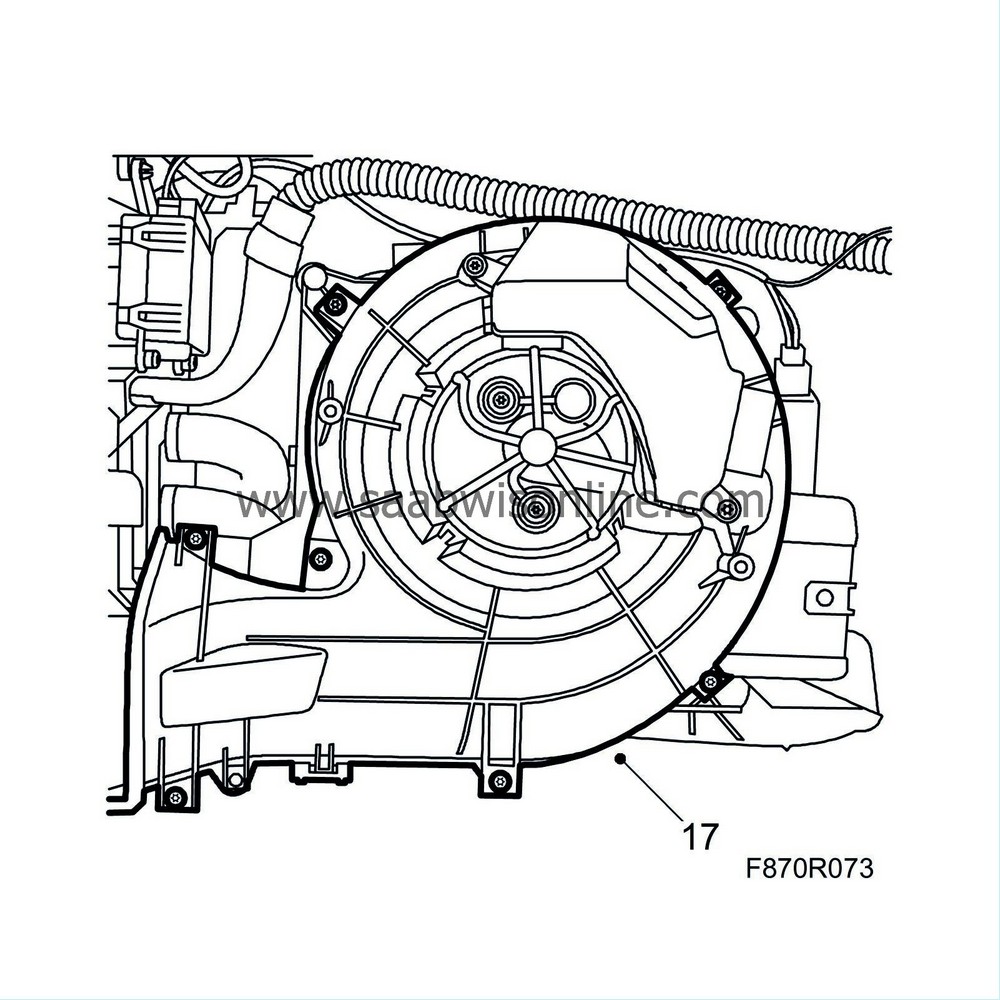
| 17. |
Dismantle the top and bottom sections of the fan unit.
|
|
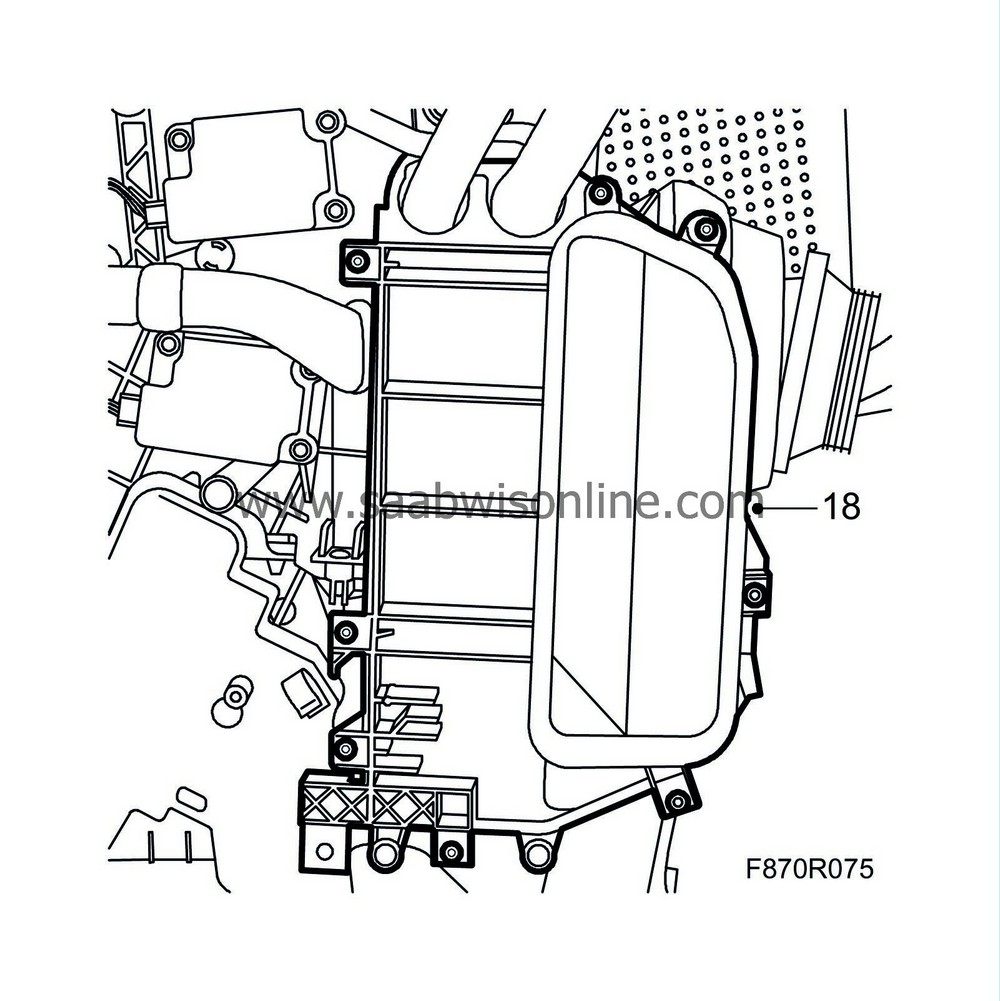
| 18. |
Dismantle the evaporator's cover.
|
|
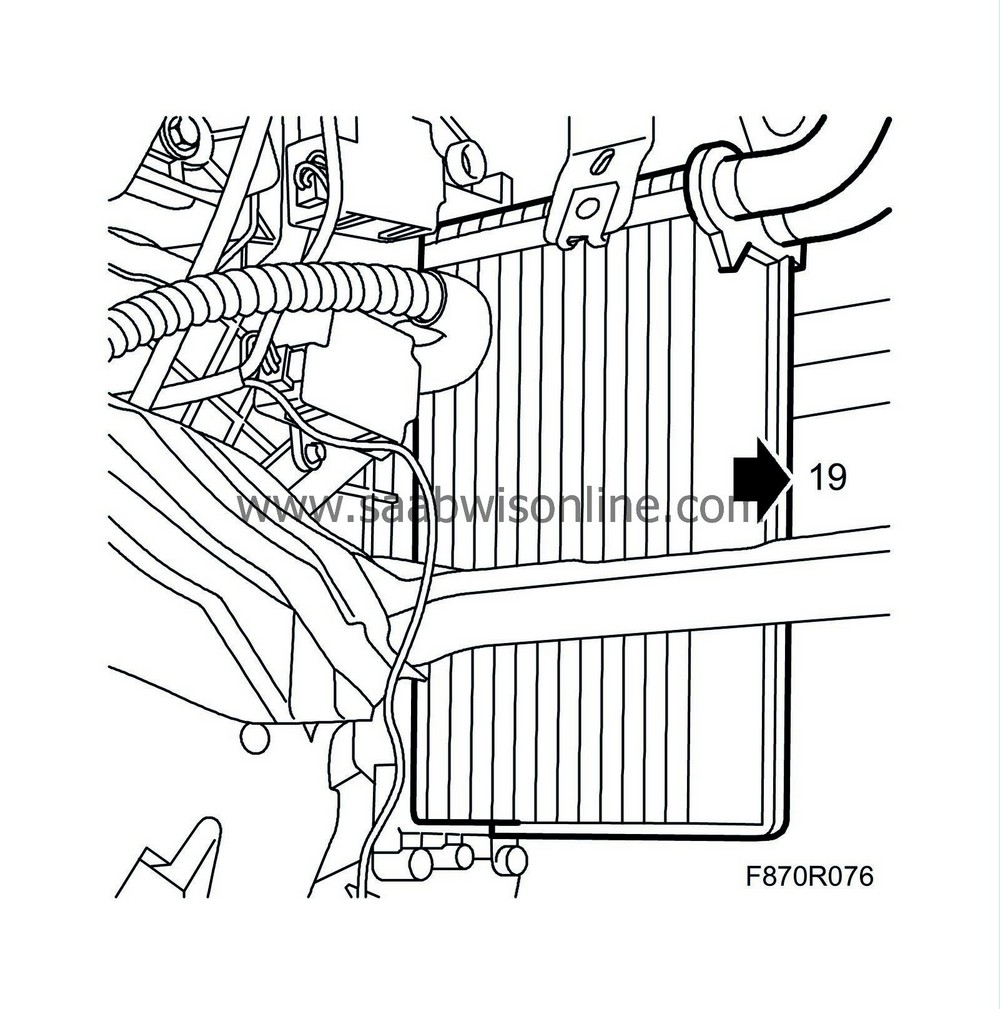
| 19. |
Carefully pull out the evaportor.
|
|
| To fit |
| 1. |
Adjust the oil quantity in the A/C system. See
Filling and adjusting the compressor oil
.
|
|
| 2. |
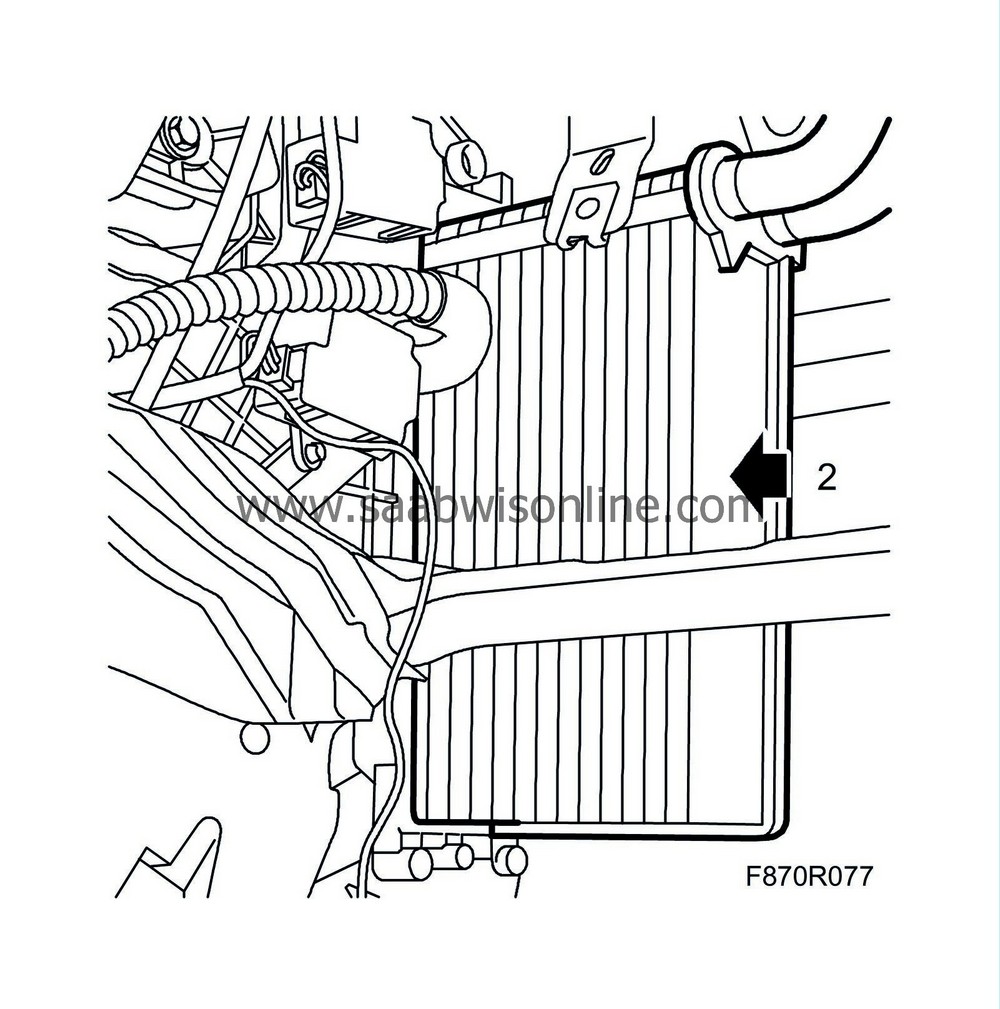
Carefully slide in the evaporator. Take care so that the foam seal aligns correctly.
|
|
| 3. |
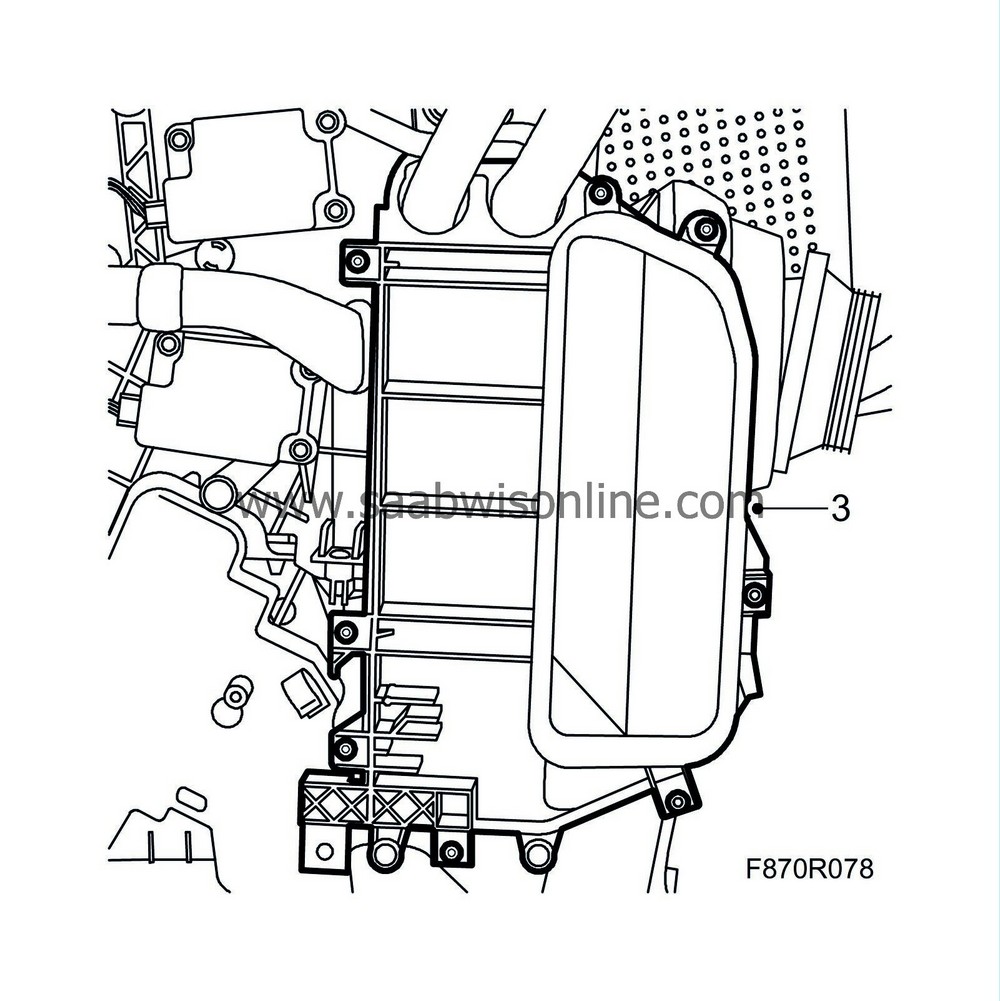
Fit the evaporator's cover.
|
|
| 4. |
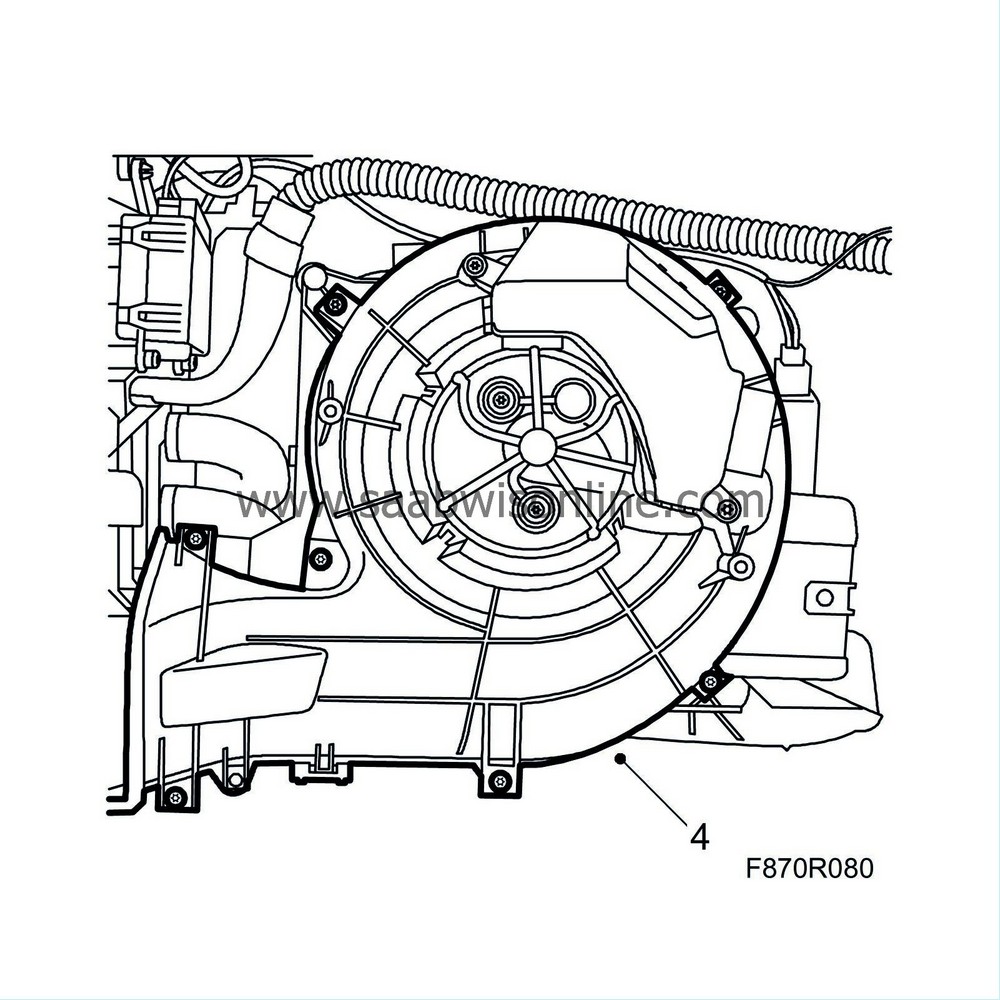
Fit the top and bottom sections of the fan unit.
|
|
| 5. |
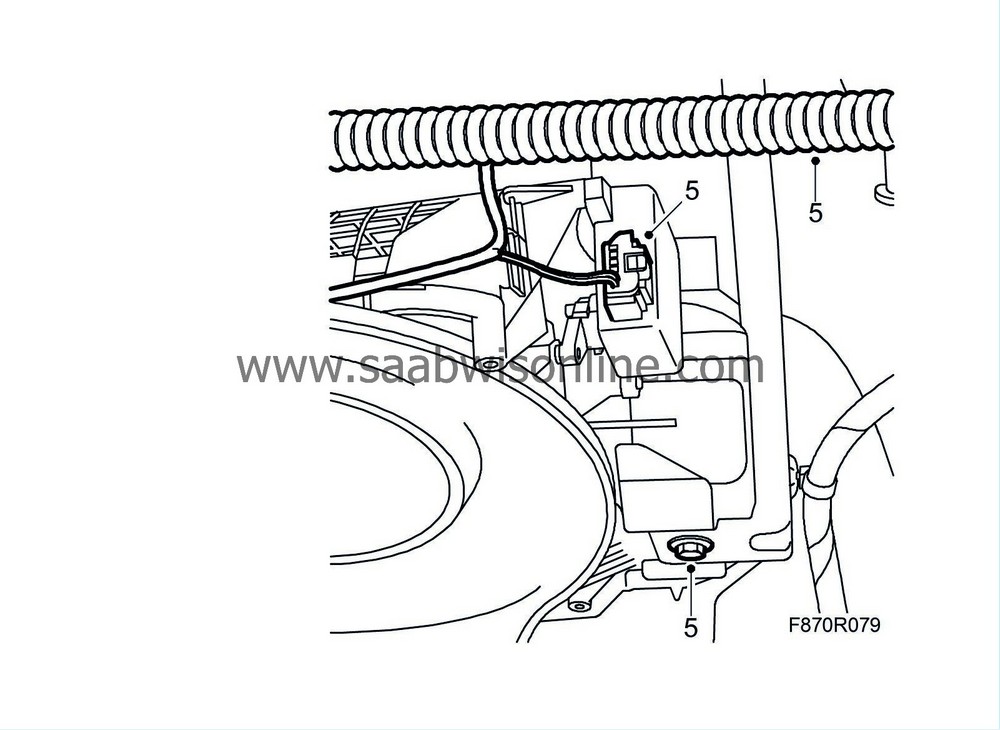
Fit the clip that holds the hose on the fan housing. Connect the recirculation motor's connector.
|
|
| 6. |
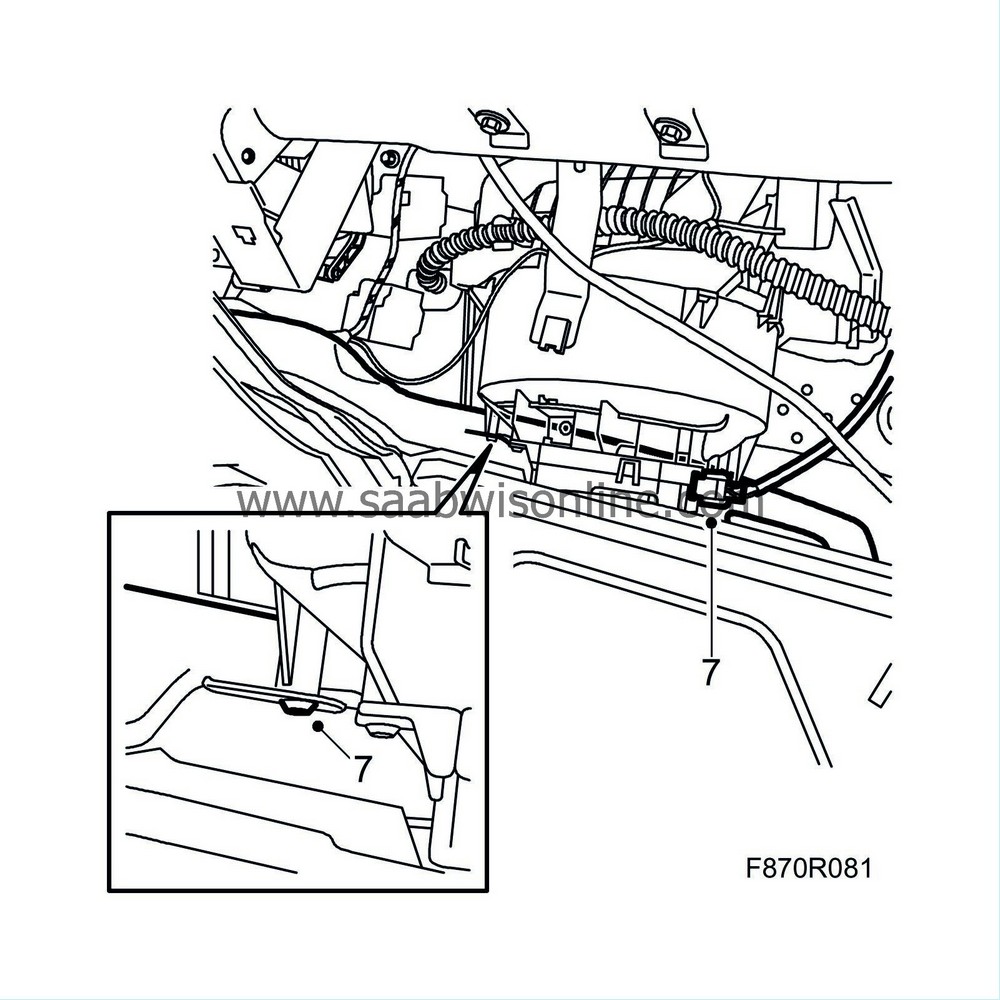
Connect the connector to the fresh-air fan control.
|
|
| 7. |
Fit the air duct for the floor vent.
|
|
| 8. |
Fit the
passenger acoustic insulation
.
|
|
| 9. |
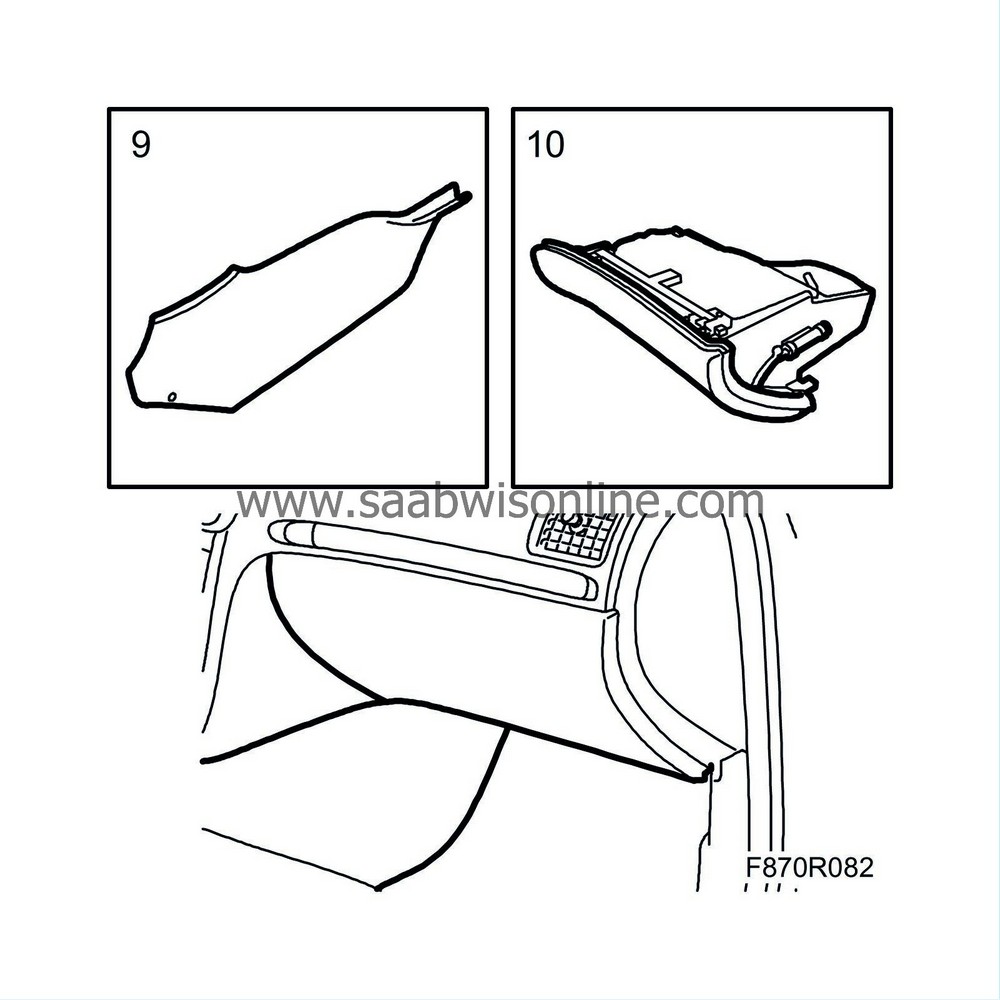
Fit the floor console's front side panel on the passenger side.
|
|
| 10. |
Fit the
glove box
.
|
|
| 11. |
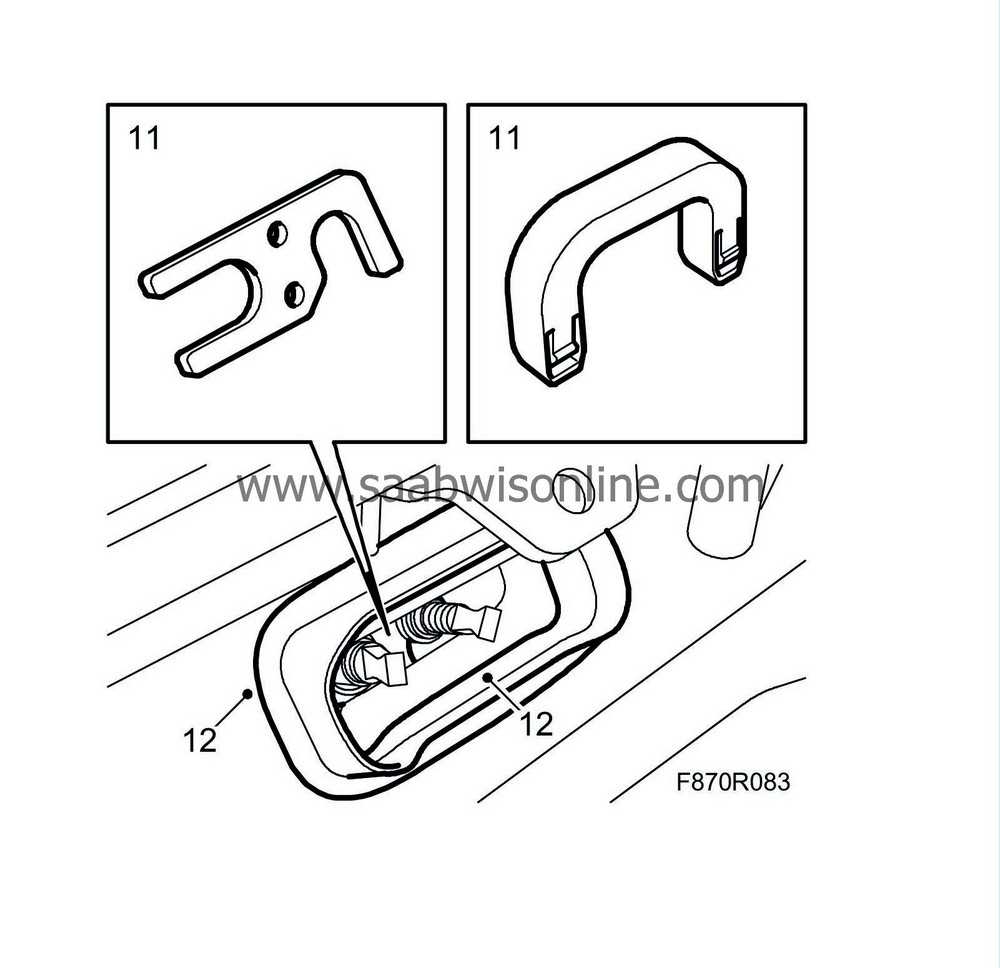
Fit the locking clasp holding the high and low pressure pipes on the heating and ventilation unit.
|
|
| 12. |
Fit the expansion valve's foam seal and rubber seal.
|
|
| 13. |
Fit the expansion valve.
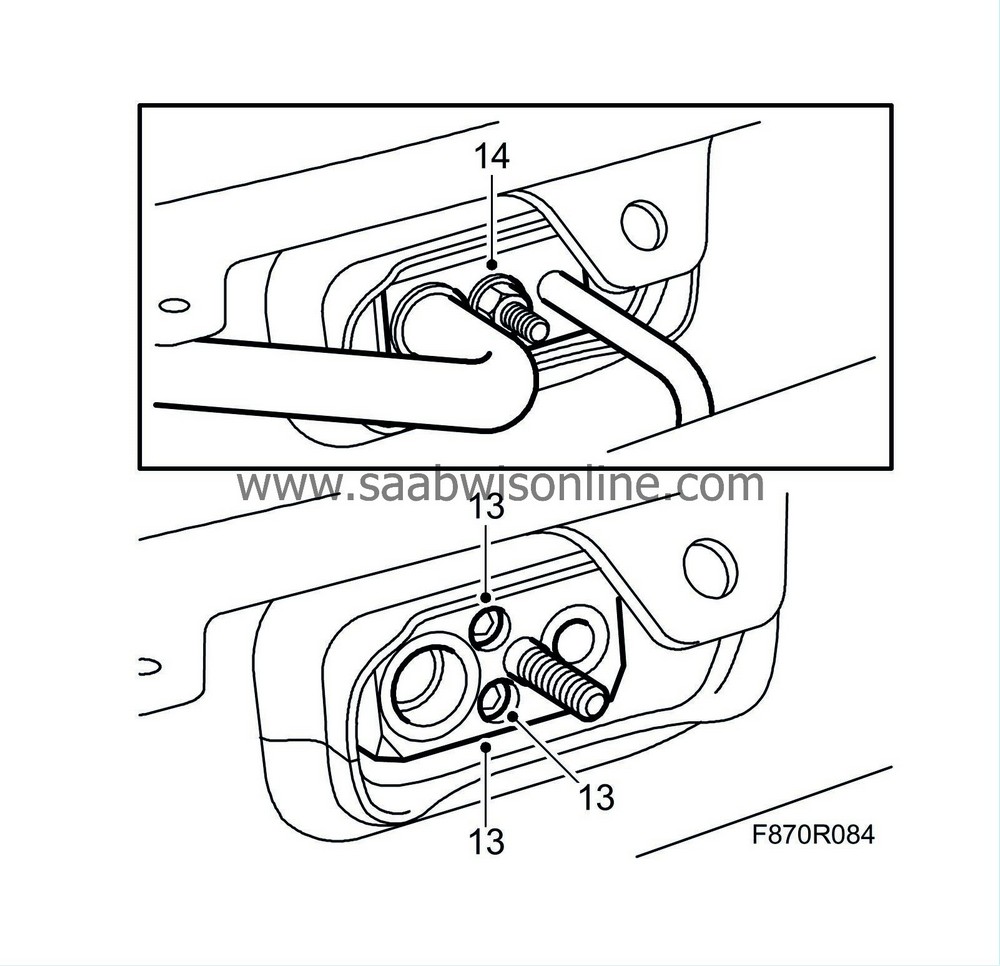
Tightening torque 15 Nm (lbf ft) |
|
| 14. |
Replace the sealing washer and fit the high and low pressure pipe's PAD connection to the expansion valve.
Tightening torque 15 Nm (11 lbf ft) |
|
| 15. |
Fit the air filter housing.
|
|
| 16. |
Fit the air filter.
|
|
| 17. |
Dismantle the
windscreen wiper assembly
.
|
|
| 18. |
Fit the
cover for the bulkhead partition space
.
|
|
| 19. |
Fit the windscreen wipers
Tightening torque 20 Nm (15 lbf ft) |
|
| 20. |
Vacuum pump and fill the A/C system. See
Draining and filling the refrigerant
.
|
|
| 21. |
Check the performance of the A/C system. See
A/C system performance test
.
|
|


