CD player/changer, front (355F)
|
|
CD player/changer, front (355F)
|
|
Important
|
|
The optic cables must be handled carefully so as not to distort the signal.
|
|
•
|
It is extremely important that the two leads in the connector are not mixed up.
|
|
•
|
The cables cannot be spliced.
|
|
•
|
The lead must not be bent to form a curve with a radius of less than 25 mm.
|
|
•
|
The lead must not be subjected to temperatures greater than 185°F (85°C).
|
|
•
|
The lead ends should be kept free from dirt.
|
|
•
|
The lead must not be subjected to blows that could cause the transparent plastic to whiten, thereby reducing light intensity. This could cause disruptions in communication.
|
|
•
|
The lead should not be stretched across a sharp edge, which would cause increased damping of the signal.
|
|
|
 Warning
|
|
The red visible light is of laser class 1. Do not look directly into the optic fibre or the control module connector at close range. At a distance of less than 20 mm from your eyes to the light source, your eyes could be damaged.
|
|
|
|
|
|
Carry out
actions before removing control module
.
|
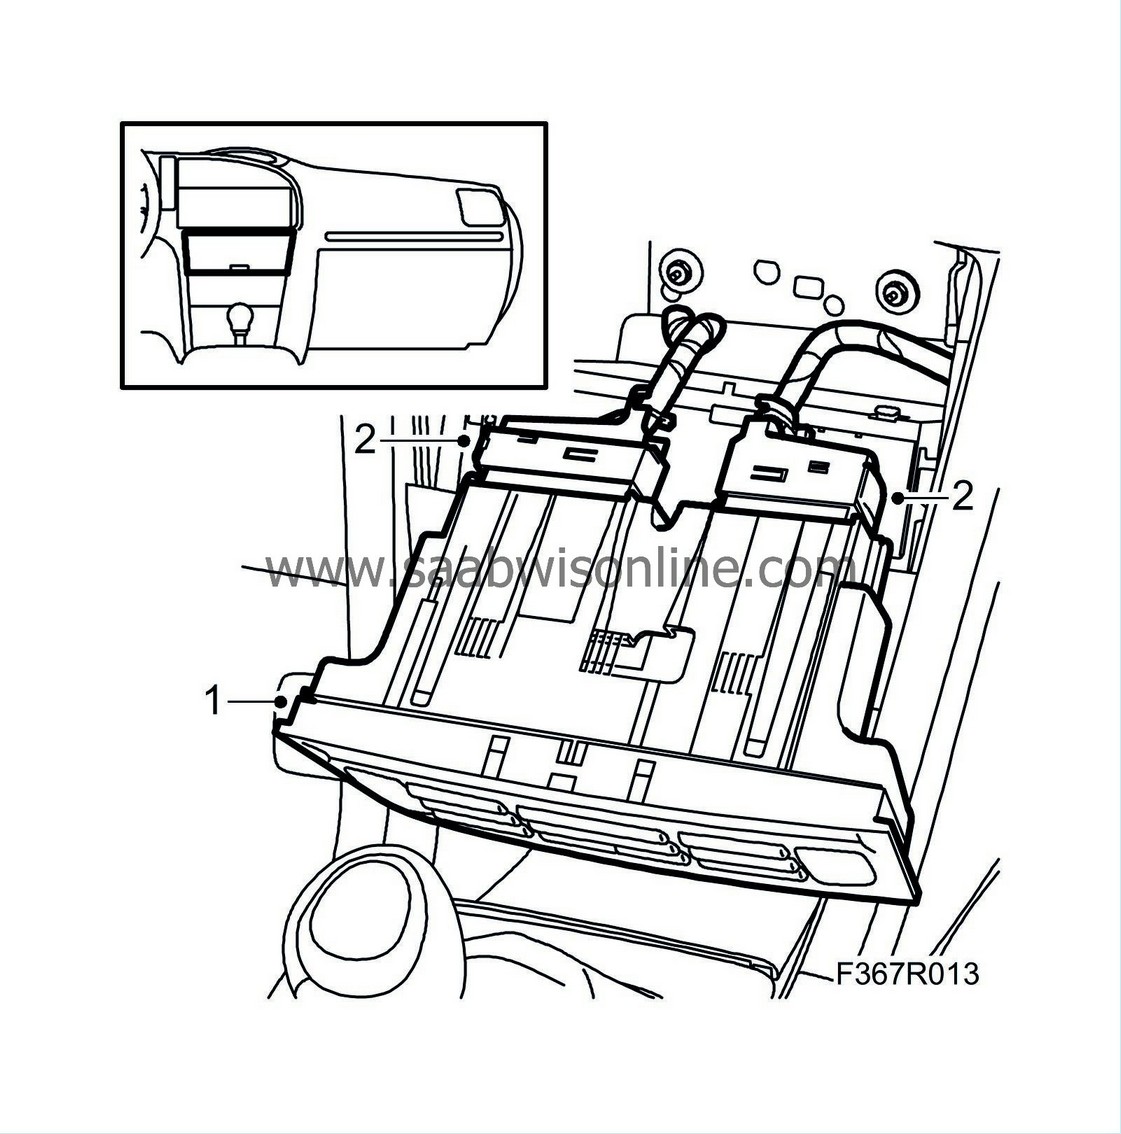
1.
|
Remove the ACC/MCC unit with
82 93 474 Removal tool
.
|
Important
|
|
Take care when releasing the locking mechanism on the connector so as not to damage the connector. Pull the halves straight apart to avoid bending the pins. For further information regarding connectors, refer to
Connectors, handling and inspection
.
|
|
|
|
|
2.
|
Unplug the connector to the ACC/MCC unit.
|
|
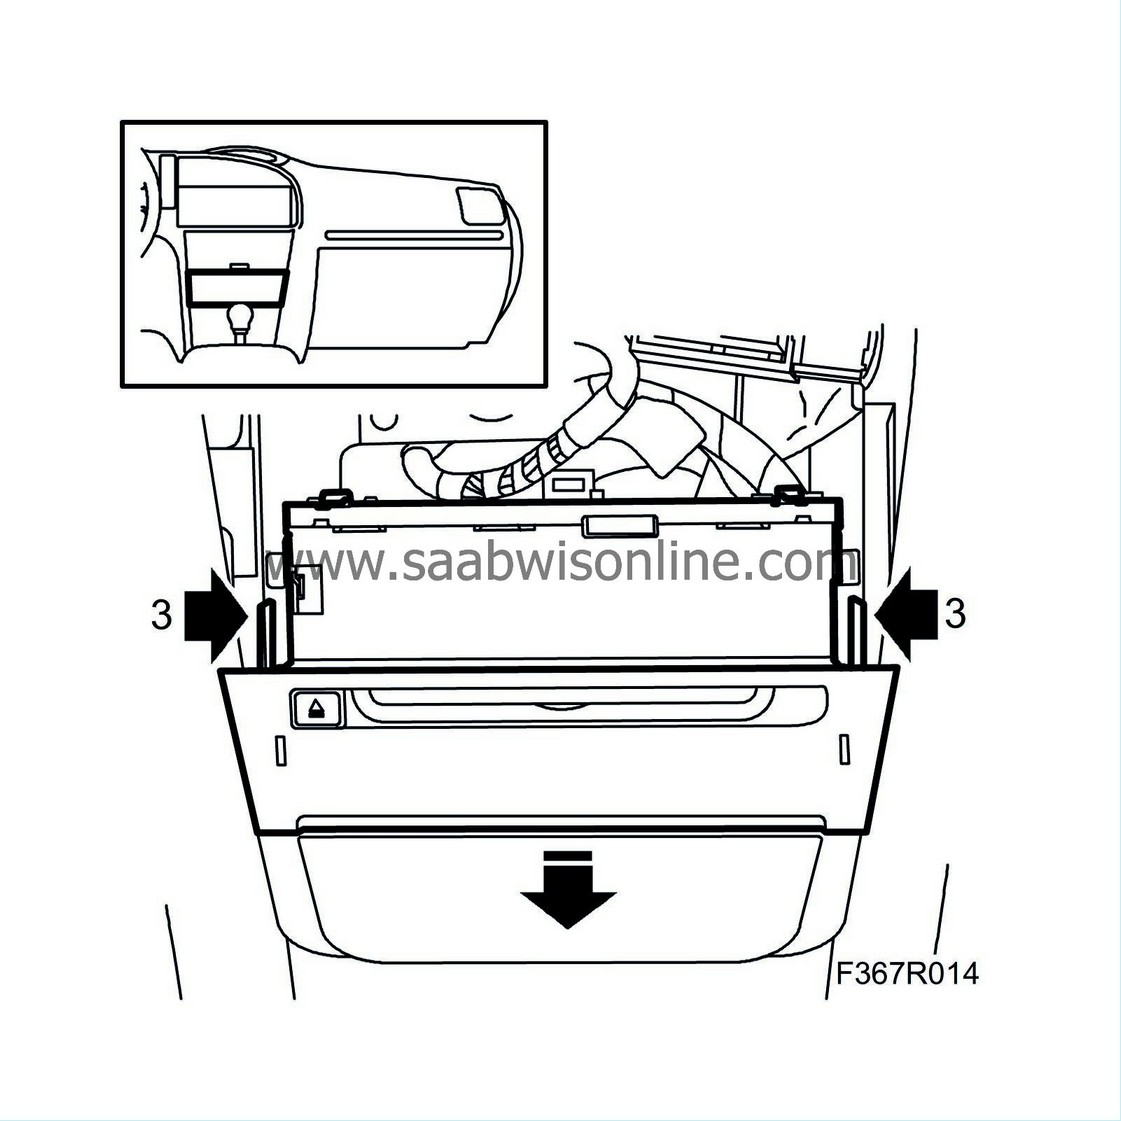
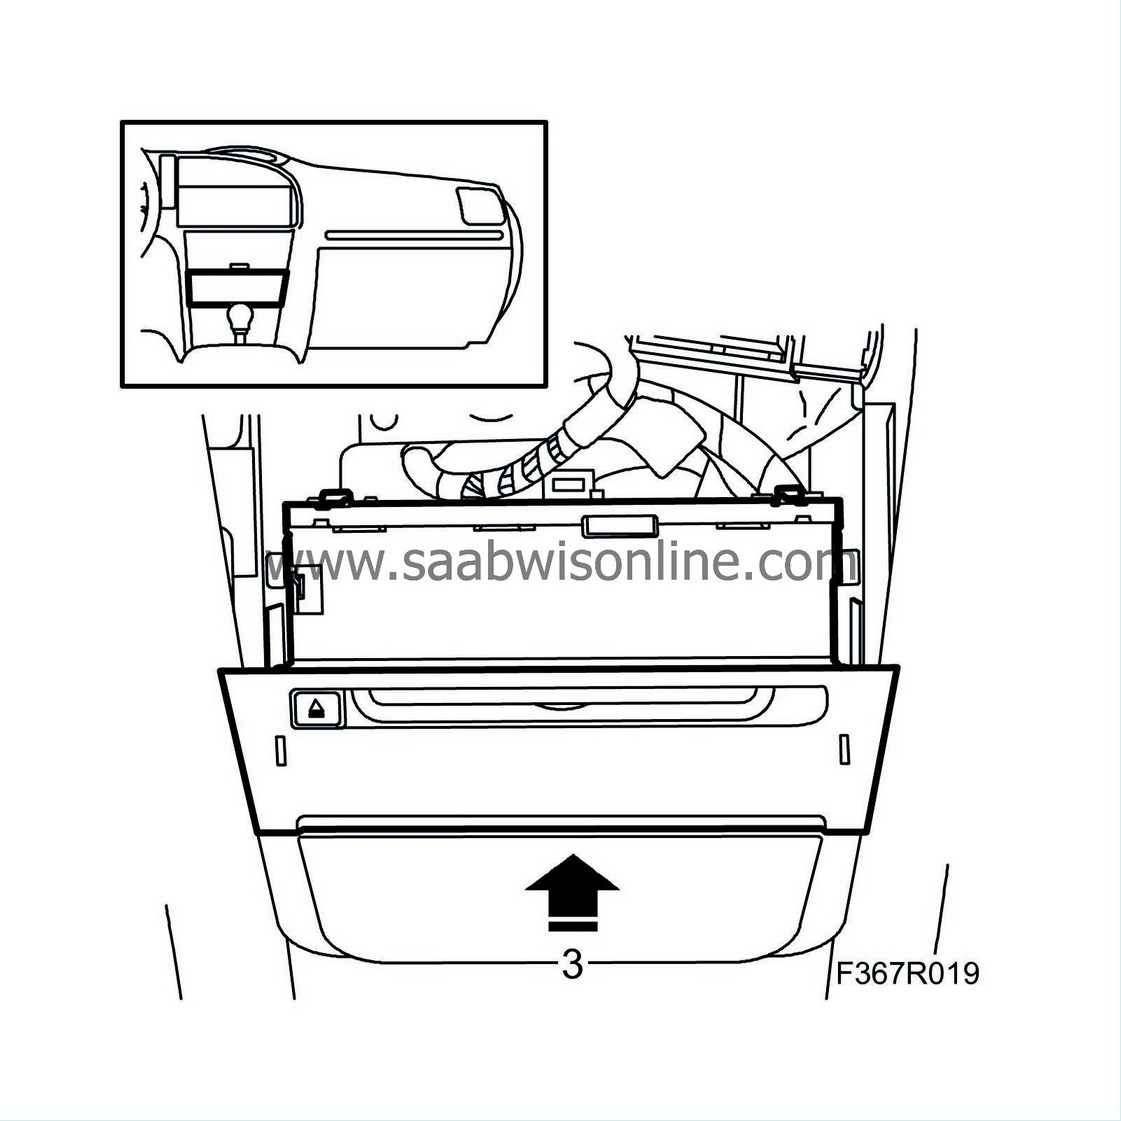
3.
|
Remove the EHU by pressing in the two catches.
|
Important
|
|
Take care when releasing the locking mechanism on the connector so as not to damage the connector. Pull the halves straight apart to avoid bending the pins. For further information regarding connectors, refer to
Connectors, handling and inspection
.
|
|
|
|
|
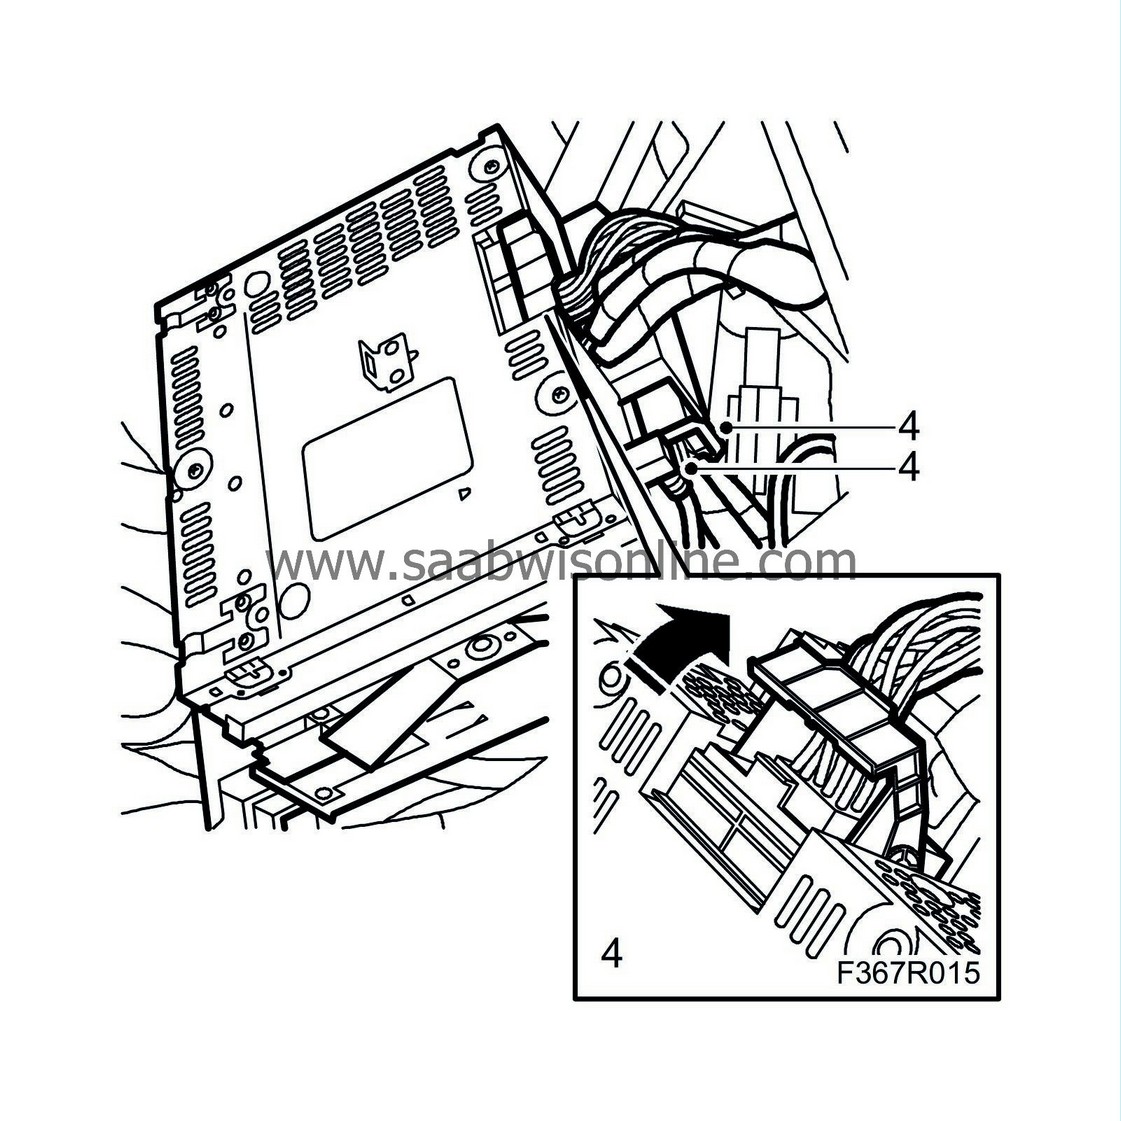
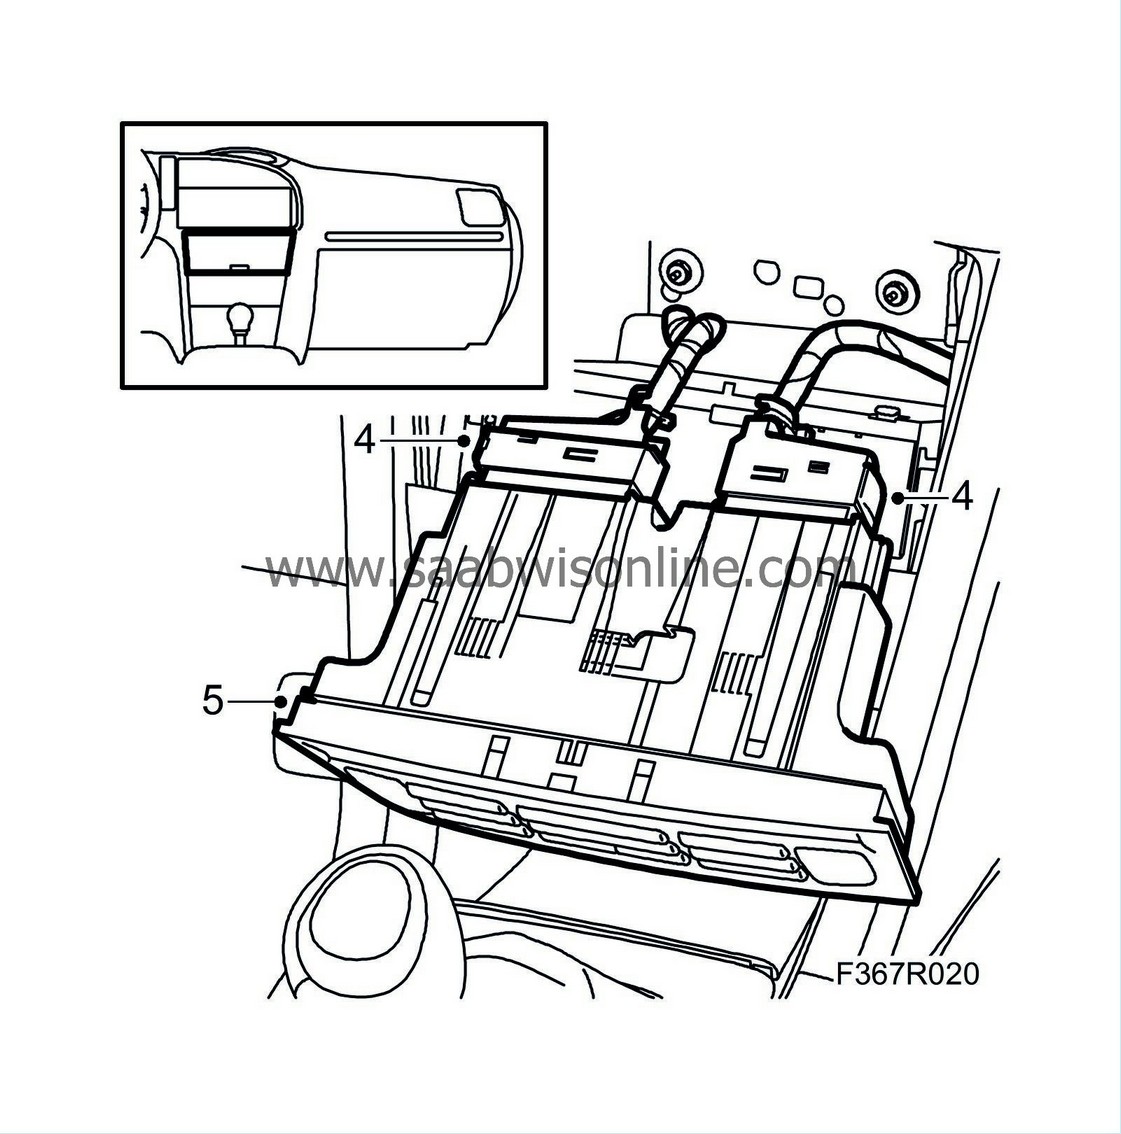
4.
|
Unplug the CD player.
|
|
1.
|
Slide in the CD player until it locks in position.

|
Important
|
|
Take care when plugging in the connector so as not to damage or press out the pins/sleeves in the connector. For further information regarding connectors, refer to
Connectors, handling and inspection
.
|
|
|
|
|
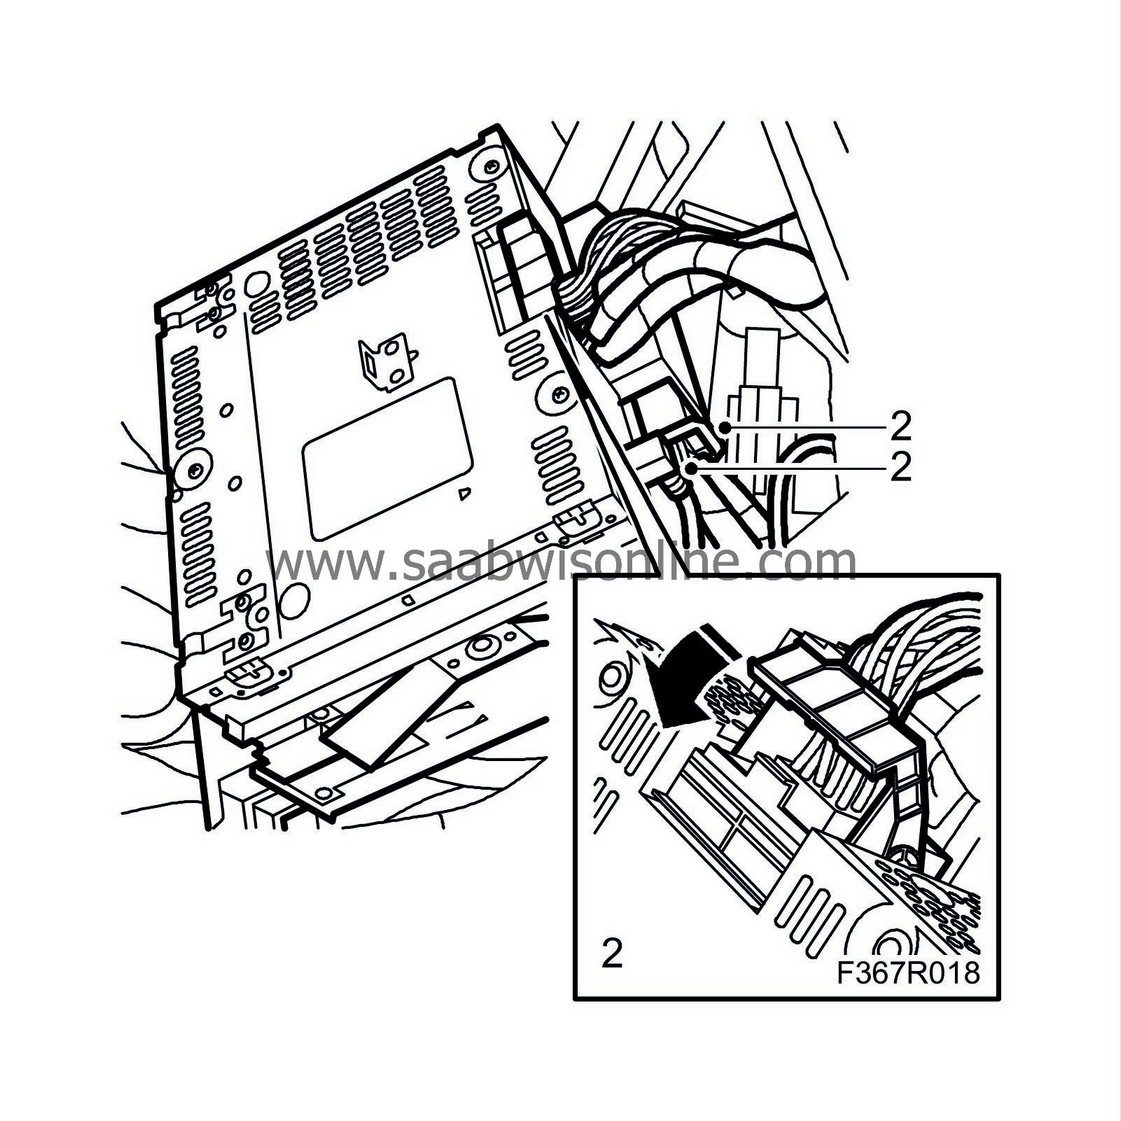
2.
|
Plug in the CD player.
|
|
3.
|
Fit the EHU. You should hear a click.
|
Important
|
|
Take care when plugging in the connector so as not to damage or press out the pins/sleeves in the connector. For further information regarding connectors, refer to
Connectors, handling and inspection
.
|
|
|
|
|
4.
|
Plug in the connector to the ACC/MCC unit.
|


