PRE-RELEASE
Dashboard
| Dashboard |
|
|||||||
| To remove |
| 1. |
Turn the ignition switch to the LOCK position.
|
|
| 2. |
Remove on both sides the
A-pillar trim
.
|
|
| 3. |
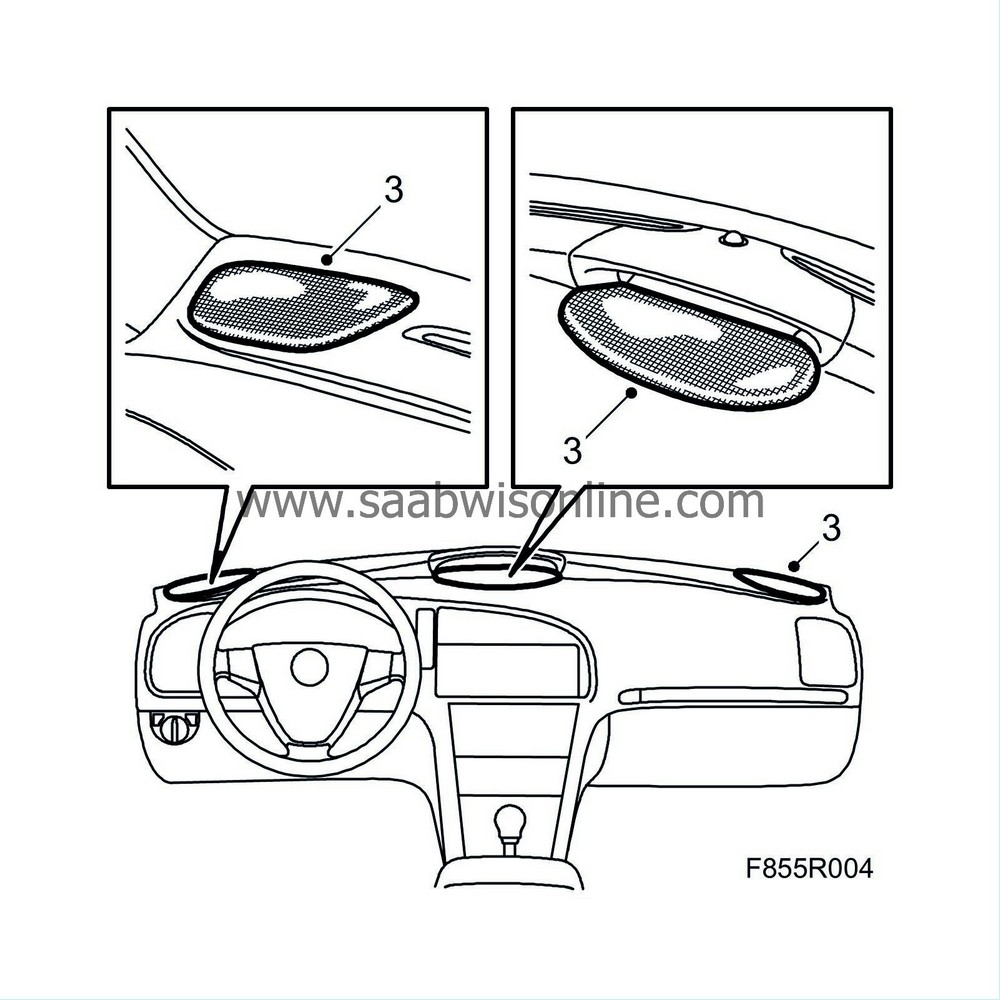
Remove the speaker grille from the dashboard.
|
|
| 4. |
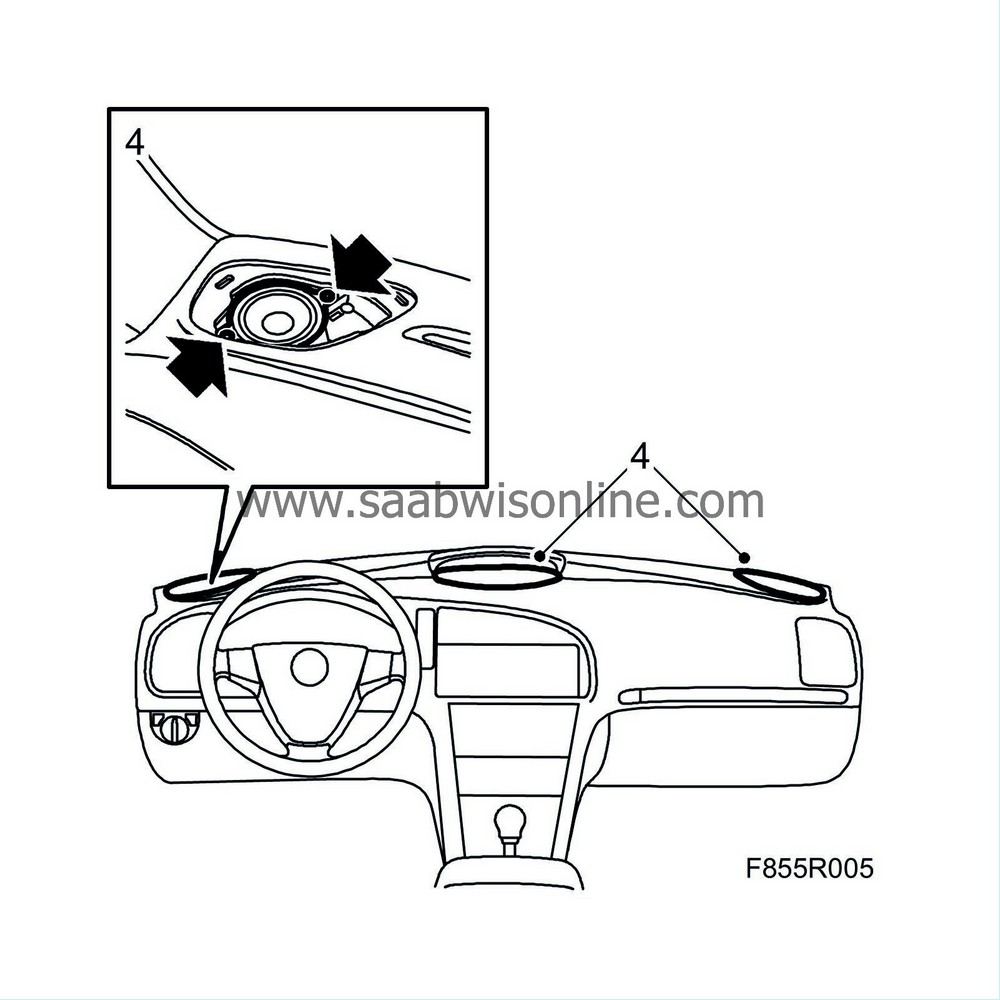
Remove the speakers and unplug their connectors.
|
|
| 5. |
Remove
SID
(Saab Information Display) and unplug the connector.
|
|
| 6. |
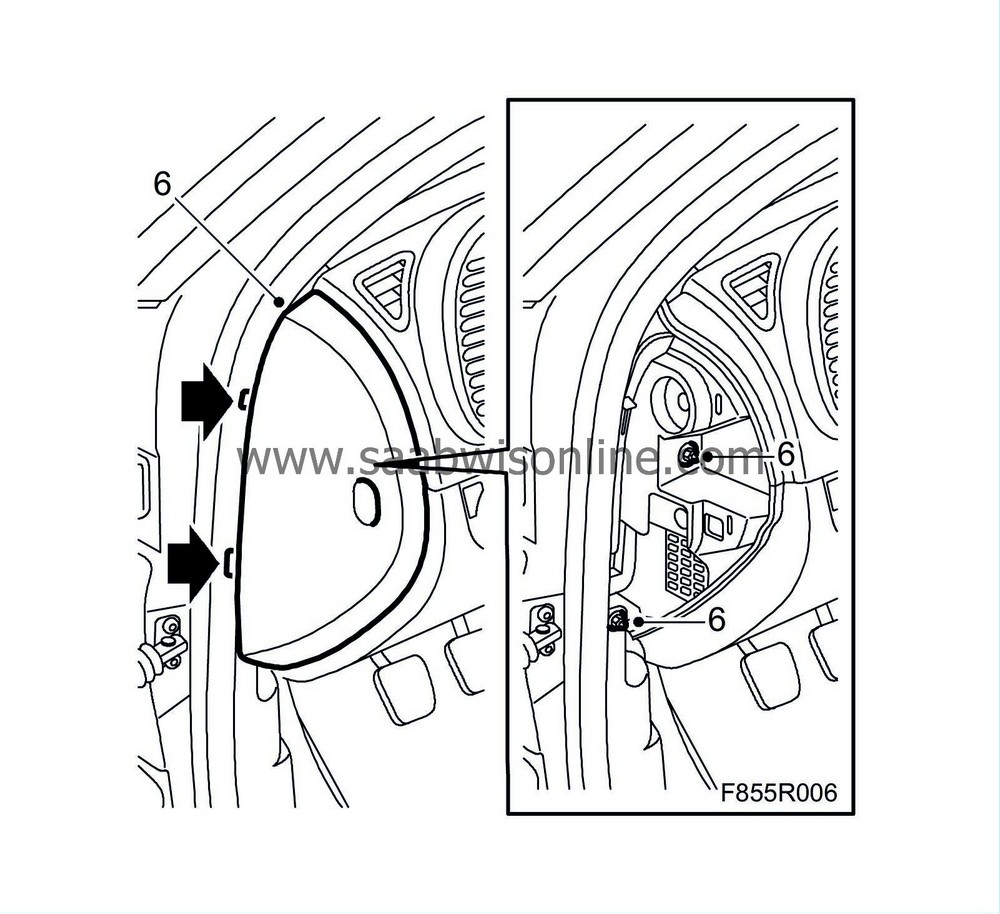
Remove the side covers from the dashboard (right and left-hand) and unscrew the nuts holding the dashboard.
|
|
| 7. |
Remove
the driver airbag
.
|
|
| 8. |
Remove
the steering wheel
.
|
|
| 9. |
Remove the
Column integration module CIM (703)
.
|
|
| 10. |
Remove the
MIU
(Main Instrument Unit).
|
|
| 11. |
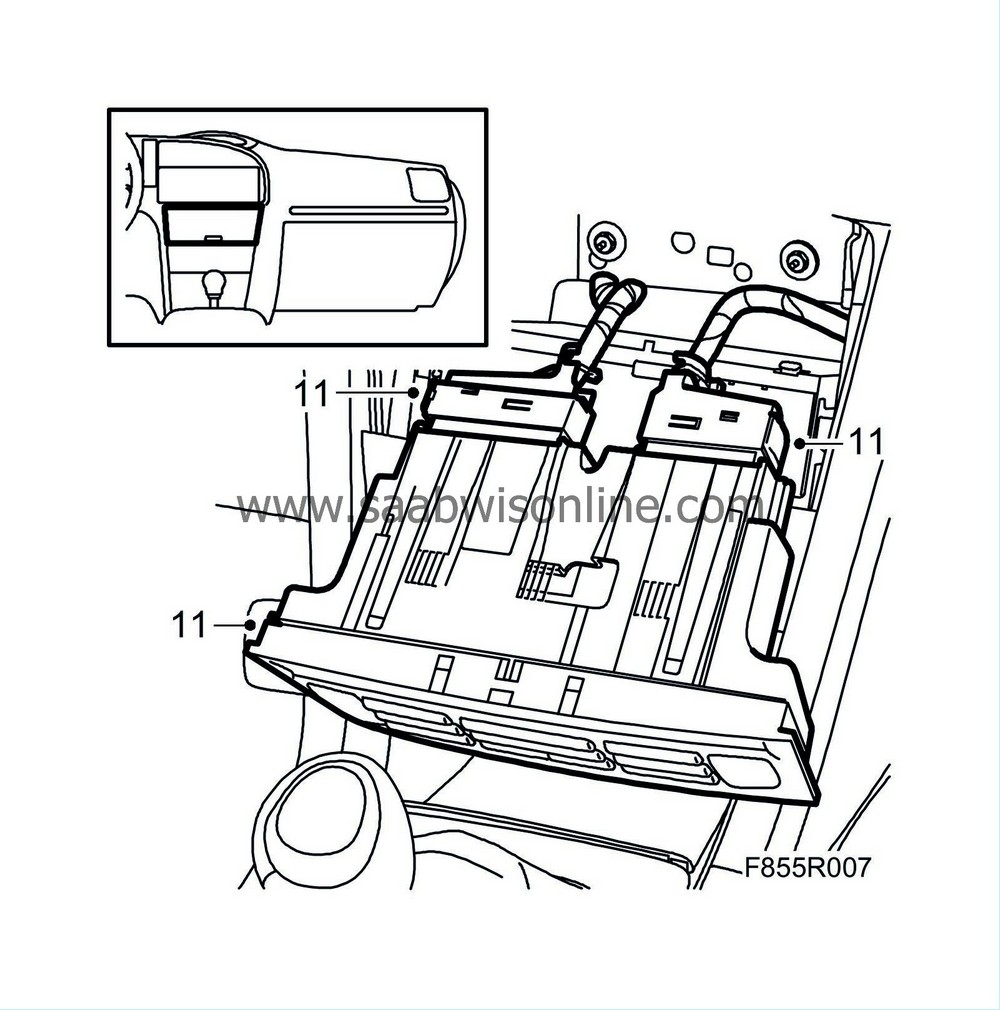
Remove the ACC-unit, or alternatively the MCC-unit, and unplug the connector.
|
|
| 12. |
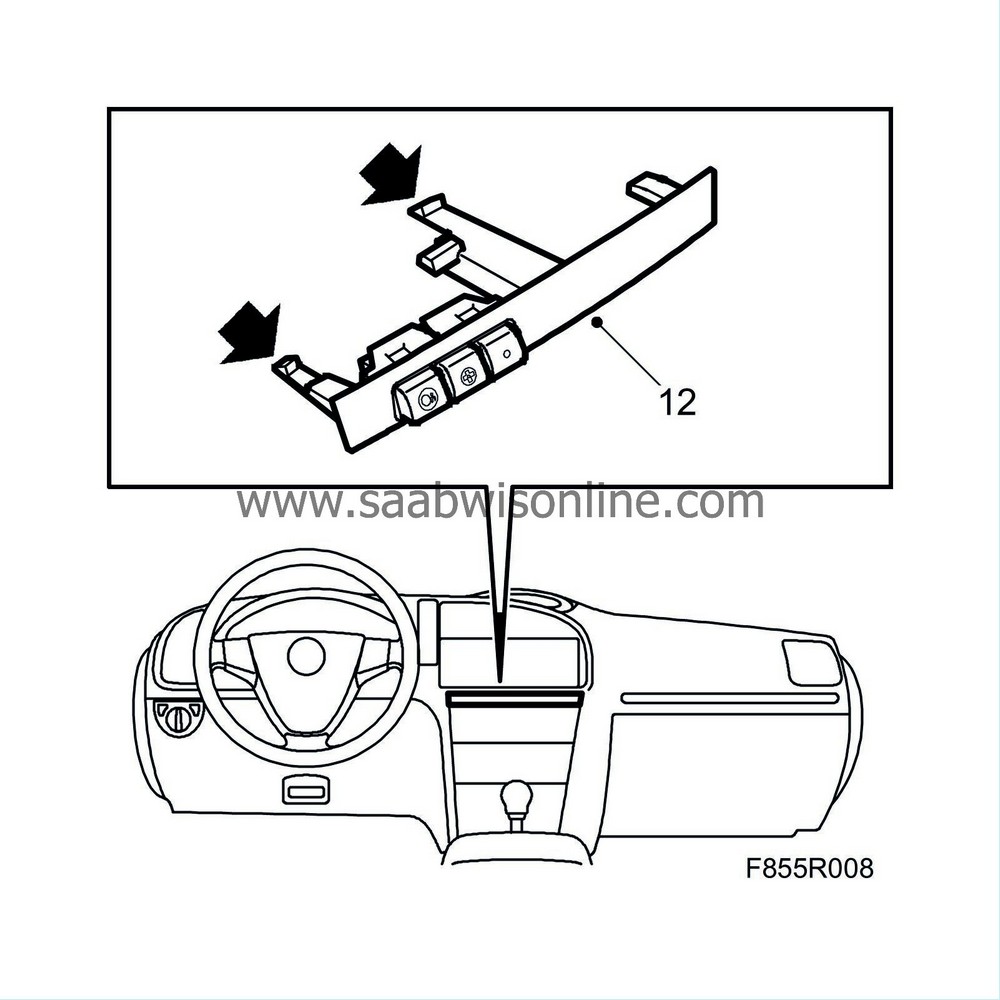
Remove the cup holder or where fitted the OnStar unit.
|
|
| 13. |
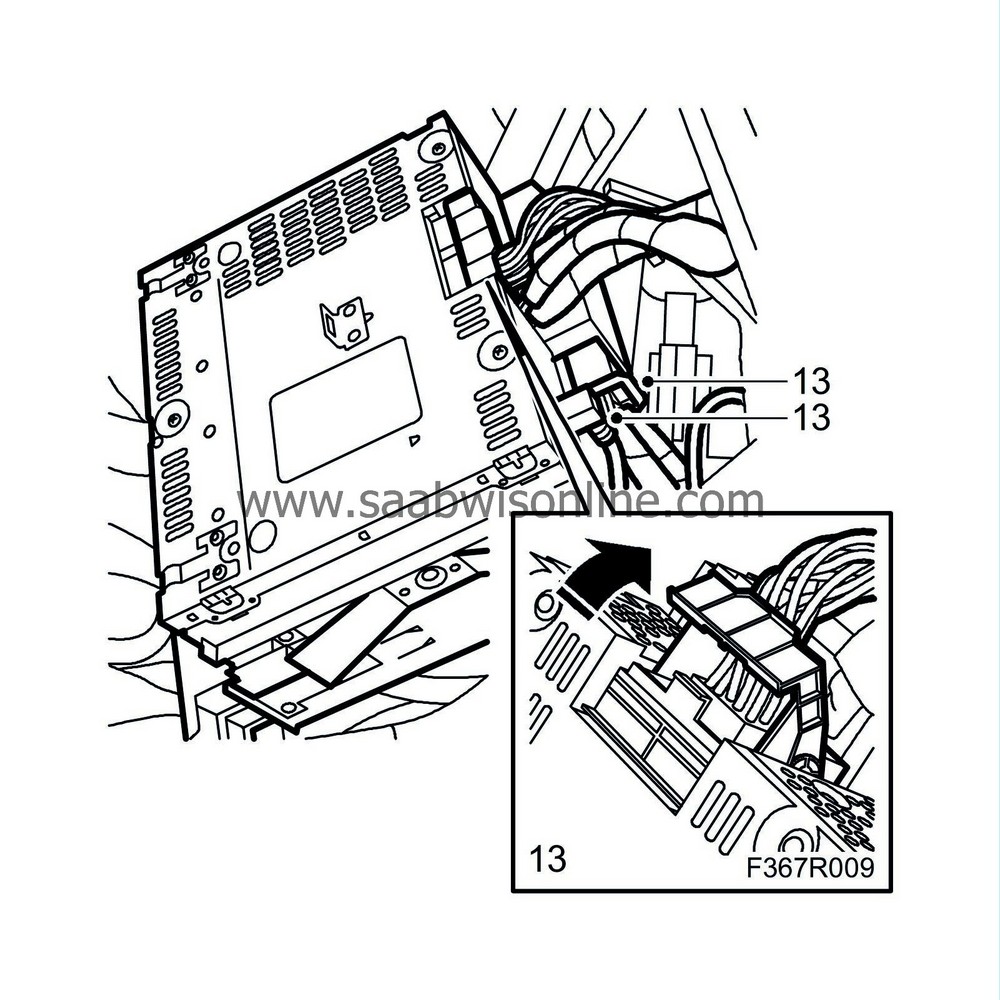
Remove the CD-unit and unplug the connector.
|
|
| 14. |
Remove
the ashtray
.
|
|
| 15. |
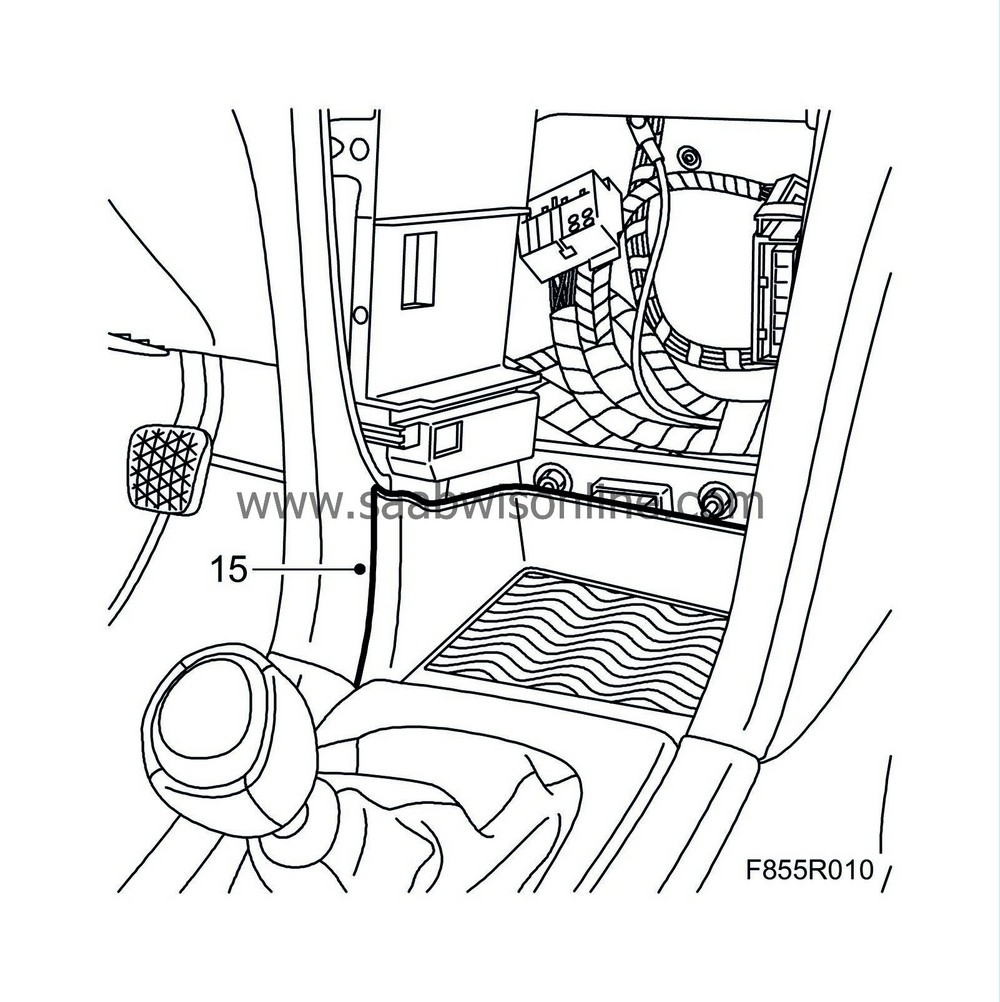
Remove the centre console forward storage box.
|
|
| 16. |
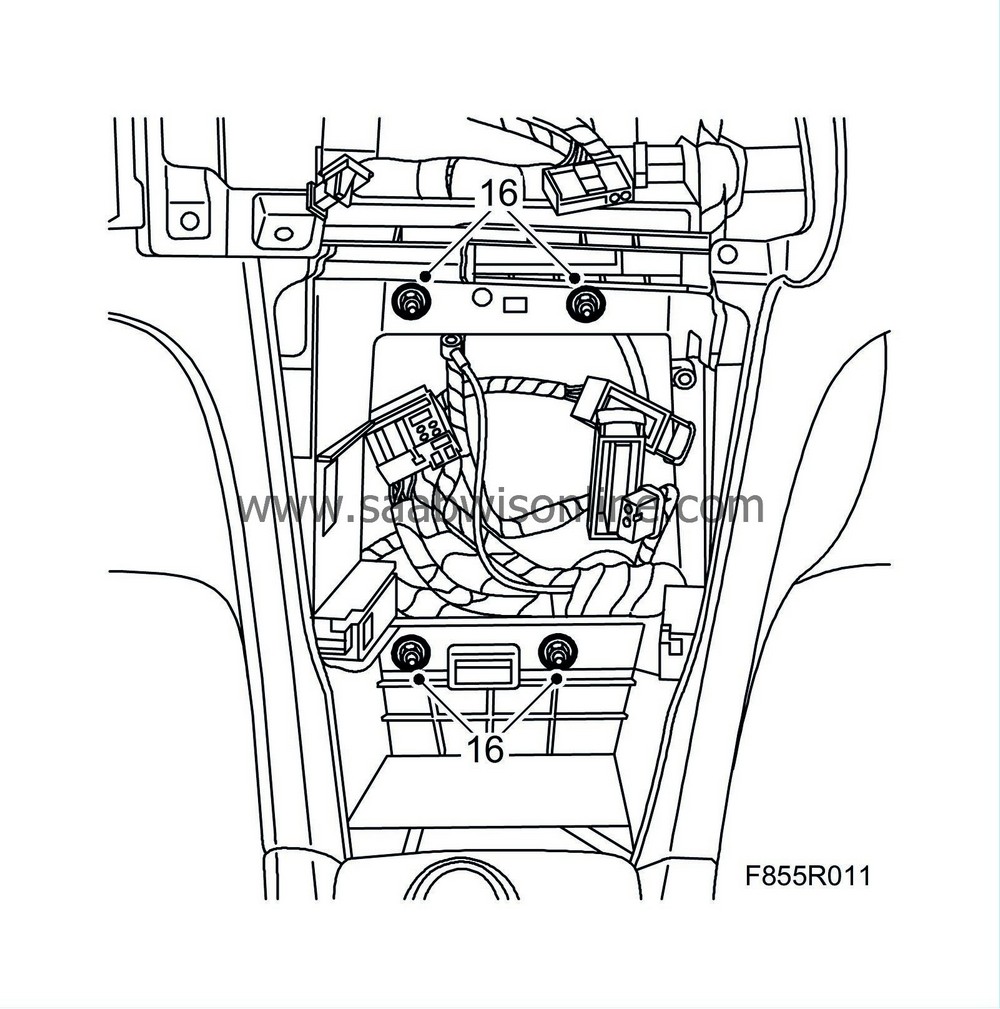
Unscrew the nuts holding the dashboard.
|
|
| 17. |
Remove
the glove box.
.
|
|
| 18. |
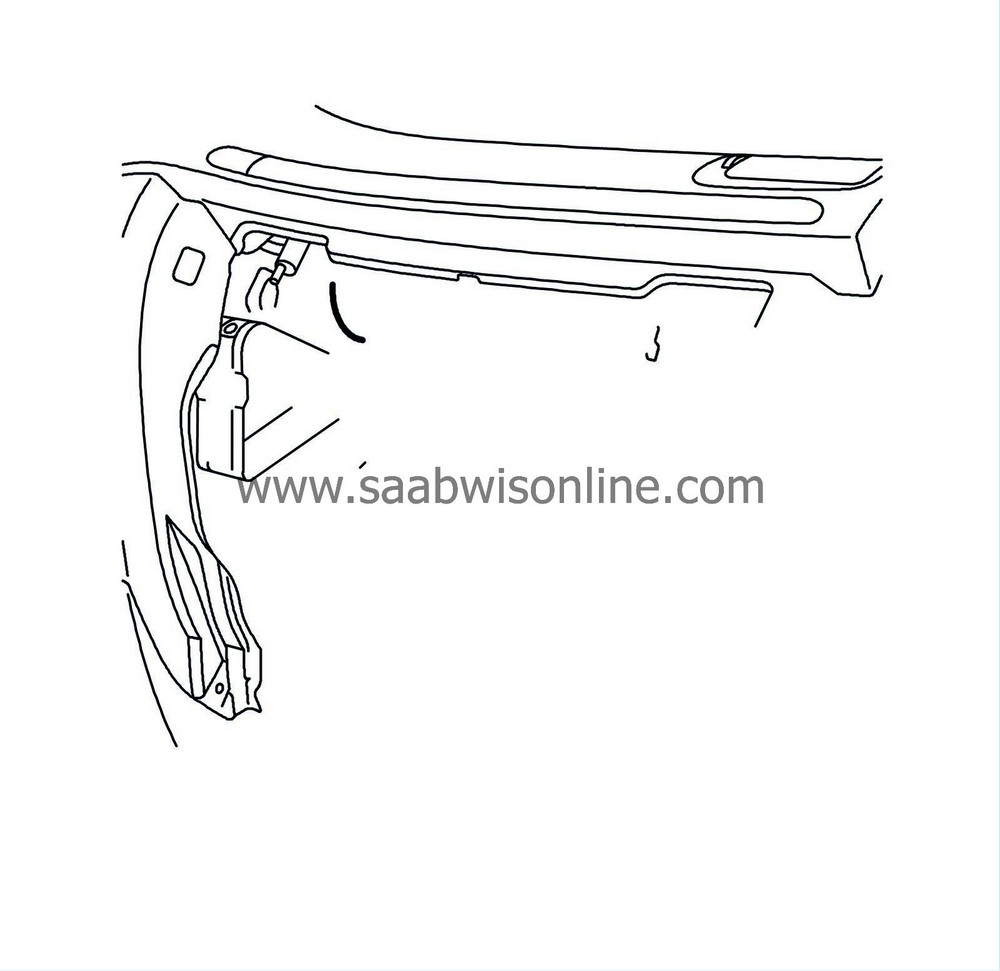
Remove the passenger air bag bolts from the steering wheel member and unplug the passenger airbag connector.
|
|
| 19. |
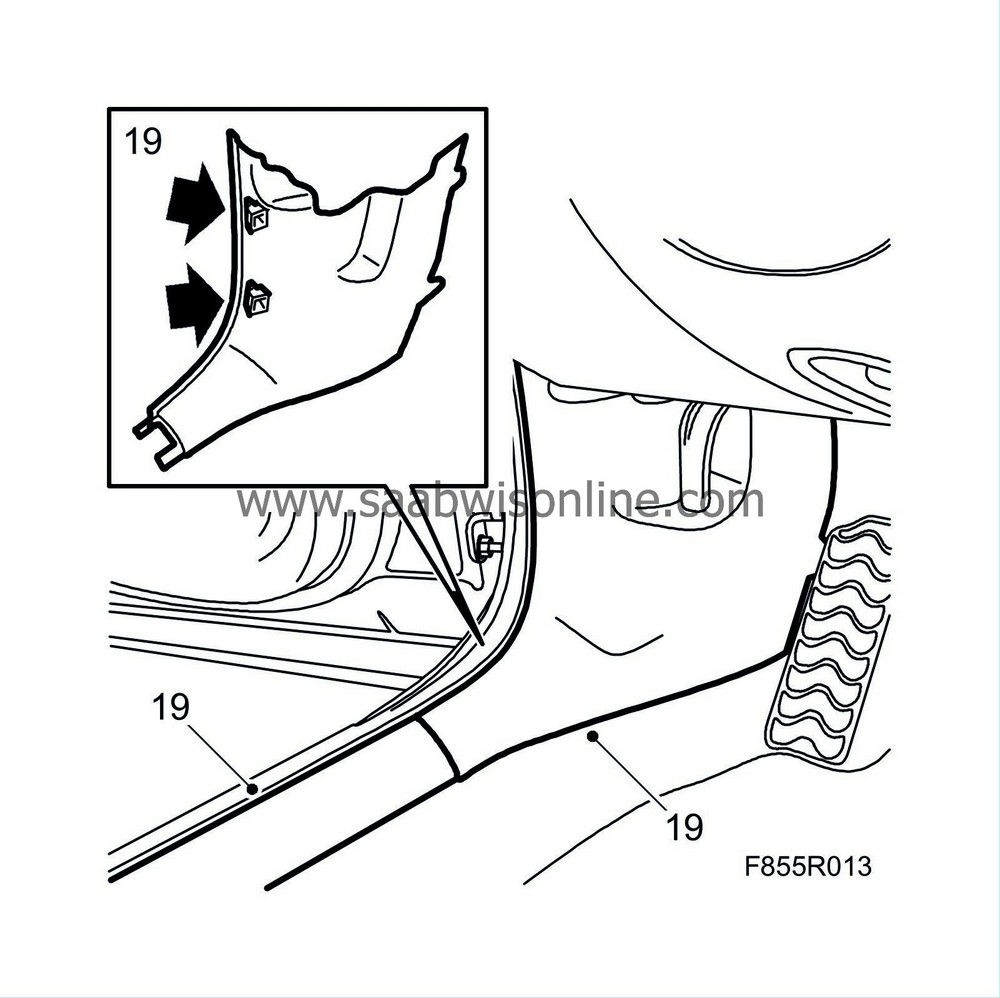
Remove the forward scuff plates and the lower side panels on the A-pillars.
|
|
| 20. |
Remove
the floor console
.
|
|
| 21. |
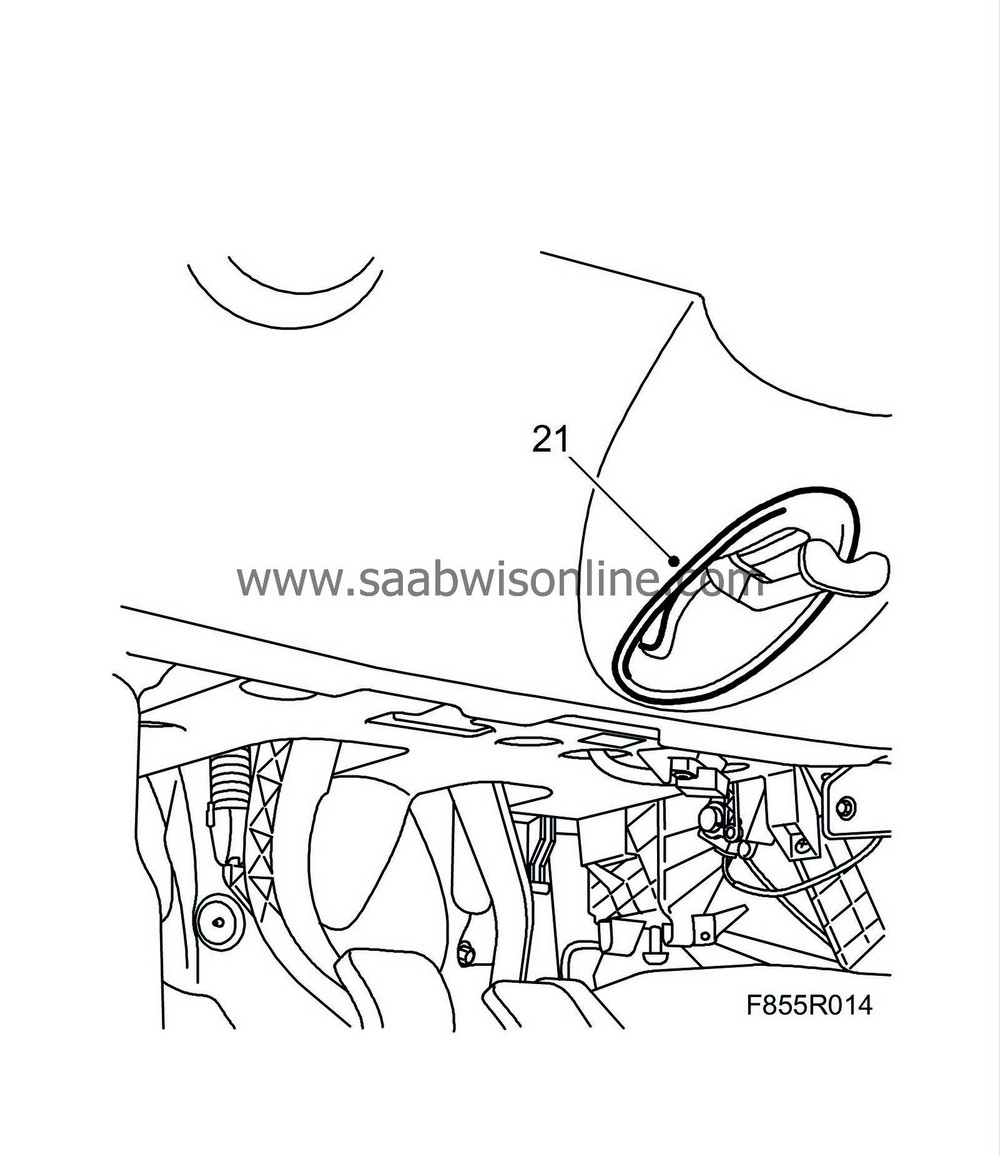
Remove the decorative cover from the steering wheel adjustment.
|
|
| 22. |
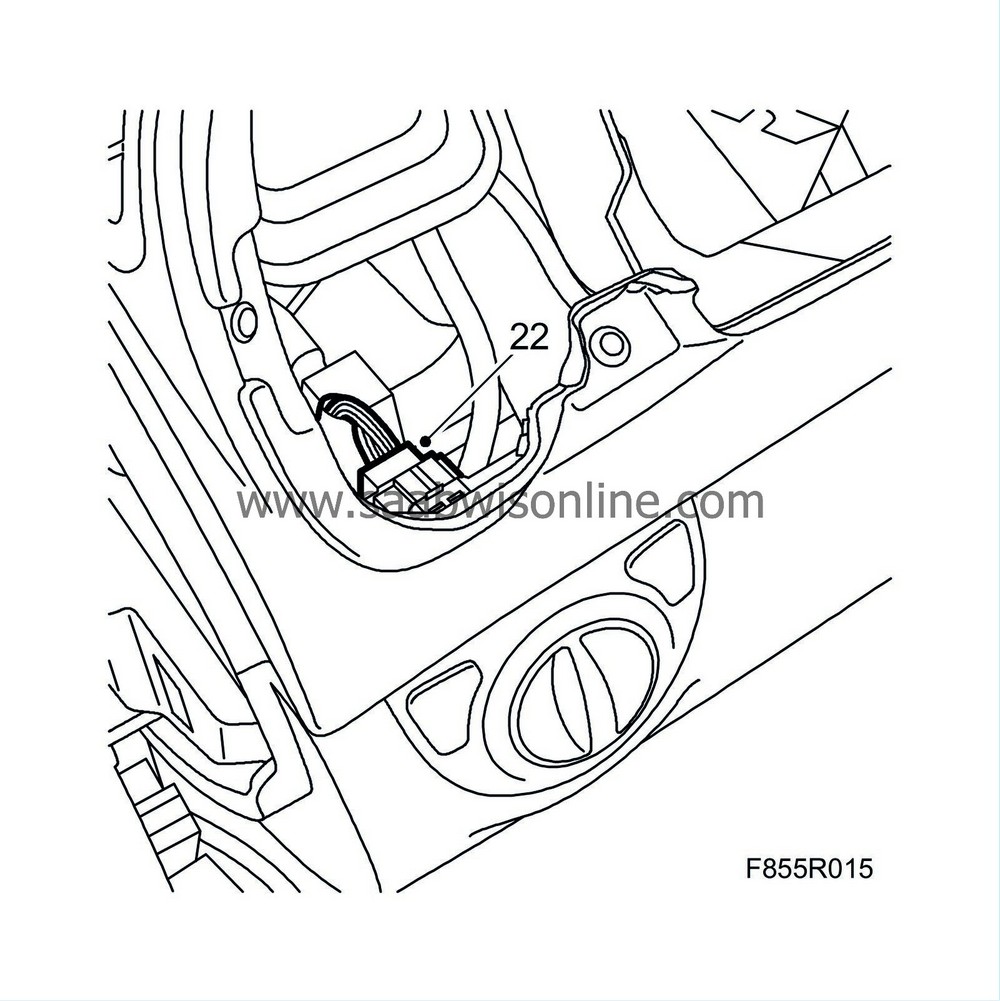
Unplug the light control connector.
|
|
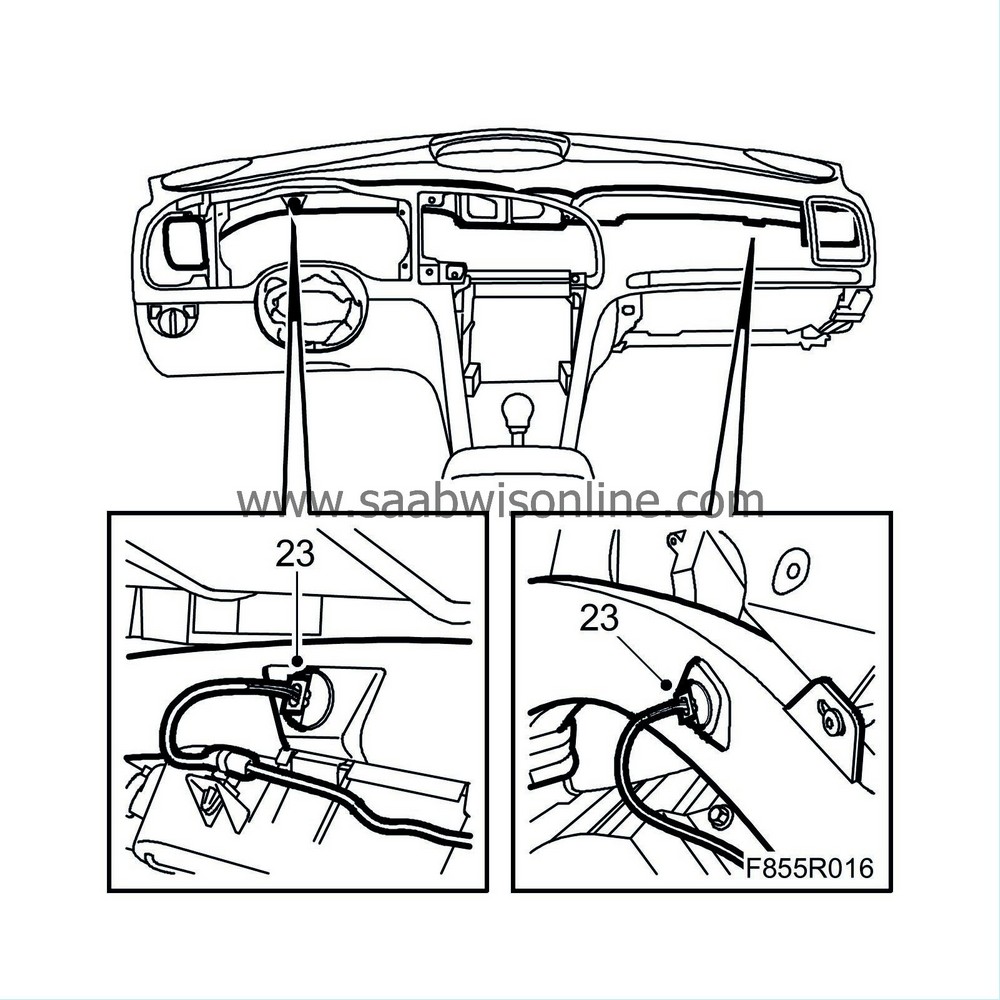
| 23. |
Remove the temperature sensors from the panel vents on the driver and passenger sides.
|
|
| 24. |
Remove the sound insulation panels
driver side
and
passenger side
.
|
|
| 25. |
Thread the CIM connector in through the dashboard so that it does not catch when the dashboard is removed.
|
|
| 26. |
Locate the front seats in their rearmost position. Move the gear lever to its rearmost position.
|
|
| 27. |
Carefully remove the dashboard from the car.
|
|
| To fit |
| 1. |
Locate the seats in their rearmost position and move the gear lever to its rearmost position.
|
|
| 2. |
Lift the dashboard carefully into position. Arrange all cables and connectors so that they are not pinched when the dashboard is mounted.
|
|
| 3. |
Ensure that the steering wheel adjusting arm is correctly positioned.
|
|
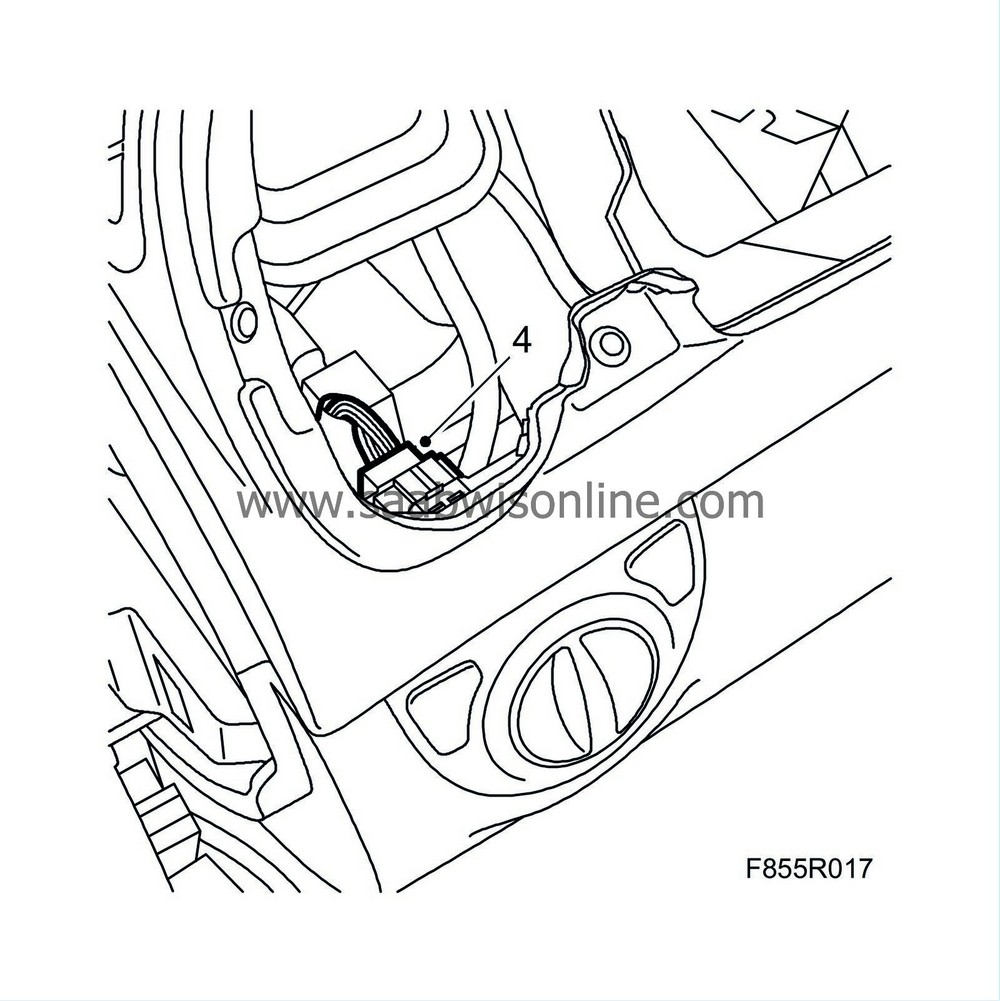
| 4. |
Plug in the light control connector.
|
|
| 5. |
Thread the speaker cables and connectors up through the speaker openings in the dashboard.
|
|
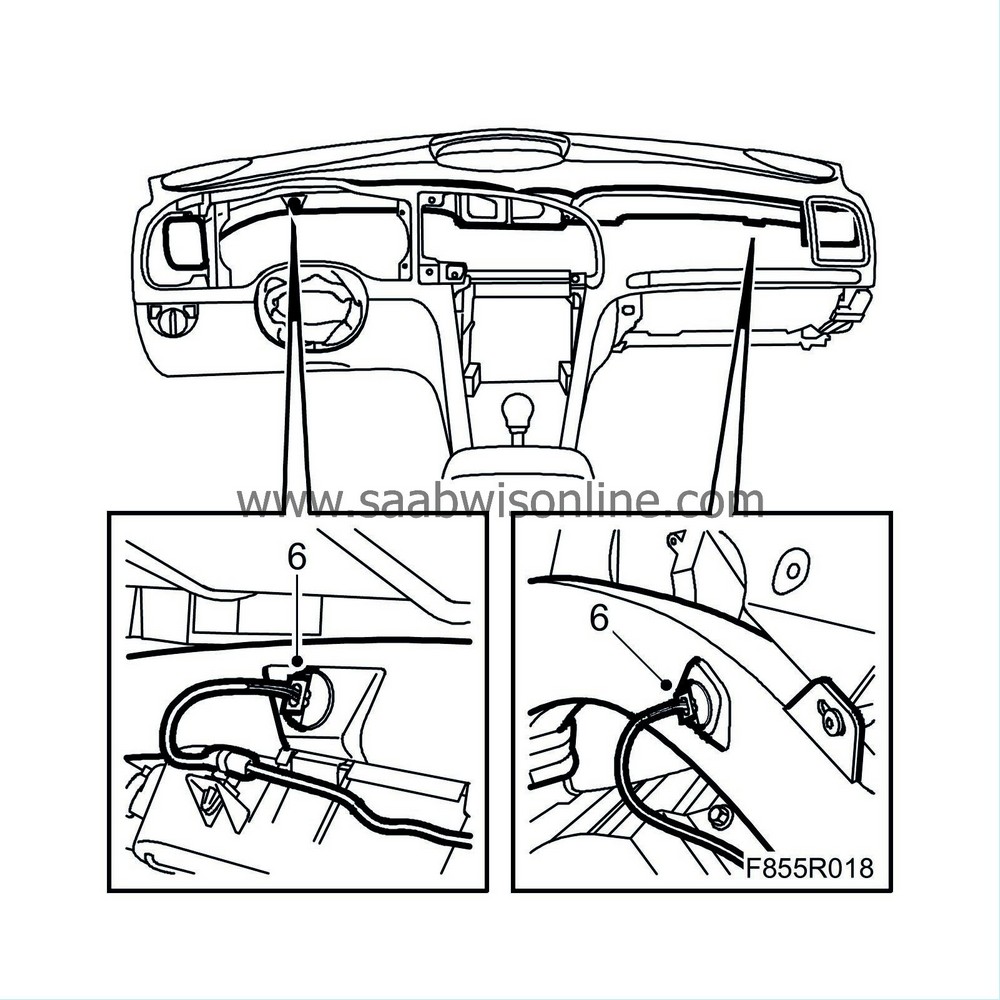
| 6. |
Fit the temperature sensors to the panel vents on the driver and passenger sides.
|
|
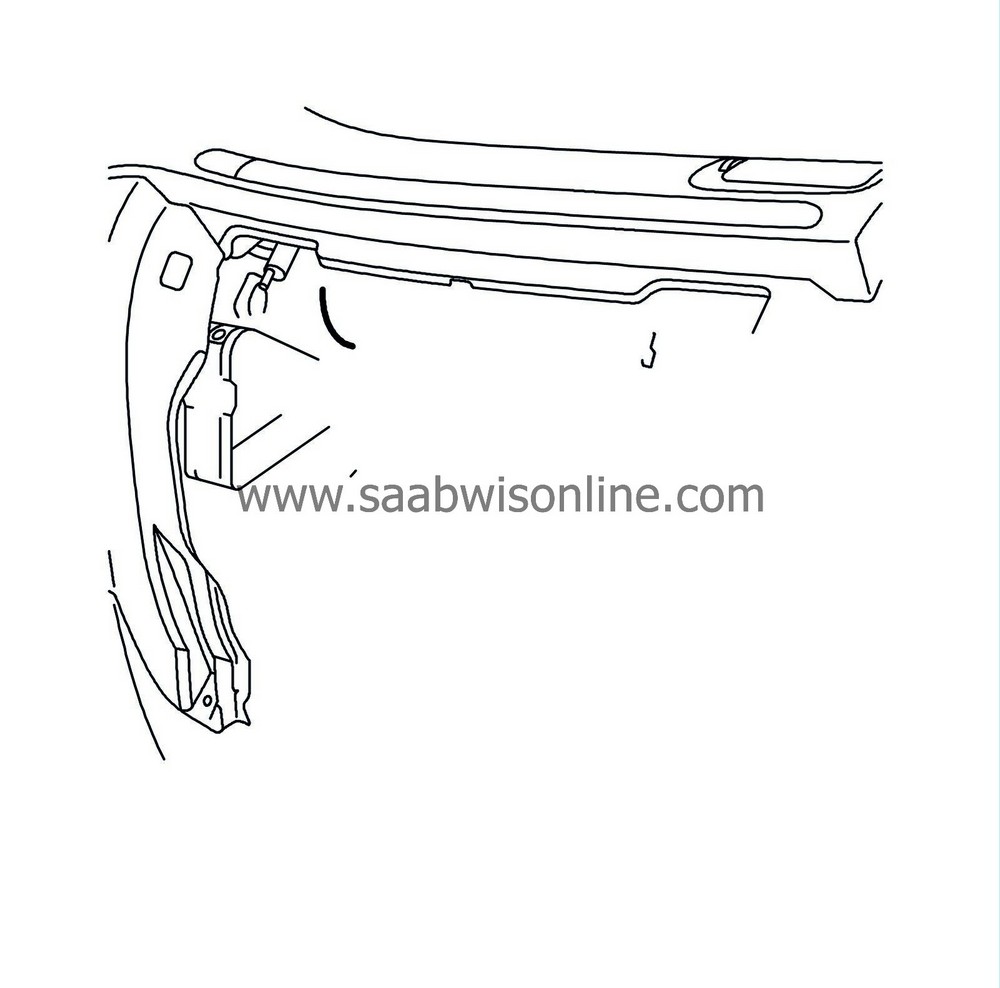
| 7. |
Plug in the passenger airbag connector. Make sure that the rear section of the connector is properly closed.
|
|
| 8. |
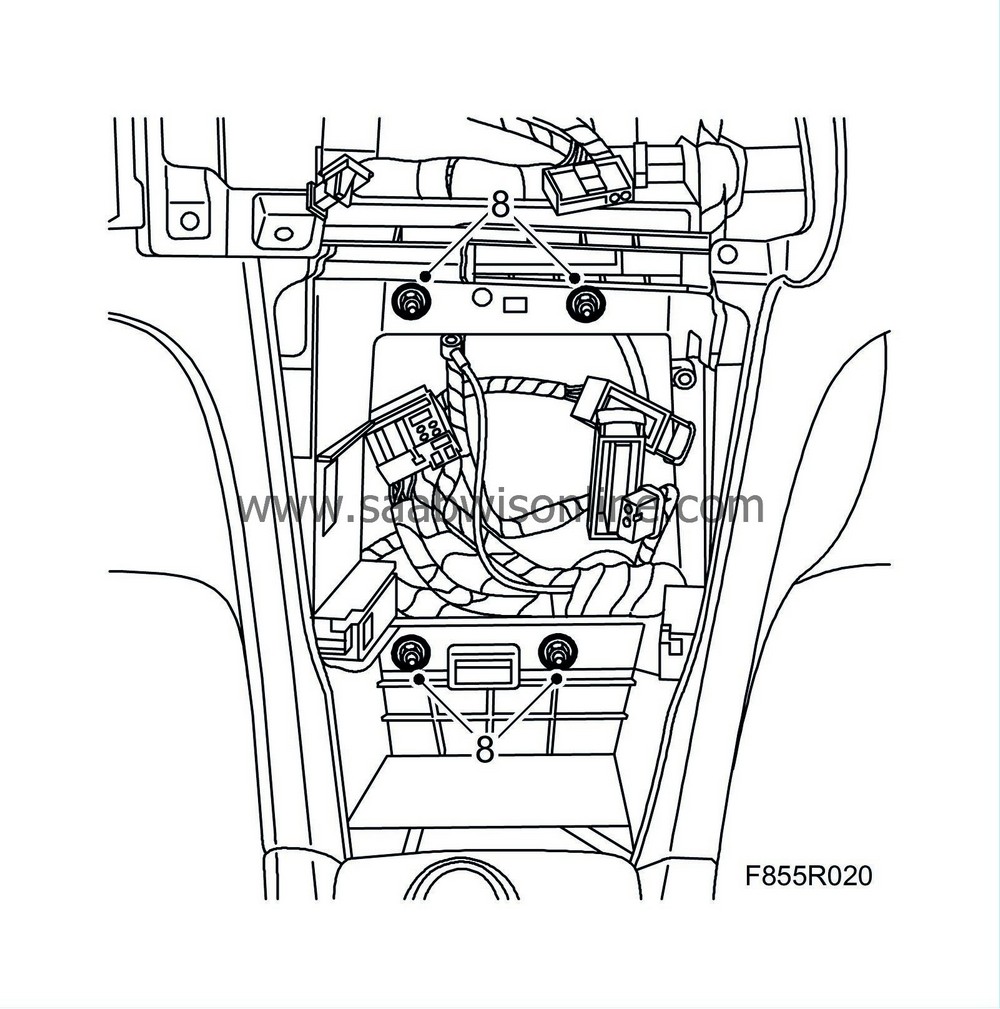
Fit the screws which retain the dashboard in the middle. Make sure that the locating pins on the dashboard are correctly positioned in the steering column mounting beam.
|
|
| 9. |
Fit the air ducts to the rear air vent.
|
|
| 10. |
Fit
the floor console
.
|
|
| 11. |
Fit the screws attaching the passenger airbag to the steering column mounting beam.
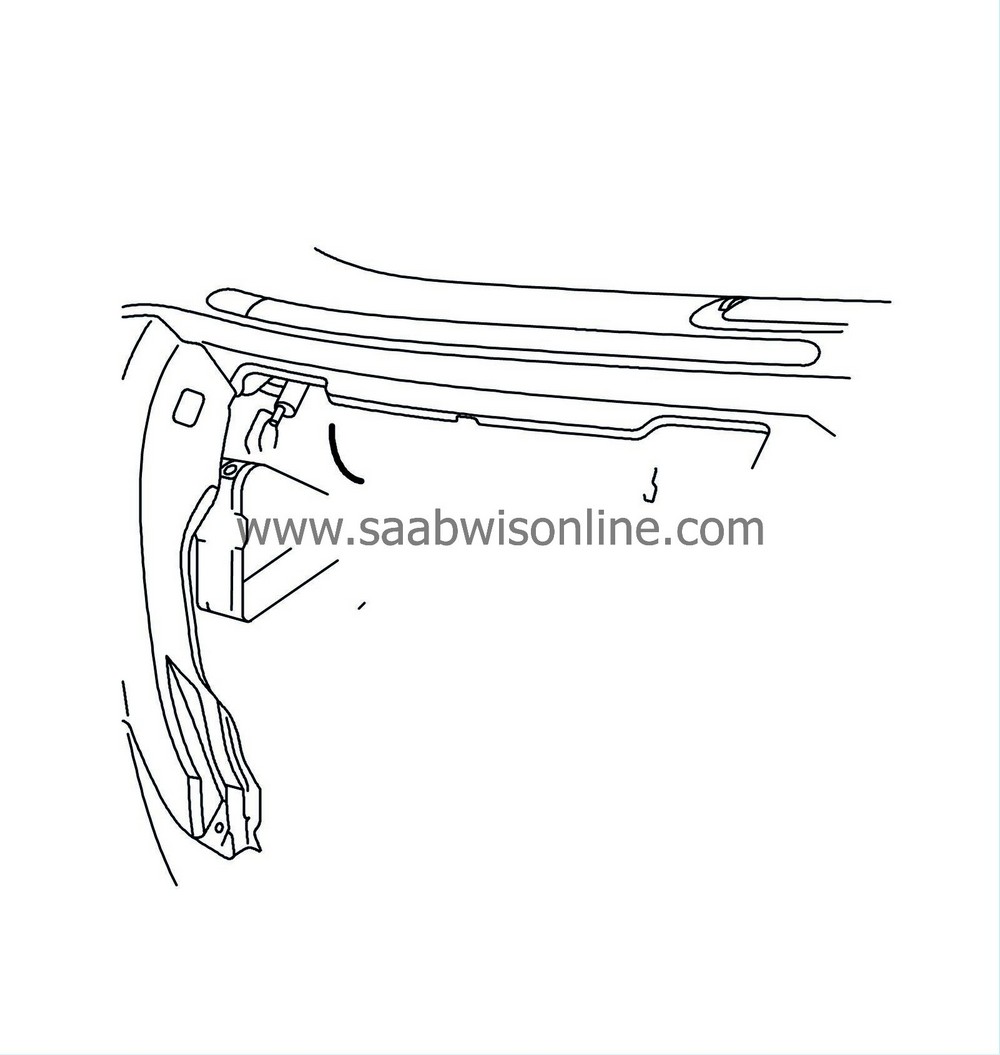
Tightening torque 5 Nm (4 lbf ft) |
|
| 12. |
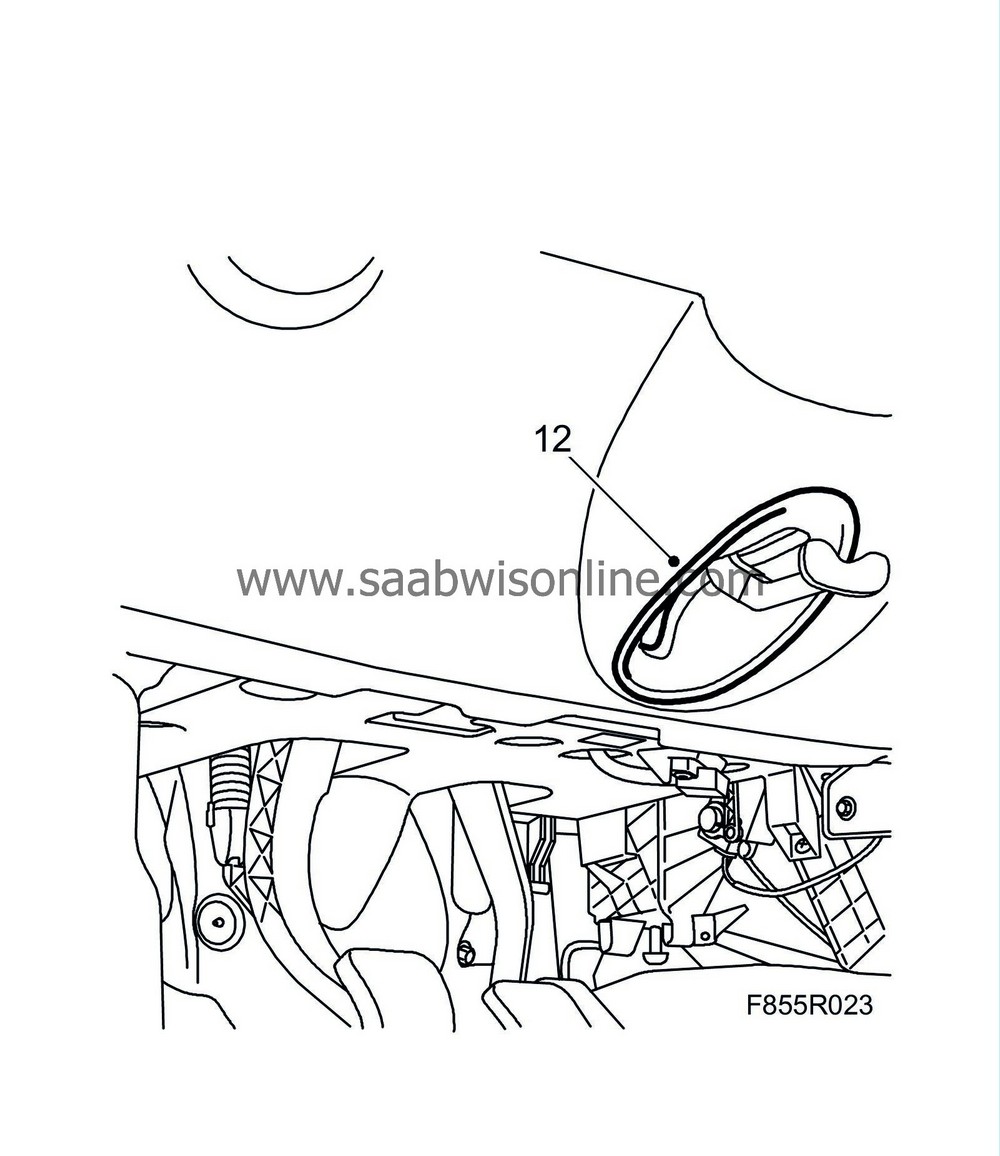
Fit the decorative cover onto the steering wheel adjuster.
|
|
| 13. |
Fit the sound insulation panels to the
driver side
and
passenger side
.
|
|
| 14. |
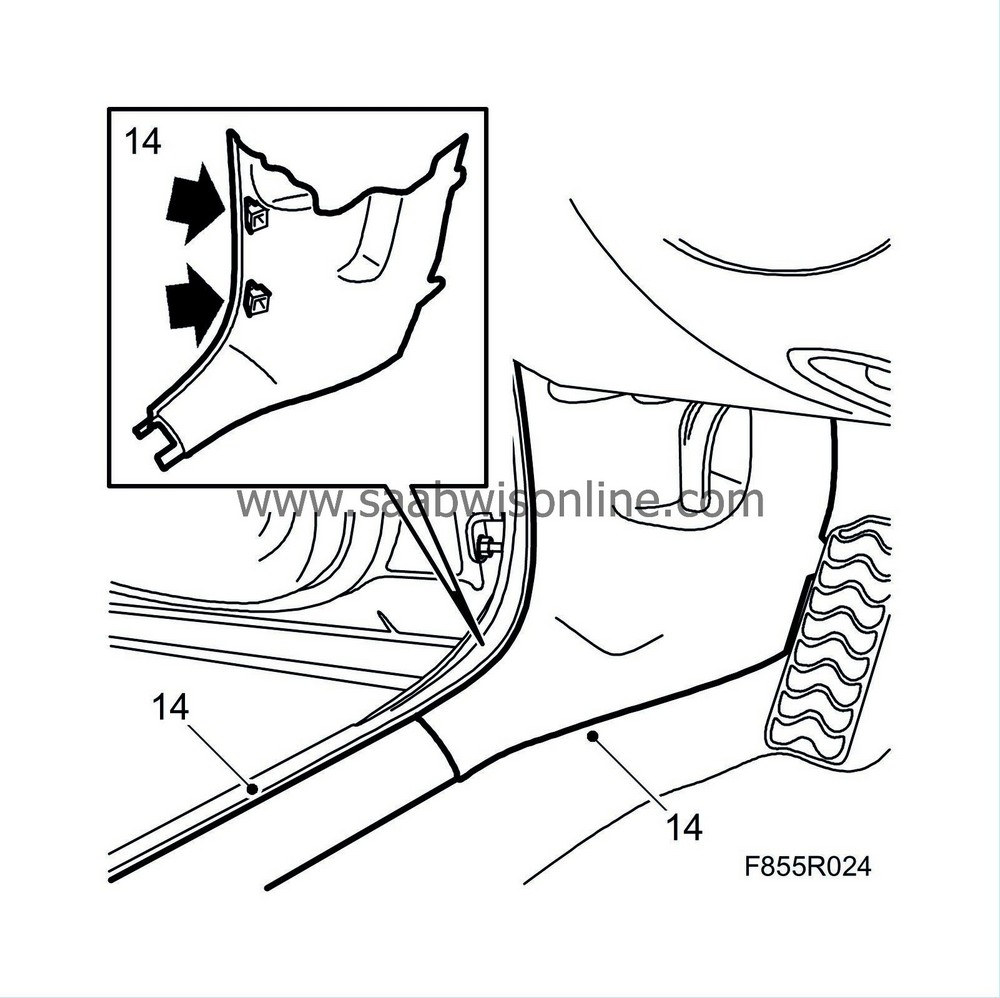
Fit the lower A-pillar side panels and the scuff plates.
|
|
| 15. |
Refit
the glove box
.
|
|
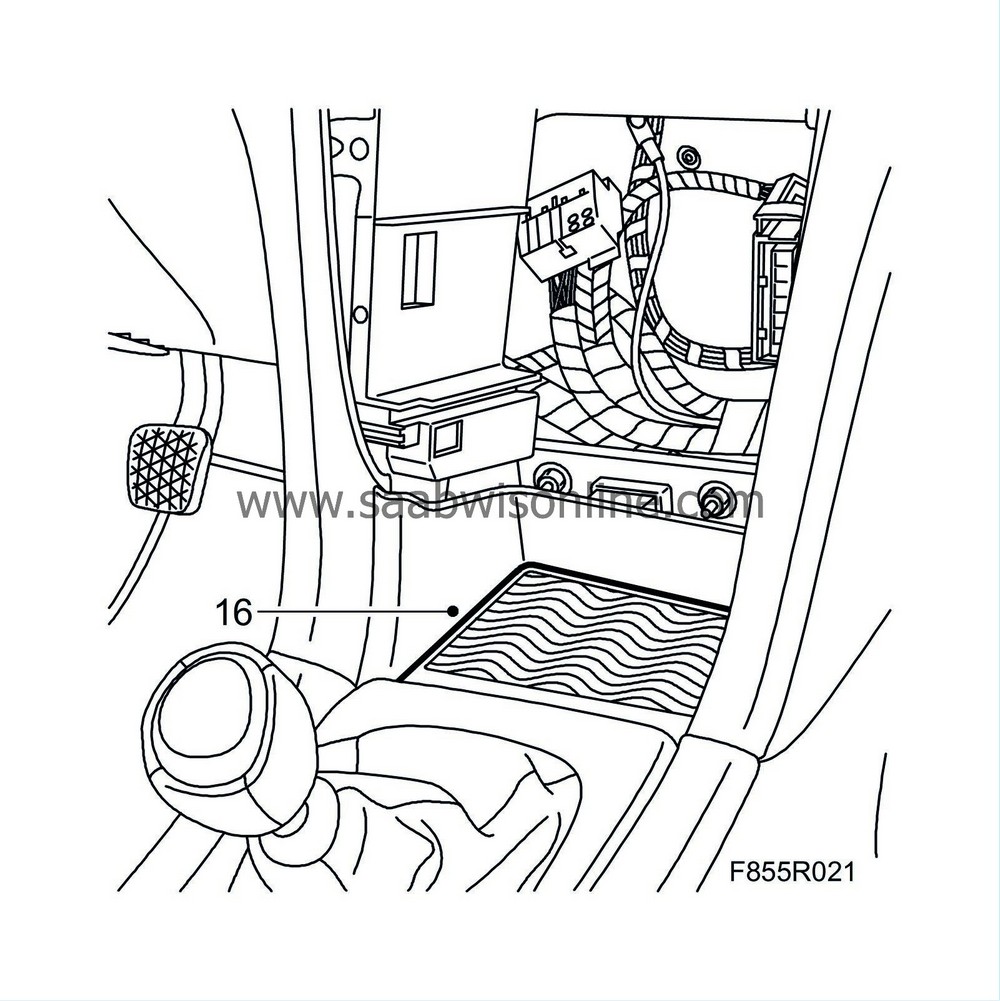
| 16. |
Fit the forward storage box of the centre console.
|
|
| 17. |
Fit
the ashtray
.
|
|
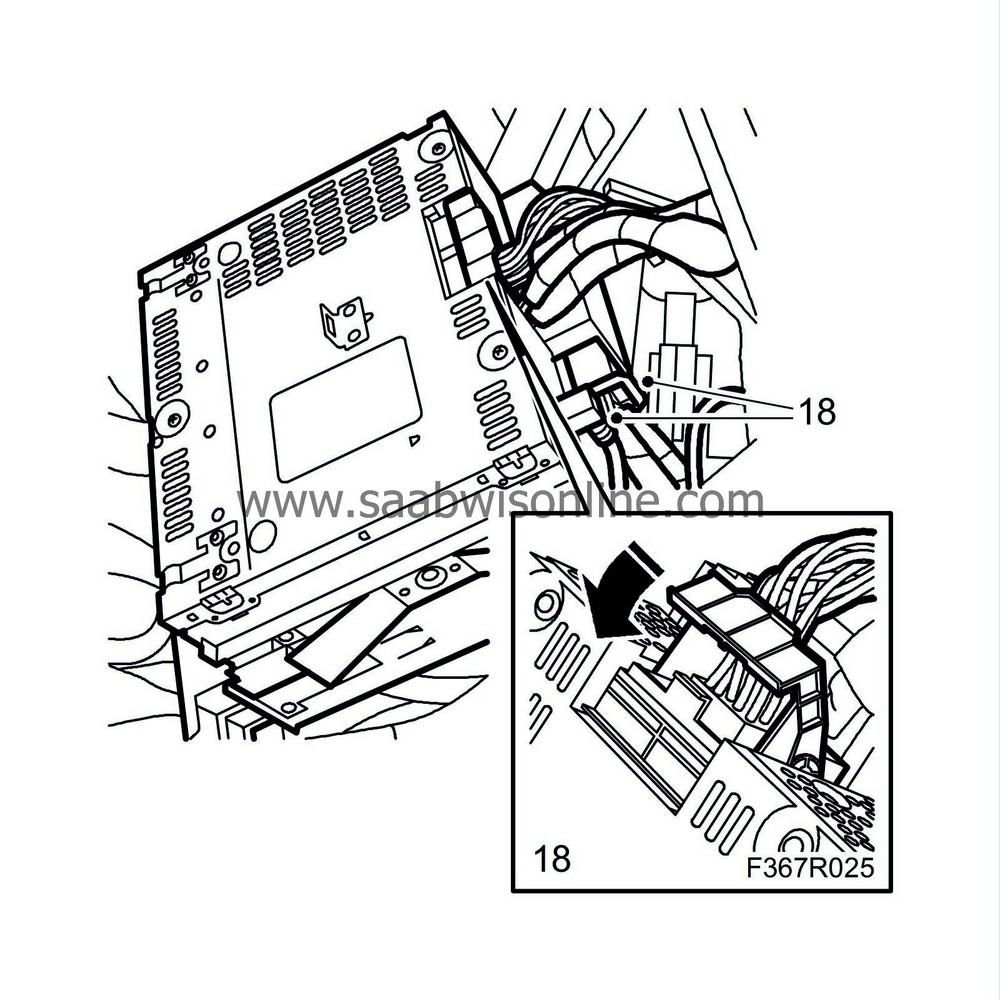
| 18. |
Plug in the CD-unit connector and fit the CD-unit.
|
|
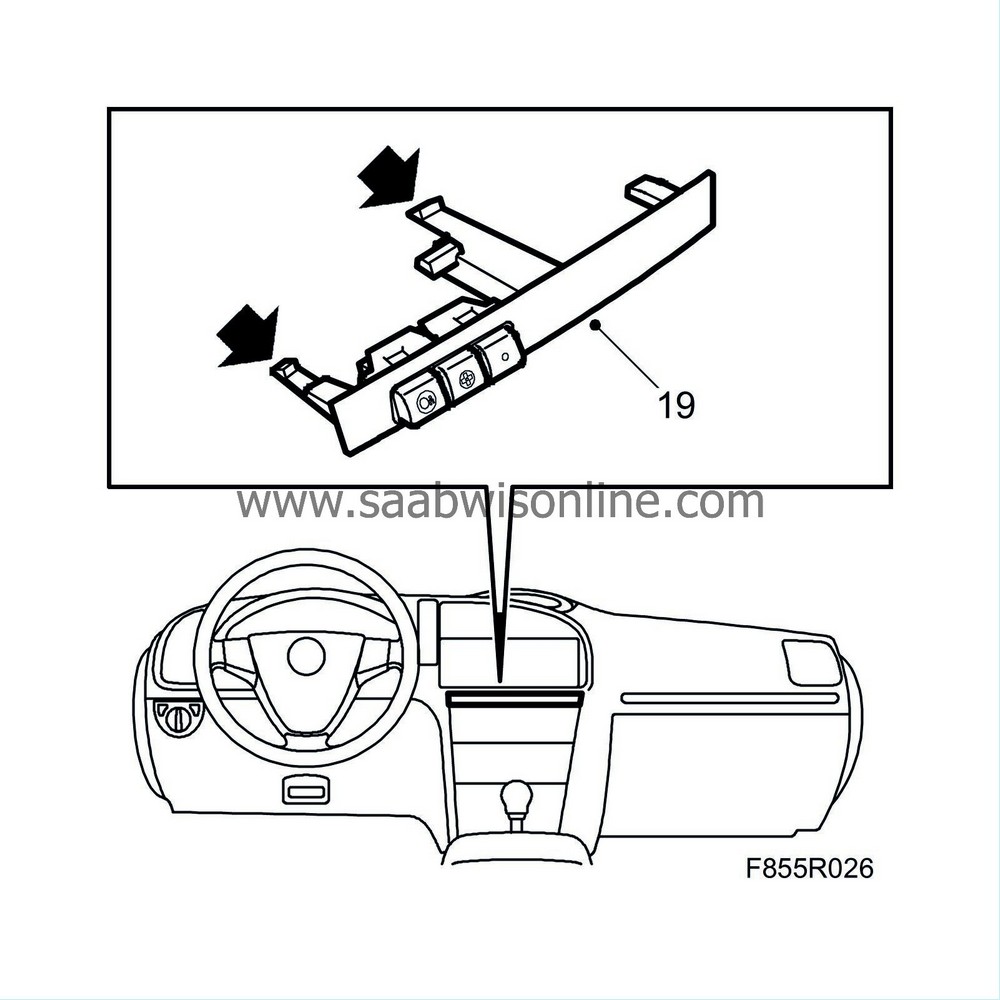
| 19. |
Fit the cup holder or where fitted the OnStar unit.
|
|
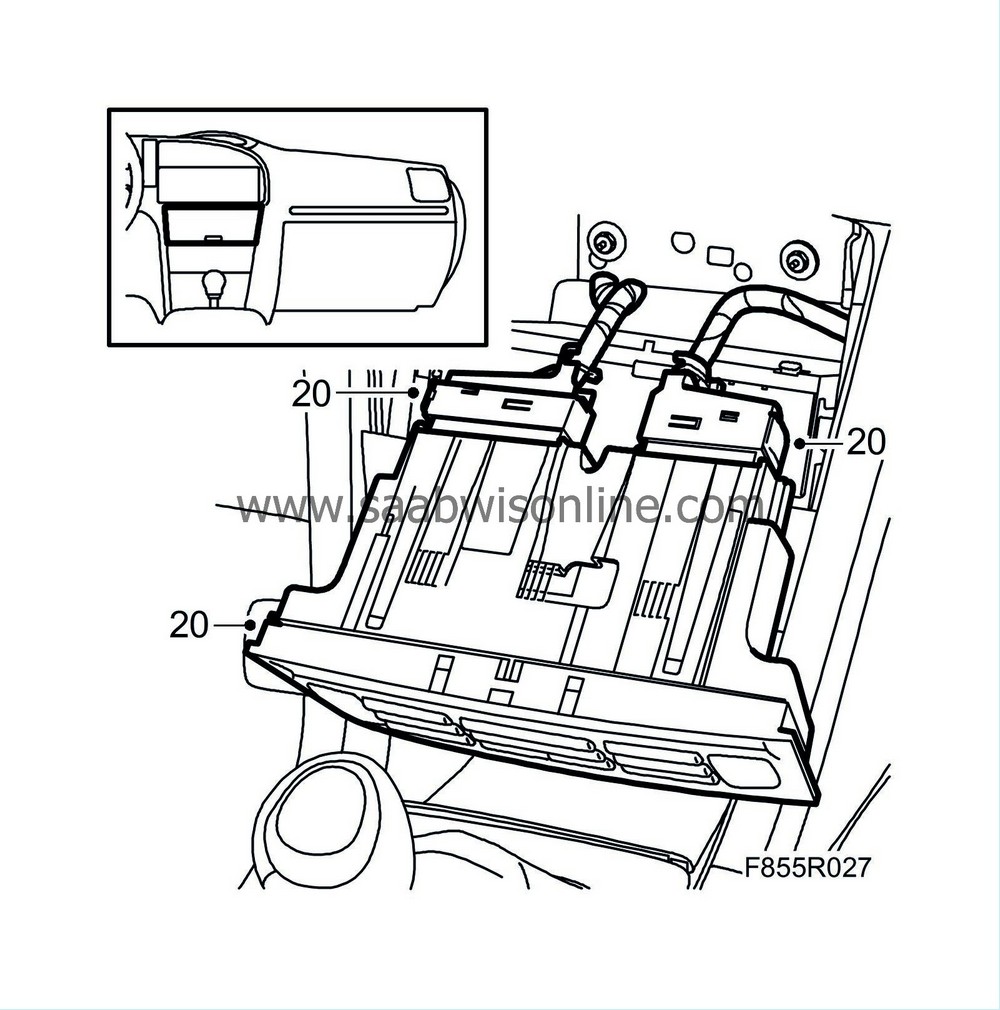
| 20. |
Plug in the connector to the ACC or alternatively the MCC unit. Fit the ACC or MCC unit.
|
|
| 21. |
Fit the
MIU
(Main Instrument Unit).
|
|
| 22. |
Fit the
Column integration module
(CIM).
|
|
| 23. |
Fit
the steering wheel
.
|
|
| 24. |
Fit
the driver airbag
.
|
|
| 25. |
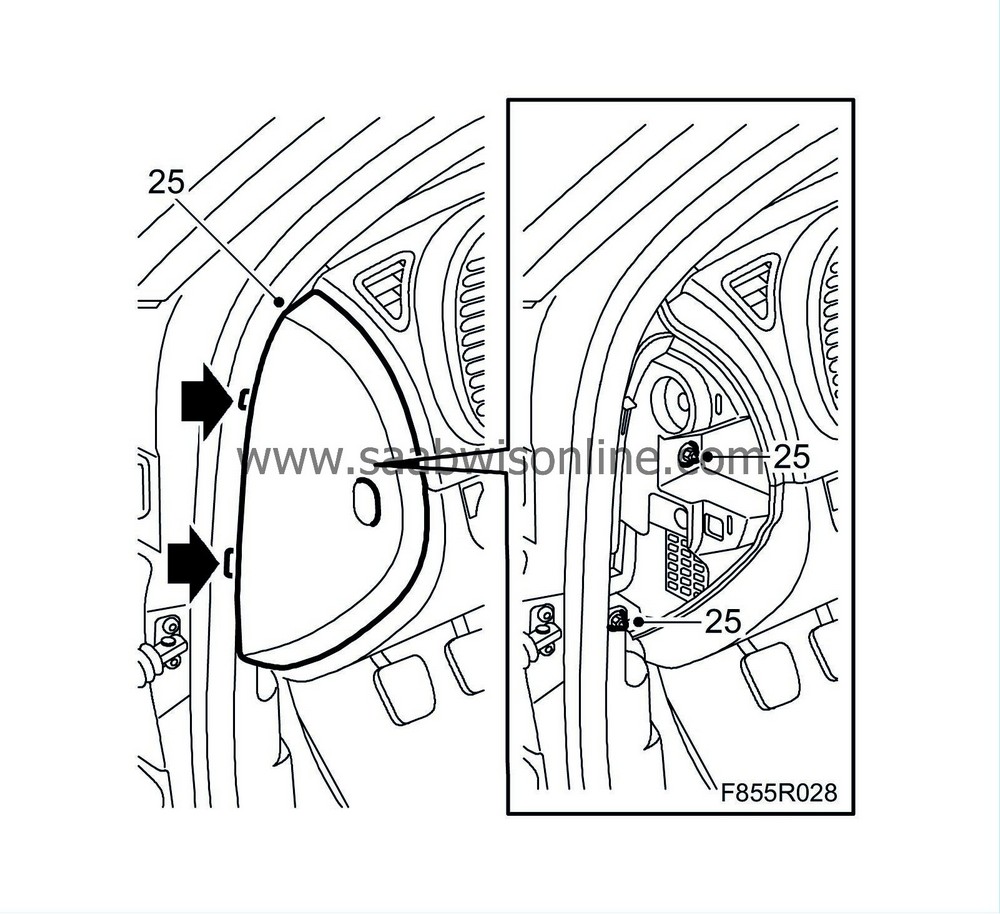
Fit the nuts which hold the dashboard to the steering column mounting beam and fit the dashboard side covers.
|
|
| 26. |
Fit the
SID
(Saab Information Display).
|
|
| 27. |
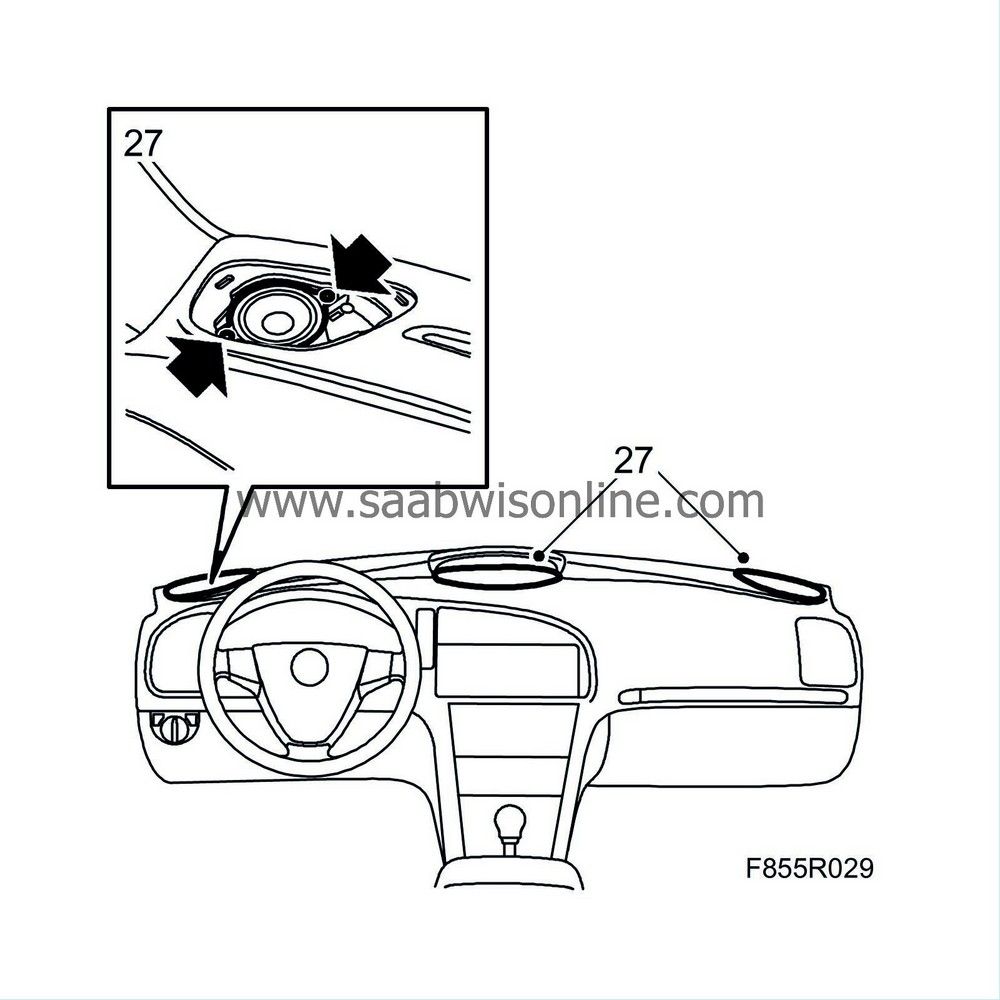
Plug in the speaker connectors and fit the speakers.
|
|
| 28. |
Fit the speaker grilles.

|
|
| 29. |
Fit on both sides the
A-pillar trim
.
|
|
| 30. |
Switch on the ignition and check the airbag system and control module with the diagnostic tool as follows:
Connect the diagnostic tool to the diagnostic socket under the dashboard. Delete any trouble codes. Switch the ignition off and then on again. Wait at least 10 seconds with the ignition on. Check whether any trouble codes have been displayed. If a trouble code has been displayed: Carry out the fault diagnosis procedure according to the instructions for the respective code. If a trouble code has not been displayed. Disconnect the diagnostic tool. |
|

 Warning

