Oil sump in car (aut) (up to and including VIN 61109304)
|
|
Oil sump in car (aut) (up to and including VIN 61109304)
|
|
1.
|
Place covers on the wings to keep the paintwork clean and protect it from damage.
|
|
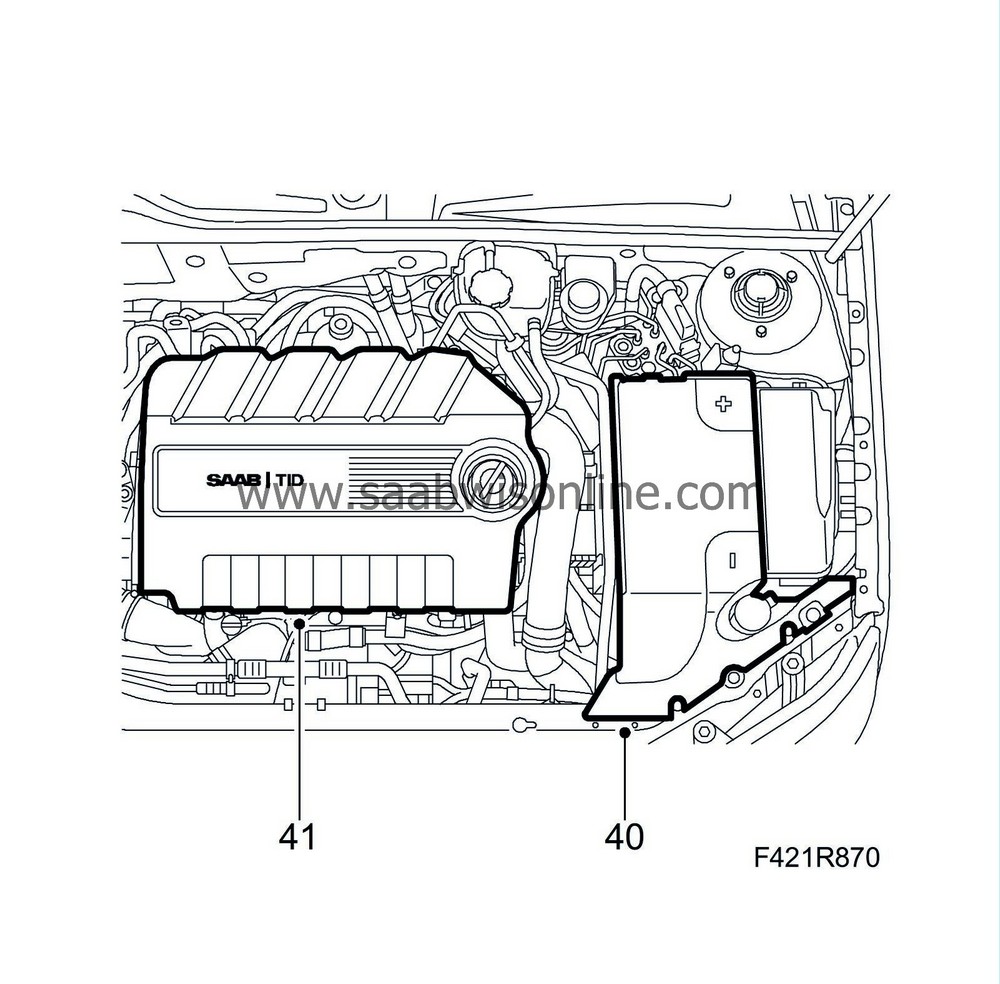
2.
|
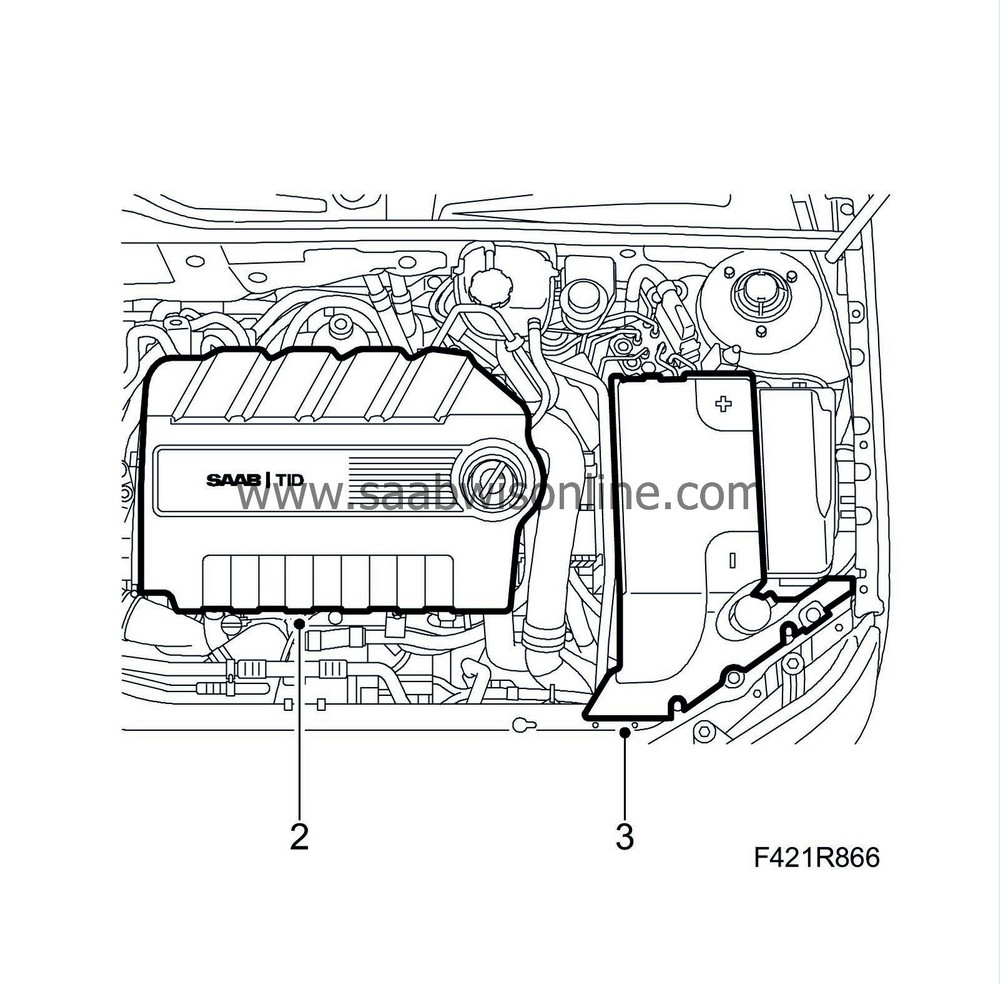
Remove the upper engine cover and insulation.
|
|
3.
|
Remove the battery cover.
|
|
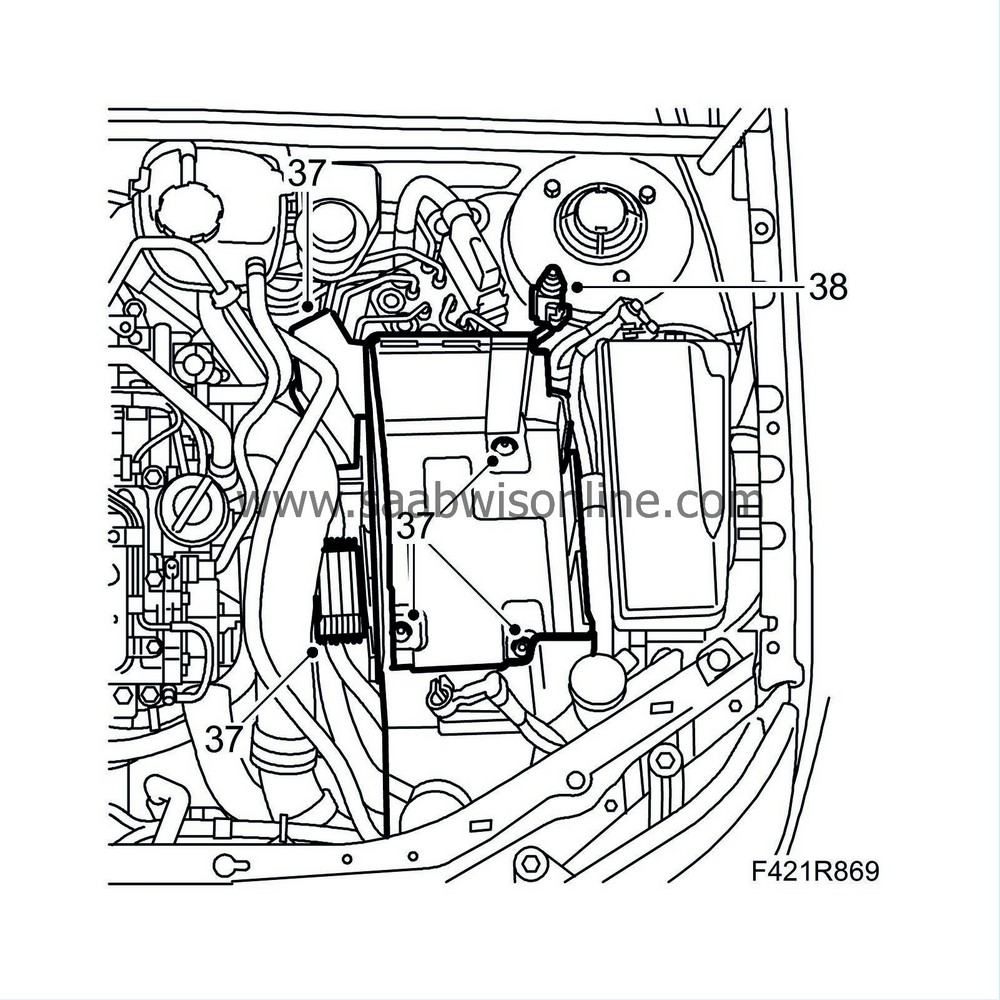
4.
|
Remove the battery and the bonnet switch electrical connection.

|
|
5.
|
Remove the glow plug relay plus the fuse holder and wiring harness cable ties from the battery tray. Remove the battery tray.
|
|
6.
|
Remove the upper bolts on the gearbox.

|
|
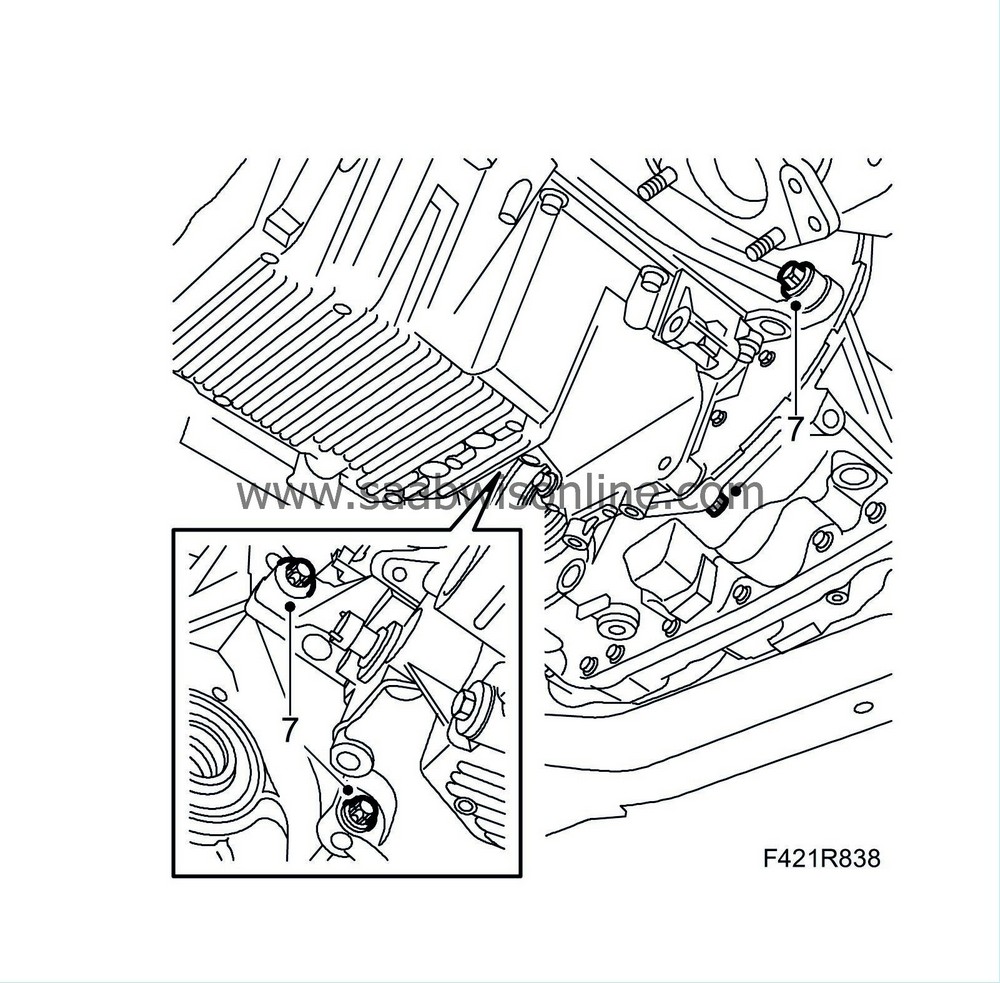
7.
|
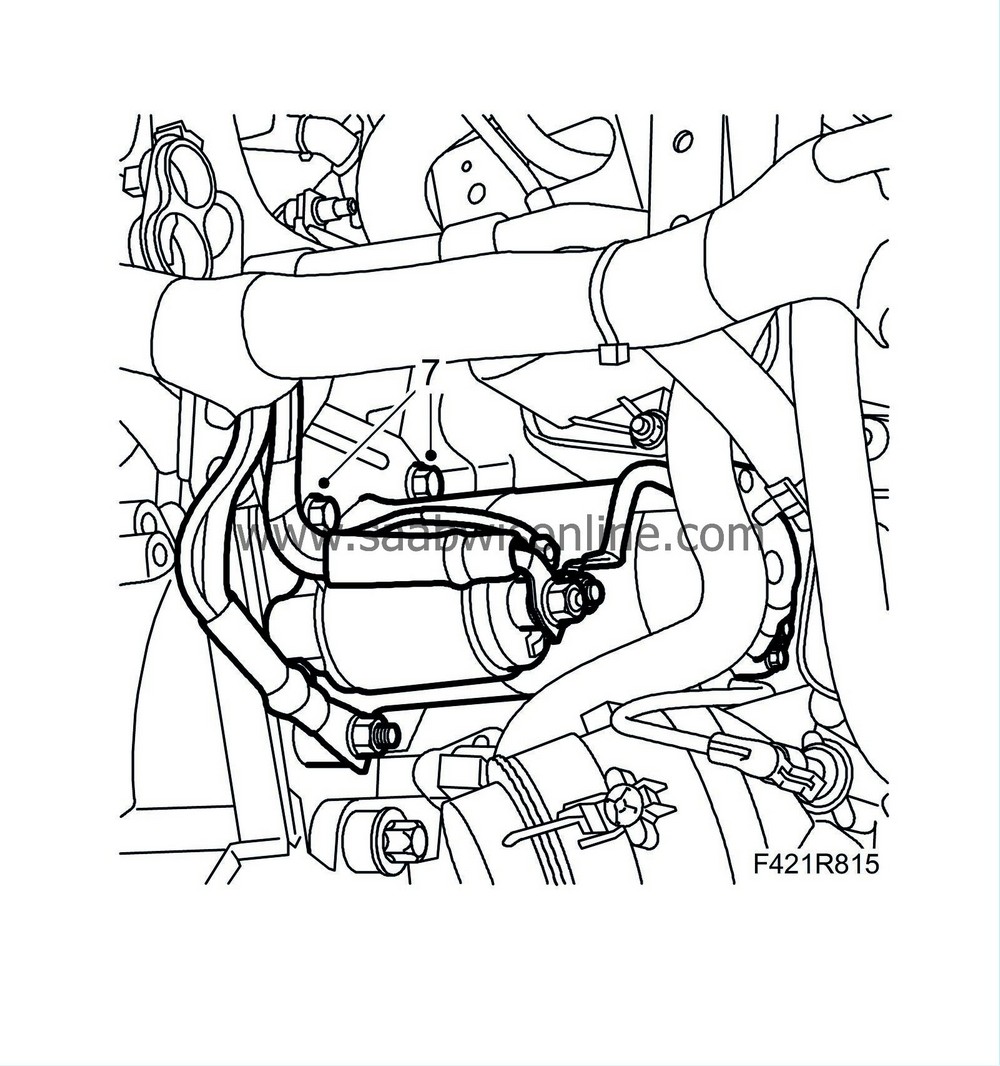
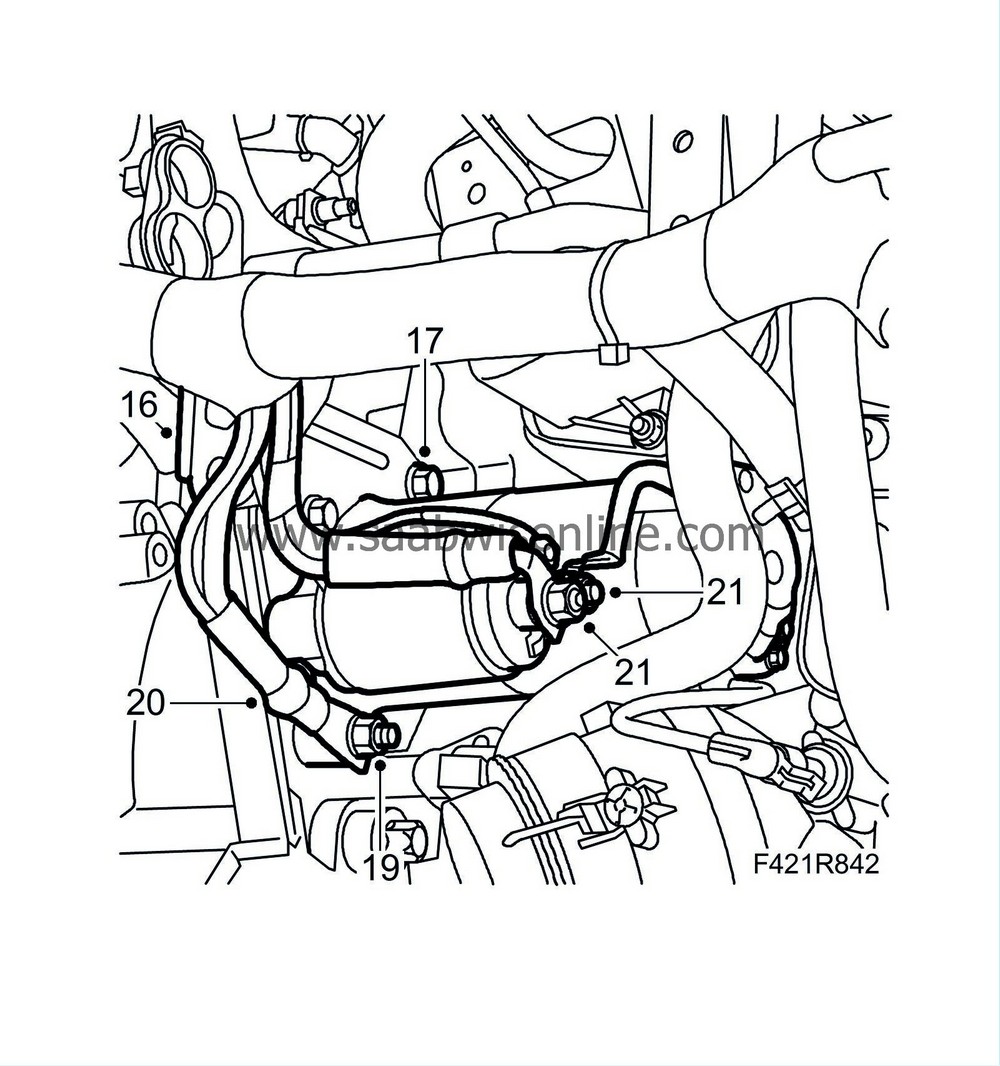
Remove the upper starter motor bolts and remove the bracket from the coolant pipes and the wiring harness. Move aside the coolant reservoir in order to gain access.
|
|
8.
|
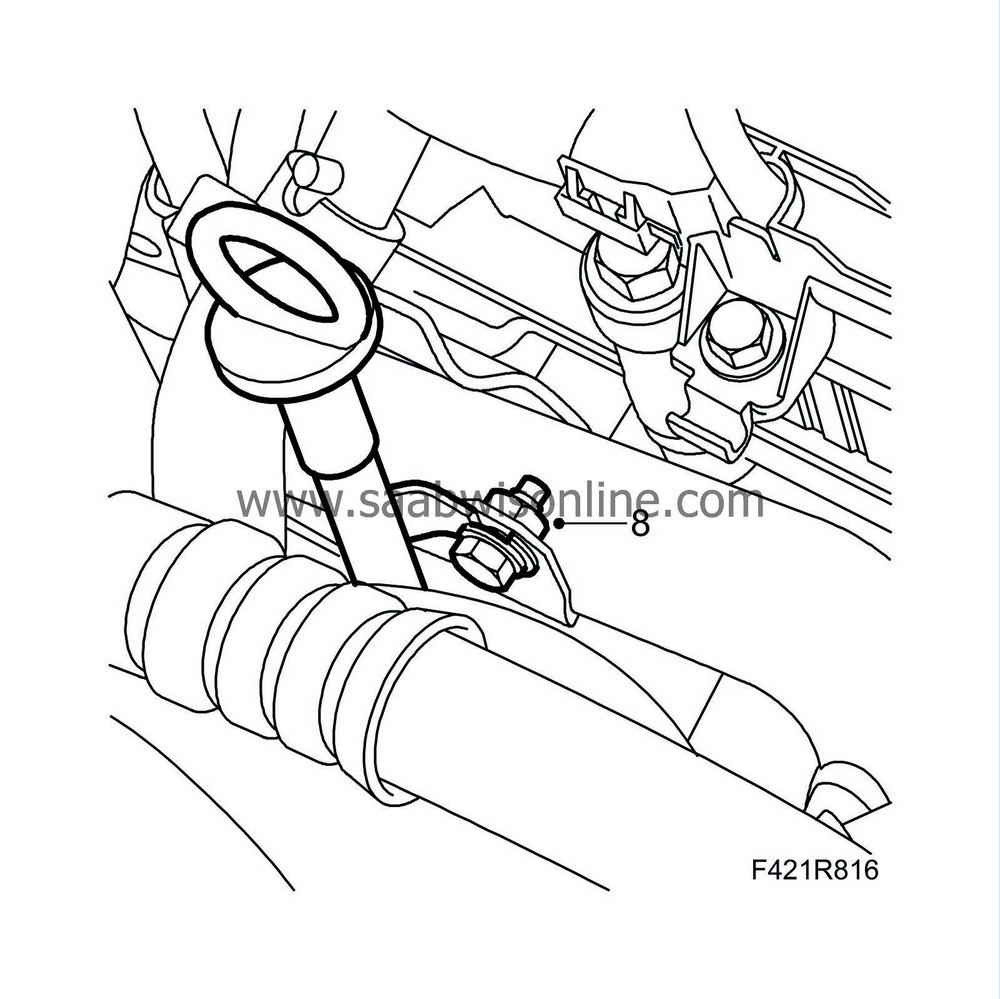
Remove the upper retaining screw on the dipstick tube.
|
|
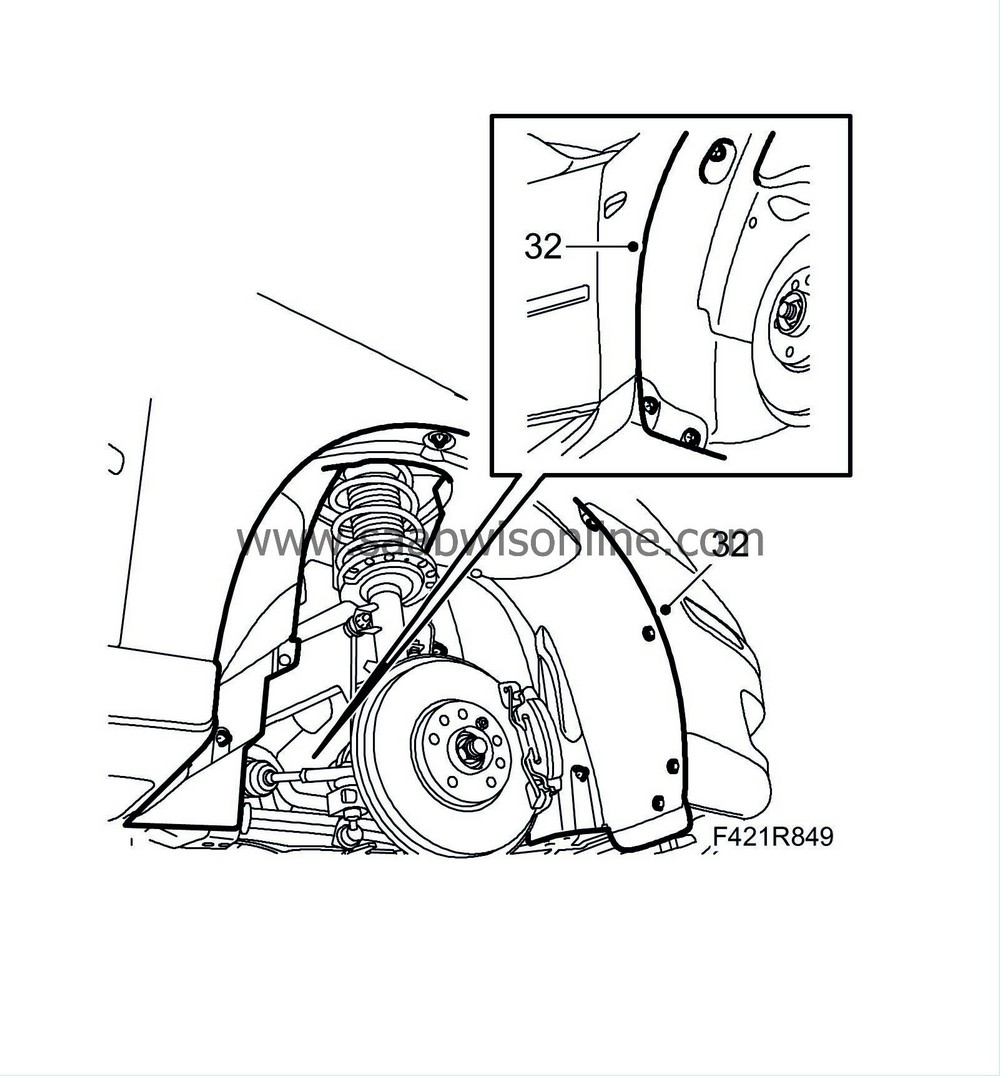
9.
|
Raise the car and remove the front right wheel.
|
|
10.
|
Remove the right wing liner.

|
|
11.
|
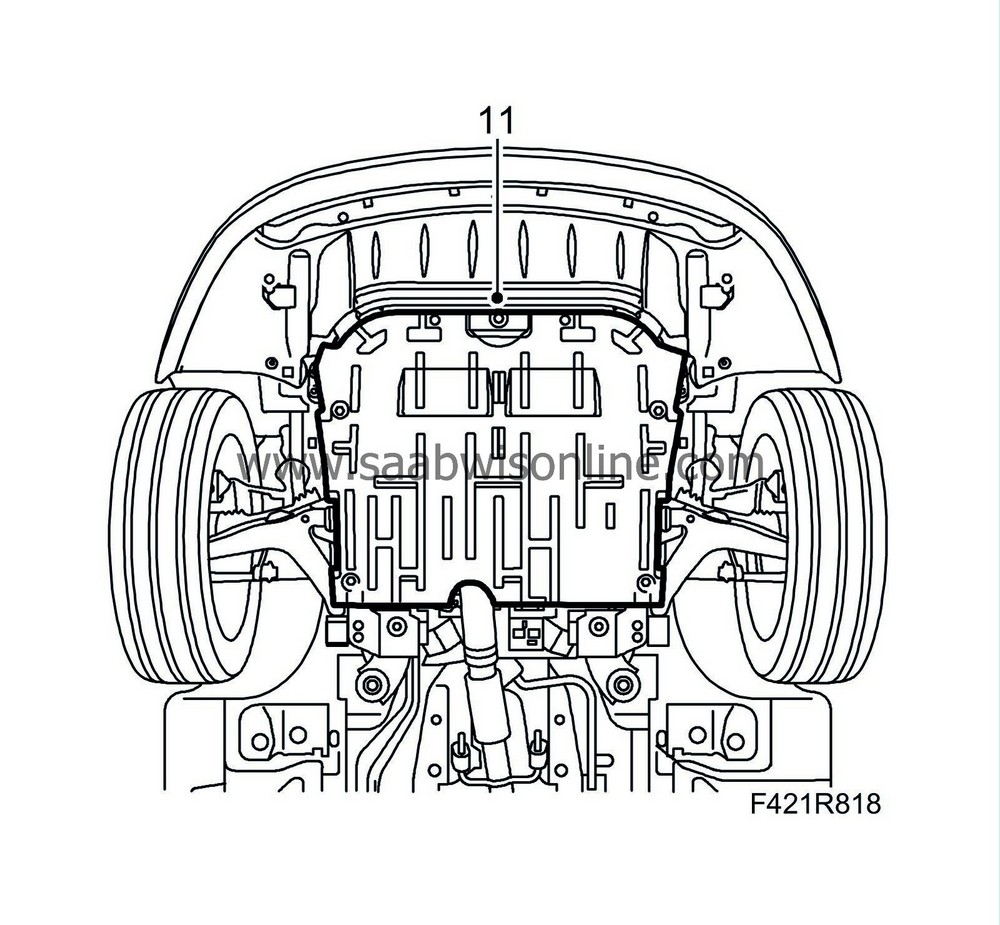
Remove the lower engine cover and the oil sump insulation.
|
|
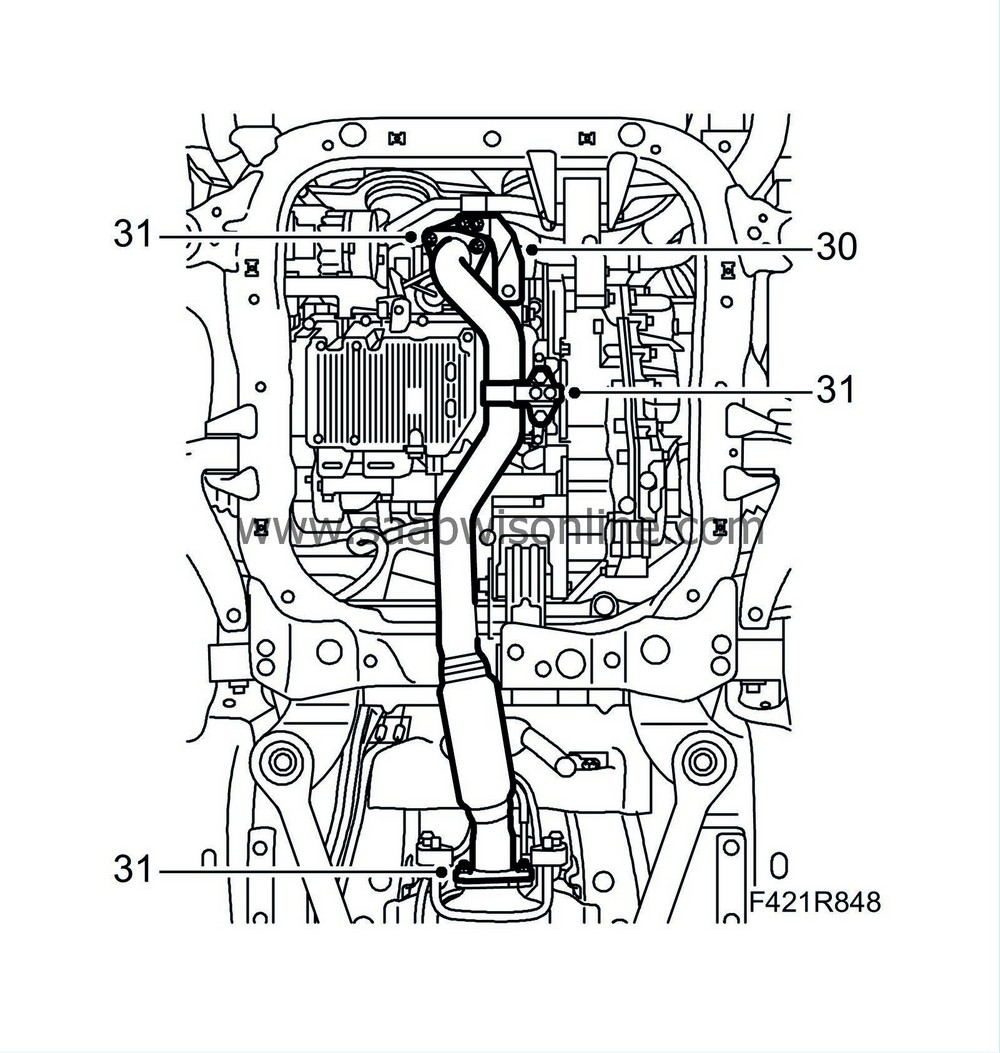
12.
|
Remove the front exhaust pipe.
|
Important
|
|
The flexible bellow on the front section of the exhaust system must not be bent more than 5° from its neutral line. This means that if the front exhaust system is left hanging freely, it must not be bent more than by its own weight.
|
|
If the strain on the pipe is too great, its component parts will be permanently deformed. This can cause noise, leaks and eventually complete breakdown.
|
|
|

|
|
13.
|
Remove the catalytic converter lower mounting.
|
|
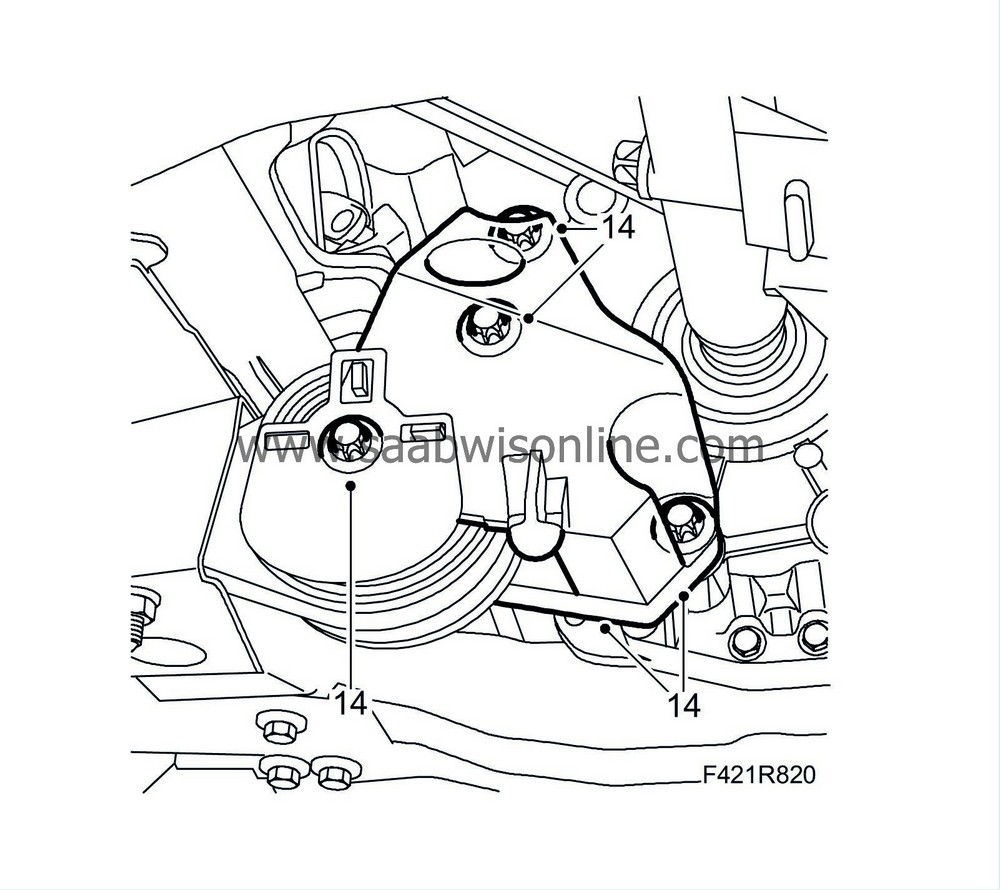
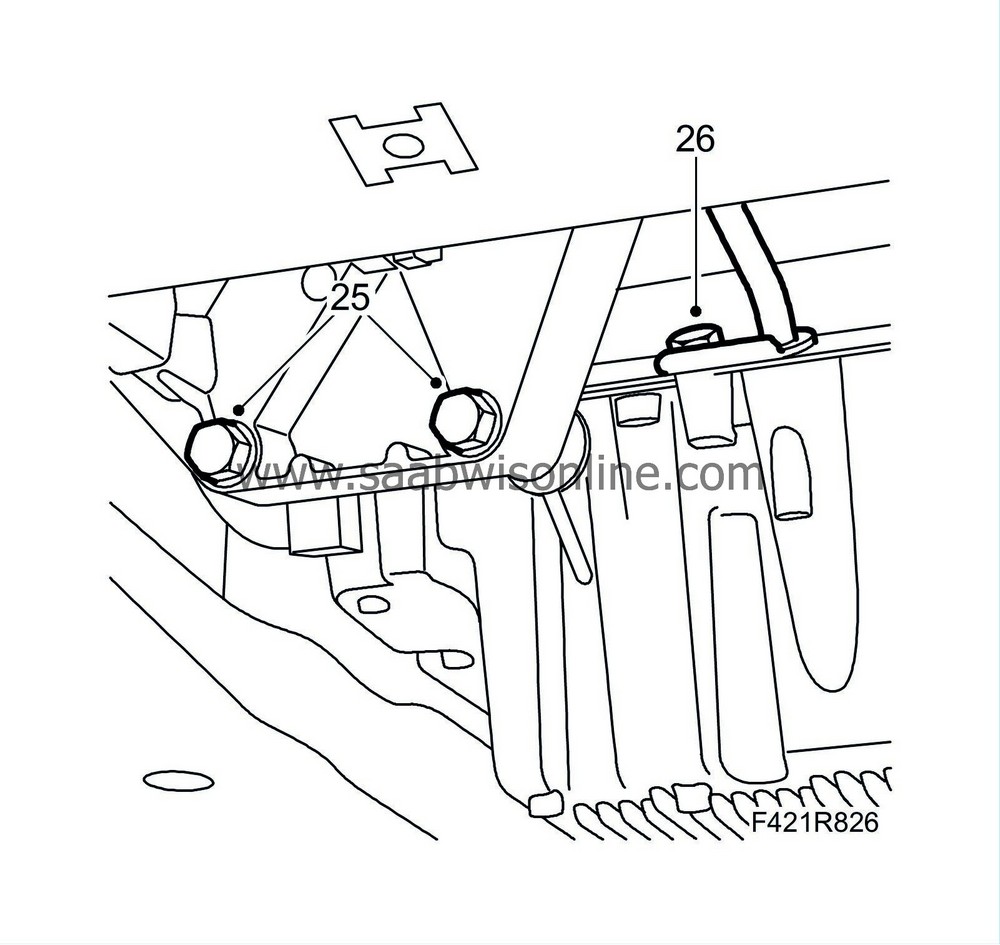
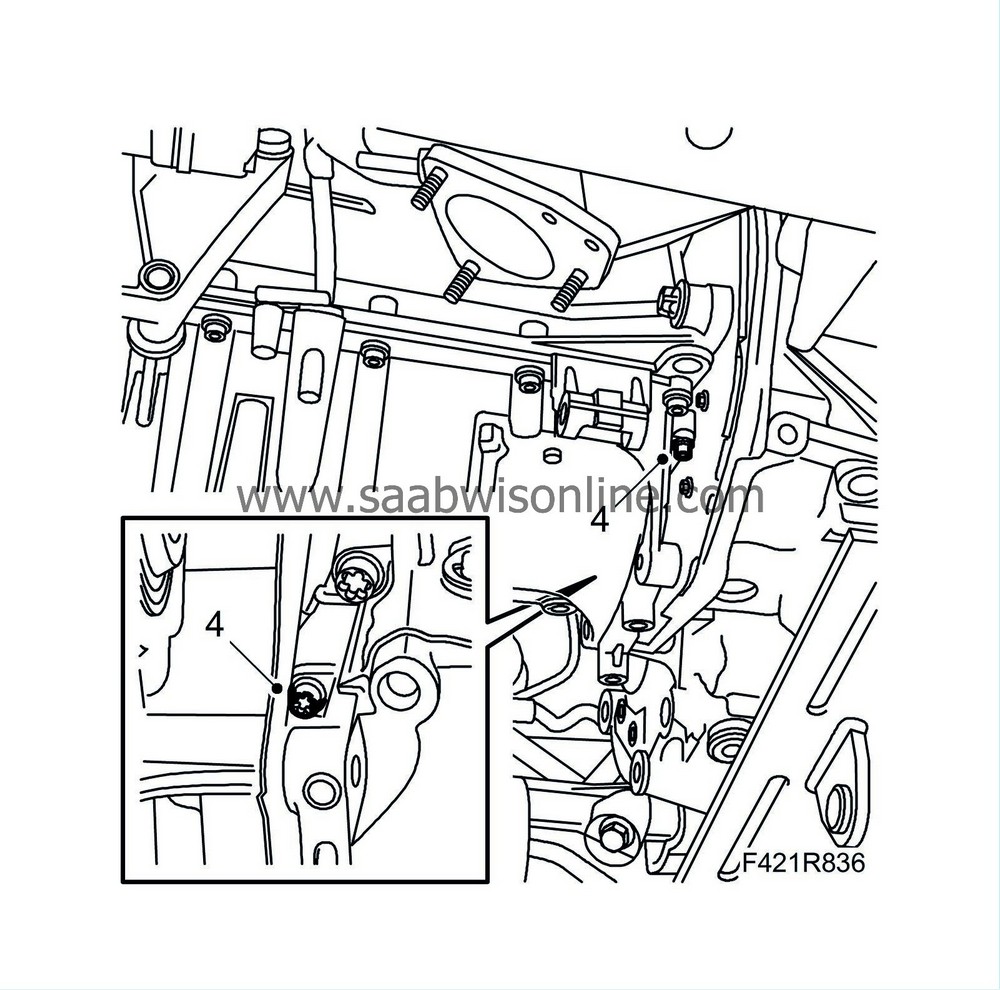
14.
|
Remove the rear torque arm bracket.
|
|
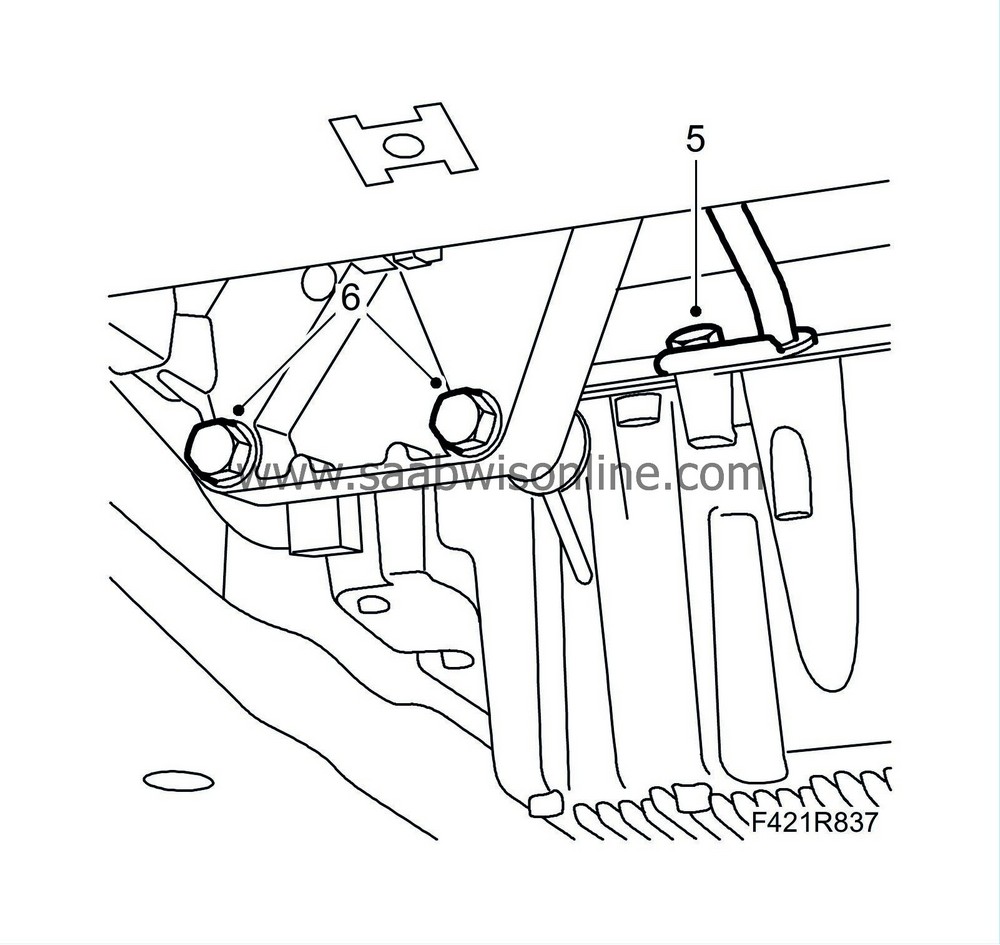
15.
|
Remove the front torque arm.
|
|
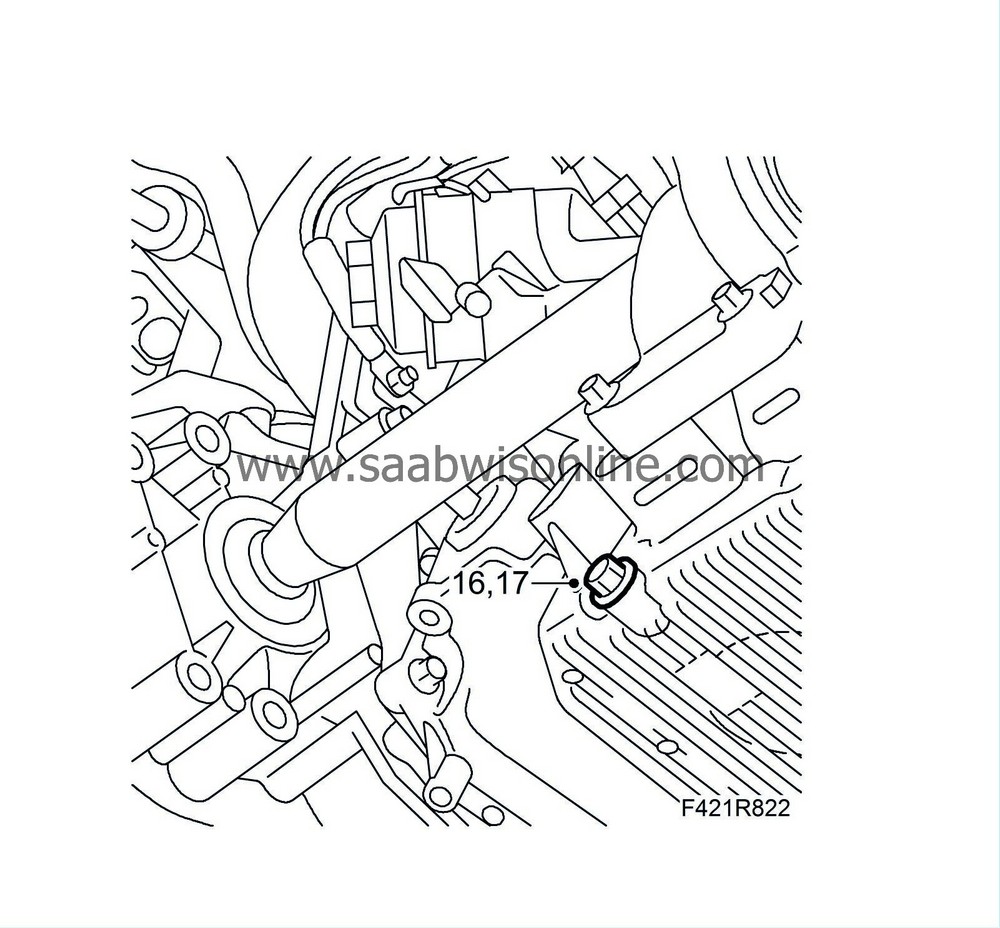
16.
|
Place a receptacle under the car and drain the engine oil.
|
|
17.
|
Fit the oil plug with a new seal.
Tightening torque 25 Nm (18 lbf ft)
|
|
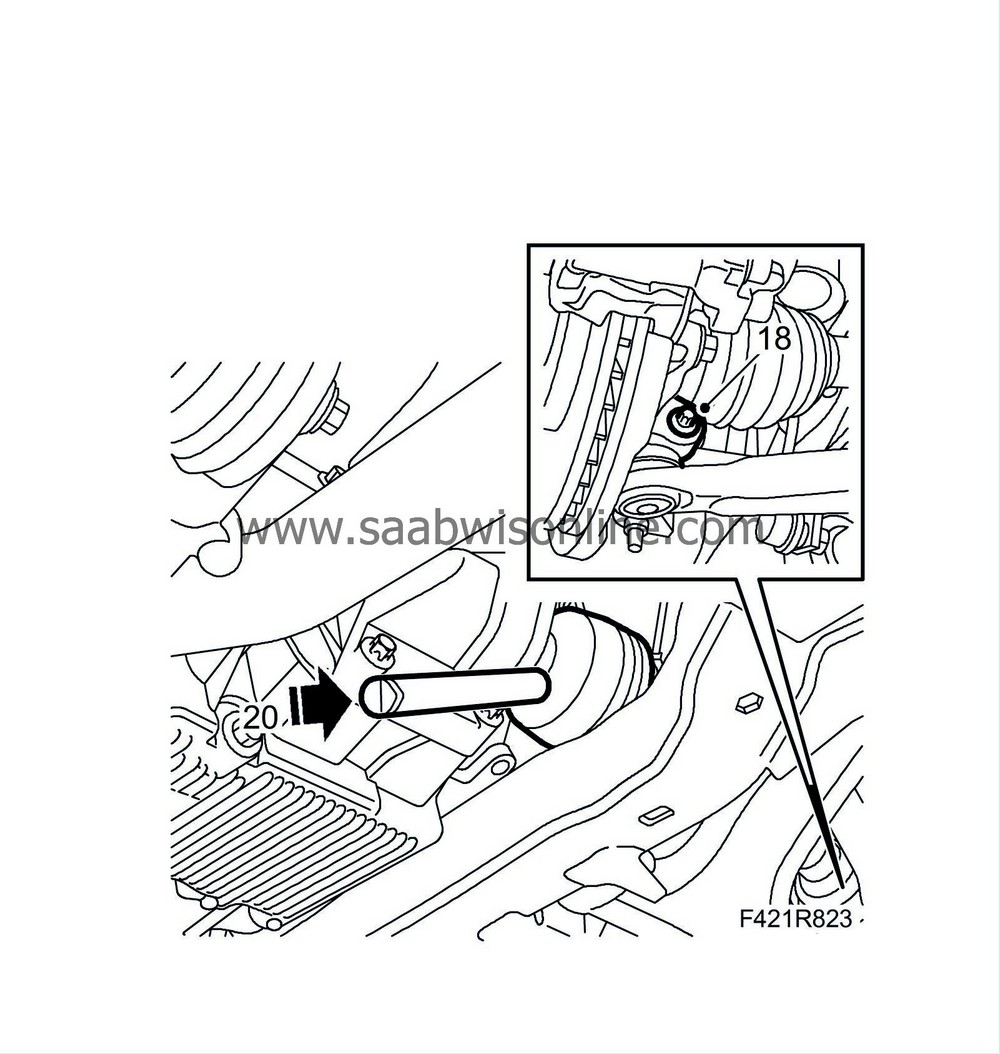
18.
|
Remove the outer ball joint form the suspension arm.
|
|
19.
|
Let down the suspension arm and lay a
83 95 238 Wedge
between the anti-roll bar and the suspension arm.
|
|
20.
|
Knock out the inner drive shaft universal joint with a mallet and brass drift.
|
|
21.
|
Remove the bolts and pull out the intermediate shaft. Place a receptacle under the gearbox.
|
|
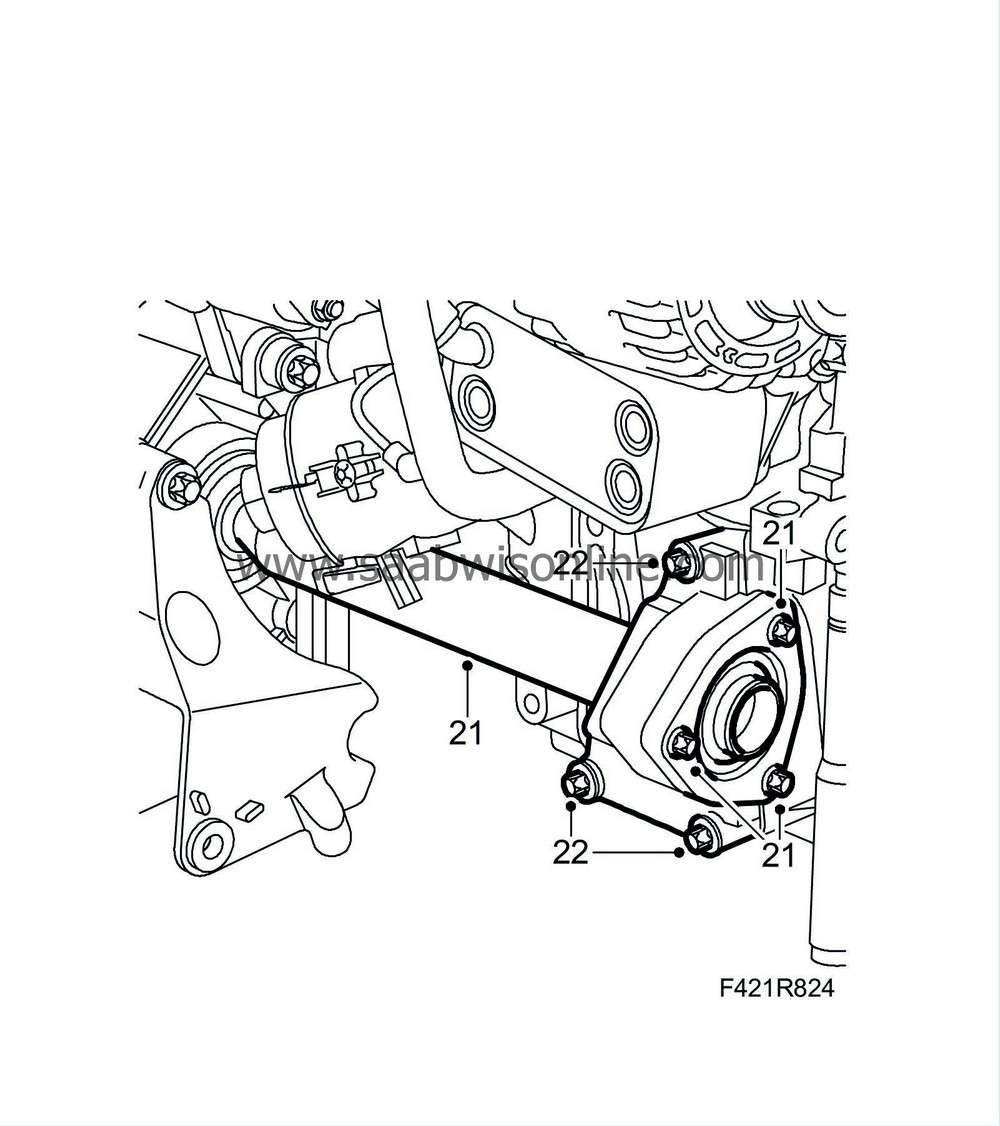
22.
|
Remove the intermediate shaft bracket.
|
|
23.
|
Detach the connector to the oil level sensor.

|
|
24.
|
Remove the crankcase ventilation hose from the oil sump.
|
|
25.
|
Remove the lower bolts from the A/C compressor bracket.
|
|
26.
|
Remove the lower screw on the dipstick tube. ¨
|
|
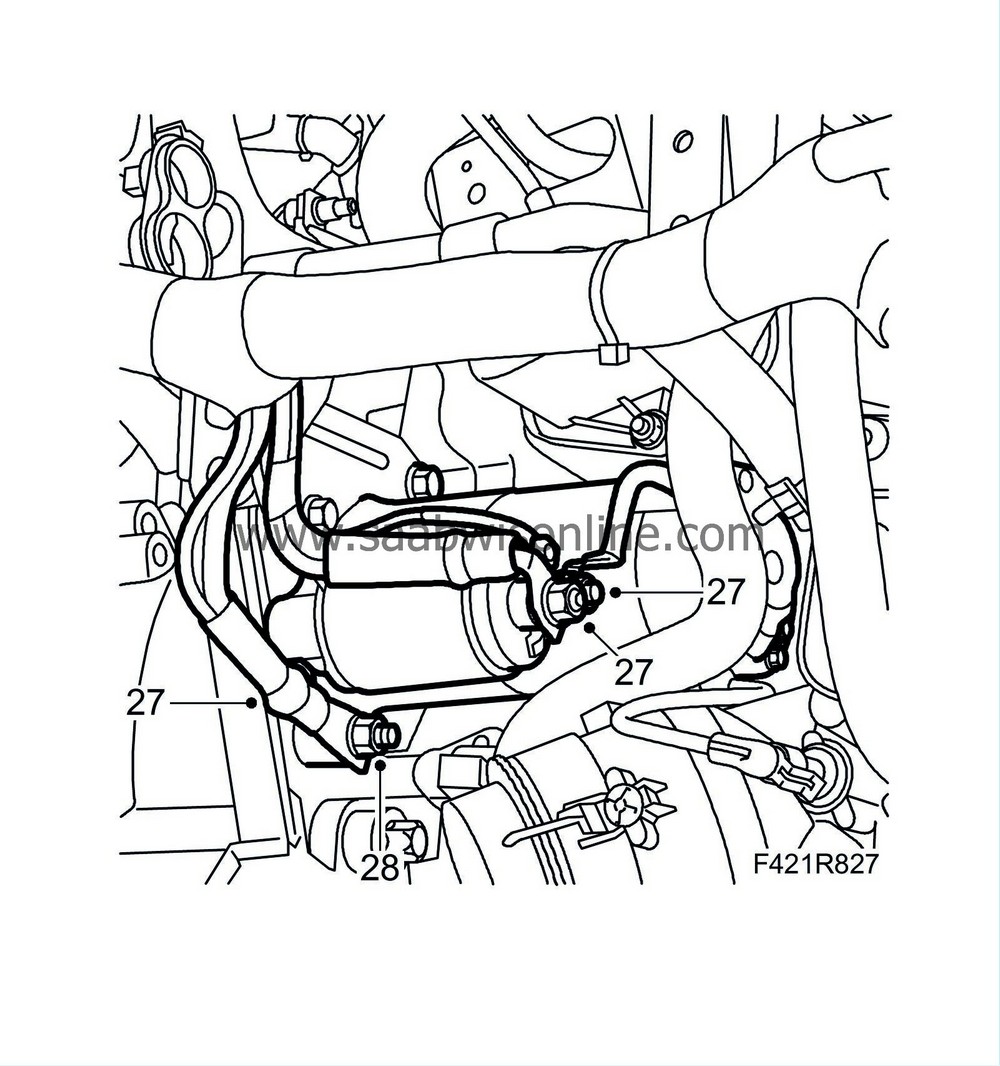
27.
|
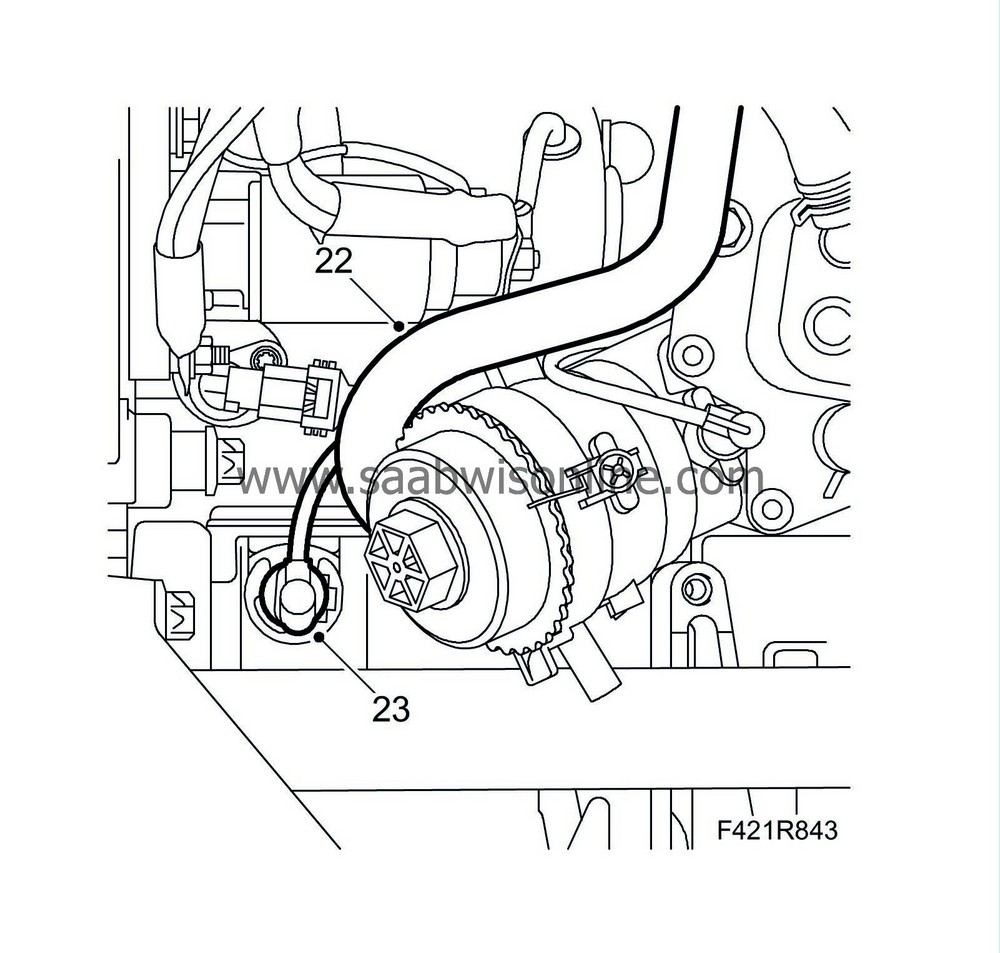
Remove the starter motor electrical connections and the ground cable from the stud.
|
|
28.
|
Remove the lower starter motor bolt and lift down the starter motor.
|
|
29.
|
Undo the 6 bolts holding the torque converter to the driver plate. Rotate the engine clockwise with the pulley centre bolt.

|
|
30.
|
Lower the car, mark the location of the bolts on the left-hand engine bracket with a marker for correct refitting.

|
|
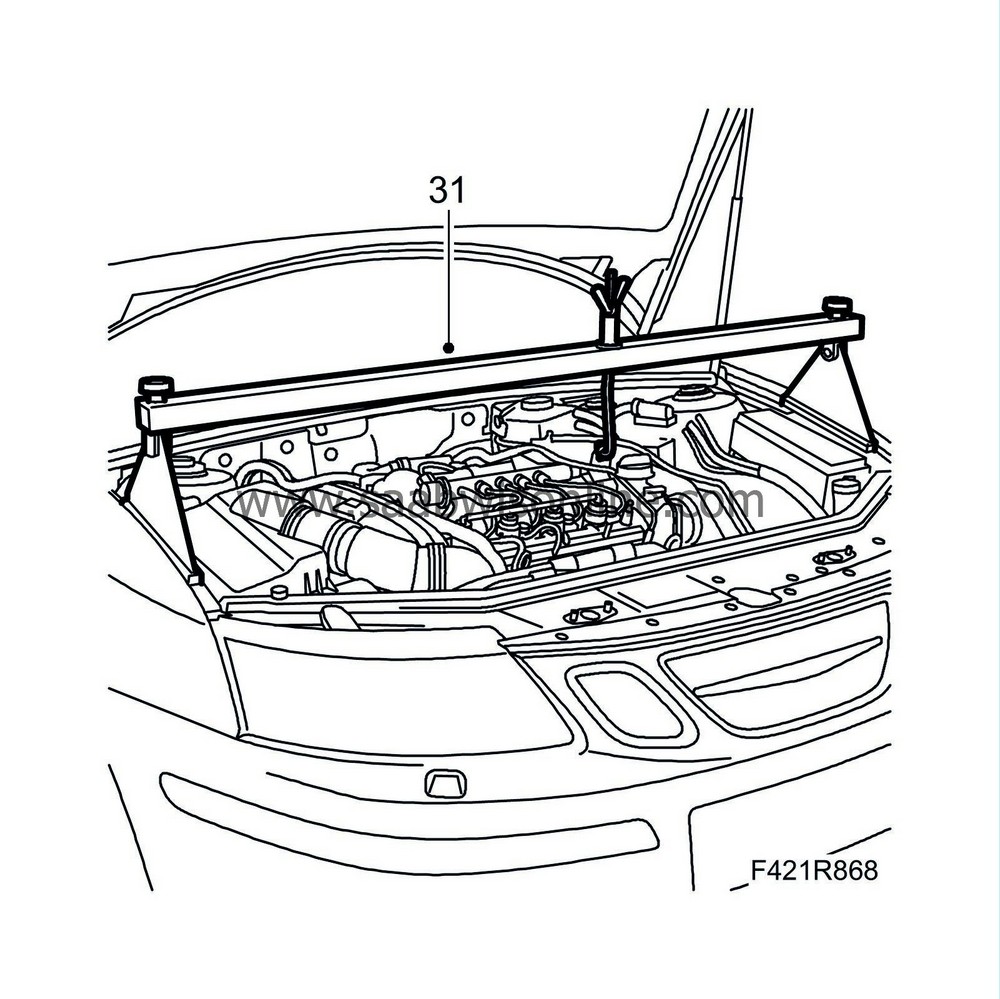
31.
|
Fit
83 94 850 Lifting beam
to the engine. Take the weight off the engine and gearbox. Remove the bracket bolts from the mounting.
|
|
33.
|
Remove the upper bolts holding the gearbox to the engine.

|
|
34.
|
Pull out the gearbox about 10 mm.
|
|
35.
|
Undo the plug and press the torque converter against the gearbox.

|
|
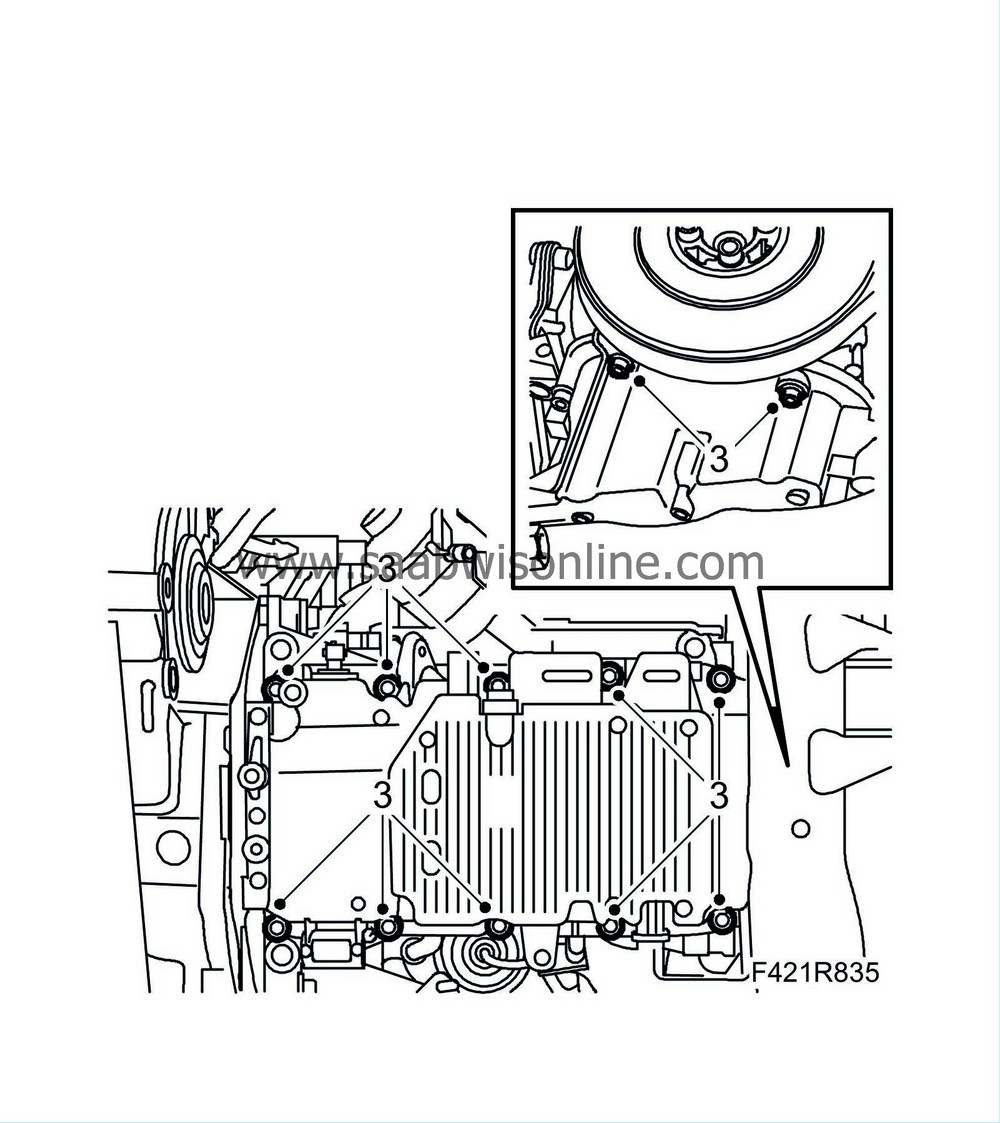
36.
|
Remove the lower bolts of the oil sump.
|
|
38.
|
Place a screwdriver between the sump and the timing cover at the AC compressor bracket and carefully prise the oil sump loose.
|
|
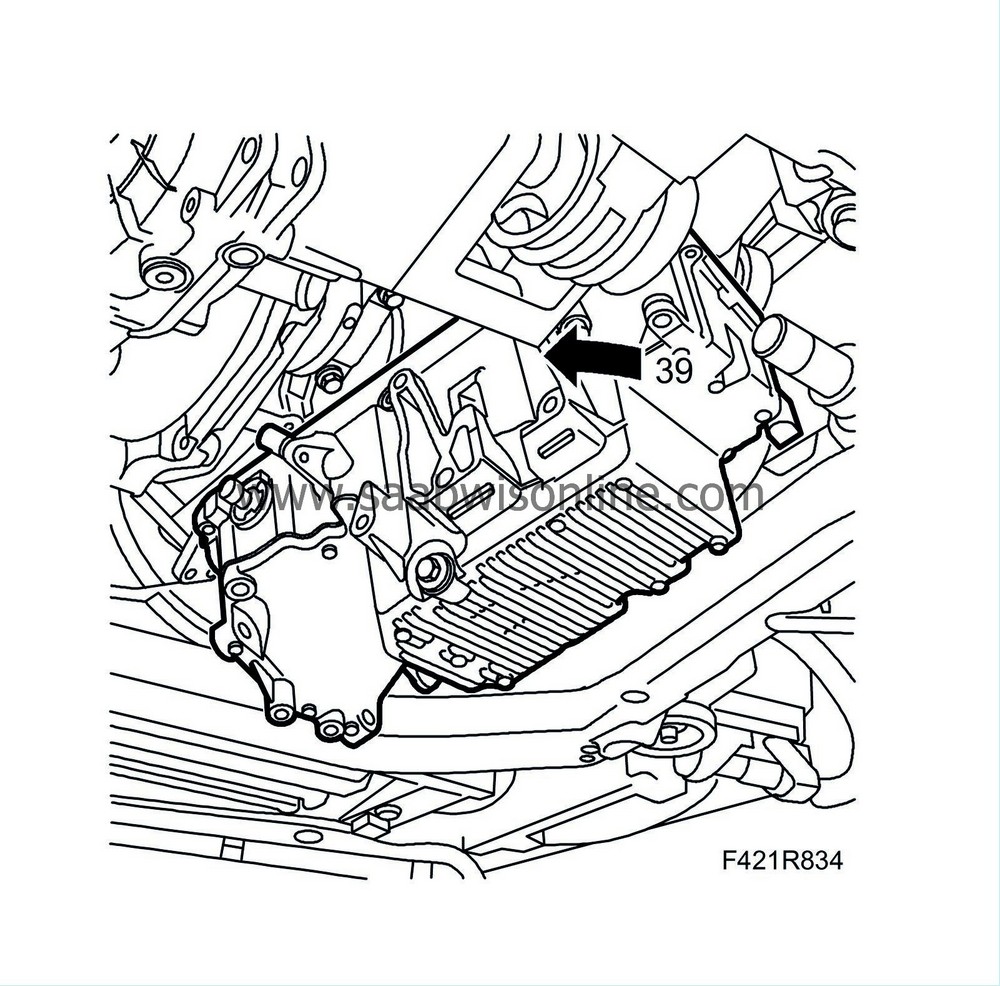
39.
|
Turn the sump ninety degrees and lift it down.
|
|
1.
|
Clean the engine block and sump sealing surfaces. Remove any contaminants in the oil sump.
|
|
3.
|
Fit the oil sump carefully so that the sealing compound is not disturbed. Turn the sump ninety degrees.
Tightening torque, M6 bolts, 9 Nm (7 lbf ft).
Tightening torque, M8 bolts, 25 Nm (18 lbf ft).
|
|
4.
|
Fit the lower bolts.
|
|
5.
|
Fit the dipstick tube with a new seal and tighten the screw.
|
|
6.
|
Fit the lower bolts to the A/C compressor bracket.
|
|
7.
|
Fit the gearbox to the engine. Tighten the lower bolts between the engine and the gearbox.
Tightening torque, M12 60 Nm (44 lbf ft)
Tightening torque, M10 40 Nm (30 lbf ft)
|
|
8.
|
Press the torque converter against the driver plate. Fit the plug.
|
|
9.
|
Apply
Thread locking adhesive, Loctite 242
to the bolts holding the torque converter to the driver plate. Use the original bolts with associated washers. The torque converter will be ruined if the bolts that are used that are too long.
|
|
10.
|
Rotate the engine clockwise with the belt pulley and fit the bolts one at a time and then tighten them.
Tightening torque 30 Nm (22 lbf ft)
|
|
11.
|
Lift in place the starter motor and insert the lower stud.
|
|
13.
|
Lift up the unit and fit the bolts to the engine bracket according to the markings made earlier.
|
|
14.
|
Remove the lifting beam.
|
|
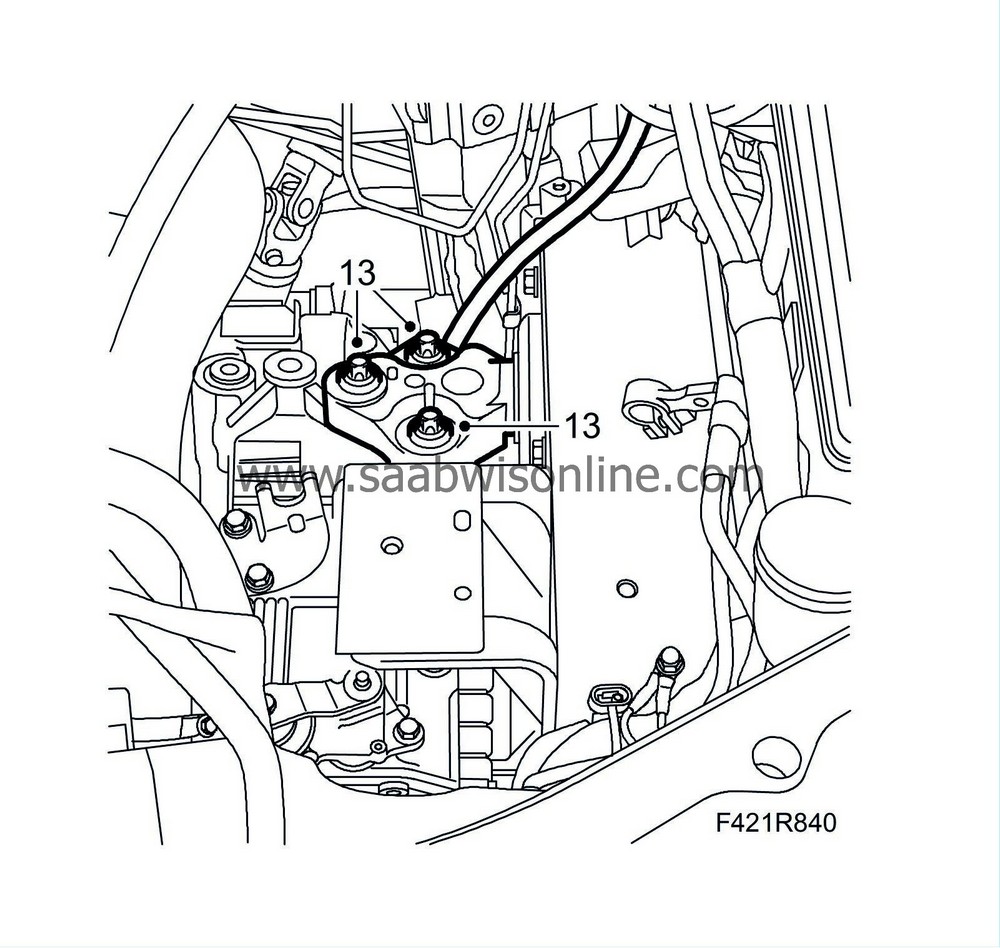
15.
|
Fit the wiring harness bracket and the upper bolts between the engine and the gearbox.
Tightening torque, M12 60 Nm (44 lbf ft)
|
|
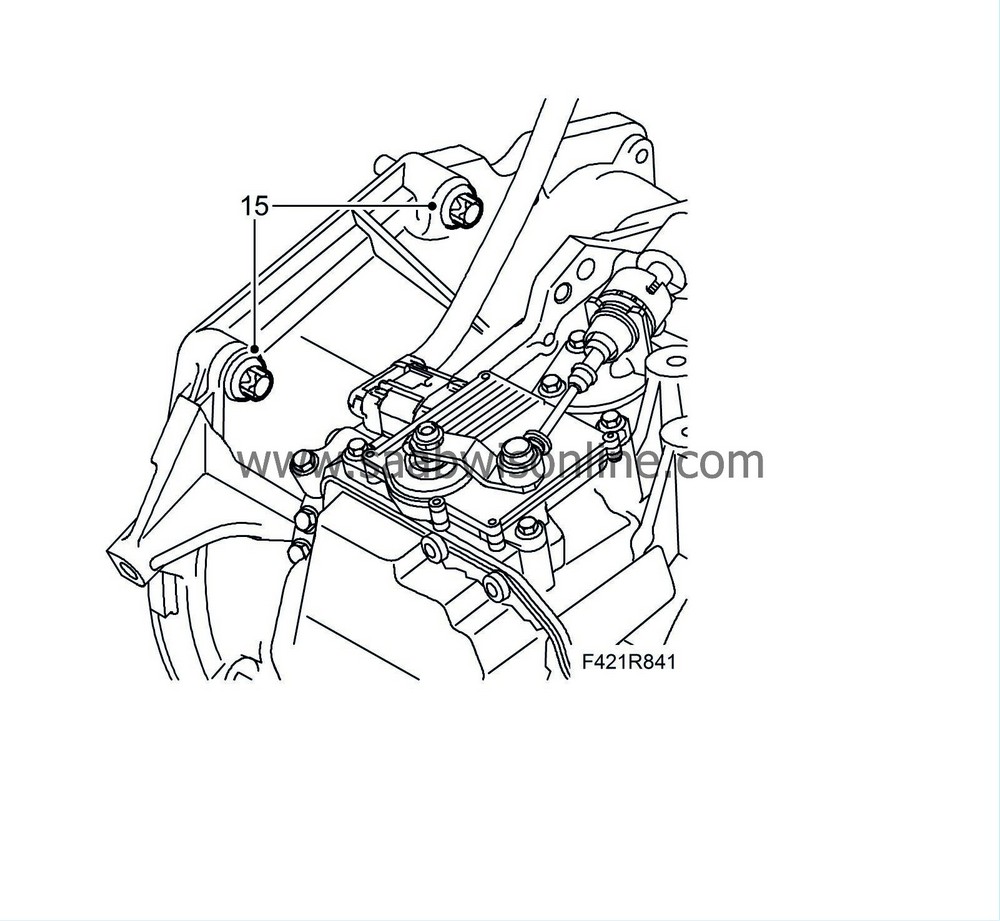
16.
|
Fit the bracket to the coolant pipe and the wiring harness.
|
|
17.
|
Fit the upper starter motor bolts.
Tightening torque 24 Nm (18 lbf ft).
|
|
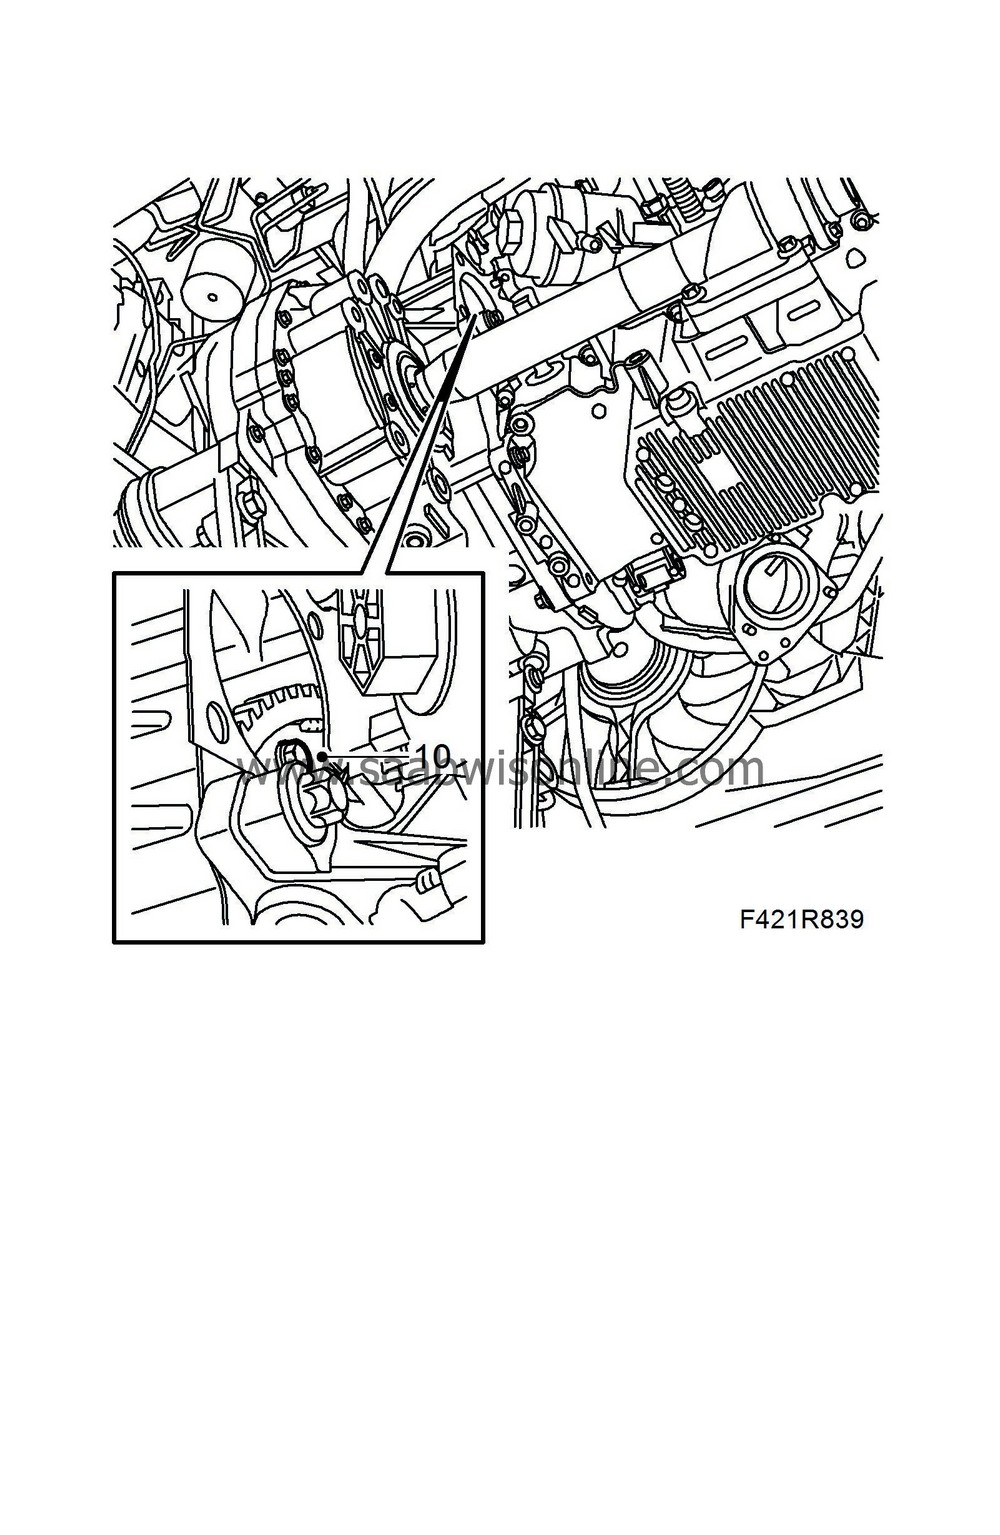
19.
|
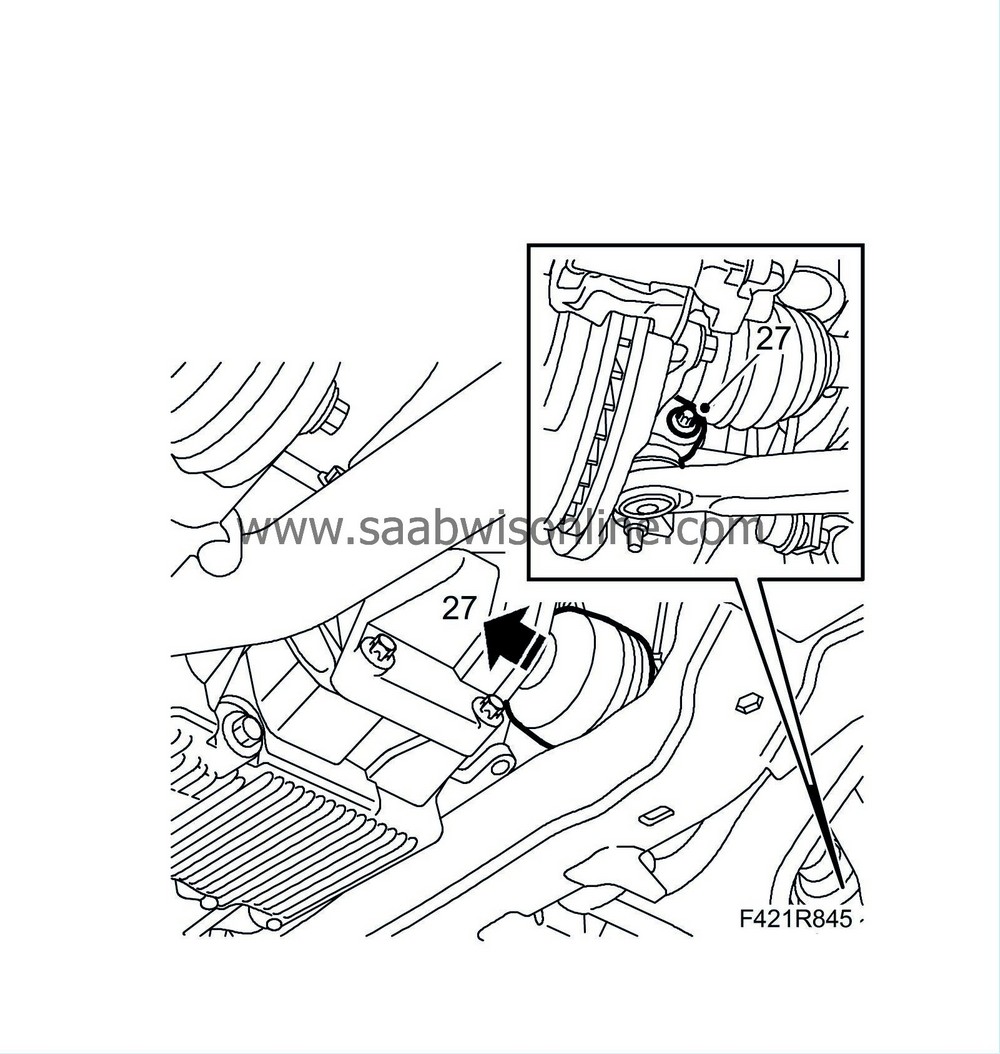
Tighten the lower stud.
Tightening torque 24 Nm (18 lbf ft).
|
|
20.
|
Fit the ground cable to the lower stud.
|
|
21.
|
Fit the electrical connections on the starter motor.
|
|
22.
|
Fit the crankcase ventilation hose to the oil sump.
|
|
23.
|
Plug in the oil level sensor connector.
|
|
24.
|
Fit the intermediate shaft bracket.
Tightening torque 55 Nm (41 lbf ft).

|
|
25.
|
Position
83 95 162 Protective collar, drive shafts
in the shaft seal. Insert the intermediate shaft into the gearbox until approximately 20 mm of the shaft remains. Pull out the collar and push in the rest of the intermediate shaft. Fit the bolts.
Tightening torque 20 Nm (15 lbf ft)
|
|
27.
|
Insert the drive shaft into the intermediate shaft, making sure the circlips engage. Remove the wedge and connect the ball joint to the steering swivel member with nut and bolt. The pin must be visible above the steering swivel member before fitting the bolt. Tighten the nut.
Tightening torque 50 Nm (37 lbf ft)
|
|
28.
|
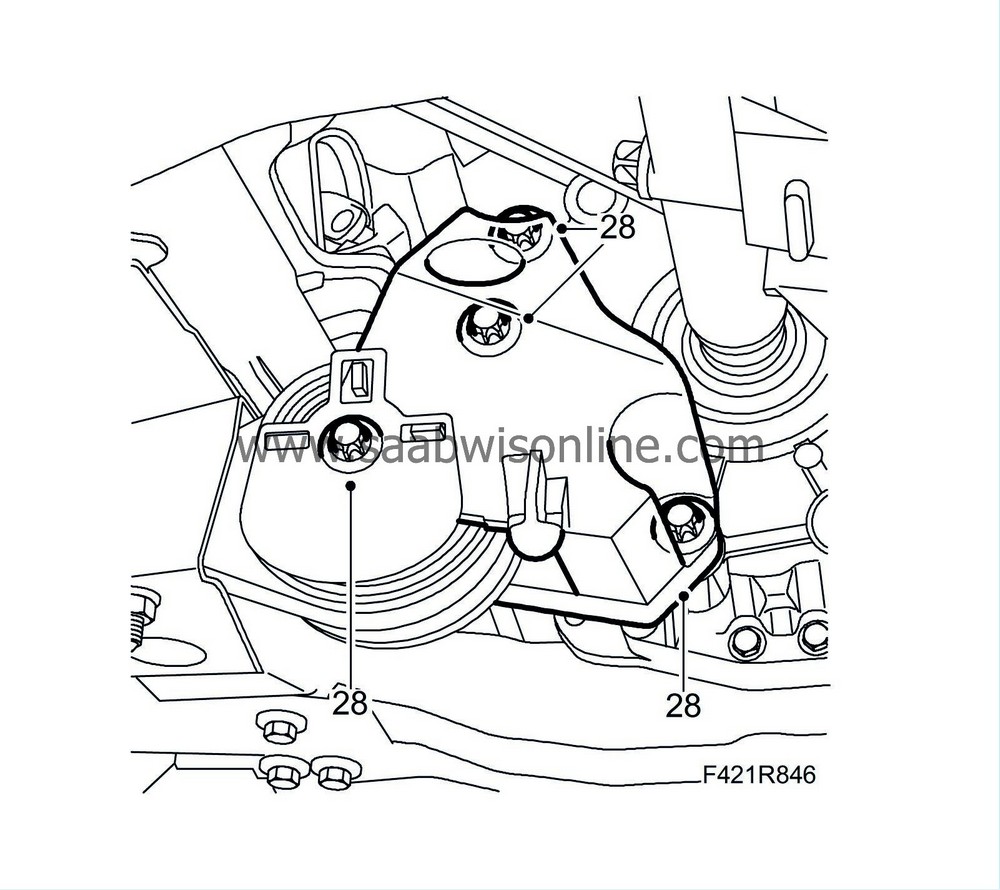
Fit the rear torque arm bracket to the gearbox.
Tightening torque 80 Nm (59 lbf ft).
|
|
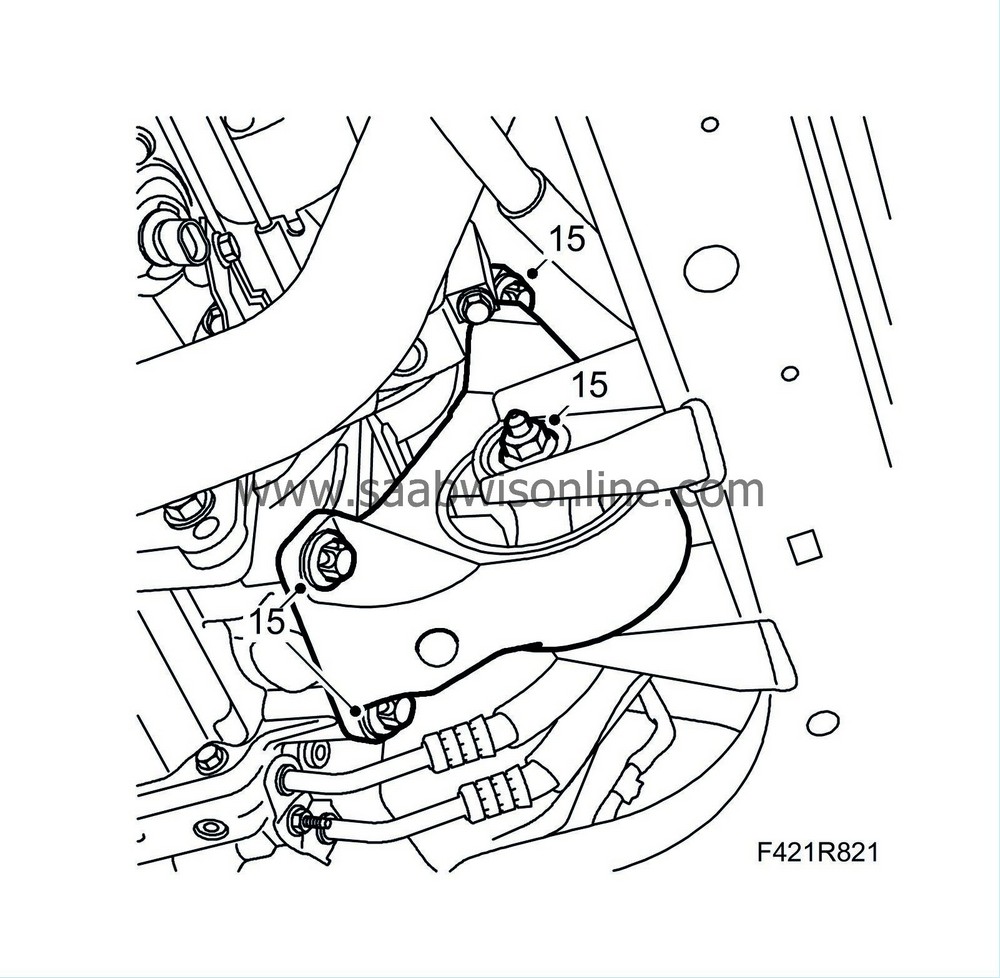
29.
|
Fit the front torque arm.
Tightening torque nut and bolt 60 Nm +90° (44 lbf ft +90°)
Tightening torque bolt to gearbox 80 Nm (59 lbf ft)

|
|
30.
|
Fit the catalytic converter lower mounting.
|
|
31.
|
Fit the front exhaust pipe. Lubricate the threads with
90 513 210 Universal paste
. Fit the oil sump insulation.
Tightening torque, exhaust flanges, 22 Nm (16 lbf ft)
Tightening torque, bracket to gearbox, 19 Nm (14 lbf ft)
|
|
32.
|
Refit the right wing liner.
|
|
33.
|
Lower the car somewhat and fit the front right wheel. See
Wheels
.
|
|
34.
|
Fit the upper retaining screw on the dipstick tube.

|
|
36.
|
Fit the filler plug.
Tightening torque 45 Nm (33 lbf ft).
|
|
37.
|
Fit the battery tray, glow plug relay, fuse holder, cable clips and covers on the fuse holder.
|
|
38.
|
Fit the bonnet switch and battery.
|
|
39.
|
Fit and connect the battery cables.
|
|
40.
|
Fit the battery cover.
|
|
41.
|
Fit the insulation and the upper engine cover.
|
|
43.
|
Connect an exhaust extractor and start the engine. Switch off the engine and wait 2-5 minutes. Check the oil level and adjust if necessary.
|
|
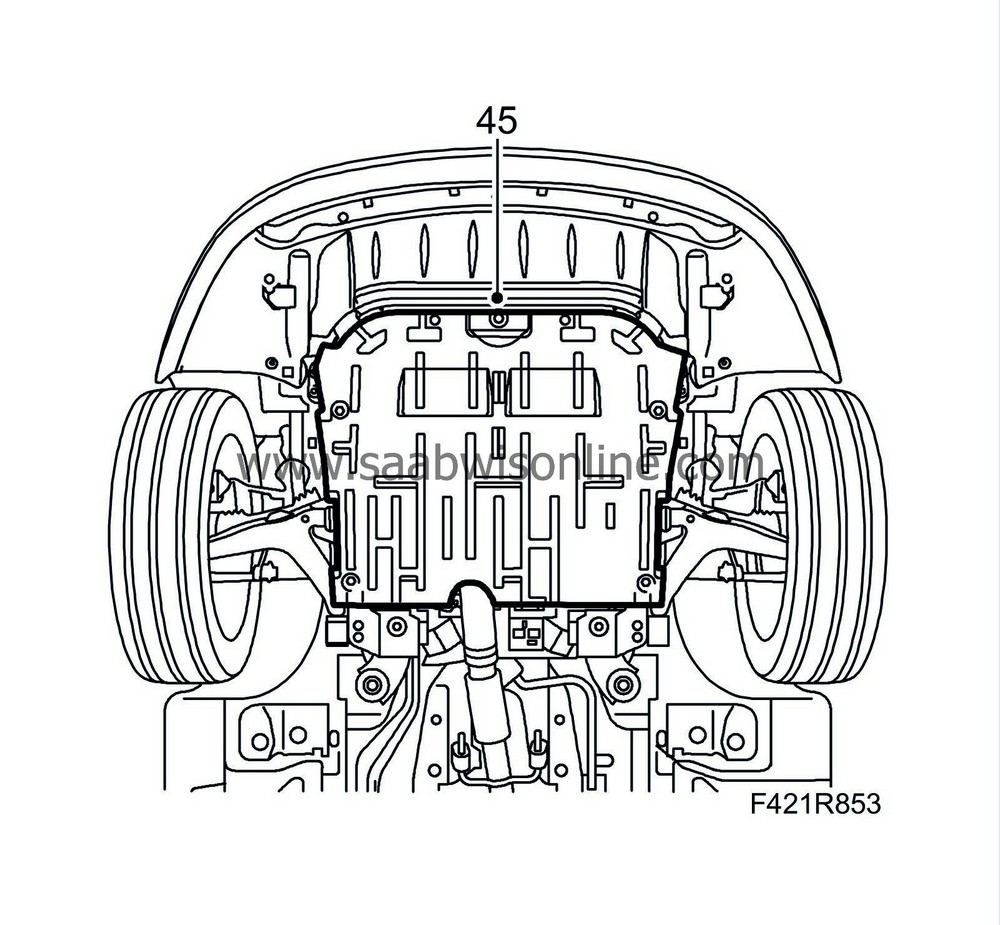
45.
|
Fit the lower engine cover.
|
|
46.
|
Remove the wing covers.
|


