PRE-RELEASE
Spare part engine, (complete engine), Z19DT
| Spare part engine, (complete engine), Z19DT |
| To remove |
| 1. |
Remove the power unit, see Power train removal.
|
|
| 2. |
Fit
32 025 020 Lifting eye
if not already fitted.
|
|
| 3. |
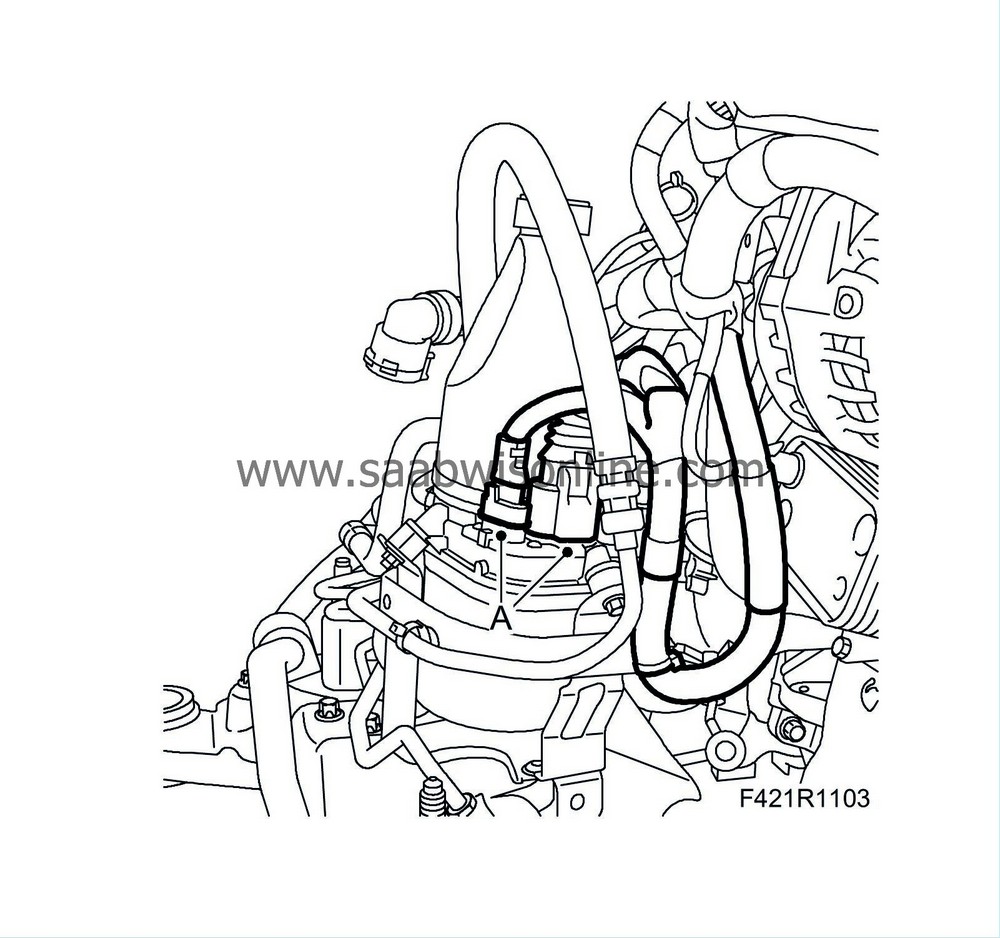
Remove the electrical connections from the EHPS unit (A).
|
|
| 4. |
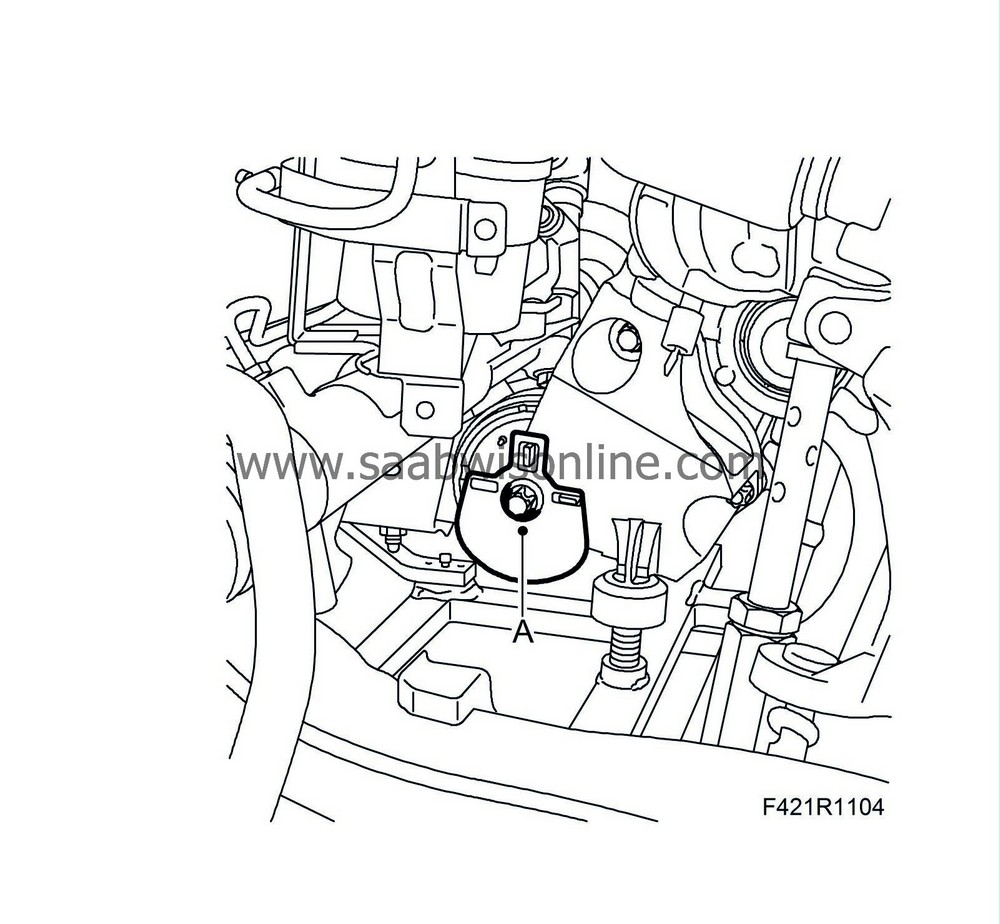
Remove the rear torque arm (A) from the subframe.
|
|
| 5. |
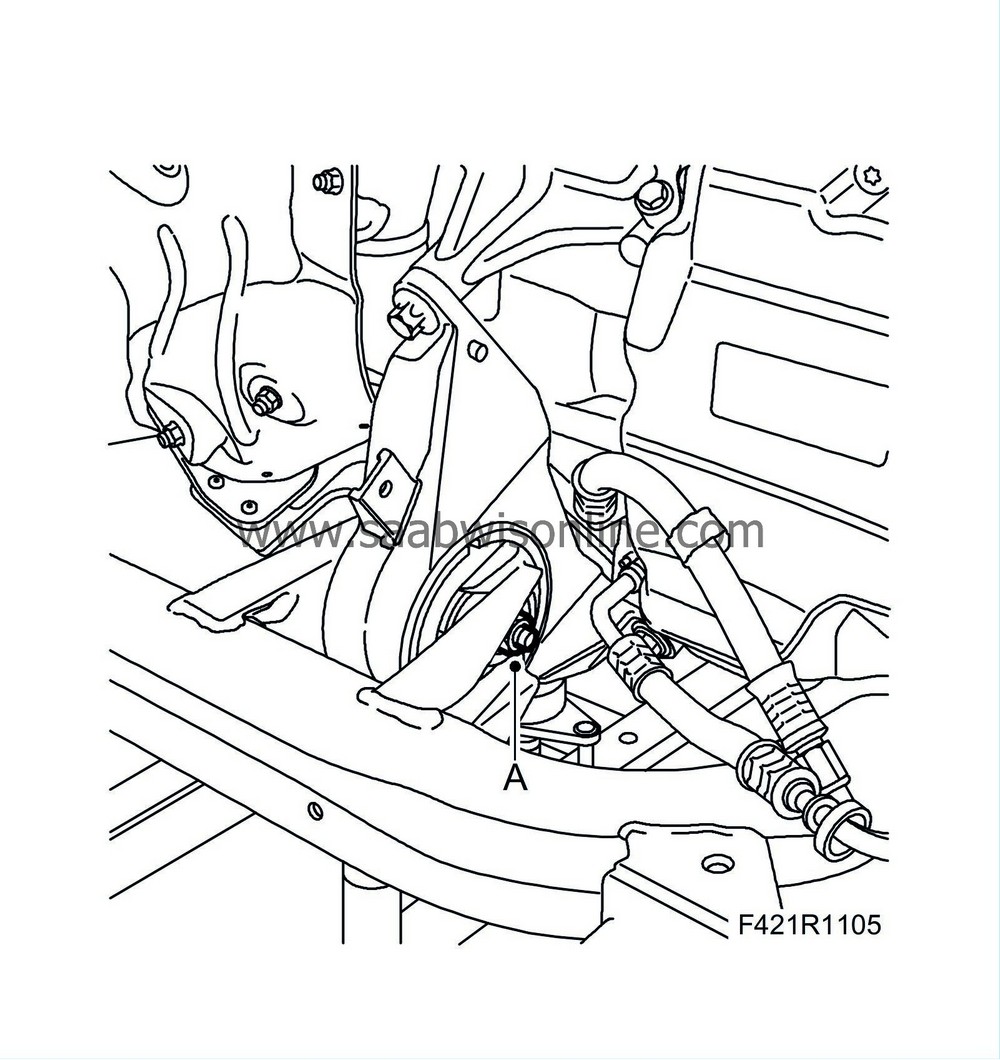
Remove the front torque arm (A) from the subframe.
|
|
| 6. |
Lift off the power unit from the subframe using
83 92 409 Lifting yoke
.
|
|
| 7. |
Position the powertrain on a suitable work surface.
|
|
| 8. |
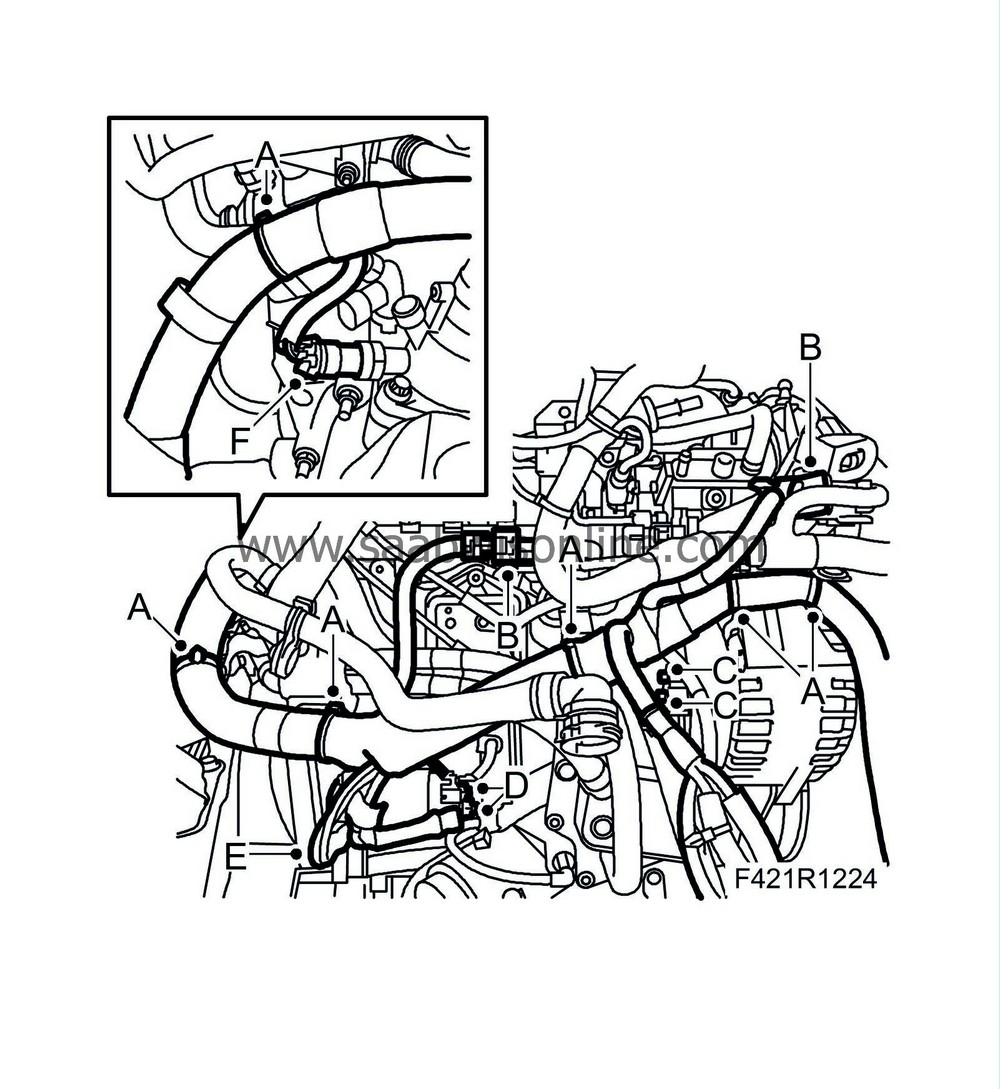
Remove the engine wiring harness.
|
|
| • |
Remove the clip (A).
|
| • |
Unplug the engine harness connector (B)
|
| • |
Detach the electrical connections of the alternator (C)
|
| • |
Detach the electrical connections of the starter motor (D)
|
| • |
Detach the ground cable (E)
|
| • |
Manual gearbox:
Unplug the connector of the reversing light switch (F).
|
| • |
Automatic transmission:
Unplug the TCM connector.
|
| • |
Remove the wiring harness from the engine
|
| 9. |
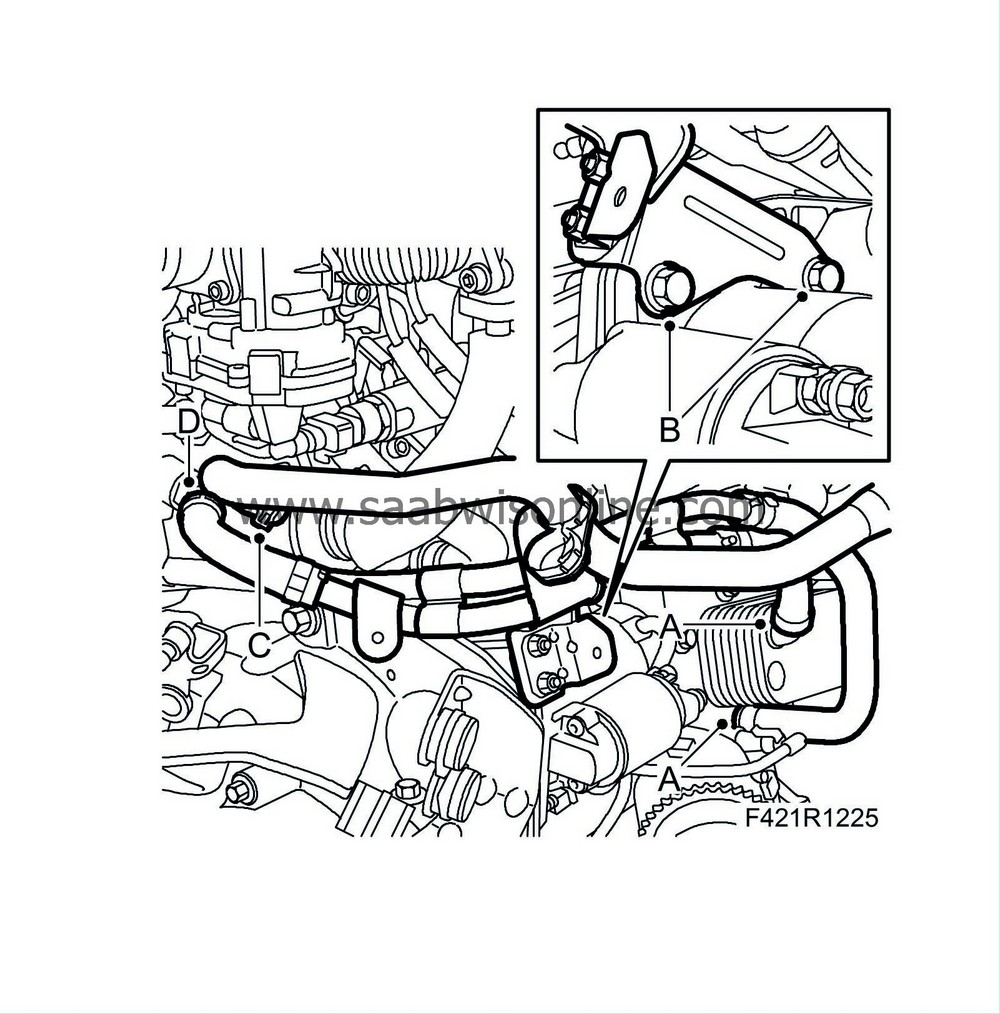
Detach the coolant lines.
|
|
| • |
Detach the coolant lines at the oil cooler (A)
|
| • |
Remove the bracket at the starter motor (B)
|
| • |
Detach the coolant line at the EGR cooler (C)
|
| • |
Detach the coolant line at the thermostat housing (D)
|
| • |
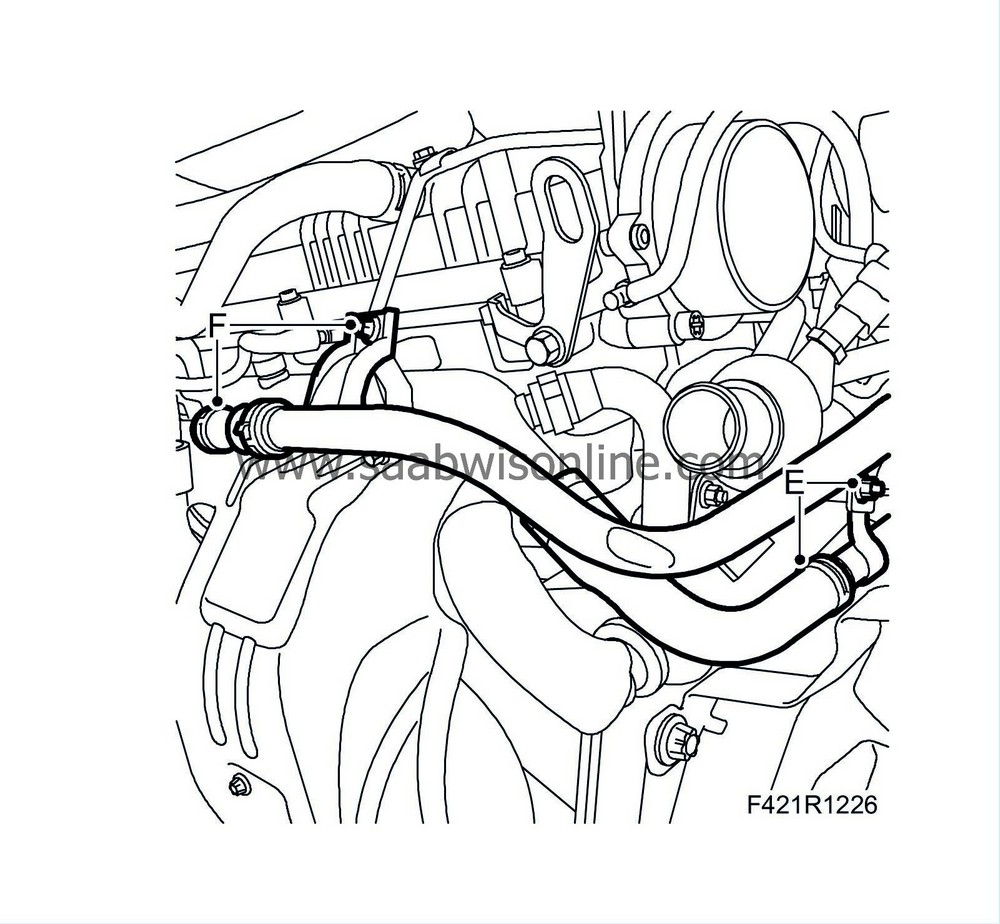
Remove the bolt and the coolant line at the coolant pipe (E)
|
| • |
Remove the bolt and the coolant line at the coolant pipe (F)
|
| 10. |
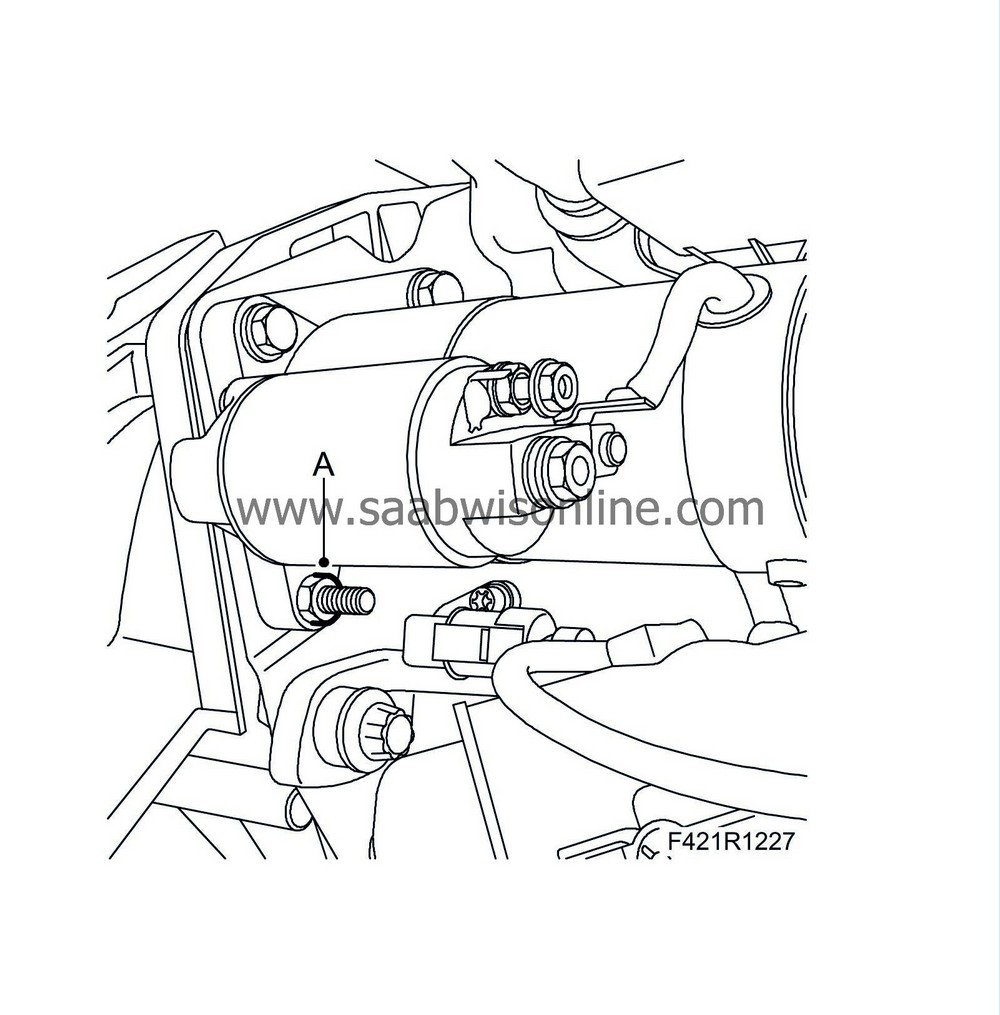
Remove the starter motor (A).
|
|
| 11. |
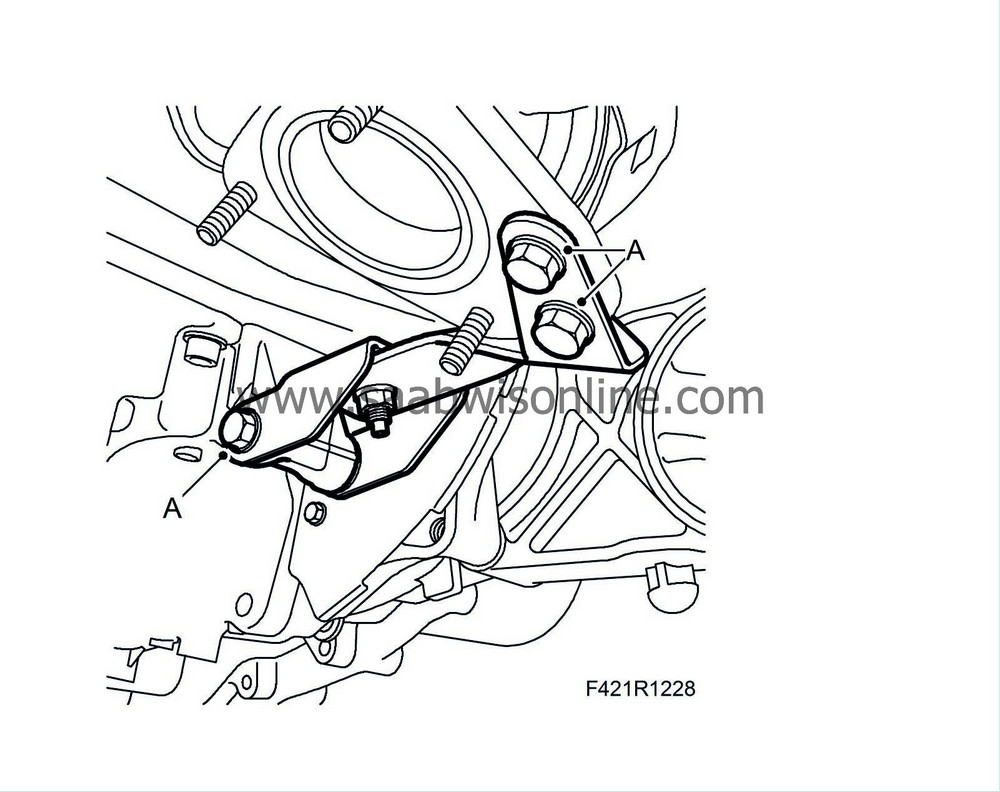
Remove the catalytic converter bracket (A).
|
|
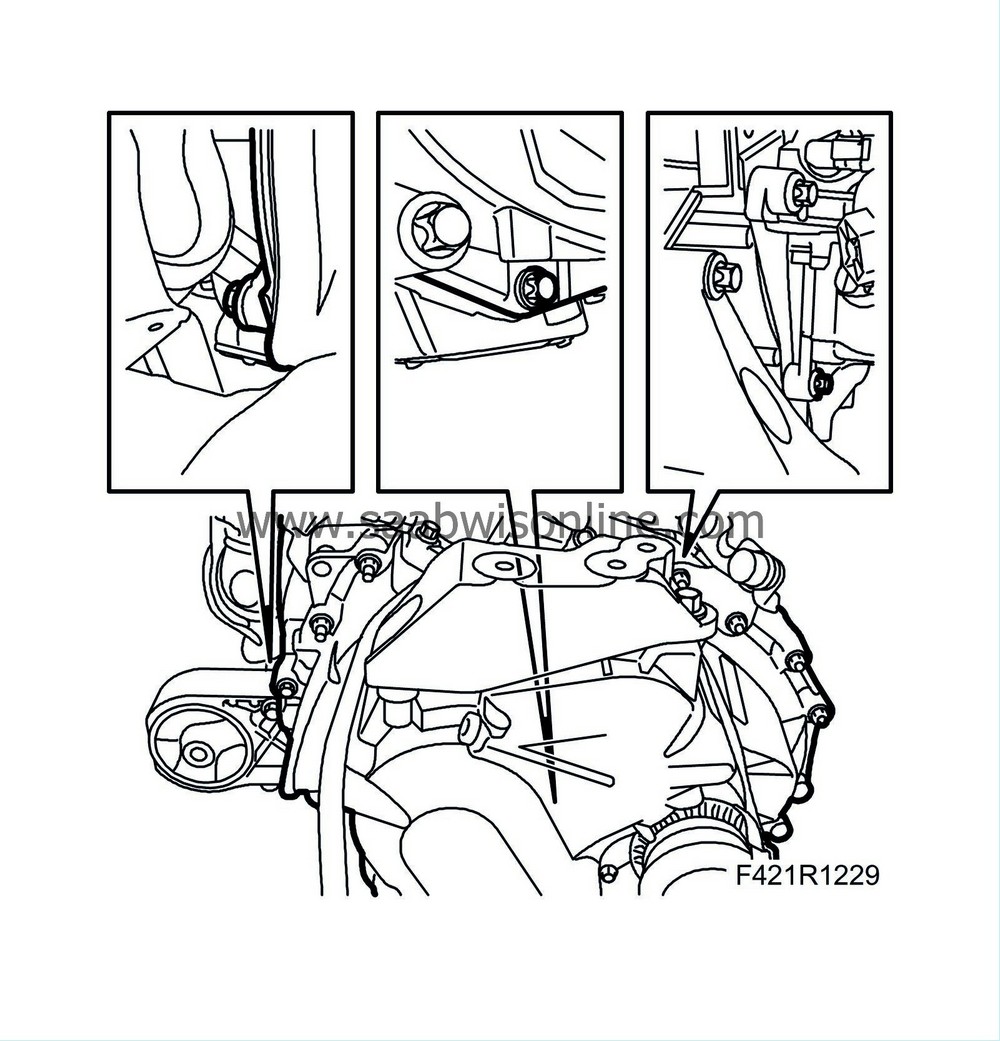
| 12. |
Remove the gearbox (A).
|
|
| 13. |
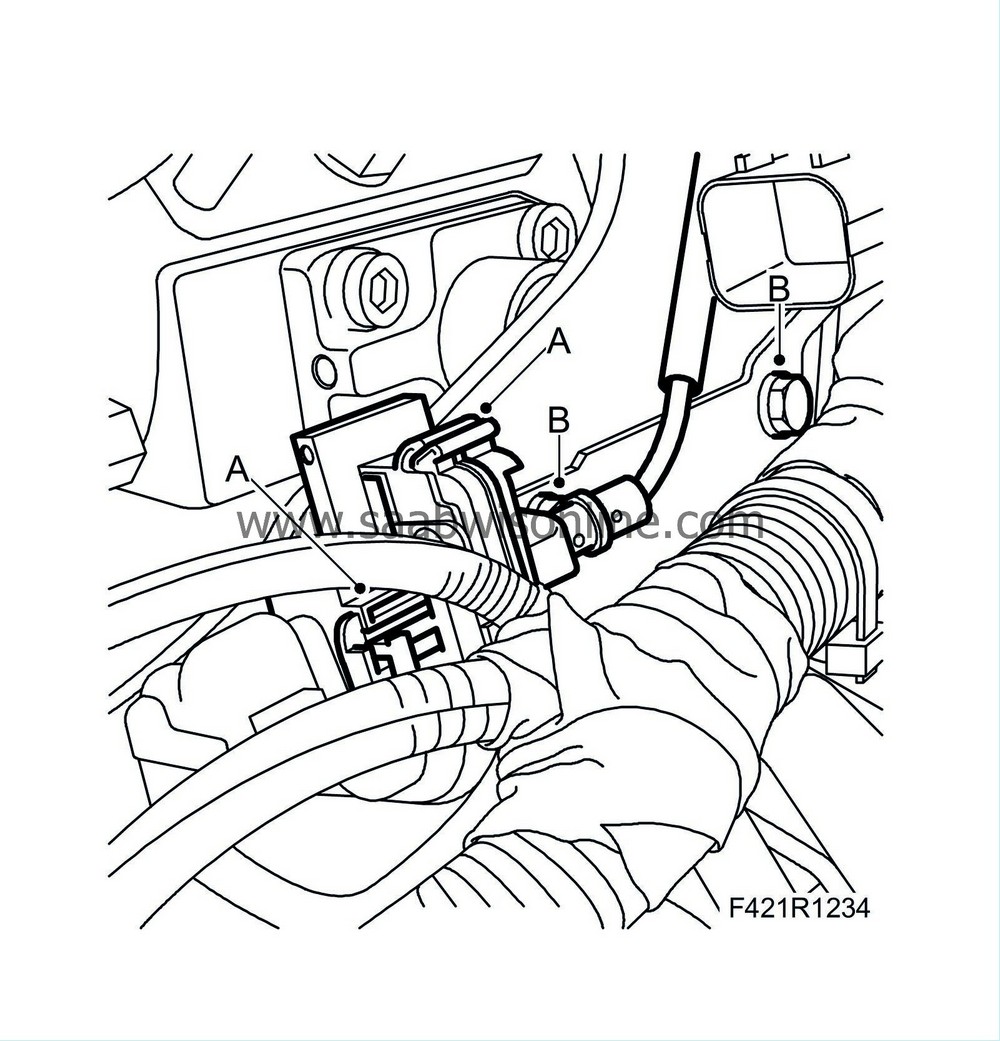
Remove the engine wiring bracket.
|
|
| • |
Open the clip and unplug the connector (A).
|
| • |
Remove the bolts (B) and move the wiring aside
|
| 14. |
Remove the alternator (A).
|
|
| 15. |
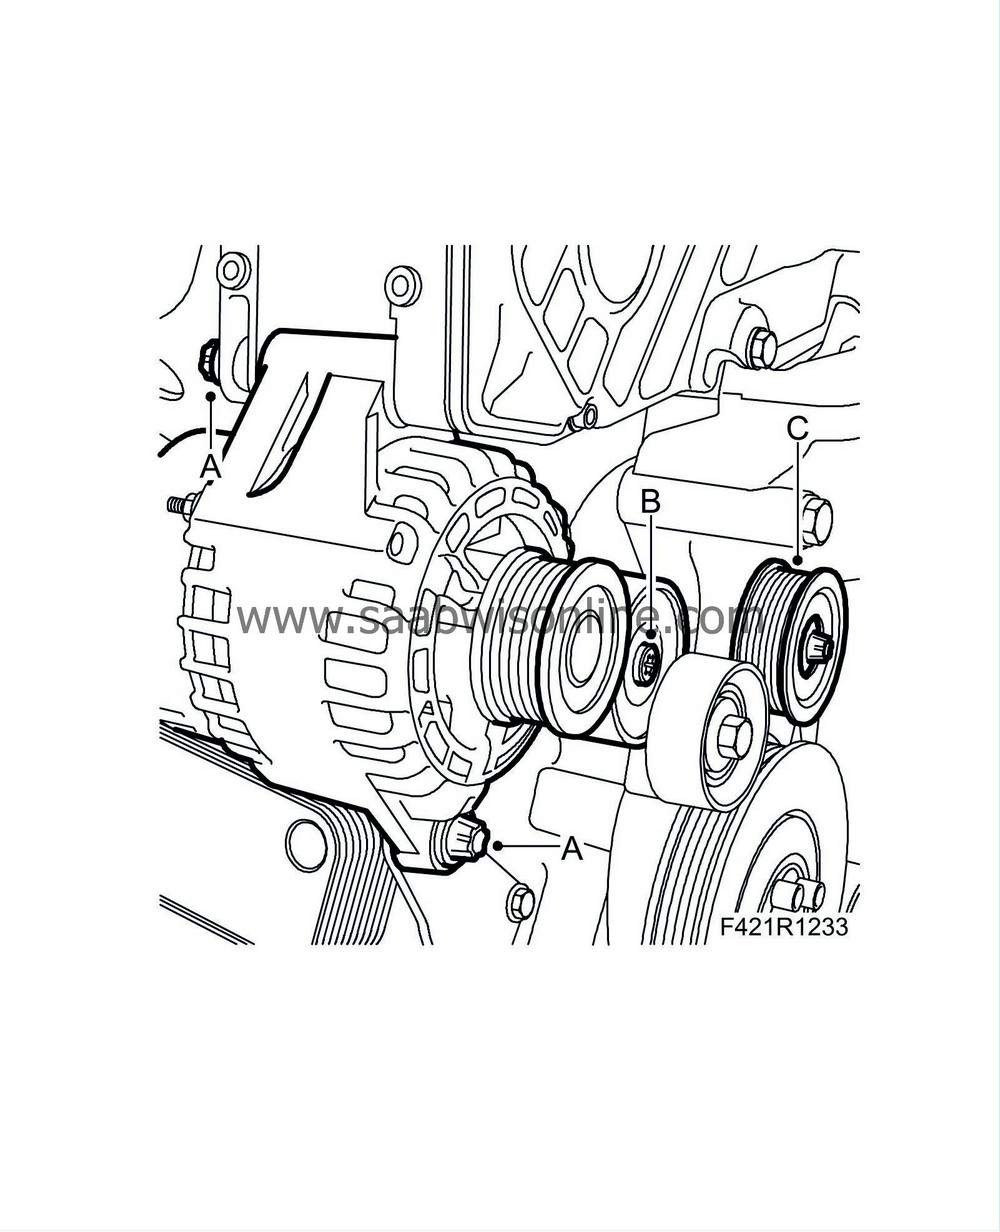
Remove the belt tensioner (A) and the upper impeller (B).
|
|
| 16. |
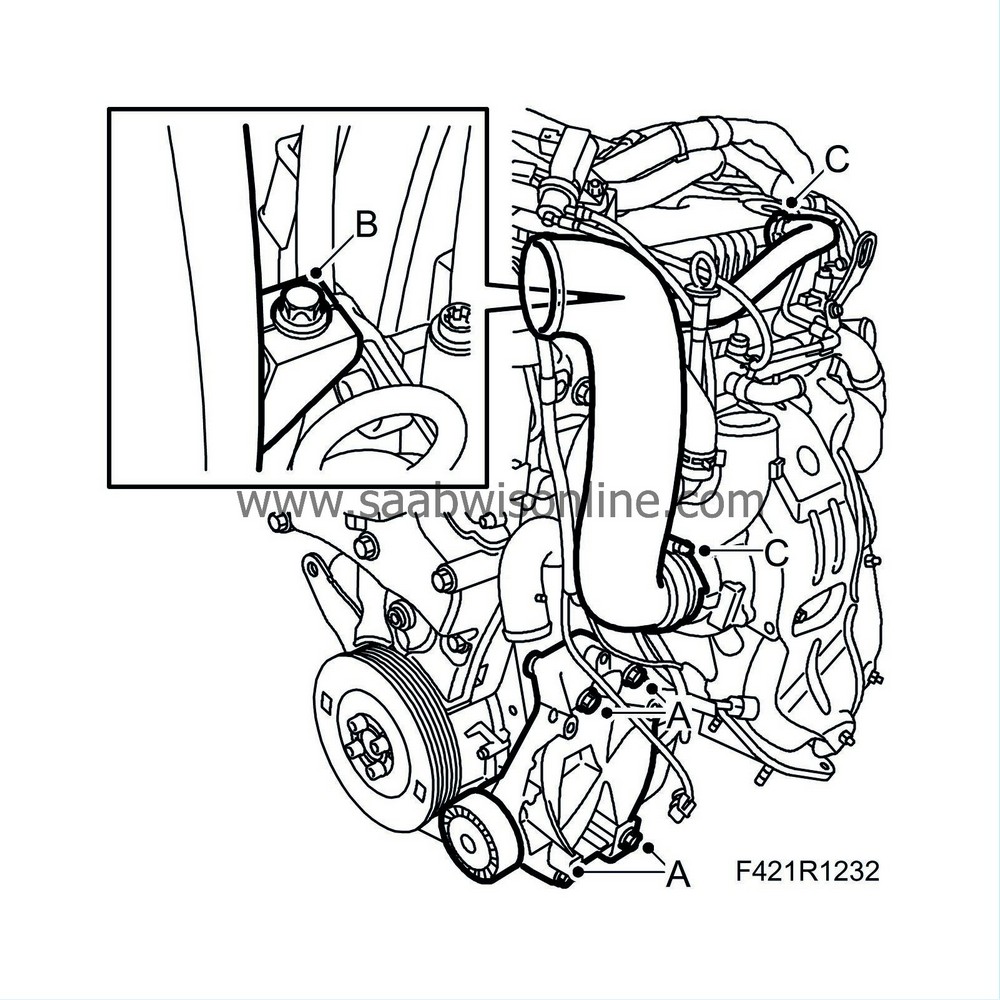
Detach the turbocharger intake manifold. Remove the A/C bracket (A).
|
|
| • |
Detach the hose at the camshaft cover (C)
|
| • |
Remove the bolt (B)
|
| • |
Detach the hose clip at the turbocharger and remove the intake manifold (C)
|
| 17. |
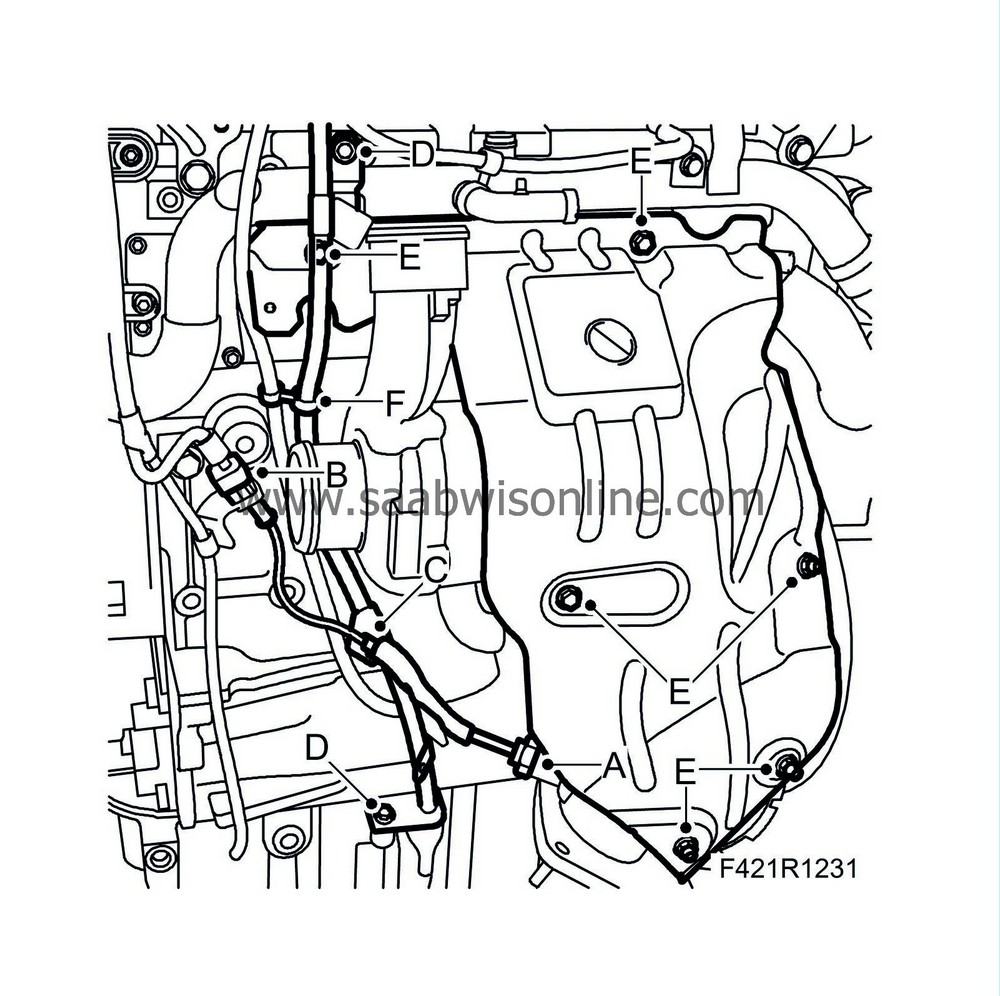
Remove the vacuum hose clips from the dipstick guide tube (F).
|
|
| 18. |
Remove the temperature sensor.
|
|
| • |
Remove the temperature sensor (A).
|
| • |
Unplug the connector (B)
|
| • |
Remove the cable and bracket (C)
|
| 19. |
Remove the dipstick with tube (D).
|
|
| 20. |
Remove the heat shield (E)
|
|
| 21. |
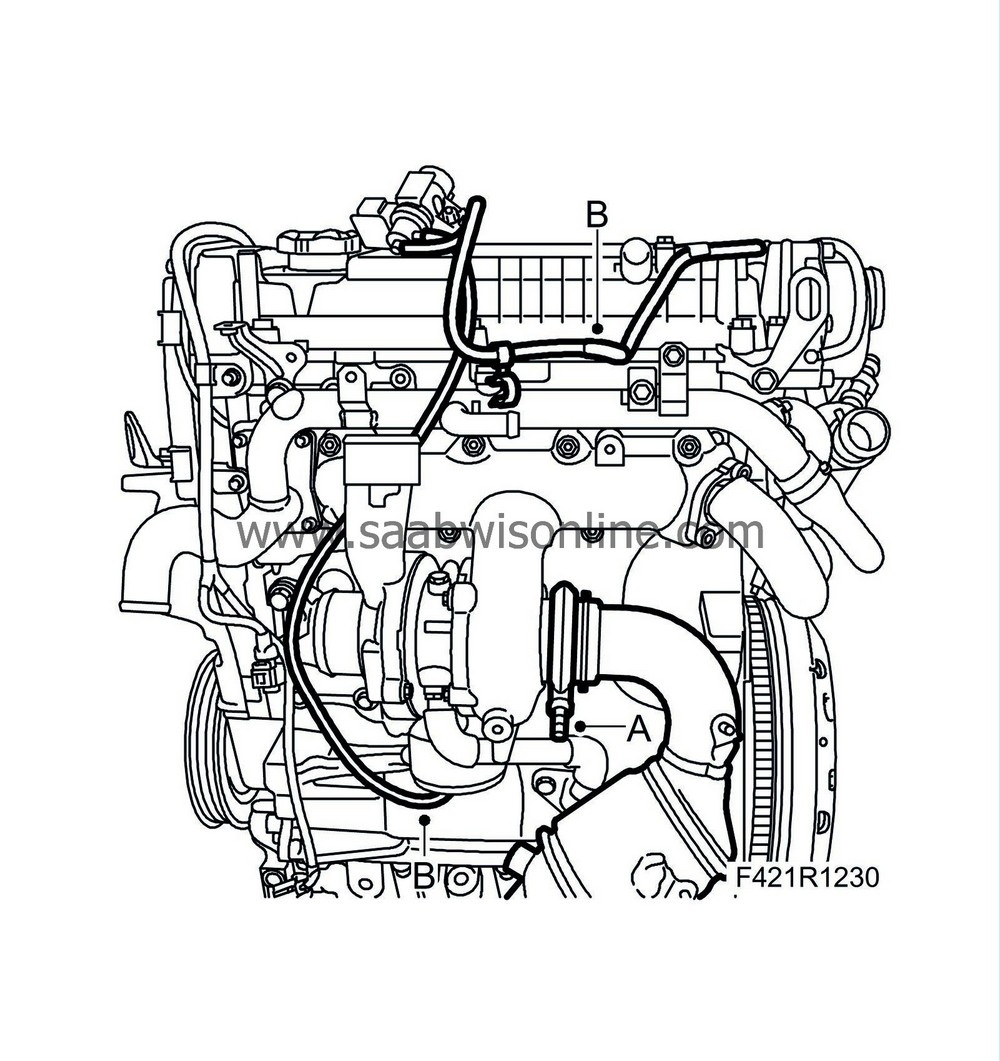
Remove the catalytic converter (A)
|
|
| 22. |
Detach the vacuum hoses from the solenoid valve (B).
|
|
| To fit |
| 1. |
Unpack the spare parts.
|
|
| 2. |
Secure the engine in an engine lift.
|
|
| 3. |
Position the engine on a suitable work surface.
|
|
| 4. |
Remove the engine from the engine lift.
|
|
| 5. |
Attach the vacuum hoses to the solenoid valve (B).

|
|
| 6. |
Fit the catalytic converter (A)
|
|
| • |
Clean the sealing surfaces on the catalytic converter
|
| • |
Fit the catalytic converter using a new gasket. Hold the clamp open slightly with circlip pliers. Turn the clamp so that the nut points down (A)
|
||||||||||
| 7. |
Fit the heat shield (E).

|
|
| 8. |
Fit the dipstick with tube (D).
|
|
| 9. |
Fit the temperature sensor
|
|
| • |
Fit the temperature sensor (A).
|
| • |
Connect and fit the connector (B).
|
| • |
Fit the cable to the clip (C).
|
| 10. |
Fit the vacuum hose clips to the dipstick guide tube (F).
|
|
| 11. |
Fit the turbocharger intake manifold.
|
|
| • |
Fit the intake manifold on the turbocharger and tighten the hose clips (C).
|
| • |
Fit the bolt (B)
|
| 12. |
Fit the A/C compressor bracket (A).

|
|
| 13. |
Fit the belt tensioner (A) and the upper impeller (C).

|
|
| 14. |
Fit the alternator (A)
|
|
| 15. |
Fit the engine wiring bracket.

|
|
| • |
Fit the bracket (B)
|
| • |
Plug in the connector and fit the connector in the bracket (A)
|
| 16. |
Fit the gearbox (A).

|
|
| 17. |
Fit the catalytic converter bracket (A).

|
|
| 18. |
Fit the lower bolt of the starter motor (A).

|
|
| 19. |
Attach the coolant lines.

|
|
| • |
Fit the bolt and the coolant line at the coolant pipe (F).
|
| • |
Fit the bolt and the coolant line at the coolant pipe (E).
|
| • |
Attach the coolant line at the thermostat housing (D).

|
| • |
Attach the coolant line at the EGR cooler (C).
|
| • |
Fit the bracket at the starter motor (B).
|
| • |
Attach the coolant lines at the oil cooler (A).
|
| 20. |
Fit the engine wiring harness.

|
|
| • |
Position the wiring harness on the engine
|
| • |
Automatic transmission:
Plug in the TCM connector
|
| • |
Man:
Attach the connector of the reversing light switch (F).
|
| • |
Attach the ground cable (E).
|
| • |
Attach the electrical connections of the starter motor (D)
|
| • |
Attach the electrical connections of the alternator (C)
|
| • |
Plug in the engine harness connector (B)
|
| • |
Fit the clip (A).
|
| 21. |
Raise the powertrain from the work area using an engine lift and
83 92 409 Lifting yoke
.
|
|
| 22. |
Lift the powertrain to the subframe.
|
|
| 23. |
Fit the front torque arm (A) to the subframe.

|
|
| 24. |
Fit the rear torque arm (A) to the subframe.

|
|
| 25. |
Attach the electrical connections to the EHPS unit (A).

|
|
| 26. |
Remove
32 025 020 Lifting eye
if fitted.
|
|
| 27. |
Fit the powertrain, see Powertrain, to fit.
|
|


