PRE-RELEASE
Replacing connecting tab on electrically heated rear window, CV
| Replacing connecting tab on electrically heated rear window, CV |
| To remove |
| 1. |
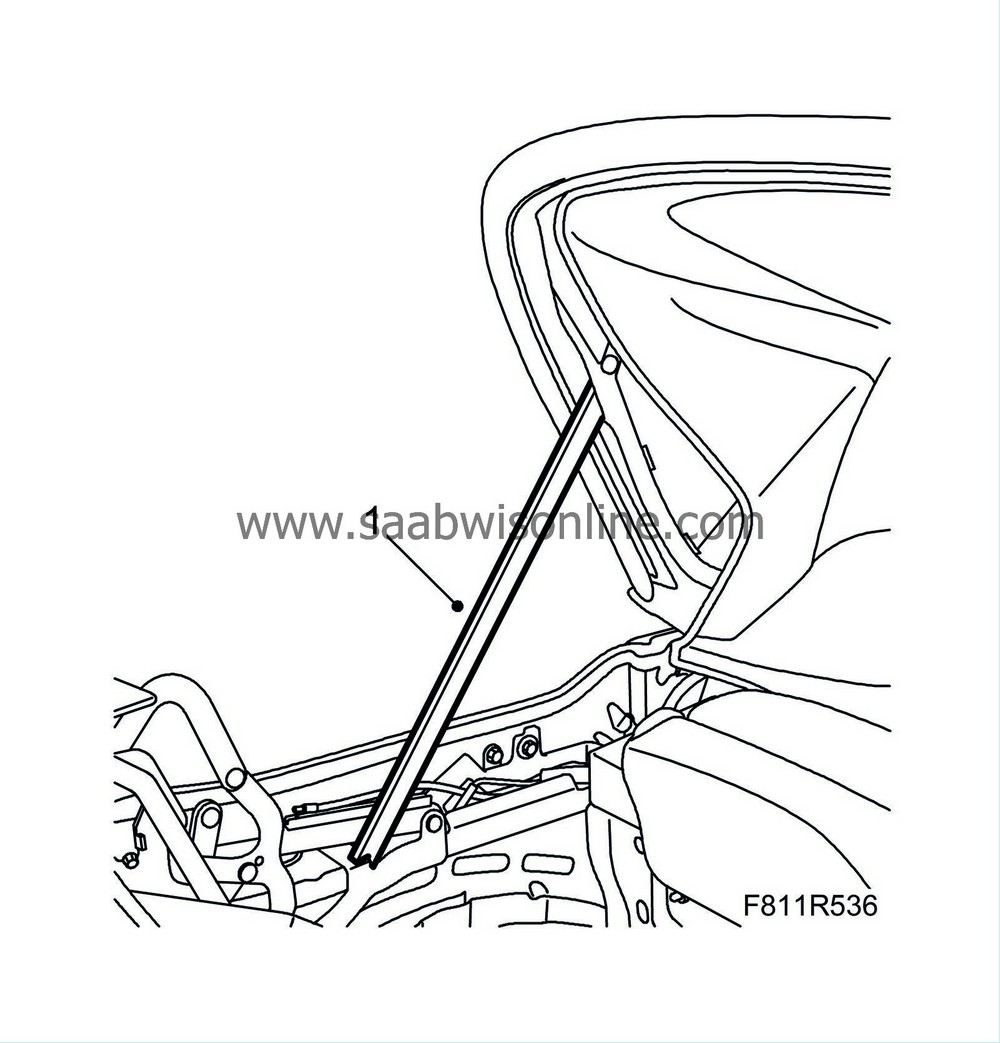
Run the sixth bow to the raised position and support it with
82 93 847 Soft top support
.
|
|
| 2. |
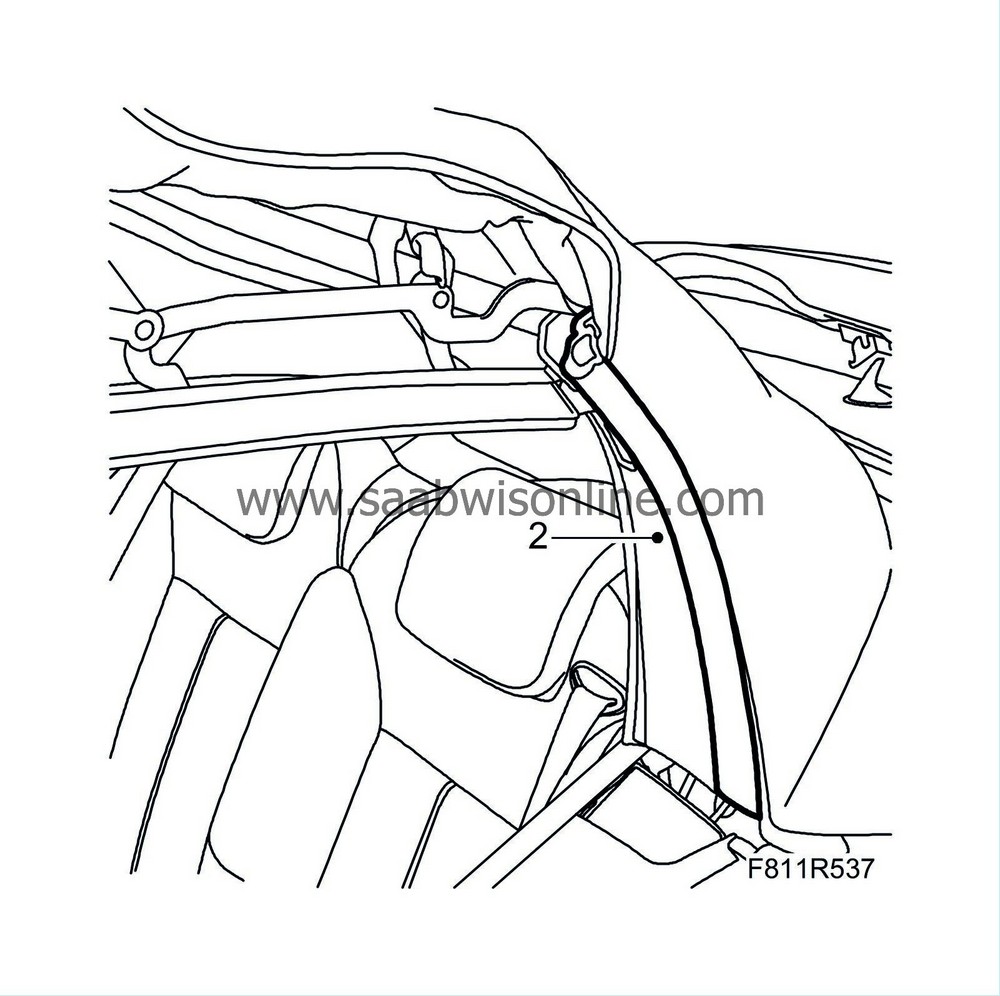
Undo the rear rail seal by pulling it out of the centre part of the U-shaped rail and loosening it a bit up toward the sixth bow.
|
|
| 3. |
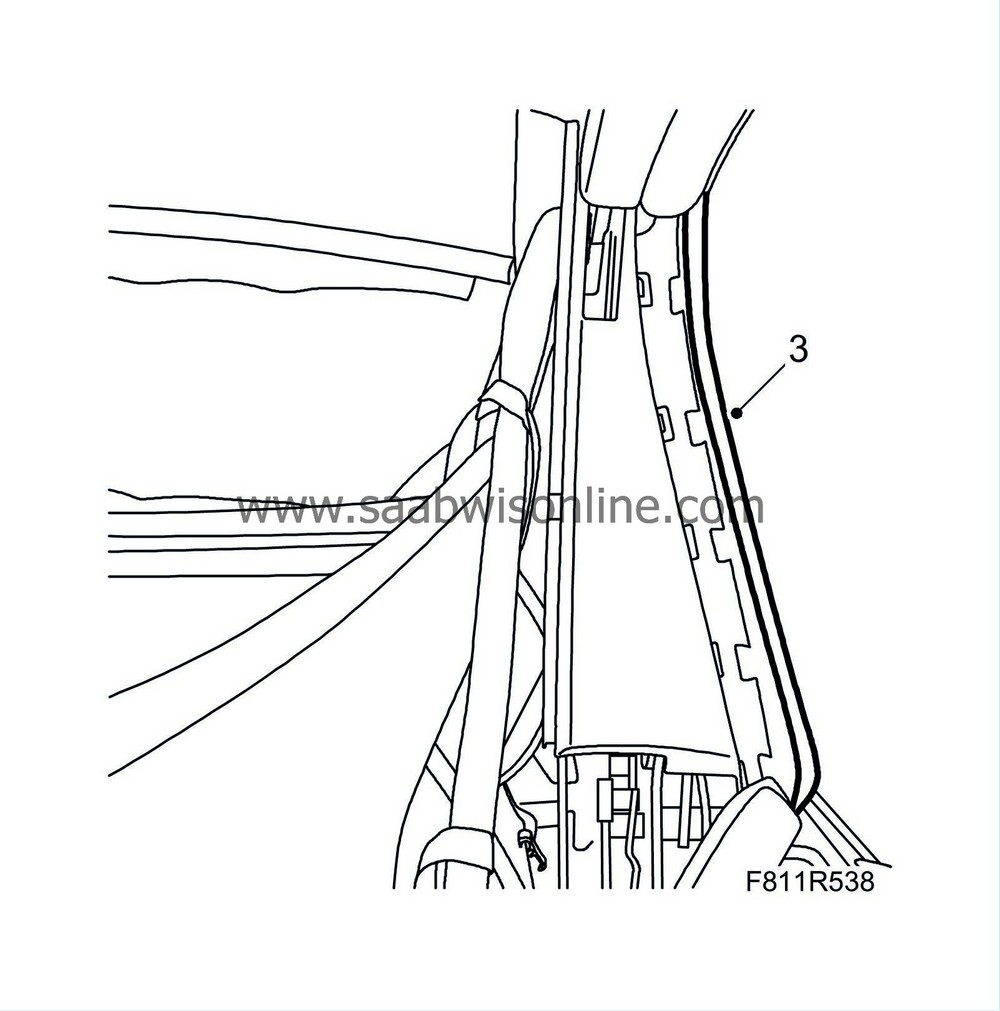
Unhook the outer roof attaching profile from the rear rail.
|
|
| 4. |
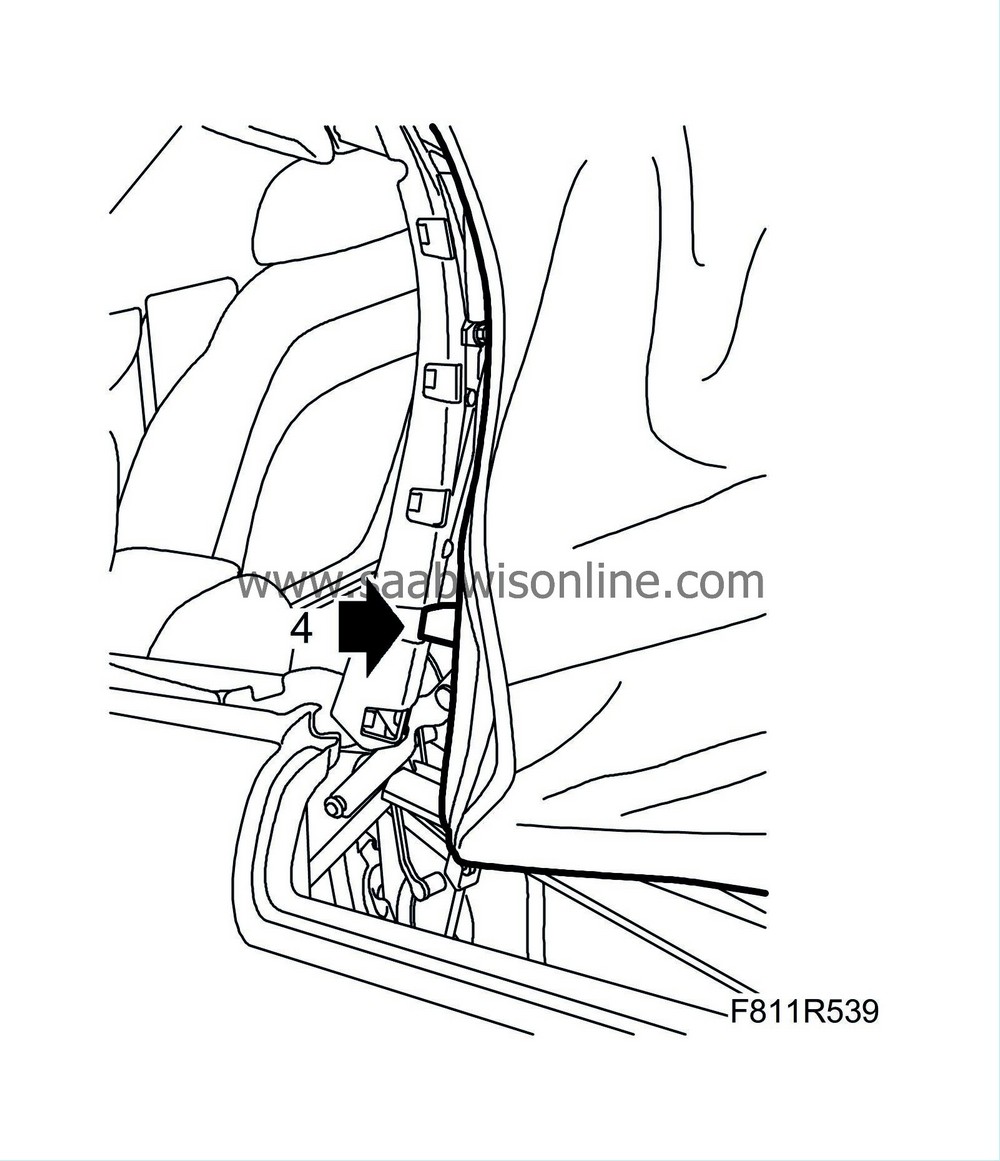
Remove the Velcro fastener for the rear rails.
|
|
| 5. |
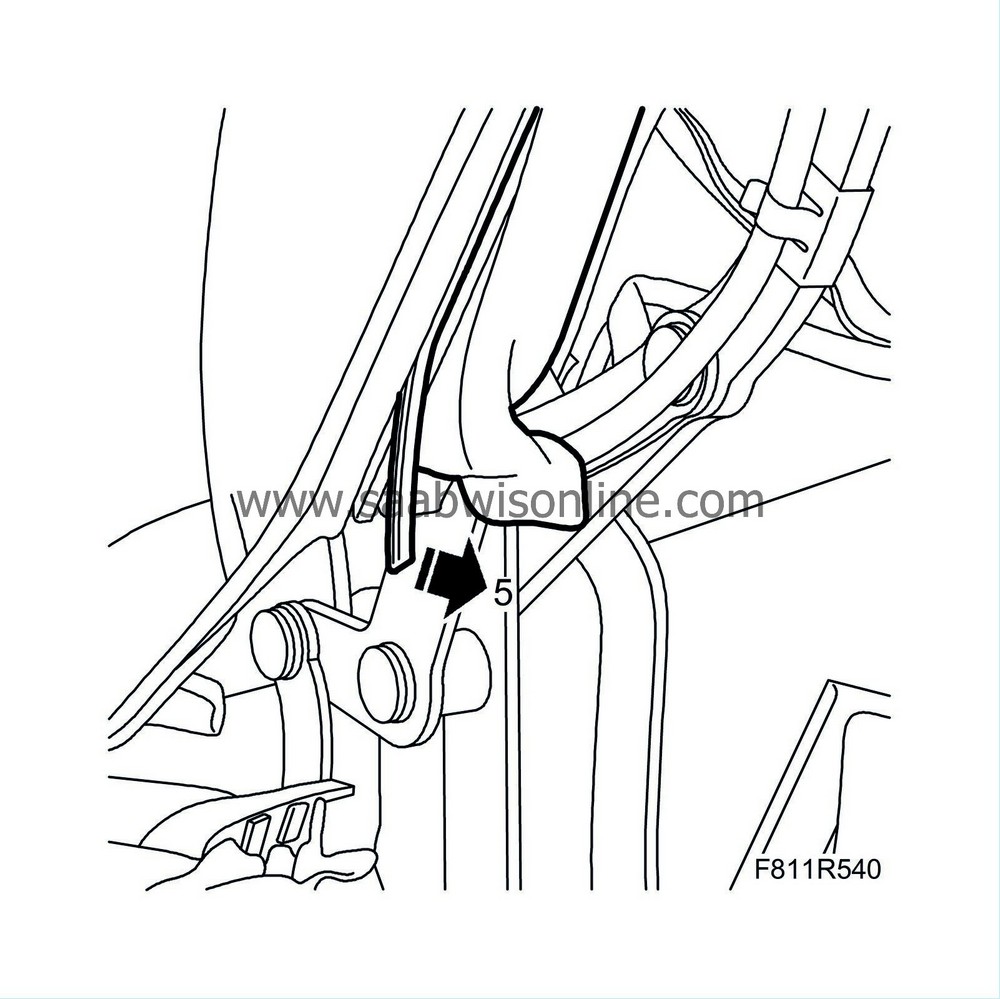
Pull out the sixth bow locking strip up to the rear window on the sixth bow. Then remove outer roof edging strip from the bow up to the rear window on the sixth bow.
|
|
| 6. |
Fold up the outer roof slightly.
|
|
| 7. |
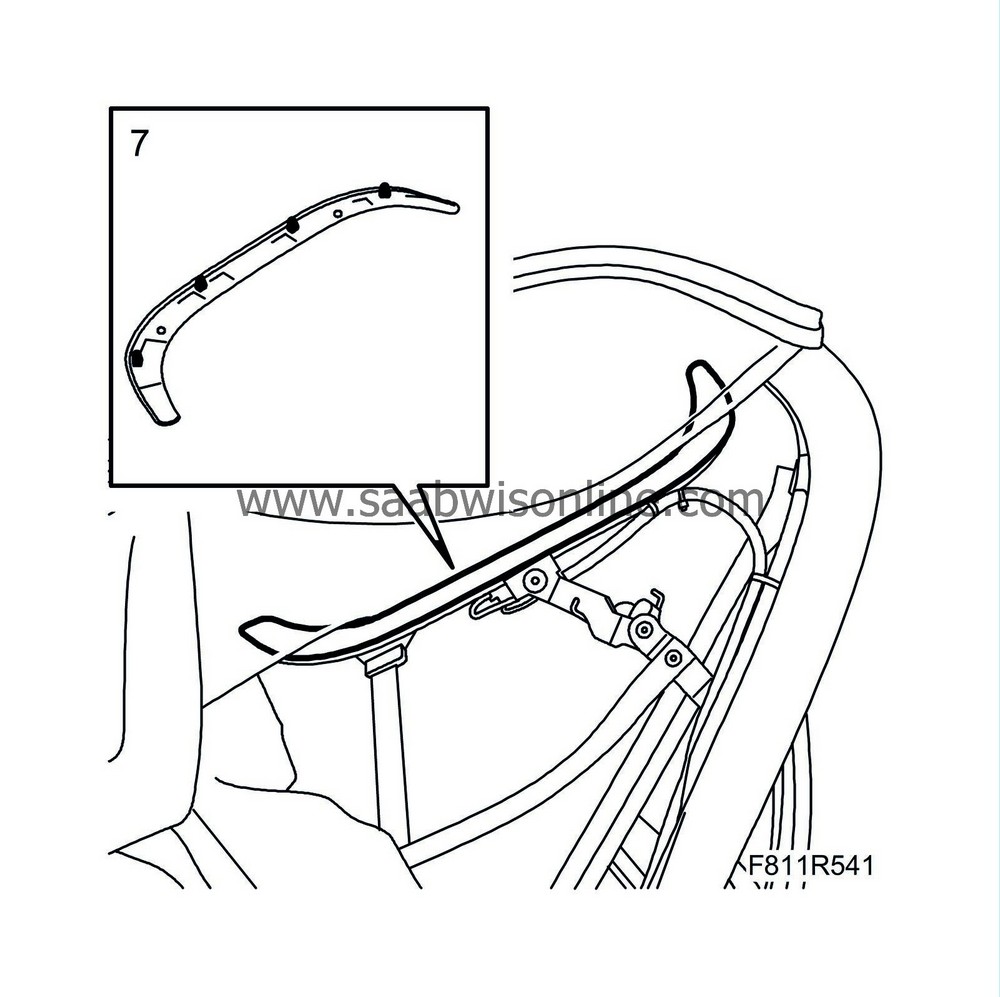
Remove the inner plastic rail toward the window.
|
|
| 8. |
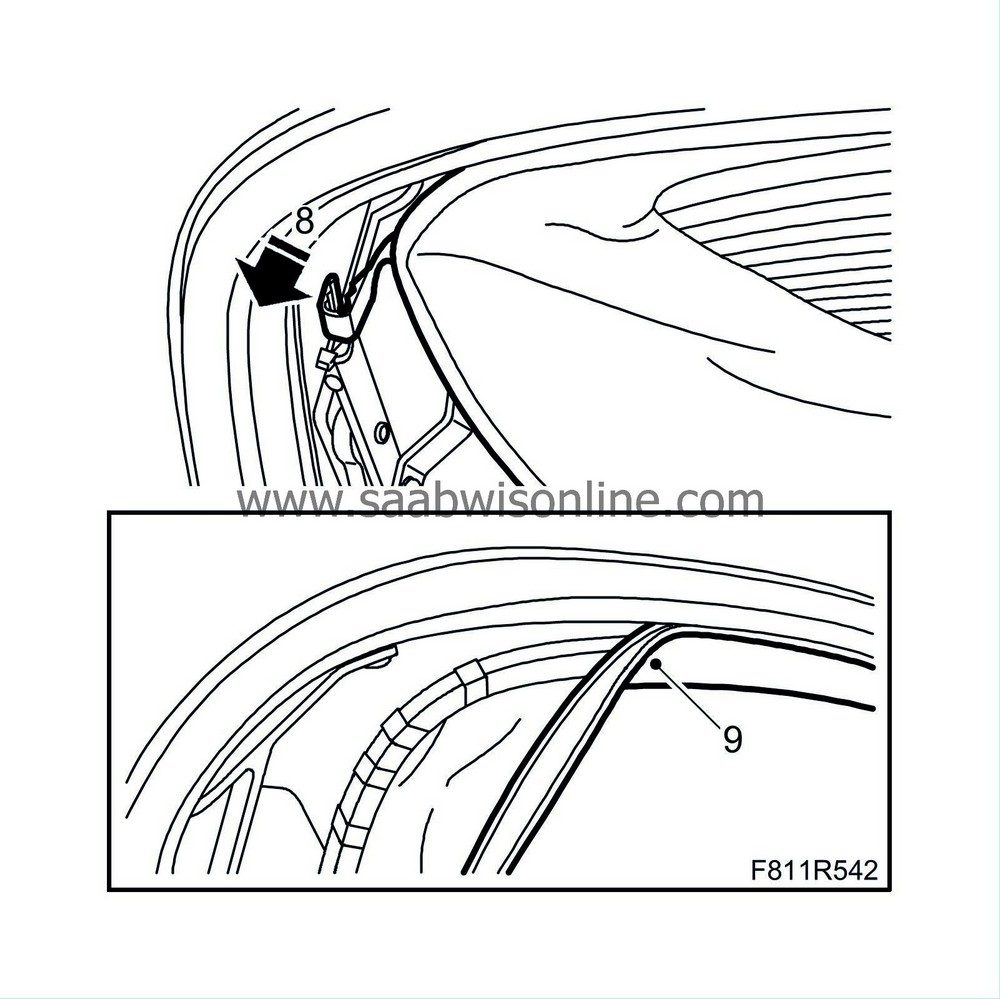
Undo the headlining plastic clip.
|
|
| 9. |
Pull the headlining edging strip from the sixth bow groove up a bit toward toward the sixth bow.
|
||||||||||
| 10. |
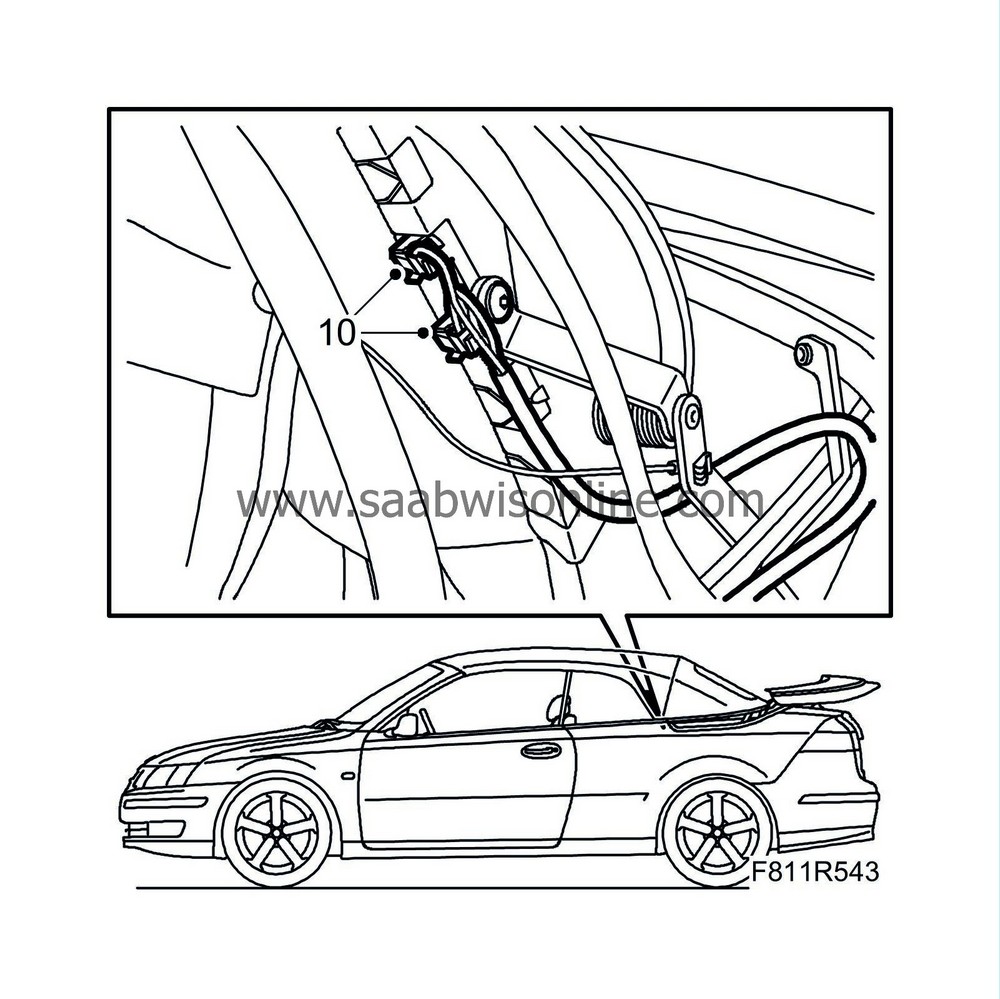
Unplug the connector from the connecting tab.
|
|
| 11. |
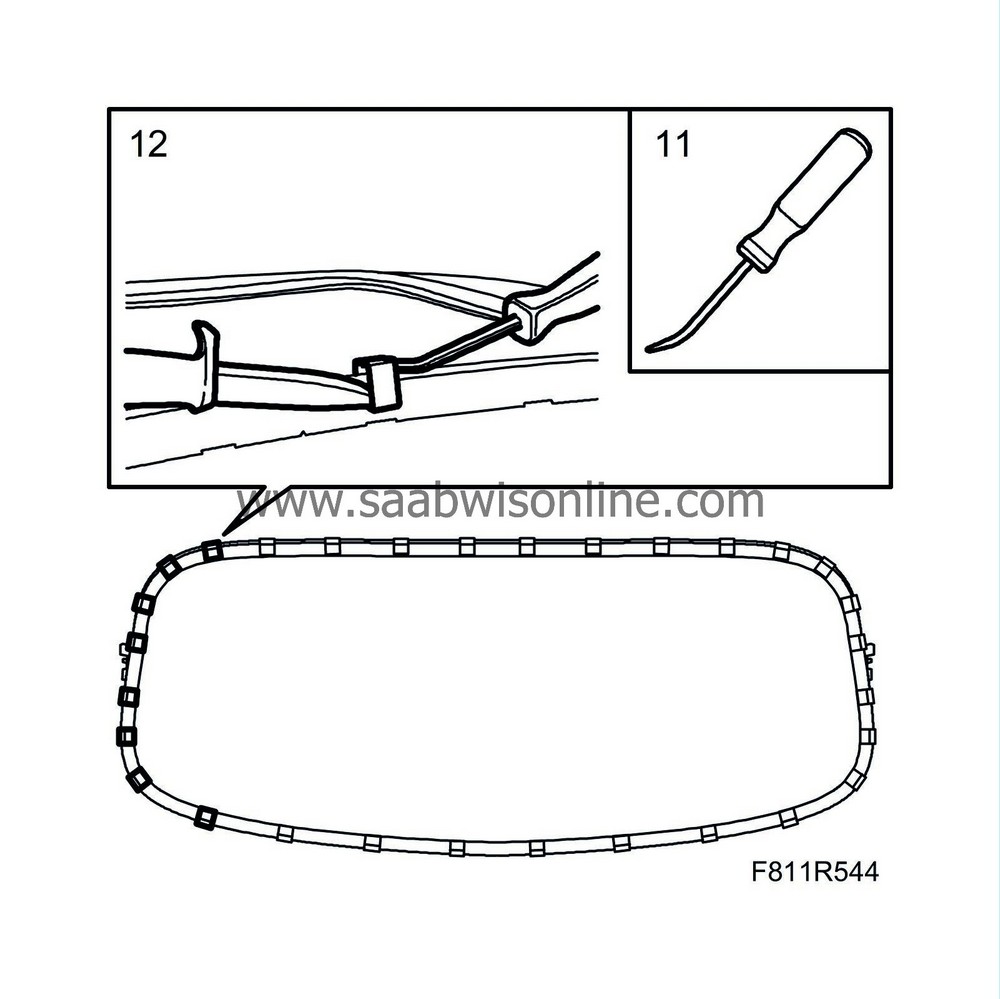
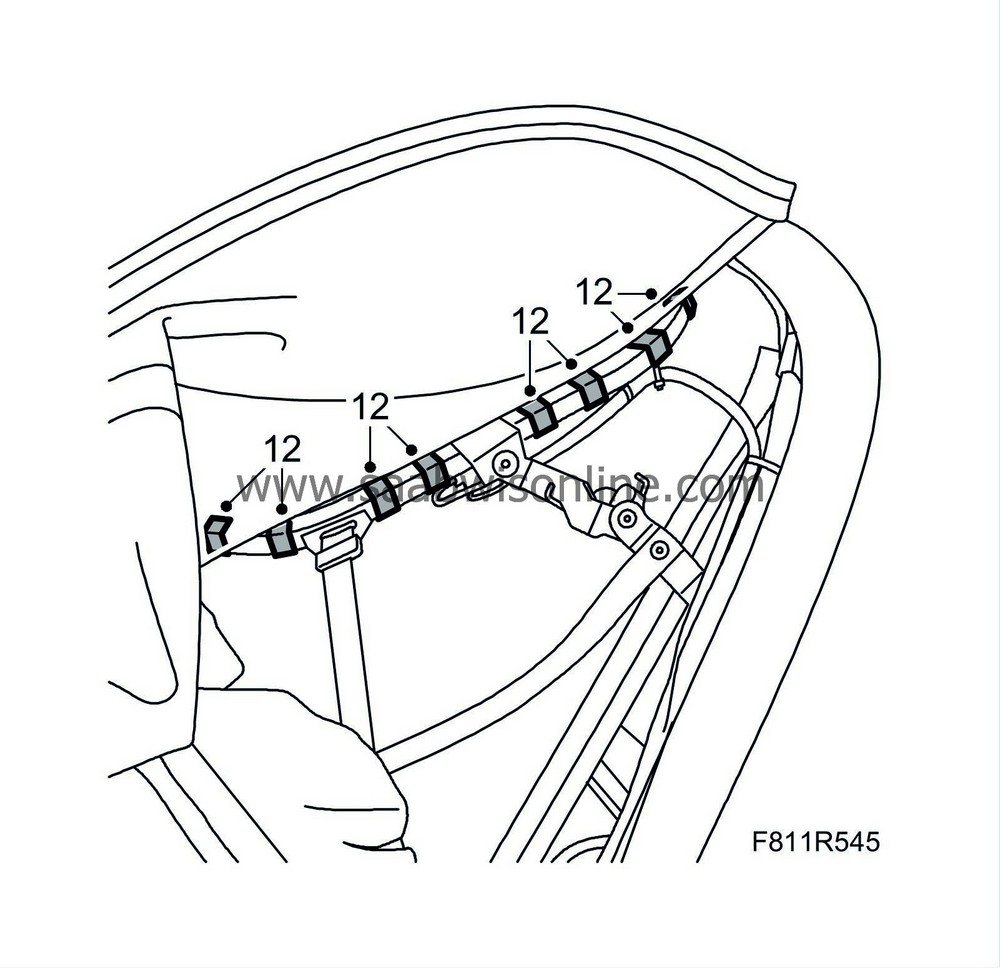
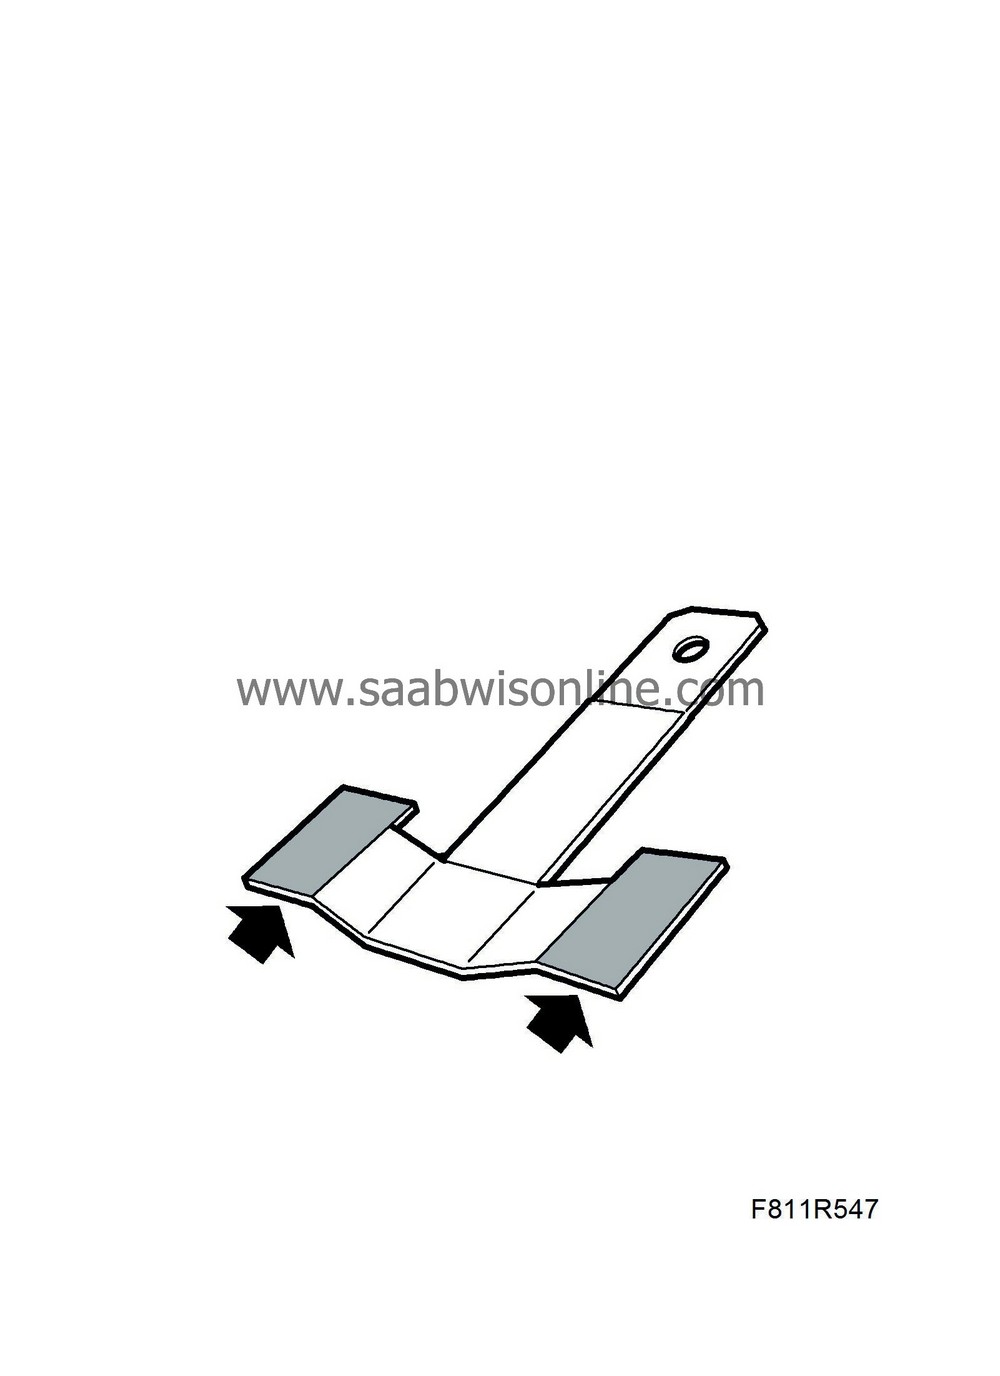
In order to access the switch actuators, some of the window clips must be removed. Made a tool as illustrated.
|
||||||||||
| 13. |
Lift up the window frame. Pull and move down the rubber moulding so that the contact points of the window are accessible.
|
|
| 14. |
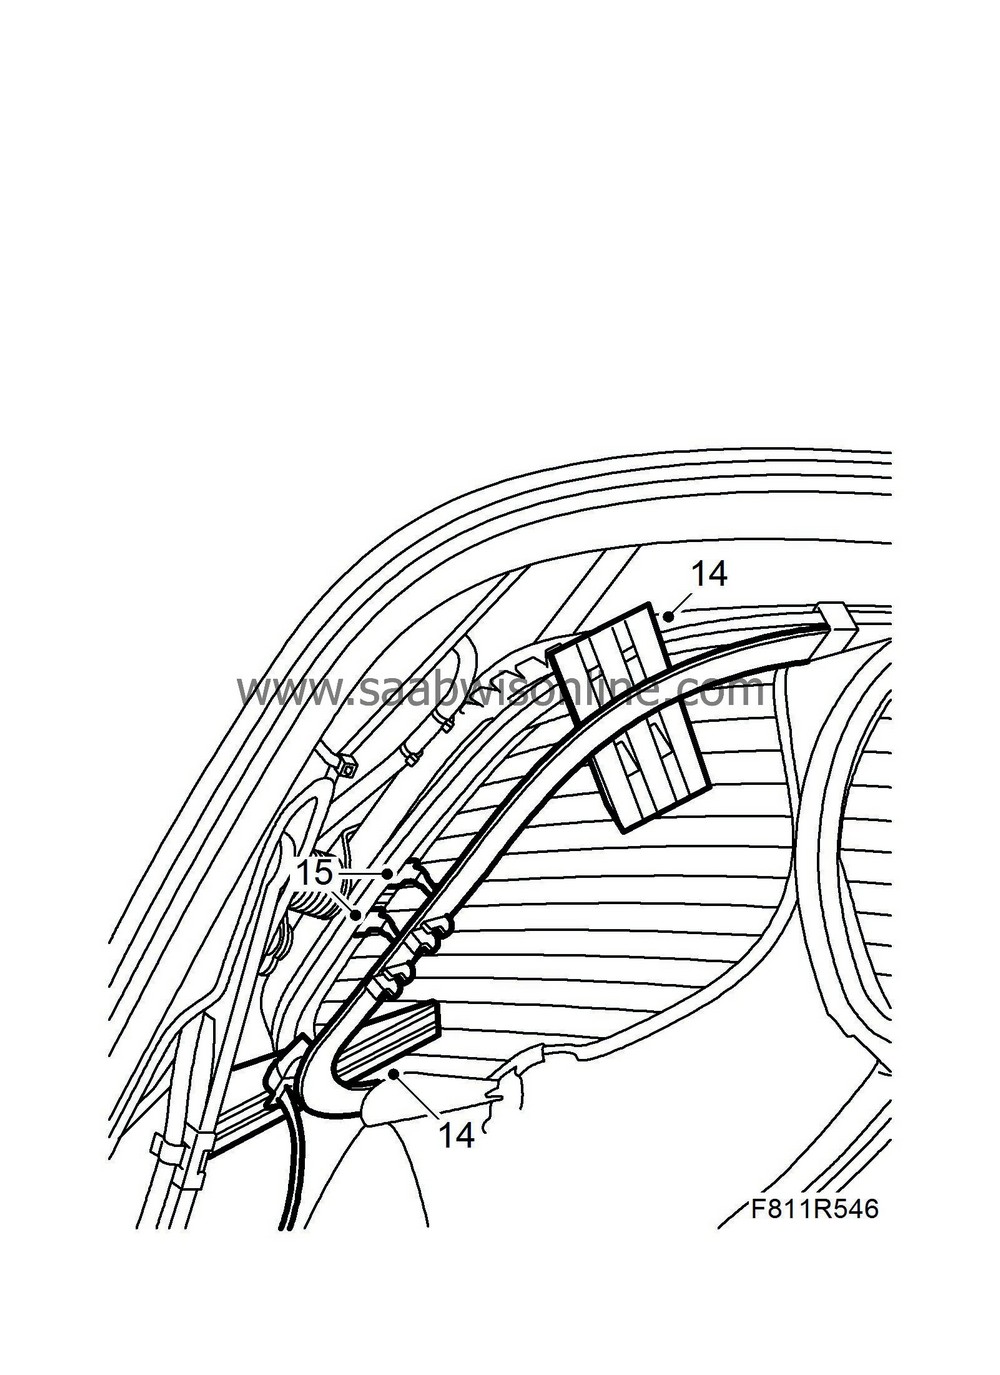
Carefully place two wedges between the window and the frame.
|
|
| 15. |
Remove the switch actuator. Use a sharp knife to carefully remove as much of the old solder from the window as possible without damaging the silver plating (the conductive material). Then even out the surface of the window contact points so they are smooth.
|
|
| 16. |
Polish the surface with a fine abrasive cloth where the new connecting tab is to be glued.
|
|
| To fit |
| 1. |
Clean the new connecting tab and the window with Teroson FL 875.
Also clean the surface where the adhesive is to be mixed. |
|
| 2. |
Use
Adhesive, Chemtronics CW 2400
. Squeeze about 15 mm out of each tub and mix thoroughly.
|
|
| 4. |
Place the new connecting tab in the same position as the old one. Make sure the adhesive flows up against the side of the connecting tab.
Hold the connecting tab in place using a clip with a weak spring. Heat carefully for 15 minutes with the hot-air gun. This time applies when the ambient temperature is at least 20°C (68°F). |
|
| 5. |
Wait until the window and connecting tab have cooled before attaching components and plugging in connectors.
|
|
| 6. |
Remove the clip and the wedges.
|
|
| 7. |
Fit the window's rubber moulding.
|
|||||||||
| 8. |
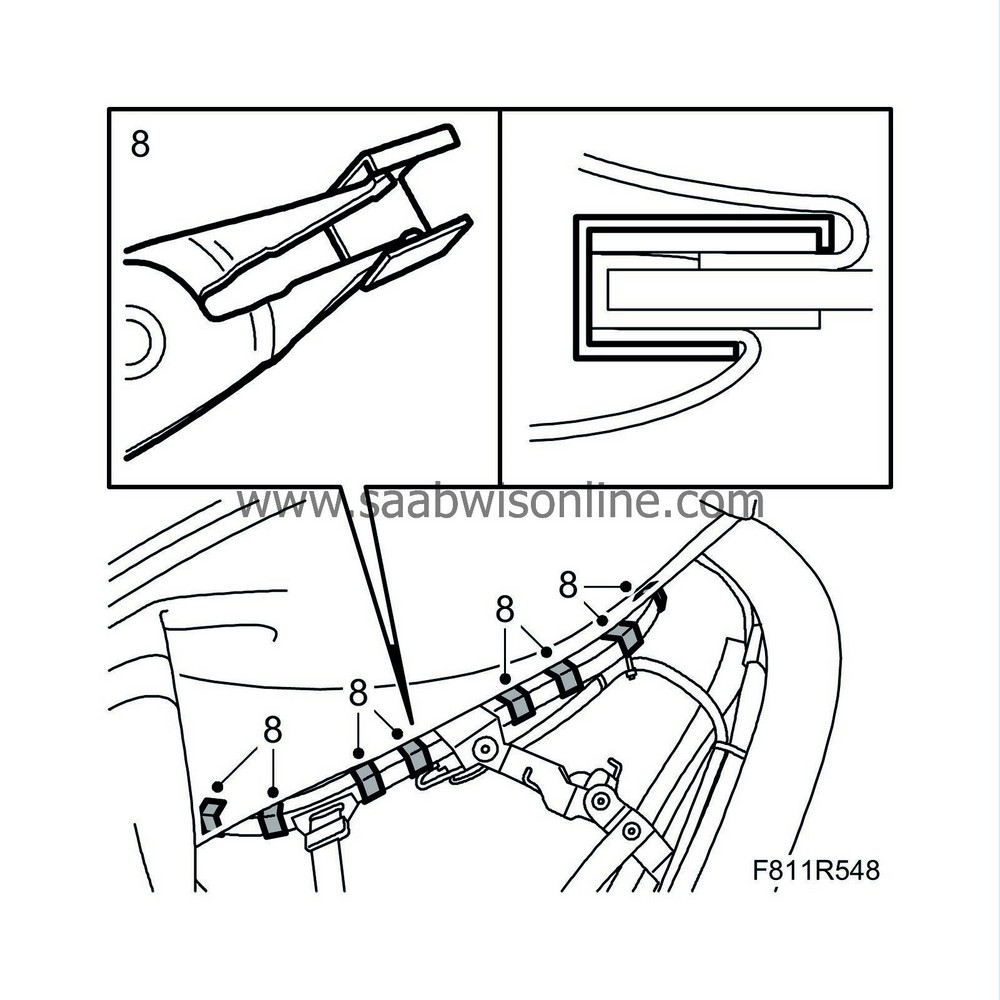
Fit the window frame using
30 12 598 Circlip pliers
to open the clips. Then fit the clips to the frame. Make sure that the headlining is correctly positioned.
|
|
| 9. |
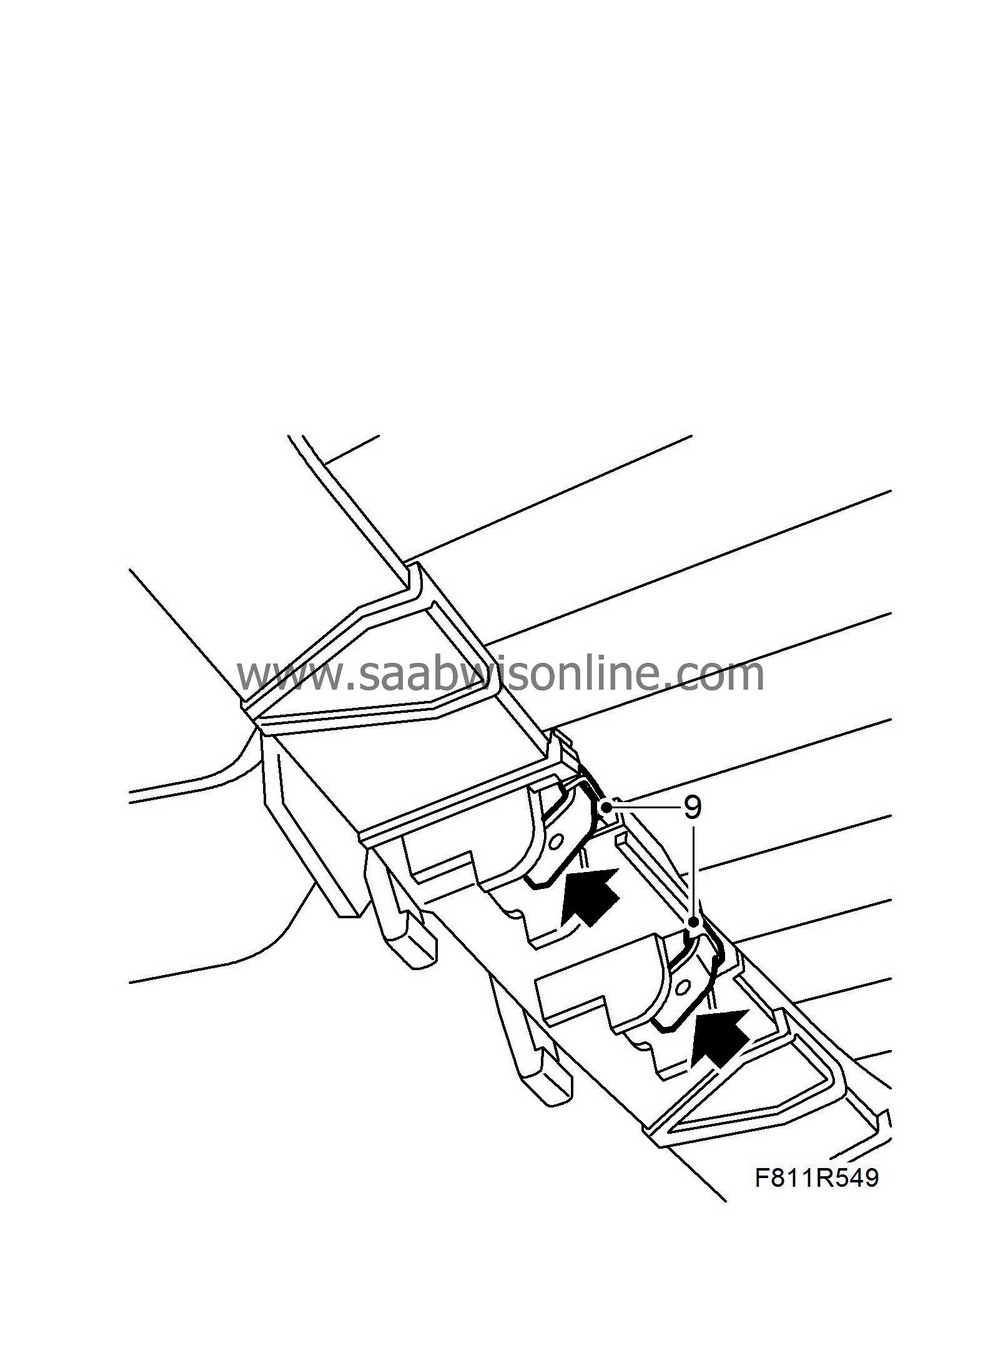
Bend up the insulated end of the connecting tab. The tab must not be against the window frame.
|
|
| 10. |
Plug in the connecting tab connectors.
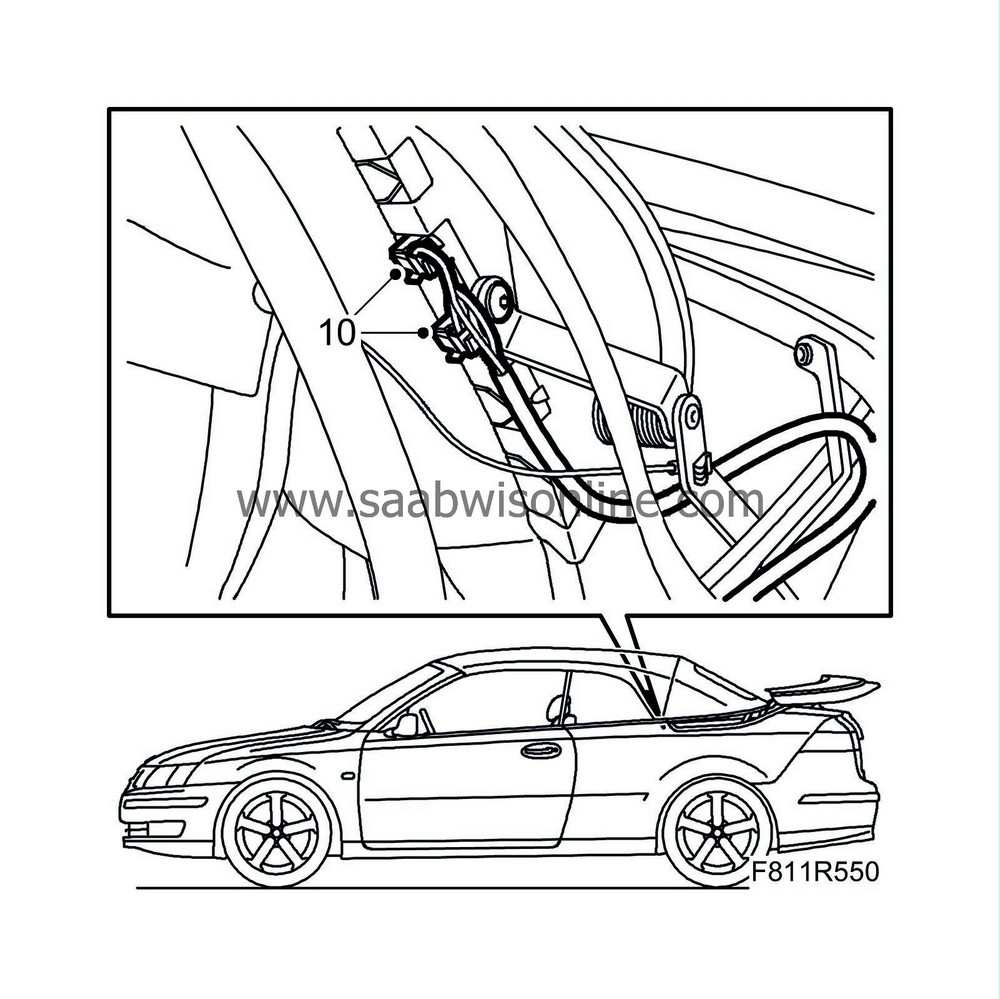
|
|
| 11. |
Fit the plastic rail on the upper edge of the window.
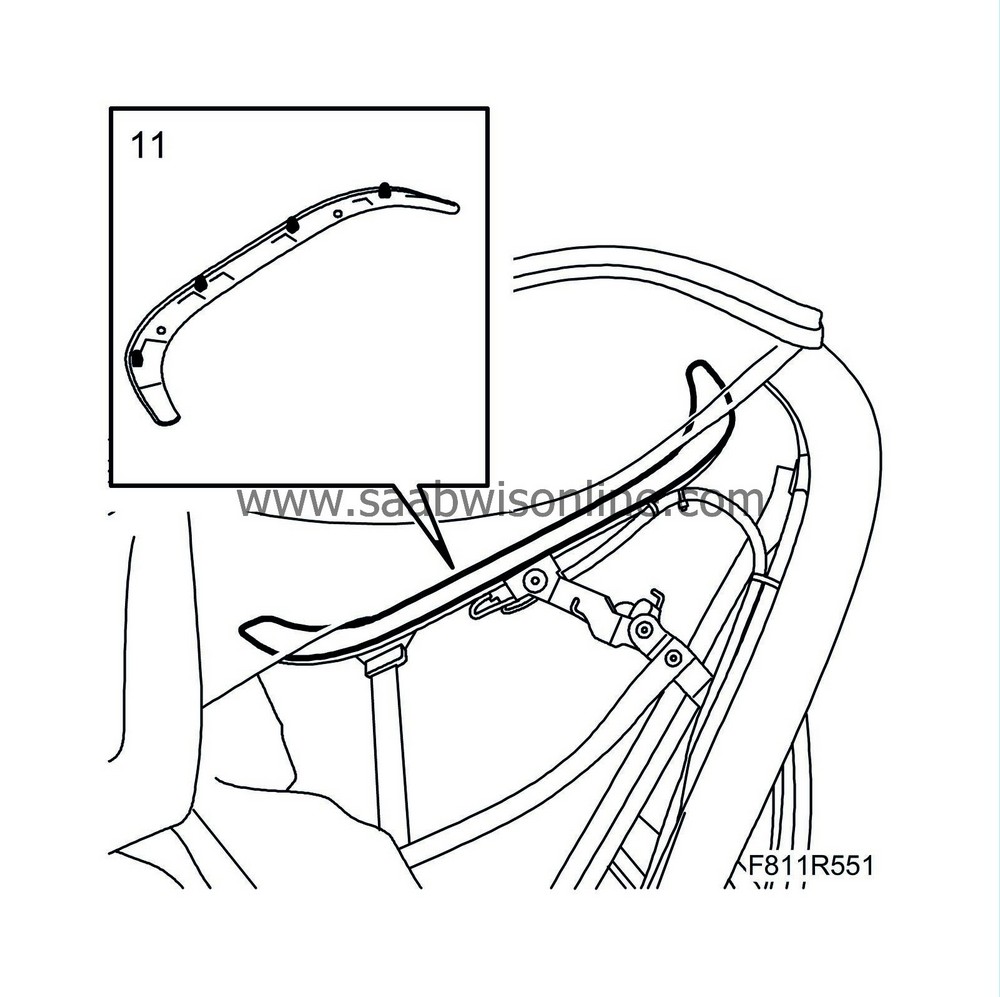
|
|
| 12. |
Fit the plastic clips of the headlining.
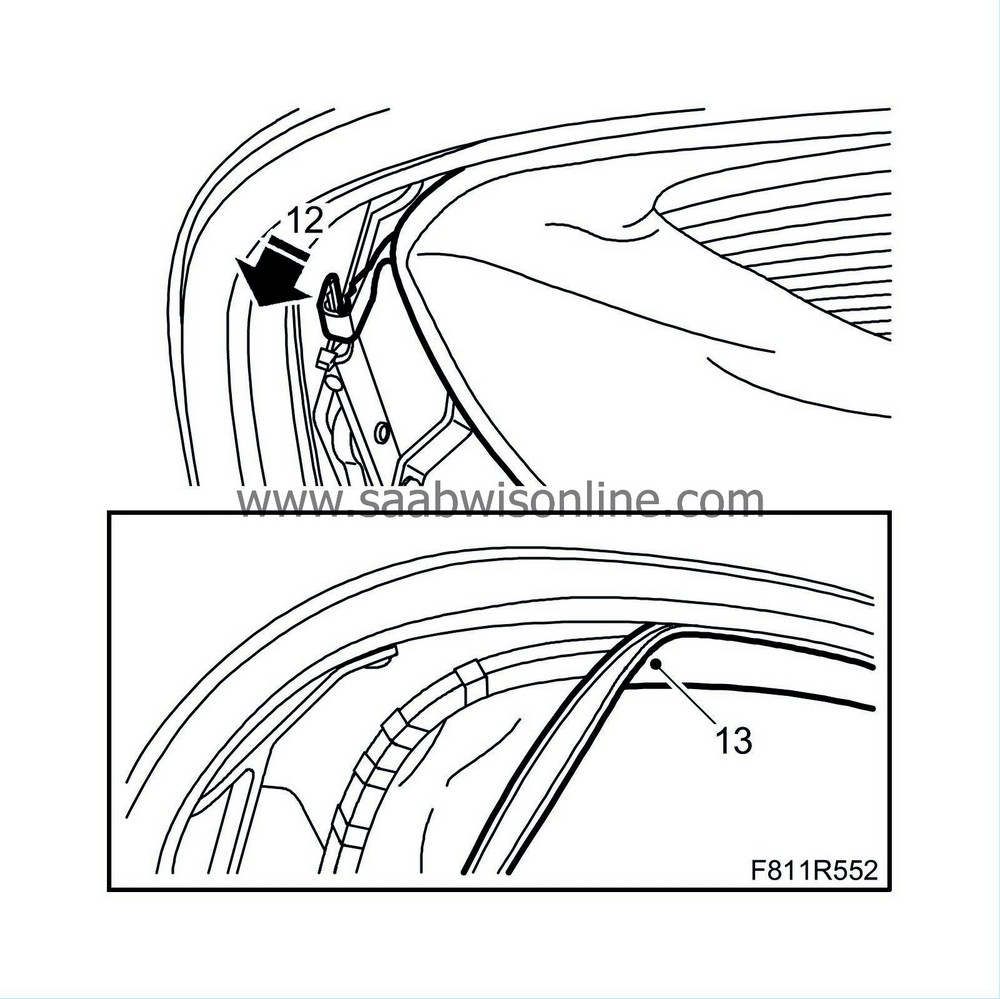
|
|
| 13. |
Press the headlining into the retaining groove of the sixth bow.
|
|
| 14. |
Fold back the outer roof.
|
|
| 15. |
Fit the outer roof edging strip on the sixth bow. Fit the sixth bow locking strip.
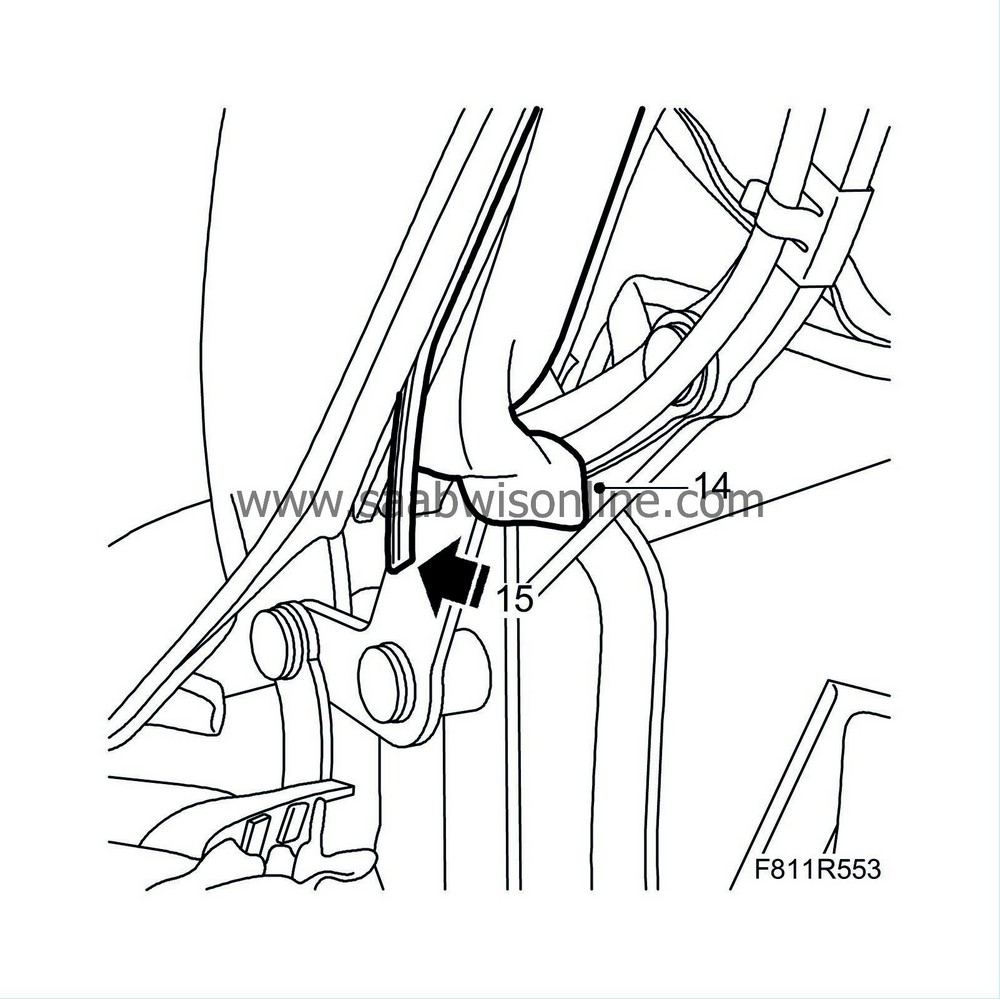
|
|
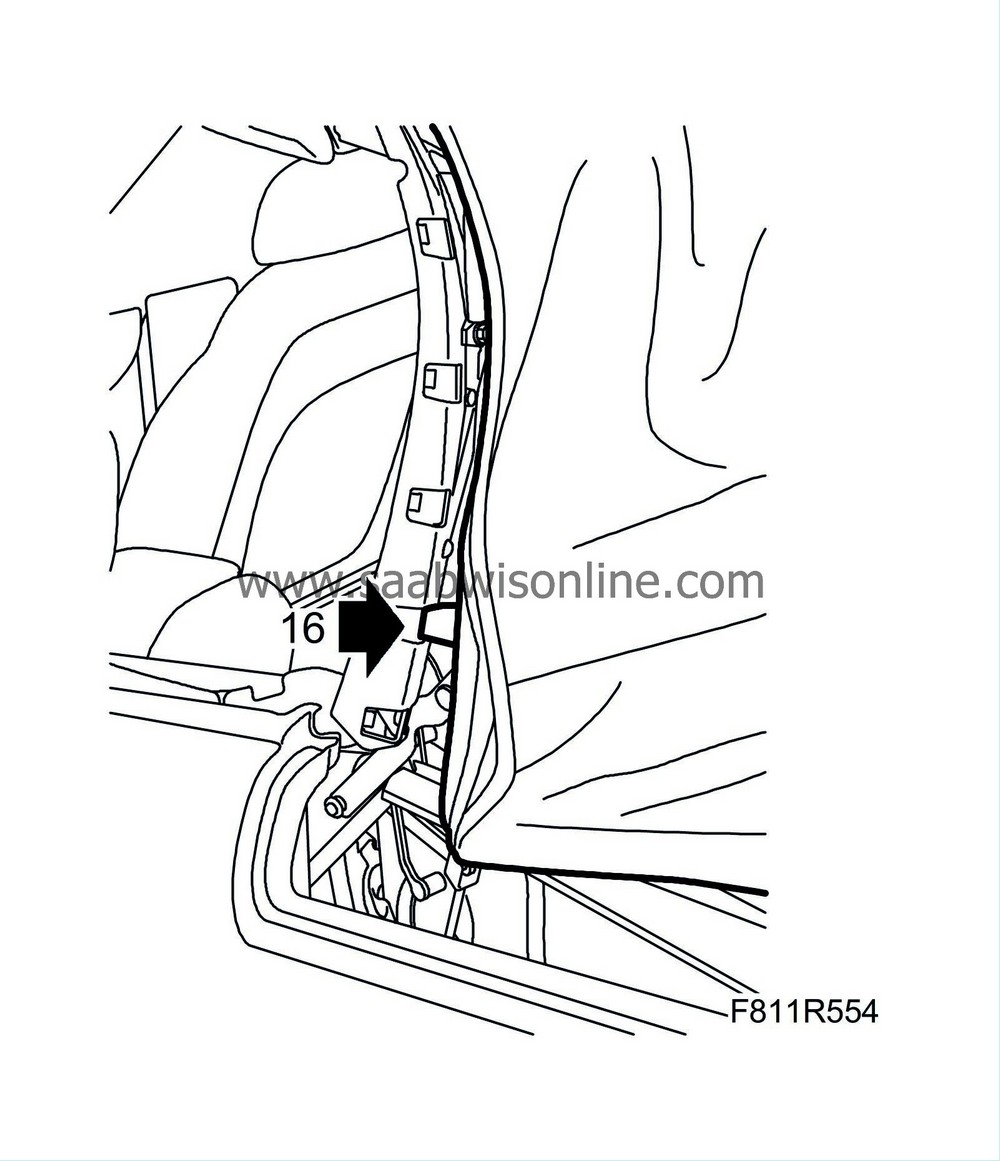
| 16. |
Fit the velcro strap to the rear rail.
|
|
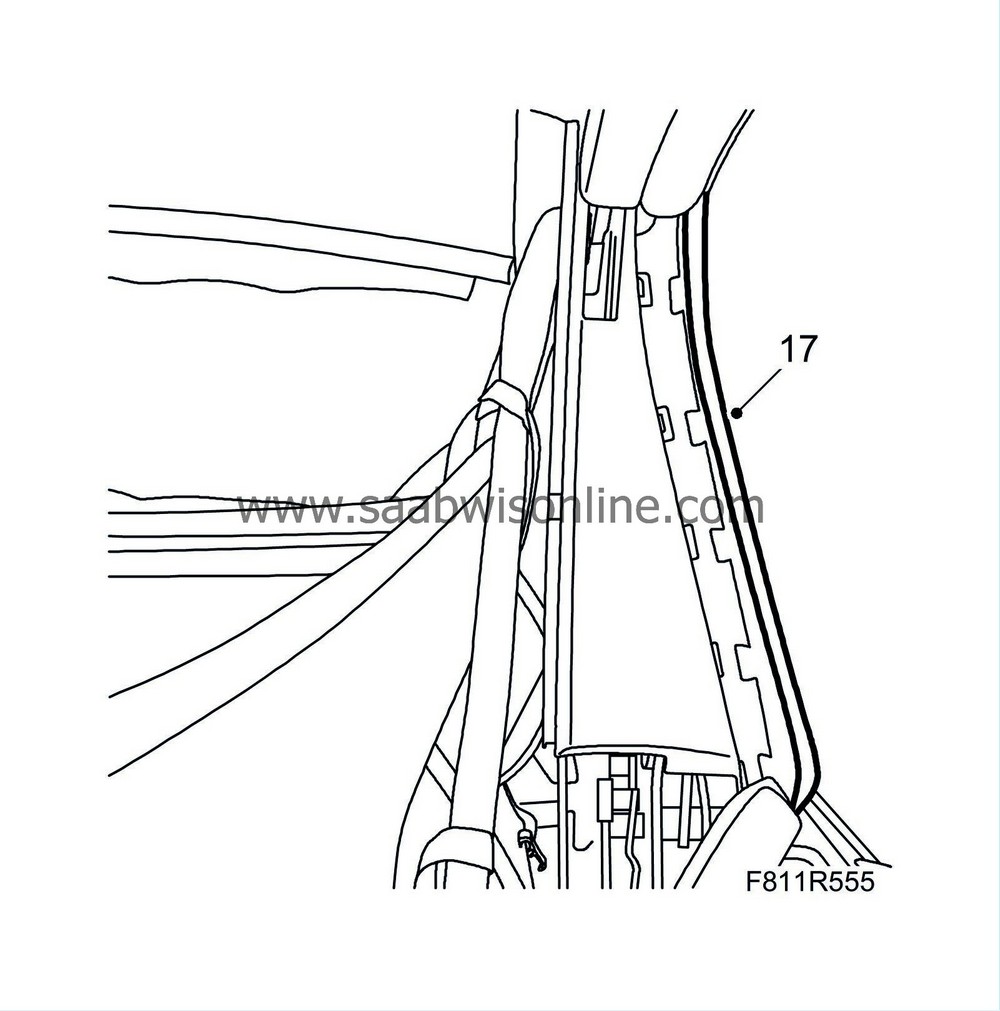
| 17. |
Hook the outer roof attaching profile to the rear rail.
|
|
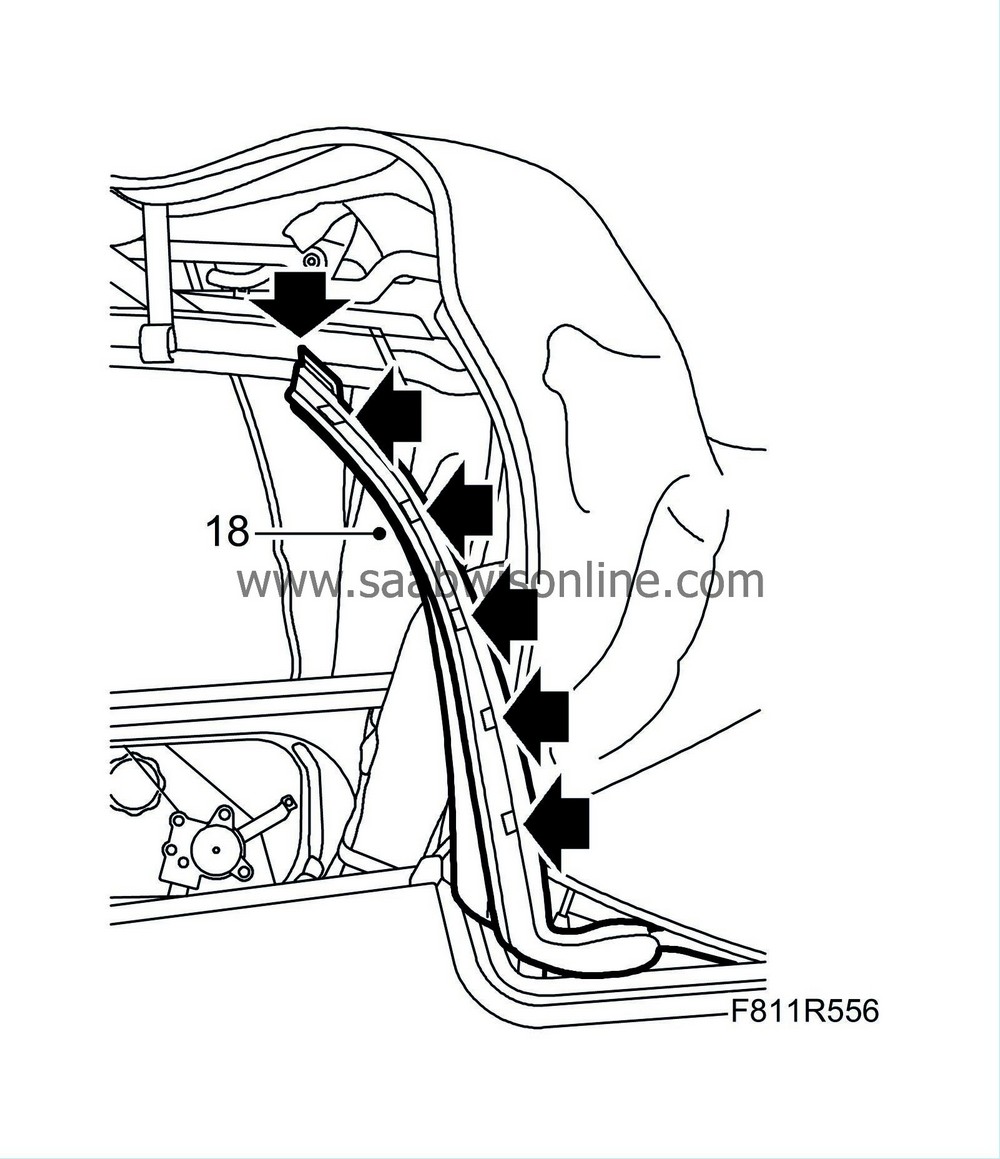
| 18. |
Fit the rear rail seal. Hook the top part of the seal to the mounting and then press it into the rail.
|
|
| 19. |
Close the soft top and check that the electrically heated rear window is working.
|
|

 Warning

