PRE-RELEASE
Soft top cover, headlining and rear window
| Soft top cover, headlining and rear window |
| Removing |
| 1. |
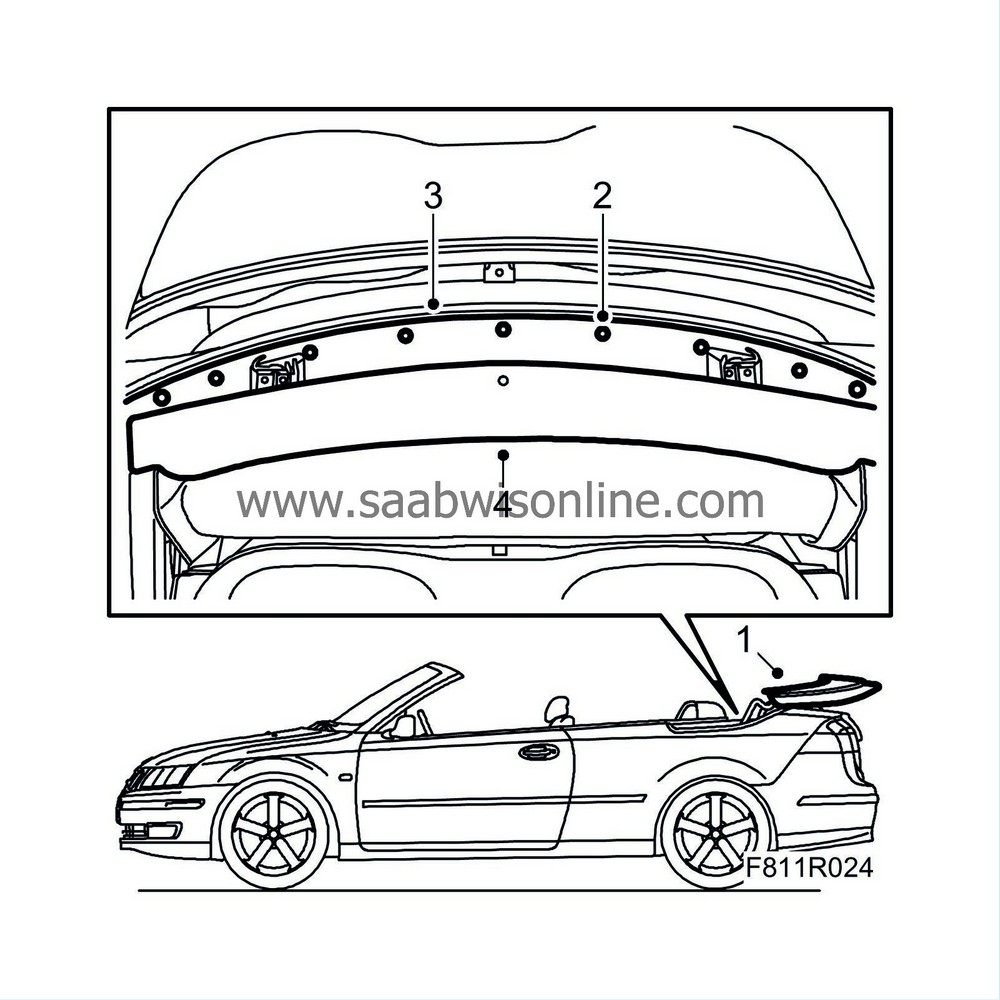
Open the soft top fully and leave the soft top cover open.
|
|
| 2. |
Remove the cover plate clip.
|
|
| 3. |
Carefully remove the cover plate.
|
|
| 4. |
Remove the cover by pulling it backwards.
|
|
| 5. |
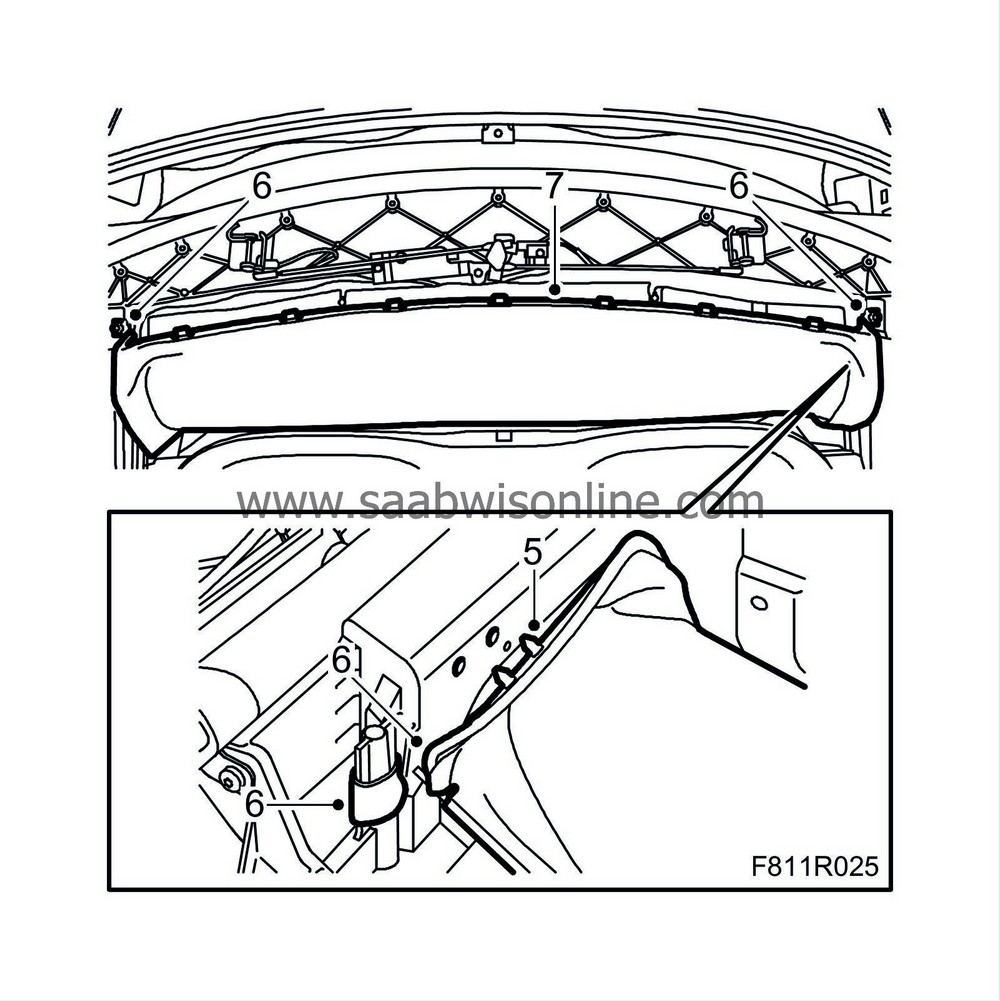
Undo the first bow plastic plugs.
|
|
| 6. |
Unhook both the headlining band eyelets.
|
|
| 7. |
Detach the headlining from the first bow hooks.
|
|
| 8. |
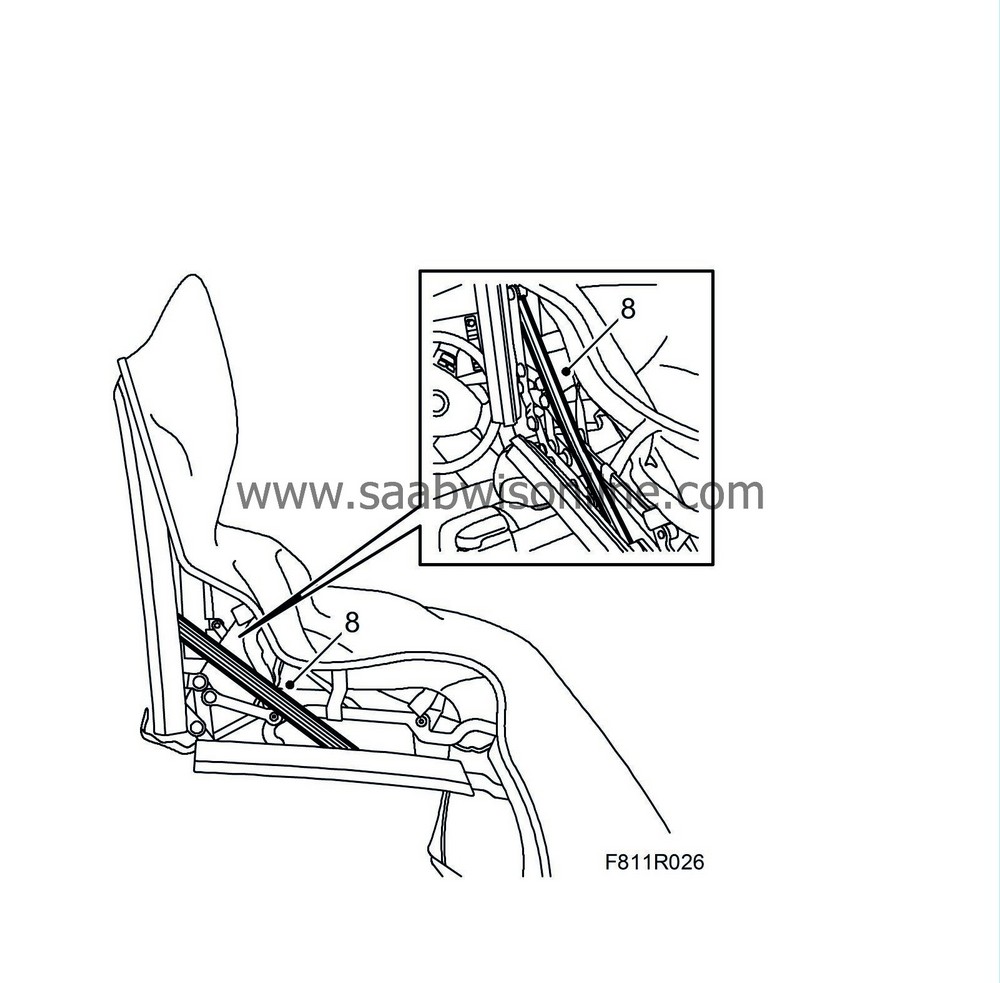
Operate the soft top half way down and secure it with
82 93 847 Soft top support
.
|
|
| 9. |
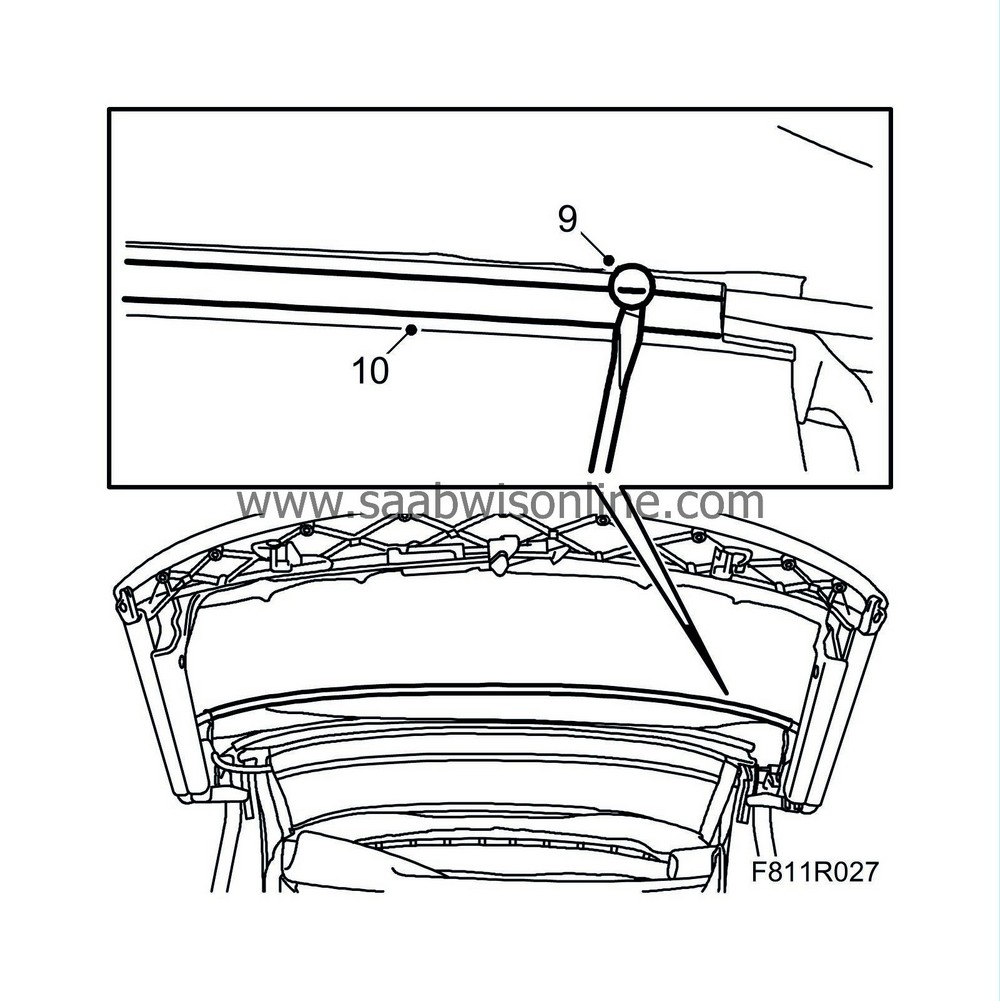
Use
84 71 179 Removal tool, clips
and remove the second bow plastic clip.
|
|
| 10. |
Pull the headlining plastic holder from the second bow.
|
|
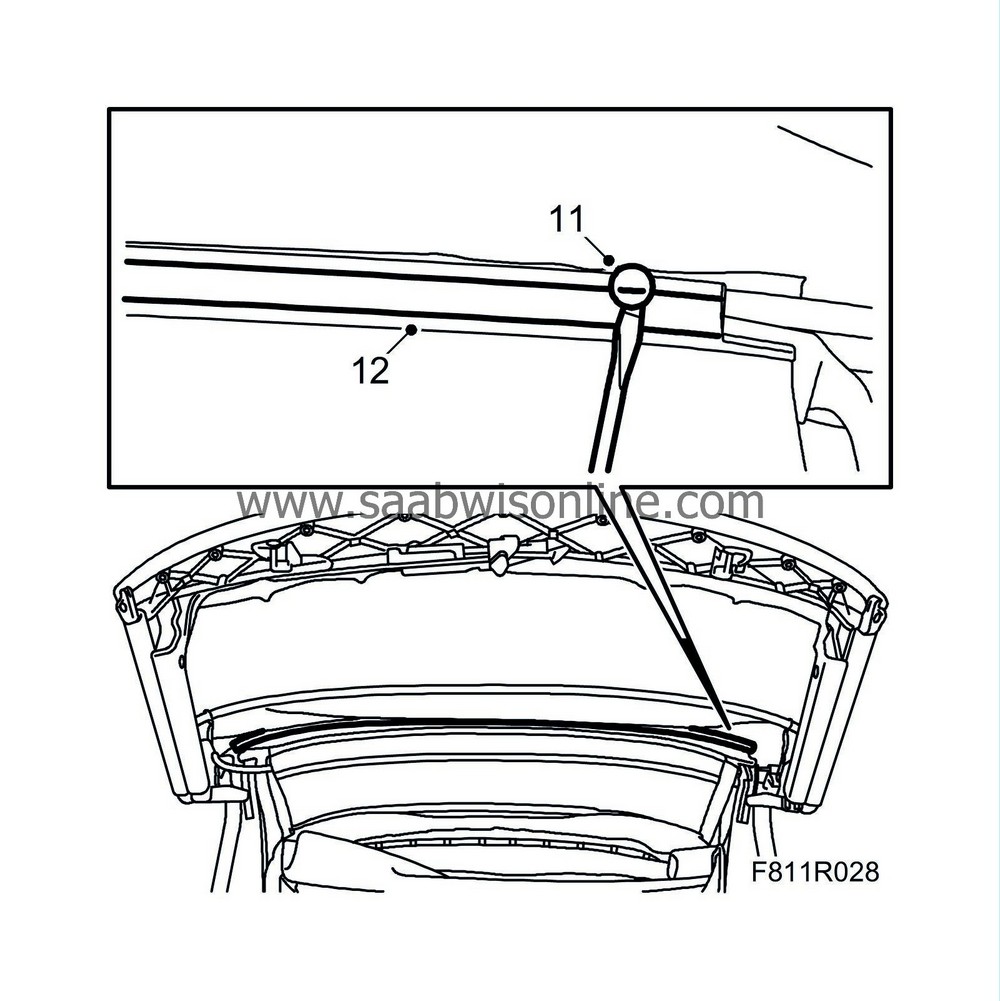
| 11. |
Use
82 93 474 Removal tool
to remove the third bow plastic clip.
|
|
| 12. |
Pull the headlining plastic holder from the third bow.
|
|
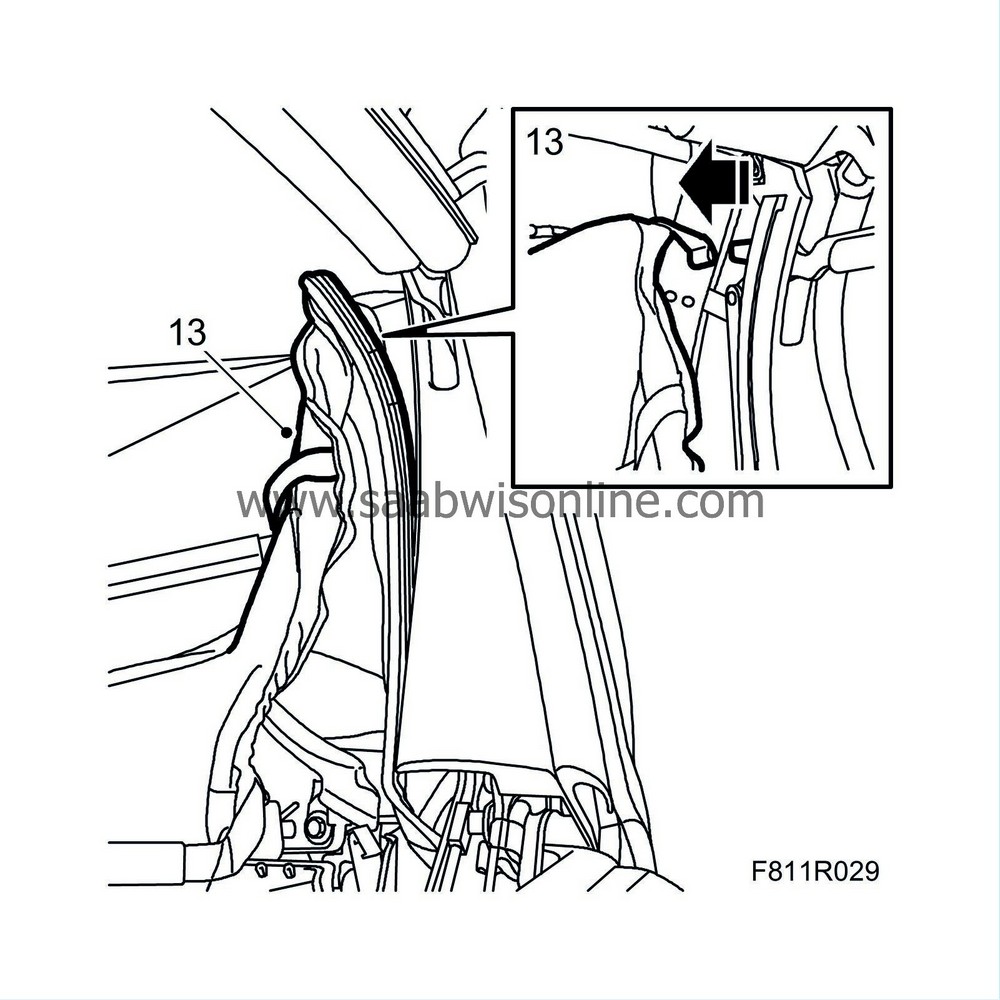
| 13. |
Detach the headlining from the rear rails by puling it out of the mounting on both sides.
|
|
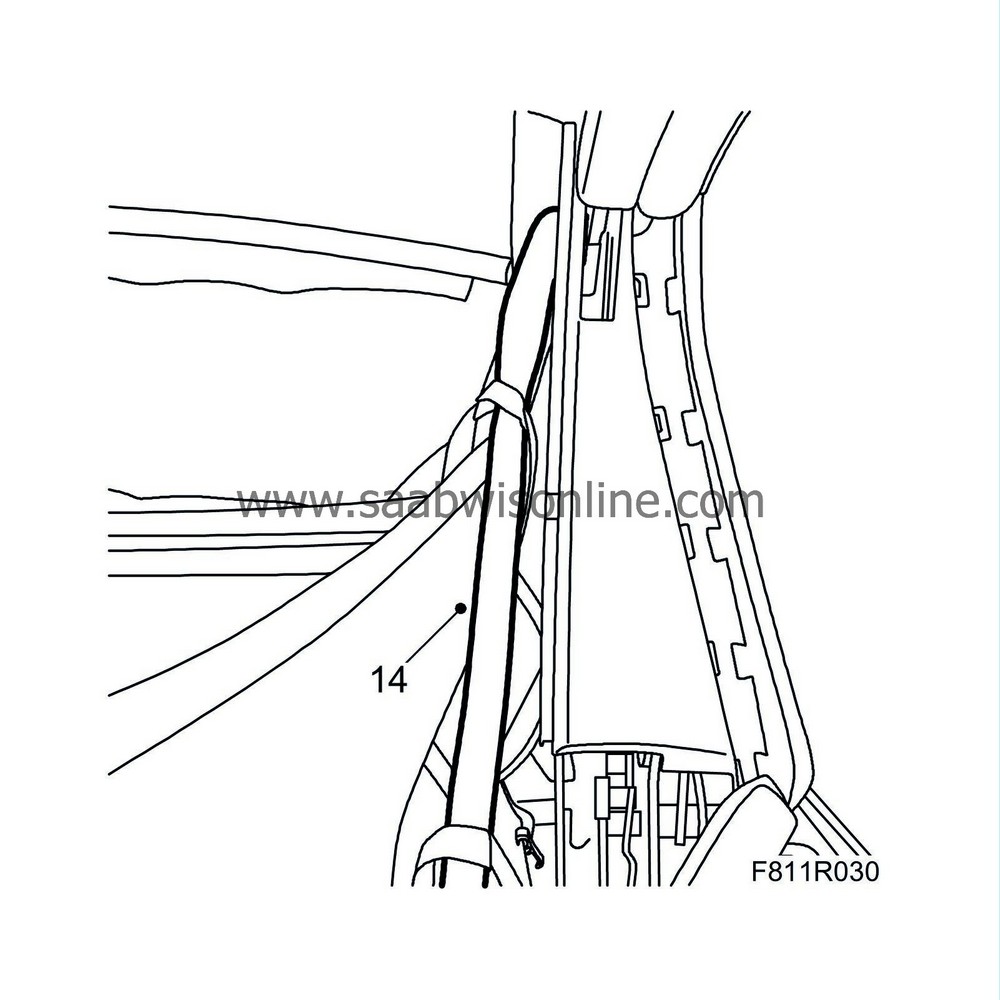
| 14. |
Pull the headlining rubber straps out of the headlining attaching eyelets.
|
|
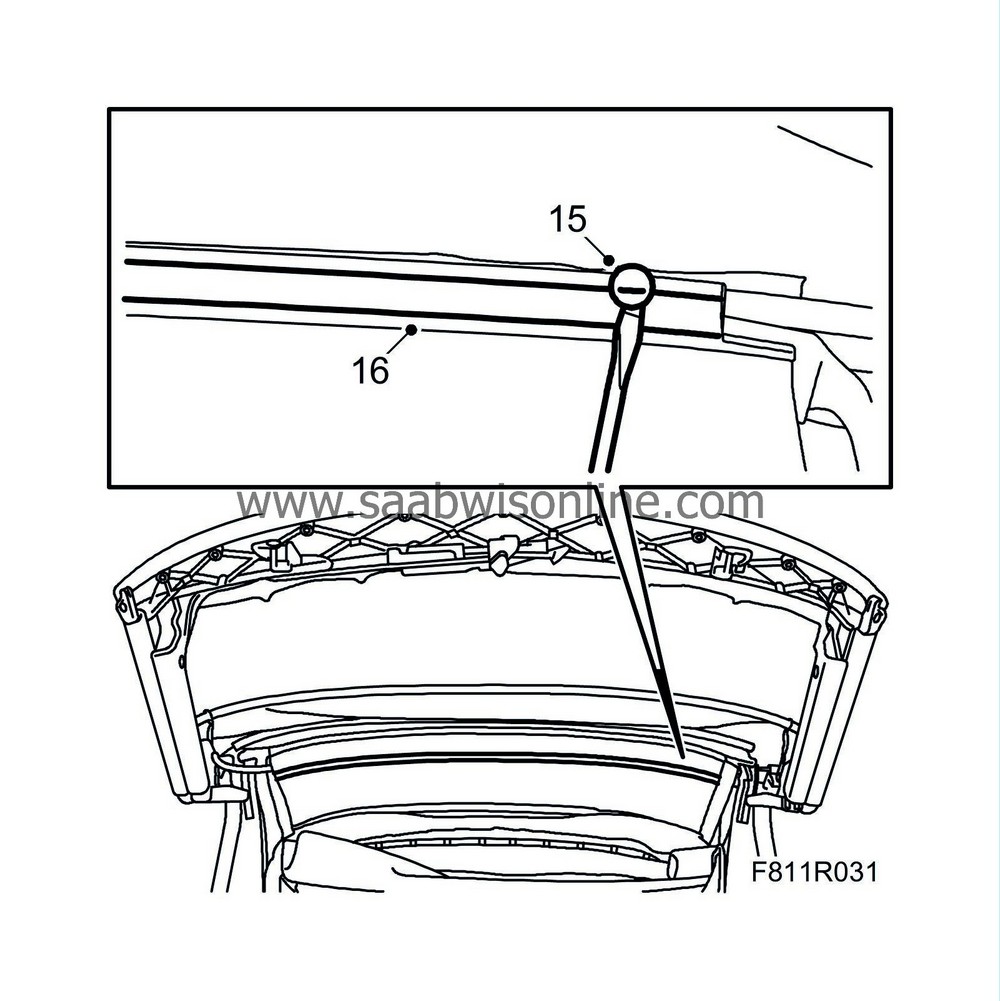
| 15. |
Use
82 93 474 Removal tool
to remove the plastic clip in the fourth bow.
|
|
| 16. |
Pull the headlining plastic holder from the fourth bow.
|
|
| 17. |
Remove the soft top support and close the soft top.
|
|
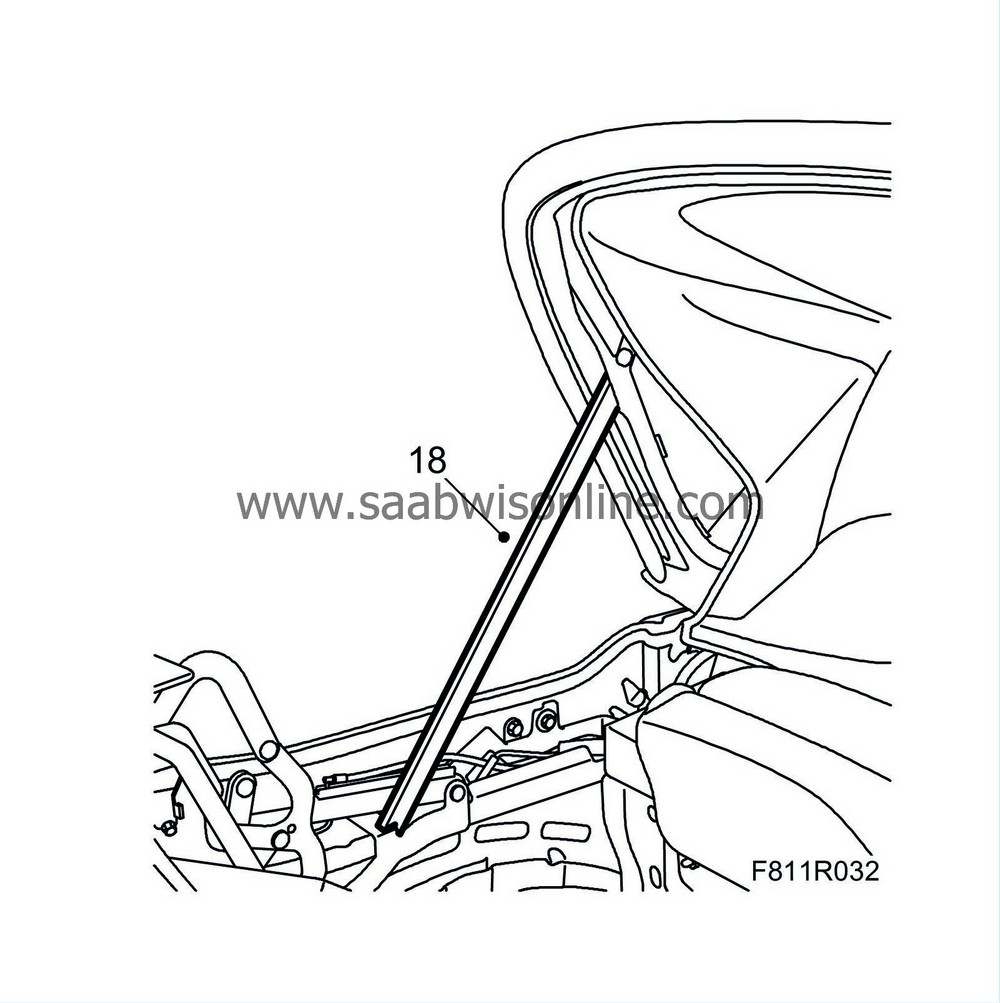
| 18. |
Raise the sixth bow and support it with the soft top support.
|
|
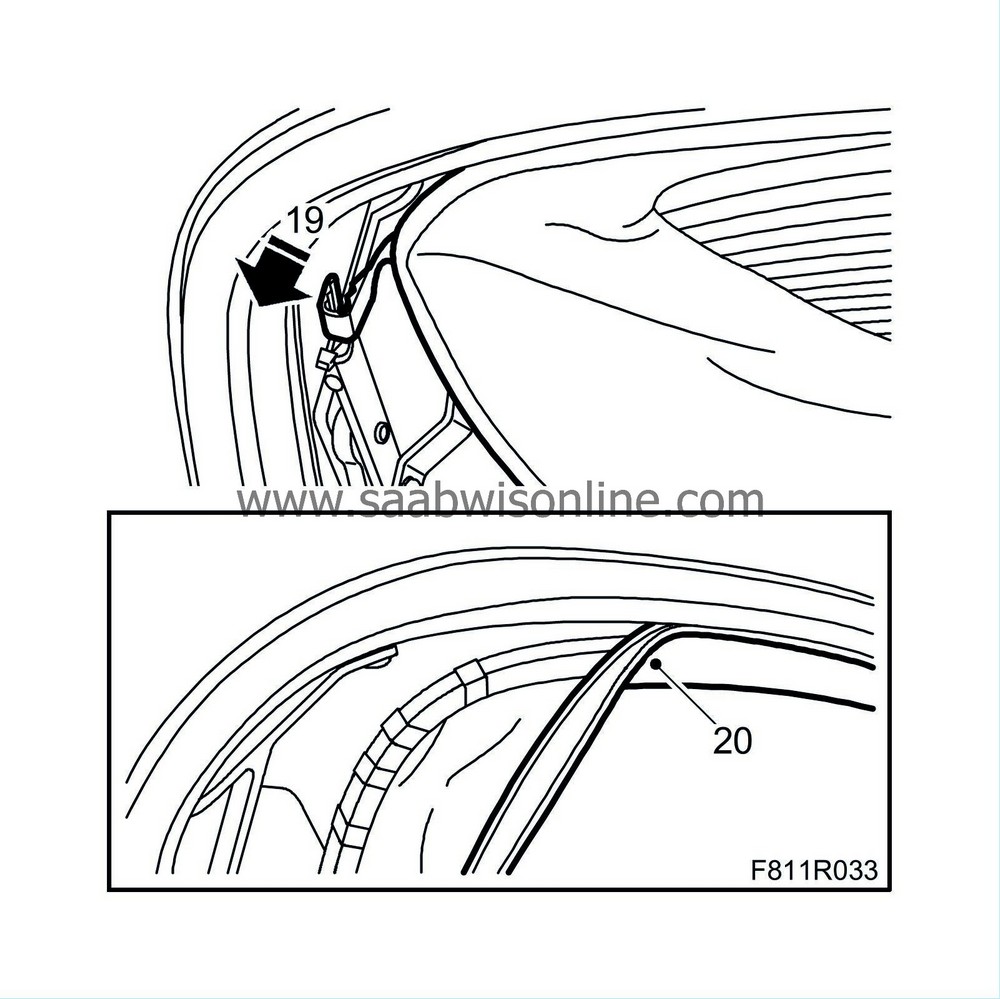
| 19. |
Undo the headlining plastic clip.
|
|
| 20. |
Pull the headlining edging from the sixth bow groove.
|
|
| 21. |
Remove the soft top support and lower the sixth bow.
|
|
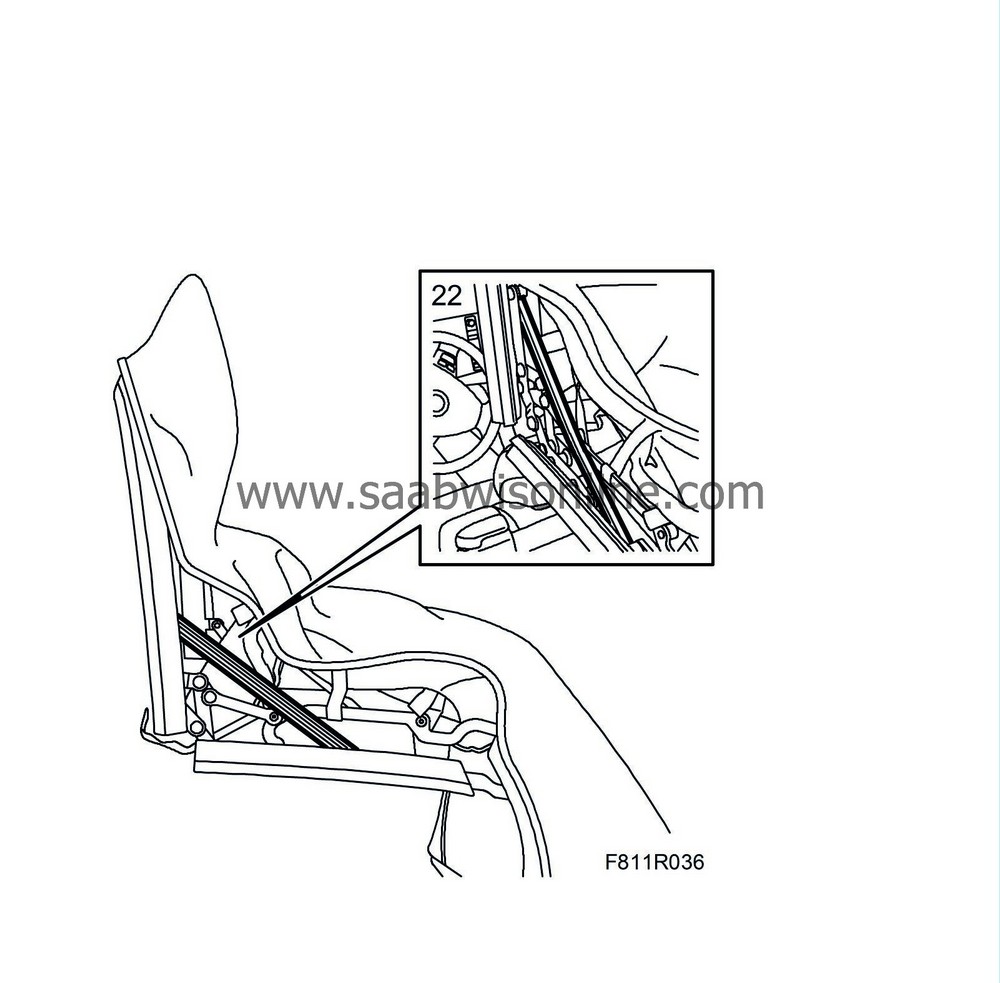
| 22. |
Operate the soft top half way down and secure it with
82 93 847 Soft top support
.
|
|
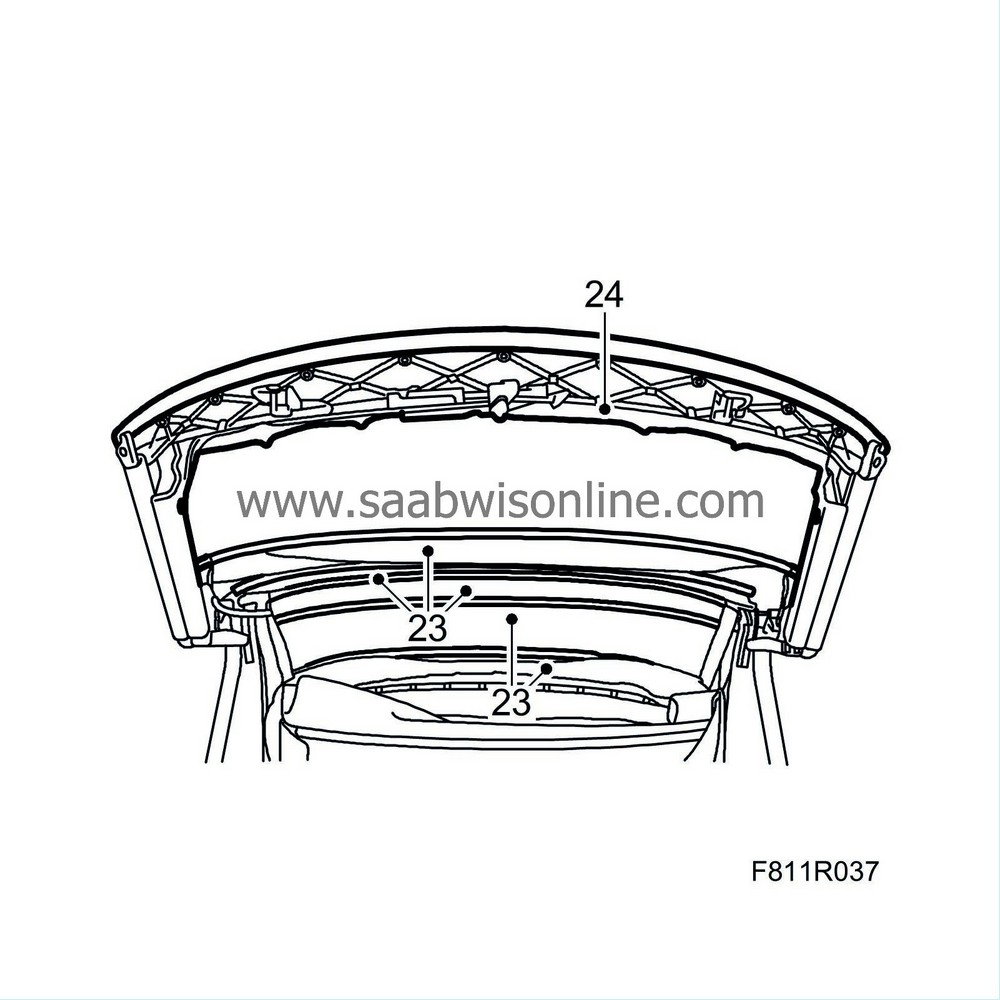
| 23. |
Detach the fabric strips from the second, third, fourth and fifth bow.
|
|
| 24. |
Unhook the insulation from the first bow.
|
|
| 25. |
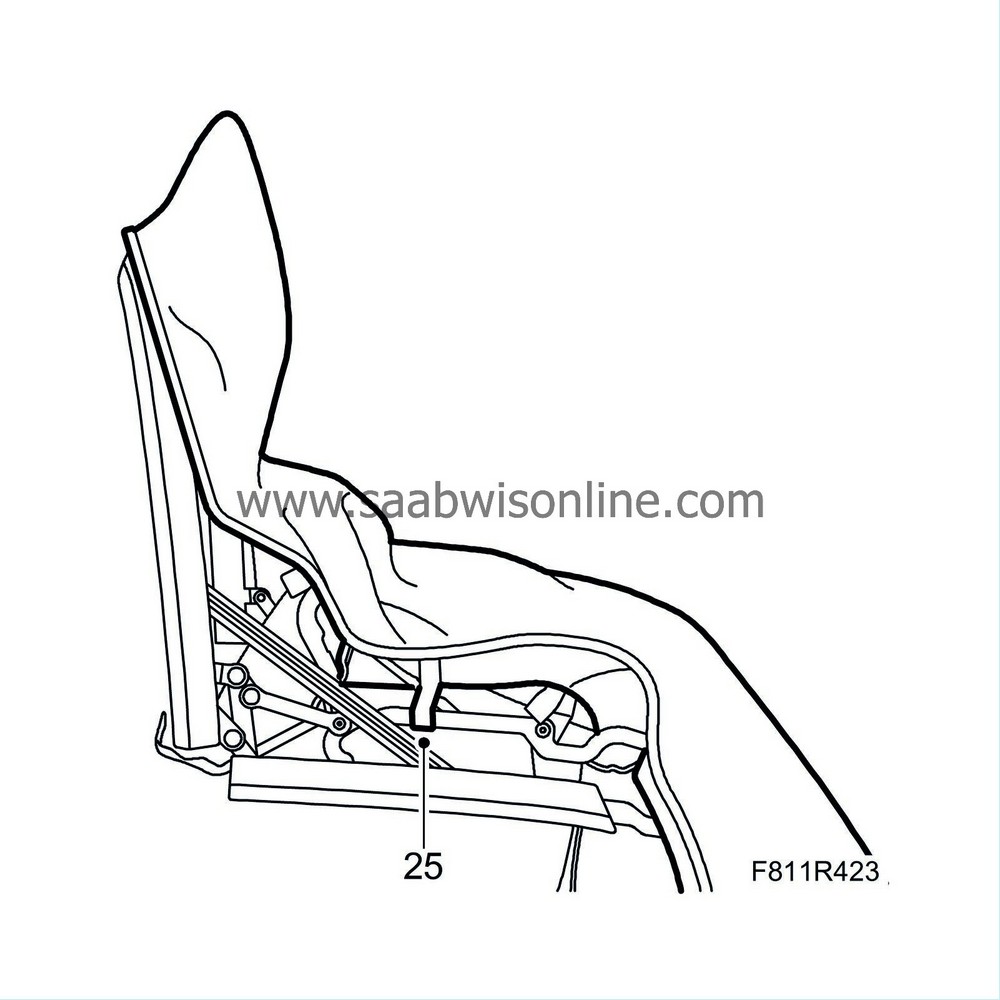
Undo the Velcro fastener on the linkage system for the front rail.
|
|
| 26. |
Undo the double-sided adhesive tape from the first bow. Lift off the fabric from the edge.
|
|
| 27. |
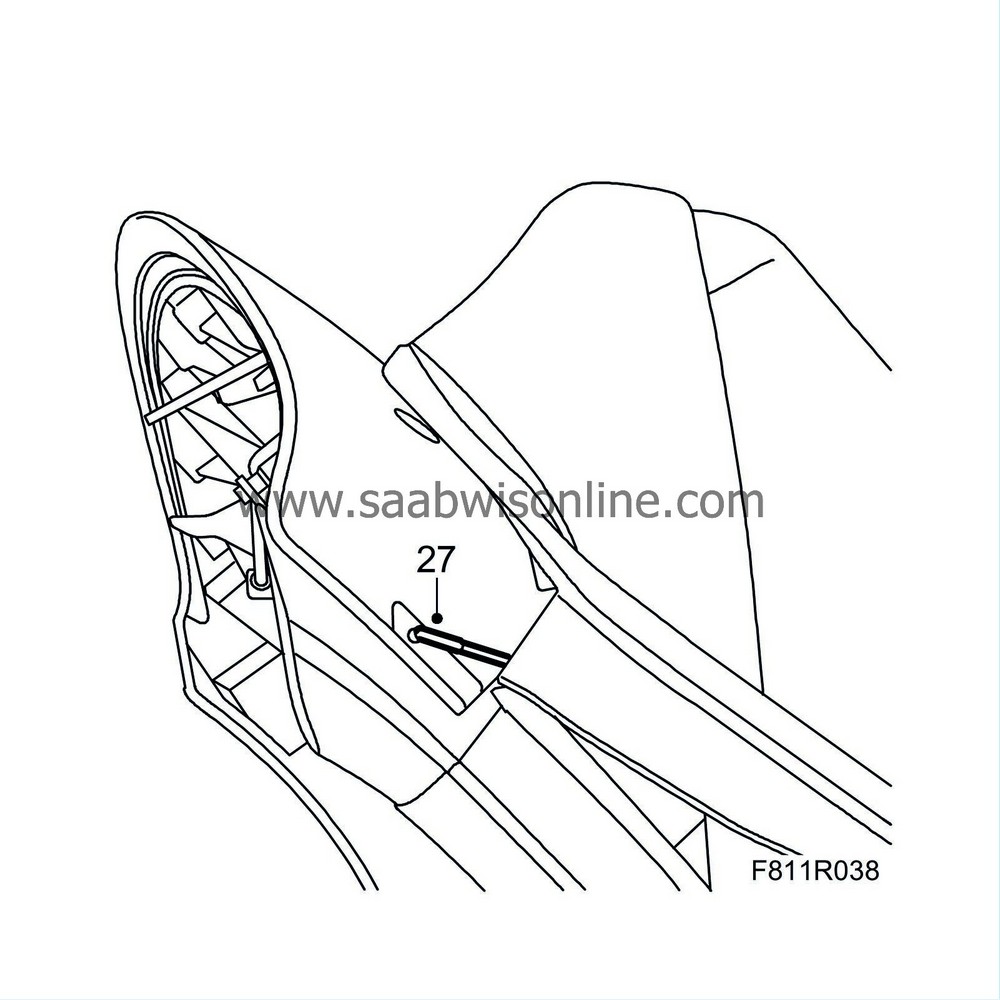
Unhook the tensioning cables from the first bow.
|
|
| 28. |
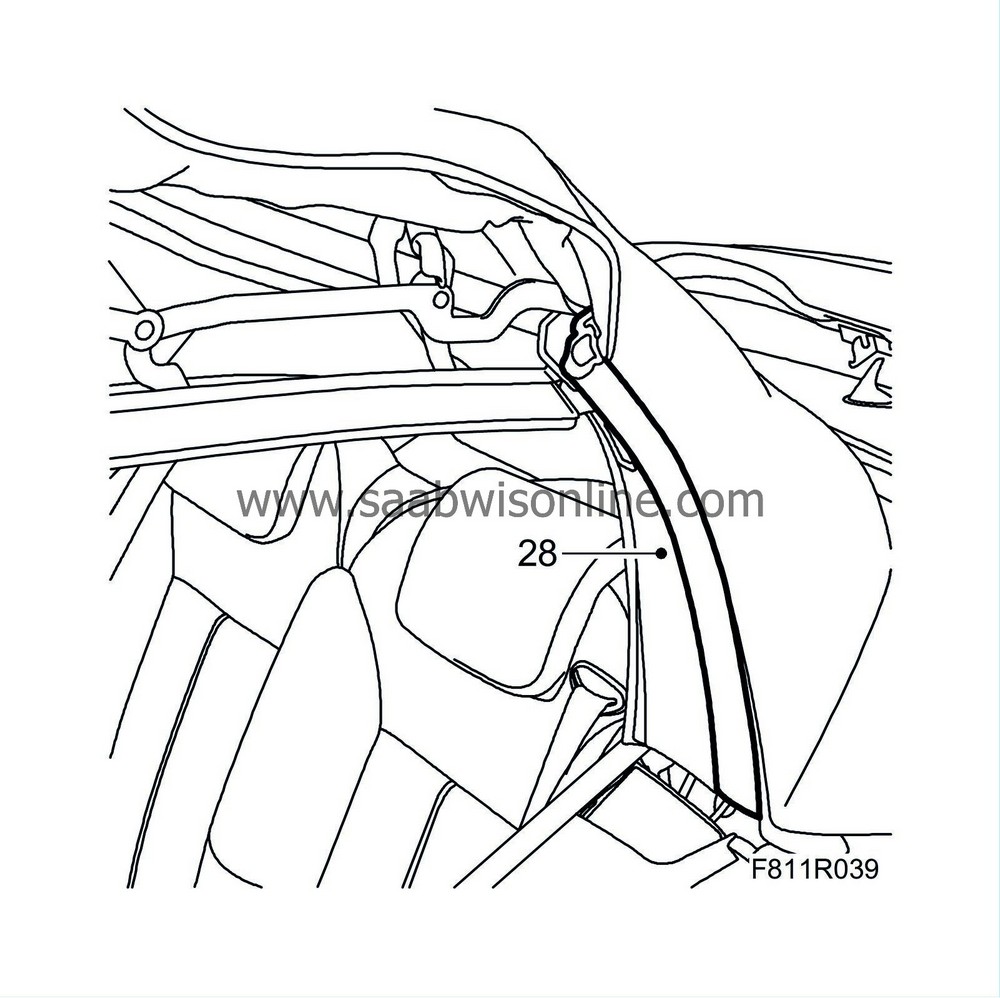
Remove the rear rail seals. Remove the seal by pulling it out of the middle of the U-shaped rail. Unhook the top part of the seal from its mounting. Leave the seal hanging.
|
|
| 29. |
Remove the soft top support. Raise the sixth bow and secure it with the soft top support.
|
|
| 30. |
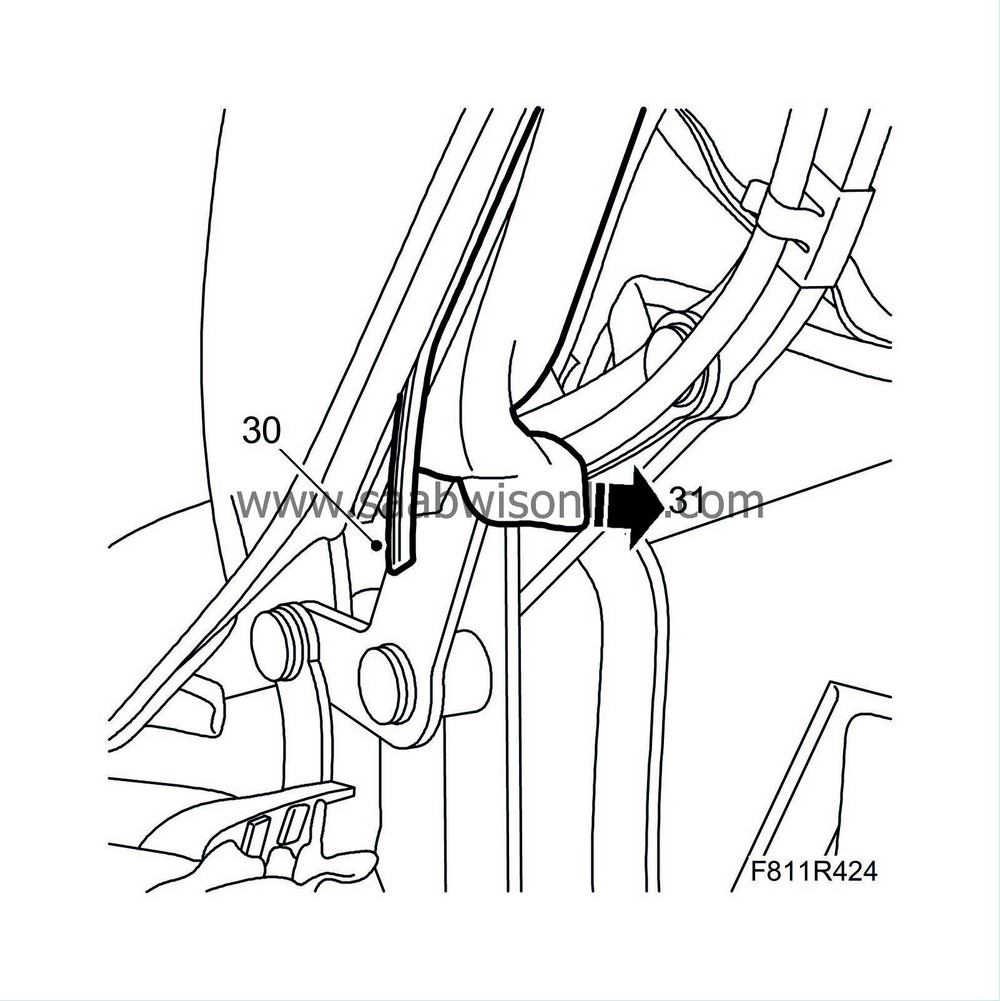
Pull out the sixth bow lock strip from the mounting groove.
|
|
| 31. |
Use the removal tool to remove the outer roof edging strip from the sixth bow.
|
|
| 32. |
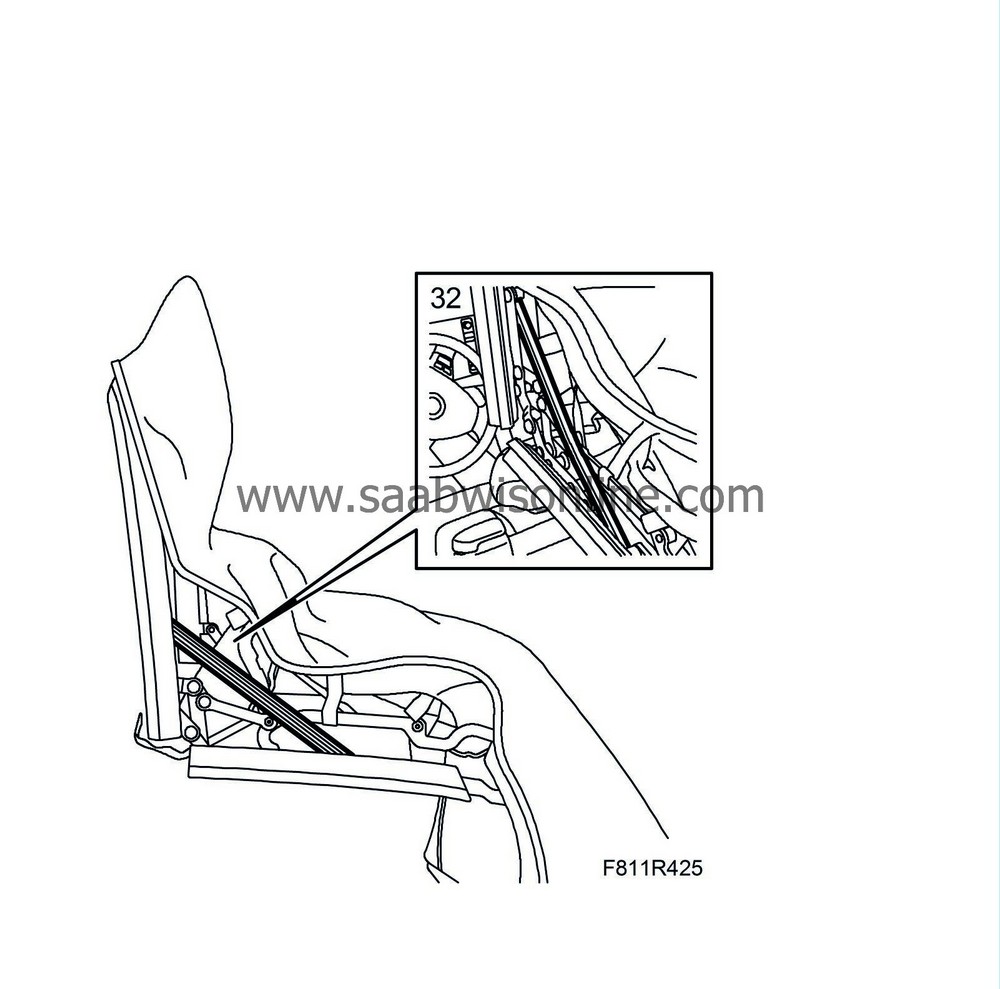
Remove the soft top support and open the soft top half way. Secure with the soft top support.
|
|
| 33. |
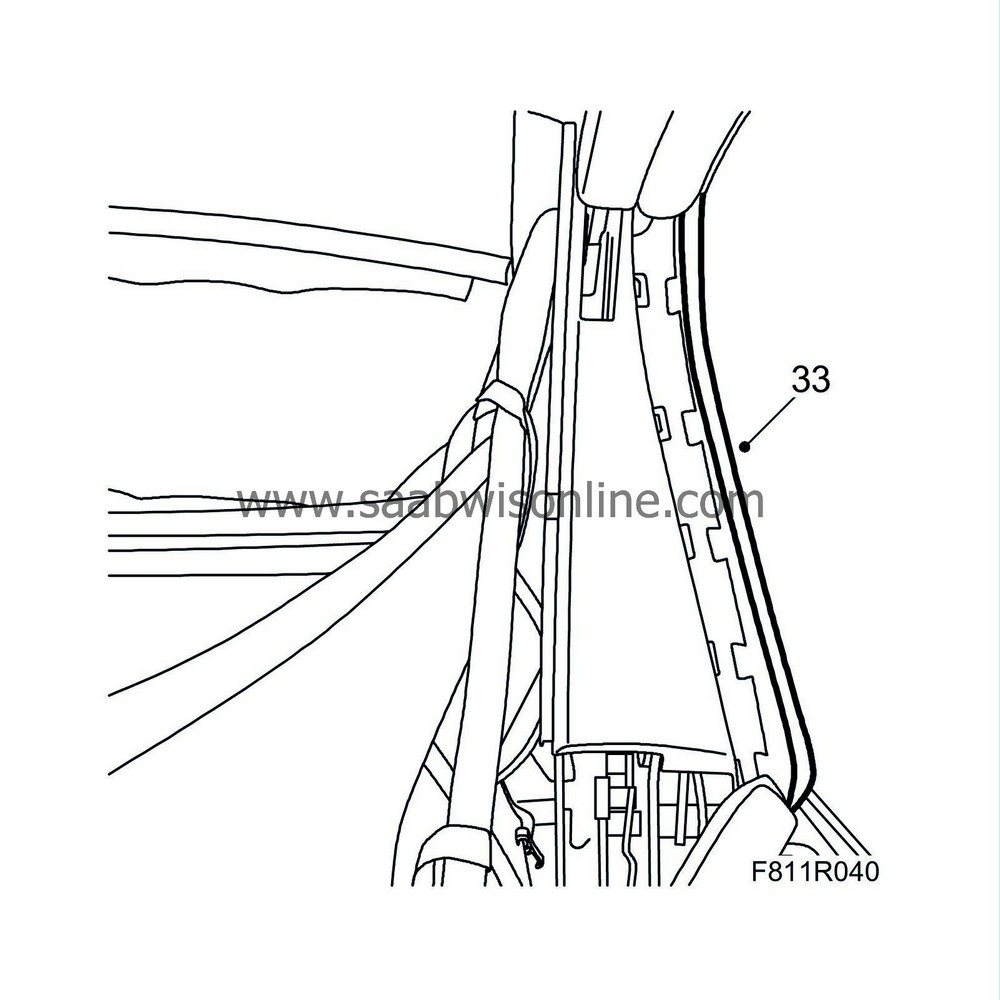
Unhook the outer roof attaching profiles from the rear rails.
|
|
| 34. |
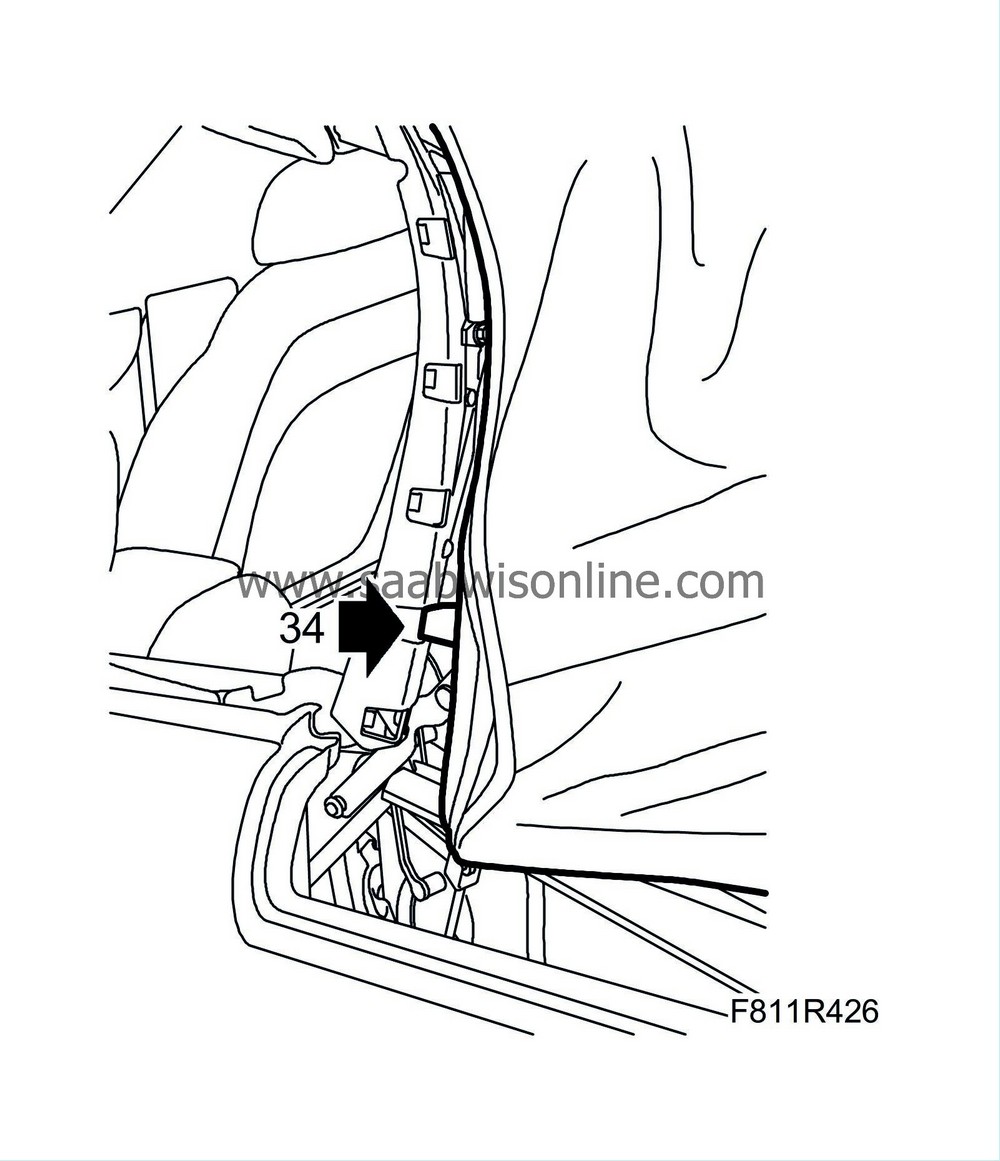
Remove the Velcro fastener for the rear rails.
|
|
| 35. |
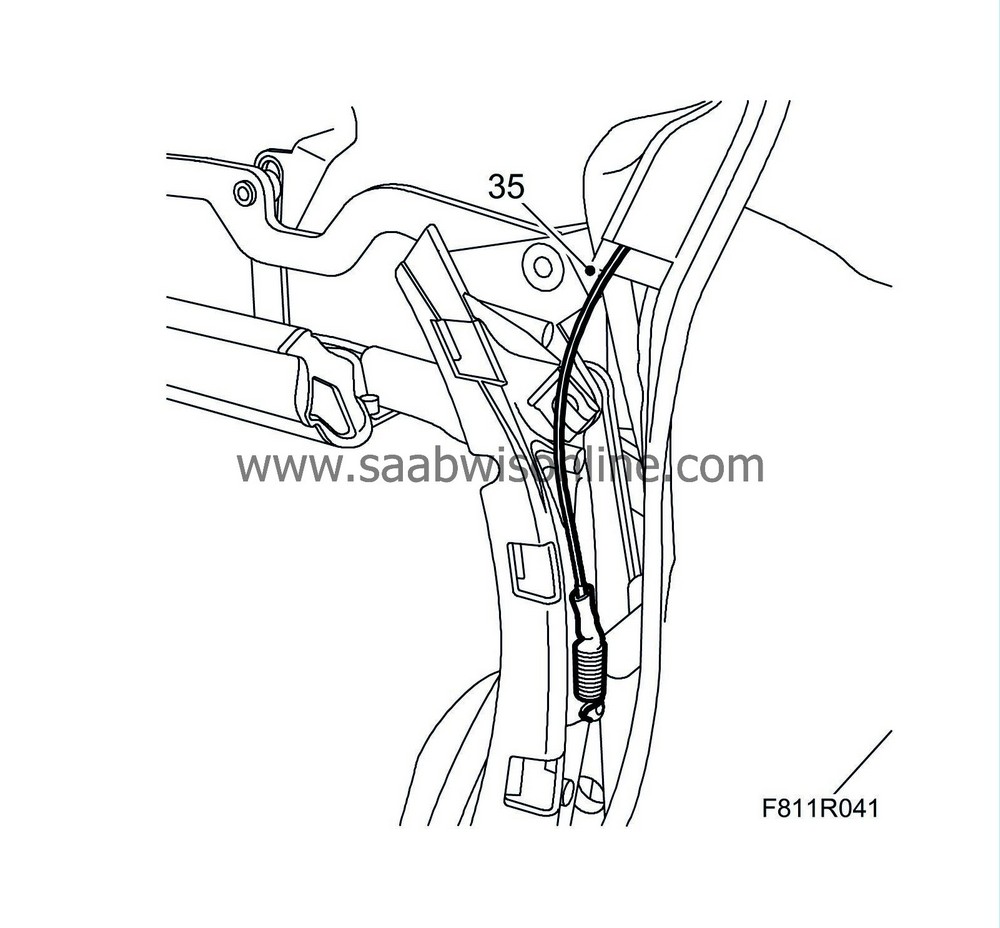
Remove the tension cables from the rear rail.
|
|
| 36. |
Remove the soft top support and close the soft top.
|
|
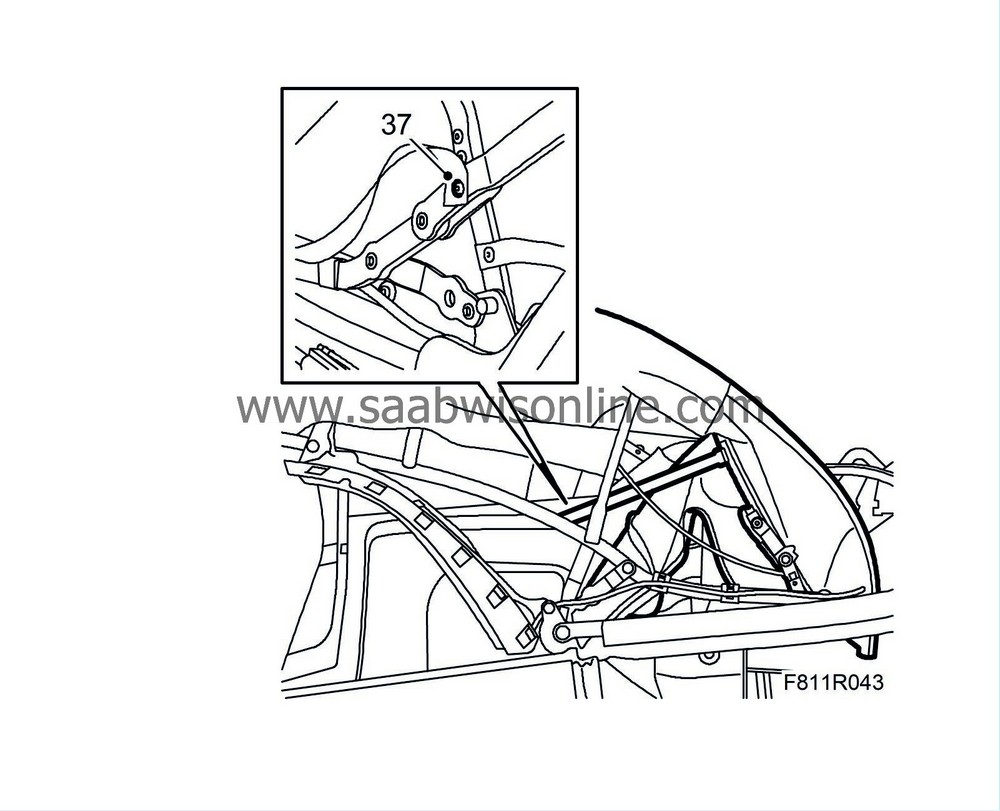
| 37. |
Drill out the blind rivets for the rear window guide straps.
|
|
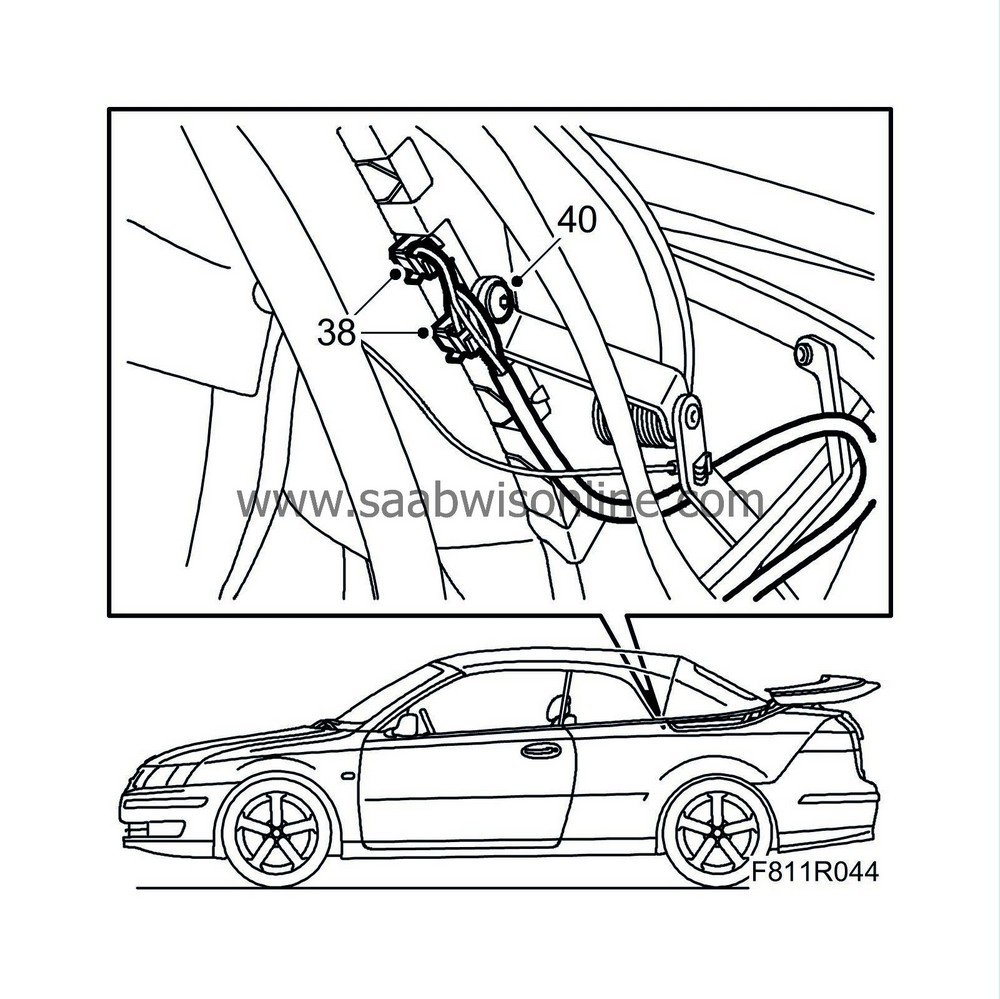
| 38. |
Dismantle the electrical connection for the heated rear window.
|
|
| 39. |
Remove the cable ties from the rear window mounting frame.
|
|
| 40. |
Remove the window frame screws. Pull out the straps from the insulation pocket.
|
|
| 41. |
Lift away the outer roof complete together with rear window with the help of an assistant.
|
|
| Dismantling the outer roof and rear window |
| 1. |
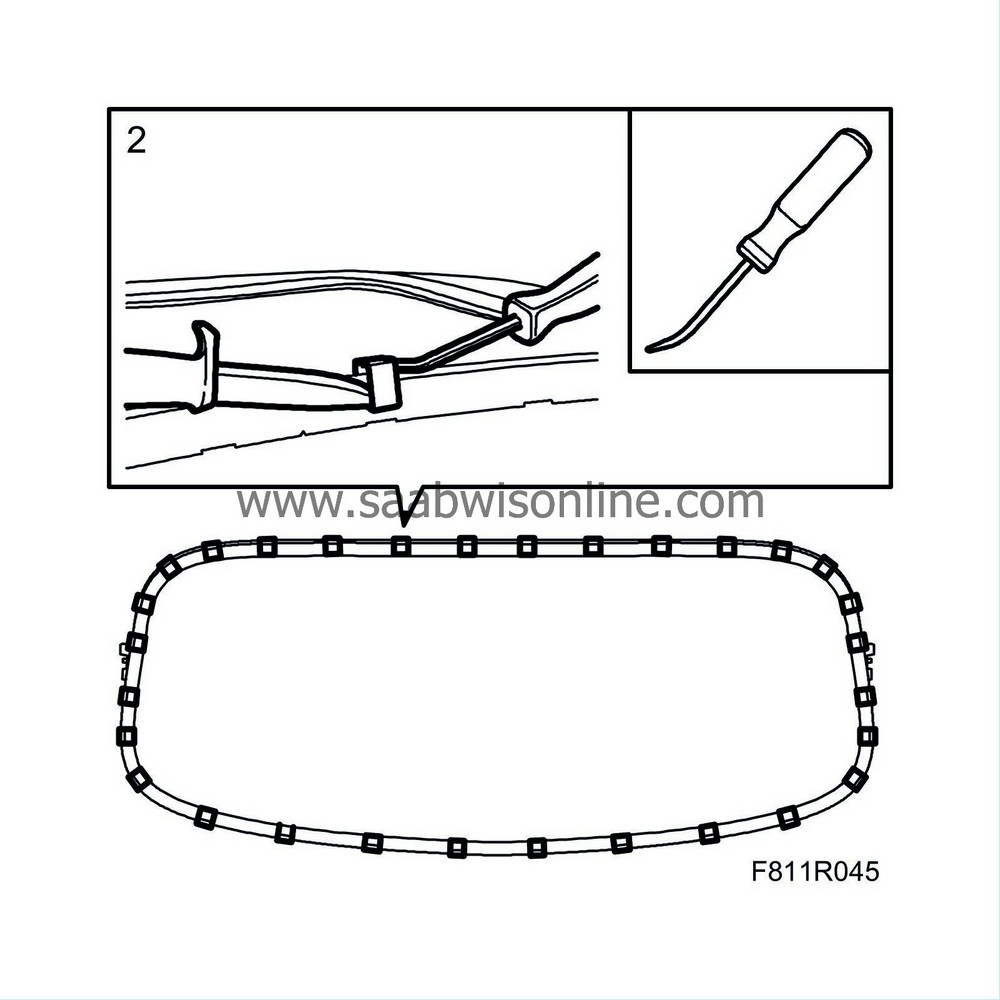
Place the complete outer roof and rear window on a work bench. Manufacture a tool as illustrated.
|
|
| 2. |
Lift up the clip with the tool and place a knife underneath. Pull out the clip with the tool, following after with the knife to protect the window frame.
|
|
| 3. |
Continue in the same manner with the remaining clips.
|
|
| 4. |
Lift away the window and change the outer roof, rear window or rear window seal as necessary.
|
|
| Assembling the outer roof and rear window |
| Note | ||
|
Change or touch up the window frame if it is damaged. |
| 1. |
Fit the rear window seal. Make sure the joint in the seal is located in the middle at the top of the rear window.
|
|
| 2. |
Lay the rear window in the outer roof frame and put the loose frame on top.
|
|
| 3. |
Secure the frame and outer roof to the centre marking of the respective part.
|
|
| 4. |
Fit the clip on each side. Use
30 12 598 Circlip pliers
and open the clip. Insert the clips at the locations marked on the frame.
Do not press the clips fully onto the frames before the headlining has been fitted on the inner frame. 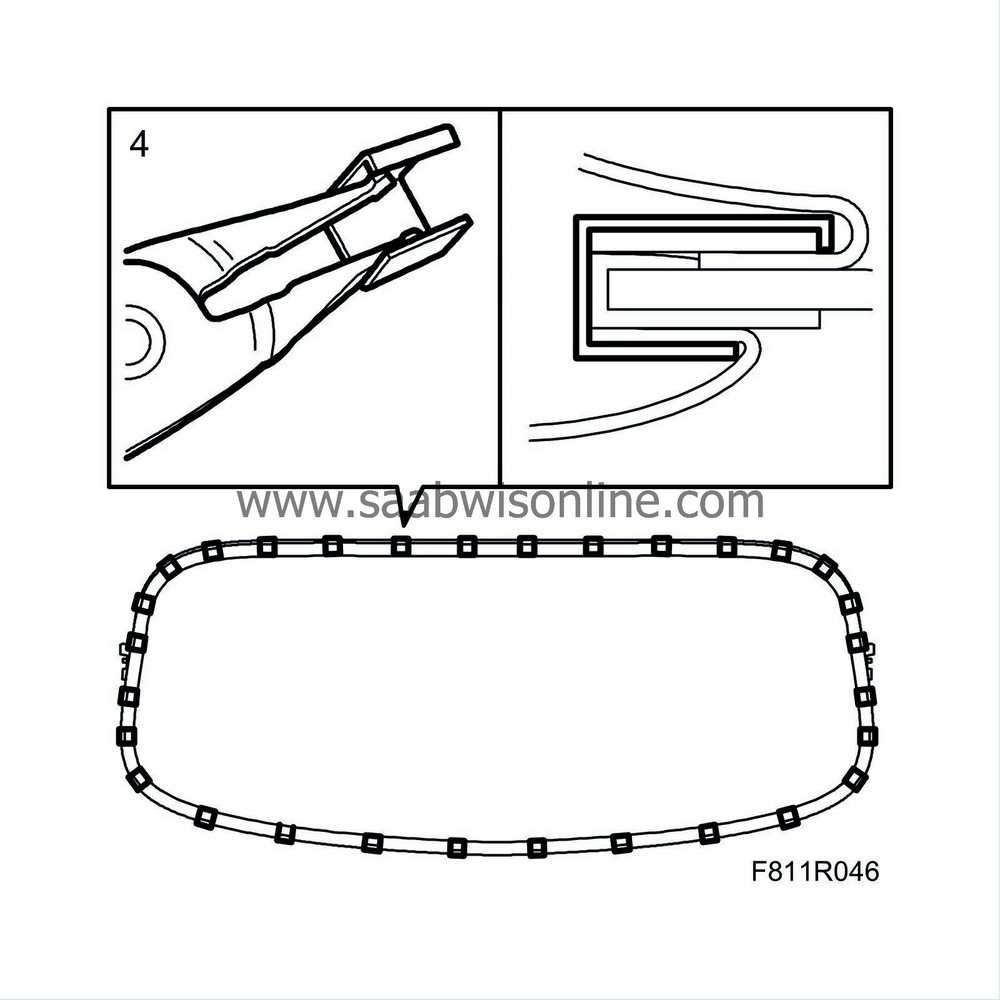
|
|||||||||
| 5. |
The fit the remaining clips in the same manner around the rear window.
|
|
| Fitting |
| 1. |
Put the outer roof with rear window in mounting position. Fit the window frame screws.
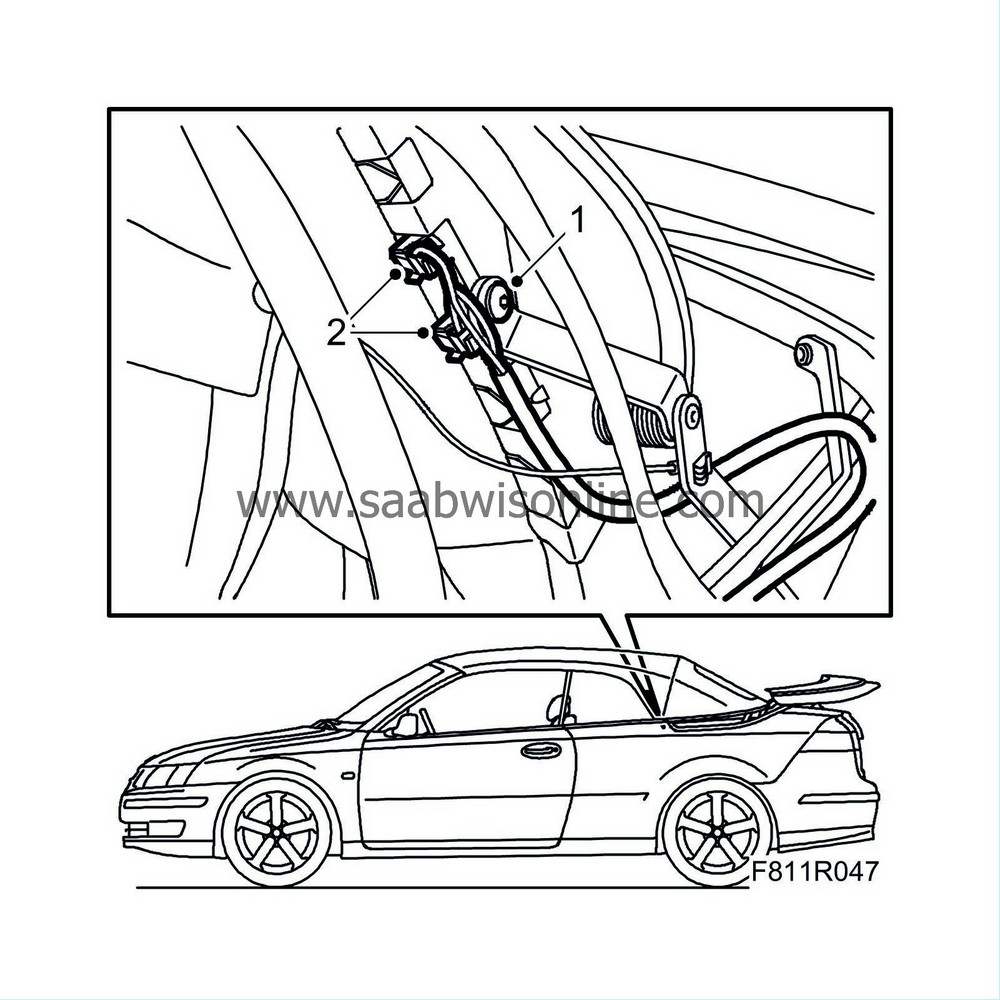
|
|
| 2. |
Fit the electrical connection for the heated rear window and the cable ties for the wiring harness.
|
|
| 3. |
Blind rivet on the rear window guide straps on both sides. Make sure the straps are not twisted.
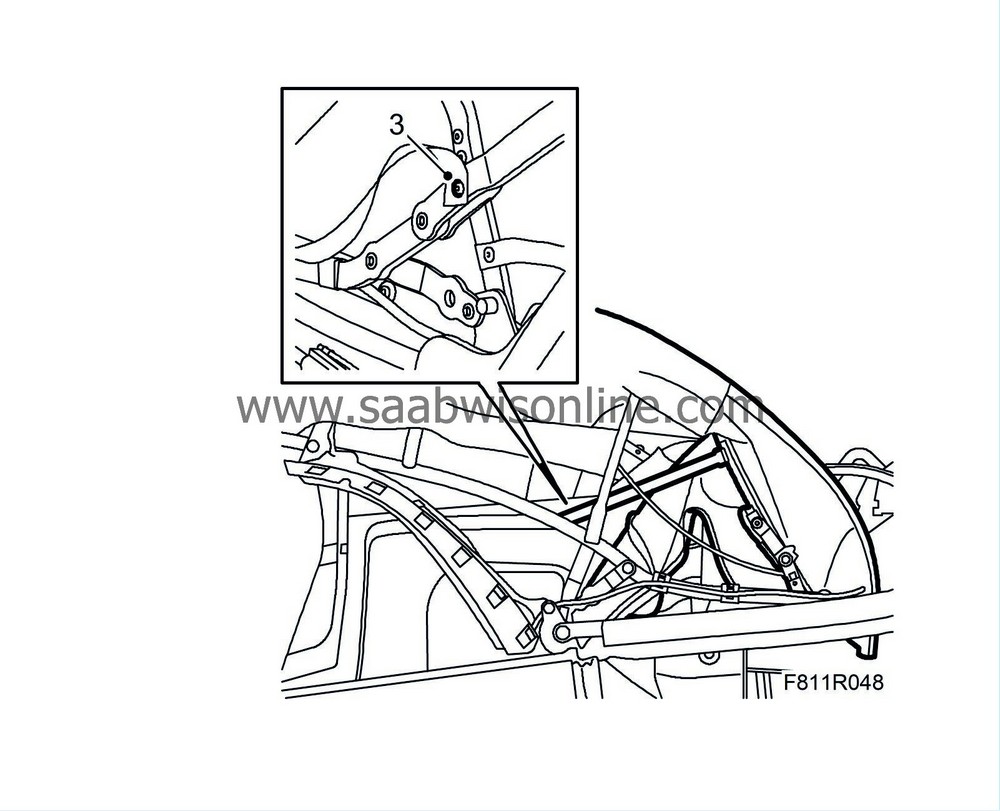
|
|
| 4. |
Fit the tension cables to the rear rails.
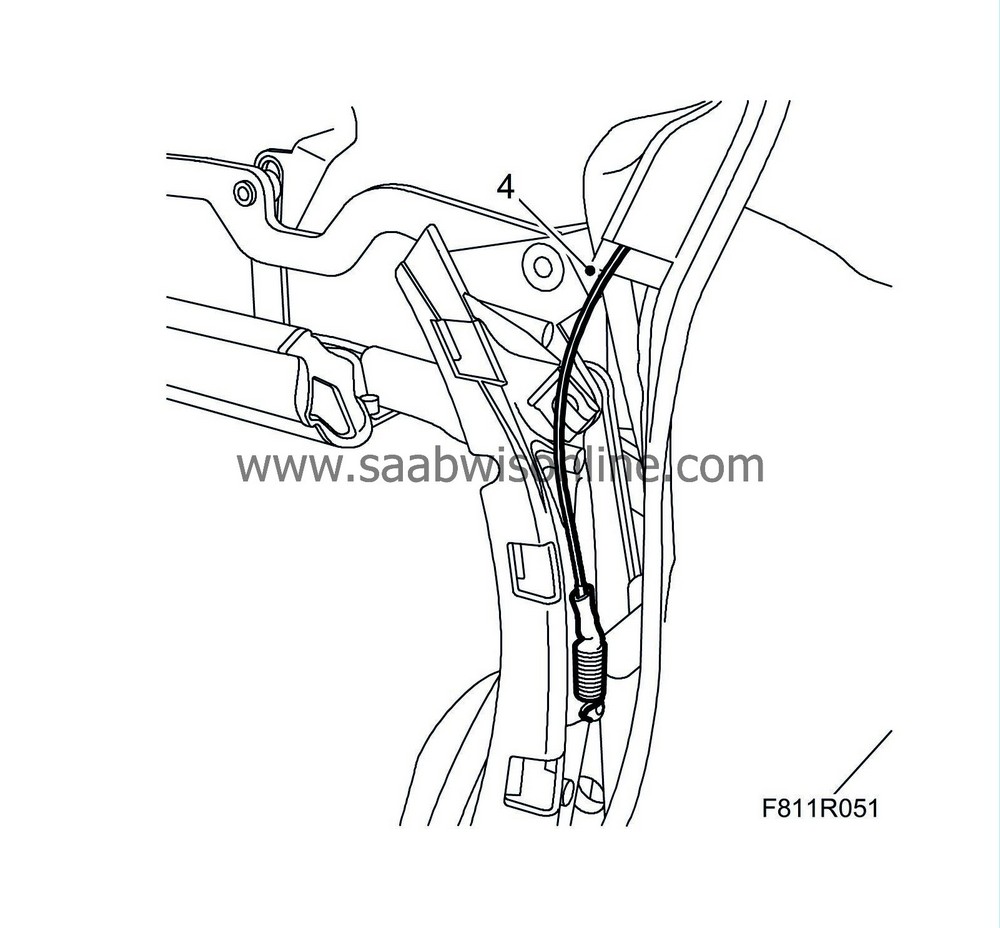
|
|
| 5. |
Operate the soft top half way down and secure it with the soft top support to prevent it falling down when the hydraulic pressure drops.
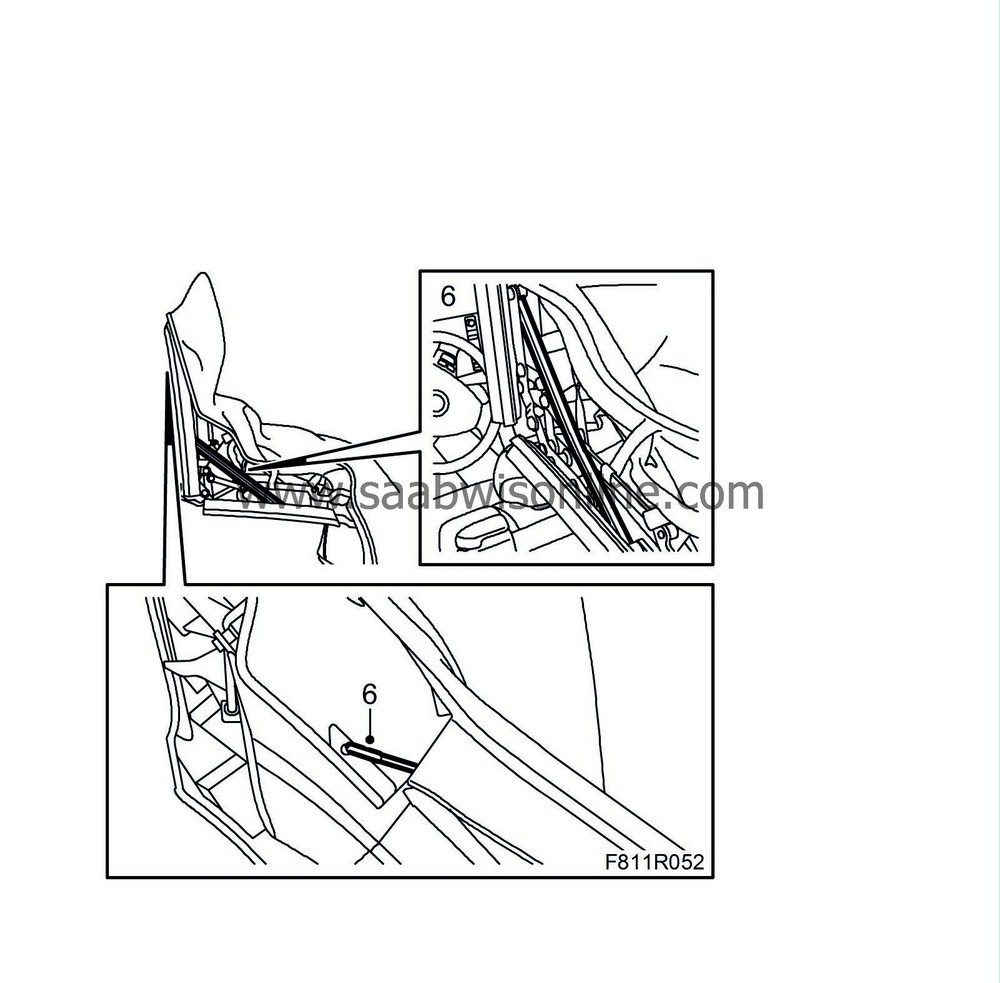
|
|
| 6. |
Hook the tension cables onto the first bow.
|
|
| 7. |
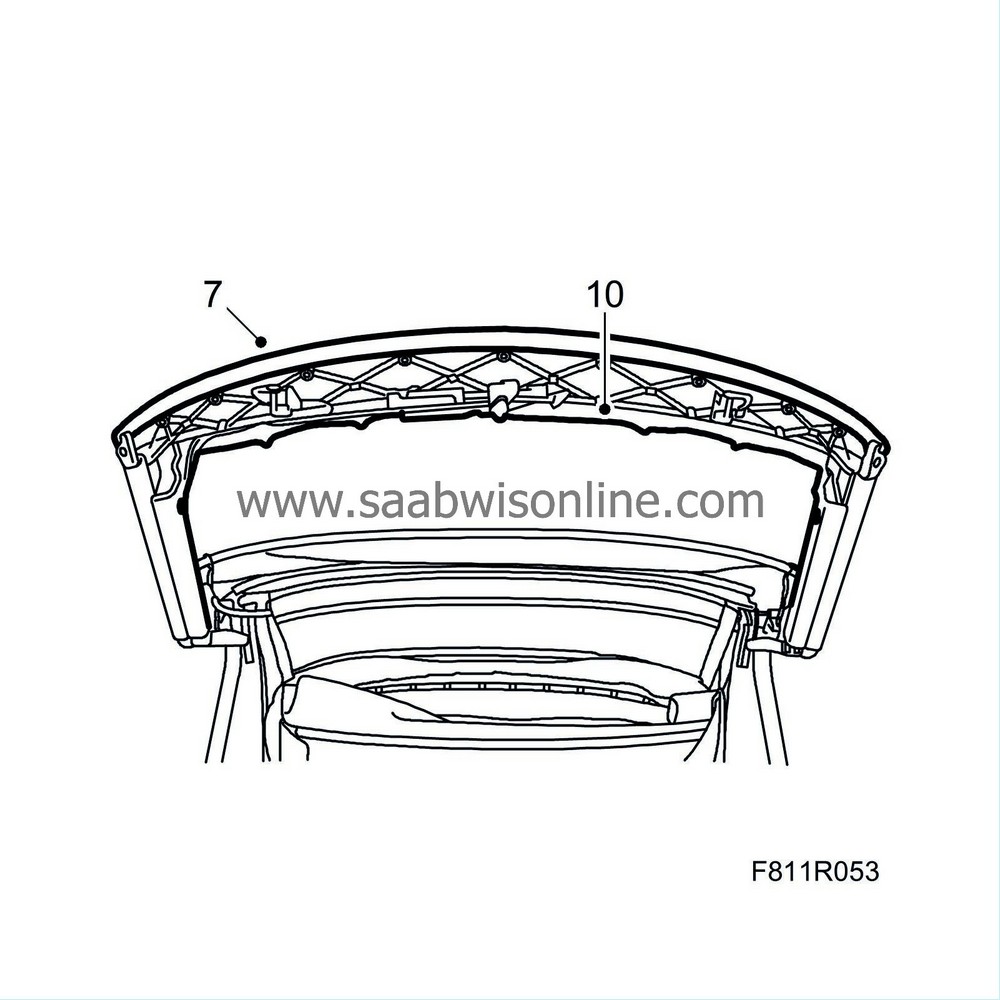
Remove the old double-sided adhesive tape on the first bow. Affix new tape to the first bow. Fit the outer roof to the first bow starting at the middle. Observe the centre markings on the parts.
|
|
| 8. |
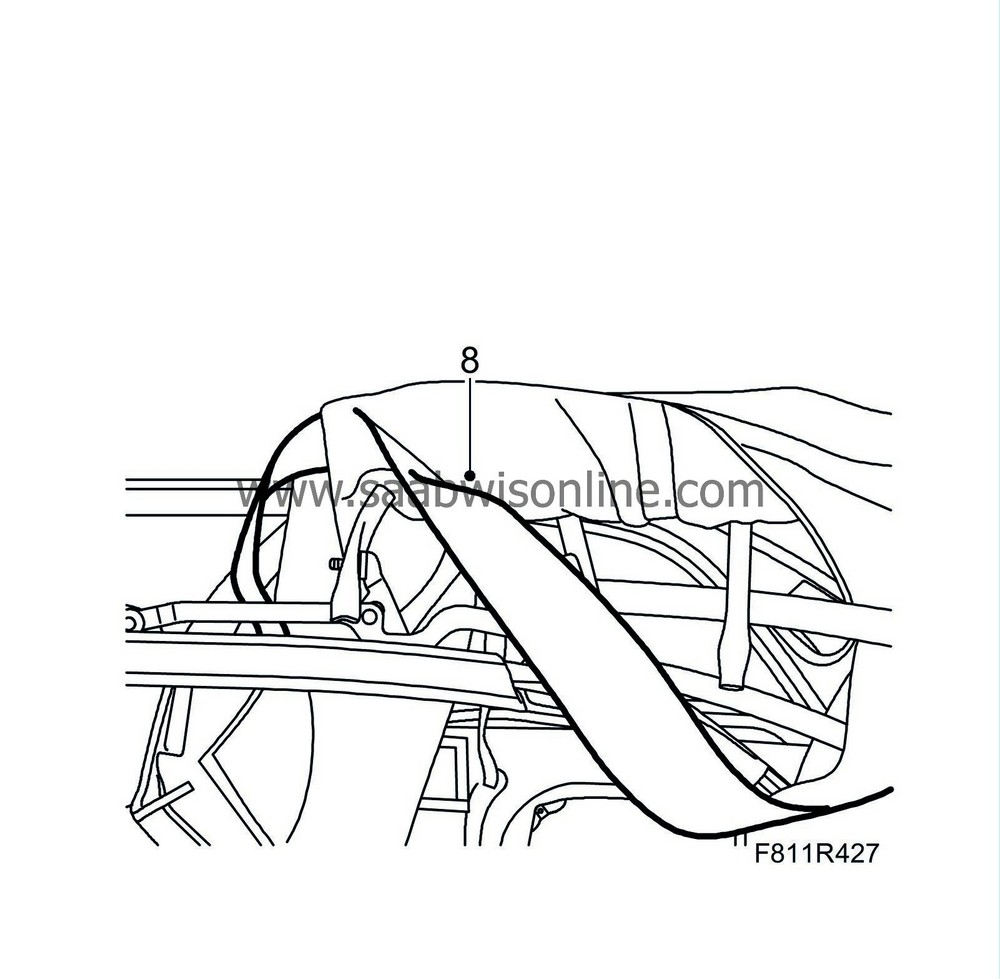
Insert the straps through the insulation pockets. Pull the straps through the hole to the first bow. Hook the eyelet onto the mounting.
|
|
| 9. |
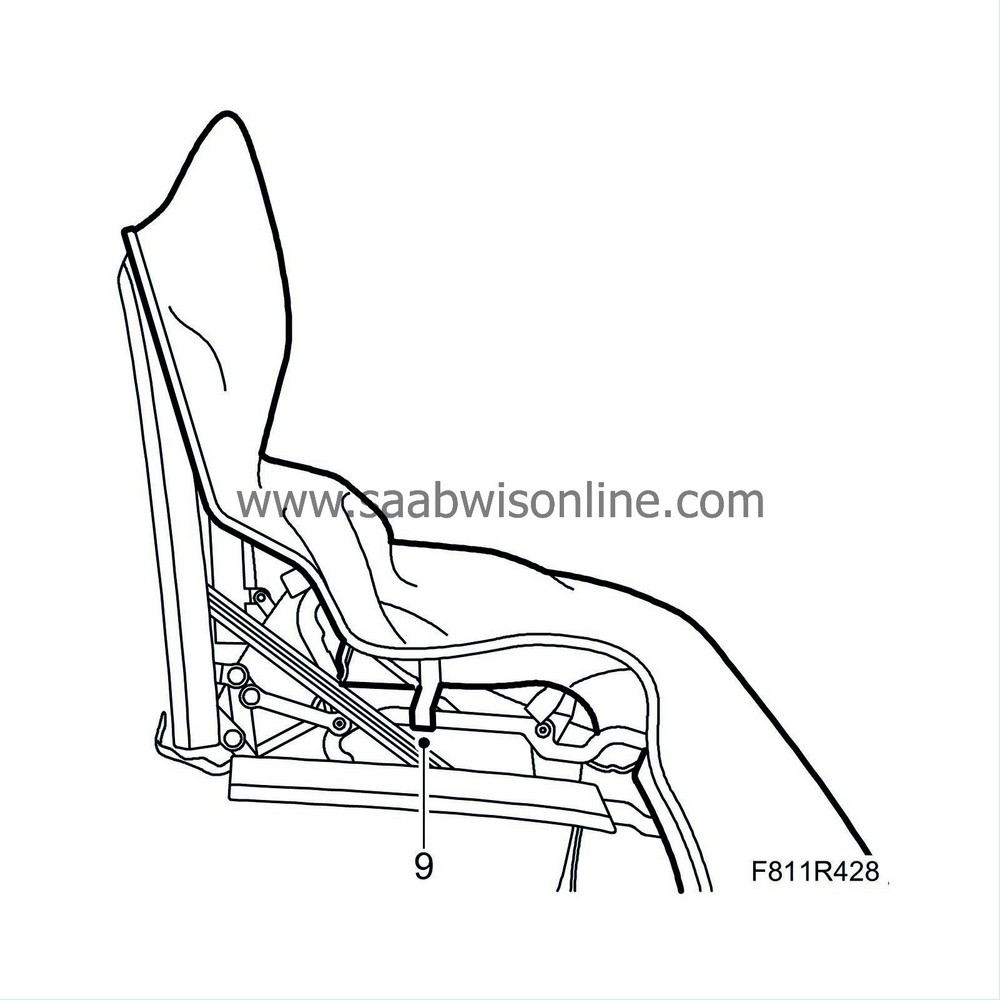
Fit the Velcro fastener to the linkage system for the front rail. The Velcro fastener must be in front of the hose package.
|
|
| 10. |
Hook the insulation onto the first bow. Make sure the insulation is above the bows.
|
|
| 11. |
Remove the soft top support and close the soft top. Put in place the insulation at the fifth bow.
|
|
| 12. |
Operate the soft top half way down and secure it with the soft top support.
|
|
| 13. |
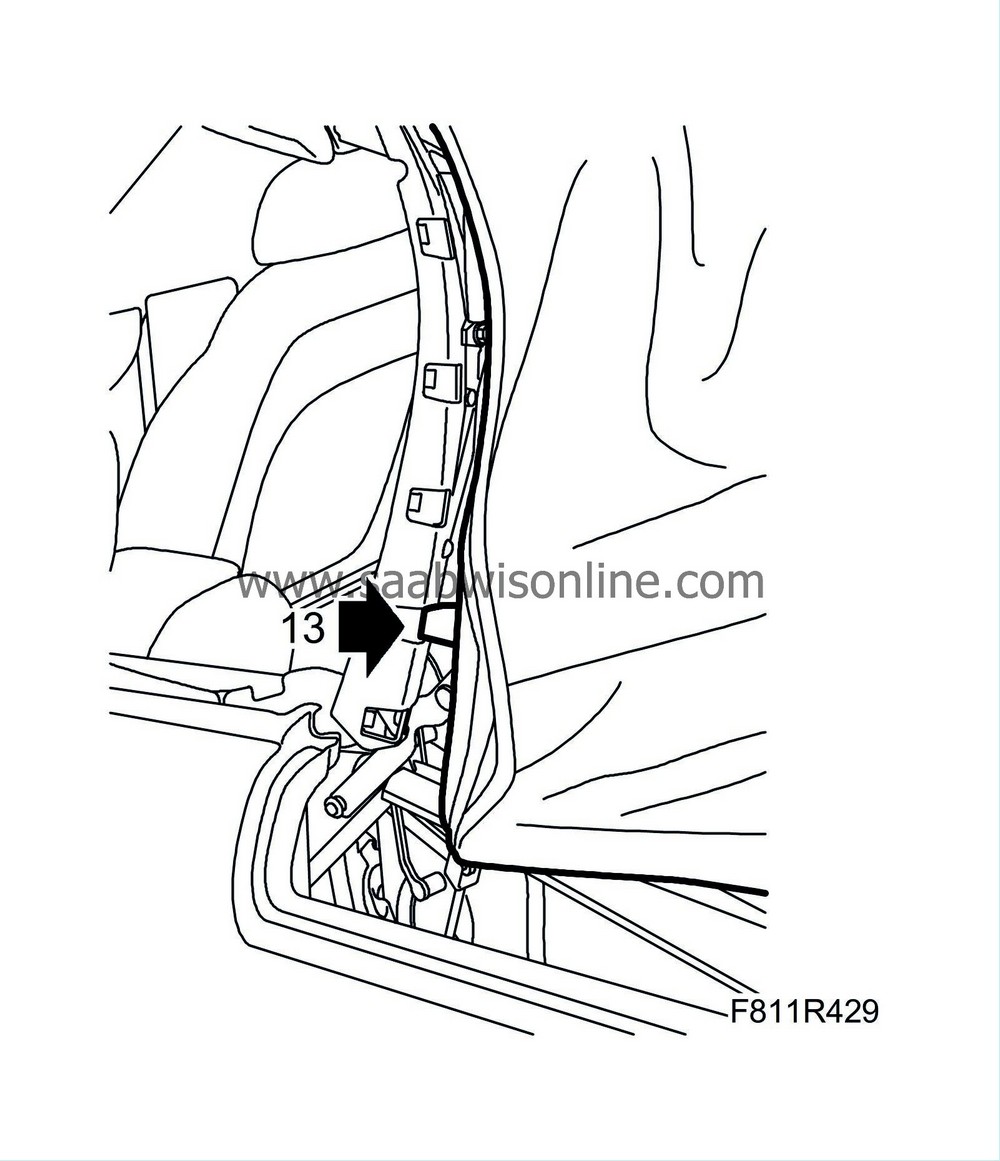
Fit the Velcro fastener to the rear rails.
|
|
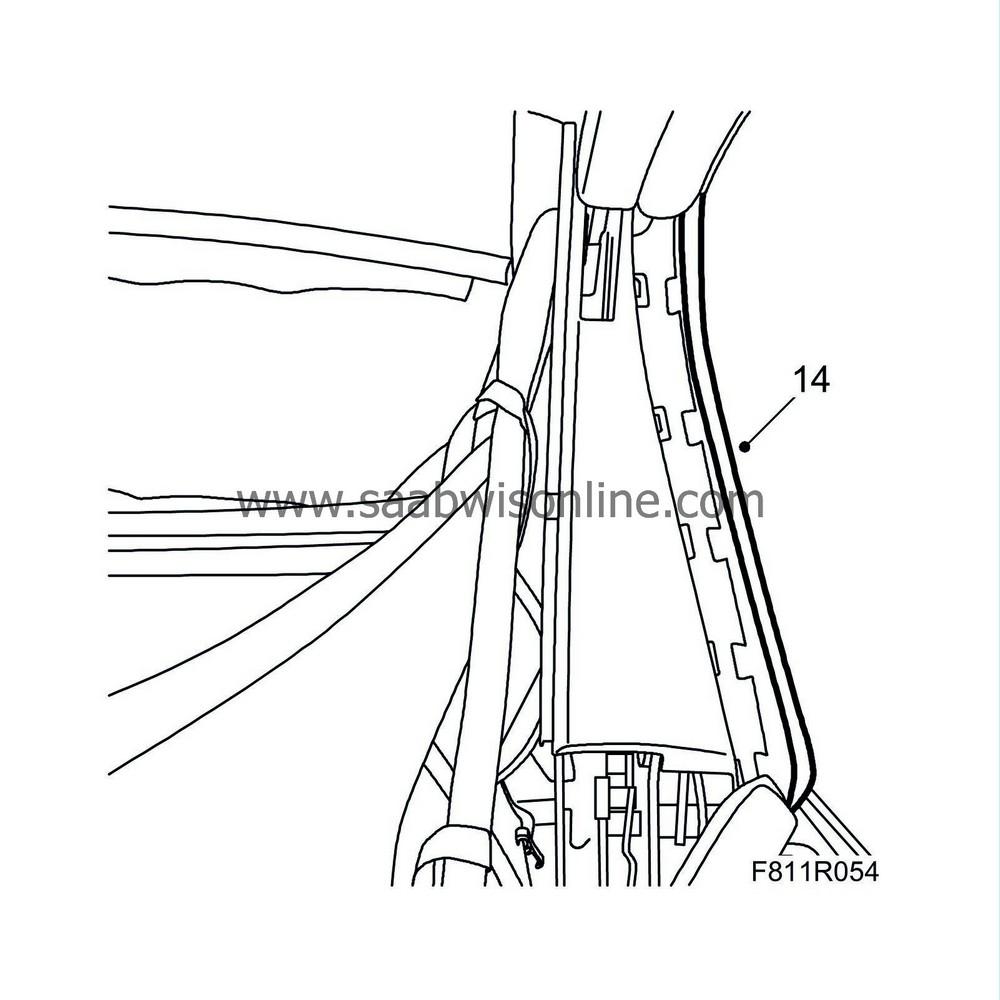
| 14. |
Hook the outer roof attaching profiles to the rear rails. Start at the corners.
|
|
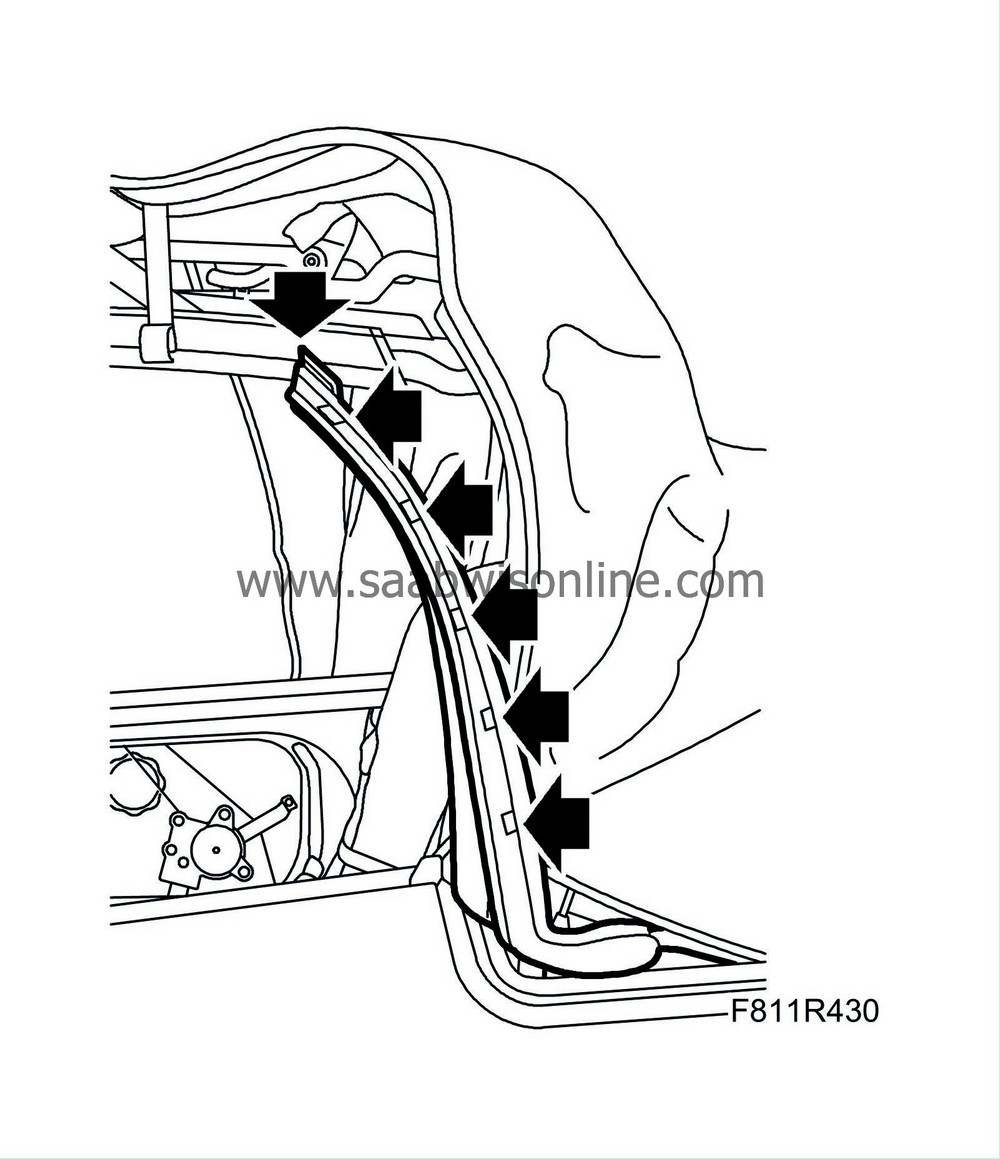
| 15. |
Fit the rear rail seals. Hook the top part of the seal to the mounting and then press it into the rail
|
|
| 16. |
Close the soft top, leaving the sixth bow up. Secure with the soft top support.
|
|
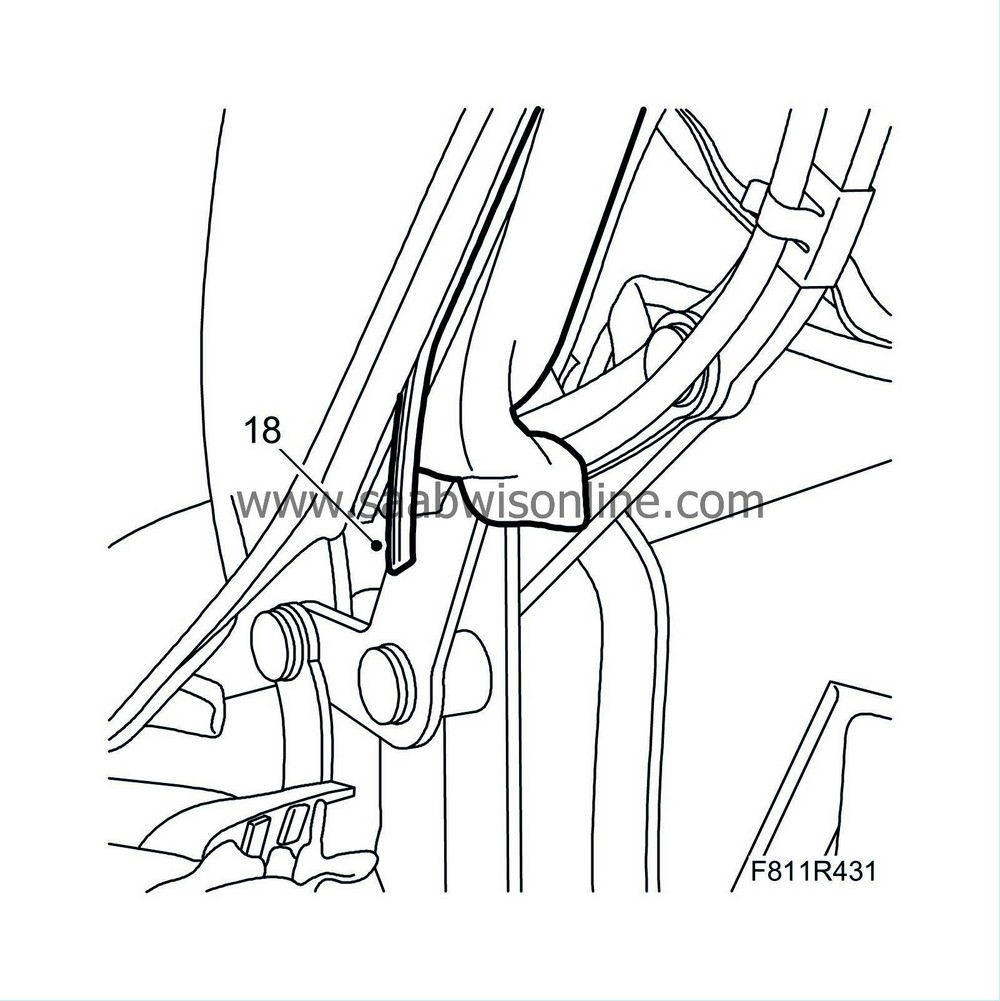
| 17. |
Place the outer roof edging into the mounting groove on the sixth bow with the help of an assistant. Start at the middle and continue outward. Press in the edging using the removal tool.
|
|
| 18. |
Fit the locking strip into the mounting groove using the removal tool to lock the outer roof edging strip to the sixth bow. Start from the side.
|
|
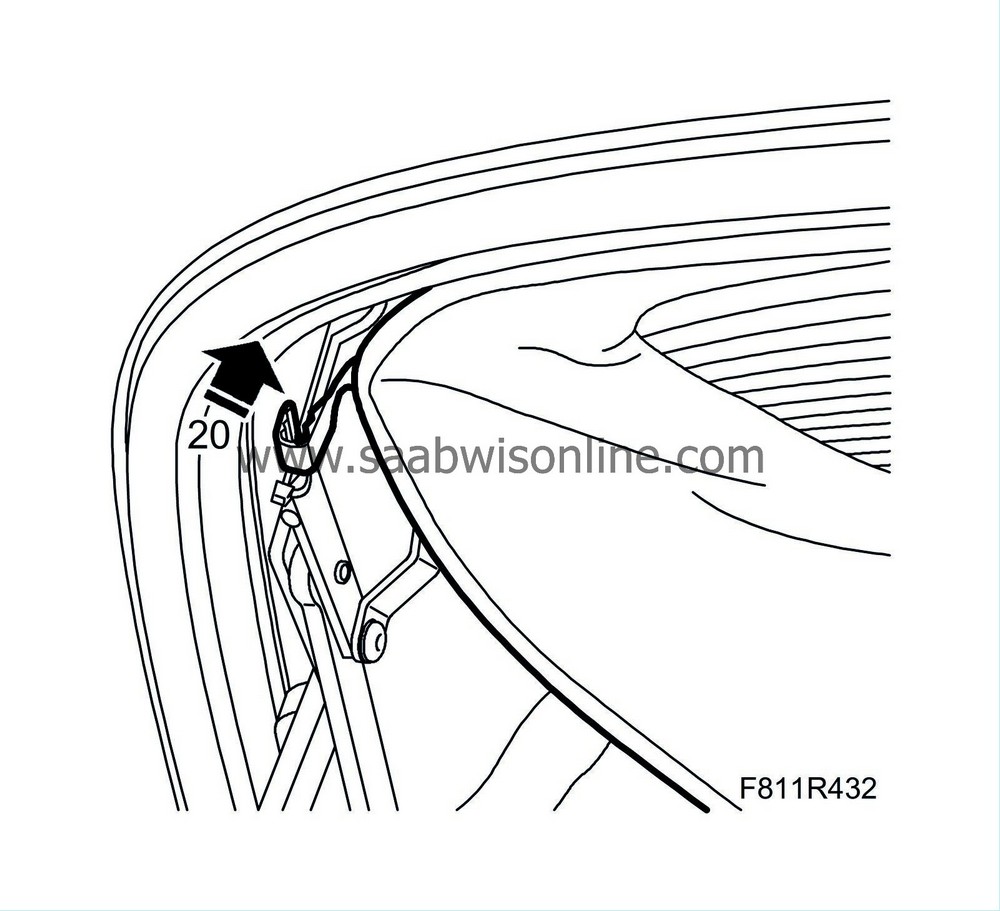
| 19. |
Press the headlining edging strip into the attaching profile.
|
|
| 20. |
Fit the plastic clip to the sixth bow.
|
|
| 21. |
Remove the soft top support. Close the soft top completely.
|
|
| 22. |
Place the outer roof fabric tabs behind the bows.
|
|
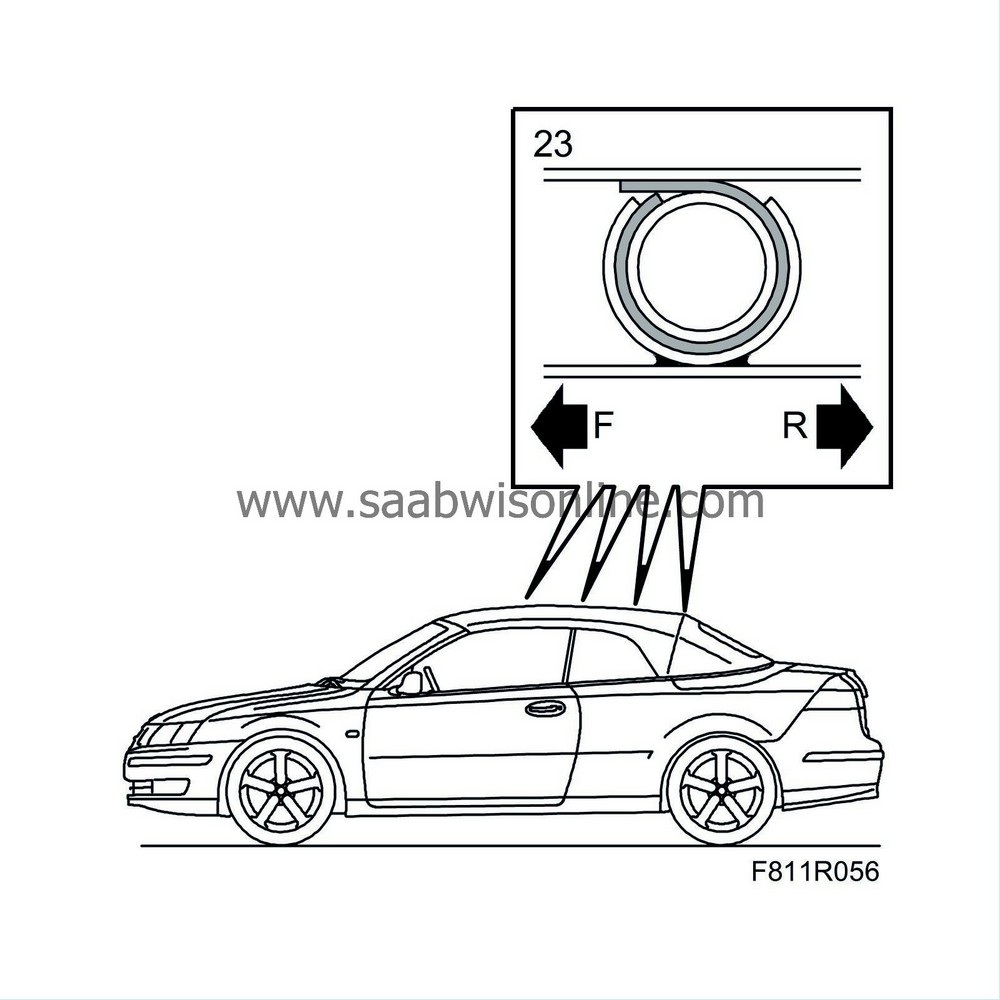
| 23. |
Change the double-sided adhesive tape on the second, third, fourth and fifth bow if necessary. Fold the outer roof fabric tabs around the bows.
|
|
| 24. |
Operate the soft top half way up and secure it with the soft top support.
|
|
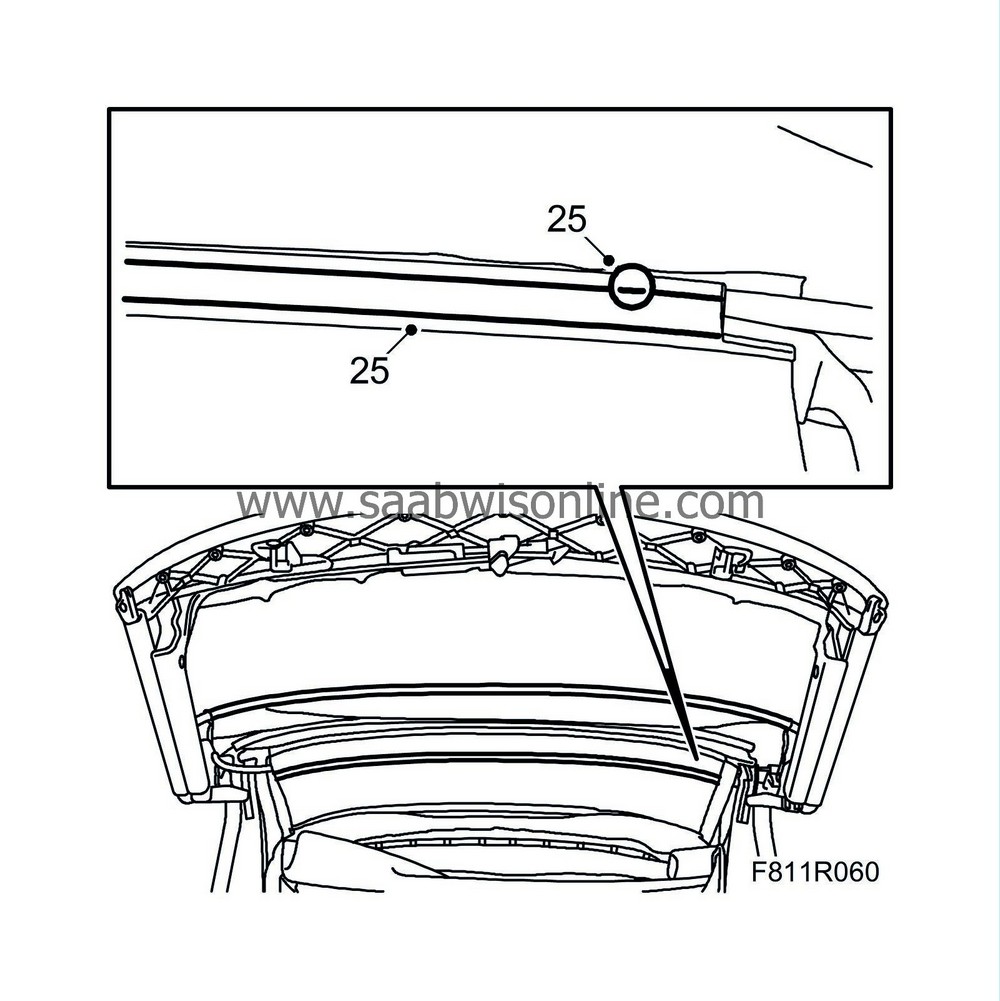
| 25. |
Press the headlining plastic holder onto the bows. Fit the plastic holder clips.
|
|
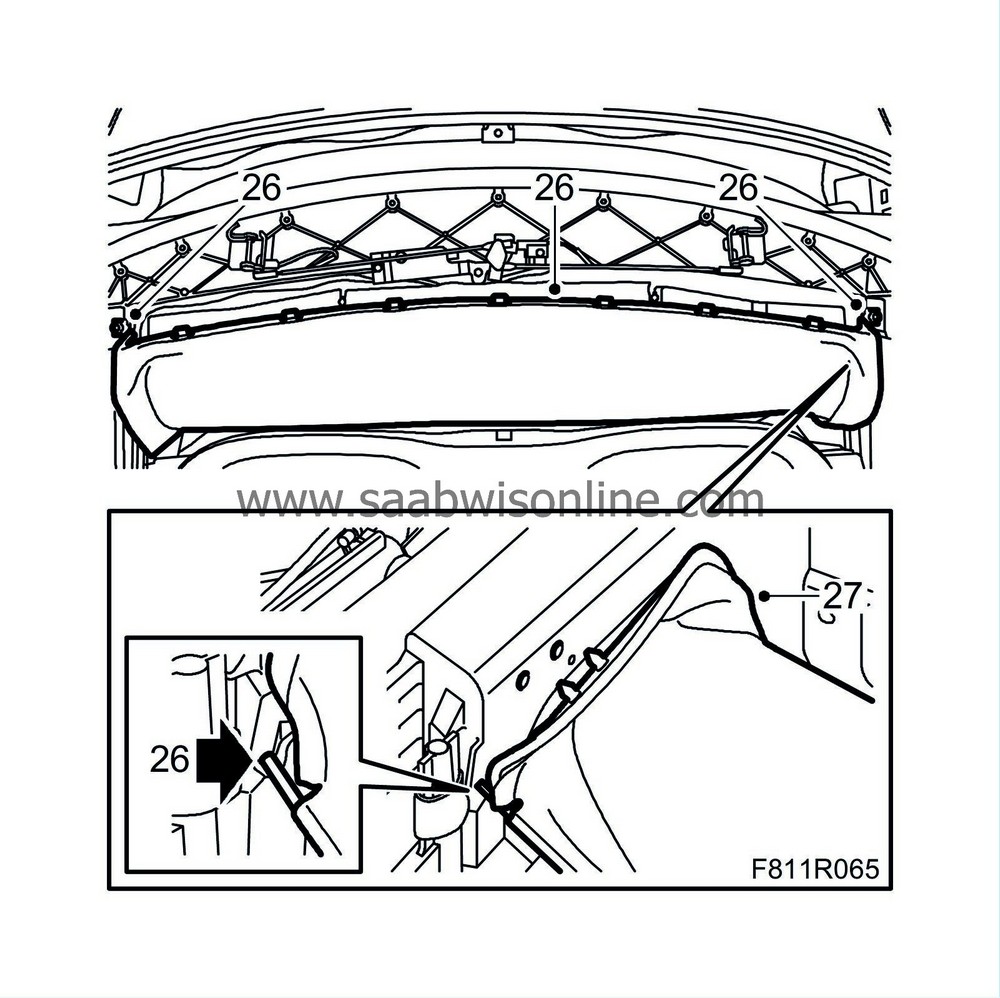
| 26. |
Hook the wire rod onto the headlining on the first bow.
|
|
| 27. |
Fit the plastic plugs for the headlining to the first bow.
|
|
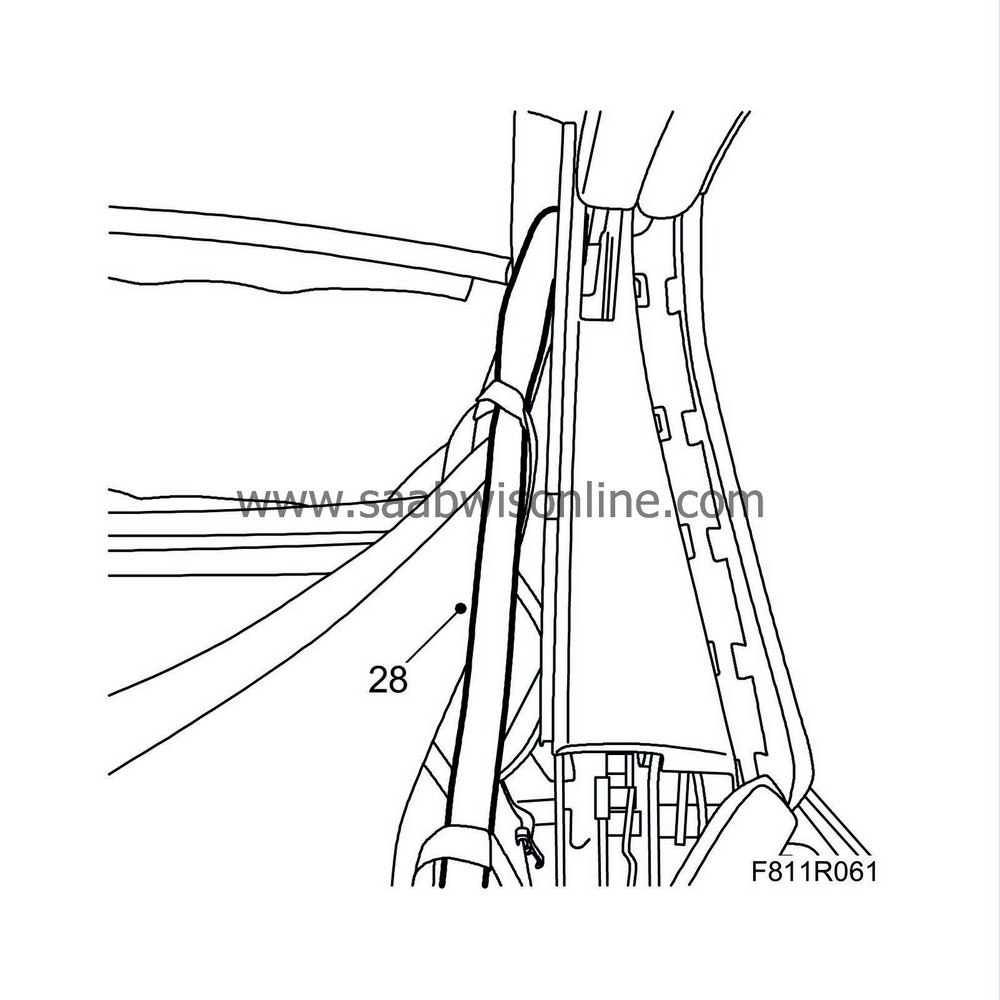
| 28. |
Fit the headlining rubber strap to the hook on the rear rail.
|
|
| 29. |
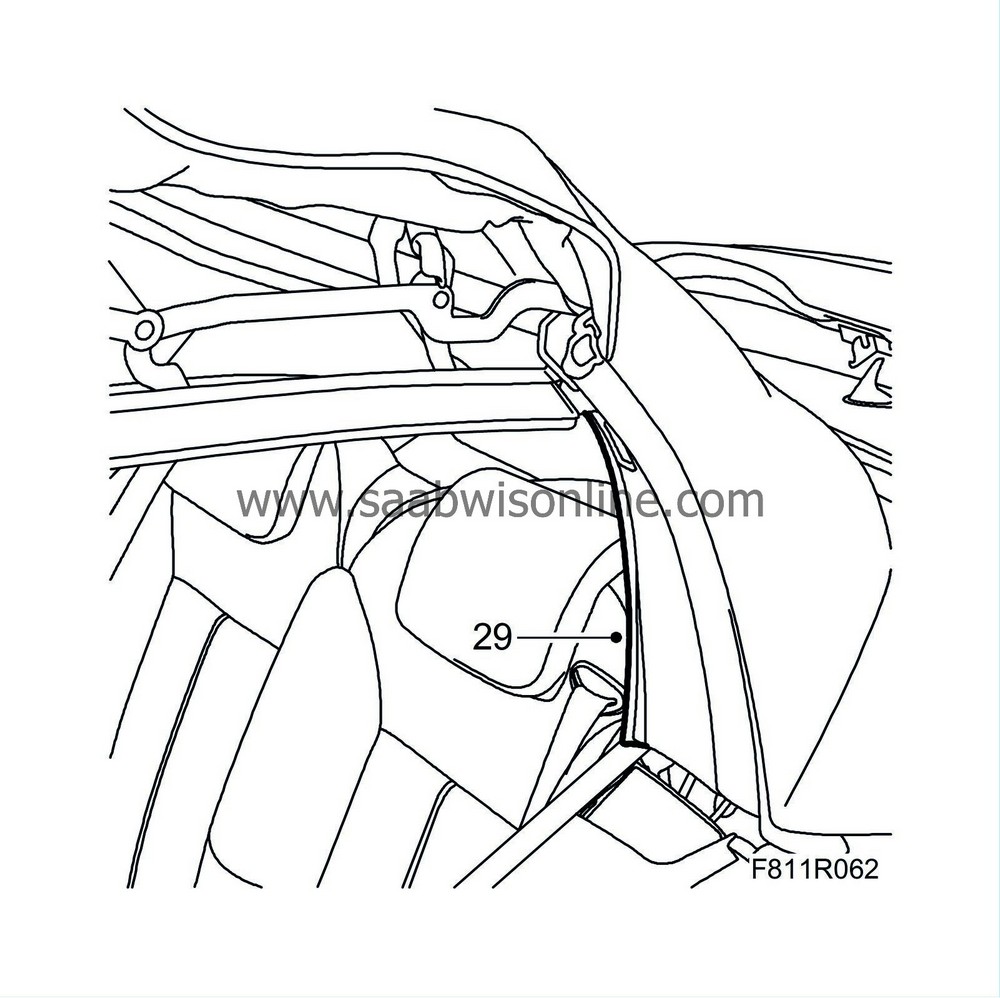
Fit the headlining to the rear rails by pressing in the headlining rail.
|
|
| 30. |
Close the soft top manually to check that the headlining is fitted correctly.
|
|
| 31. |
Operate the soft top automatically a few times to check the function.
|
|
| 32. |
Open the soft top and leave the soft top cover open.
|
|
| 33. |
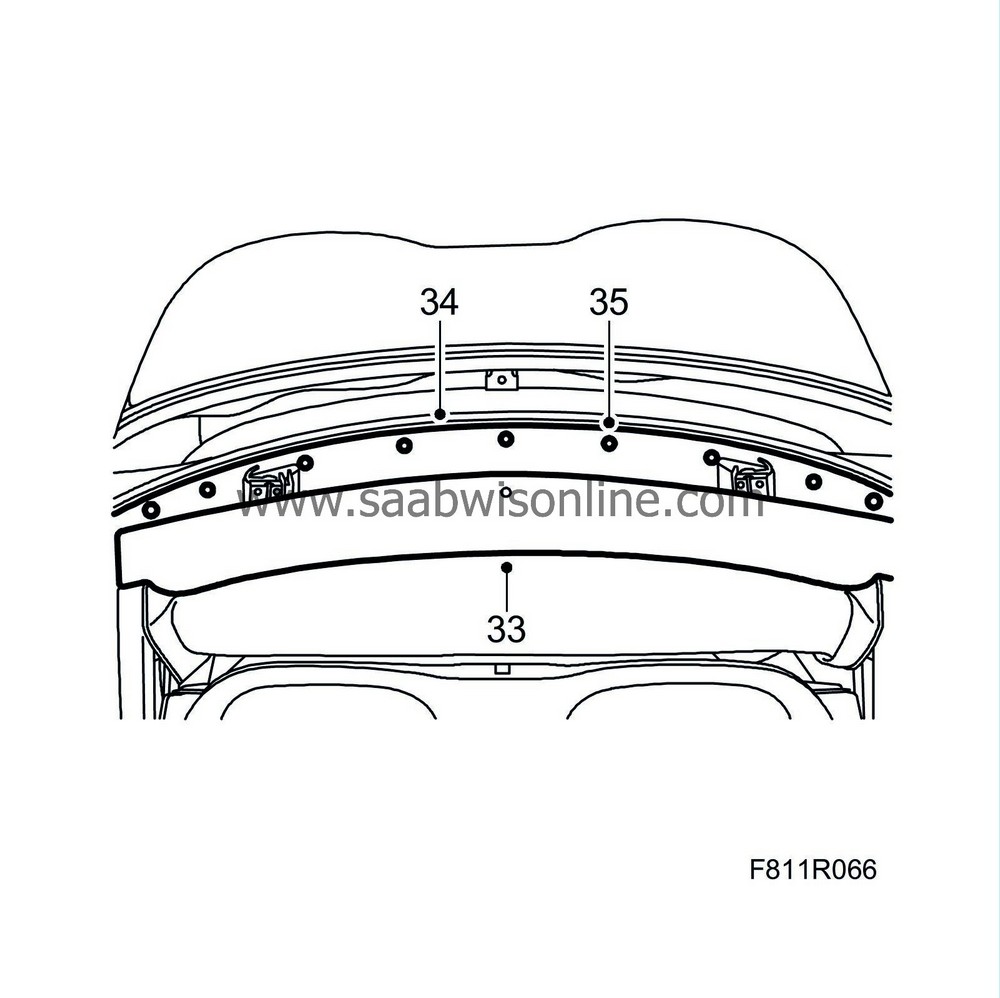
Fit the cover.
|
|
| 34. |
Fit the cover plate.
|
|
| 35. |
Fit the cover plate clip.
|
|
| 36. |
Connect the diagnostics tool and erase any diagnostic trouble code.
|
|

 Warning

