PRE-RELEASE
Removing the cylinder block
| Removing the cylinder block |
| To remove |
| 1. |
Place the car on a lift.
CV : Remove the chassis reinforcement, front subframe, CV. |
|
| 3. |
Remove the drain plug and drain the engine oil. Fit the plug with a new O-ring.
Tightening torque 25 Nm (18 lbf ft). 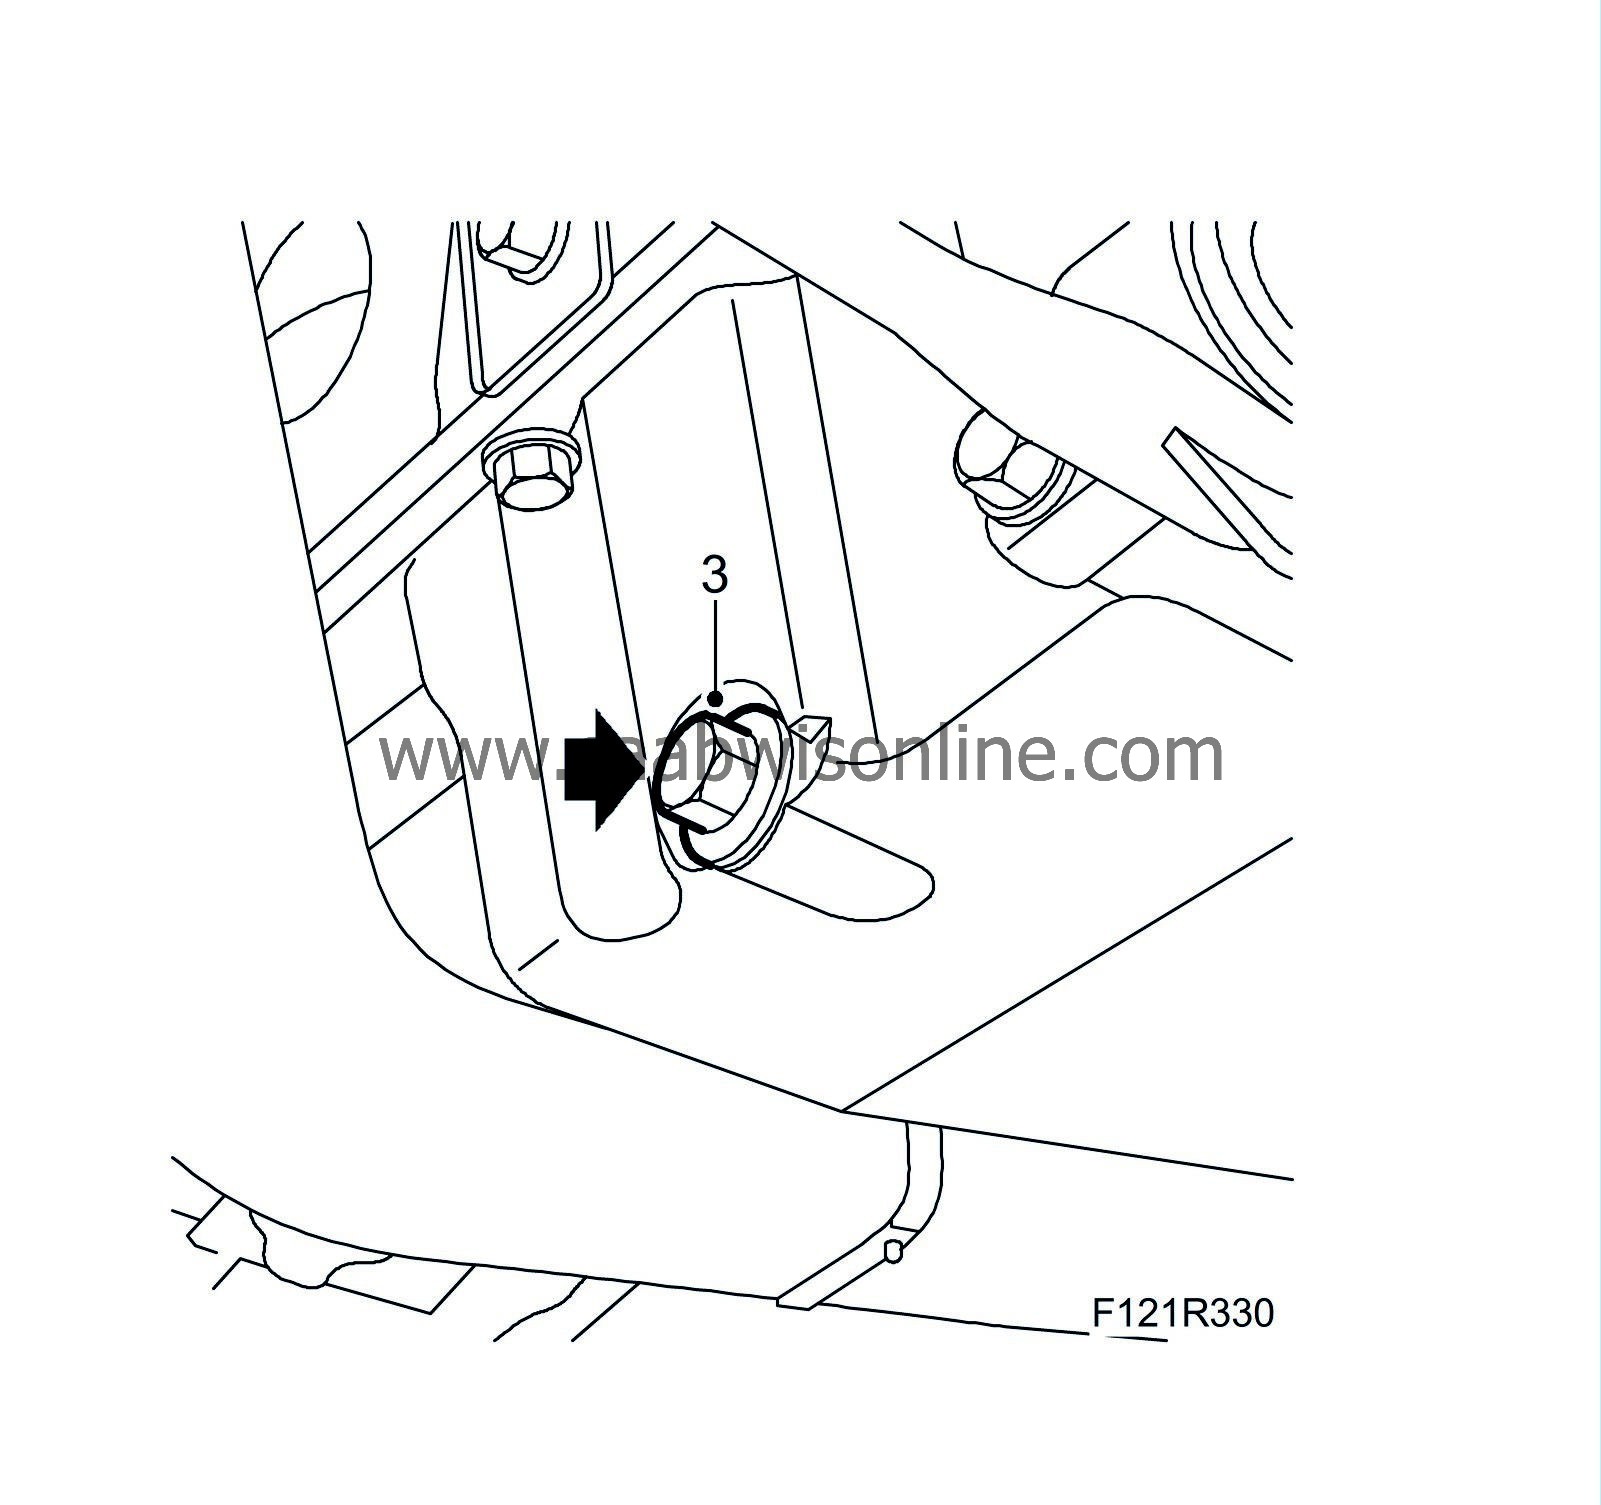
|
|
| 4. |
Remove the engine assembly, see
Power unit, to remove
.
|
|
| 5. |
Leave the power train on the trolley lift.
|
|
| 6. |
Remove the cover to the spark plugs.

|
|
| 7. |
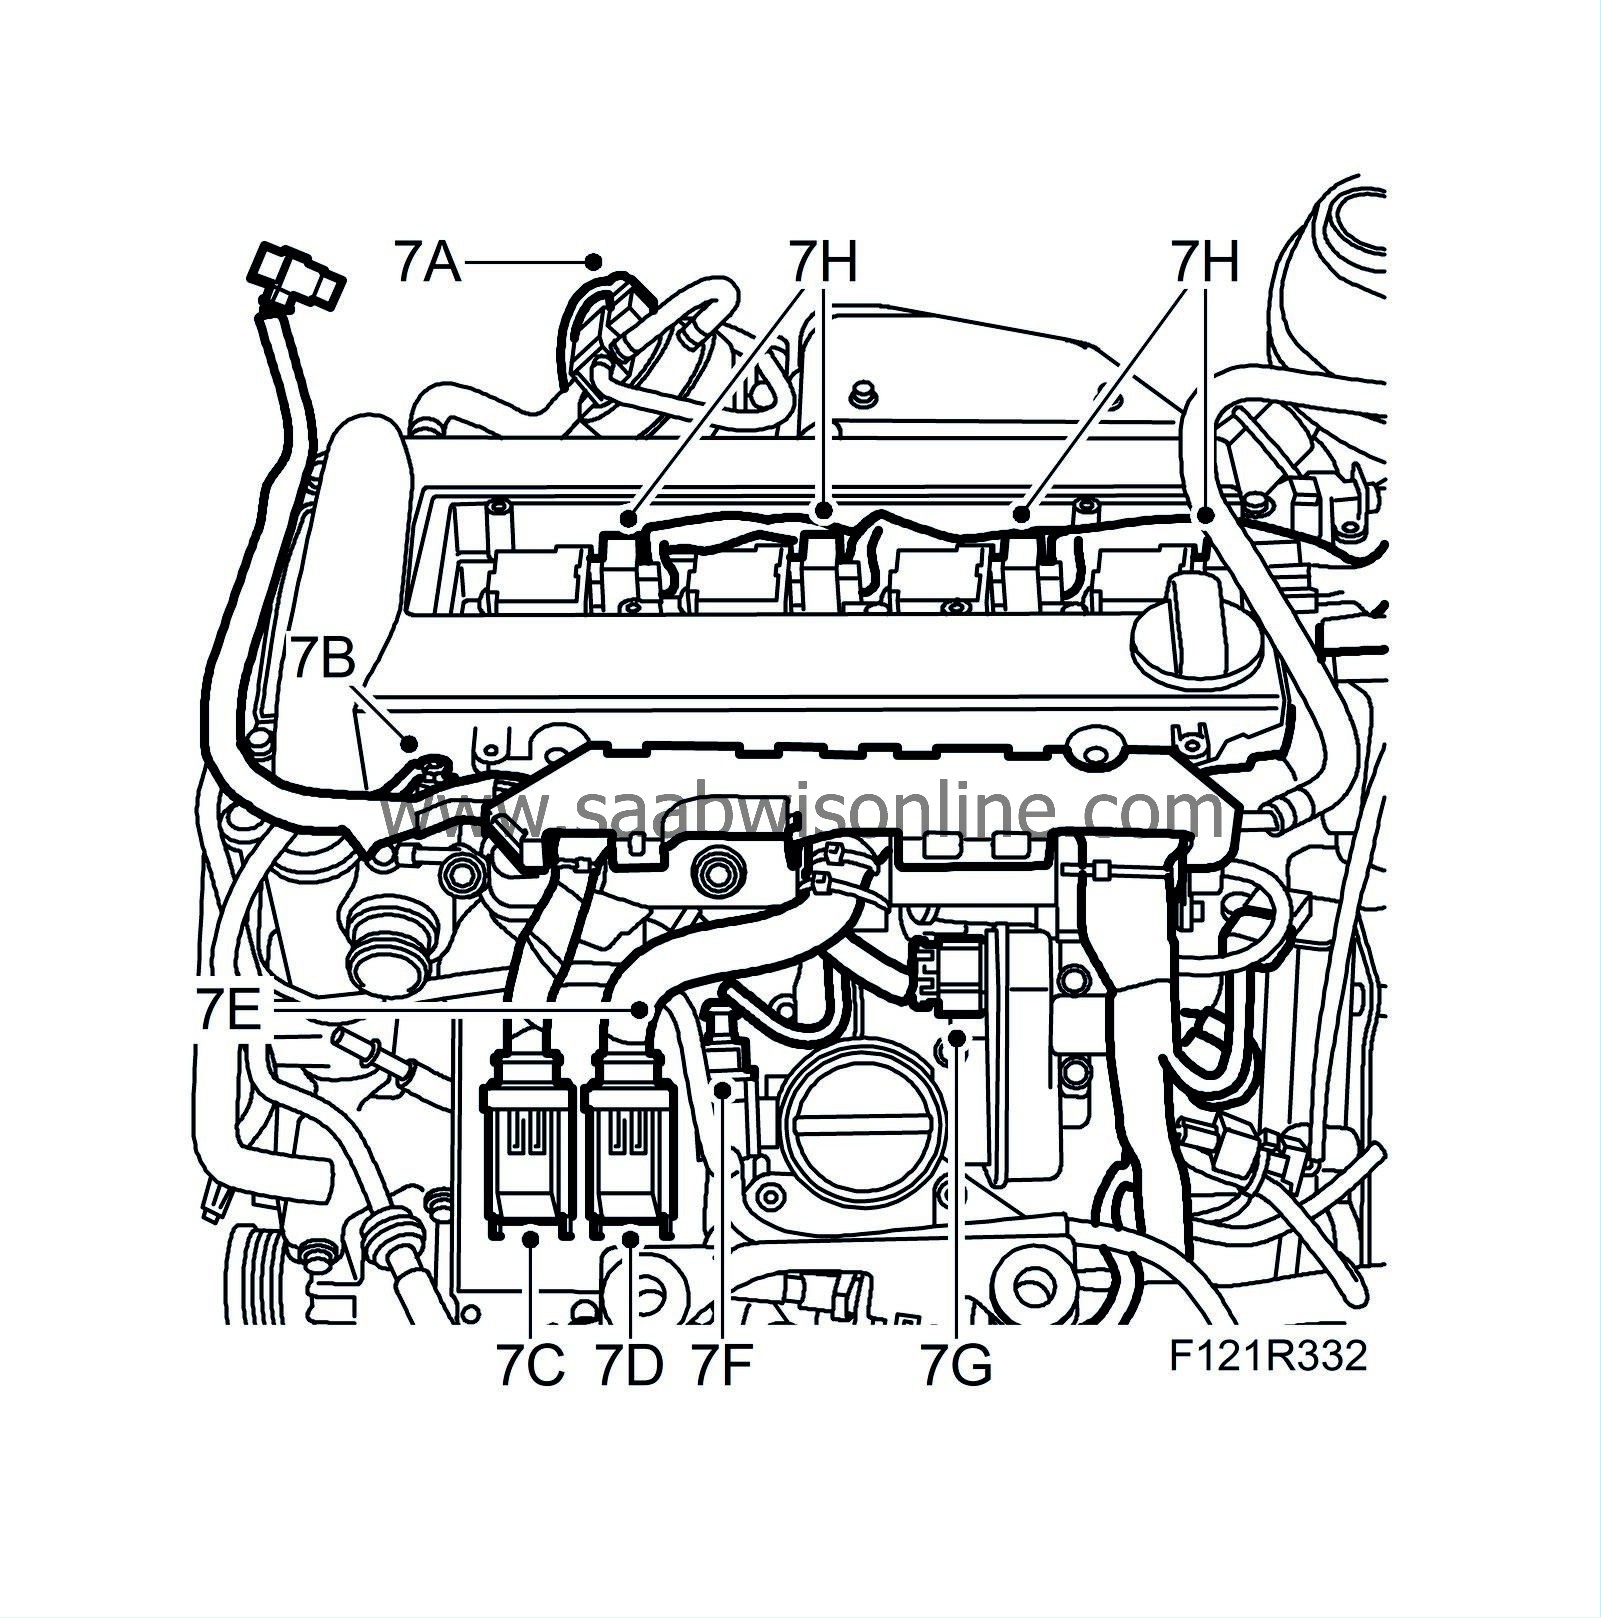
Remove the engine wiring harness using the following method:
|
||||||||||
| 7.A. |
Unplug the connector from the charge air control valve.
|
| 7.B. |
Unplug the connector from the coolant temperature sensor.
|
| 7.C. |
Unplug the engine control module connector.
|
| 7.D. |
Unplug the engine control module connector.
|
| 7.E. |
Unplug the connector from grounding point G7.
|
| 7.F. |
Unplug the bypass valve connector.
|
| 7.G. |
Unplug the throttle body connector.
|
| 7.H. |
Unplug the 4 ignition coil connectors.
|
| 7.I. |
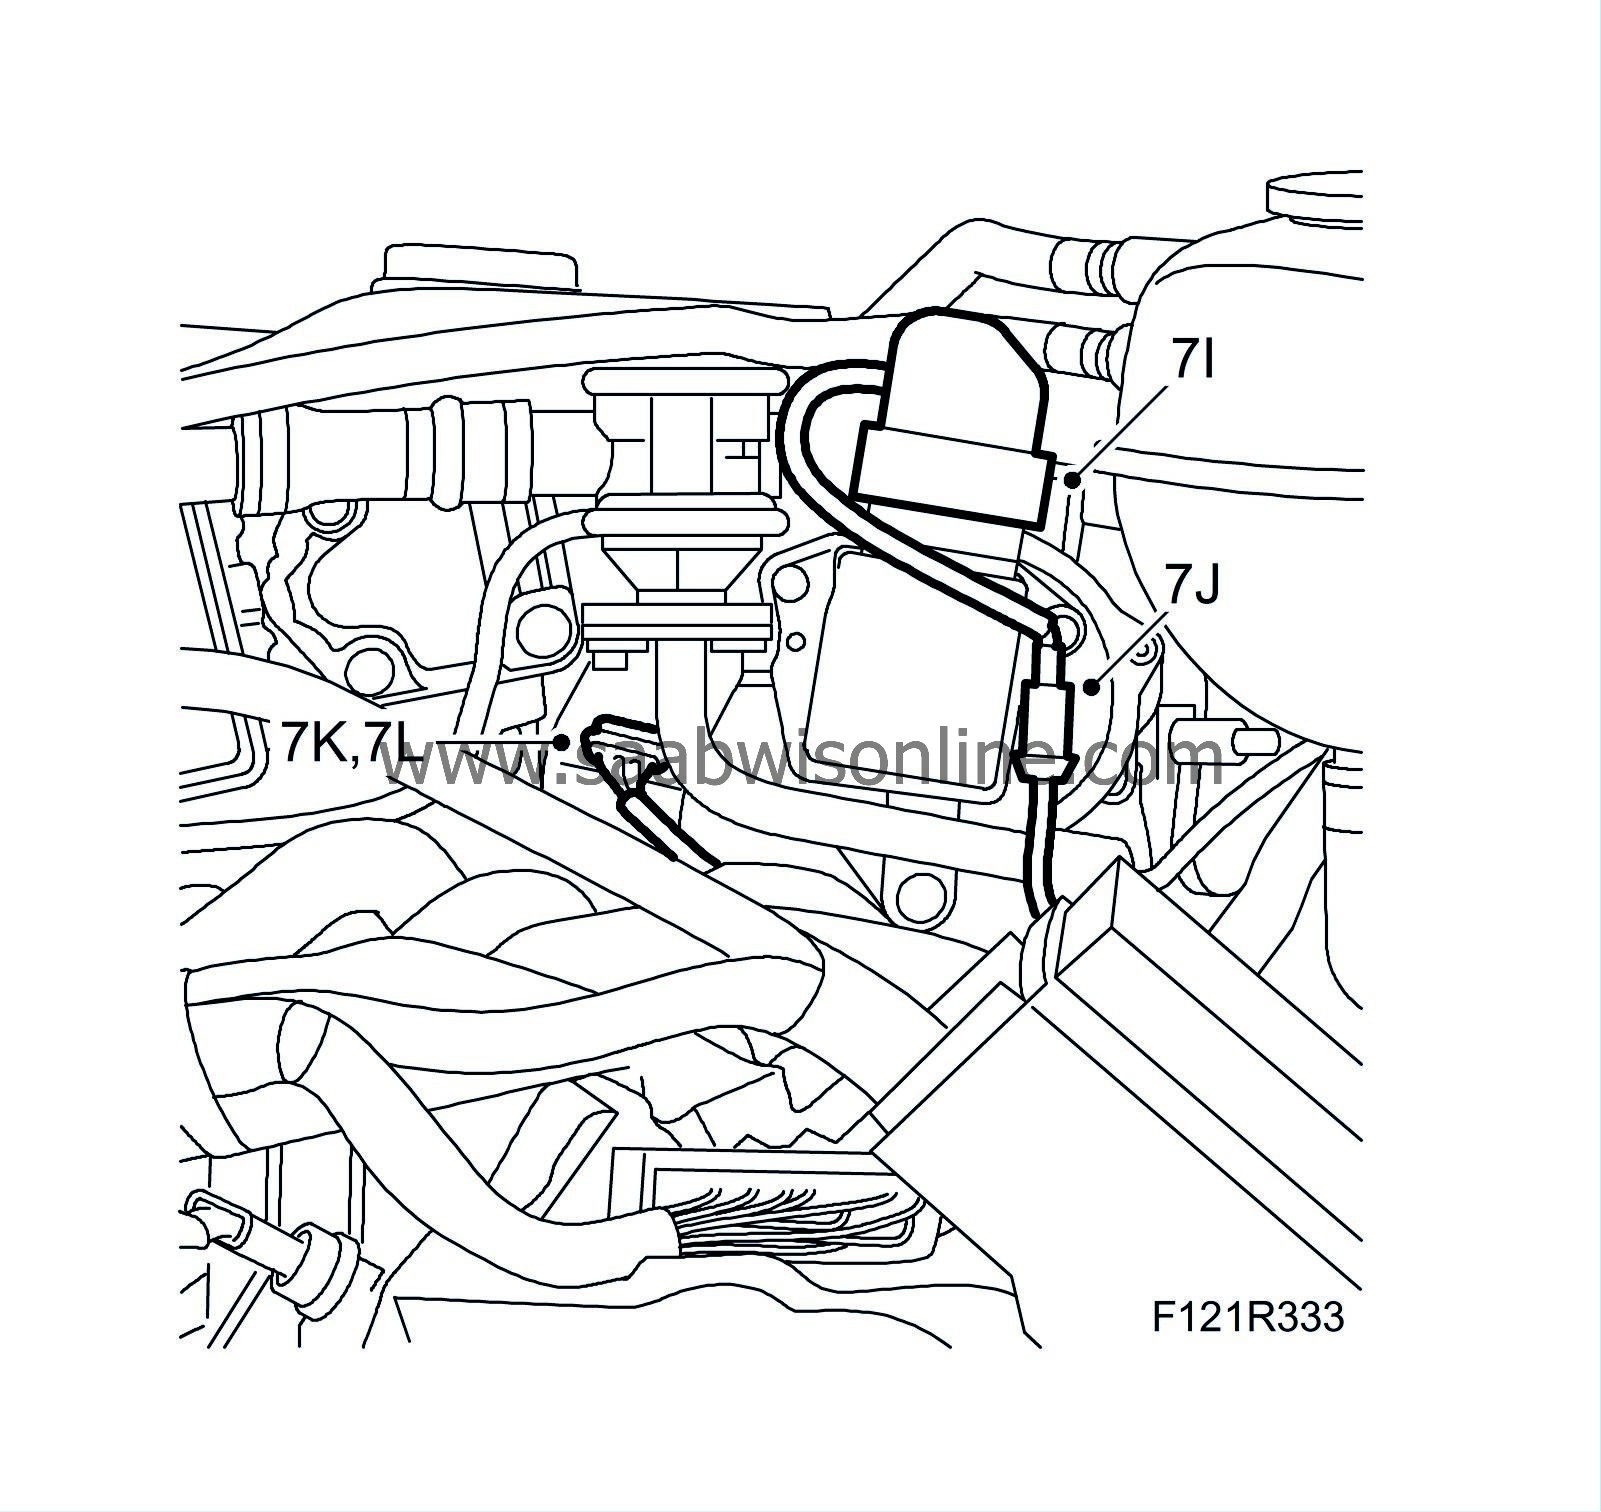
Unplug the connector from the ionization detection module.
|
| 7.J. |
M03
: Unplug the connector from the exhaust temperature sensor.
|
| 7.K. |
Unplug the connector from the front oxygen sensor.
|
| 7.L. |
Unplug the connector from the rear oxygen sensor.
|
| 7.M. |
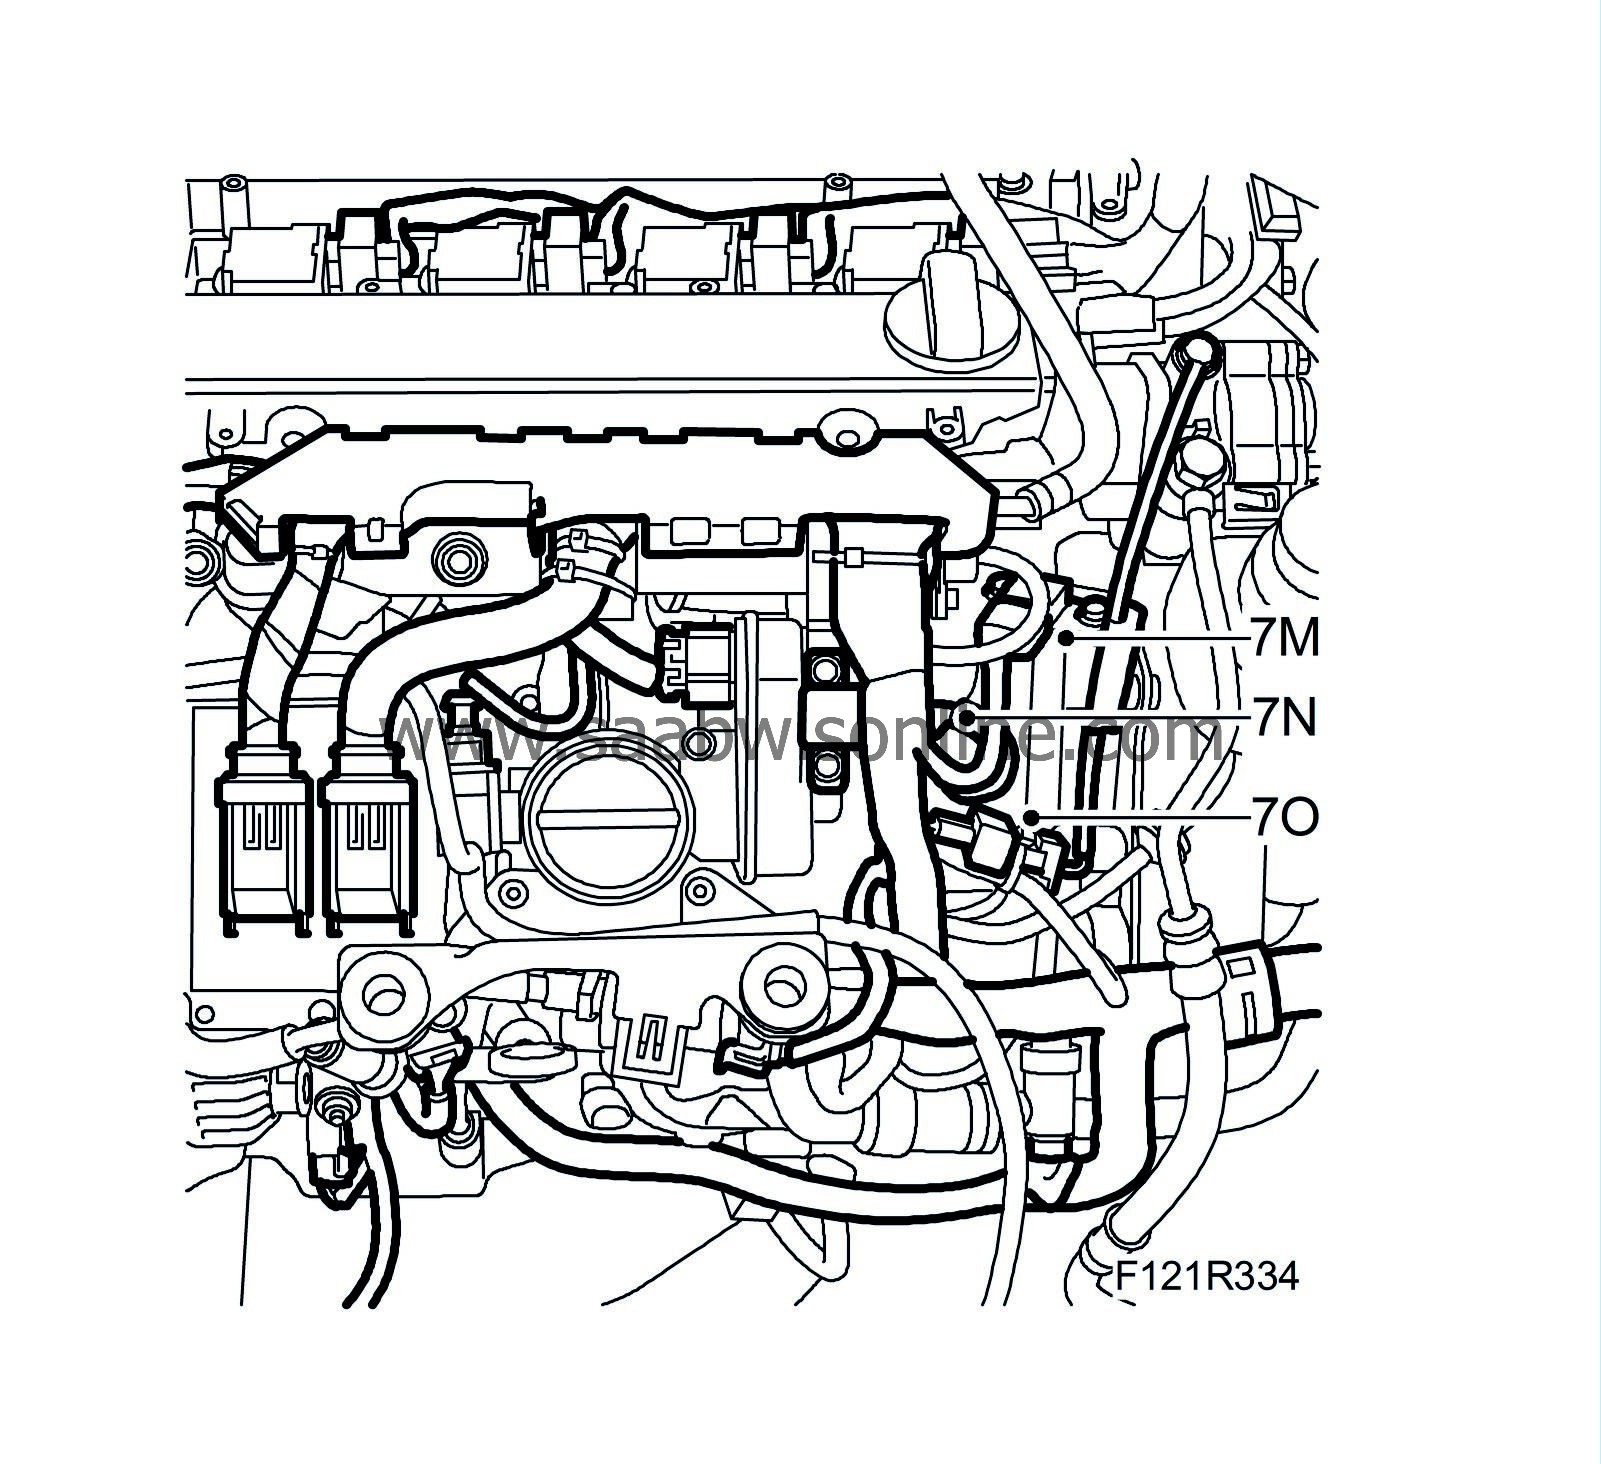
Unplug the connector from the atmospheric pressure sensor.
|
| 7.N. |
Unplug the connector from the intake manifold pressure sensor.
|
| 7.O. |
Remove the power steering fluid pressure switch.
|
| 7.P. |
Remove the starter motor contacts.
|
| 7.Q. |
Cars with secondary air injection pump:
Unplug the secondary air injection pump connector.

|
| 7.R. |
Remove the oil pressure switch.
|
| 7.S. |
Unplug the connector from the crankshaft position sensor.
|
| 7.T. |
Unplug the EVAP canister purge valve connector.
|
| 7.U. |
Unplug the oil level sensor connector.
|
| 7.V. |
Unplug the generator connector.
|
| 7.W. |
Unplug connector H8-9.
|
| 7.X. |
Remove the reversing light switch.
|
| 7.Y. |
Remove the wiring harness retaining bolts. Pull out the wiring harness and lift it aside.
|
| 8. |
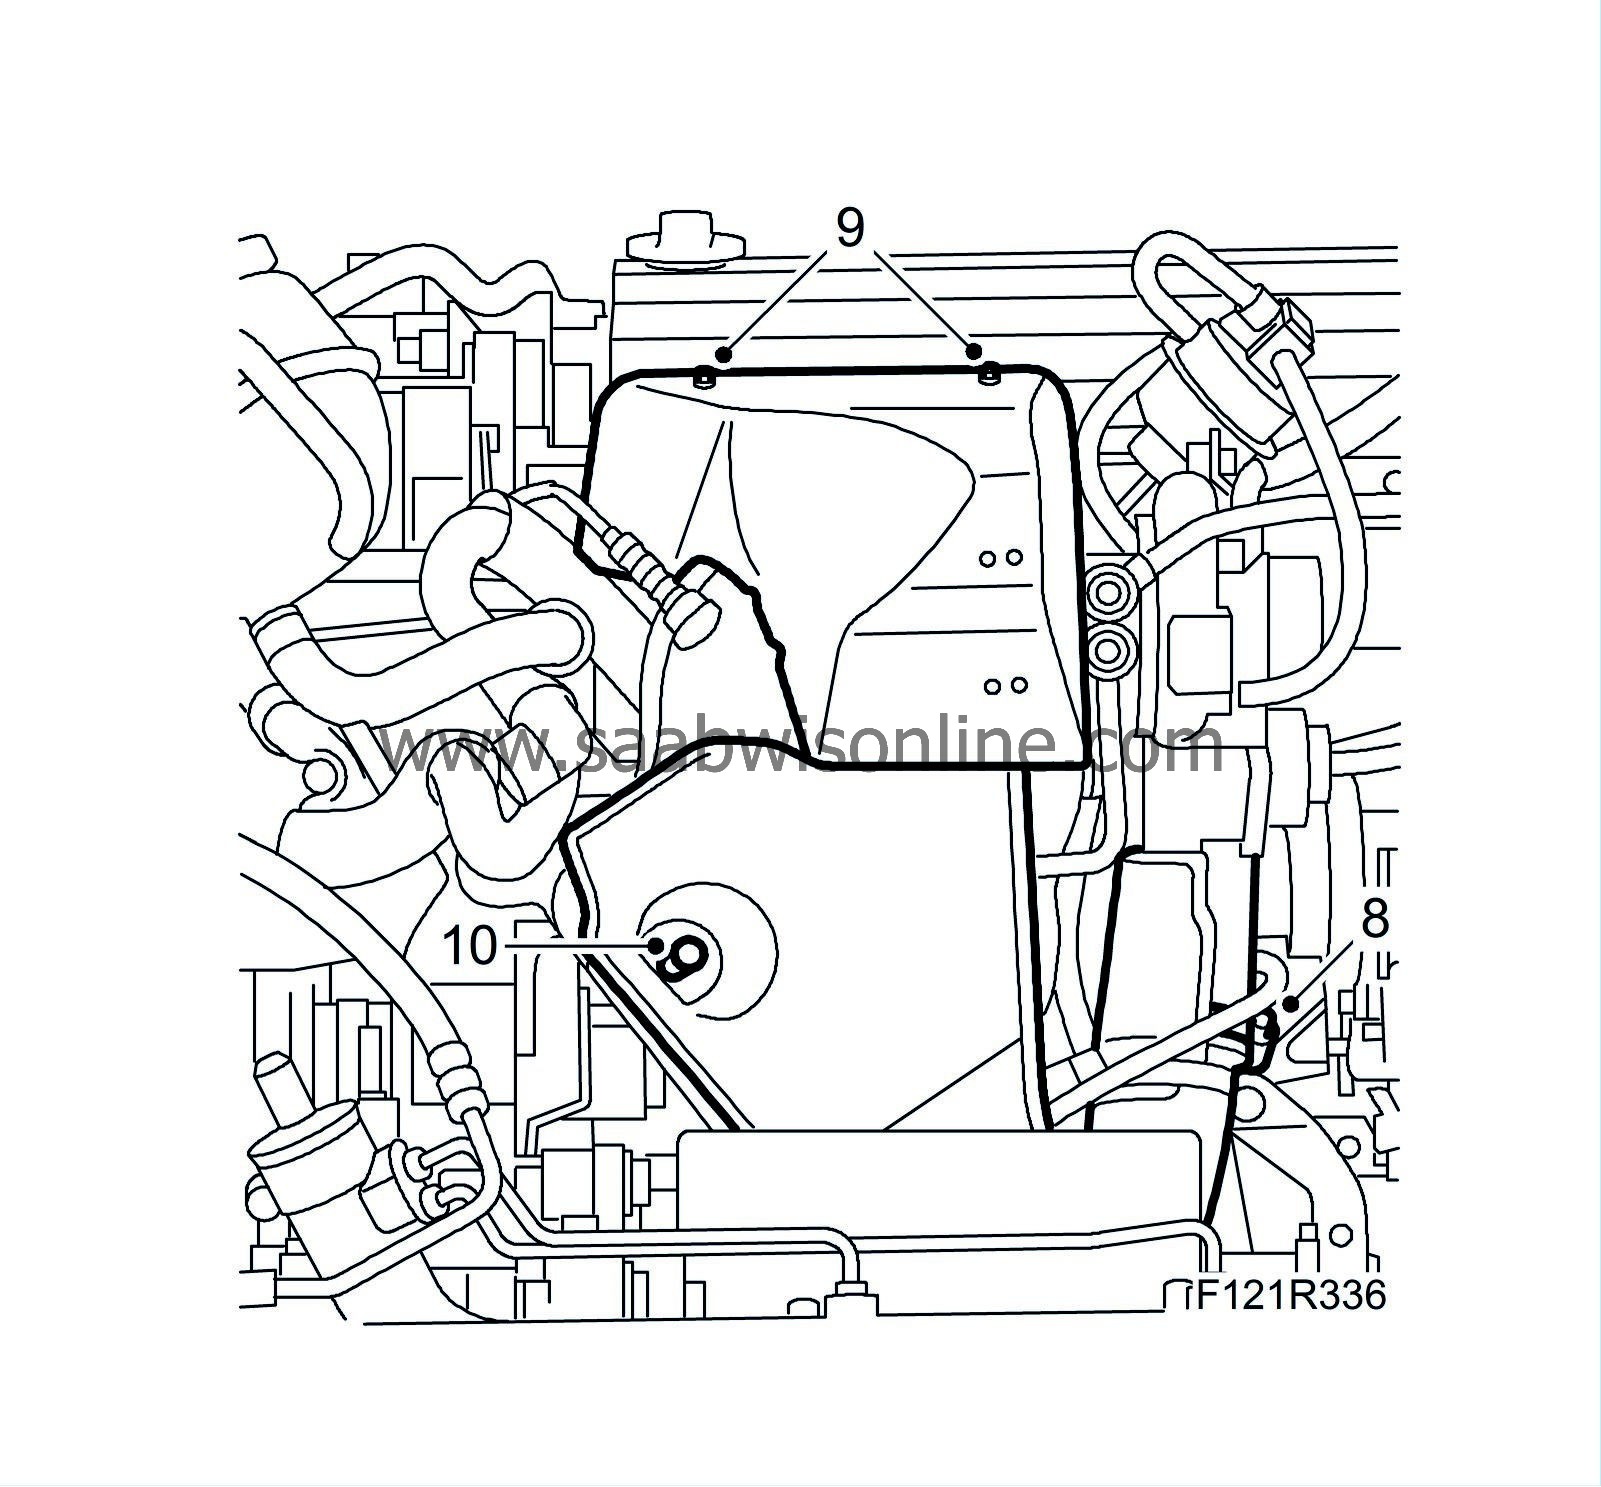
Remove the lower charge air pipe.
|
|
| 9. |
Remove the turbocharger heat shield.
|
|
| 10. |
Remove the catalytic converter heat shield.
|
|
| 11. |
Unplug the heated oxygen sensor connectors and lower the cables carefully.
|
|
| 12. |
Unplug the temperature sensor connector and lower it carefully.
|
|
| 13. |
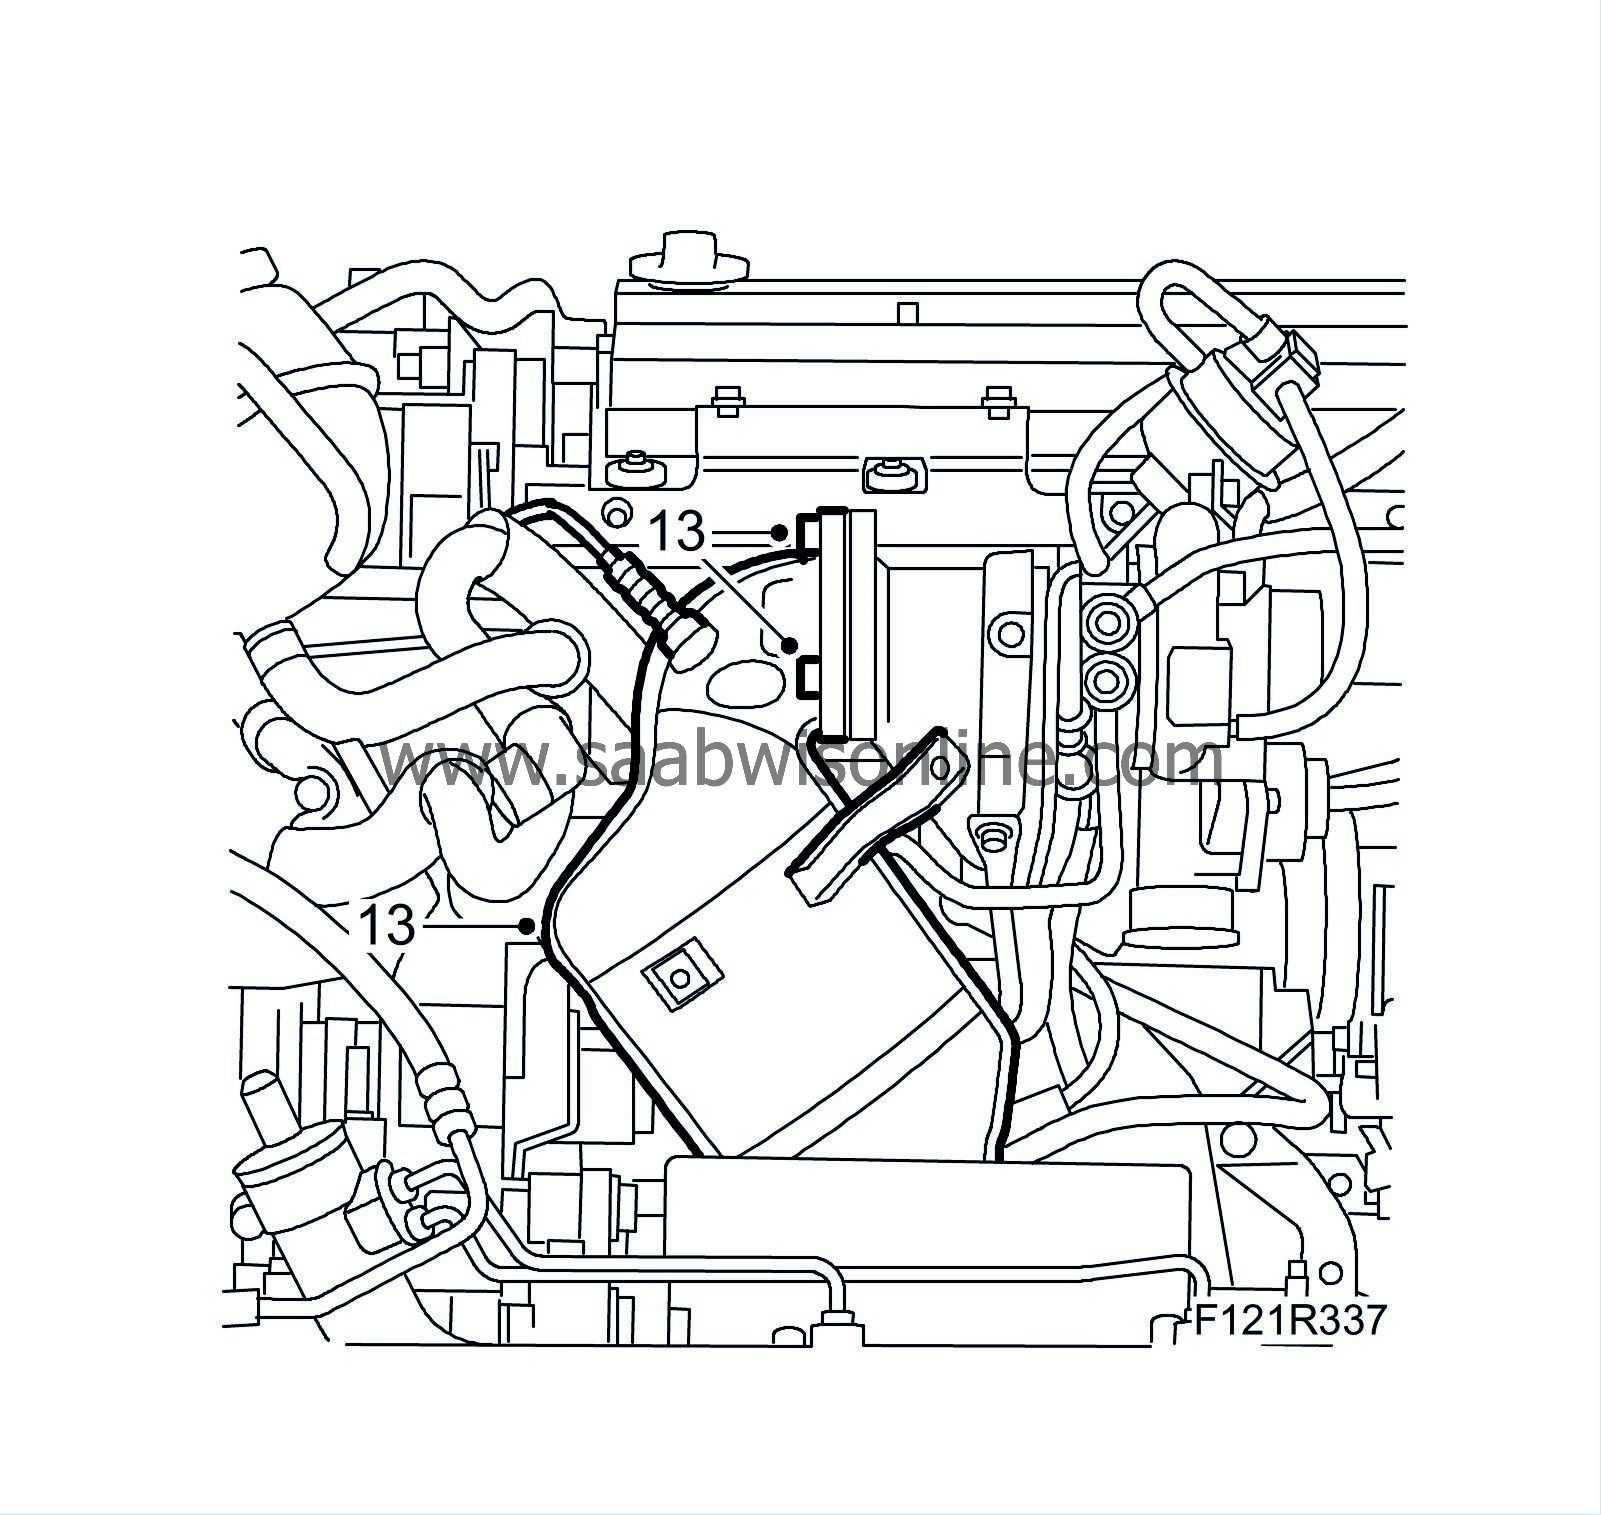
Remove the catalytic converter from the engine block and the turbocharger. Lubricate the turbocharger studs with rust solvent oil. Lift out the catalytic converter.
|
|
| 14. |
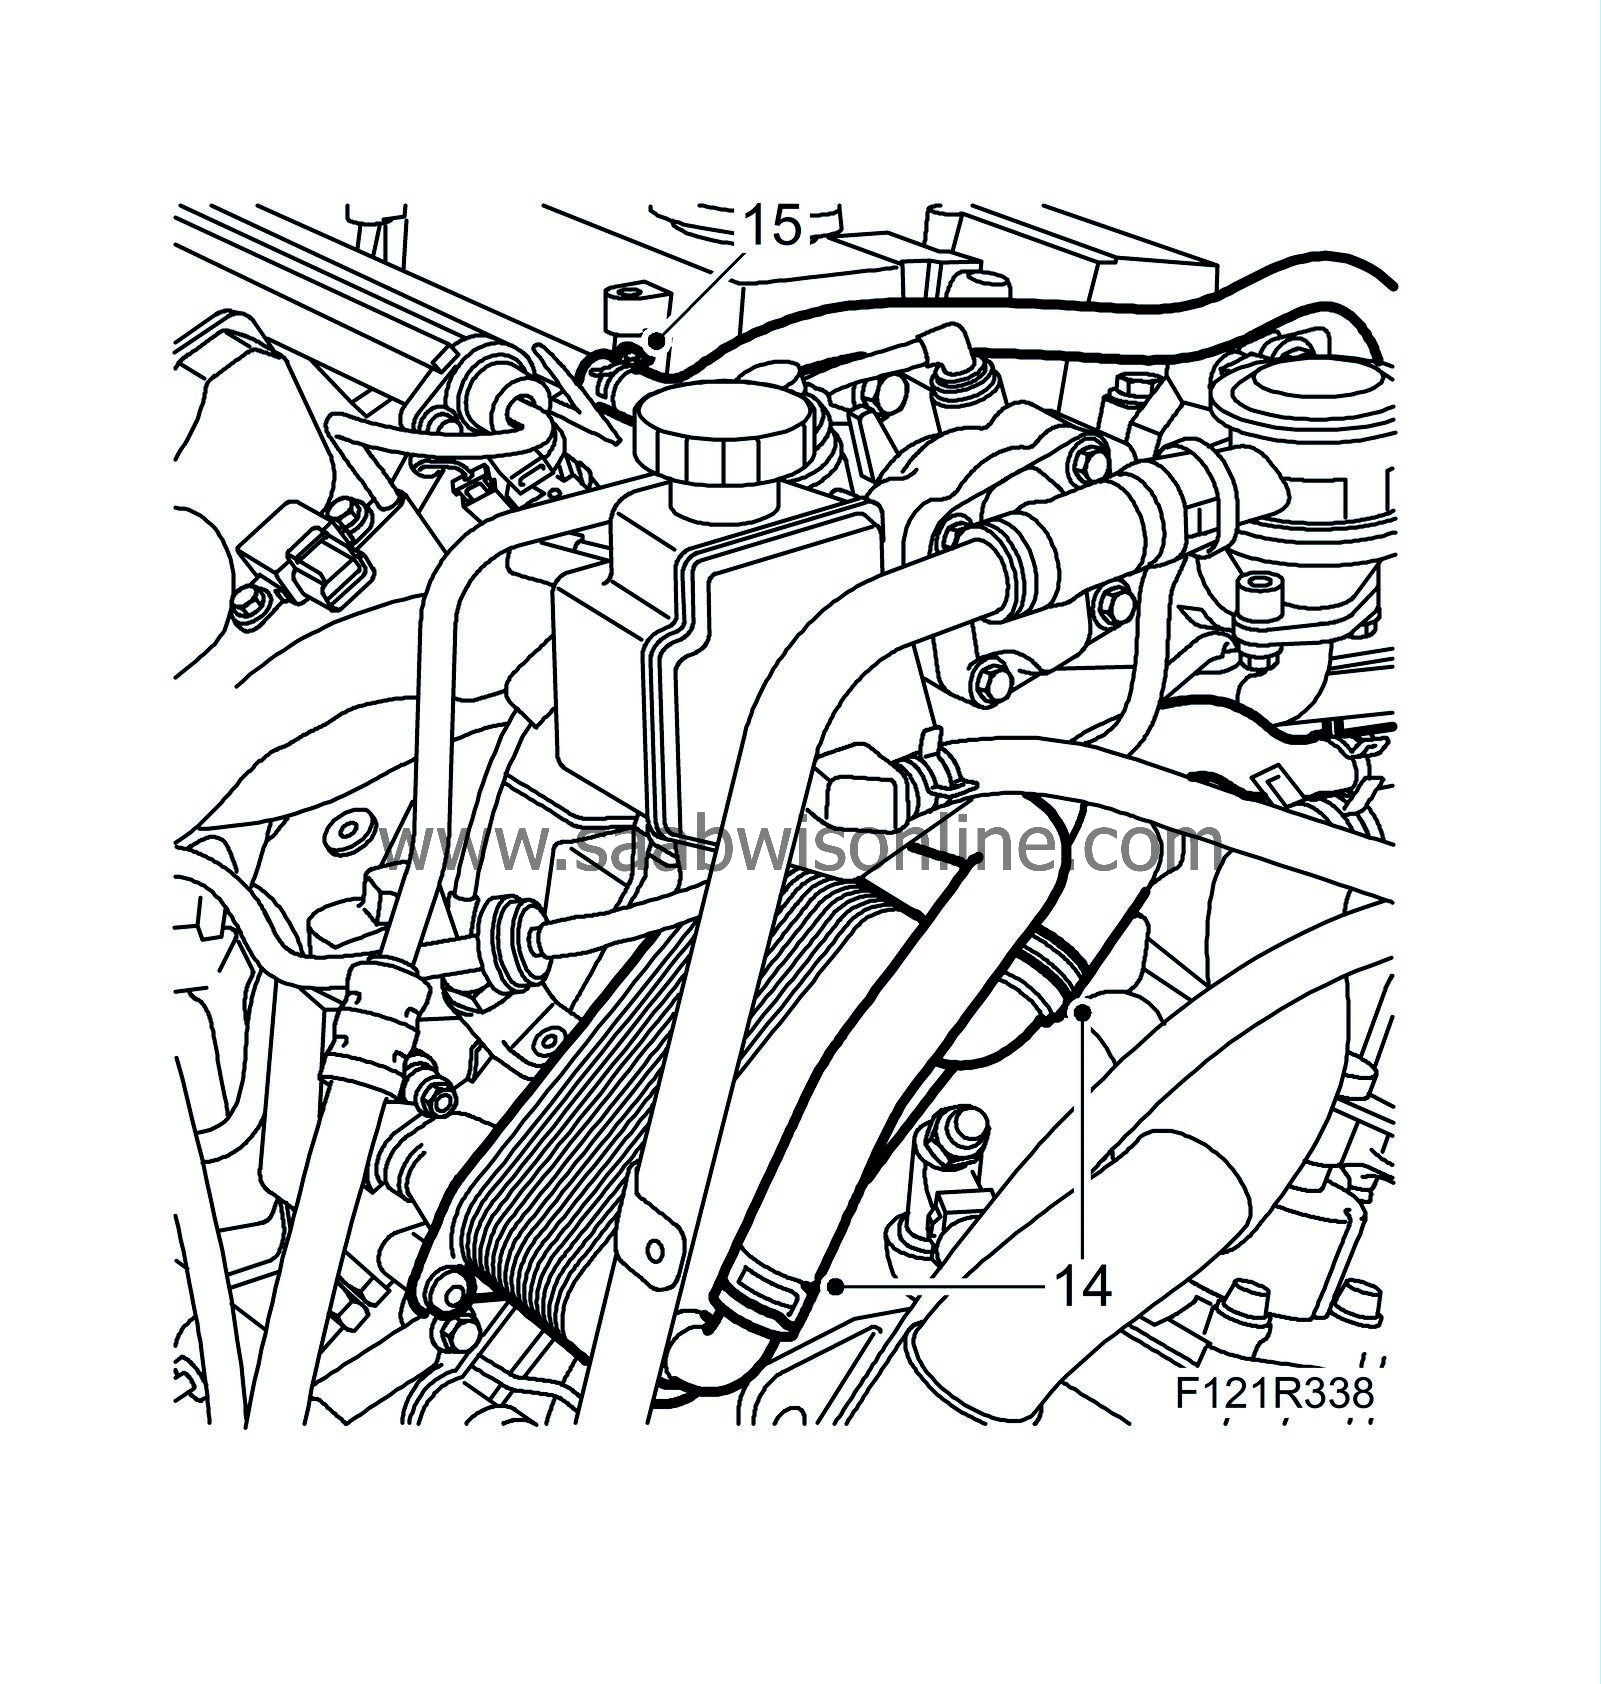
Detach the hoses form the water-cooled oil cooler.
|
|
| 15. |
Remove the cylinder head breather hose.
|
|
| 16. |
Remove the turbocharger coolant pipe.

|
|
| 17. |
Remove the thermostat housing and pipe. Leave the hoses on the thermostat housing.
|
|
| 18. |
RH side
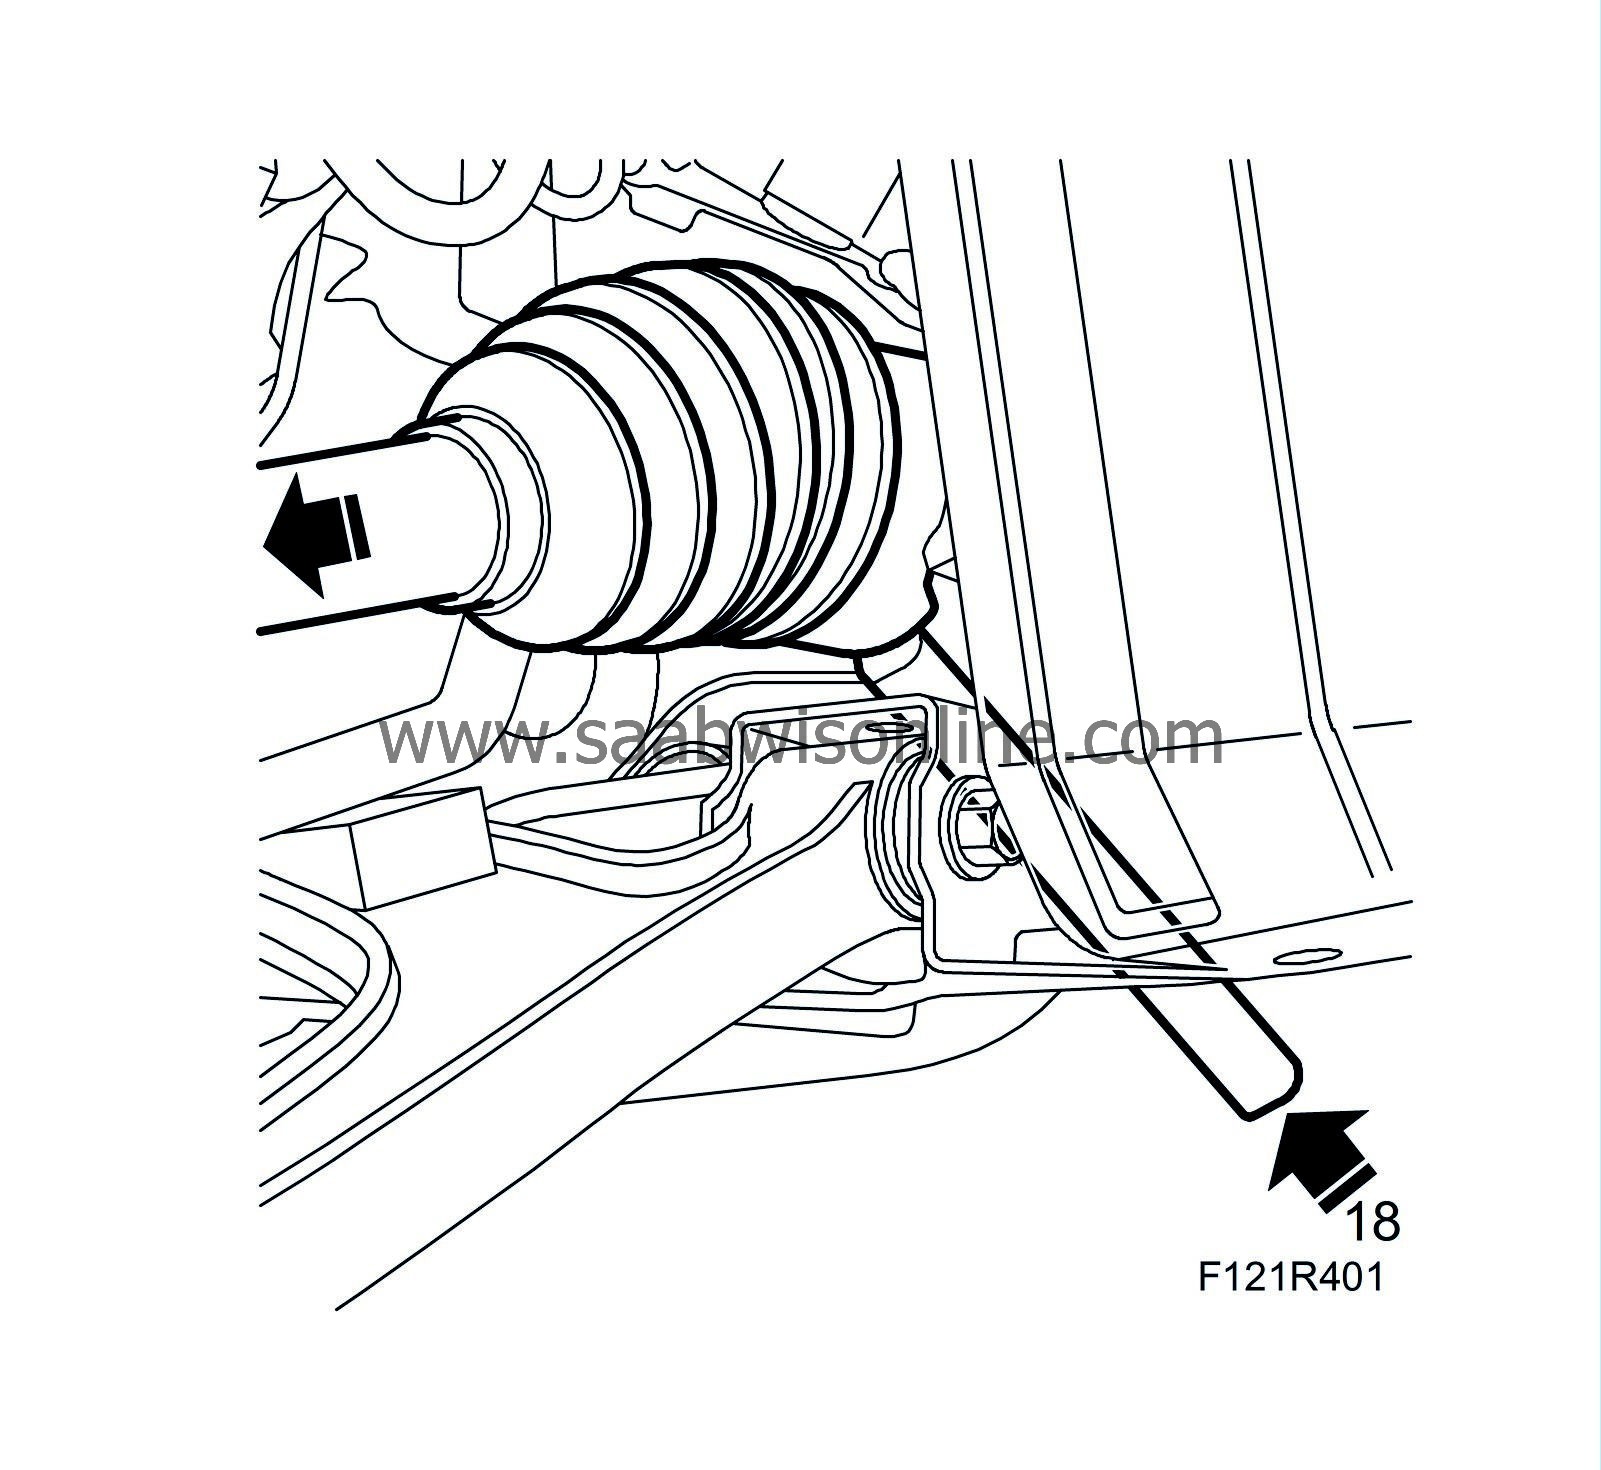
: Tap out the drive shaft from the intermediate shaft with a brass drift and mallet. Lift out the drive shaft.
|
|
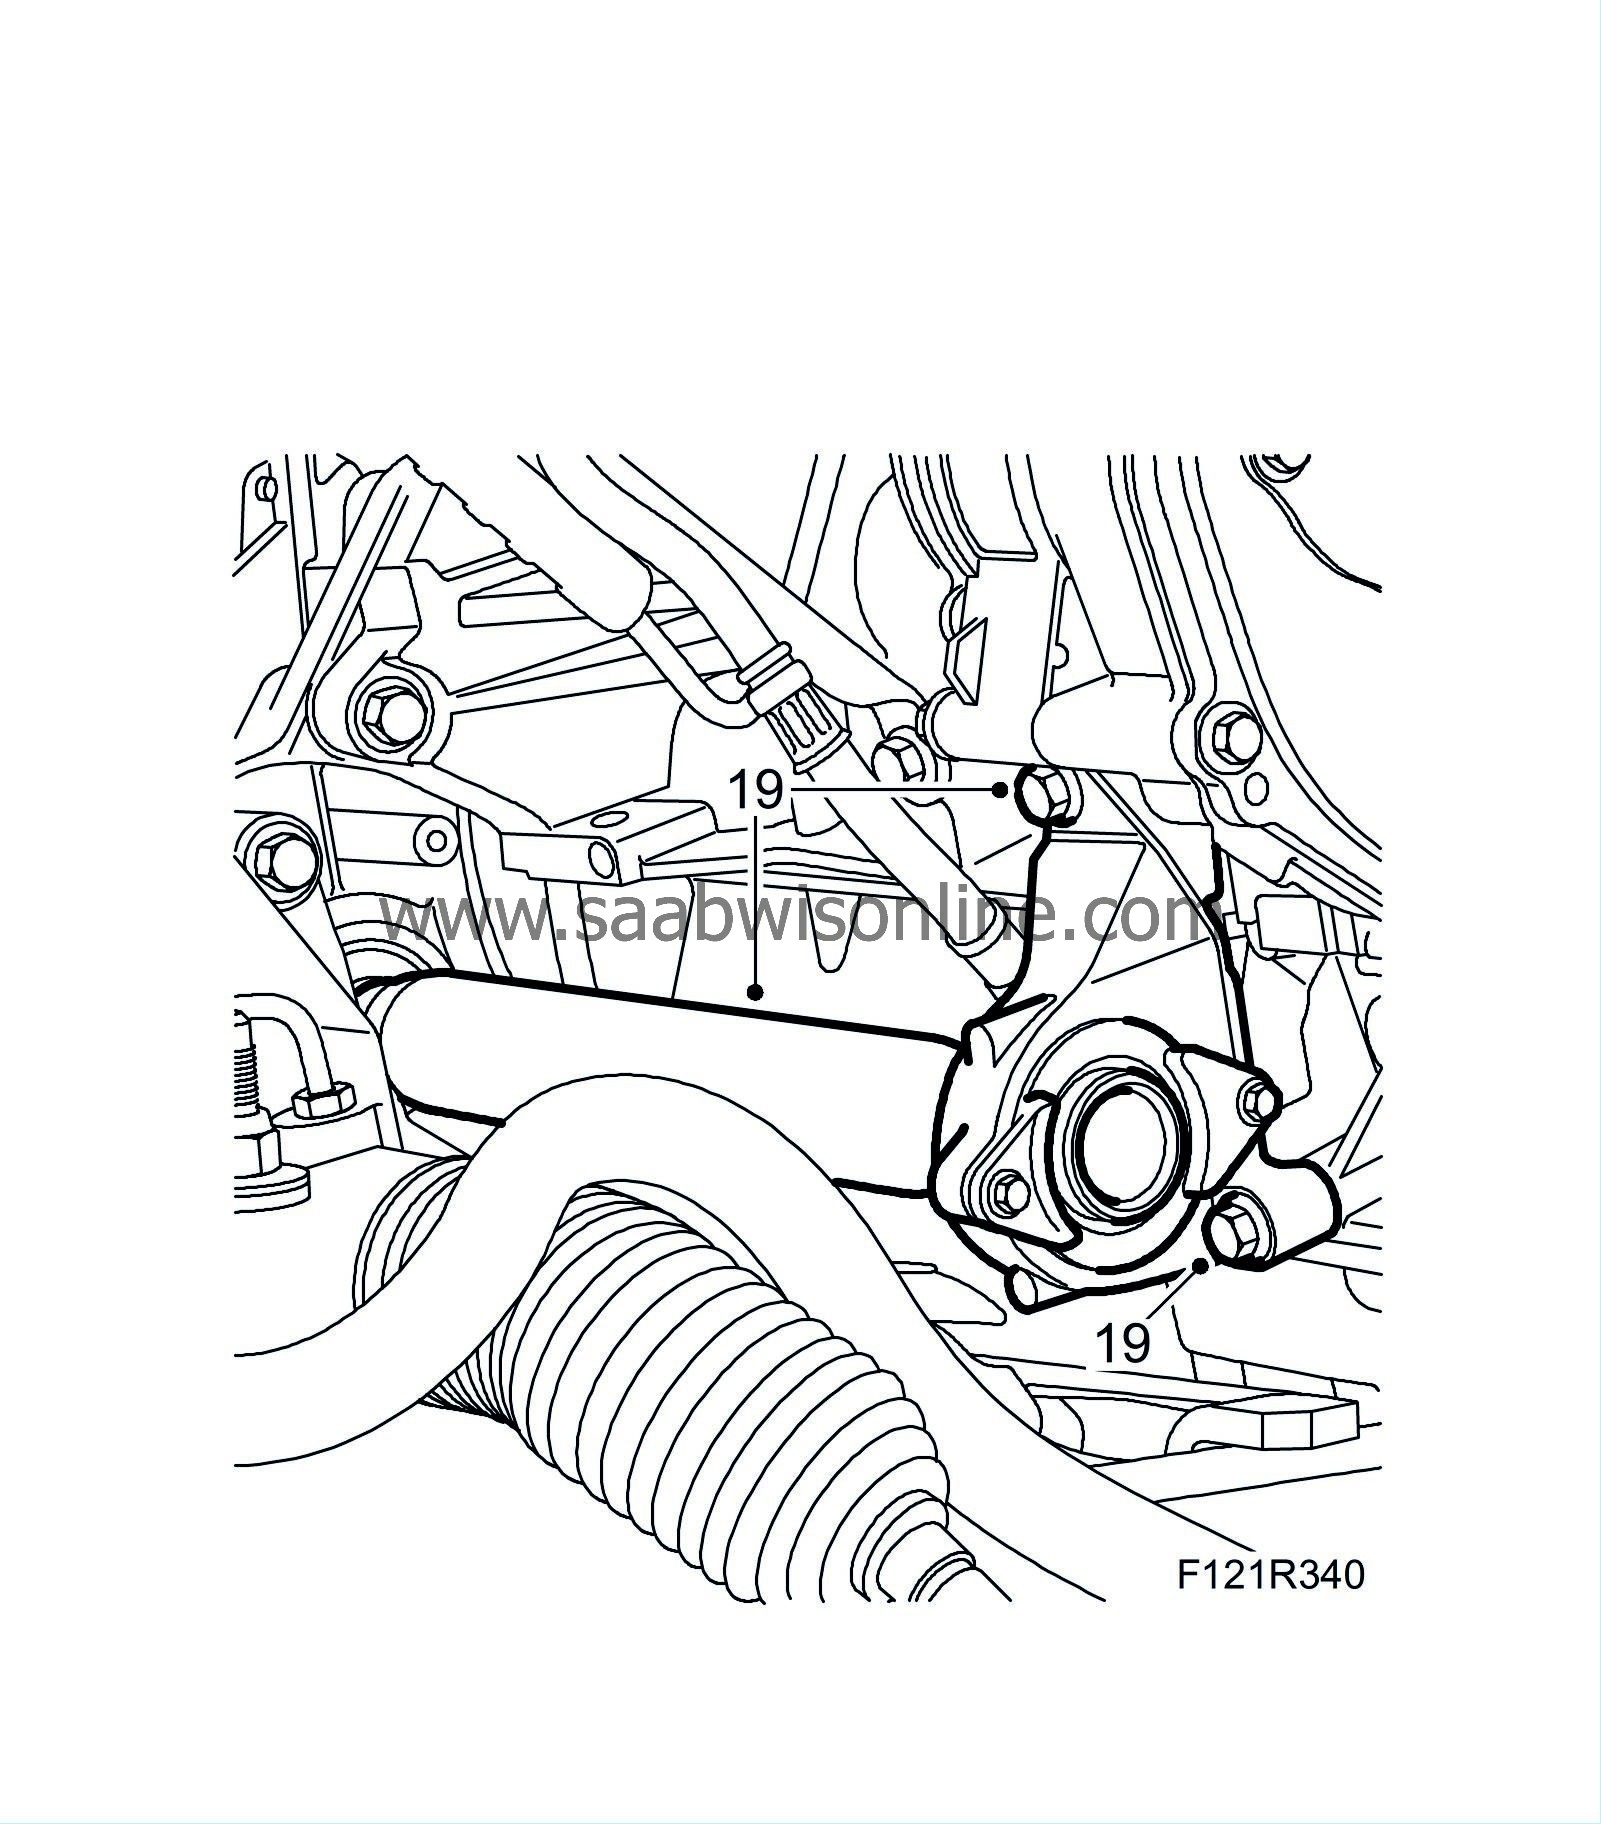
| 19. |
Remove the intermediate shaft from the engine and gearbox.
|
|
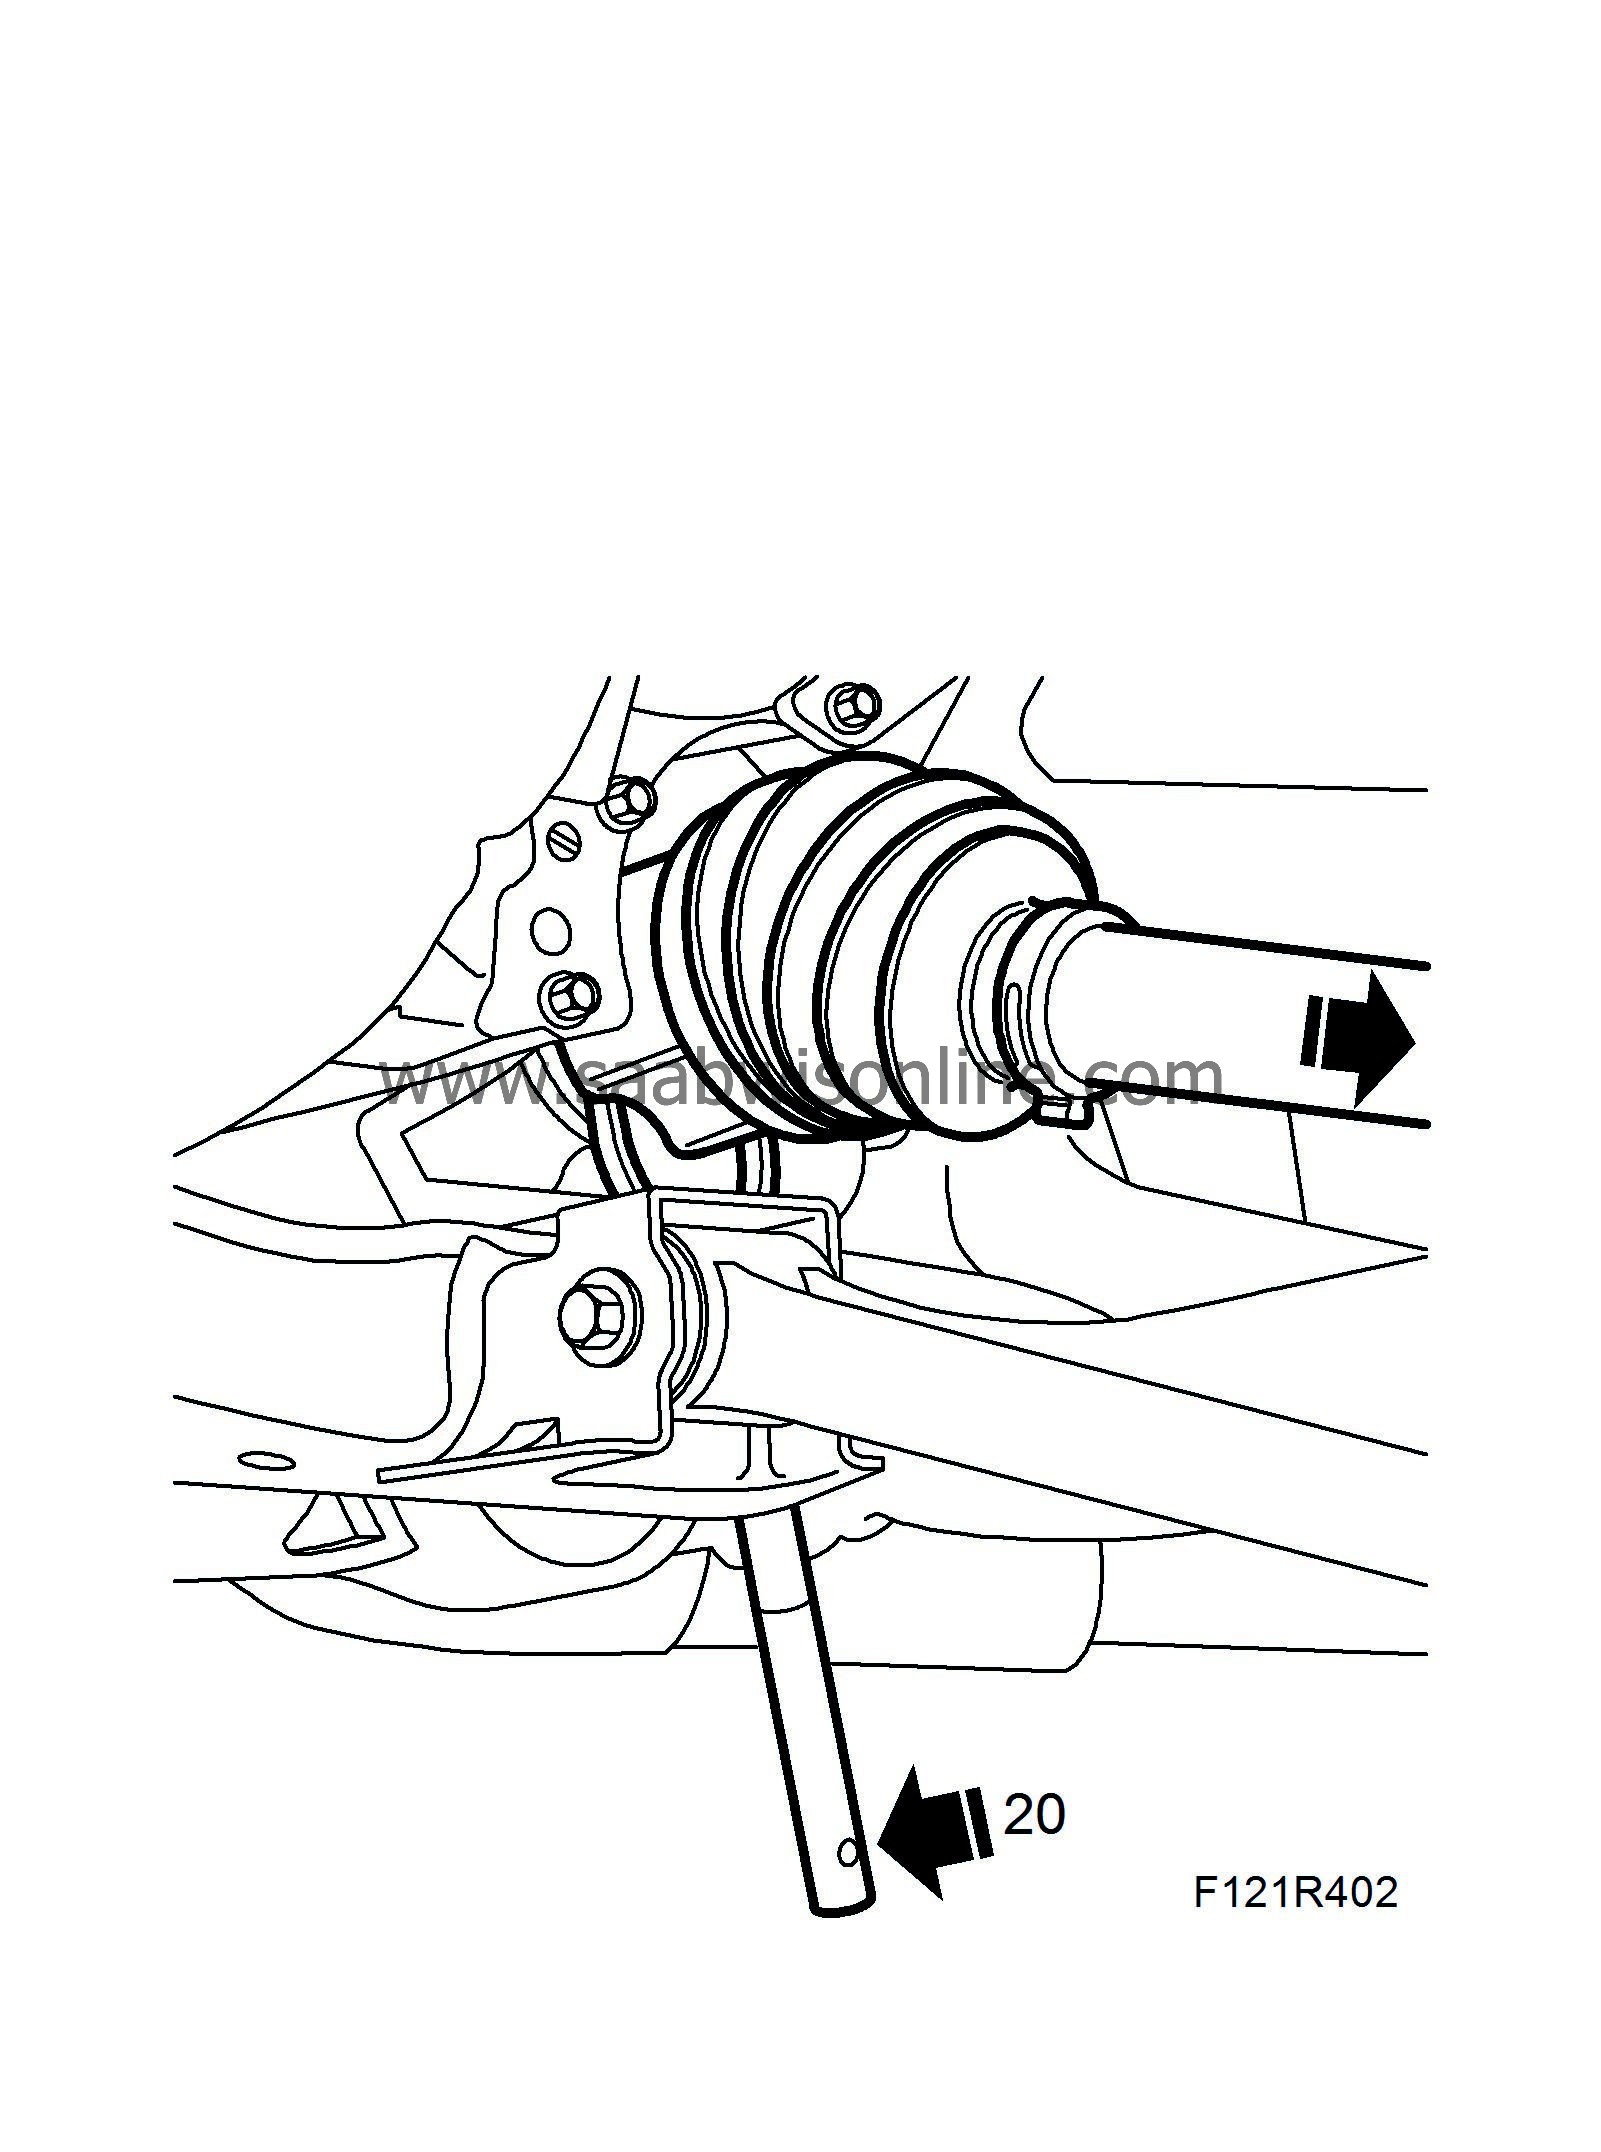
| 20. |
LH side
: Pull out the drive shaft from the gearbox. Prise with
87 92 616 Removal tool, drive shafts
. Lift out the drive shaft.
|
|
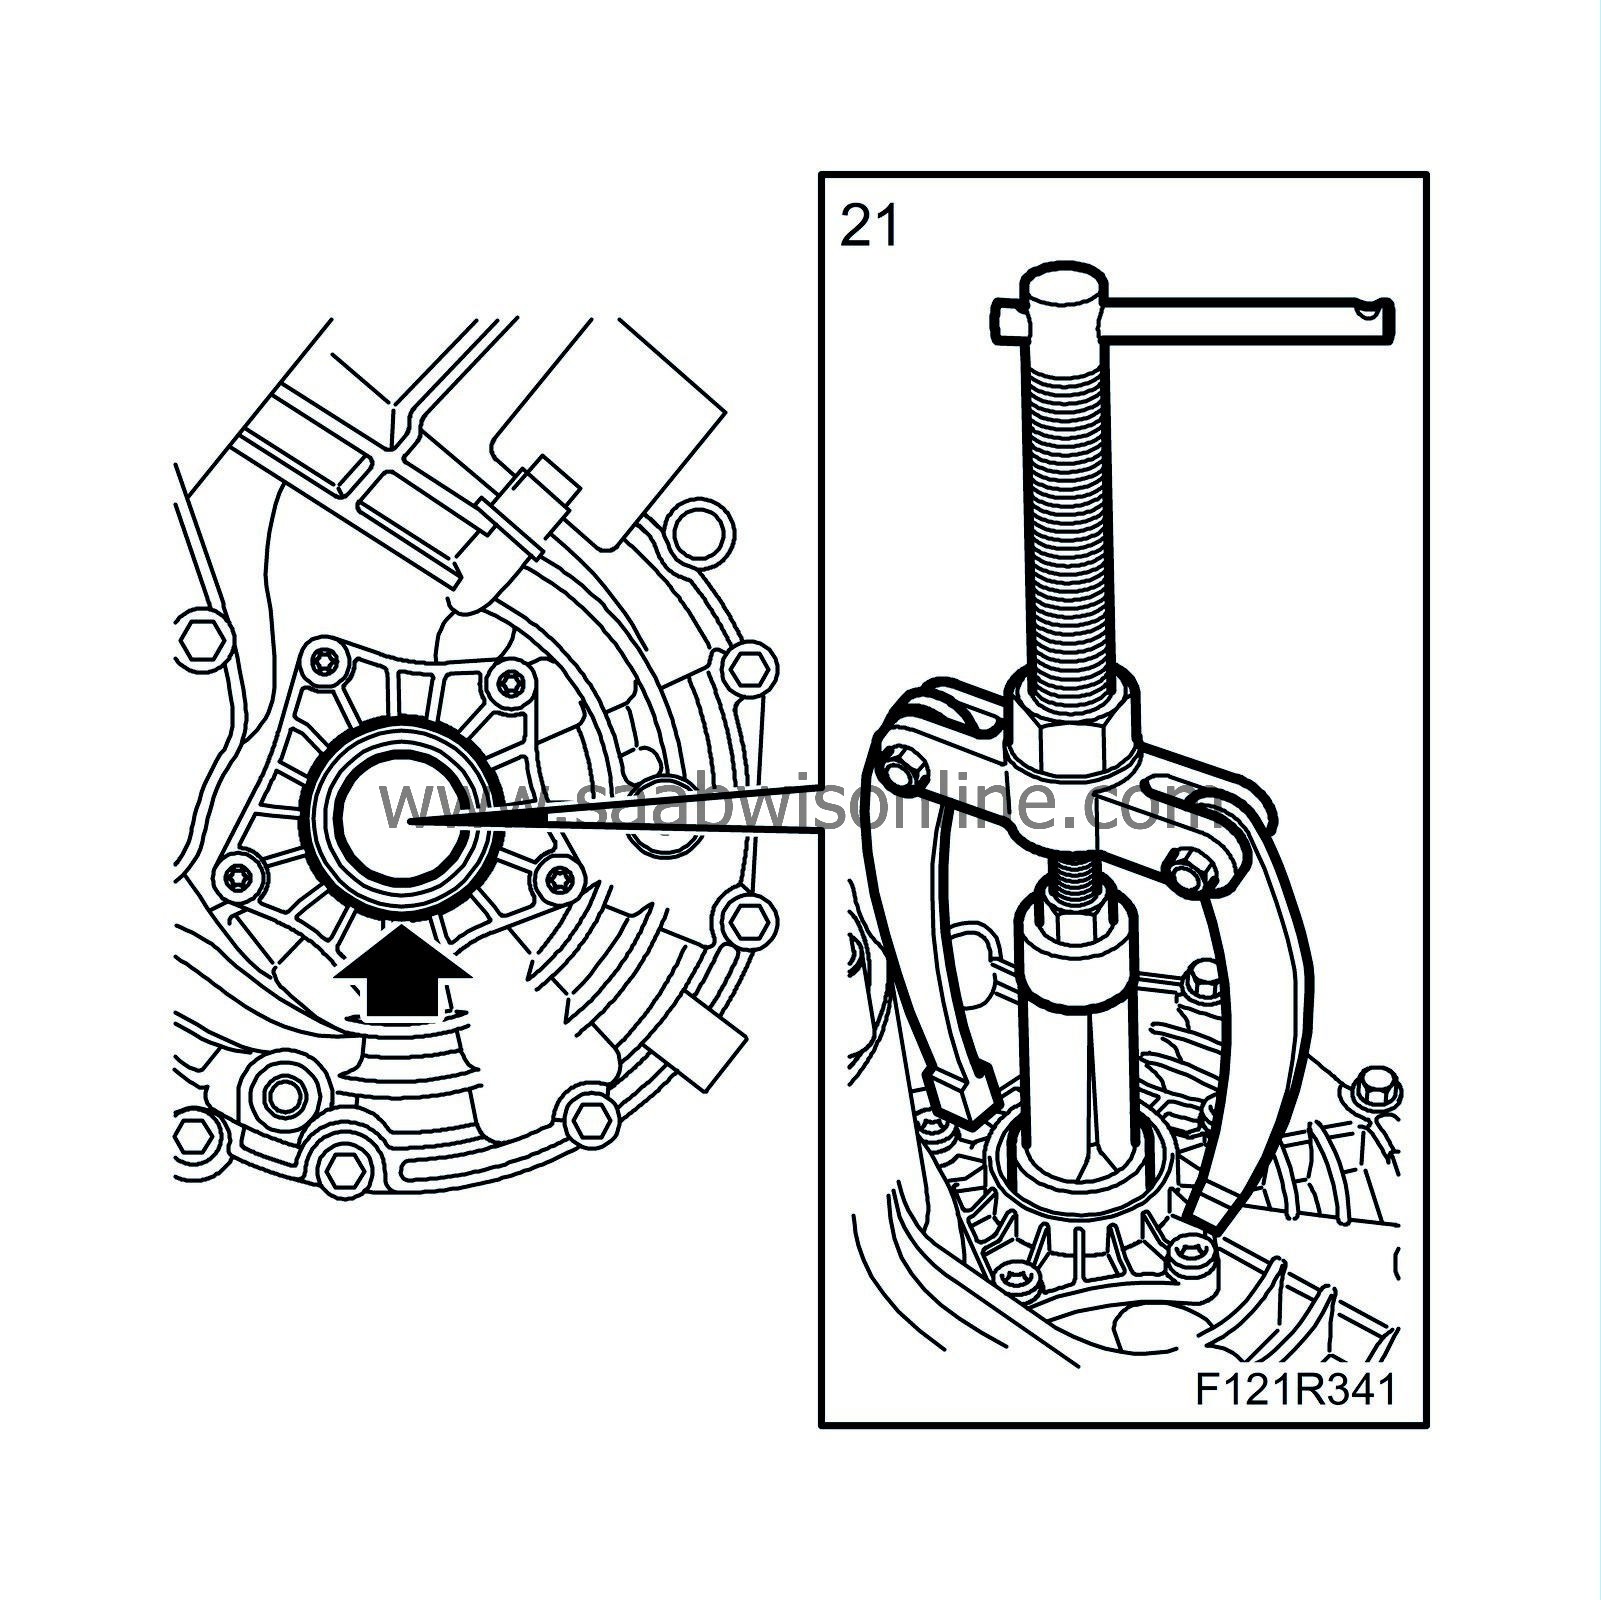
| 21. |
Remove the LH drive shaft seal with
87 92 350 Puller, drive shaft seal
and
87 91 683 Puller
.
|
|
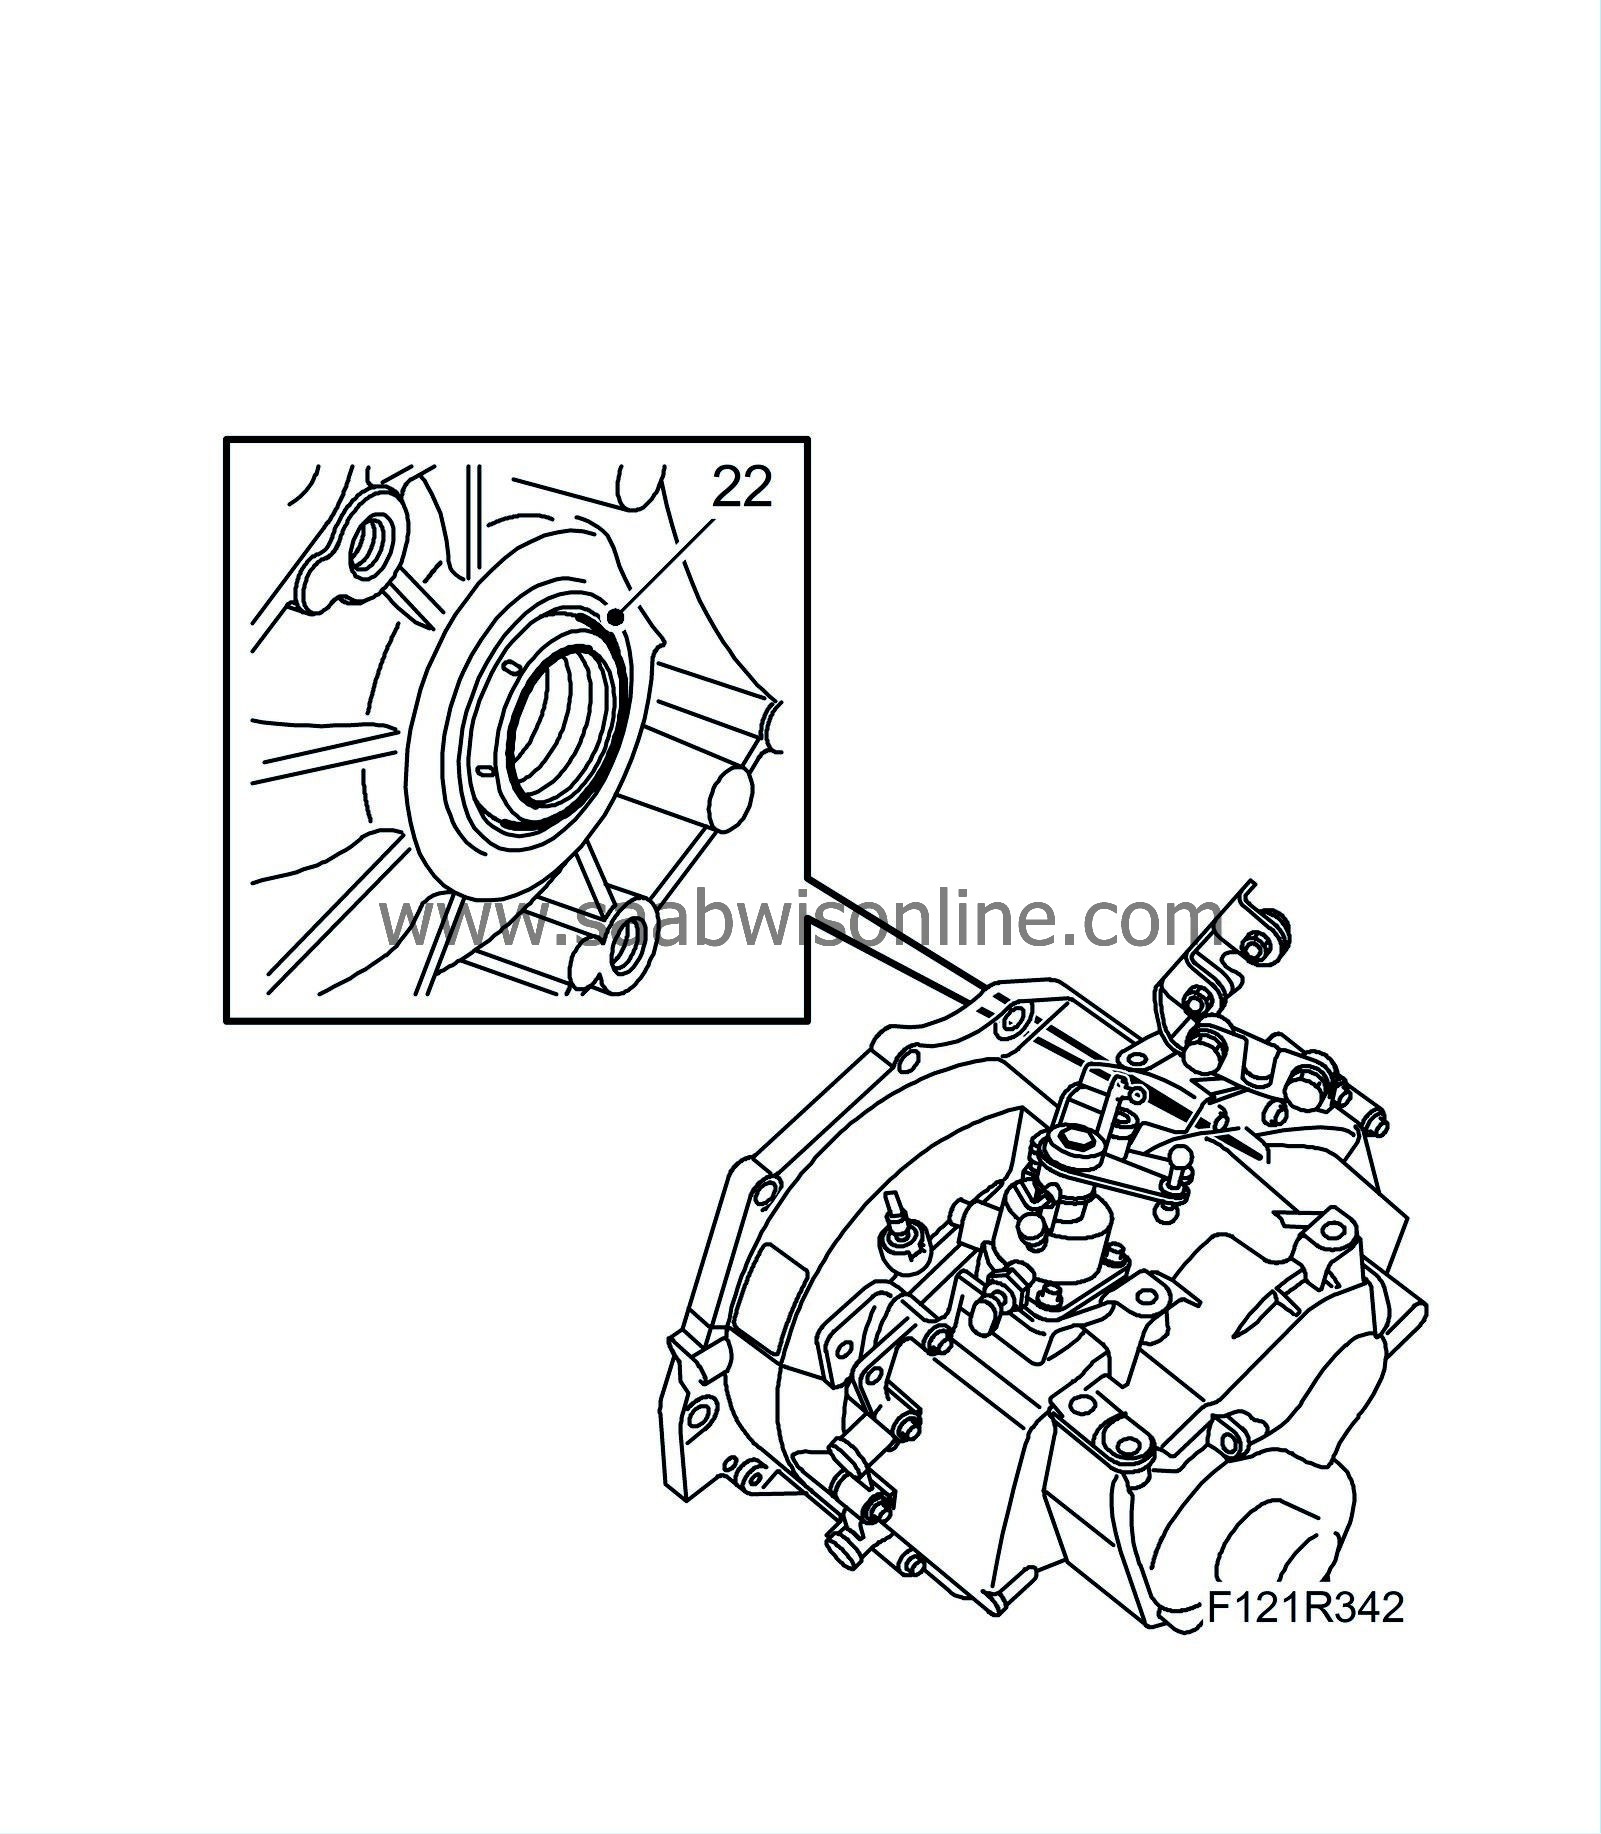
| 22. |
Remove the RH drive shaft seal with
87 92 350 Puller, drive shaft seal
and
87 91 683 Puller
.
|
|
| 23. |
Cars with secondary air injection pump
: Remove the pipe between the pump and the valve.
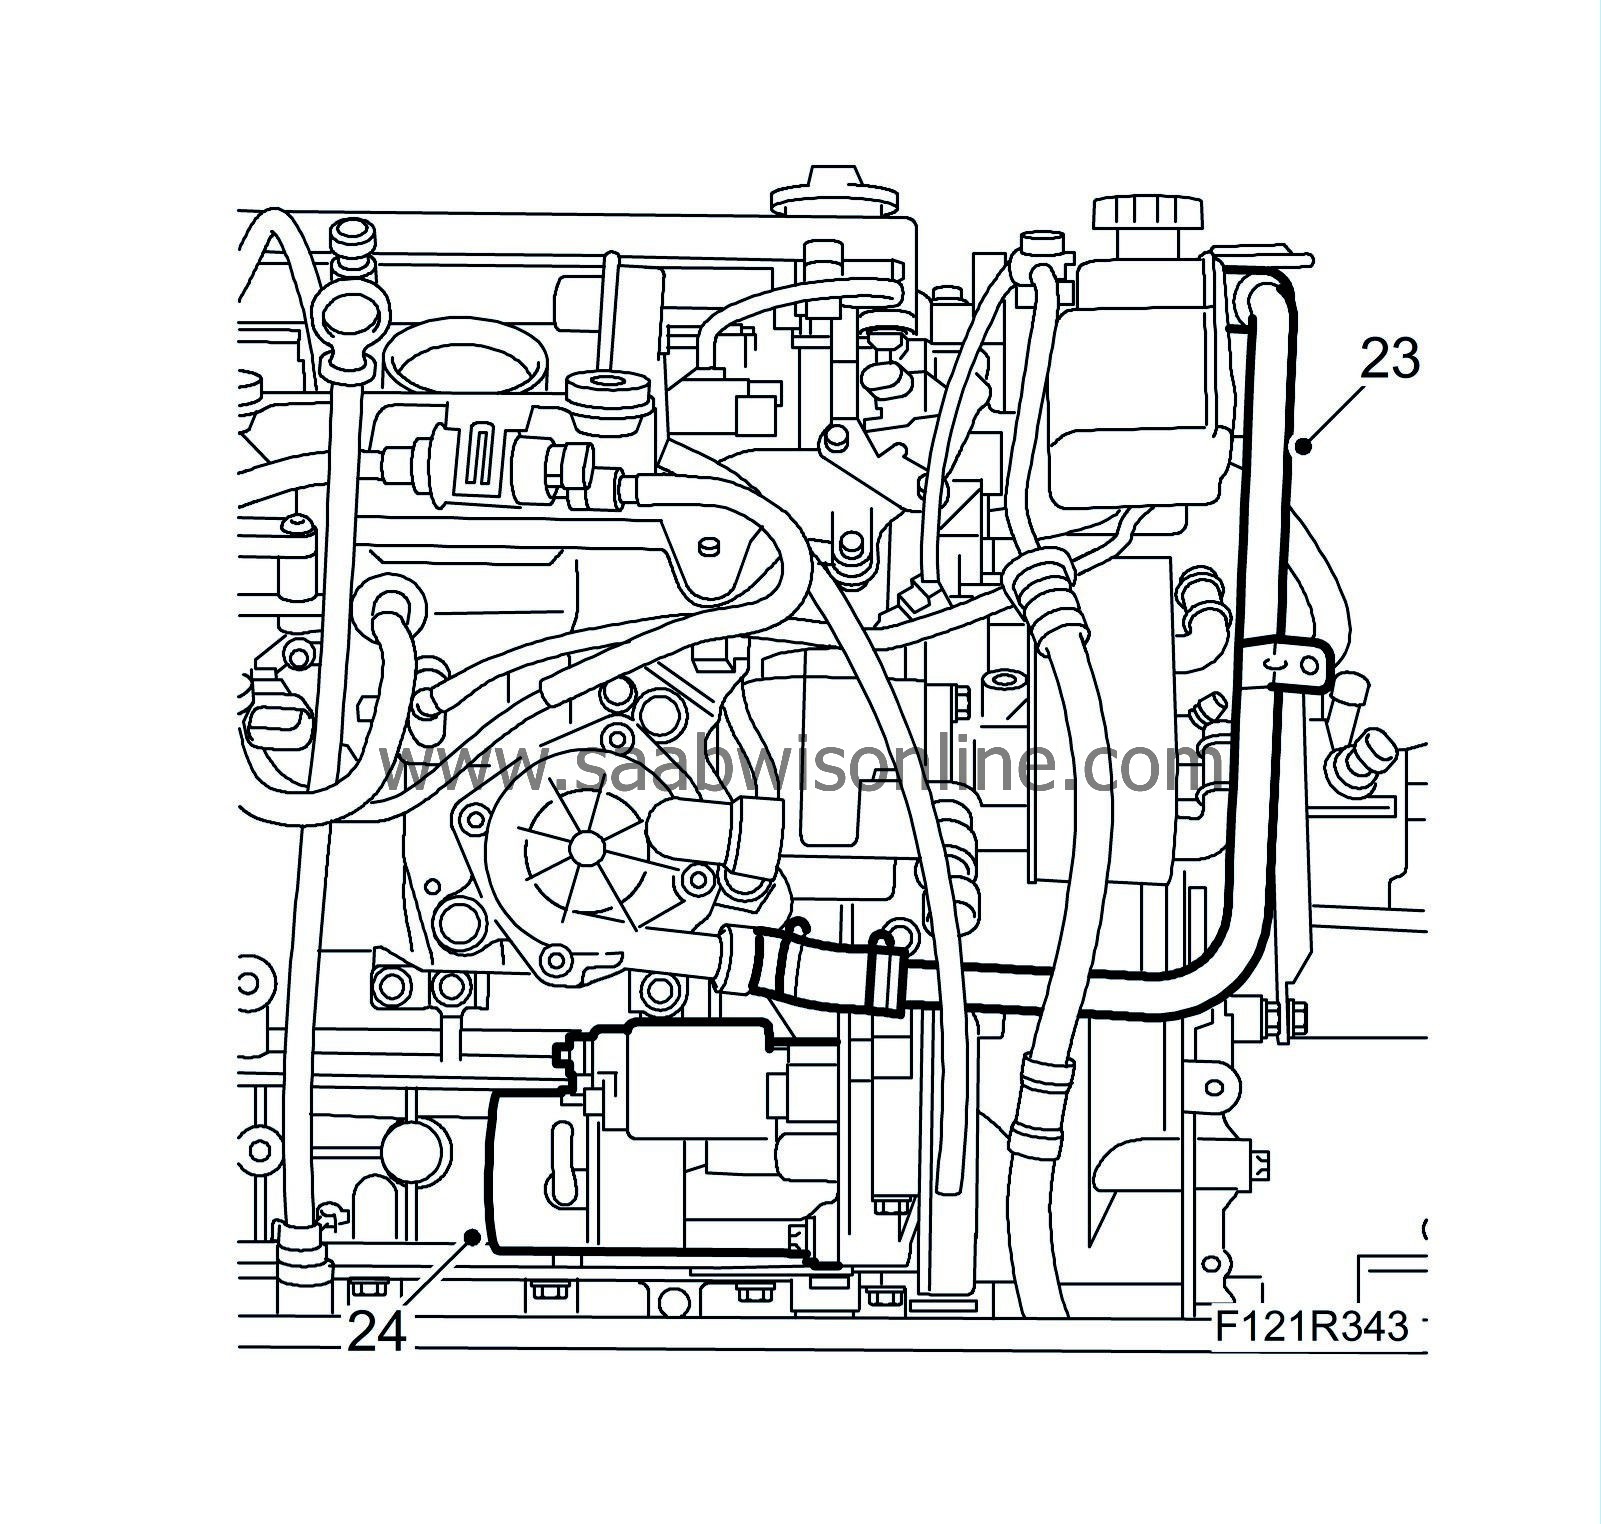
|
|
| 24. |
Remove the starter motor.
|
|
| 25. |
Remove the water-cooled oil cooler.
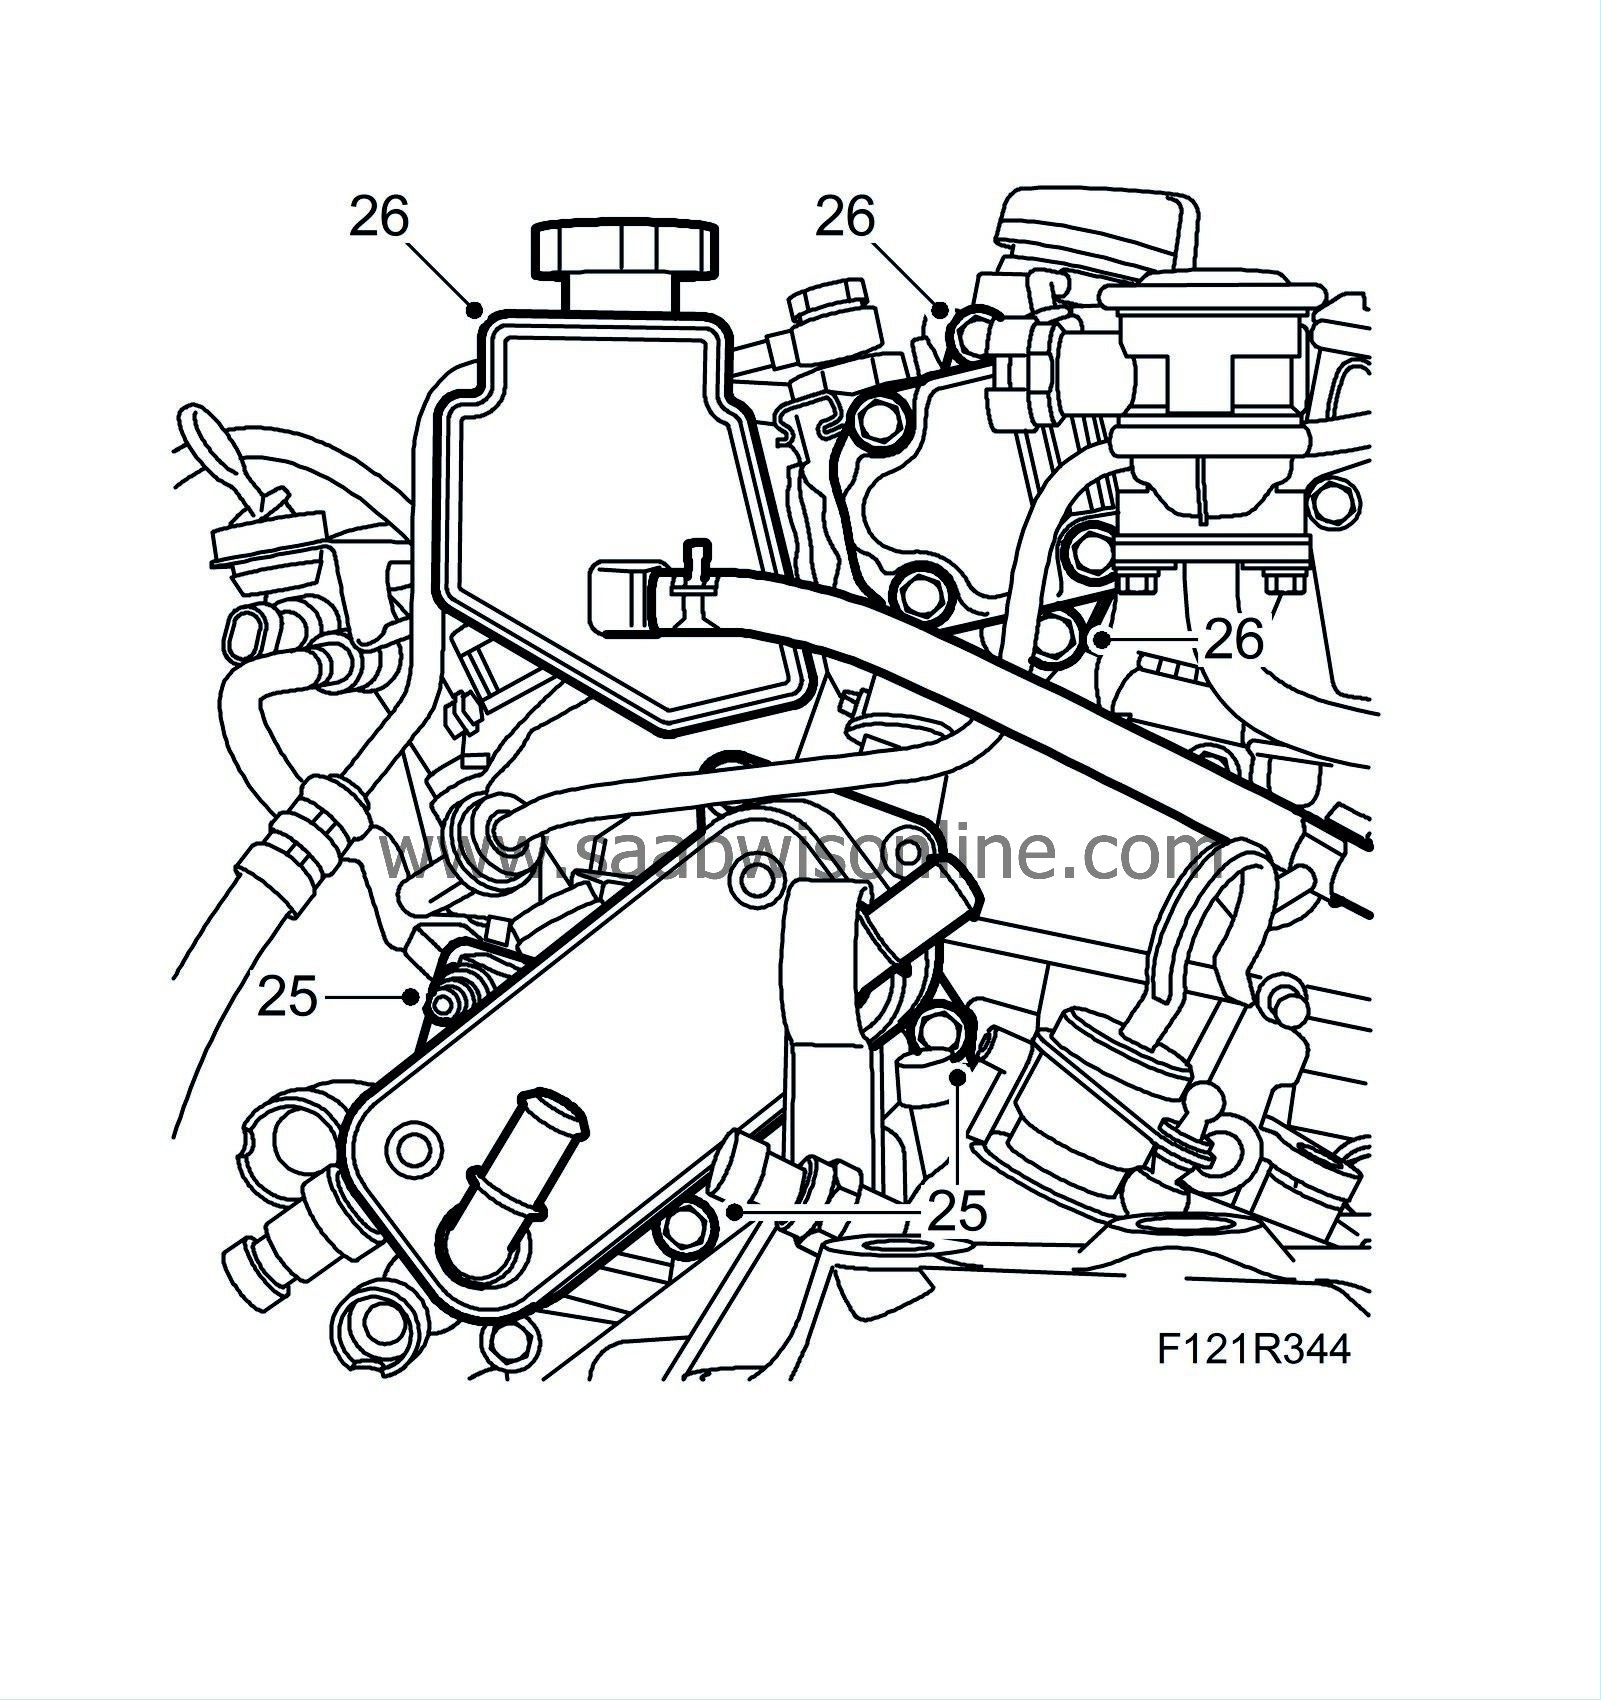
|
|
| 26. |
Remove the power steering pump from the cylinder head and move it aside.
|
|
| 27. |
Cars with automatic transmission
: Undo the 6 bolts holding the torque converter to the driver plate. Turn the plate with an open spanner on the pulley centre bolt. Turn clockwise.
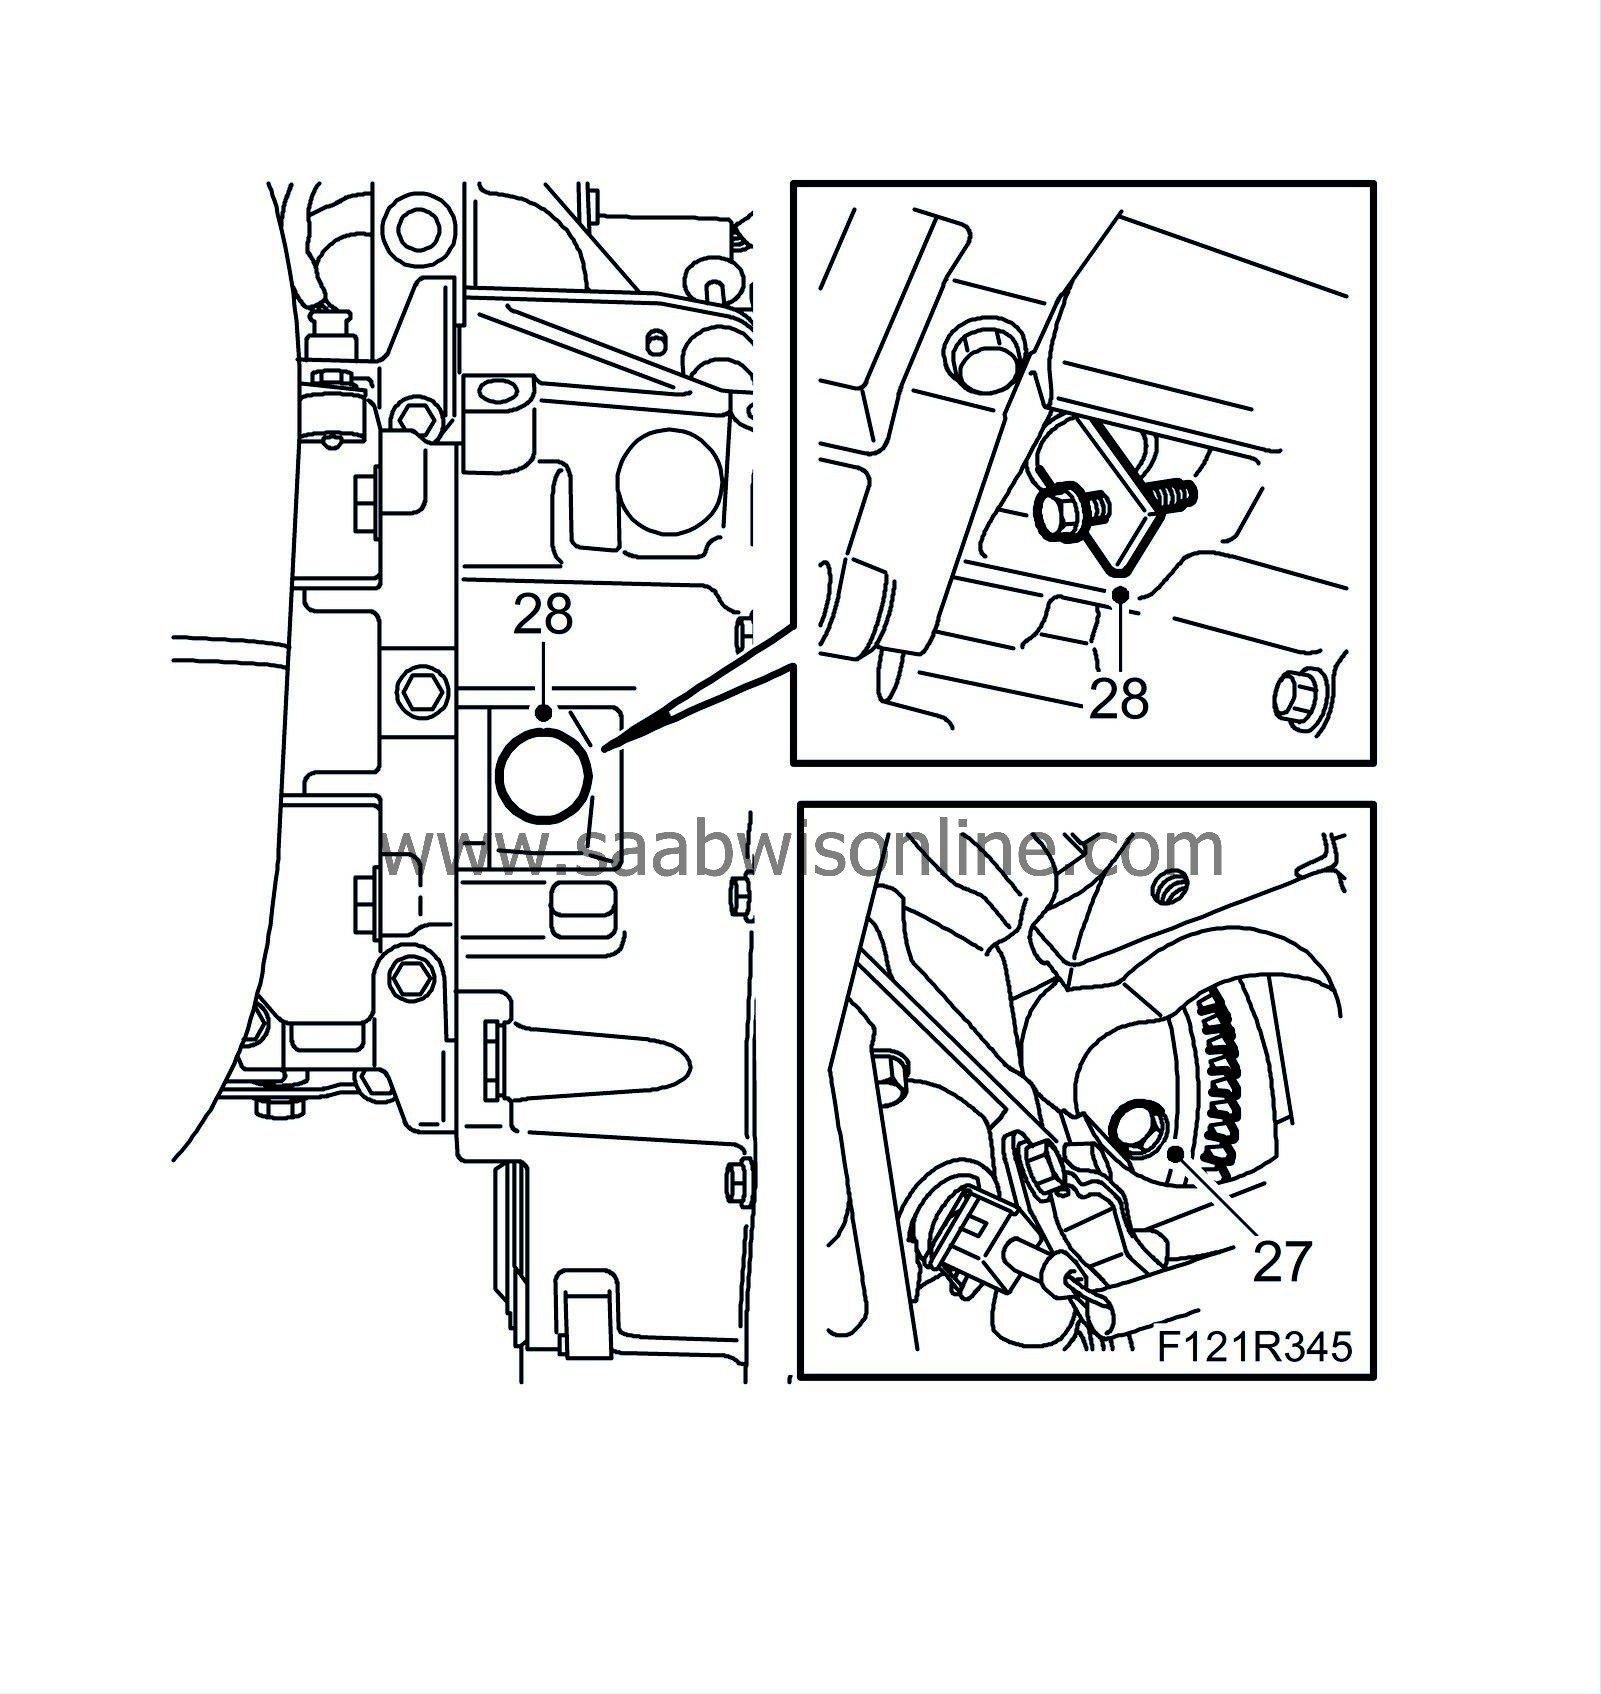
|
|
| 28. |
Cars with automatic transmission
: Detach the plug, press the torque converter toward the transmission and fit
87 92 574 Holder
to hold the torque converter in place when removing the transmission.
|
|
| 29. |
Fit
83 96 178 Lifting eyes, B207
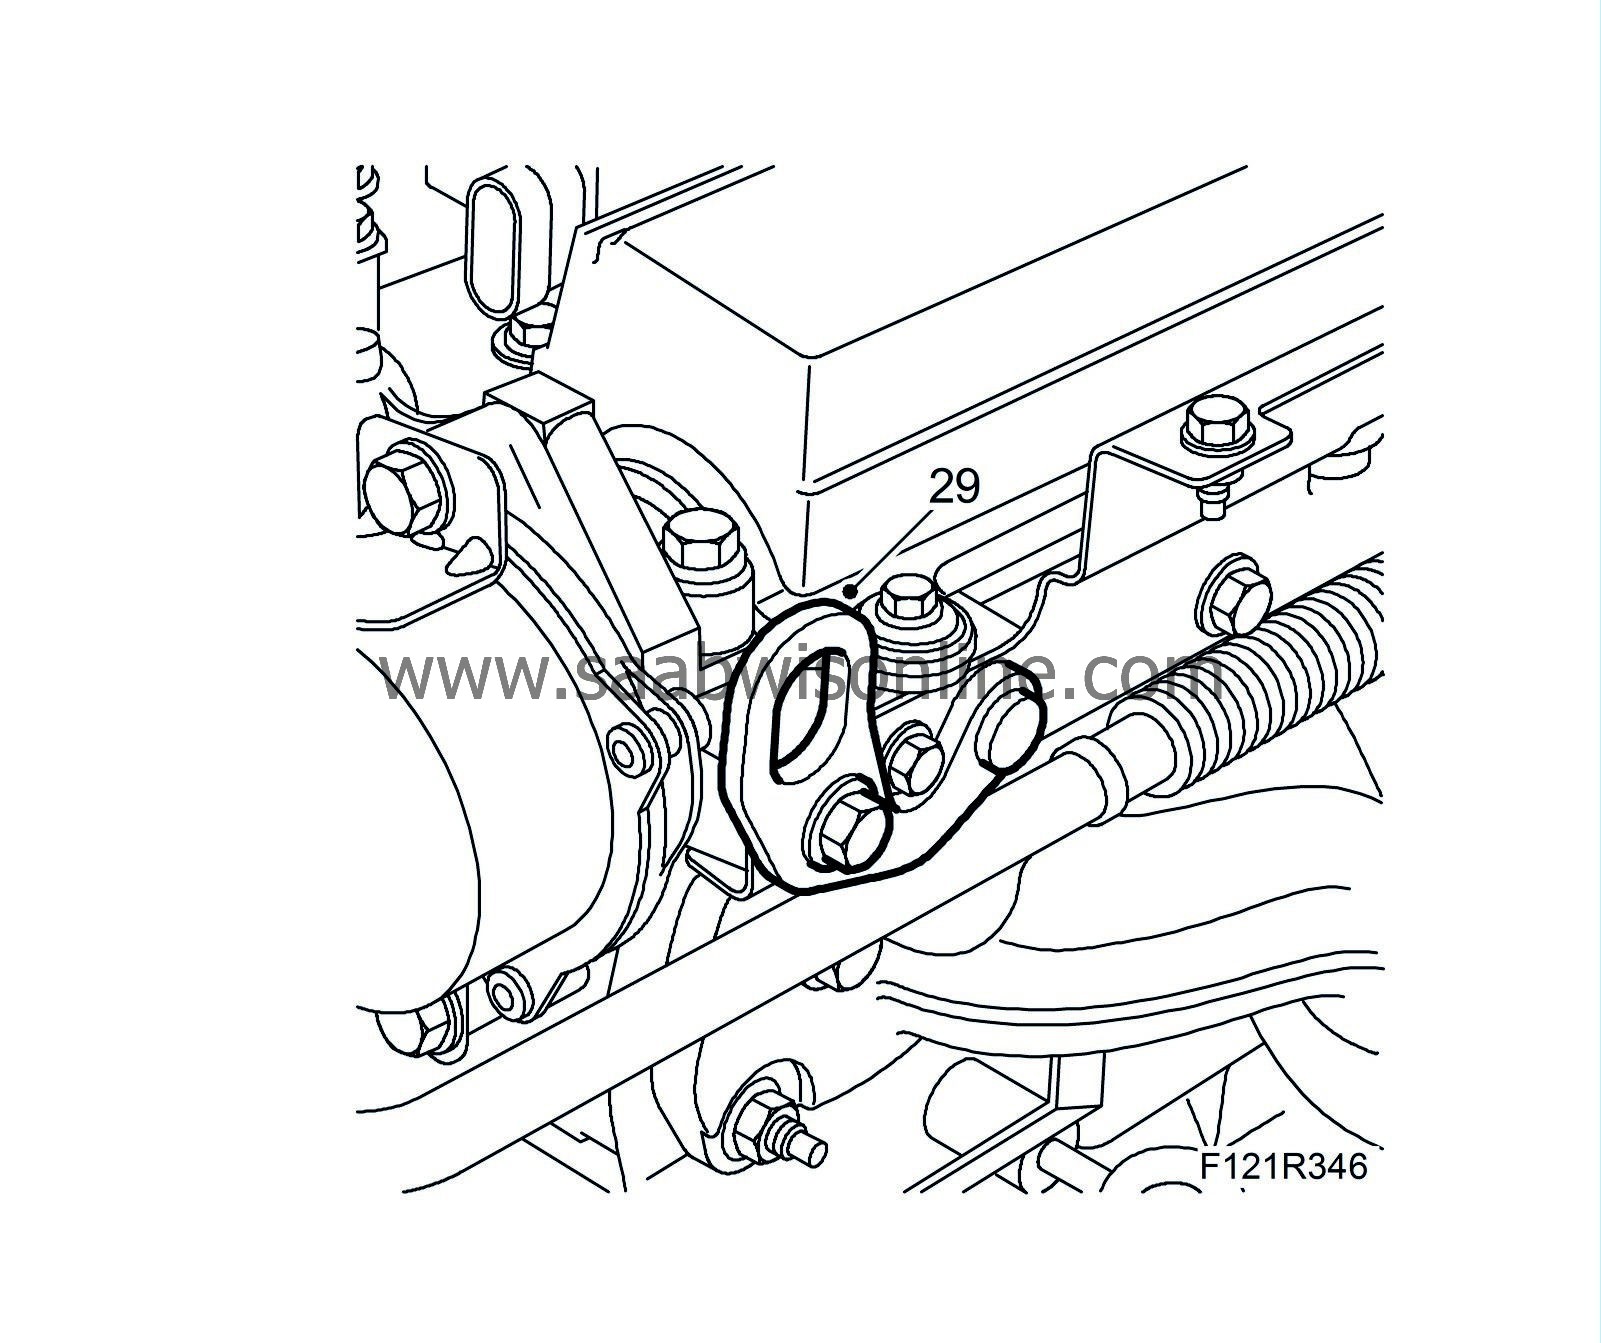
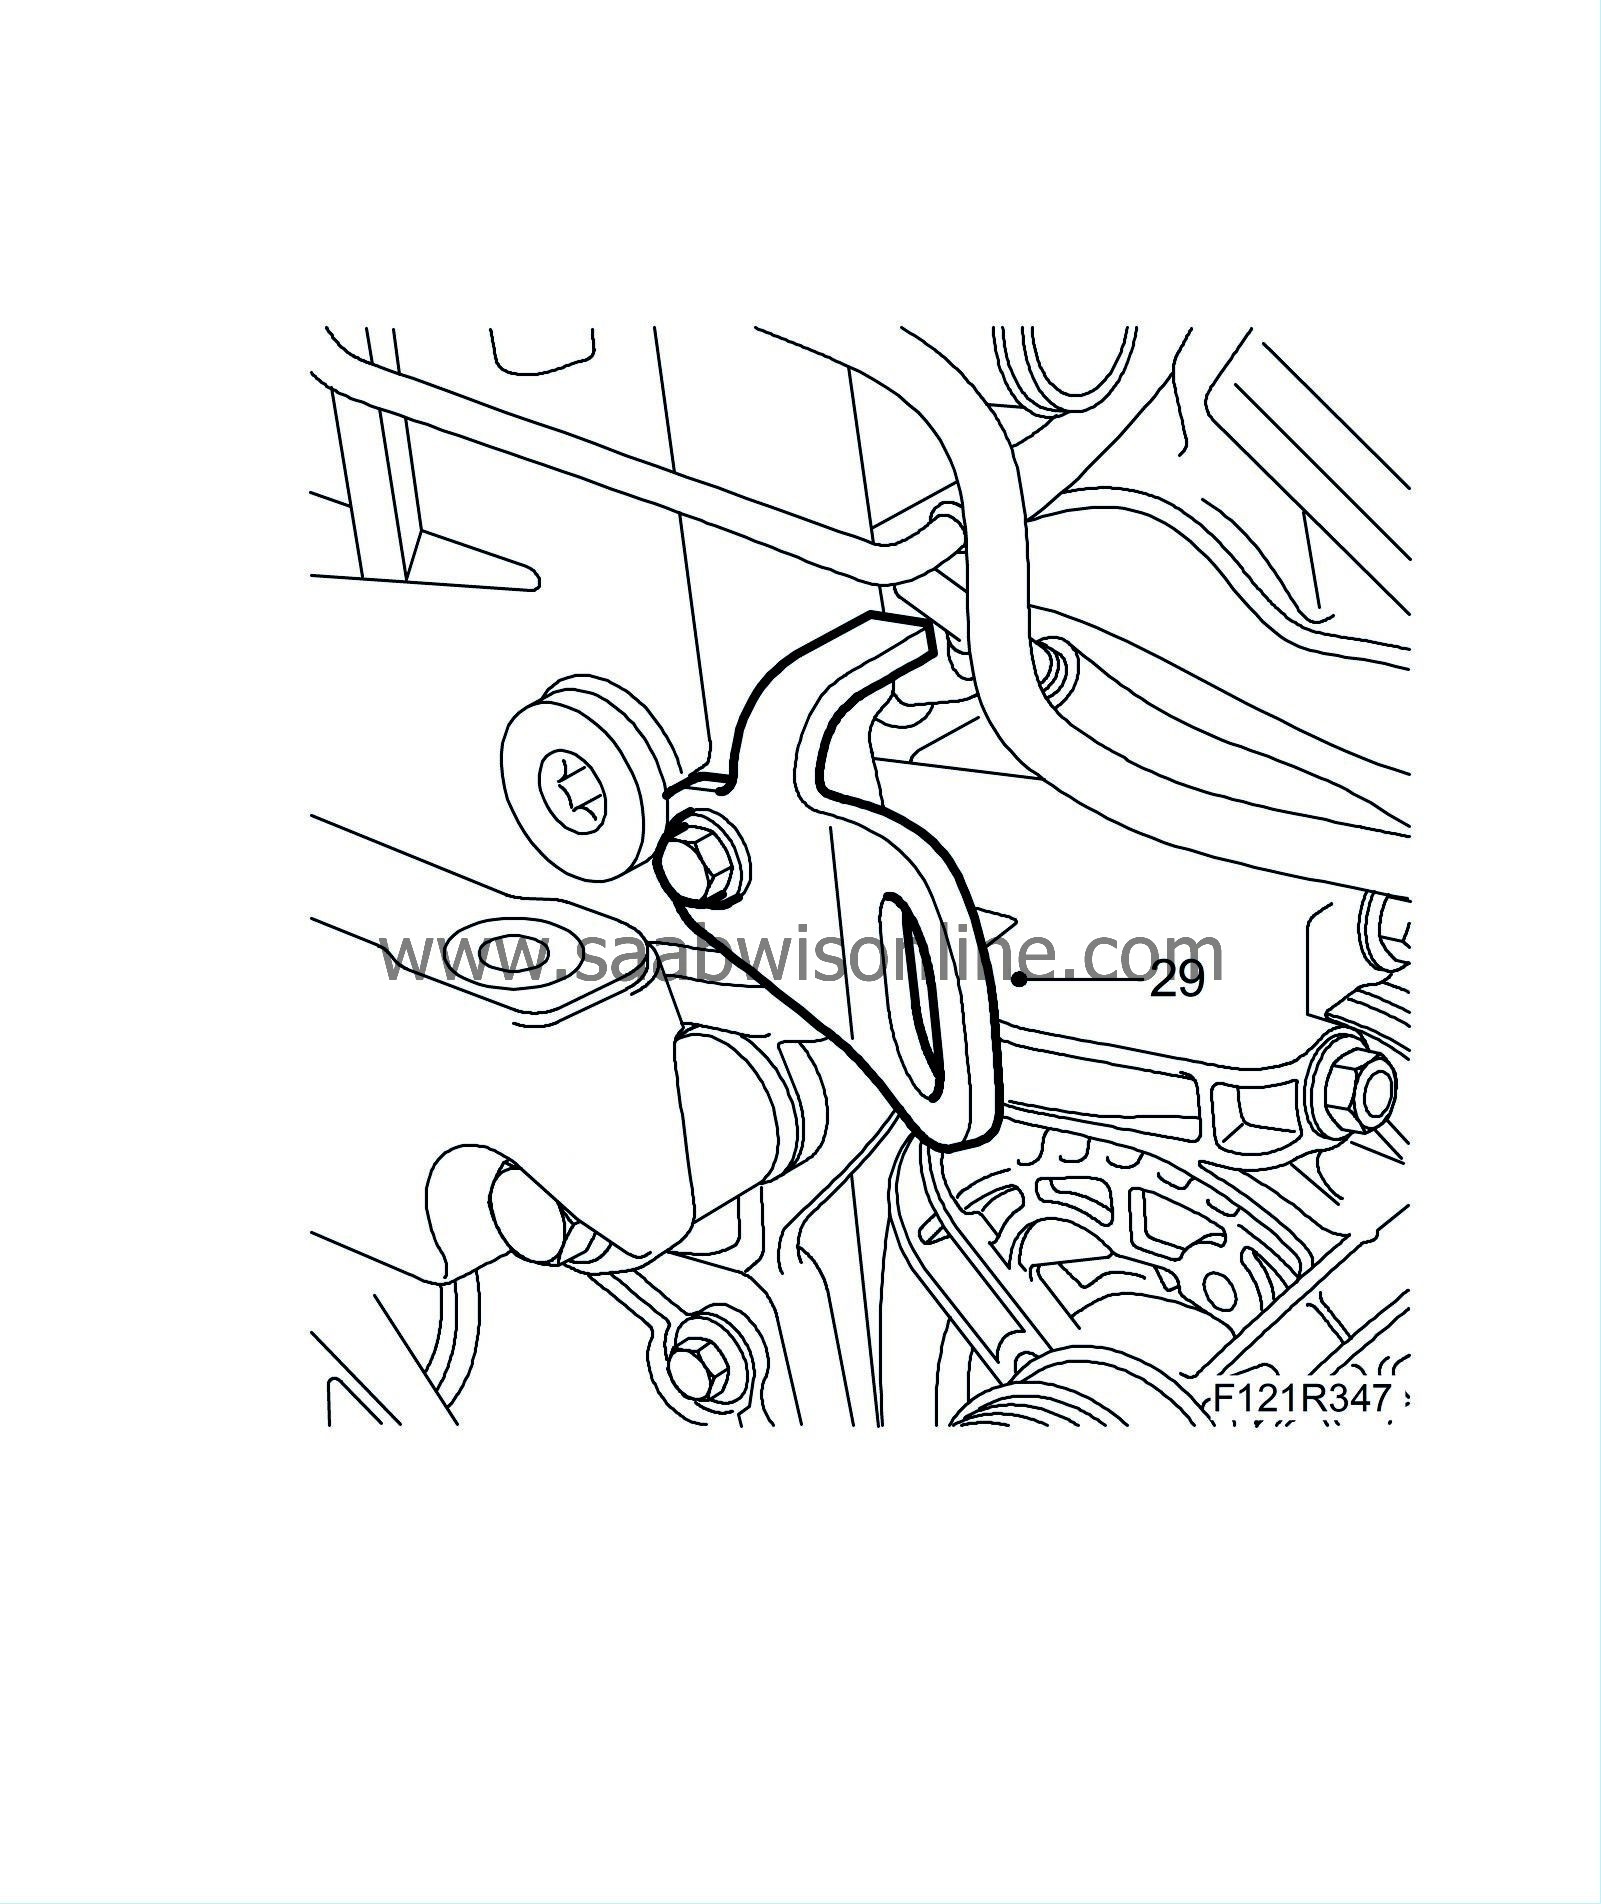
|
|
| 30. |
Secure the engine with an engine lift.
|
|
| 31. |
Remove the torque arms from the oil sump and gearbox.
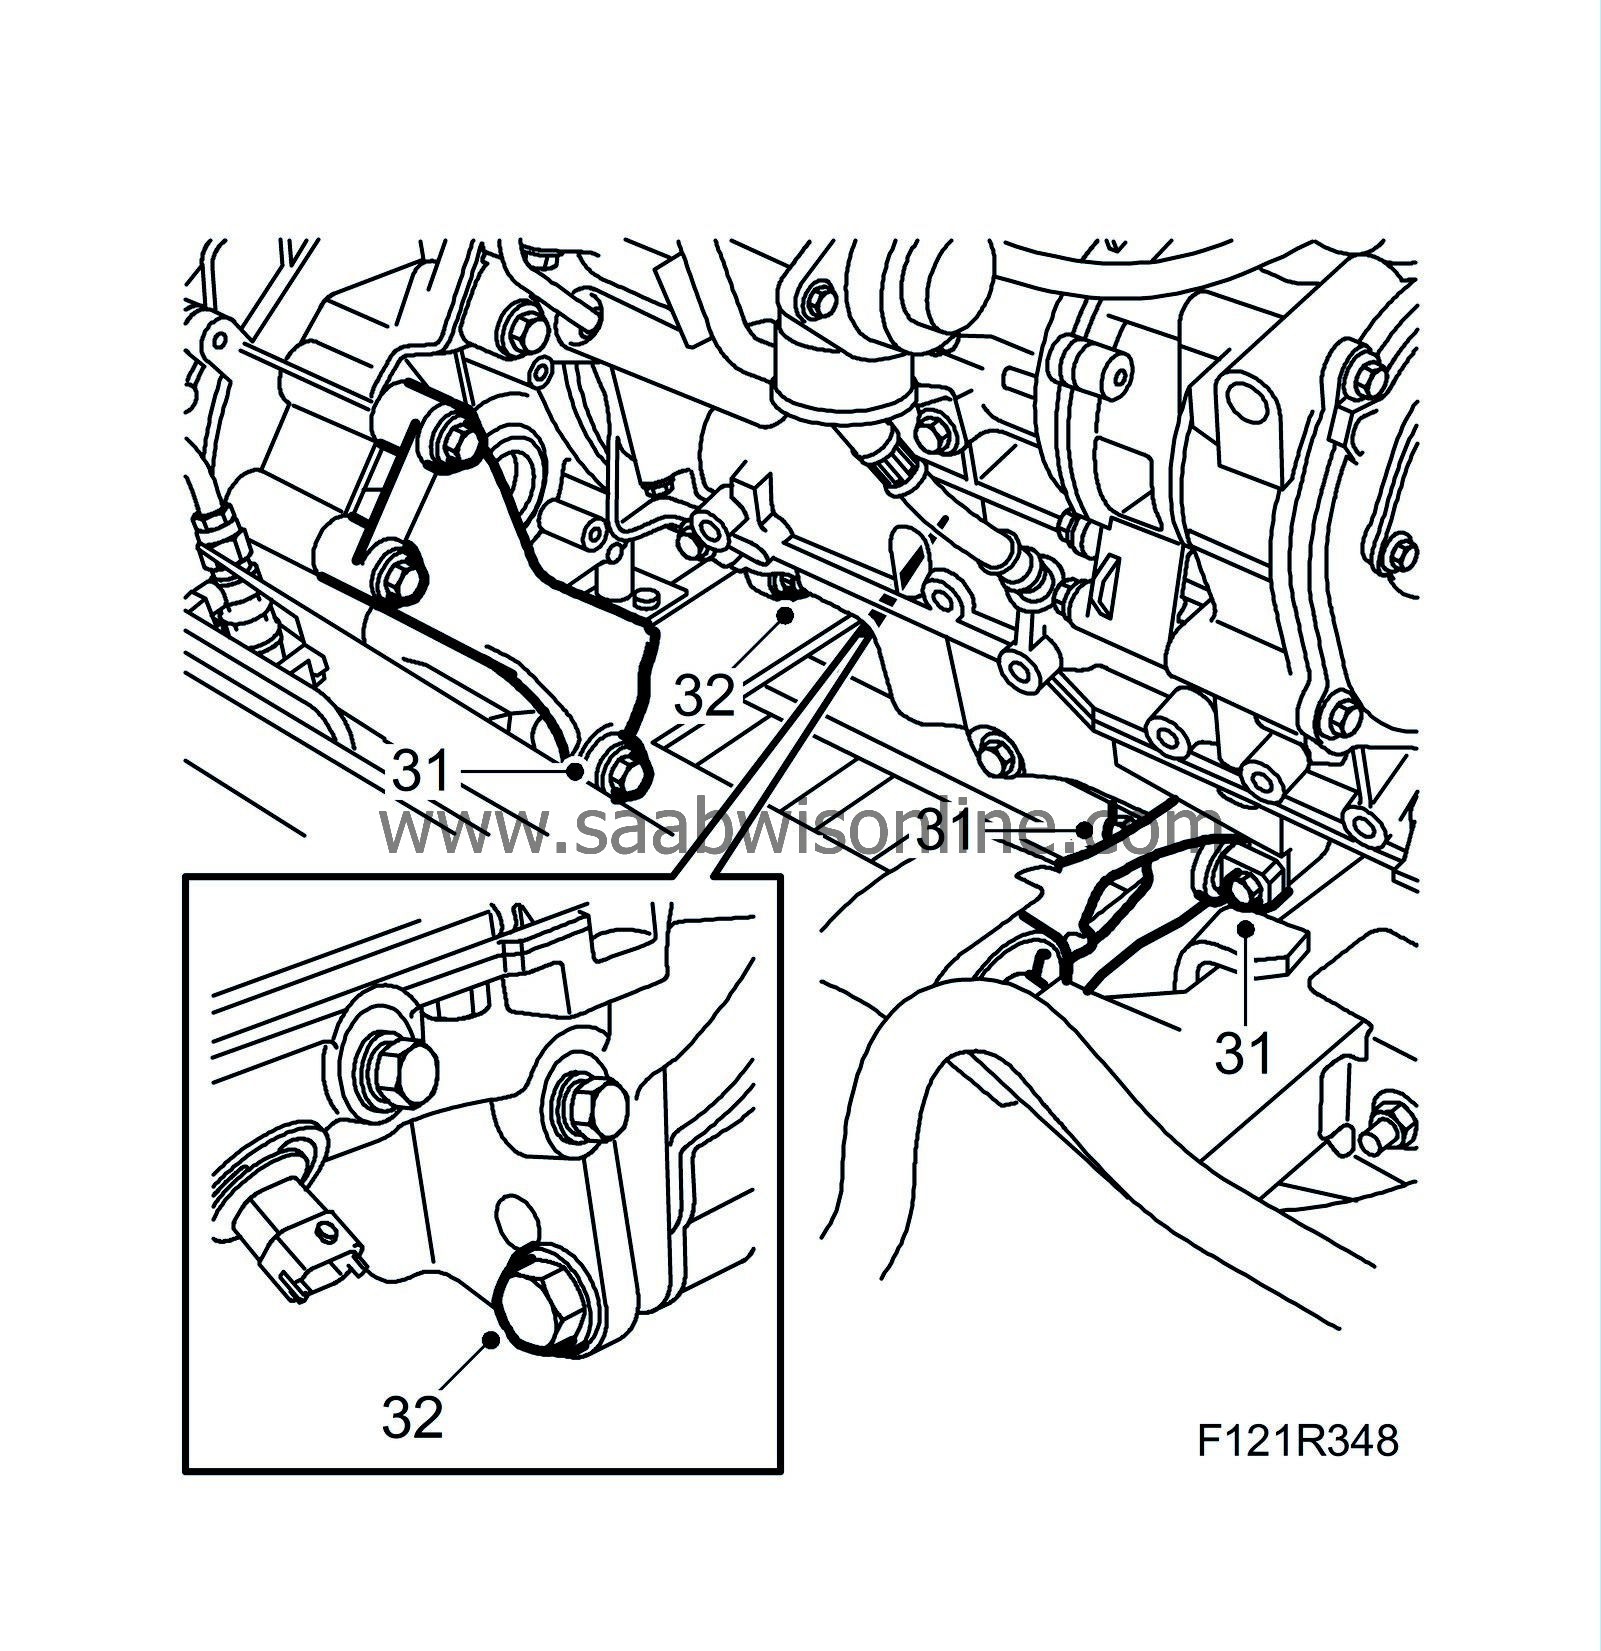
|
|
| 32. |
Raise the engine and remove the lower gearbox retaining bolts.
|
|
| 33. |
Carefully lower the engine onto a pallet.
|
|
| 34. |
Remove the upper gearbox retaining bolts.
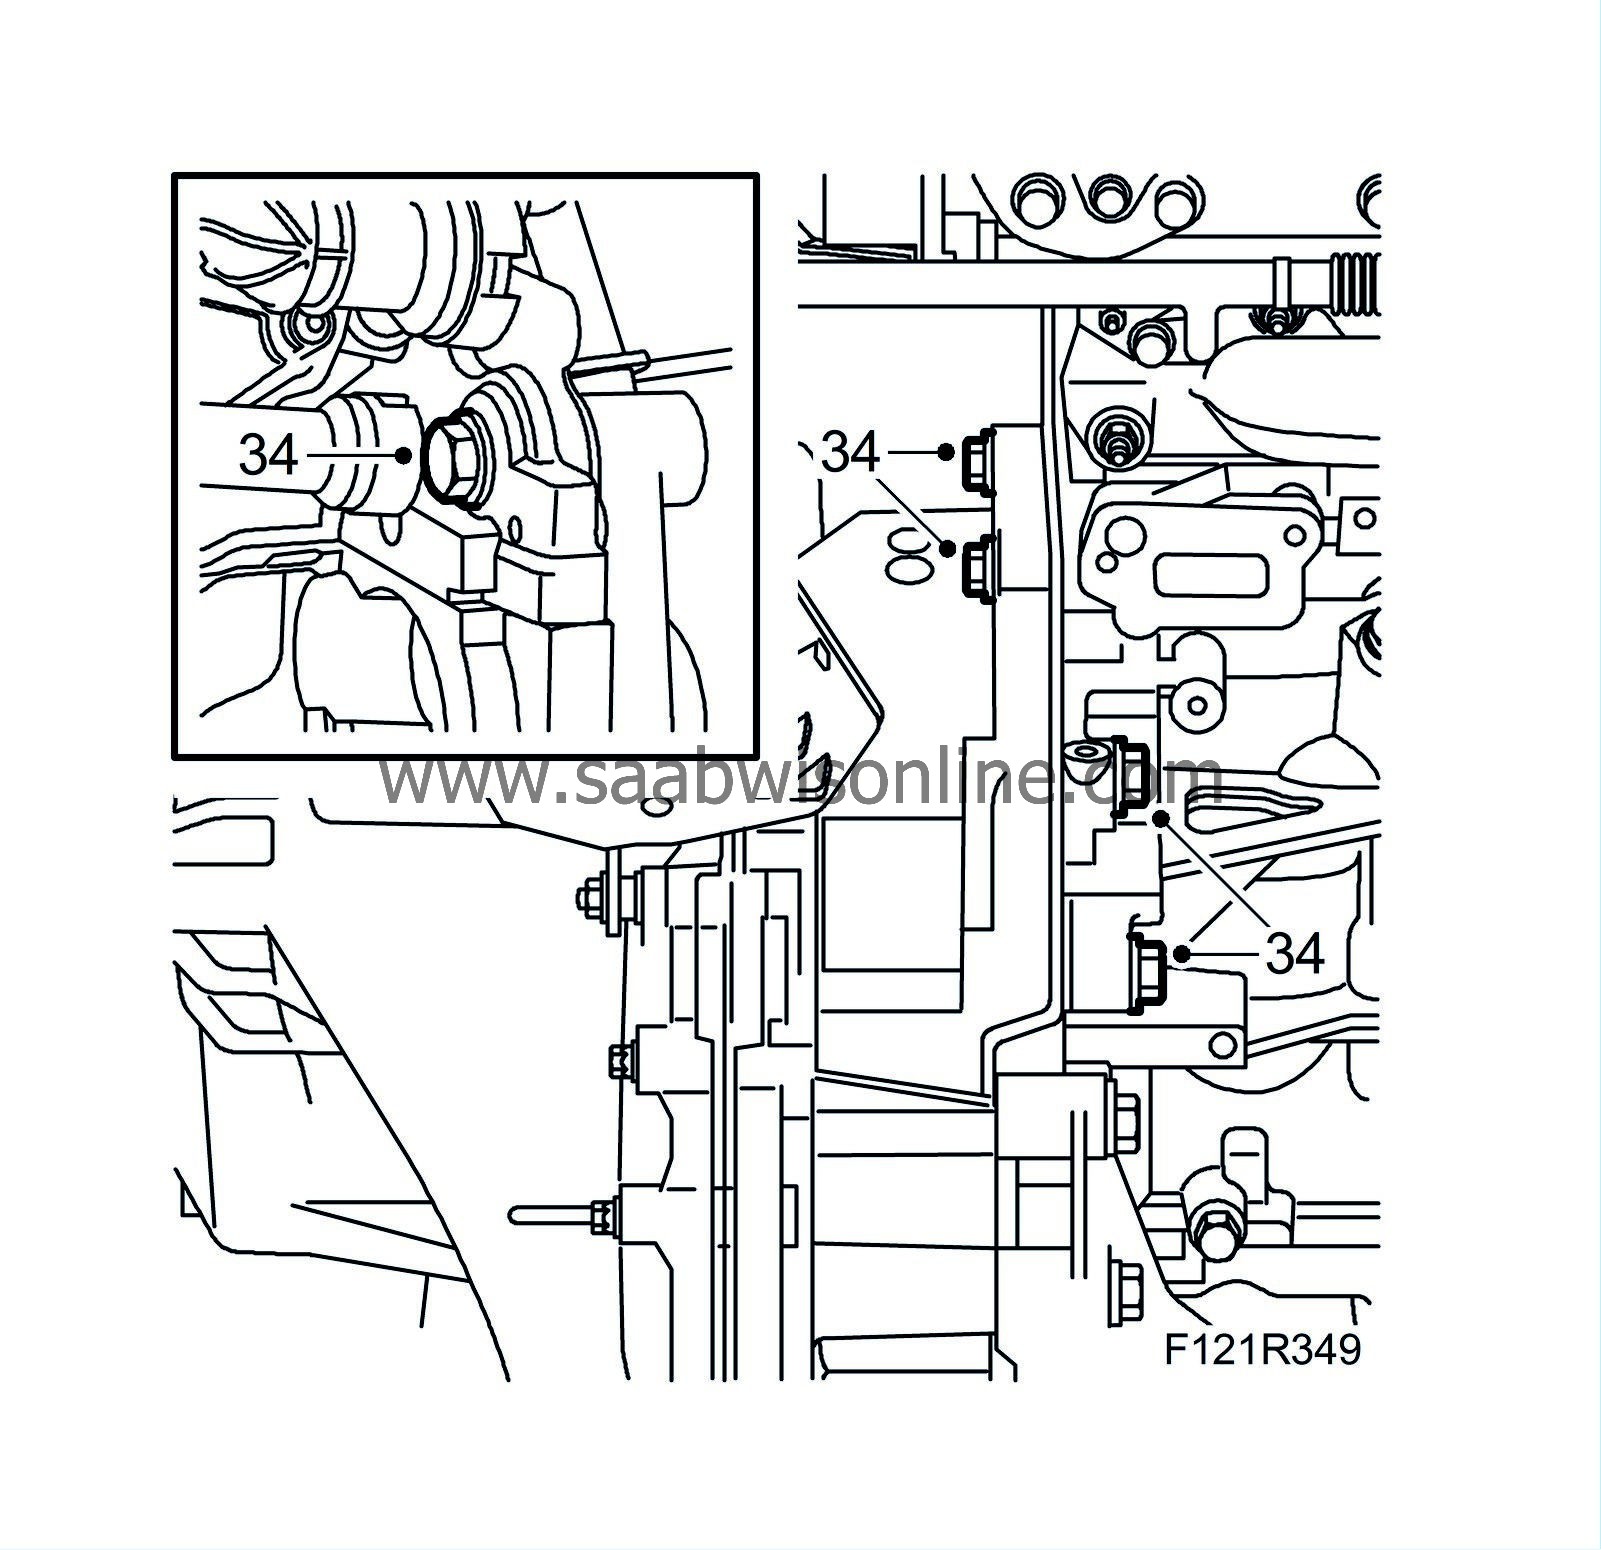
|
|
| 35. |
Fit
87 92 442 Lifting cable
to the gearbox and raise the gearbox slightly. Remove the gearbox from the engine.
|
|
| 36. |
Lift up the engine and fit
83 94 751 Holder, engine
. Fit the engine to the floor stand
78 74 878 Floor stand
.
|
|
| 37. |
Remove the turbocharger oil delivery pipe.
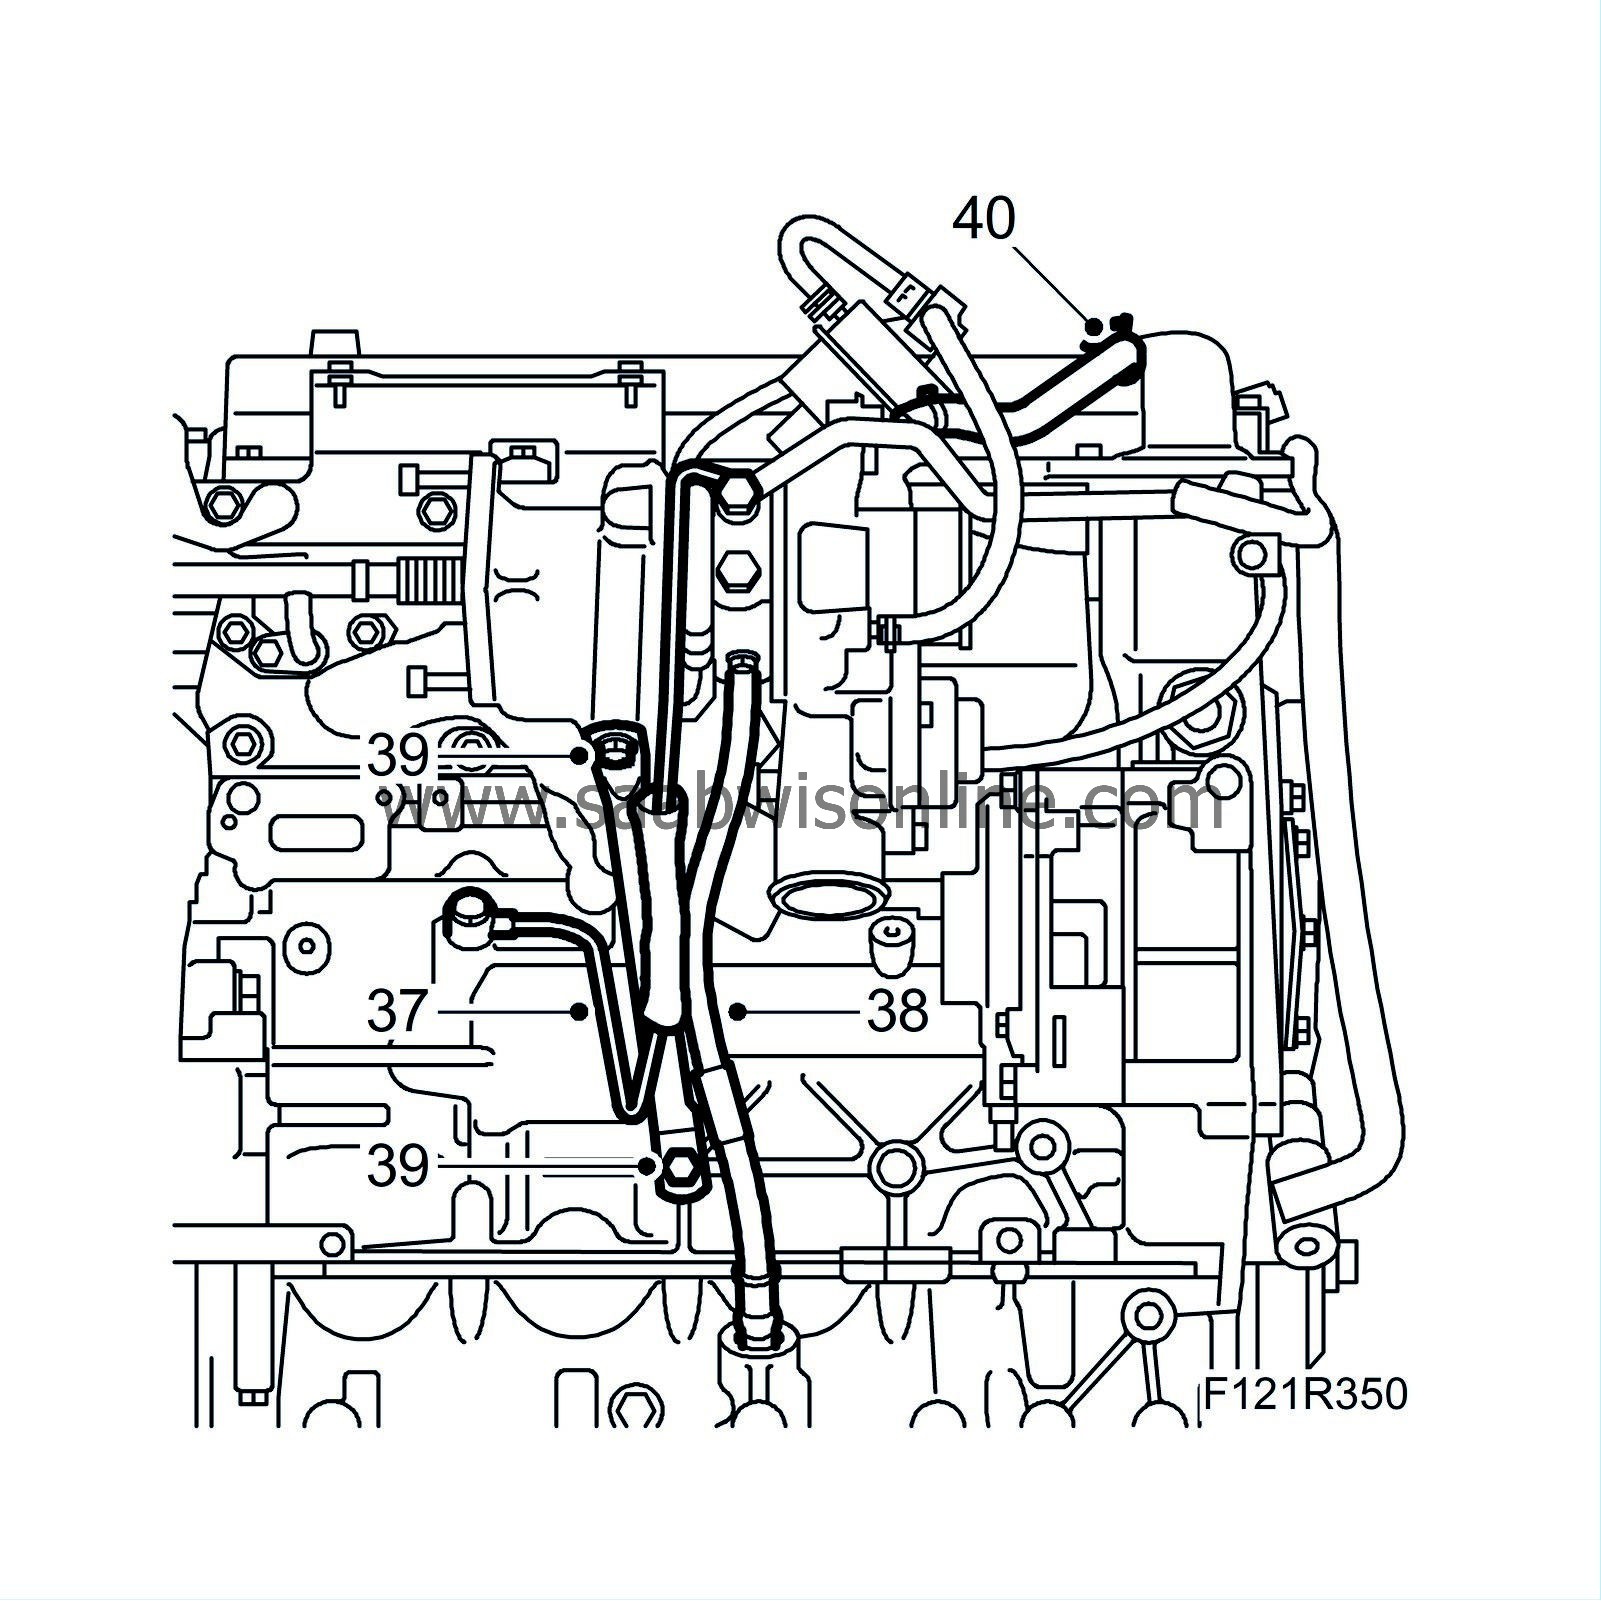
|
|
| 38. |
Remove the turbocharger oil return pipe.
|
|
| 39. |
Remove the lower turbocharger attachment bracket.
|
|
| 40. |
Remove the crankcase ventilation hose from the camshaft cover.
|
|
| 41. |
Remove the generator.

|
|
| 42. |
Cars with secondary air injection pump
: Remove the pump with bracket
|
|
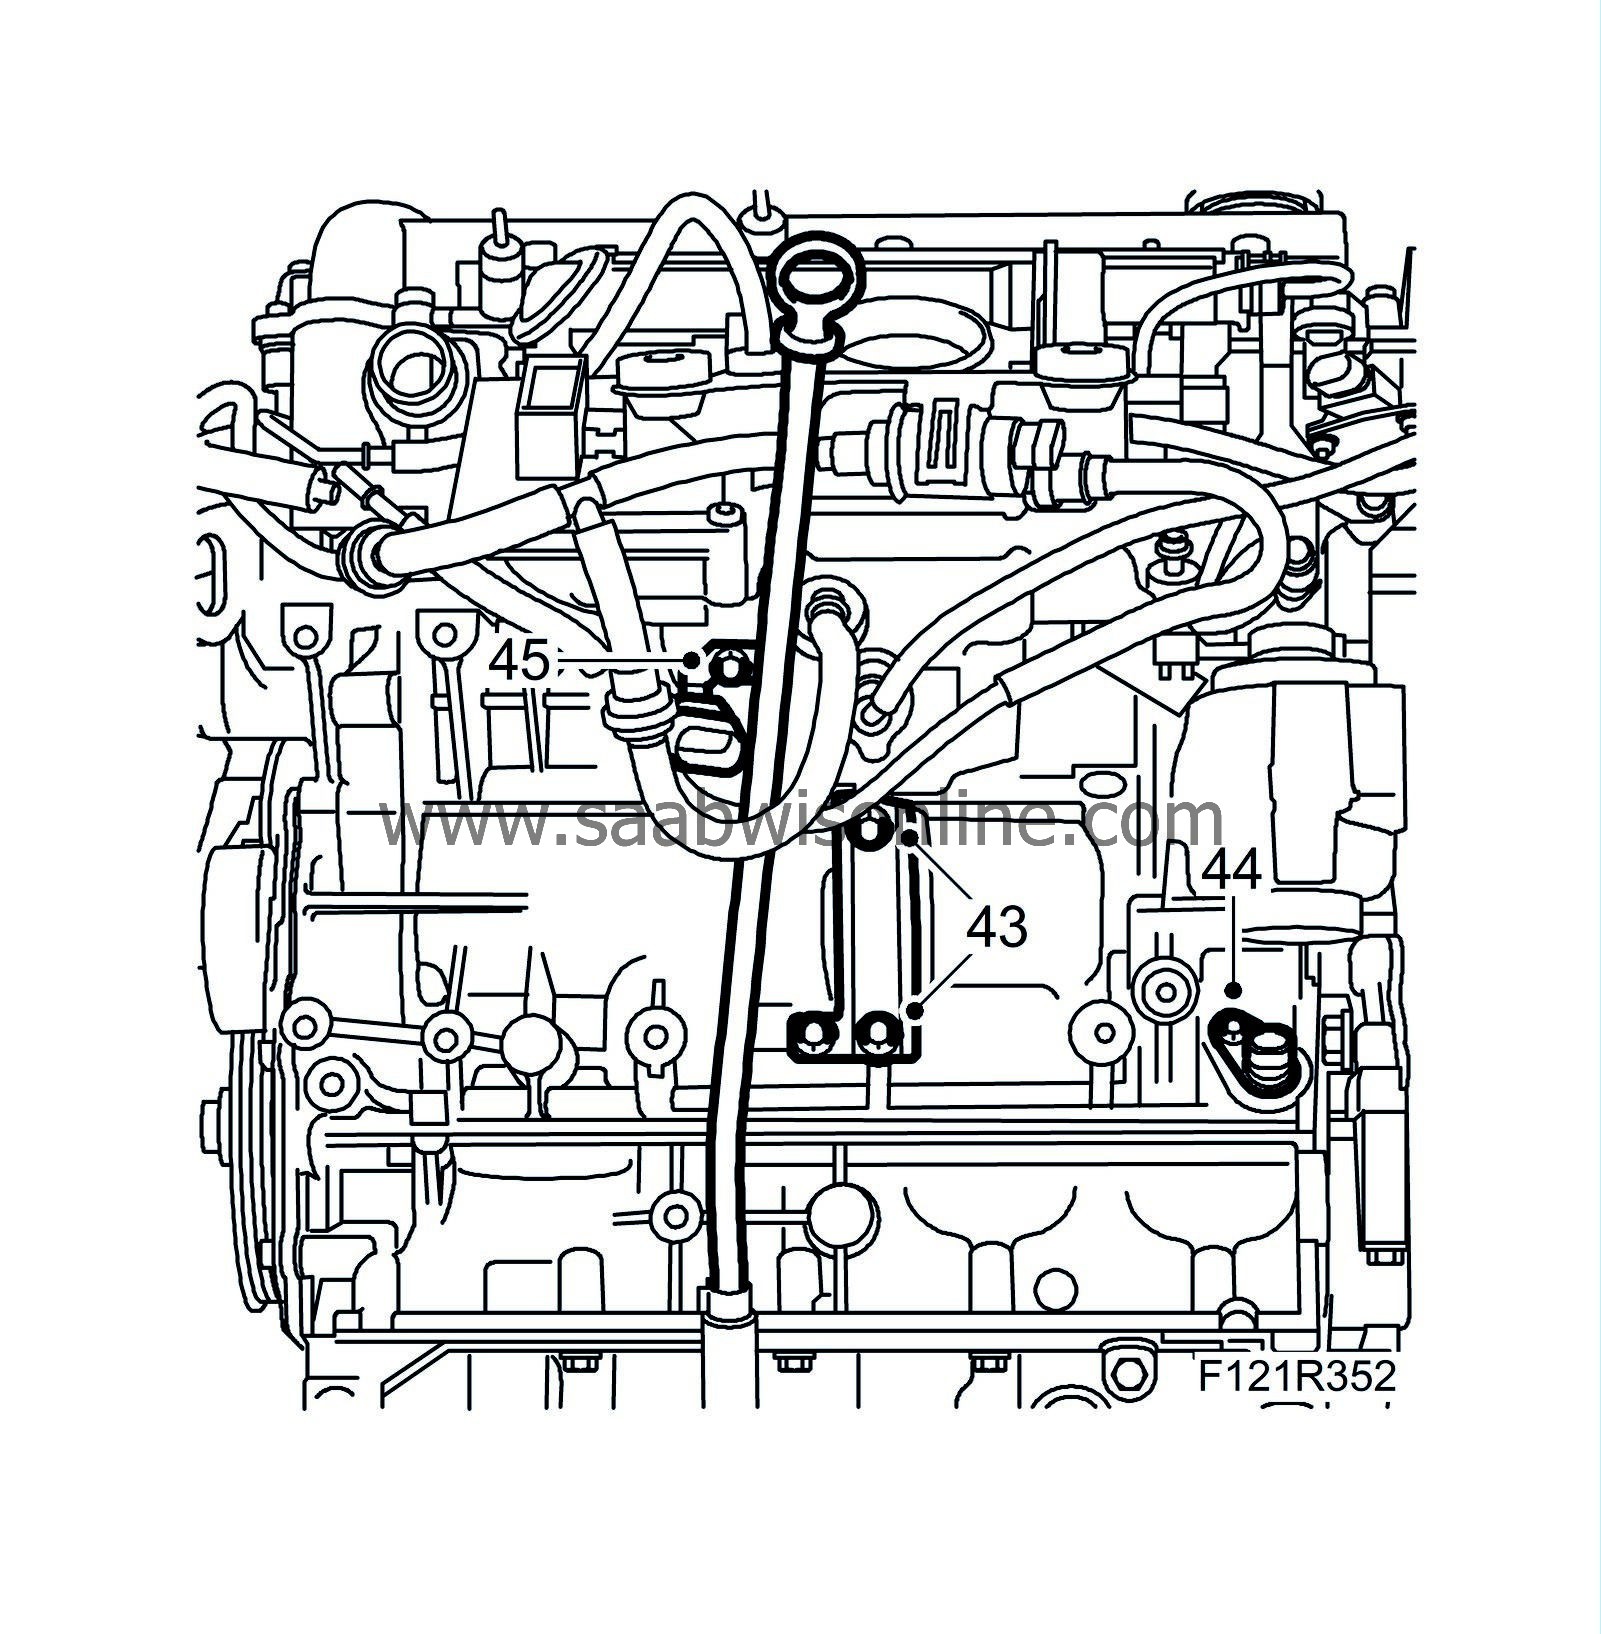
| 43. |
Remove the lower intake manifold attachment bracket.
|
|
| 44. |
Remove the crankshaft position sensor.
|
|
| 45. |
Remove the bolt from the dipstick tube.
|
|
| 46. |
Fit
83 94 868 Flywheel locking attachment
to secure the flywheel.
|
|
| 47. |
Cars with manual gearbox
: Remove the bolts holding the pressure plate and remove the clutch and driven plate hub.

|
|
| 48. |
Cars with manual gearbox:
Remove the flywheel.
Cars with automatic transmission : Remove the driver plate. 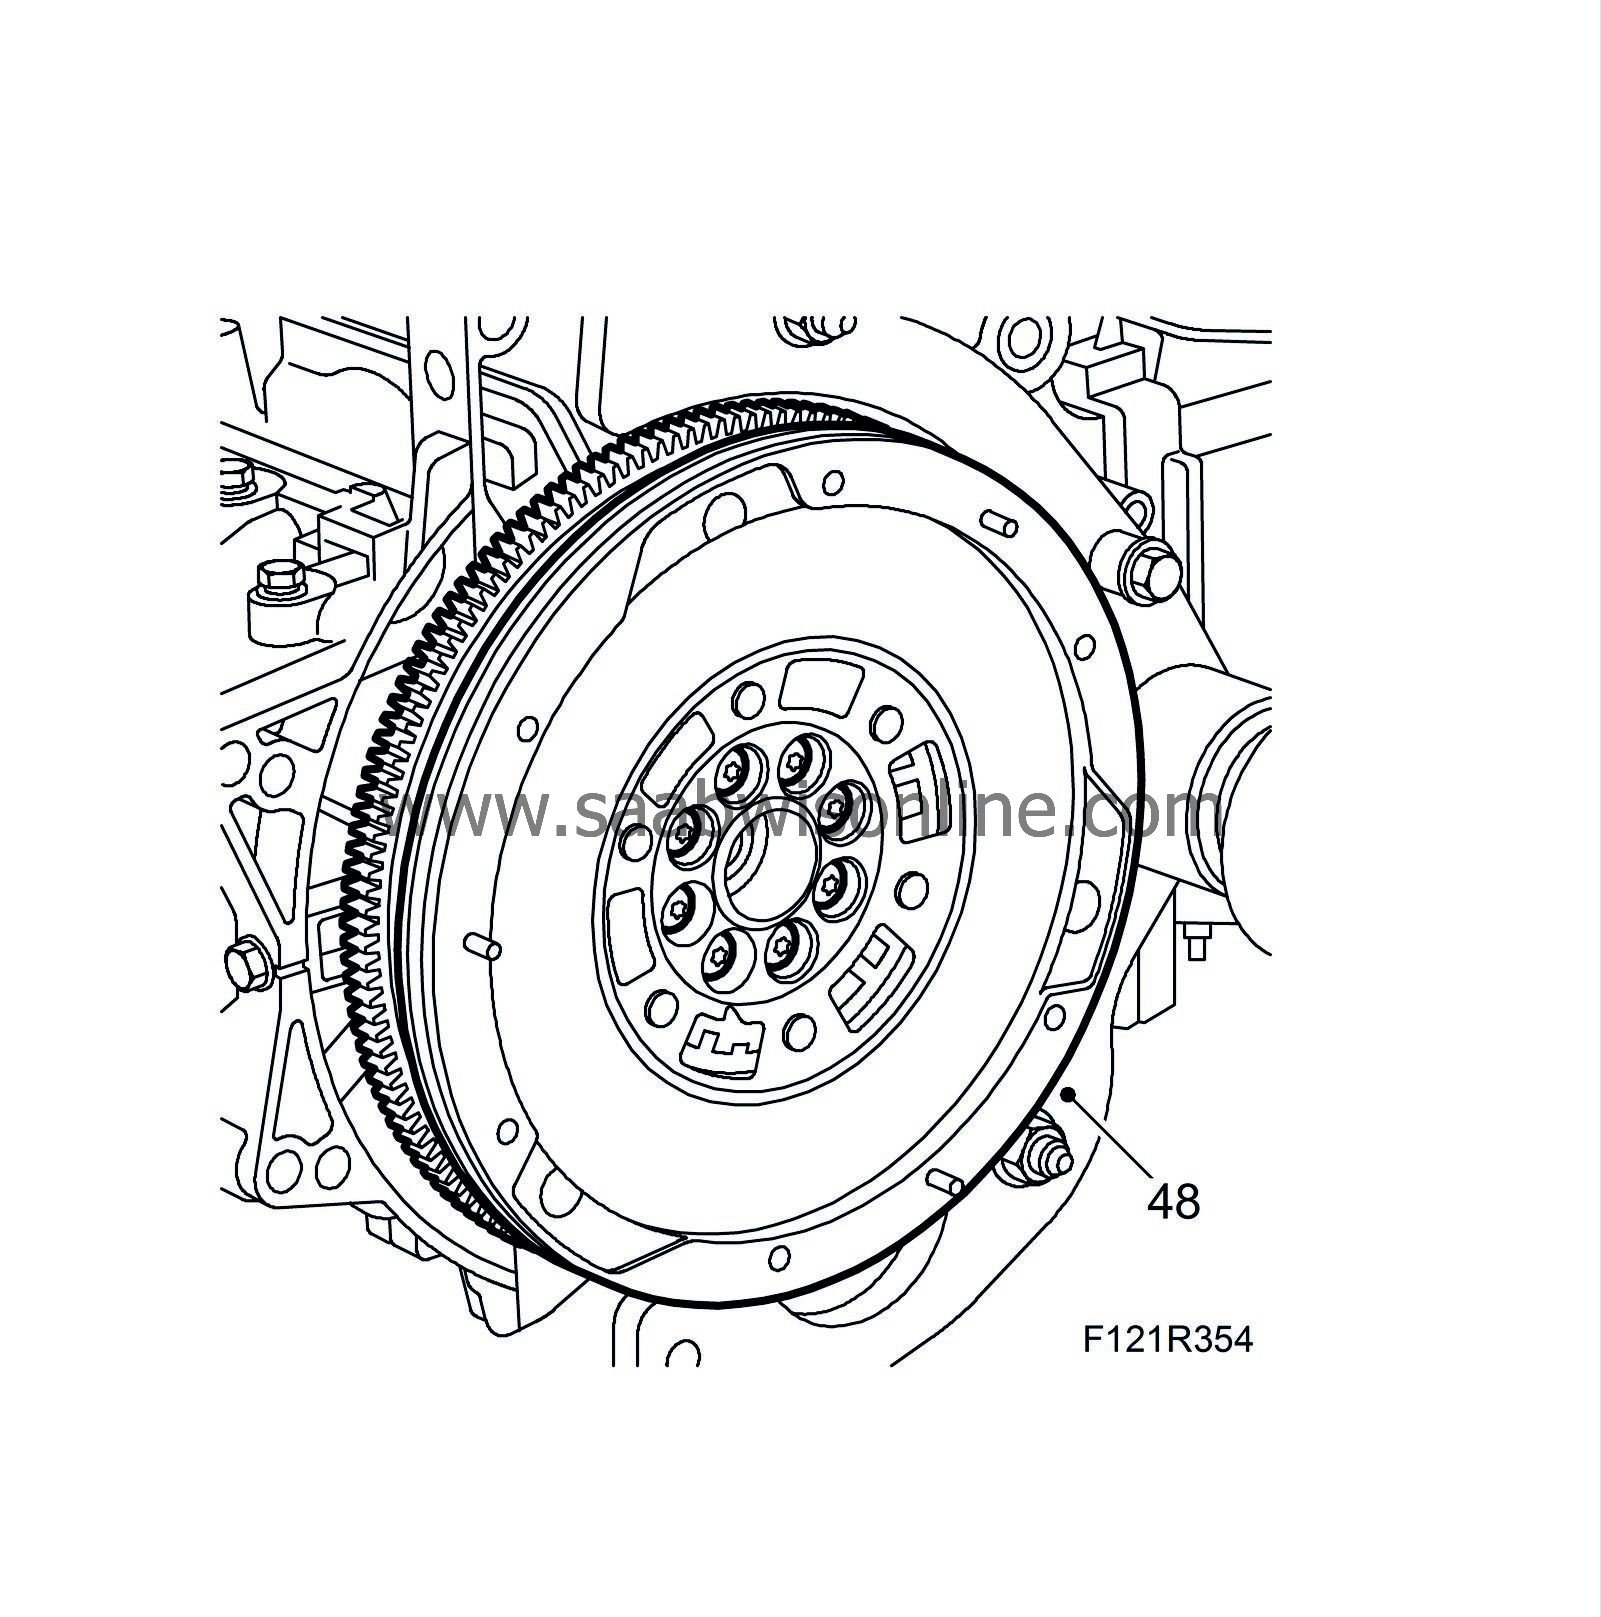
|
|
| 49. |
Remove
83 94 868 Flywheel locking attachment
.
|
|
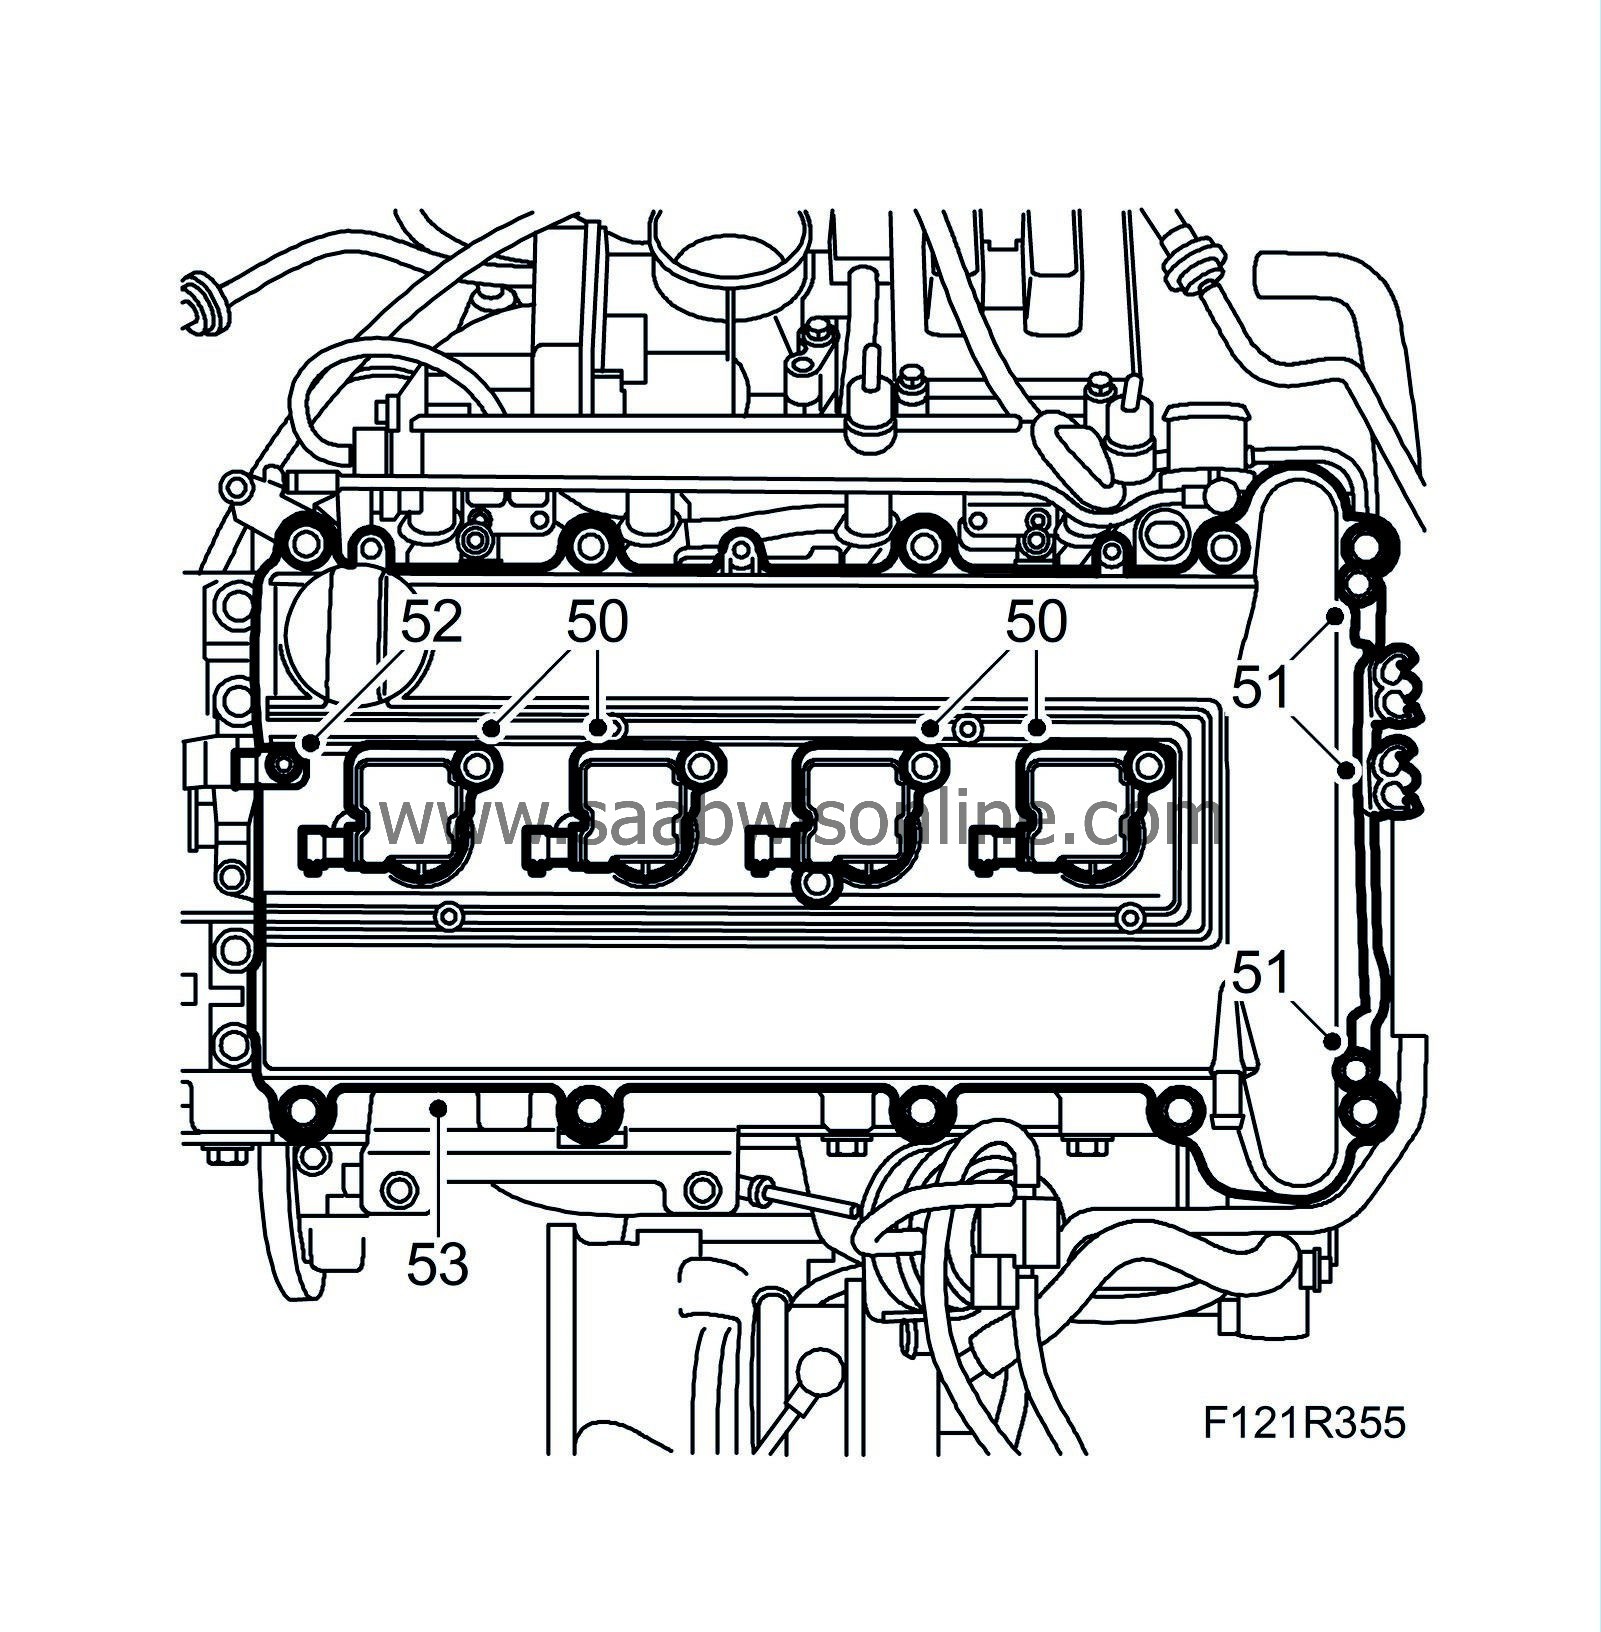
| 50. |
Remove the ignition coils.
|
|
| 51. |
Remove the bracket.
|
|
| 52. |
Remove the ground cable from the camshaft cover.
|
|
| 53. |
Remove the camshaft cover.
|
|
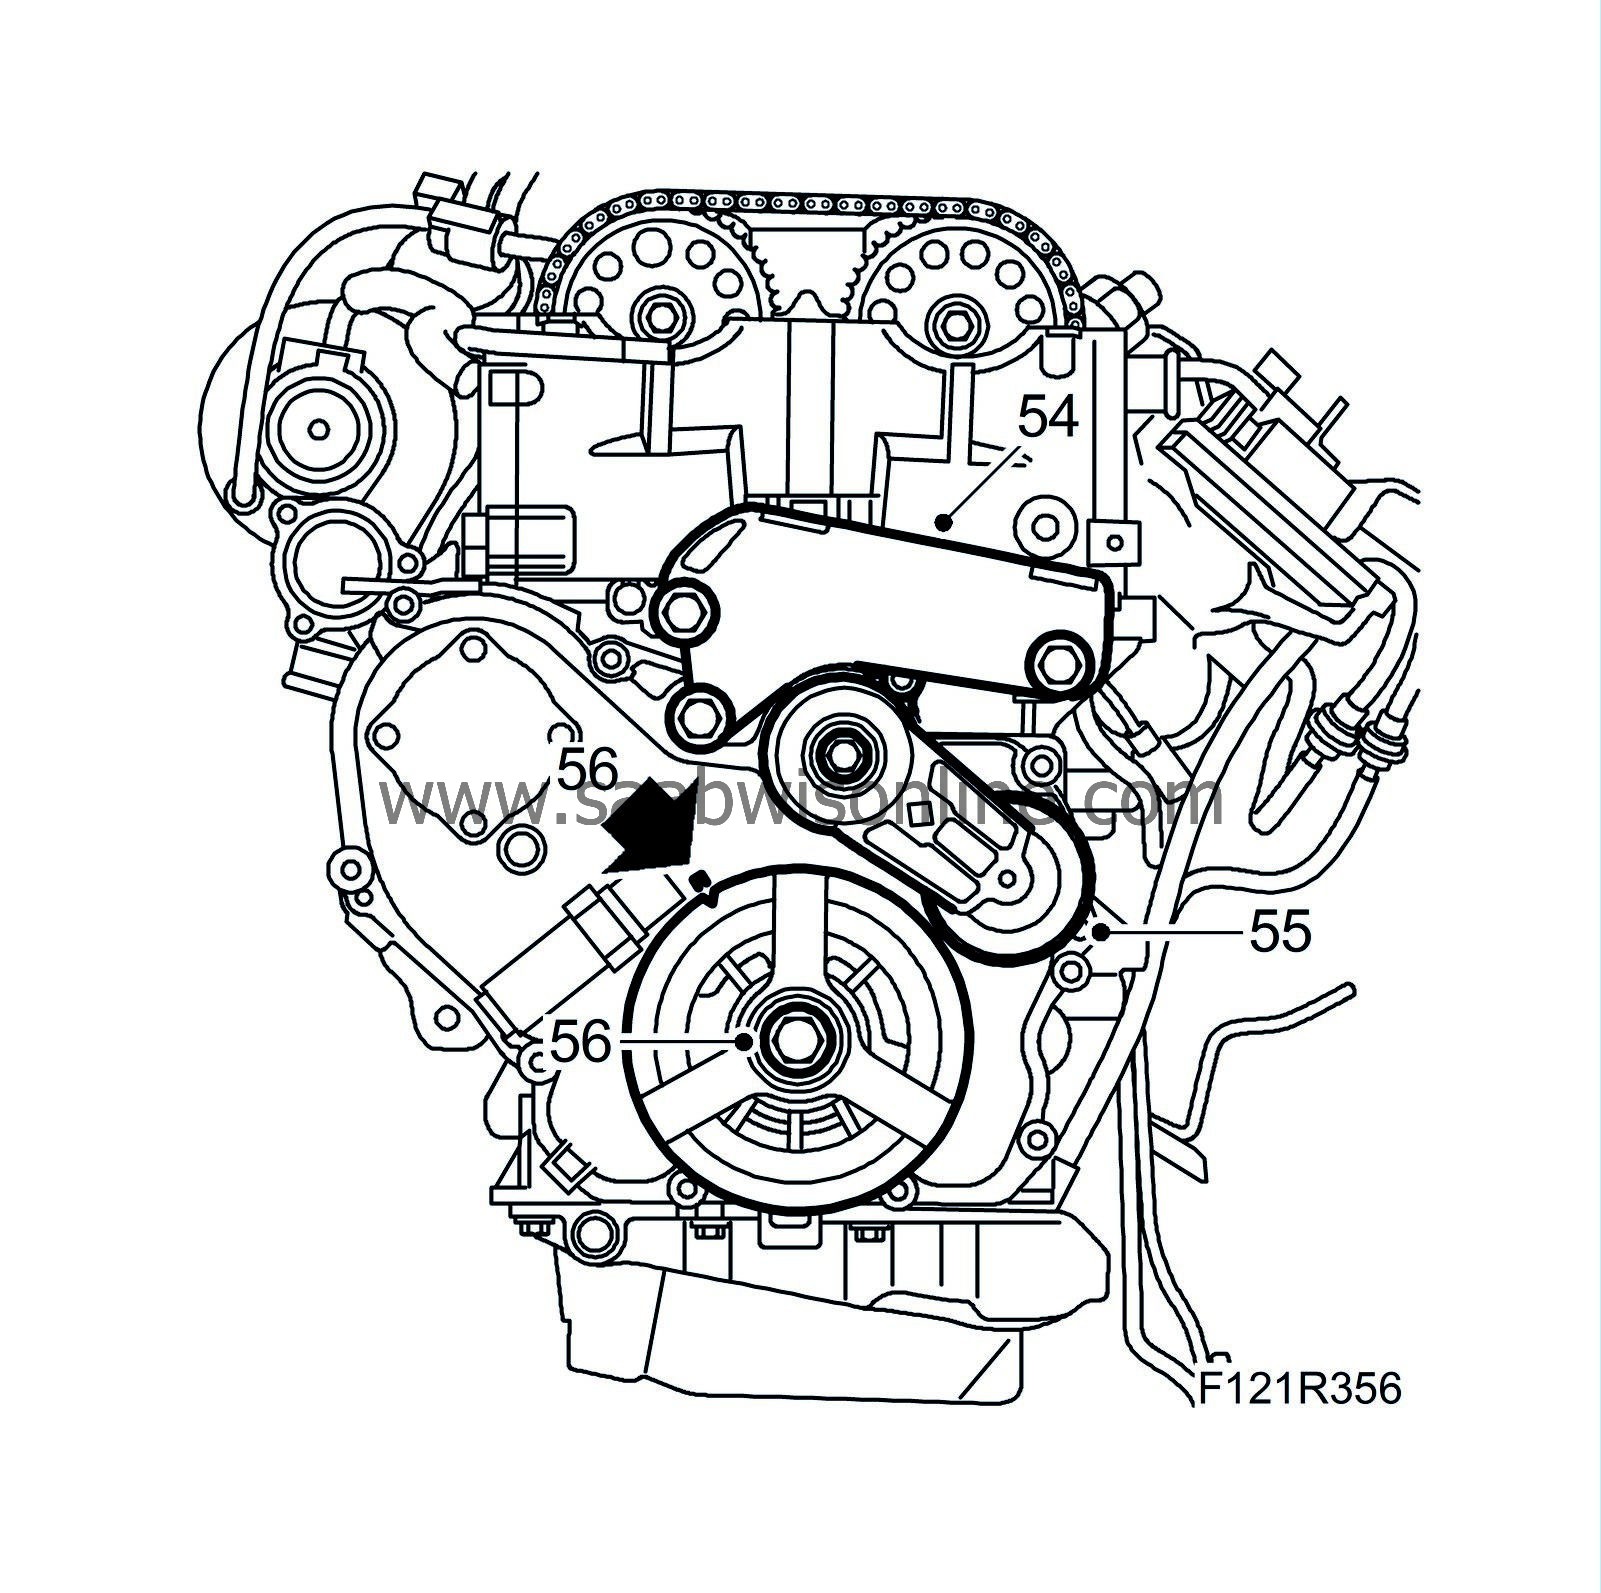
| 54. |
Remove the engine mounting bracket.
|
|
| 55. |
Remove the belt tensioner.
|
|
| 56. |
Zero the crankshaft. Remove the crankshaft pulley with
83 95 360 Holding tool, crankshaft pulley
(shaft only) and
83 96 210 Holding tool, crankshaft pulley, B207
.
|
|
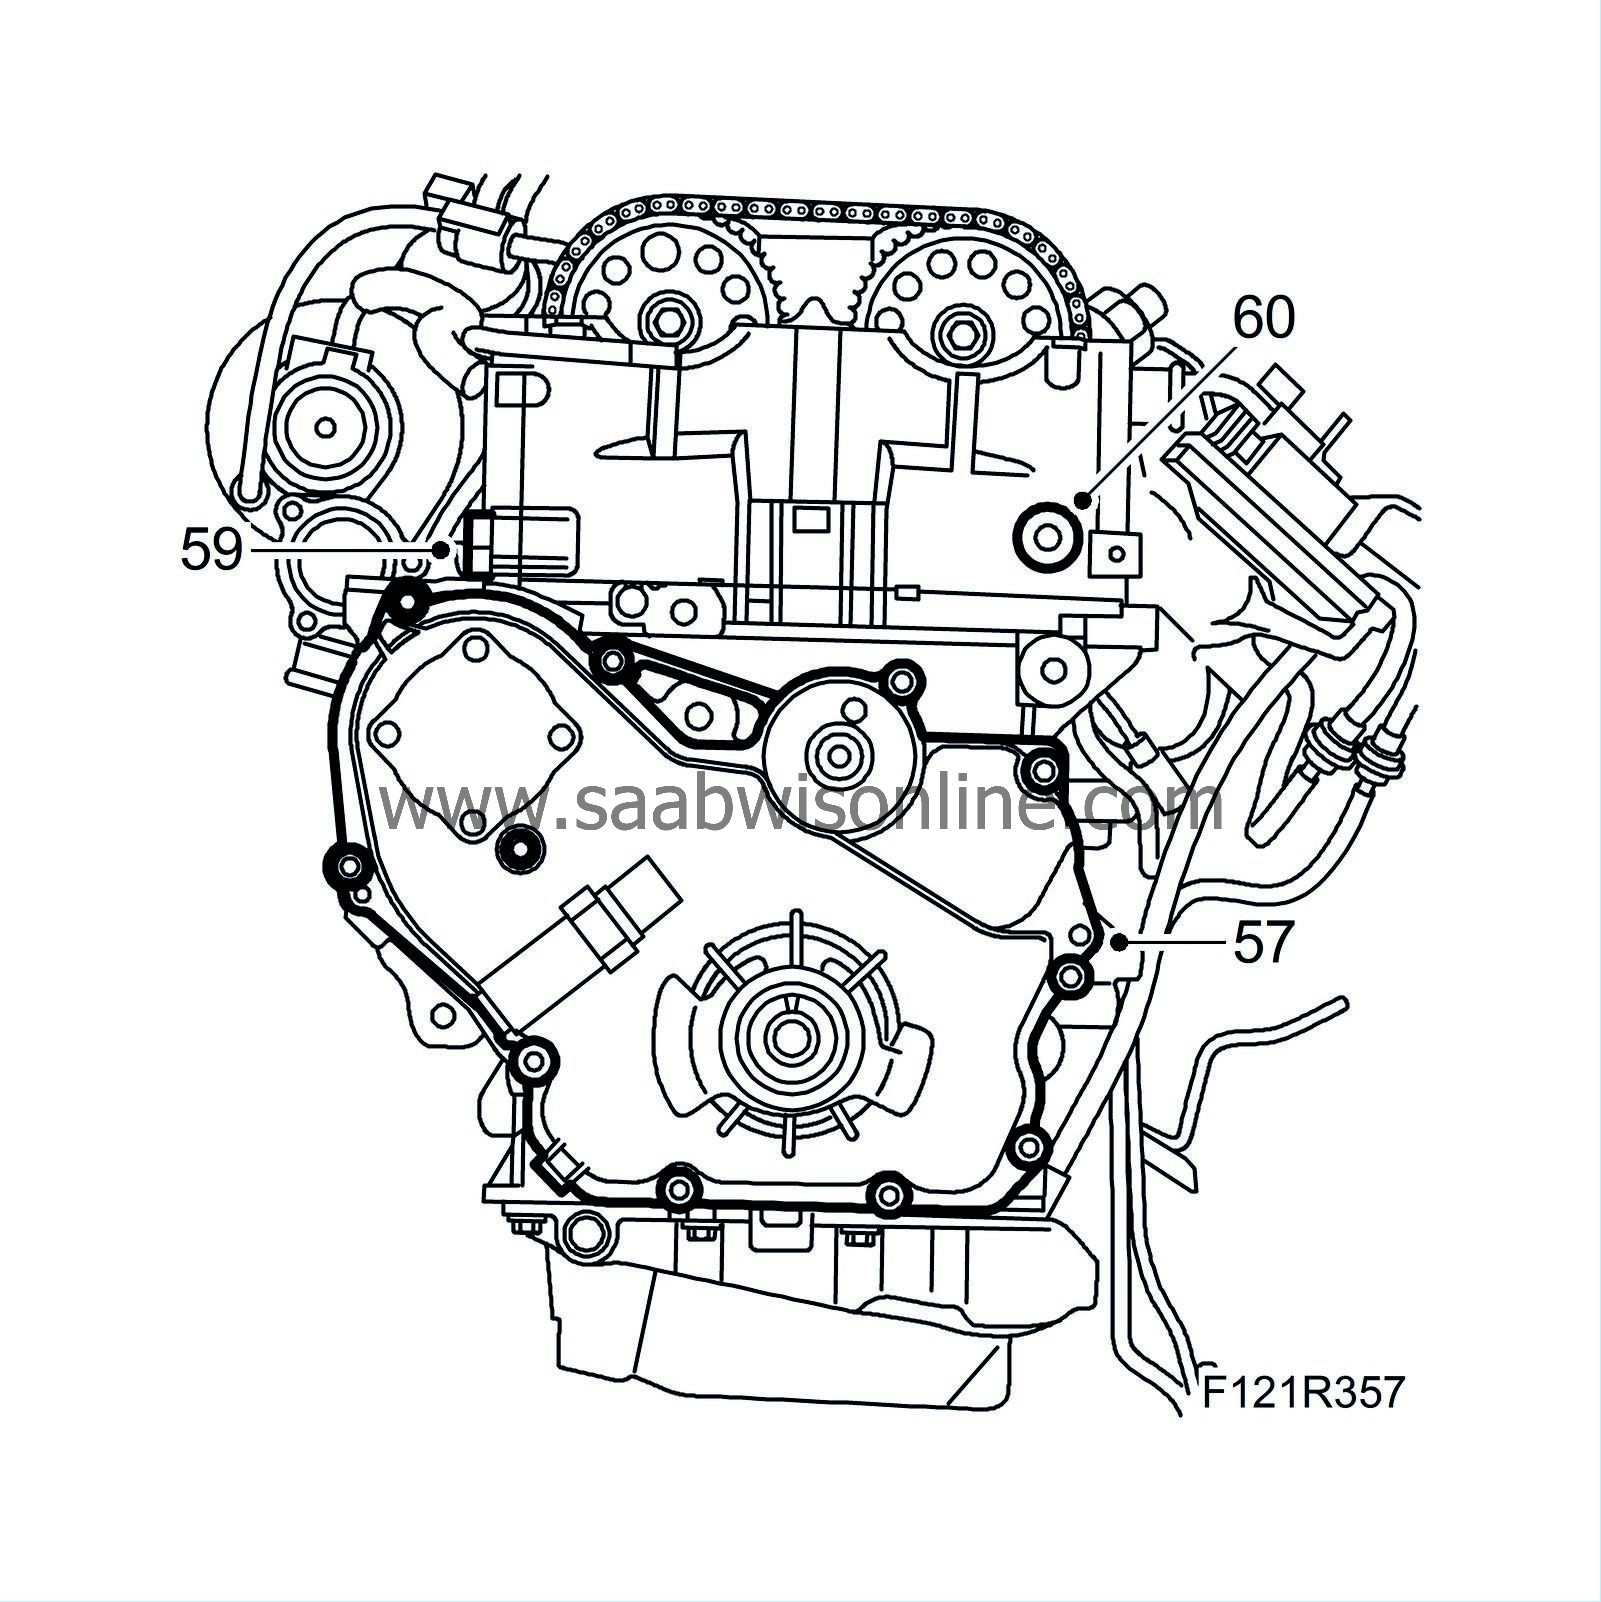
| 57. |
Remove the timing cover and gasket.
|
|
| 58. |
Remove the crankshaft seal.
|
|
| 59. |
Remove the timing chain tensioner.
|
|
| 60. |
Remove the plug from the cylinder head.
|
|
| 61. |
Remove the upper bolt from the chain guide on the inlet side.

|
|
| 62. |
Remove the upper timing chain guide rail.
|
|
| 63. |
Remove the lower chain guide bolt. Pull down the chain guide. Detach the lower section of the chain.
|
|
| 64. |
Remove the camshaft sprockets. Use a spanner to grip the camshaft flats when the bolts are loosened. Lift up the chain.
|
|
| 65. |
Remove the tensioner guide by lifting it up. Inspect the condition of the guide. Replace if necessary.
|
|
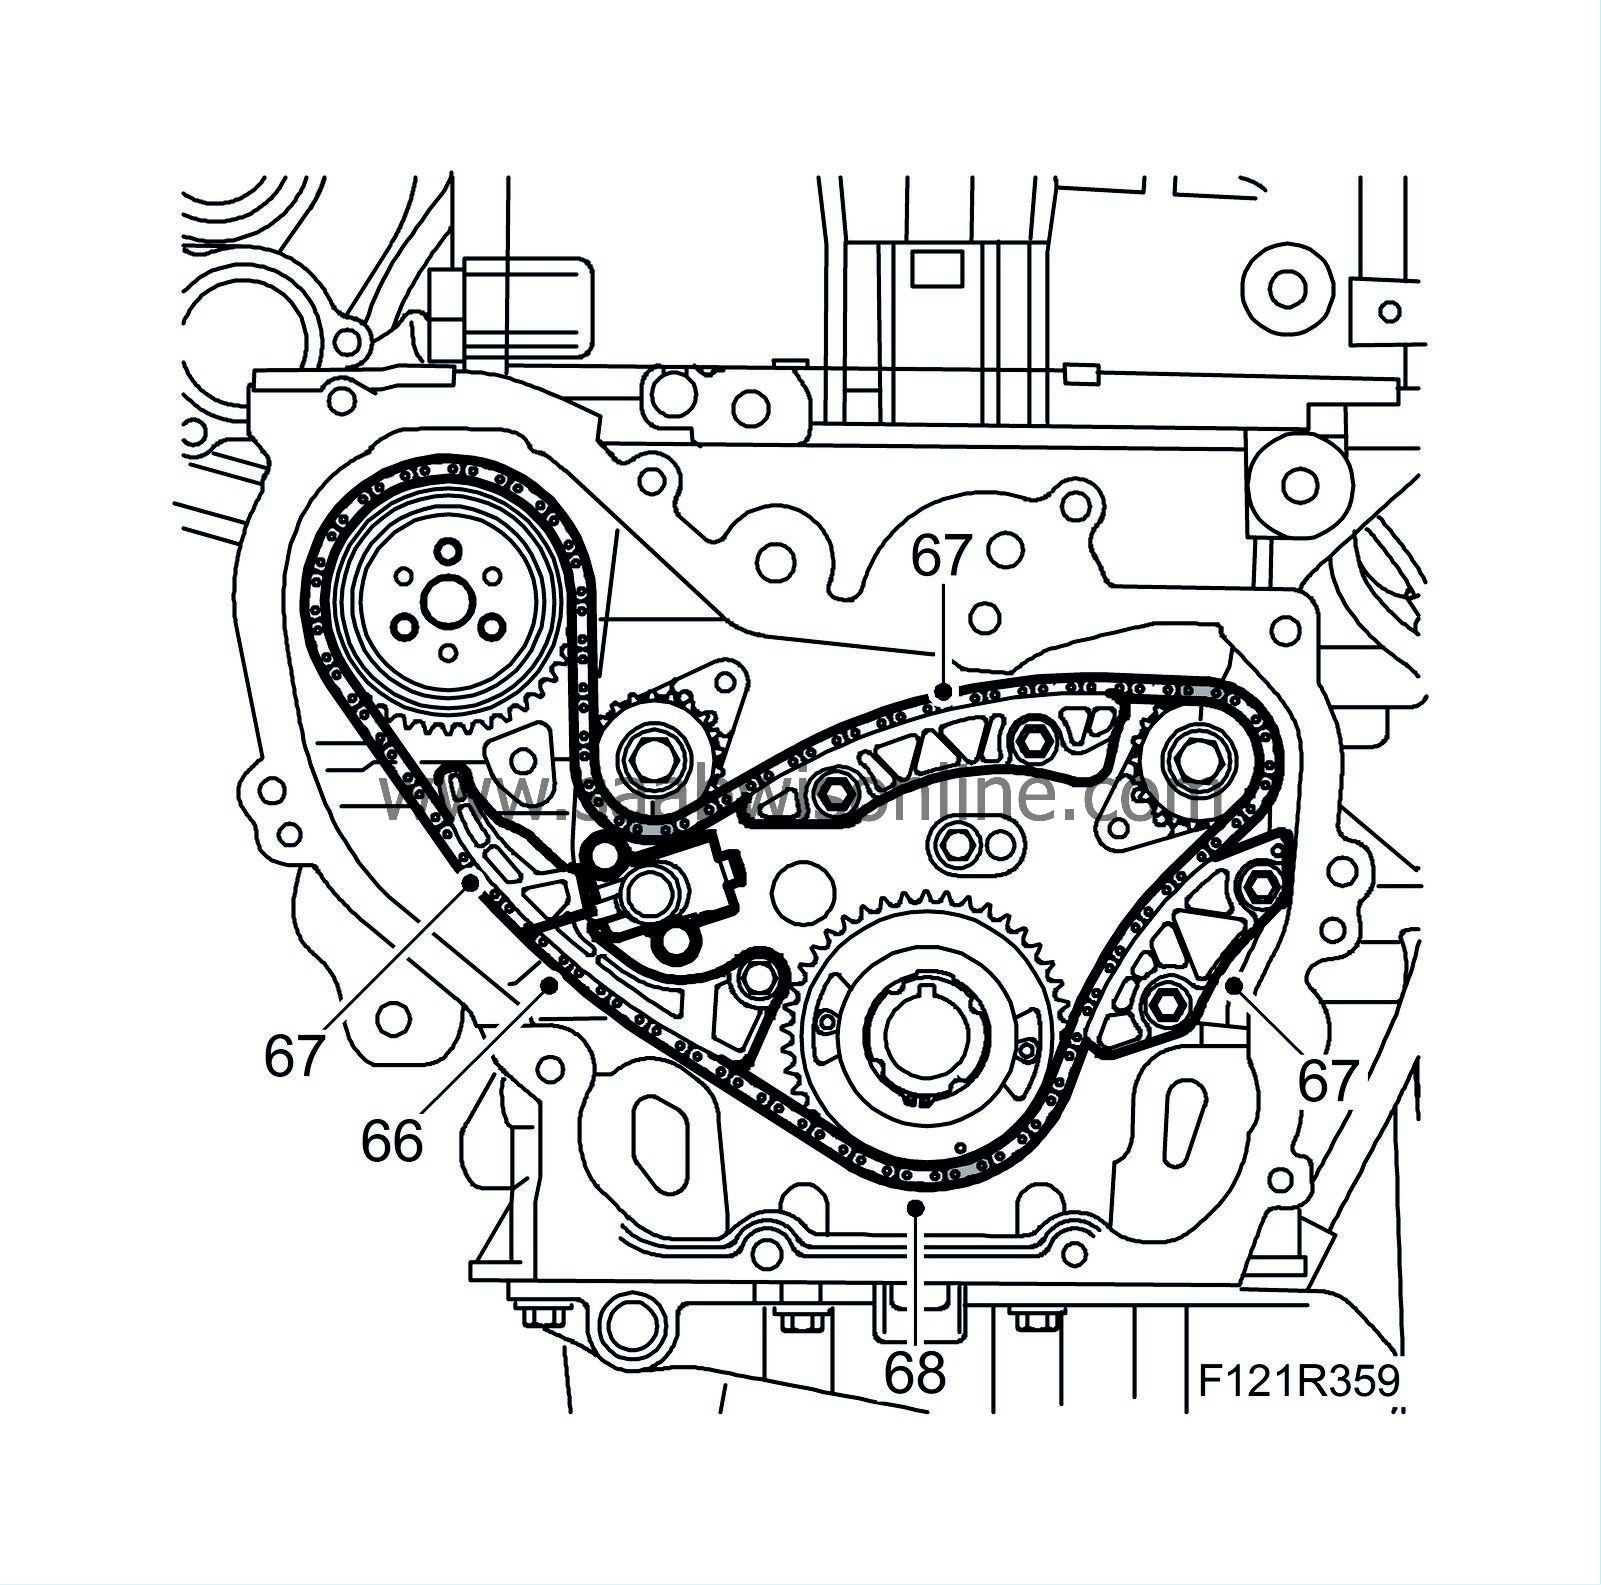
| 66. |
Remove the balancer shaft chain tensioner.
|
|
| 67. |
Remove the balancer shaft chain guide bars.
|
|
| 68. |
Remove the balancer shaft chain, sprocket and wedge.
|
|
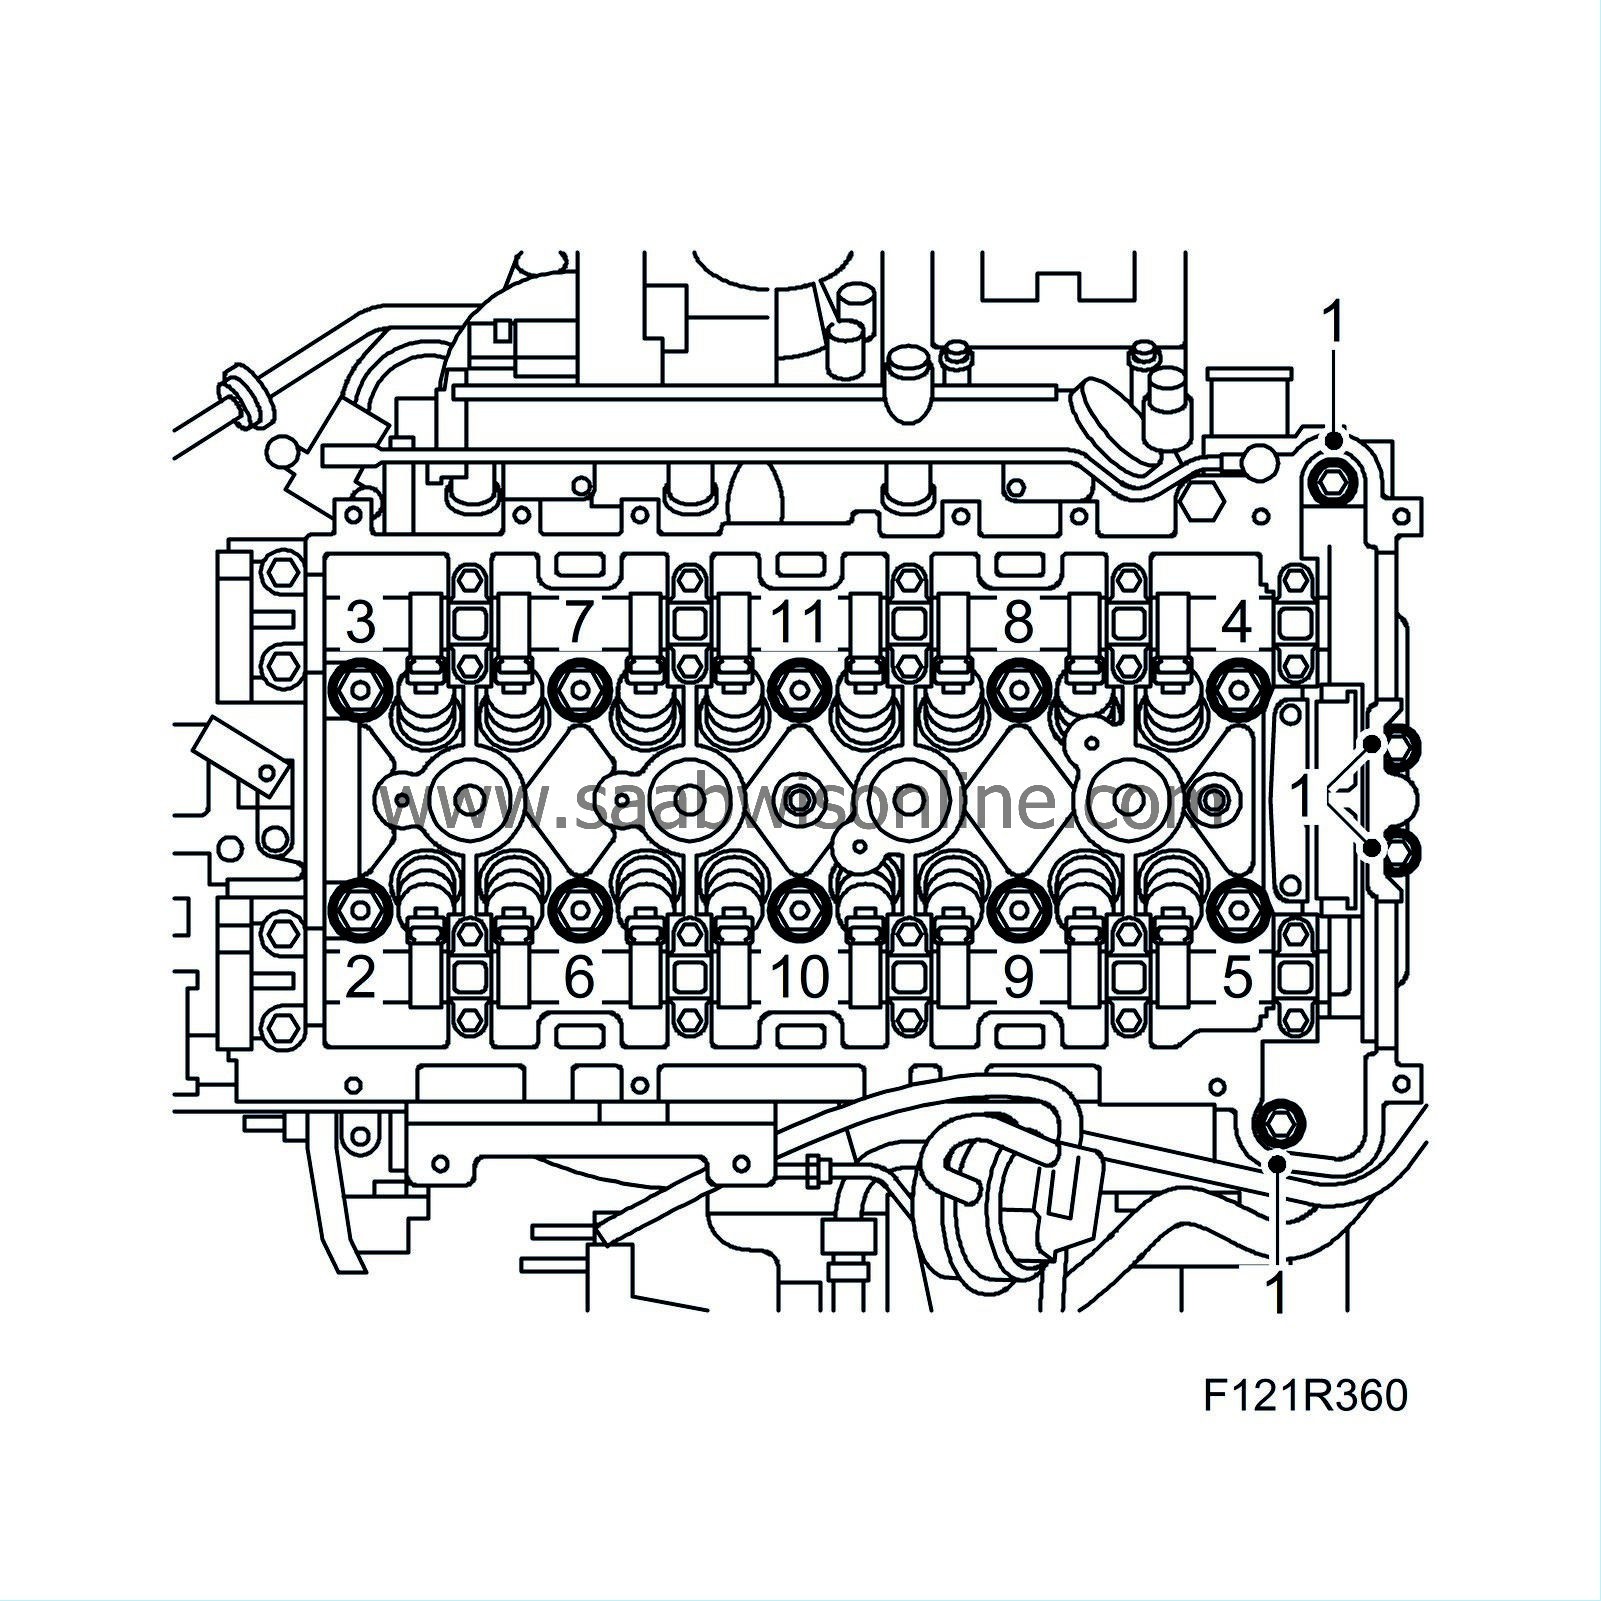
| 69. |
Remove the cylinder head in the order shown in the illustration.
|
|
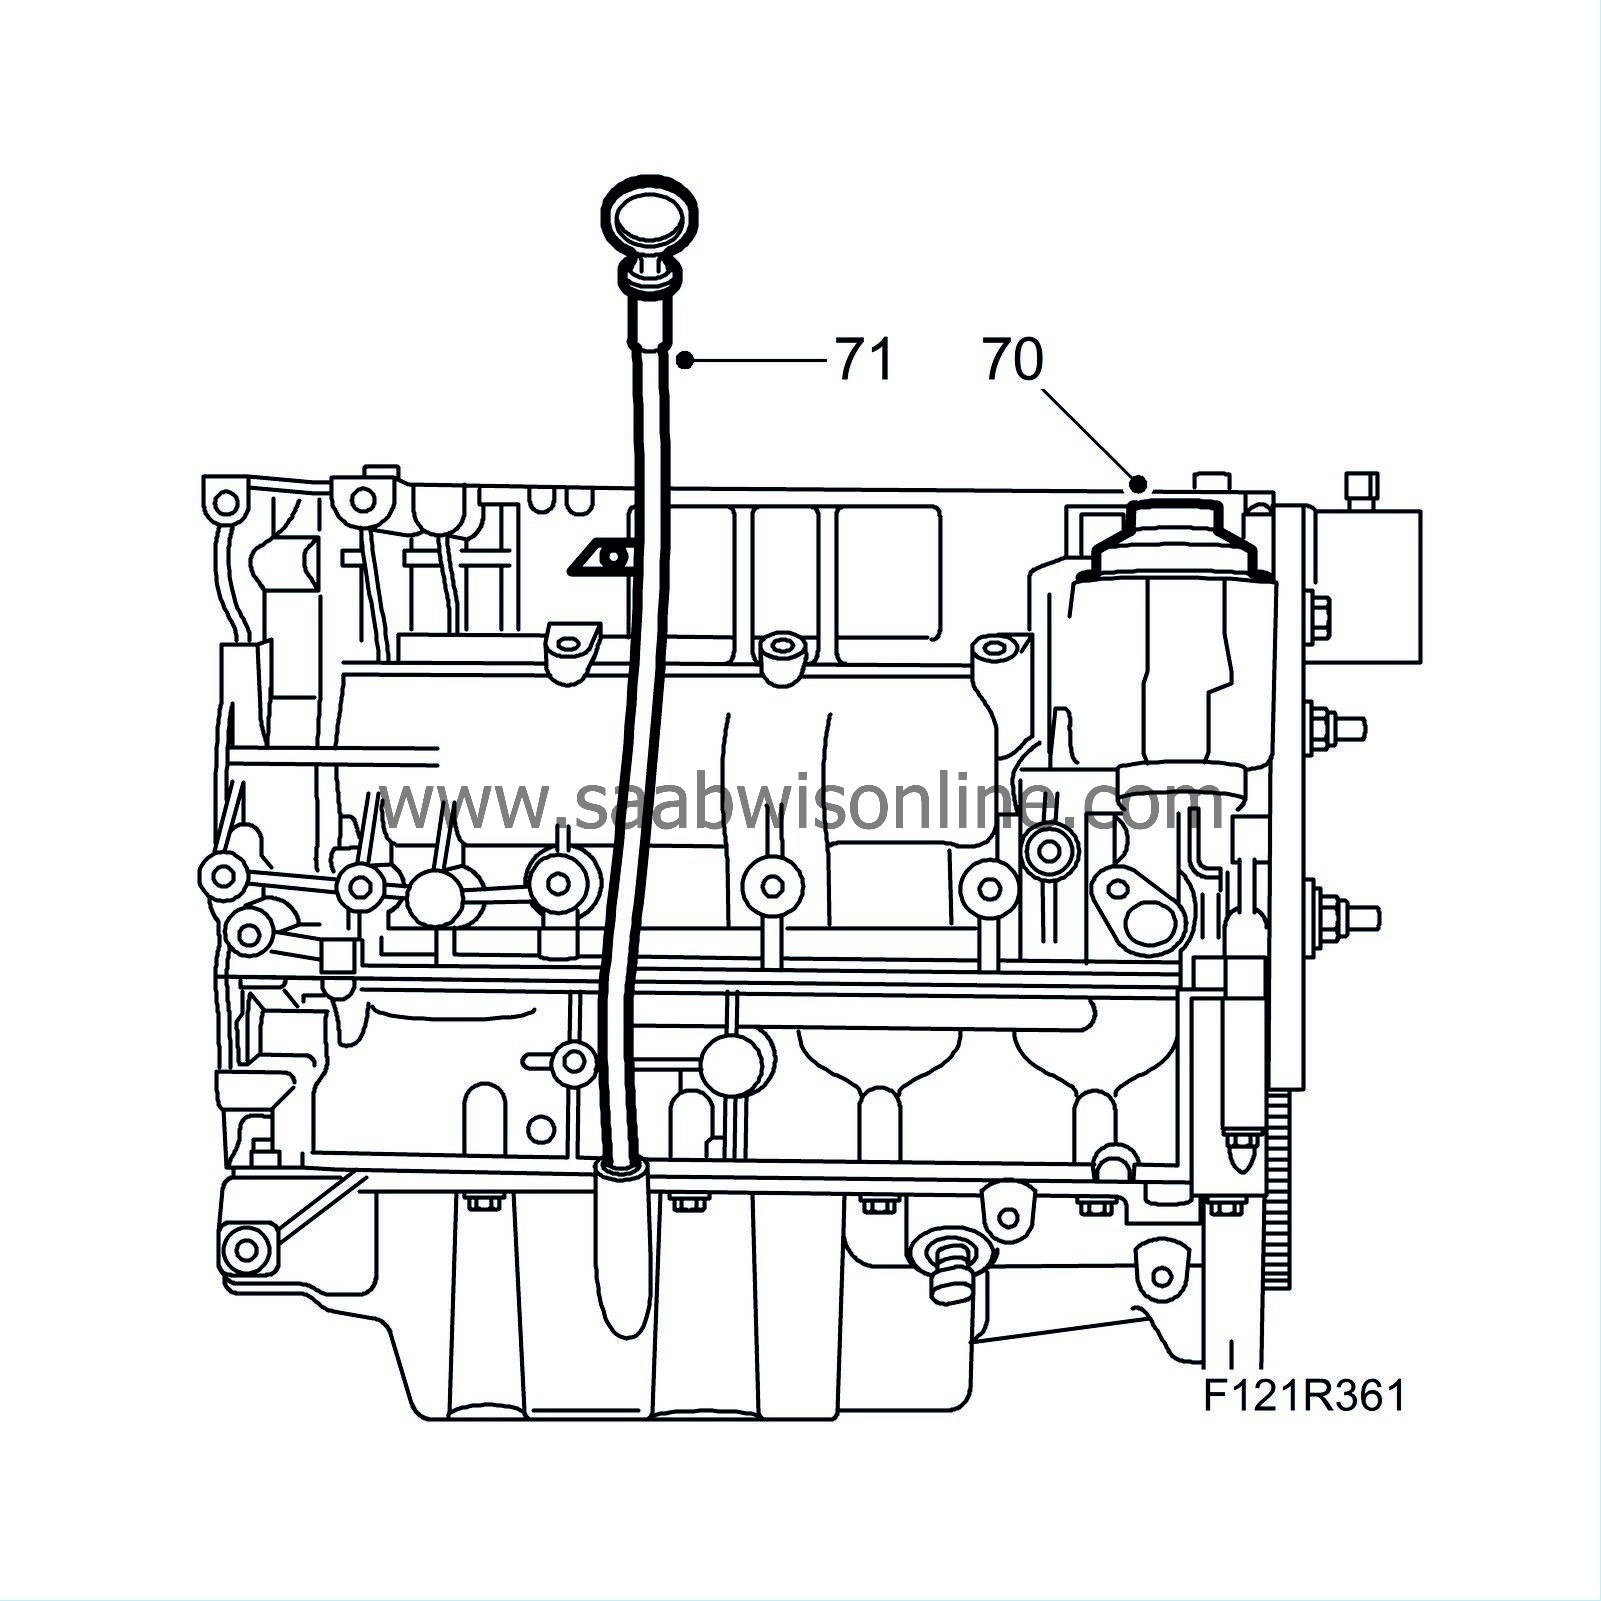
| 70. |
Remove the oil filter cover.
|
|
| 71. |
Remove the dipstick tube.
|
|
| 72. |
Lift down the cylinder block from
78 74 878 Floor stand
and remove
83 94 751 Holder, engine
.
|
|


 Warning

