PRE-RELEASE
Brake servo, B284 RHD
| Brake servo, B284 RHD |
| Important | ||
|
Scrupulous cleanliness must always be observed during all work with hydraulic components. |
||
| Important | ||
|
Always use wing covers when working in the engine bay. |
||
| To remove |
| 1. |
Remove the master cylinder
.
|
|
| 2. |
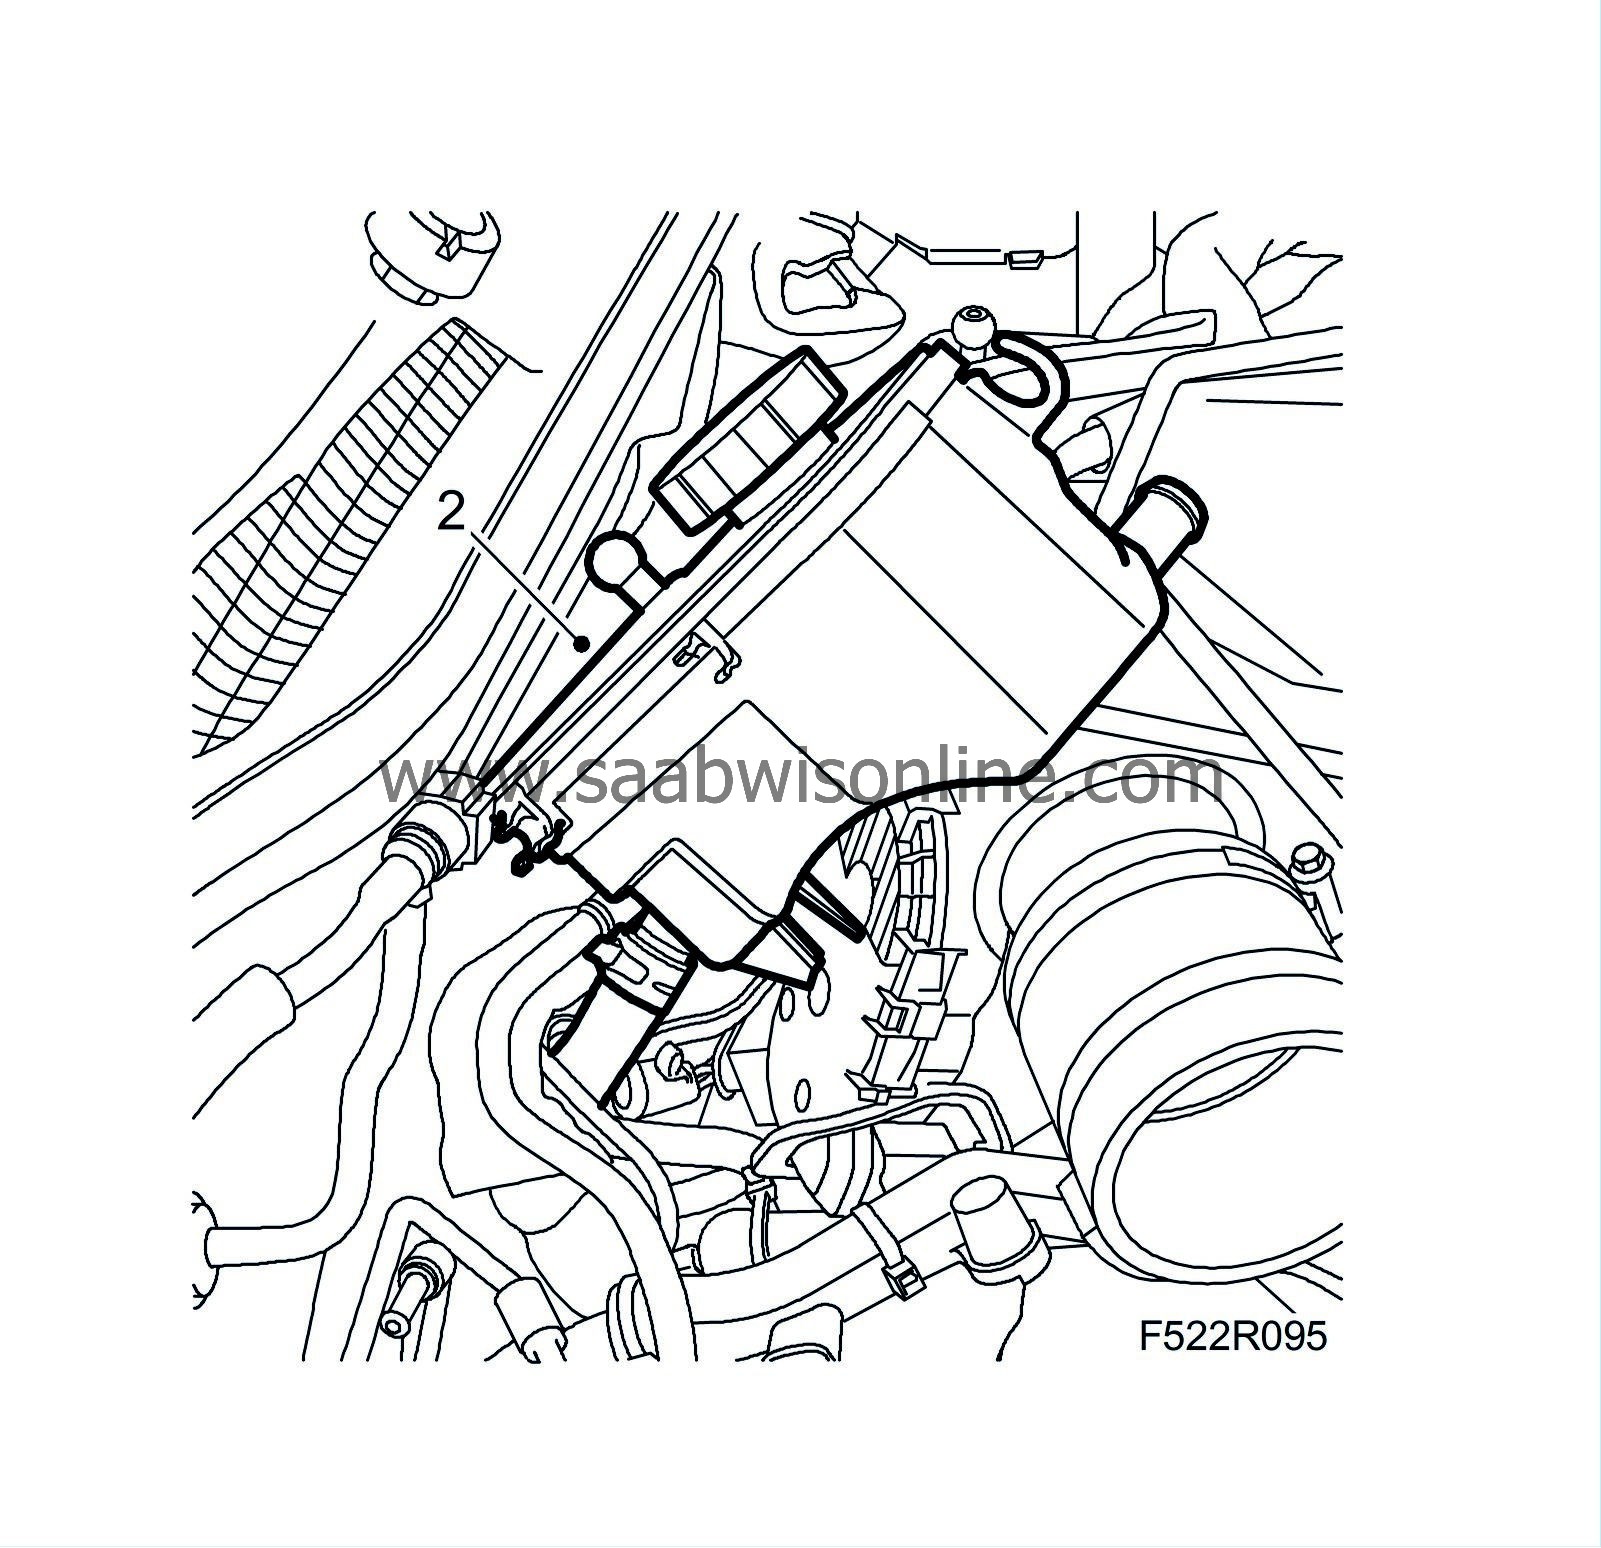
Remove the power steering fluid reservoir and return hose clip.
|
|
| 3. |
Remove the front lower engine cover.
|
|
| 4. |
Remove the fan cowling
.
|
|
| 5. |
Position the radiator member and use two
83 95 212 Straps
to relieve the load on the radiator core.
|
|
| 6. |
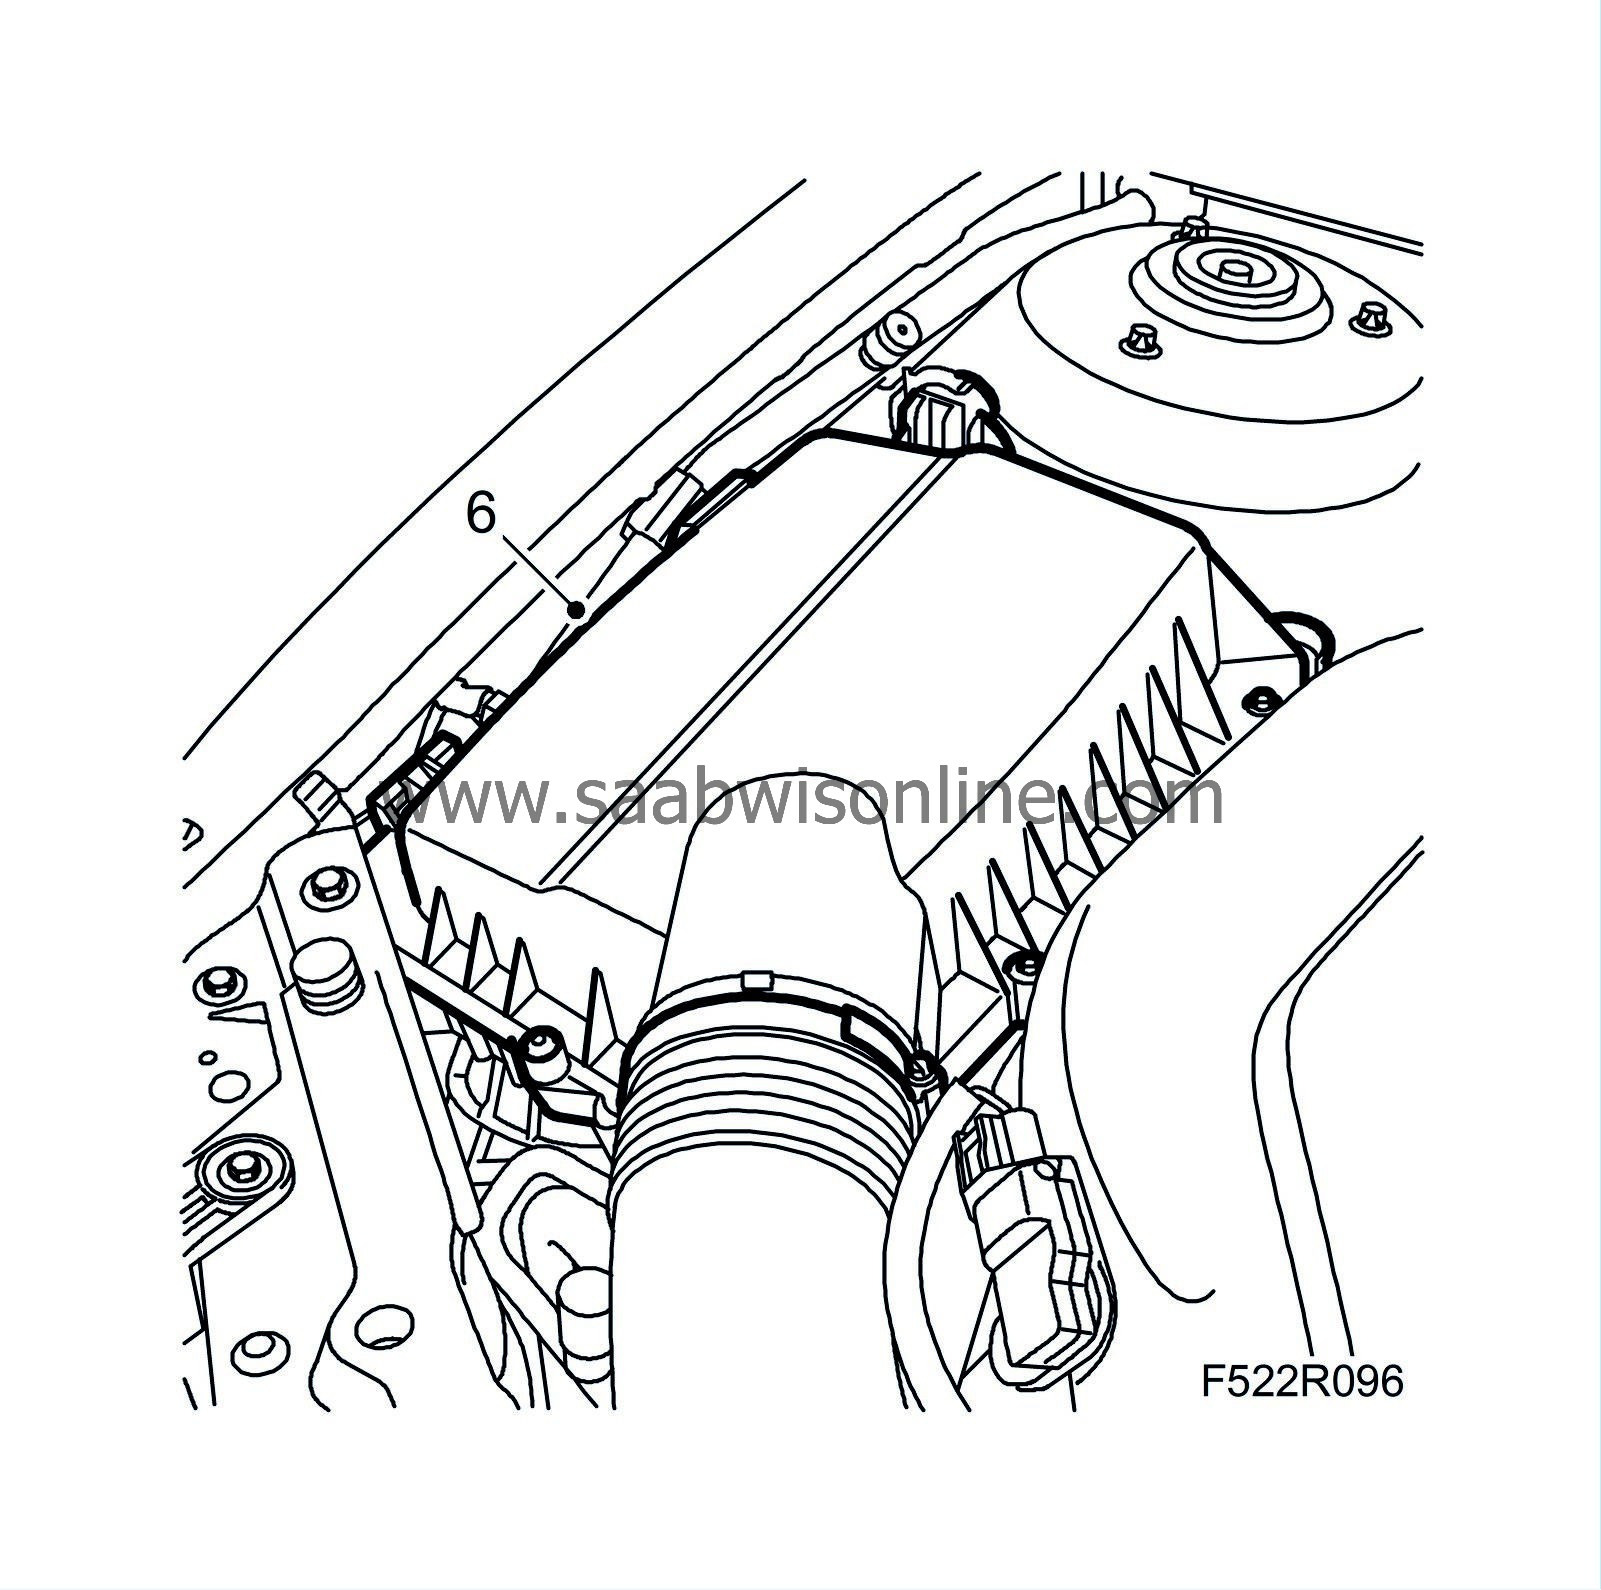
Remove the air filter housing cover.
|
||||||||||
| 7. |
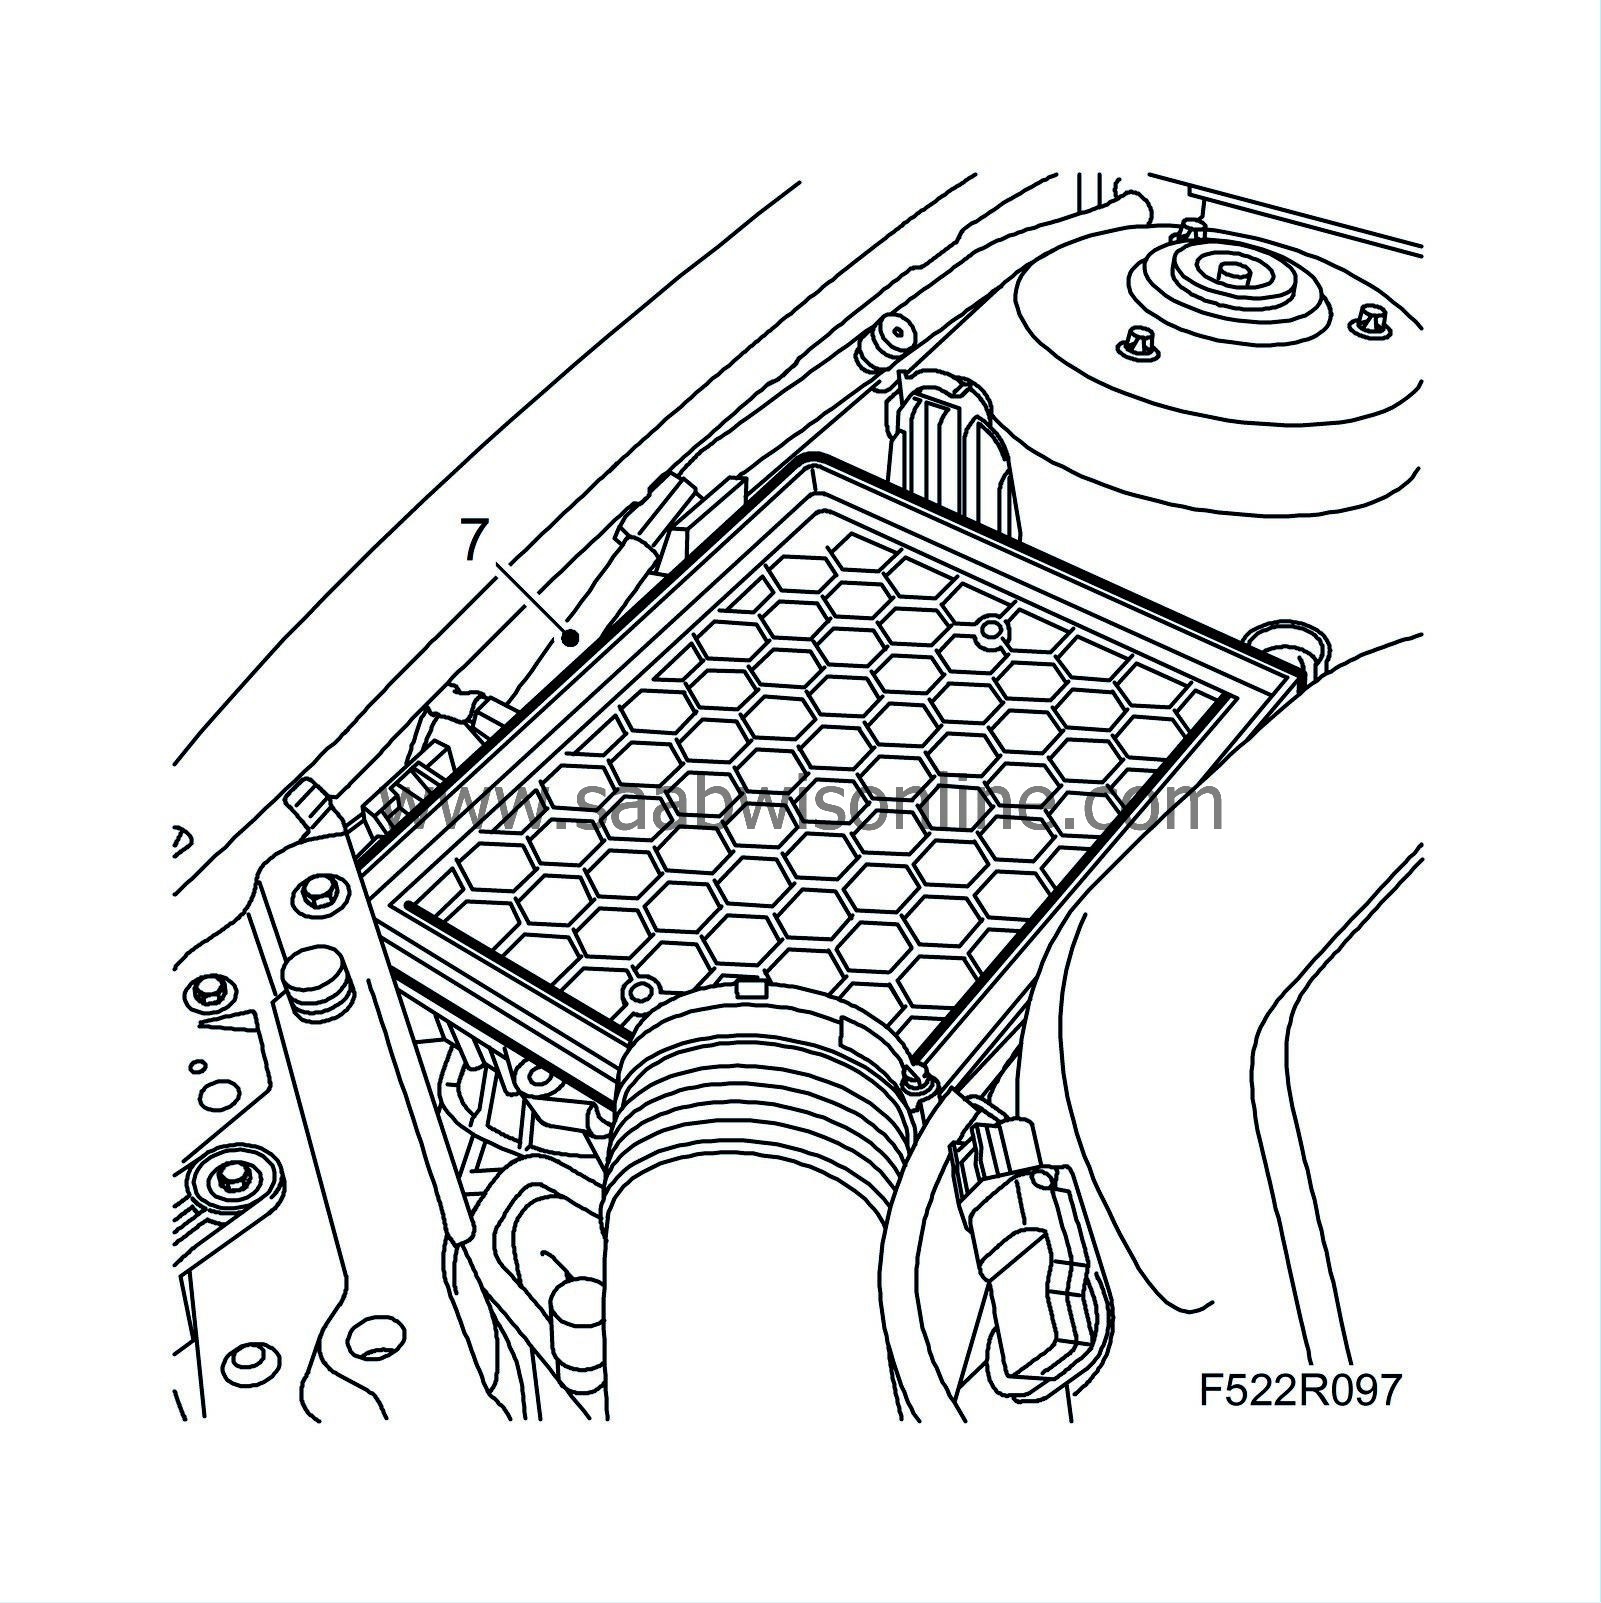
Remove the air filter. Detach the intake hose and remove the air filter housing.
|
|
| 8. |
Remove the sound baffle on the driver's side.
|
|
| 9. |
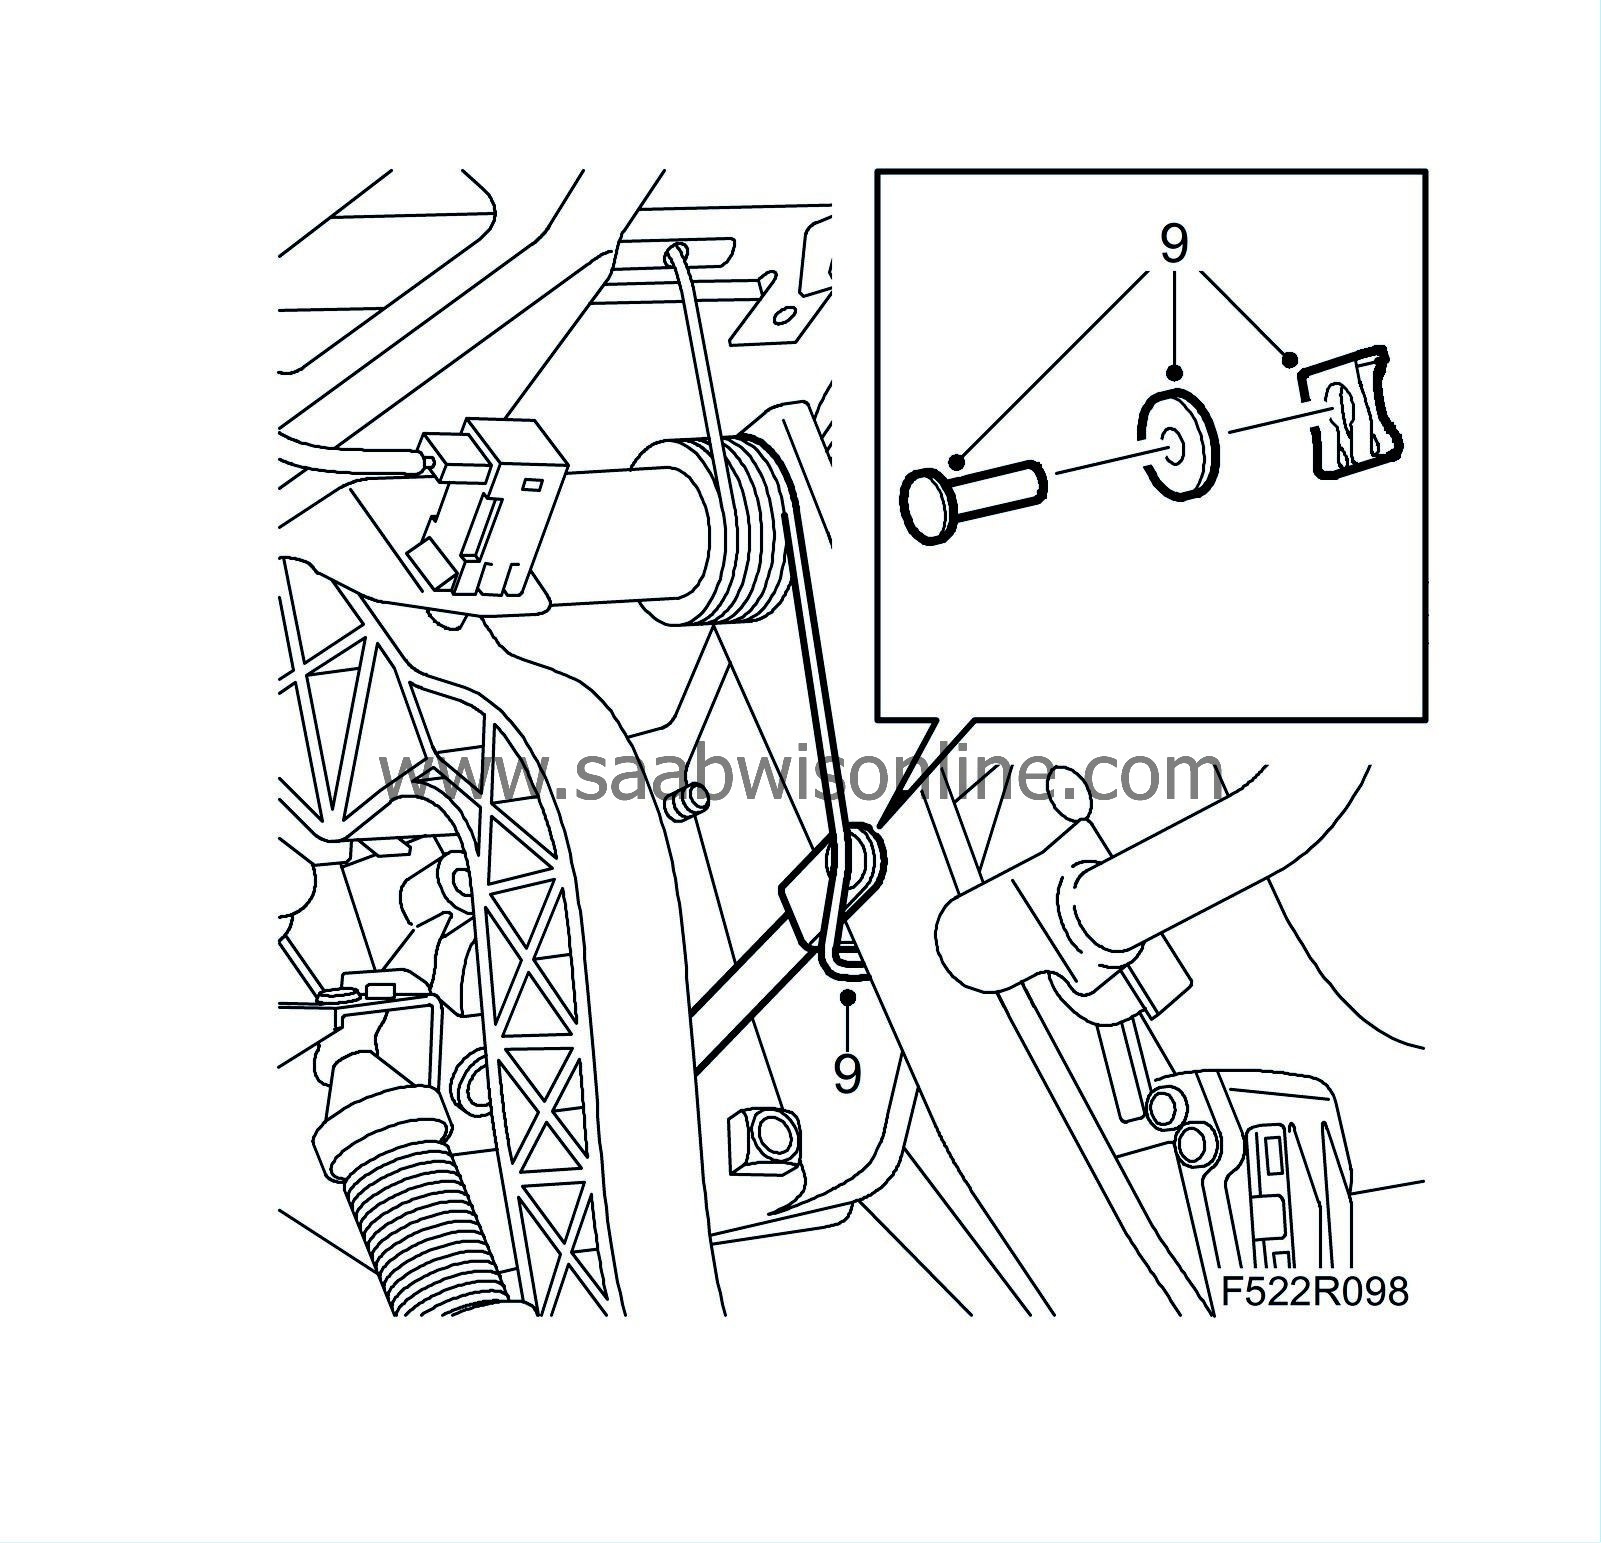
Remove the brake pedal link bolt. Unhook the return spring.
|
|
| 10. |
Turn the steering wheel approx. 20° to the right. Secure to the dashboard using woven tape or the like.
|
|
| 11. |
Raise the car.
|
|
| 12. |
Remove the rear catalytic converter
.
|
|
| 13. |
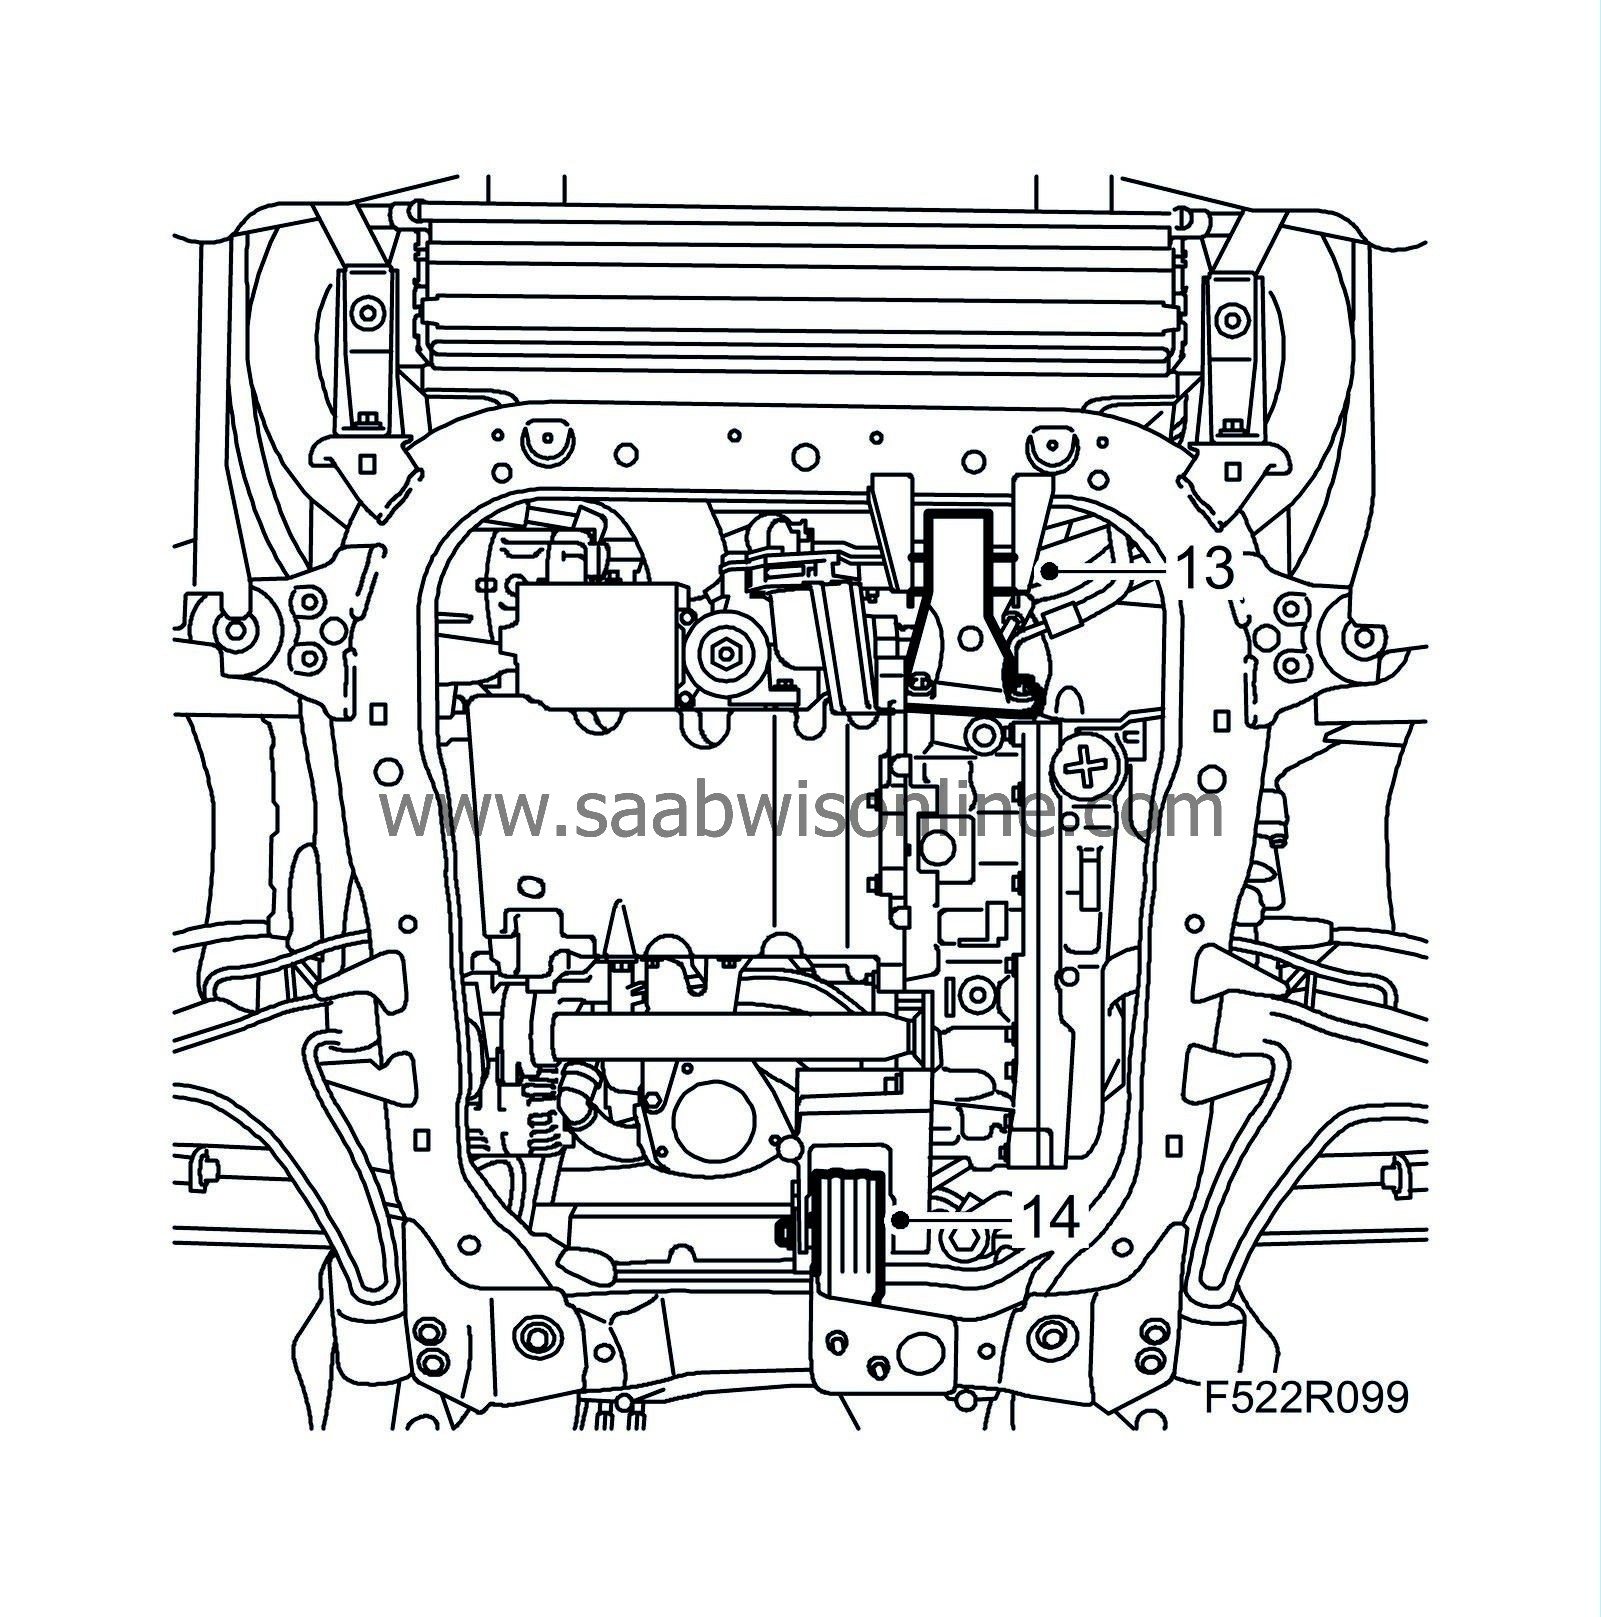
Remove the bolt holding the front torque rod to the subframe.
|
|
| 14. |
Remove the bolt holding the rear torque rod to the subframe.
|
|
| 15. |
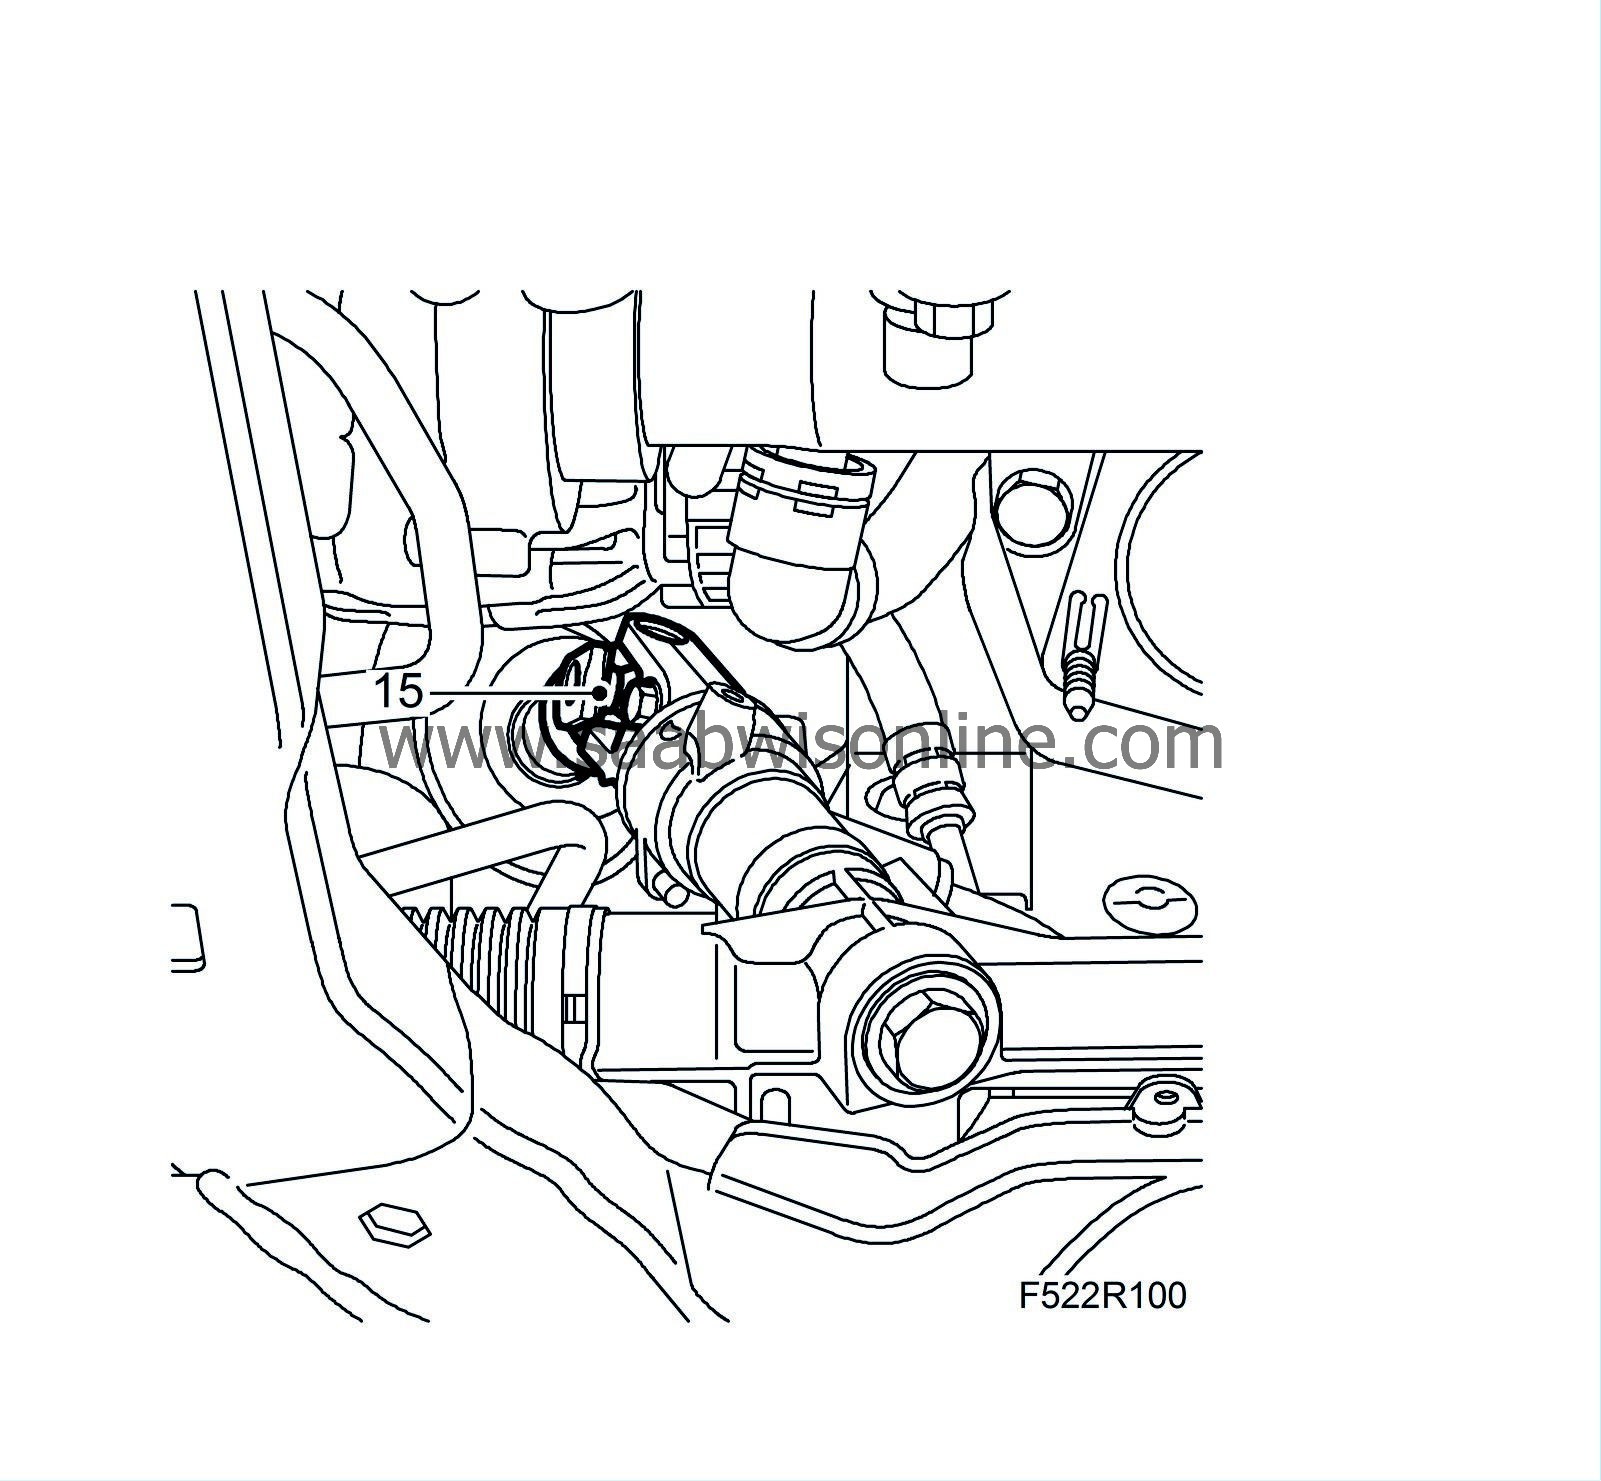
Remove the steering shaft joint from the steering gear.
|
|
| 16. |
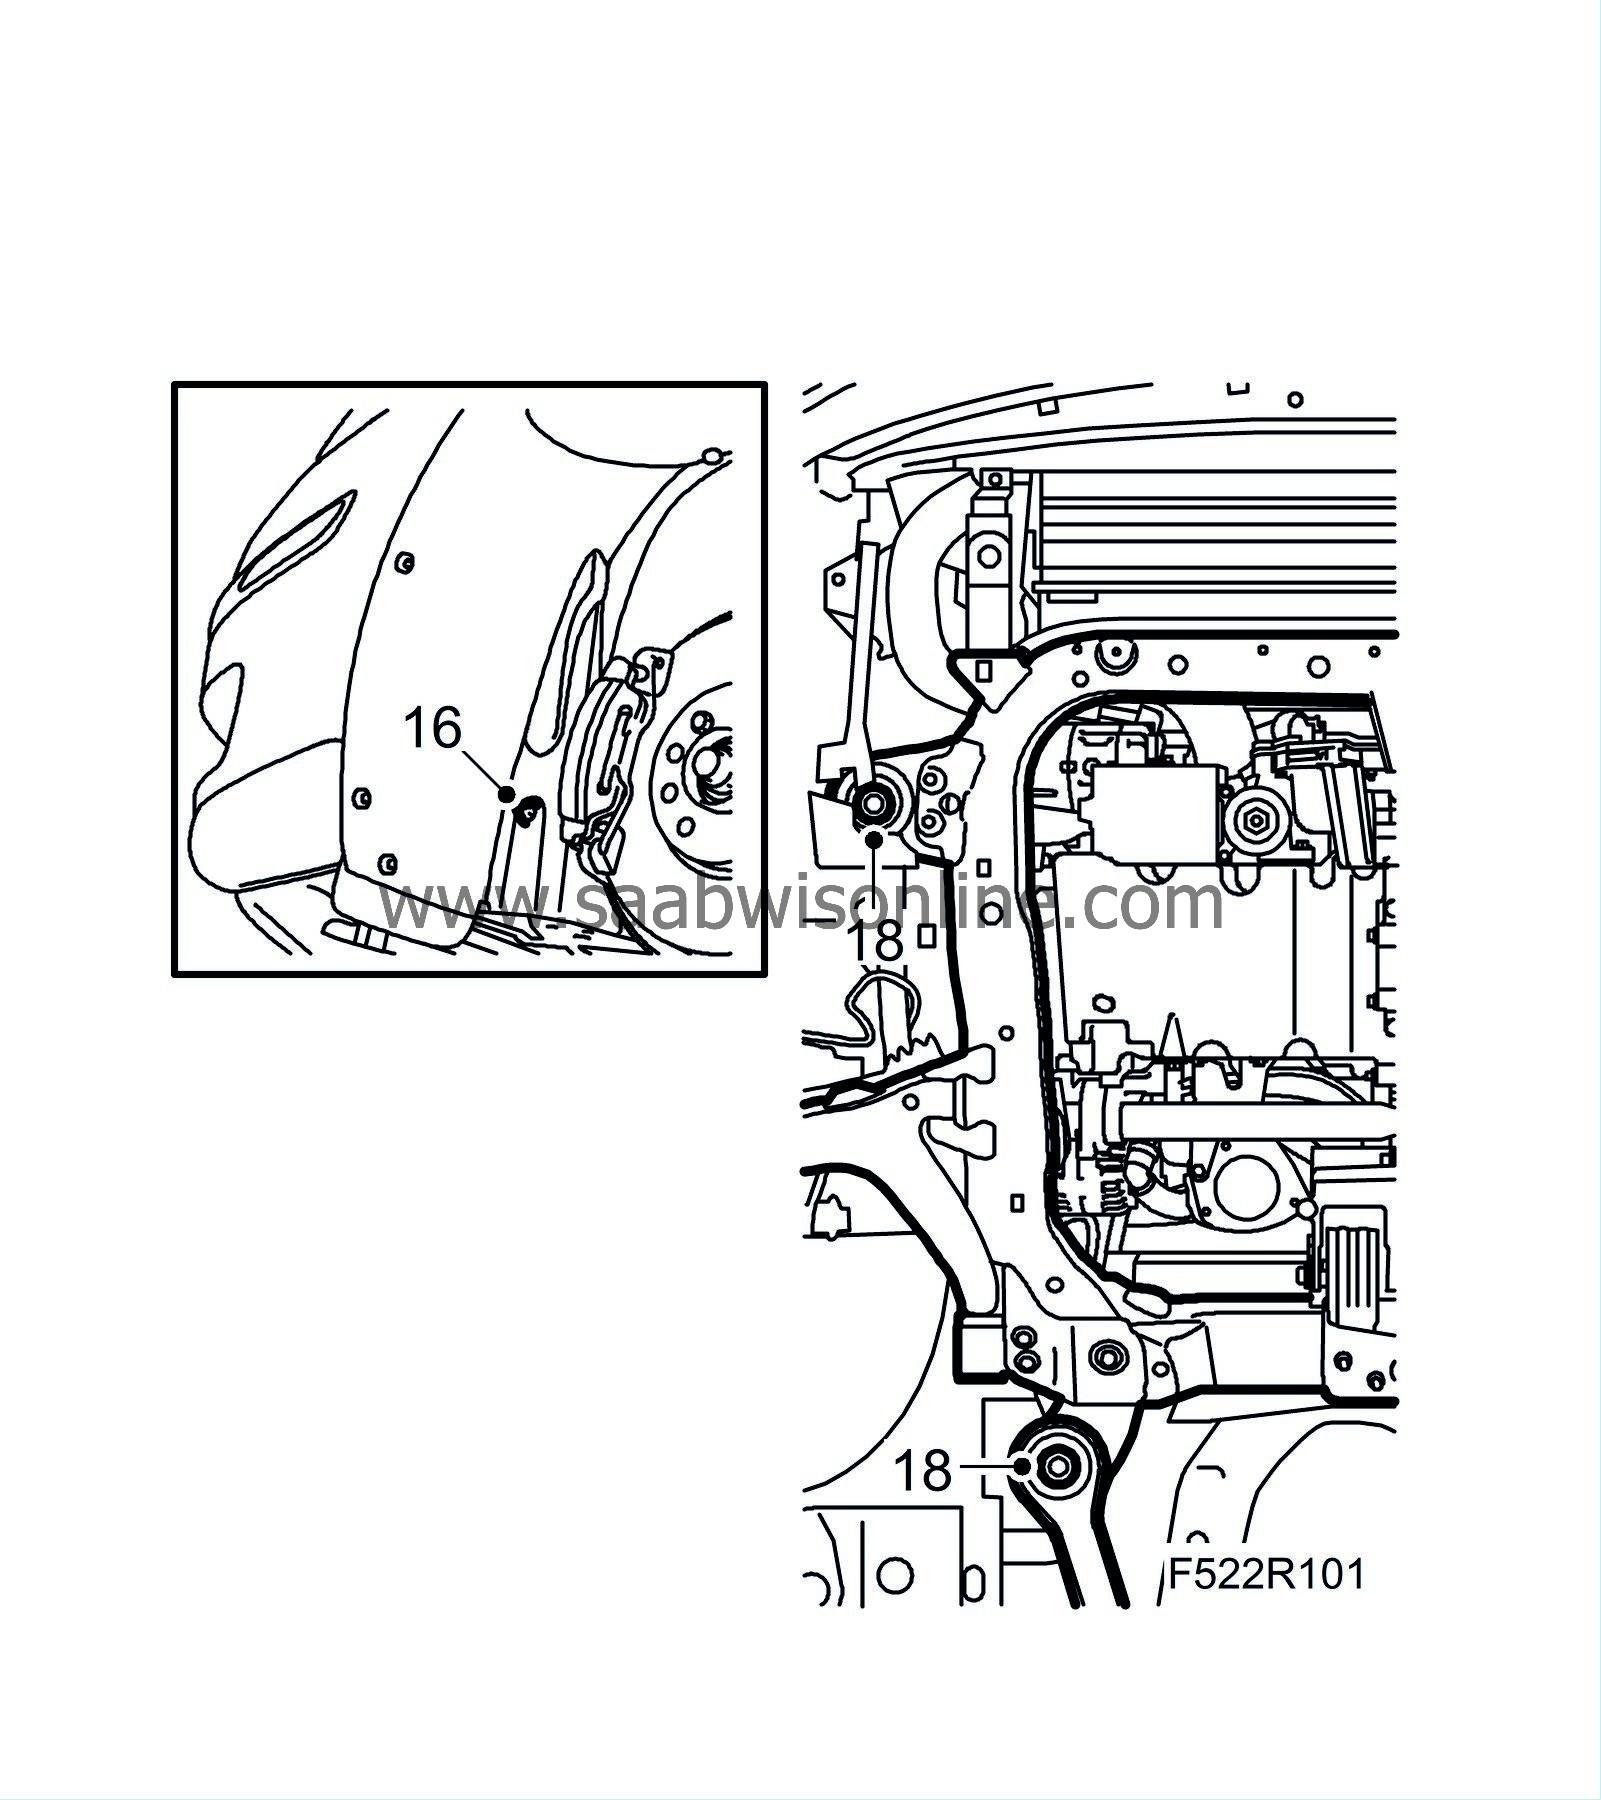
Detach the front part of the wheel arch liners and move aside slightly.
|
|
| 17. |
Position
83 95 311 Trolley lift
with
83 94 801 Parent fixture
and
83 96 137 Centring tool, subframe - body
.
|
|
| 18. |
Remove the subframe bolts and the rods.
|
|
| 19. |
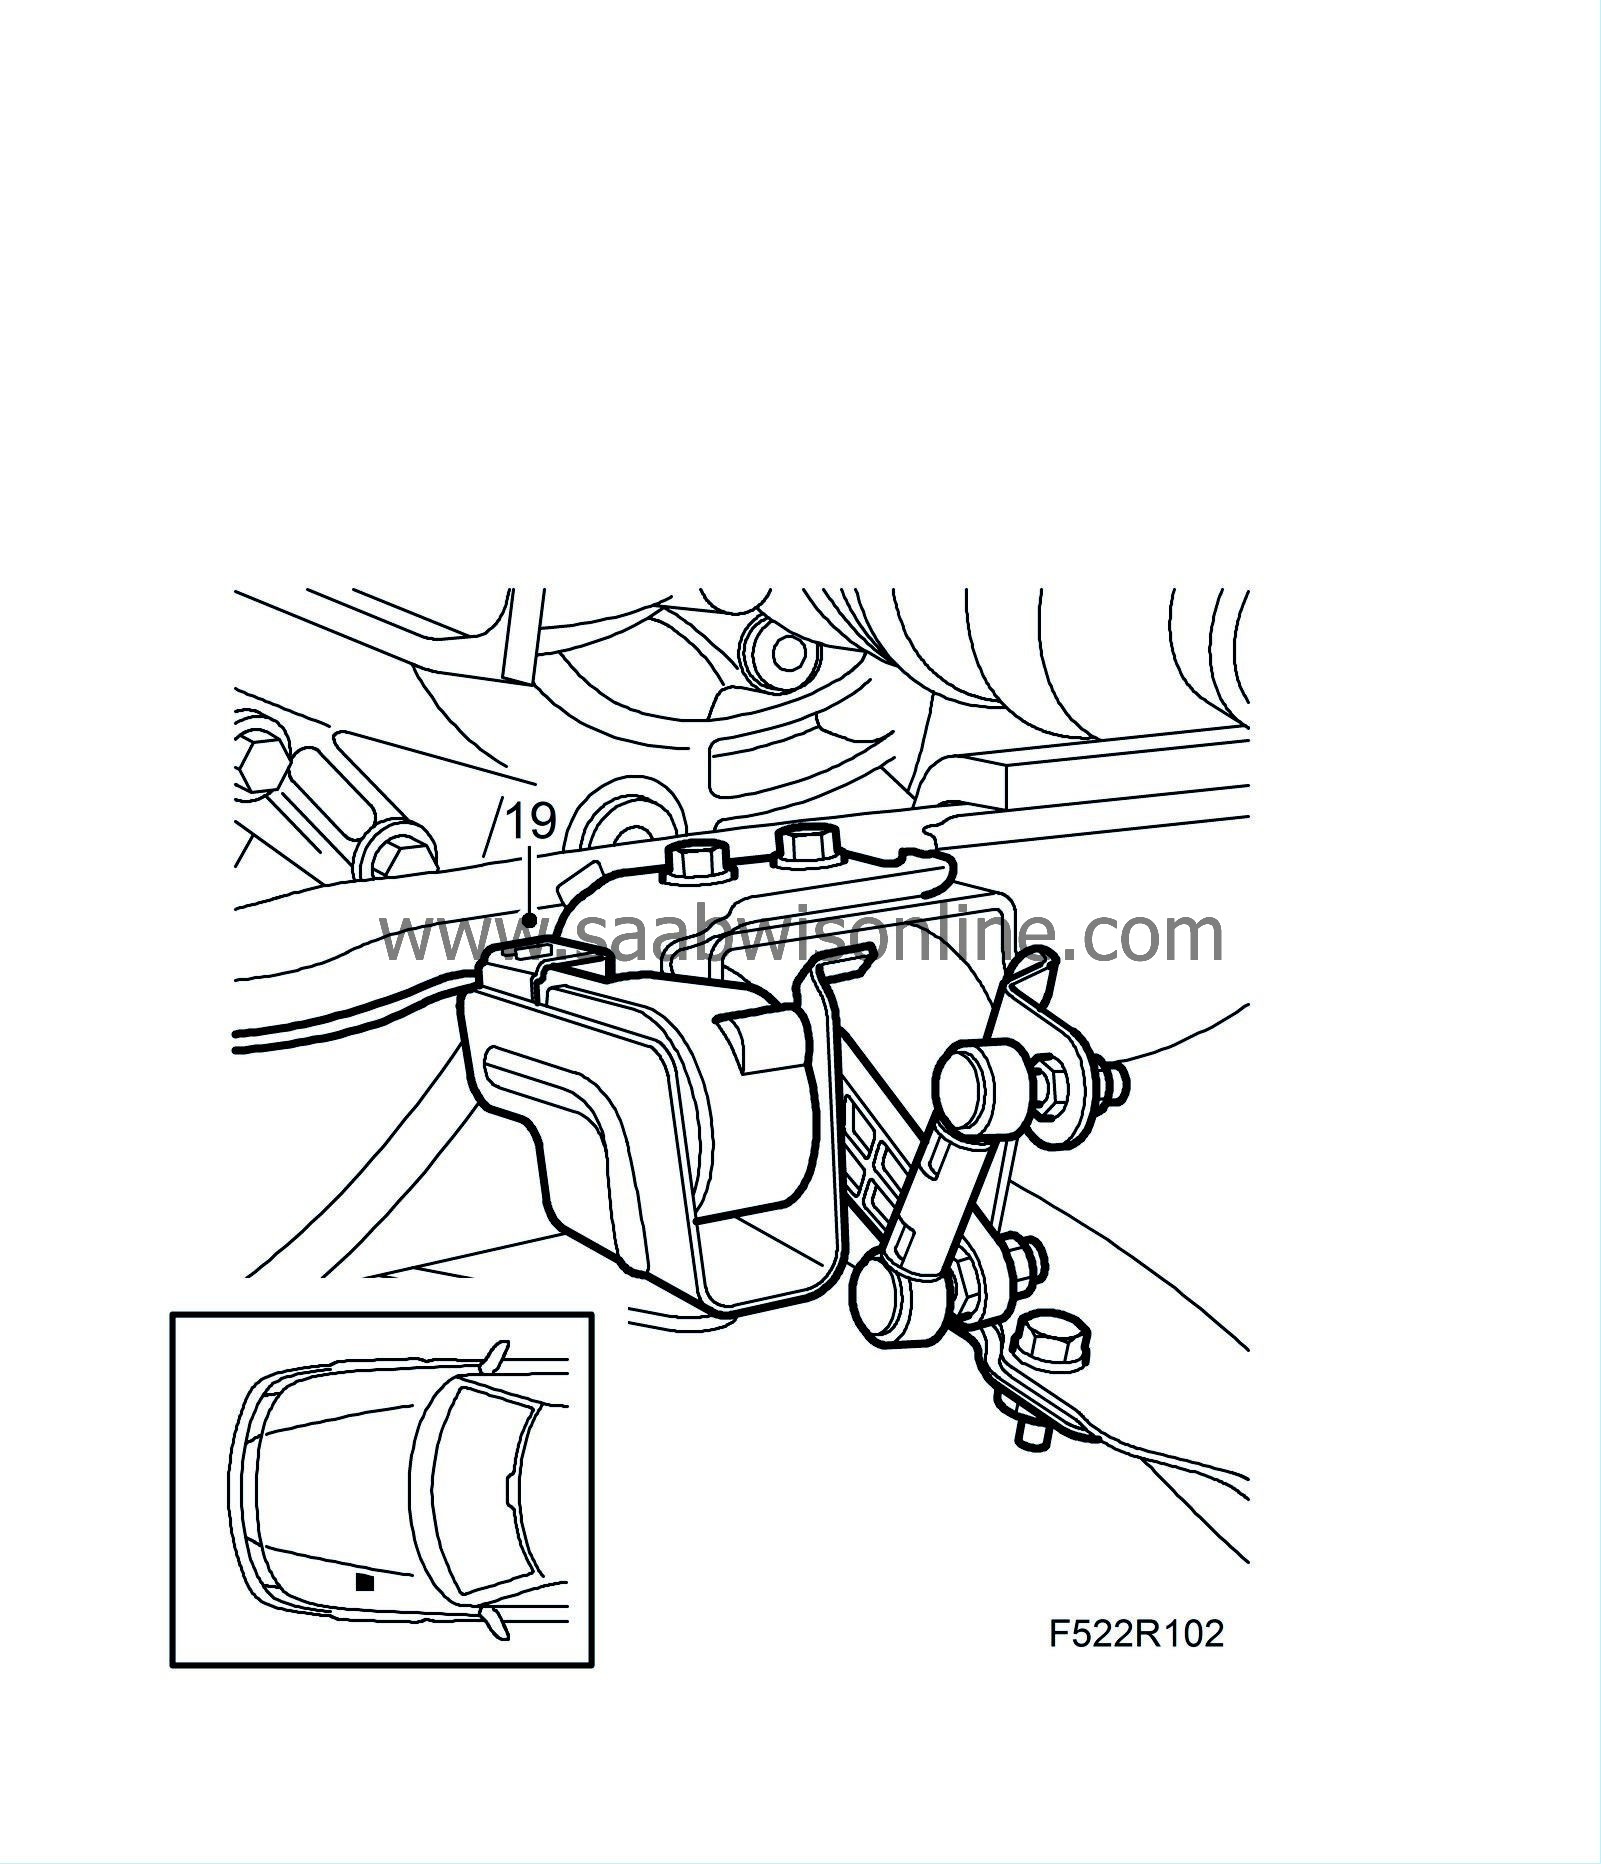
Cars with Xenon headlamps:
Unplug the load angle sensor connector and remove the calbe clip from the subframe.
|
|
| 20. |
Lower the trolley lift and move it aside. Let the subframe hang in place.
|
|
| 21. |
Lower the car.
|
|
| 22. |
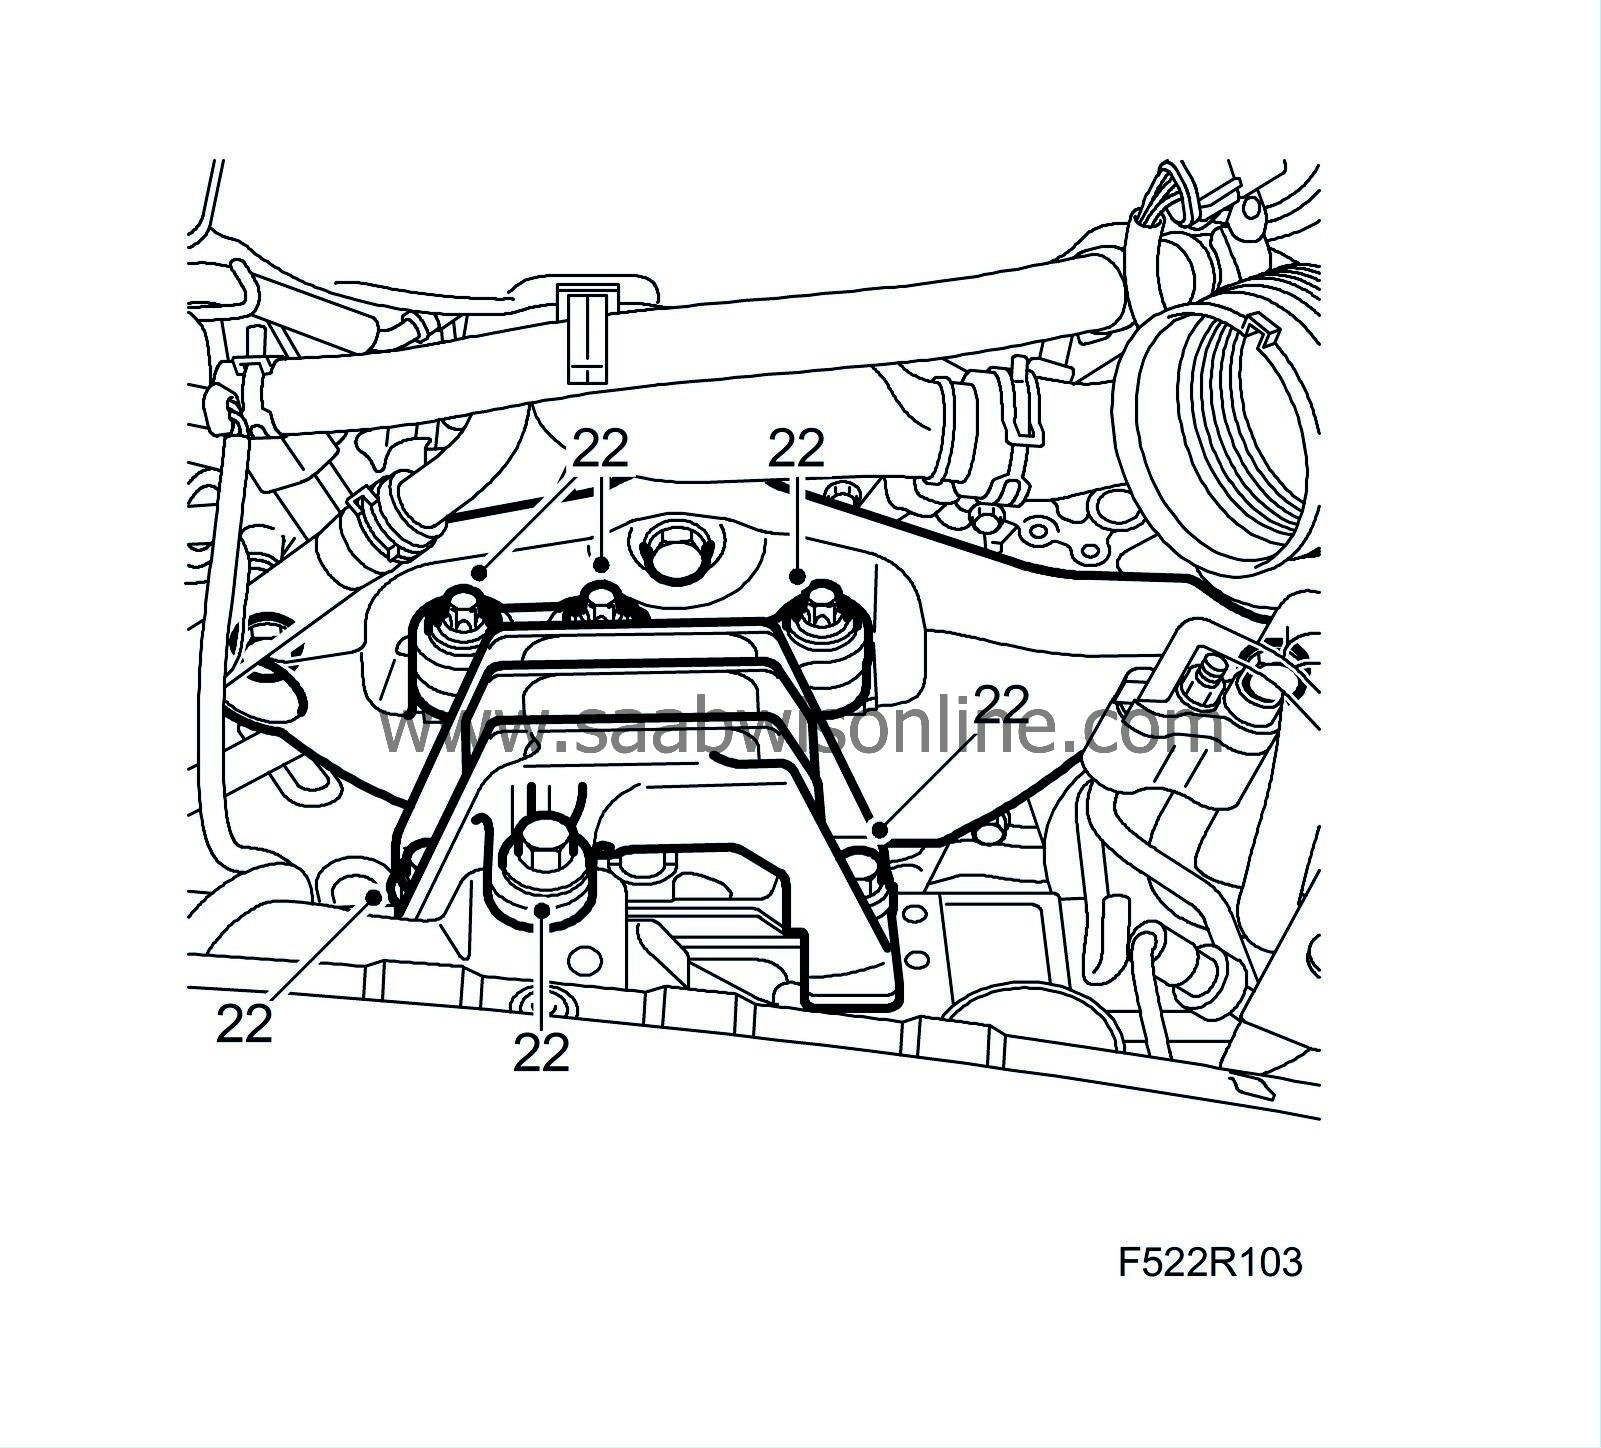
Position a jack under the engine (protect the oil pan with a wood block or the like). Mark the position of the bolts and remove the right engine pad. Lower the engine approx. 80 mm (3.5").
|
|
| 23. |
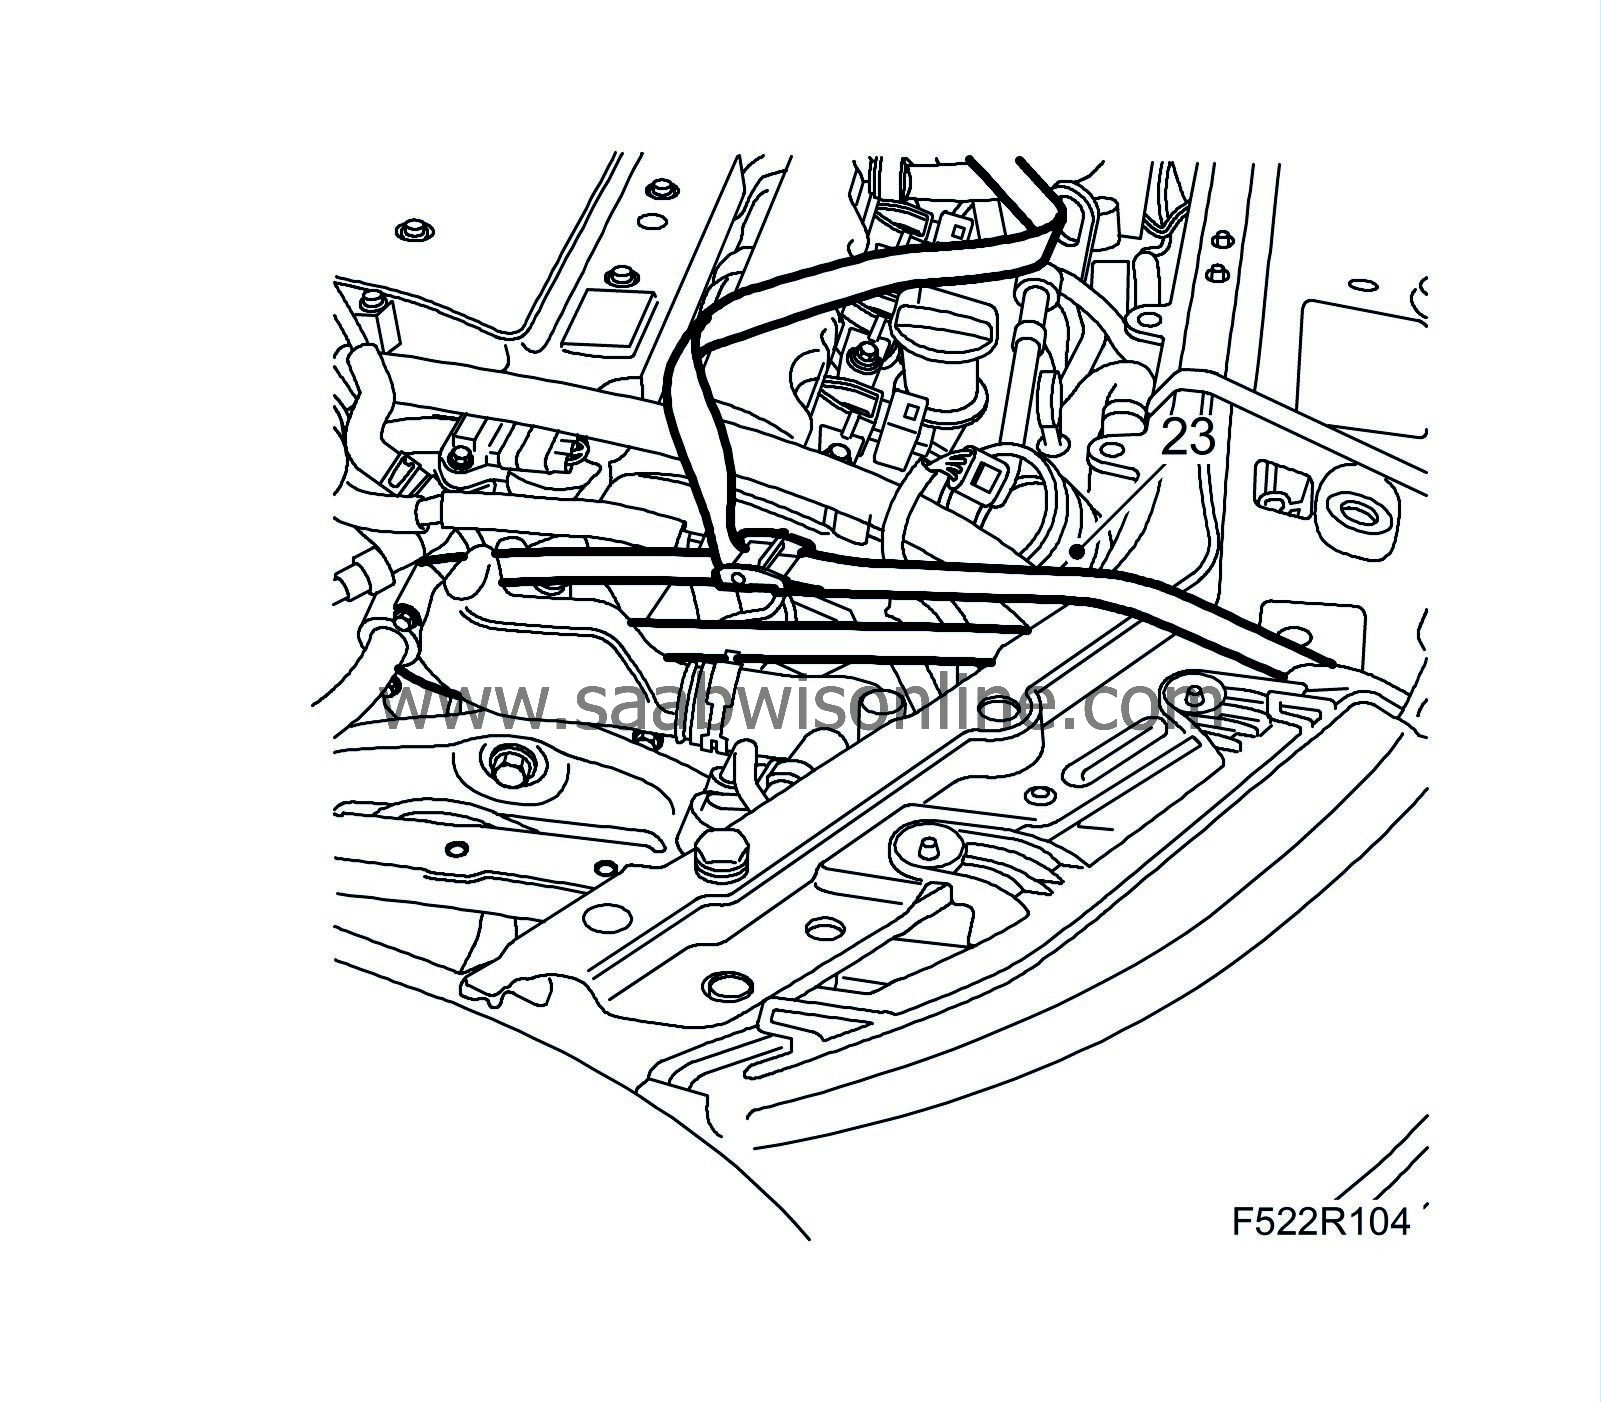
Pull the engine forward and hold it in place with a
83 95 212 Strap
.
|
|
| 24. |
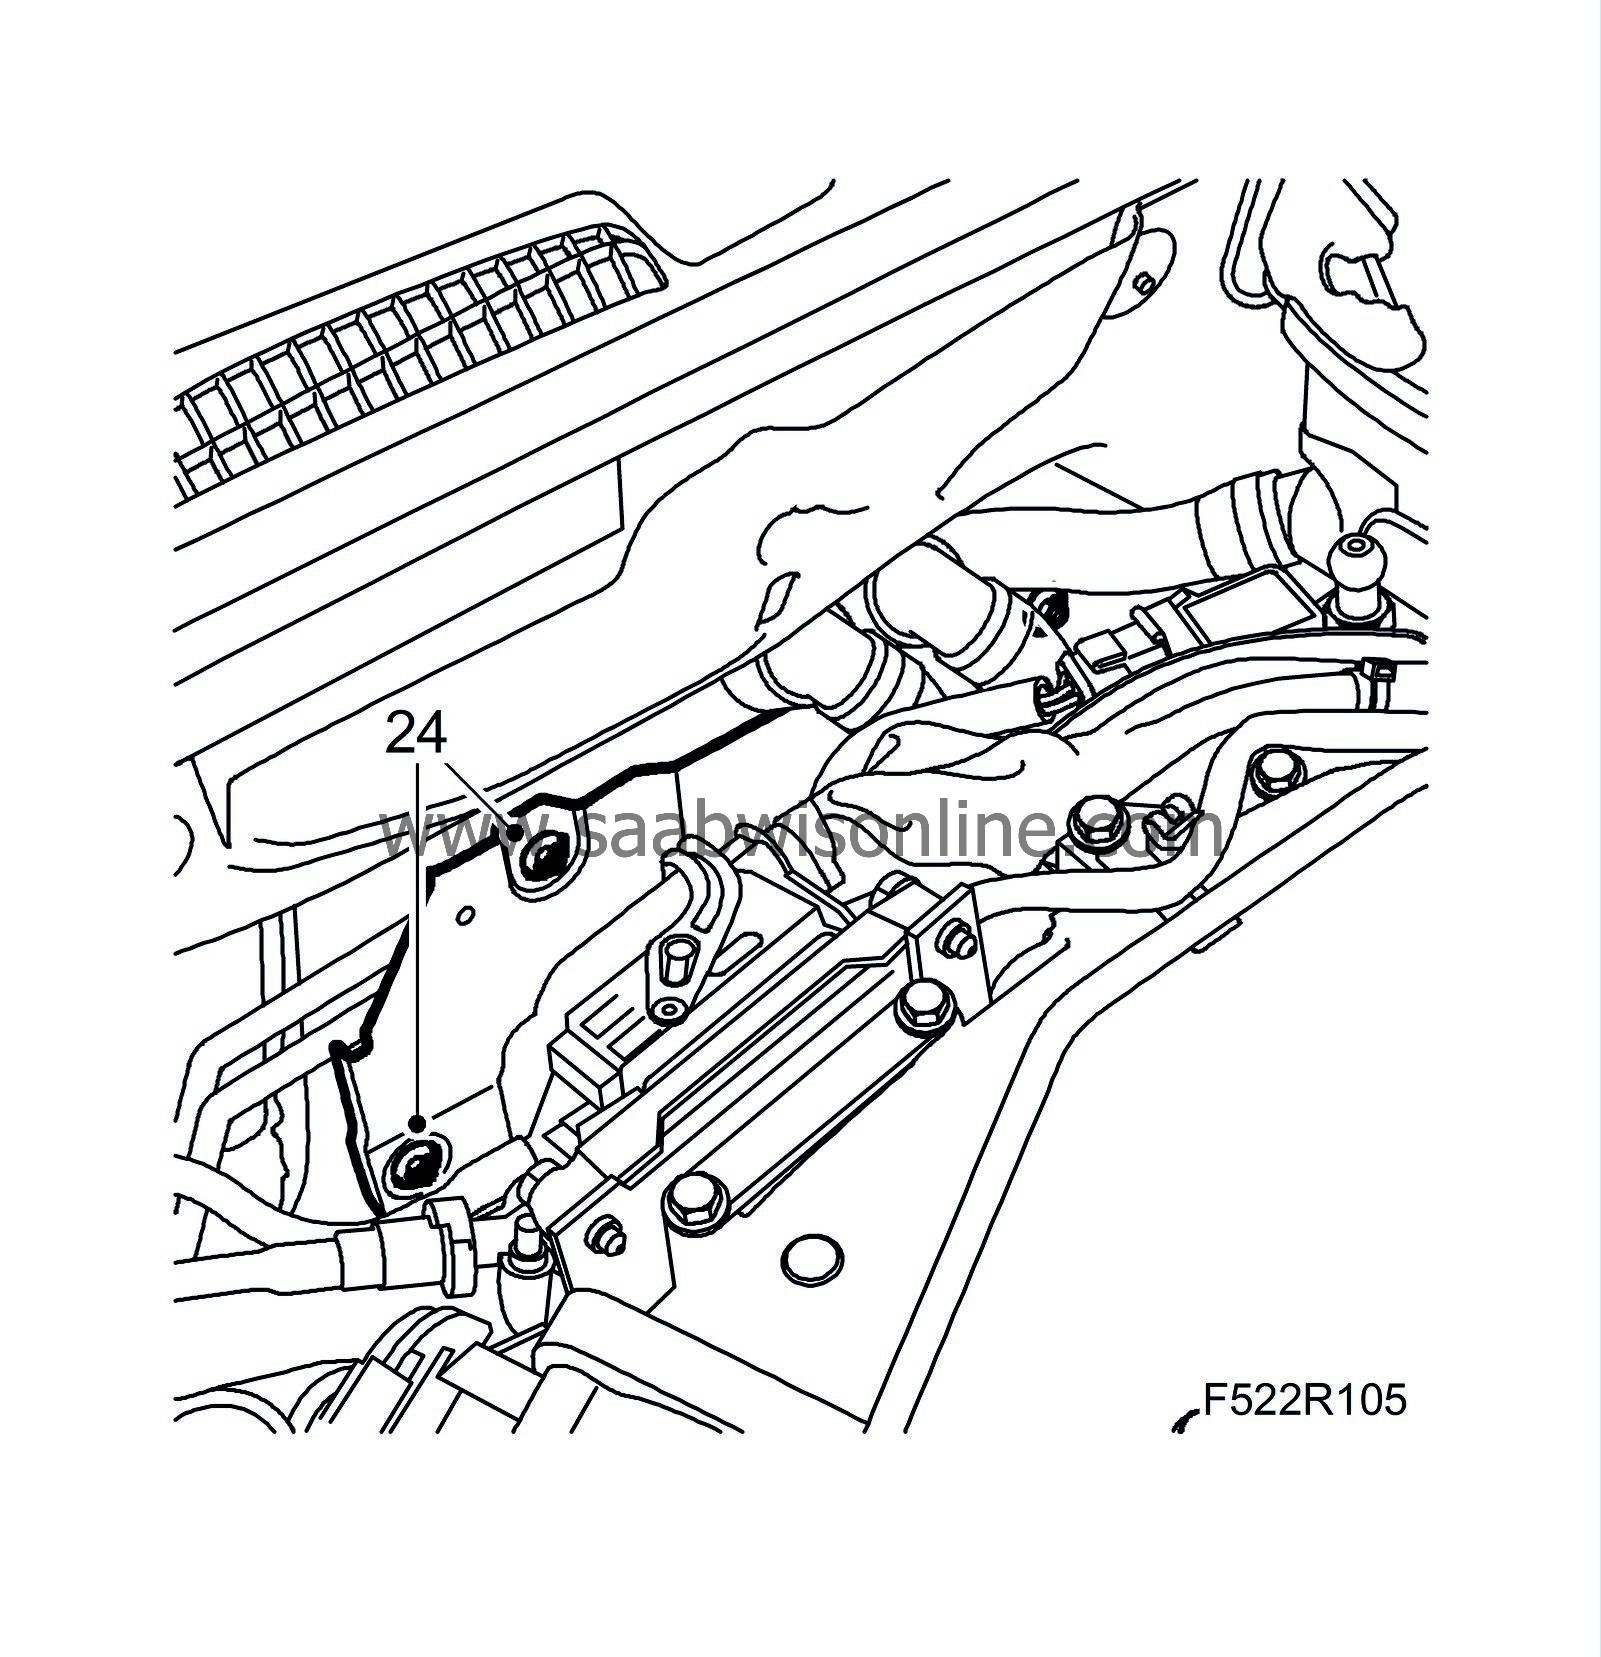
Remove the two upper nuts on the bulkhead head shield and move it out.
|
|
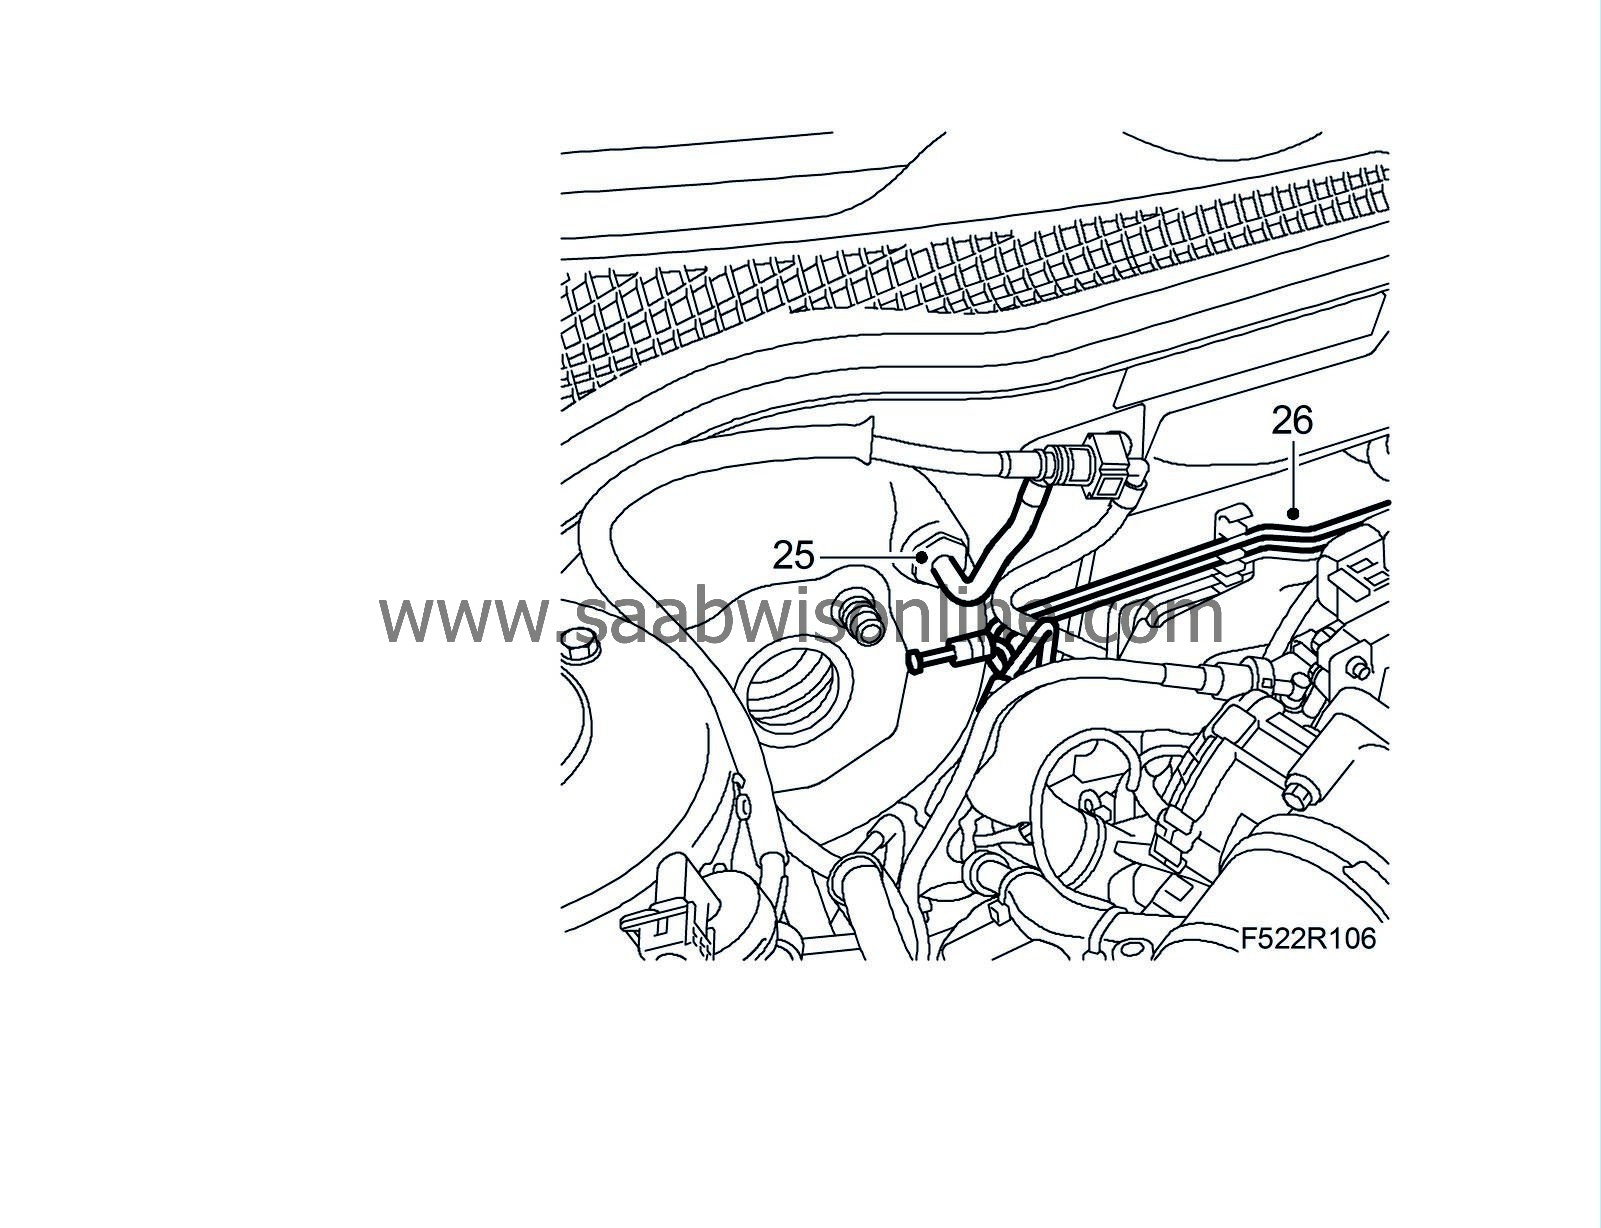
| 25. |
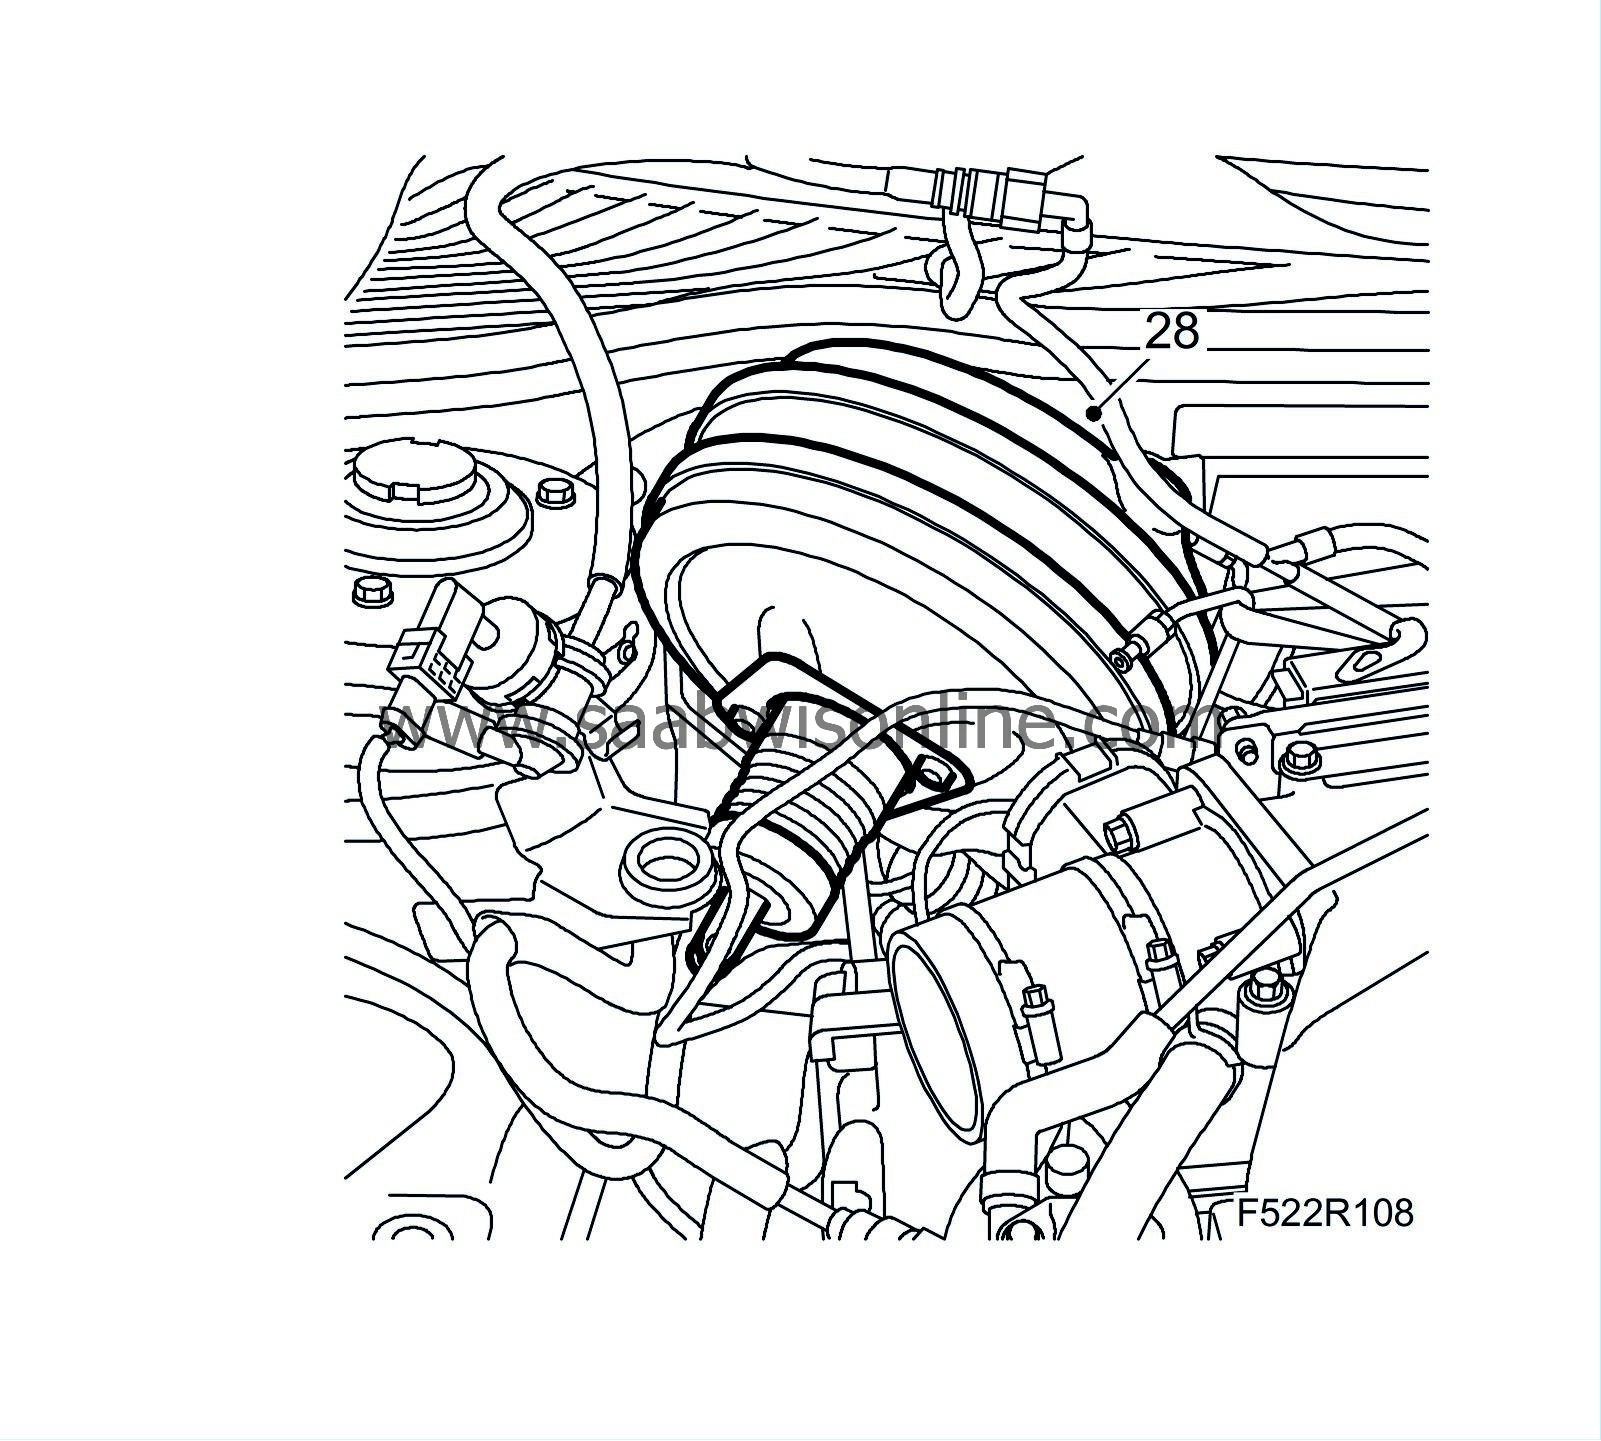
Detach the vacuum hose from the brake servo.
|
|
| 26. |
Detach the brake pipes from the bulkhead mounting. Hold them down with
83 95 212 Strap
.
|
|
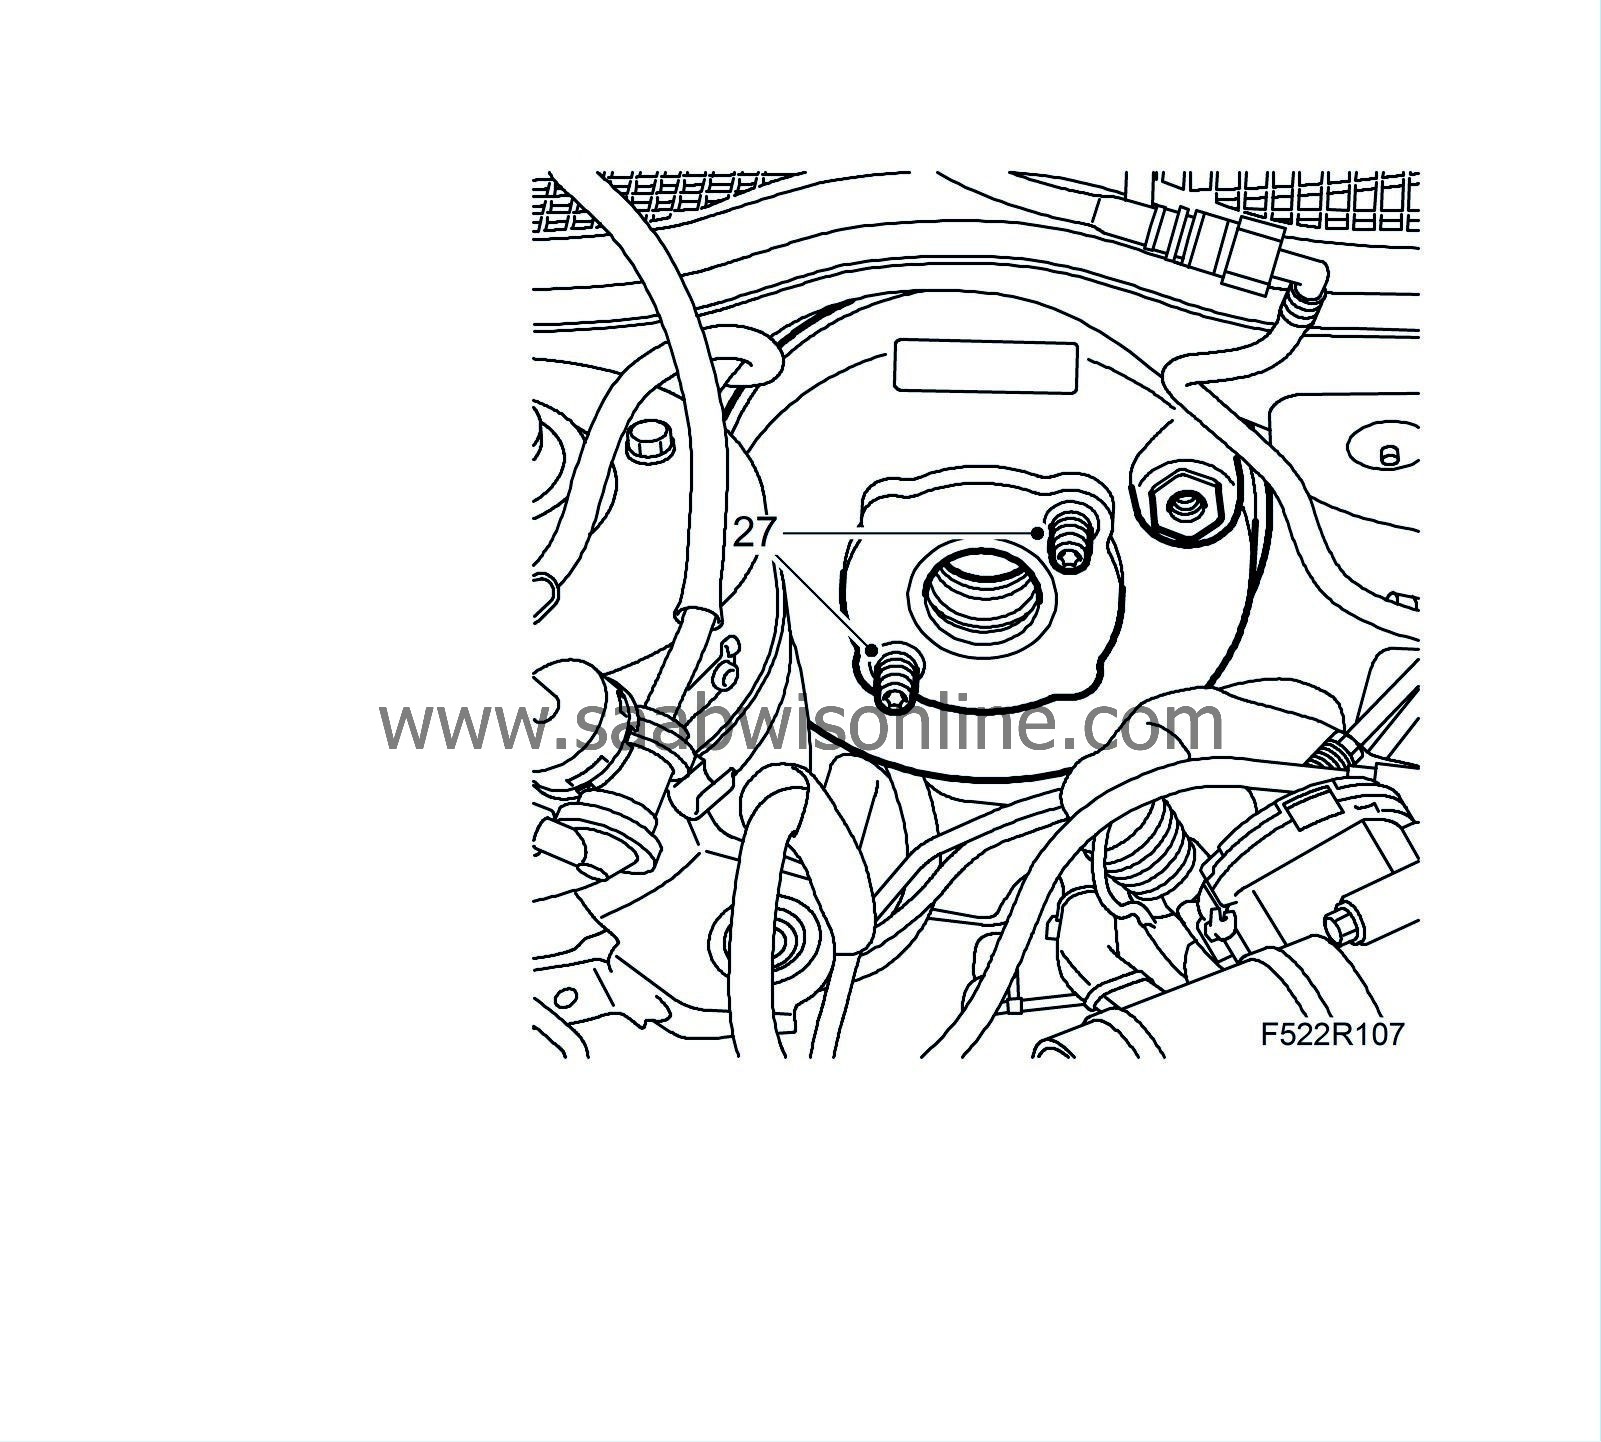
| 27. |
Remove the brake servo retaining bolts. Keep track of the seal rings that sit on the bolts' pedal bracket side.
|
|
| To fit |
| 1. |
Replace the brake servo gasket.
|
|
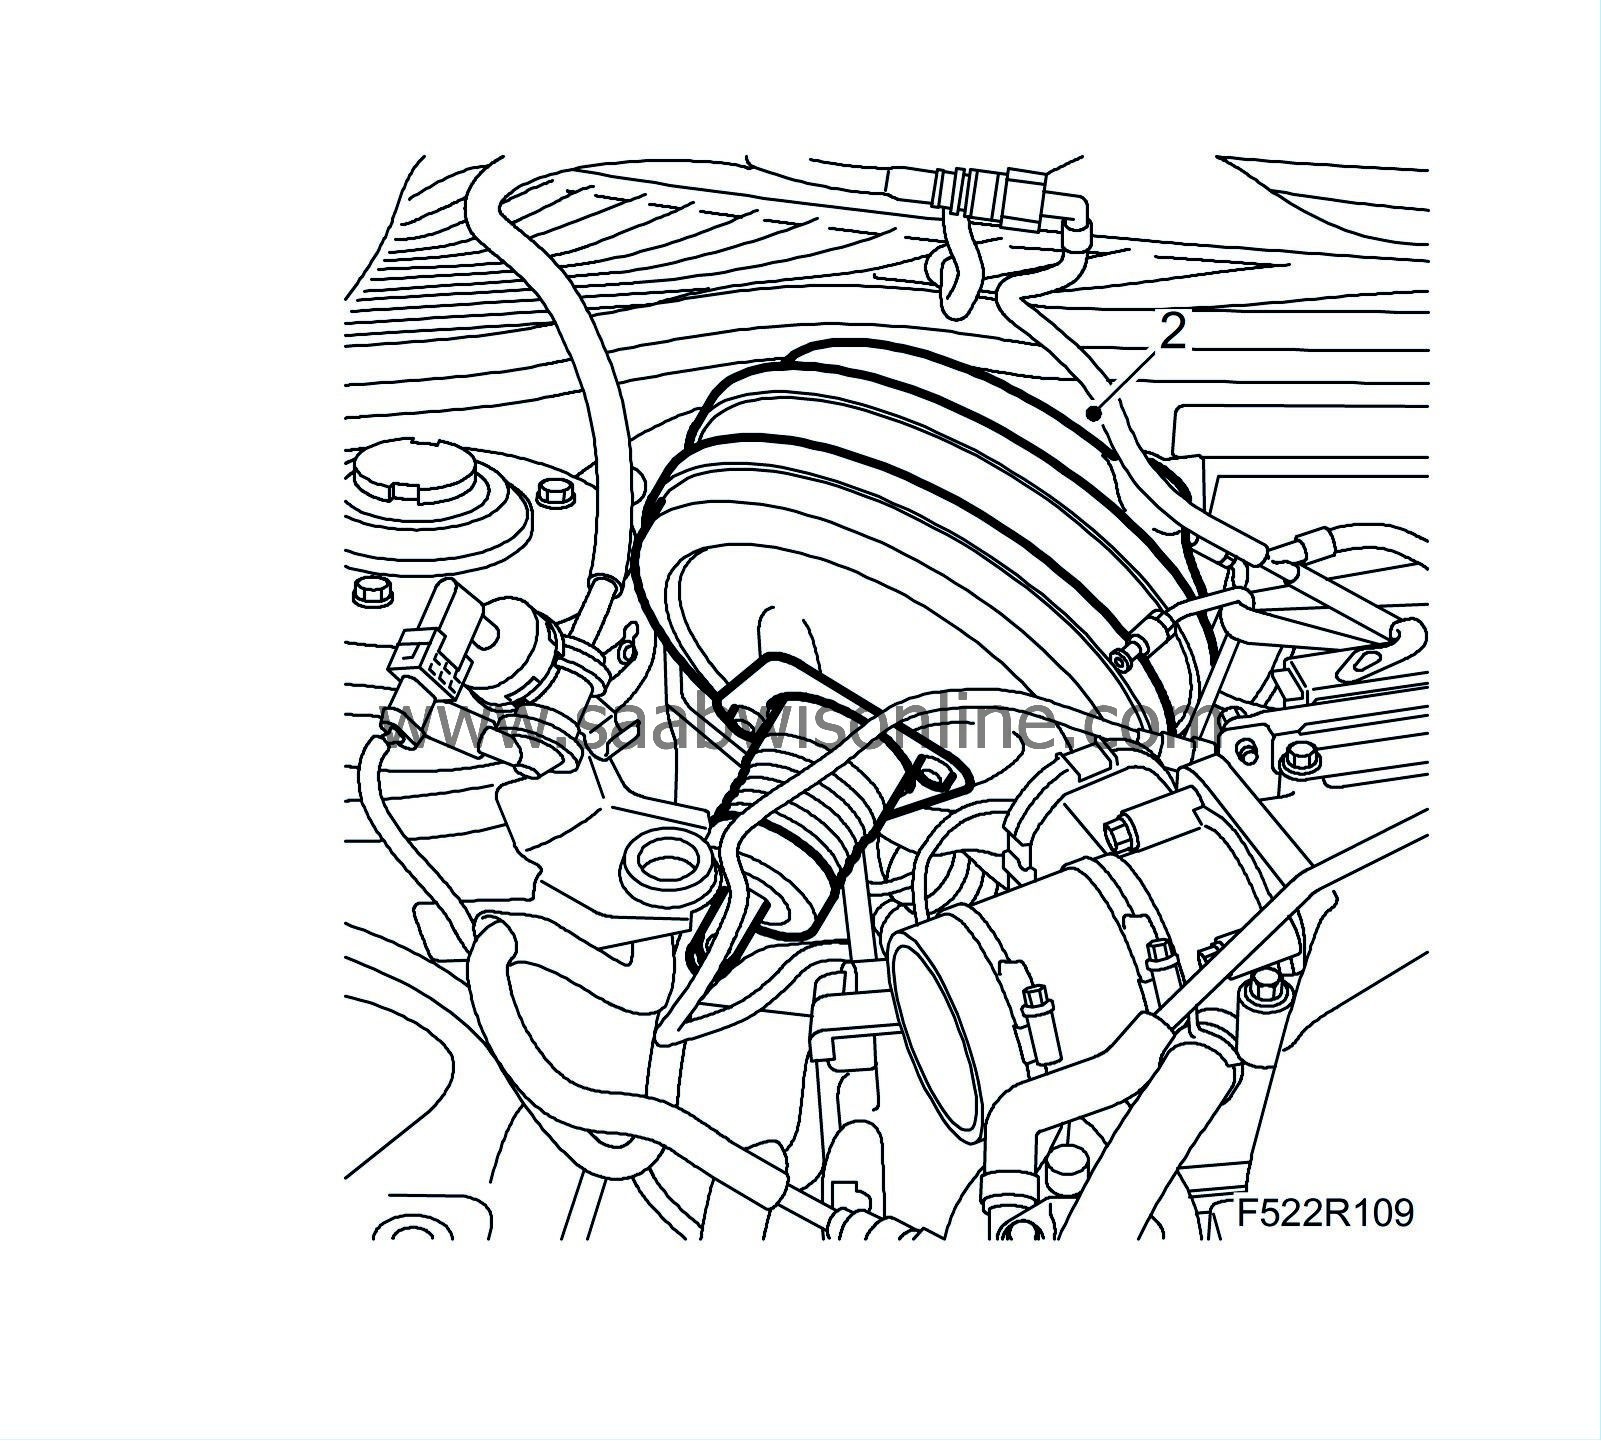
| 2. |
Rotate the brake servo so that the pushrod points toward the rear body mounting of the air filter housing. Carefully lower the brake servo without bolts or seal rings.
|
||||||||||
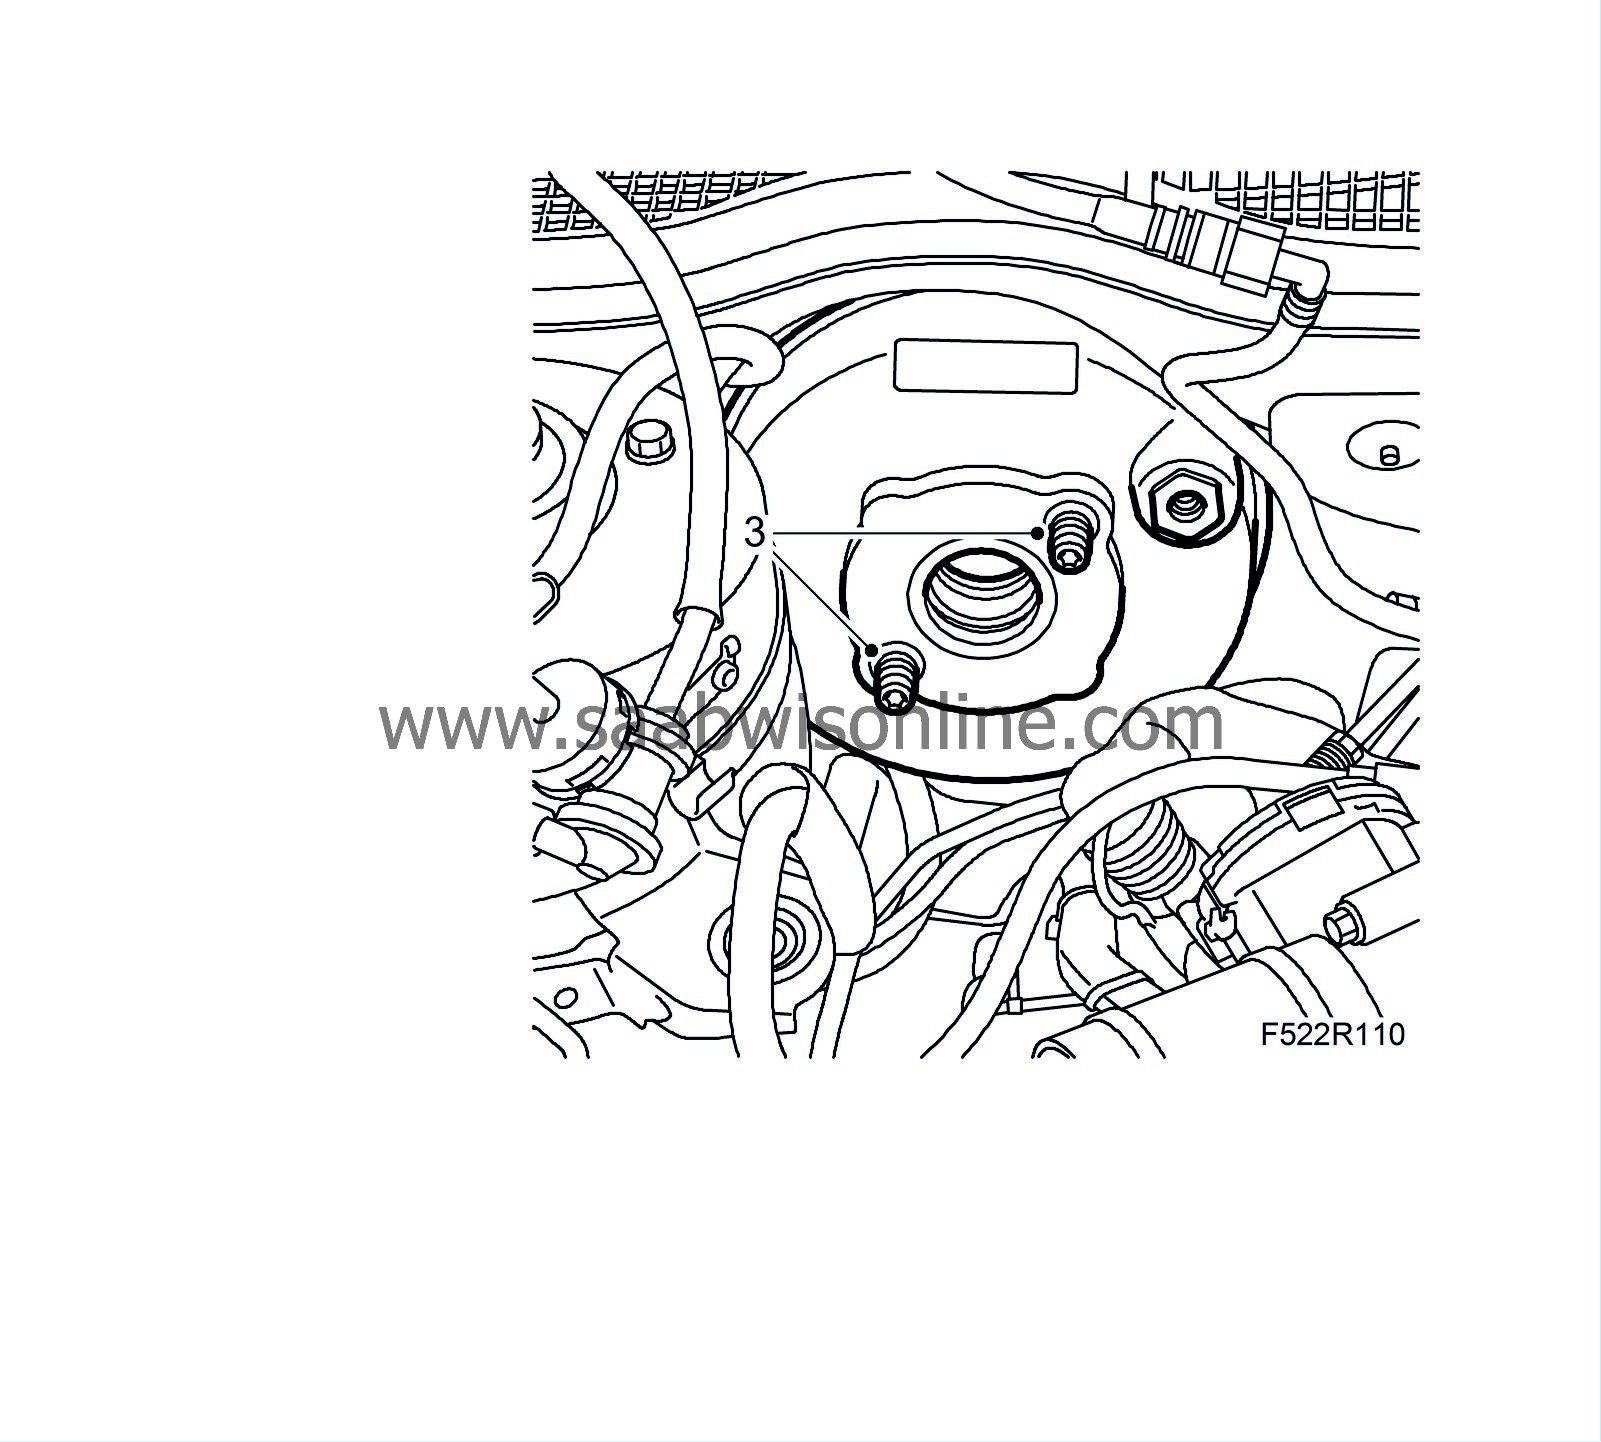
| 3. |
Rotate the brake servo and fit its bolts and seal rings. Place it on the bulkhead. Check that the pushrod is correctly positioned at the brake pedal and tighten the bolts. Use
Threadlock, Loctite 242
.
|
|
| 4. |
Fit the master cylinder. Make sure that its pushrod ends up on the brake servo pushrod. Use
Threadlock, Loctite 242
.
Tightening torque 25 Nm (18 lbf ft) 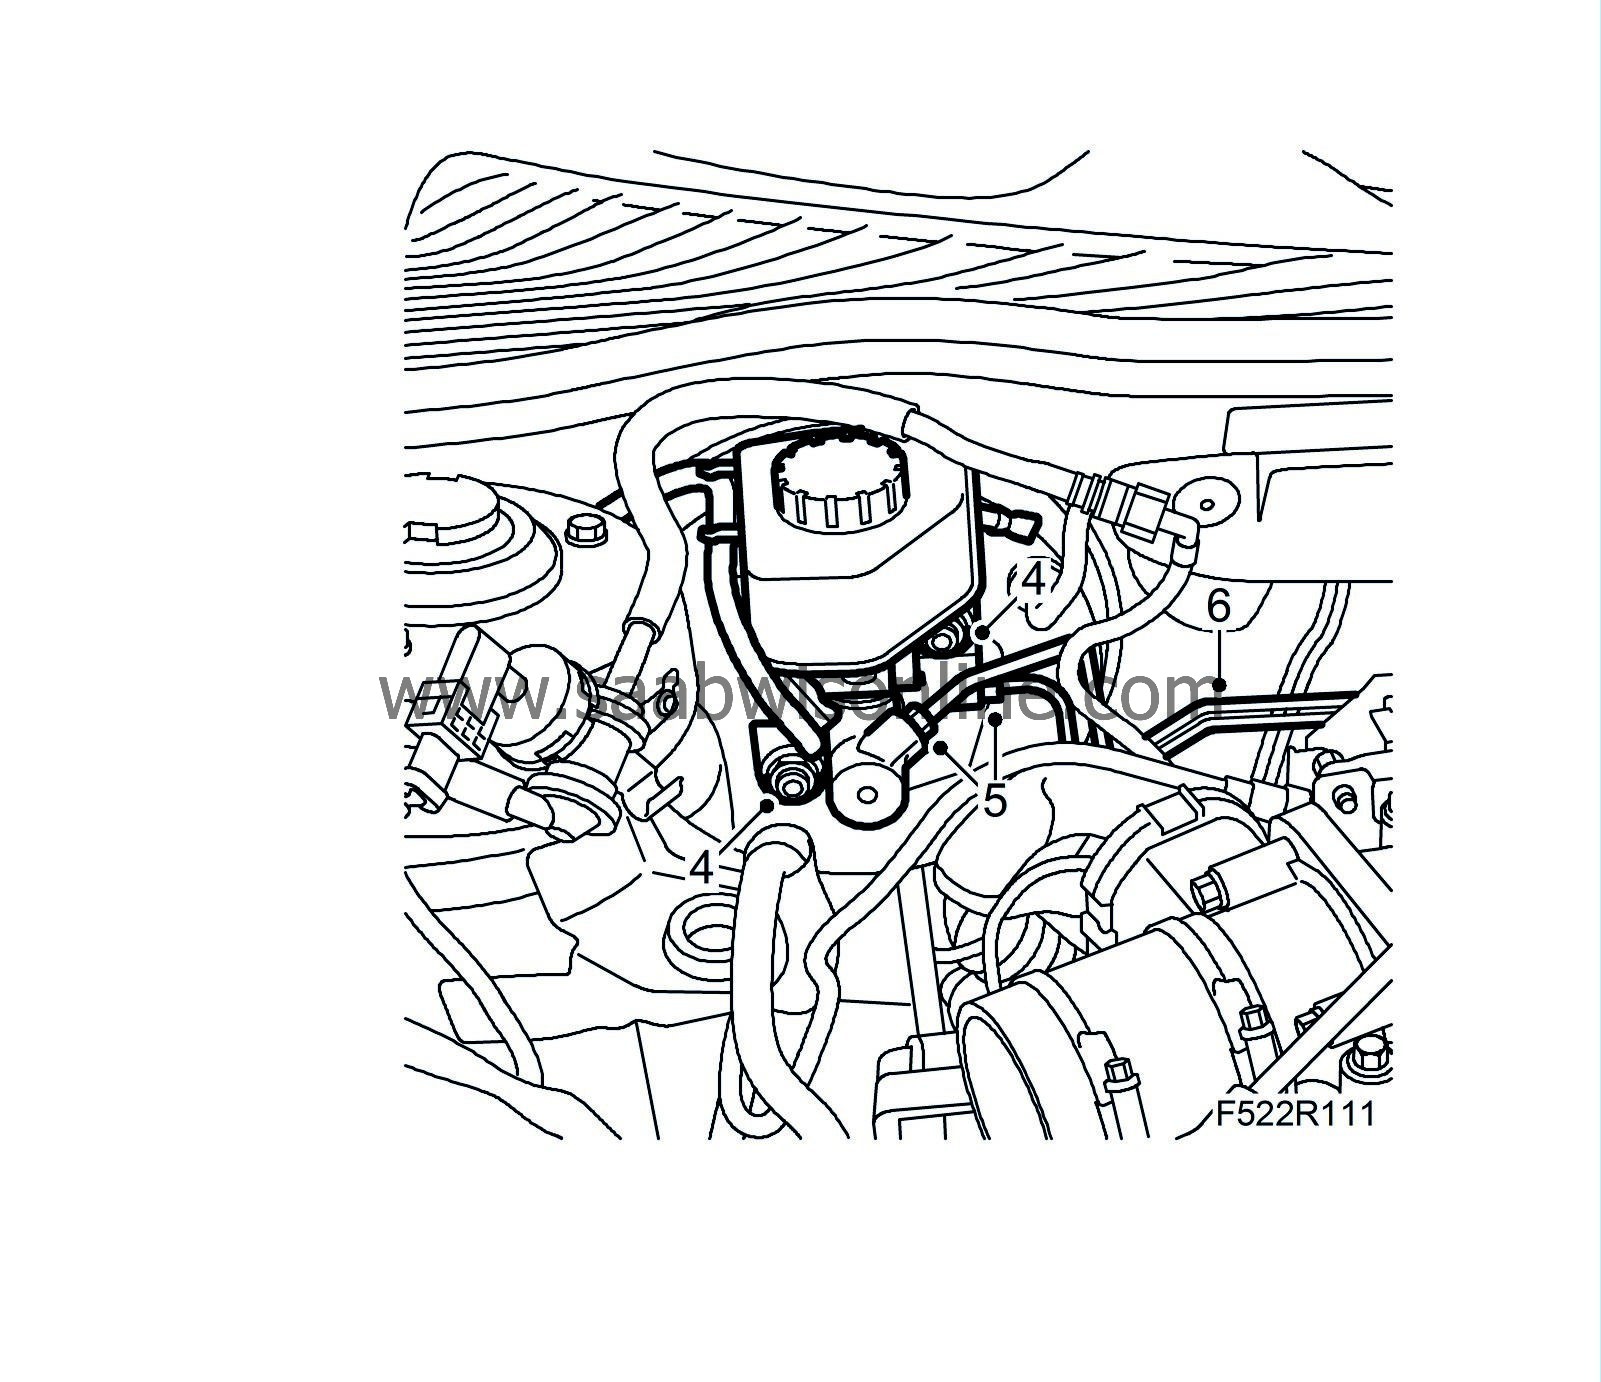
|
|
| 5. |
Remove the strap holding the brake pipes and fit them on the master cylinder.
|
|
| 6. |
Fit the brake pipes in the mountings on the bulkhead.
|
|
| 7. |
Fit the heat shield on the bulkhead.
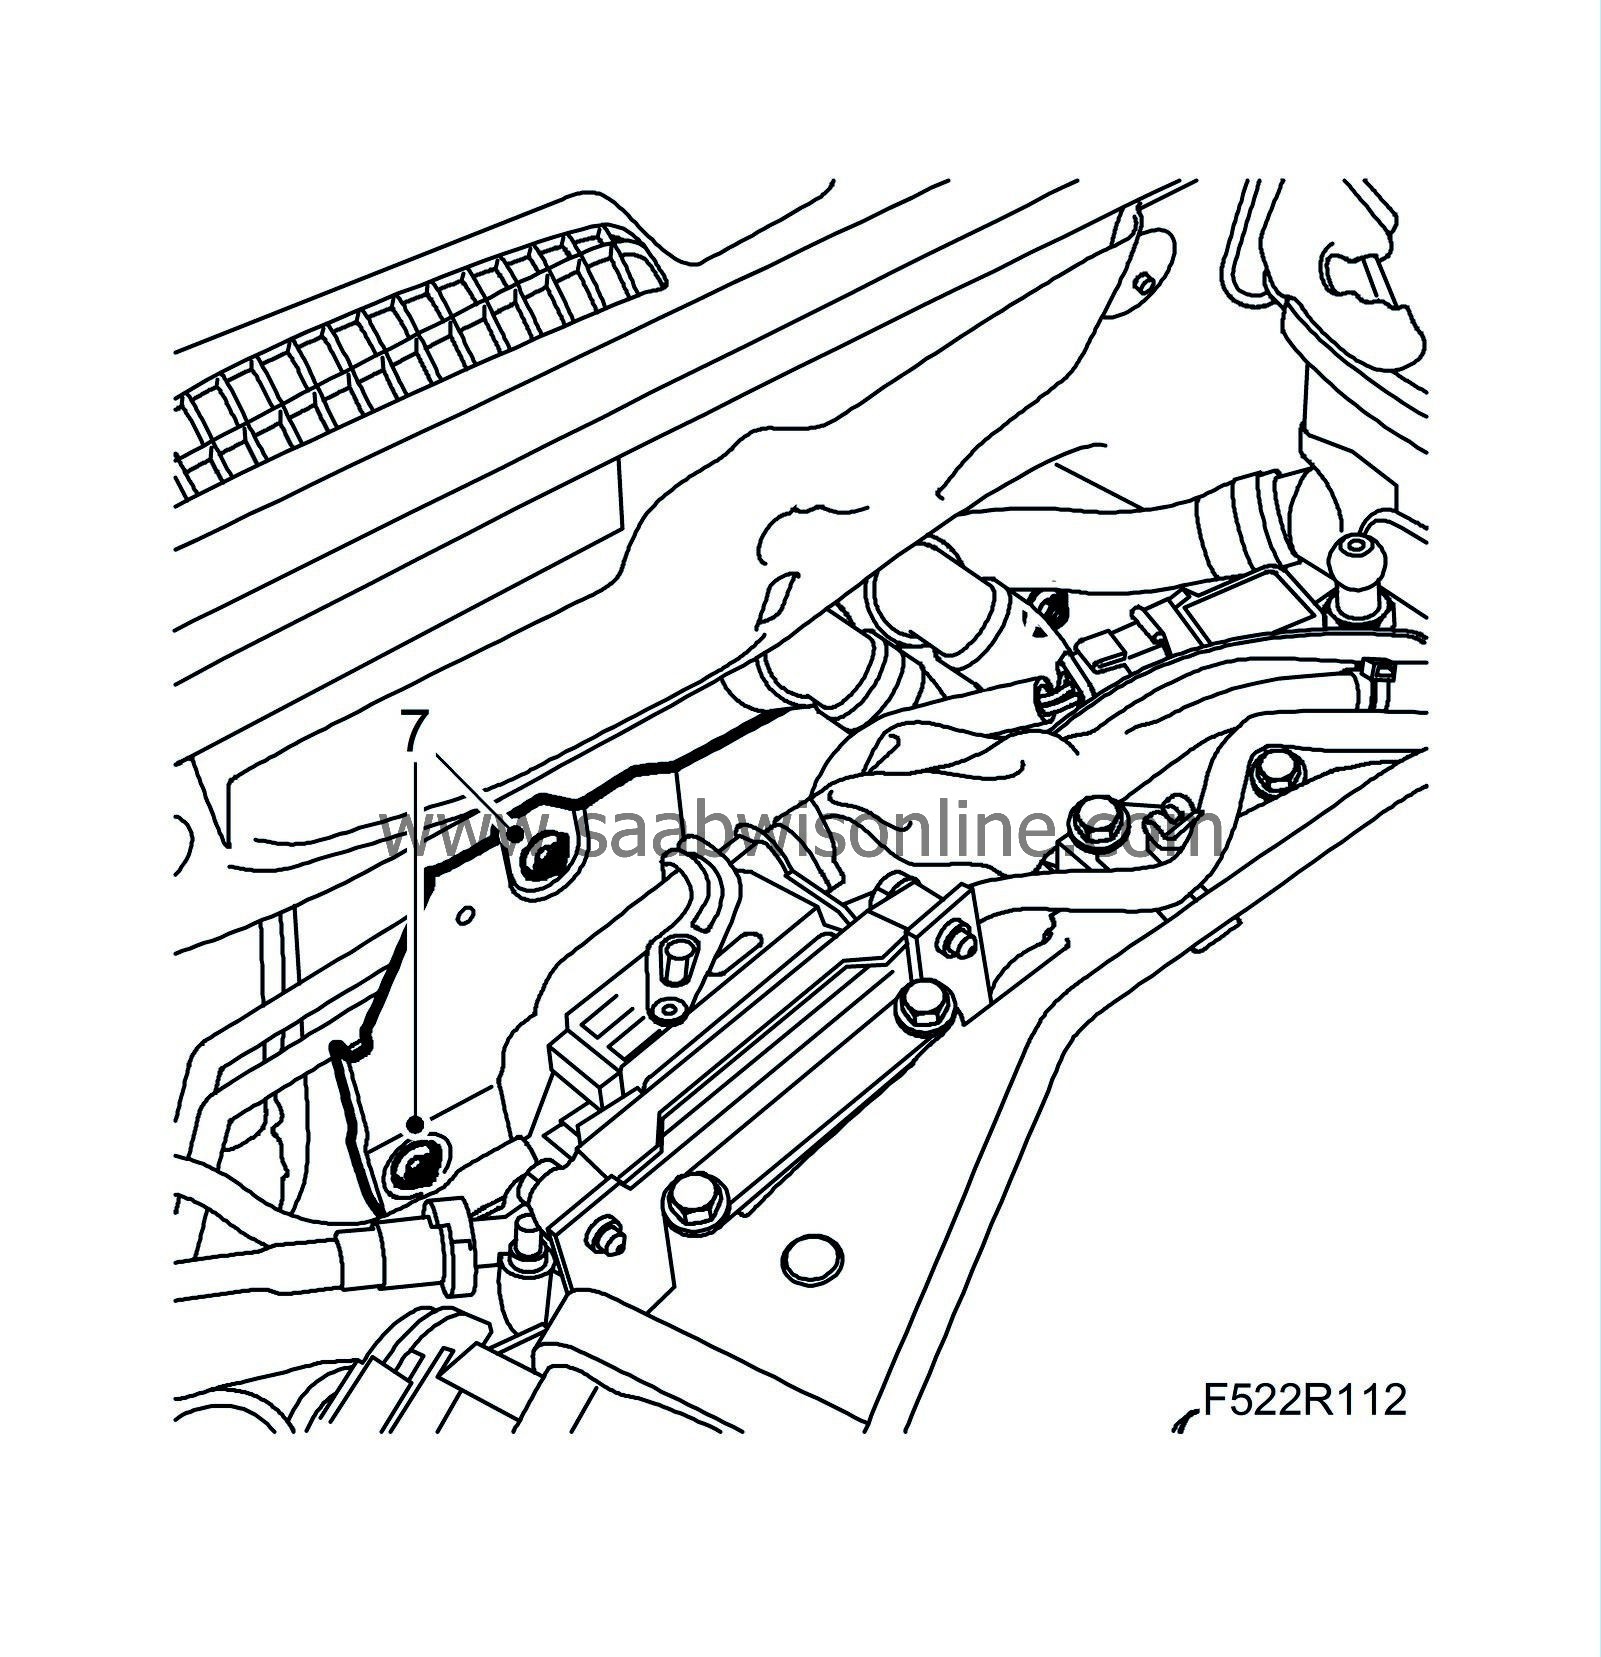
|
|
| 8. |
Fit the vacuum hose on the brake servo.
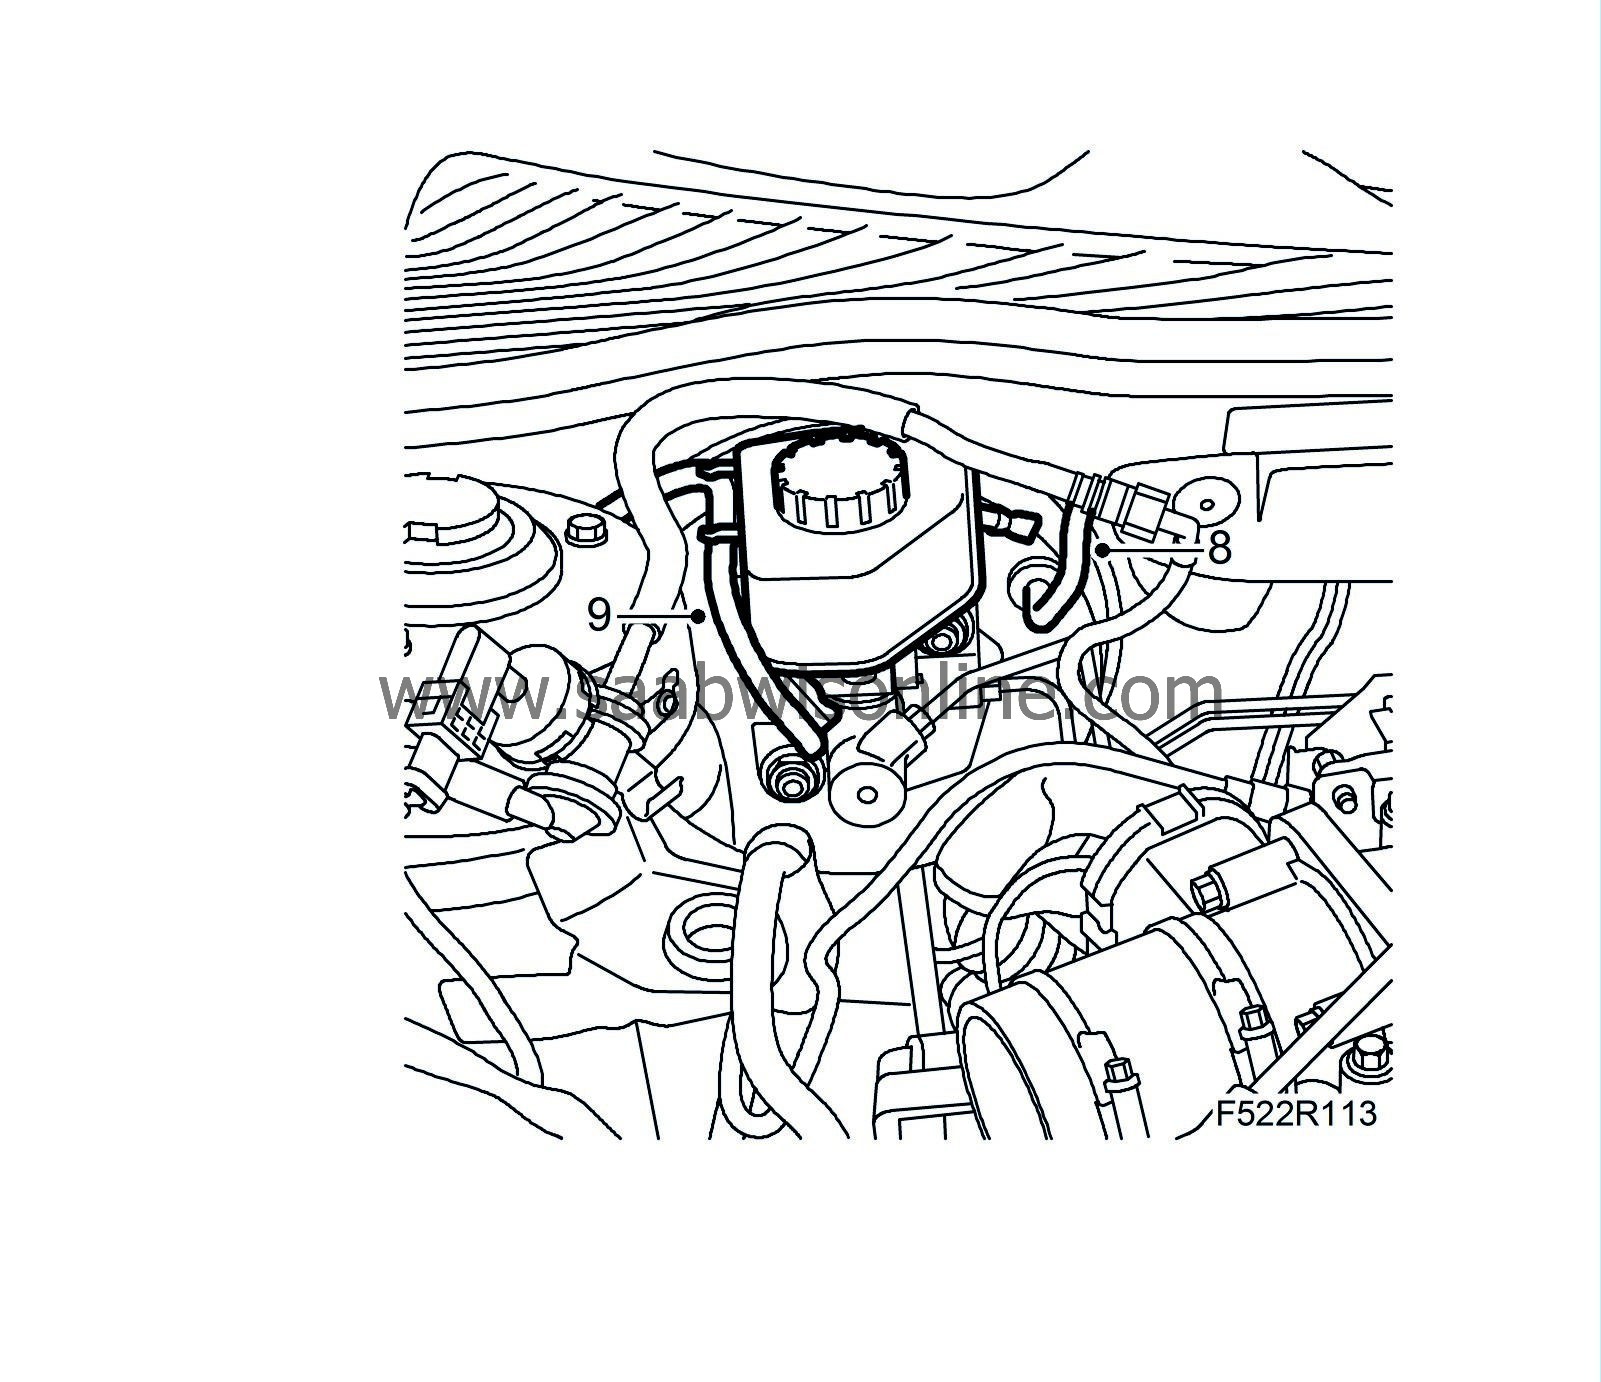
|
|
| 9. |
Plug in the connector of the brake fluid level sensor.
|
|
| 10. |
Remove the strap holding the engine and raise the engine with the jack. Fit the right engine pad.
Tightening torques to the body: 50 Nm + 180° (37 lbf ft + 180°) to the engine mounting: 45 Nm + 90° (33 lbf + 90°) 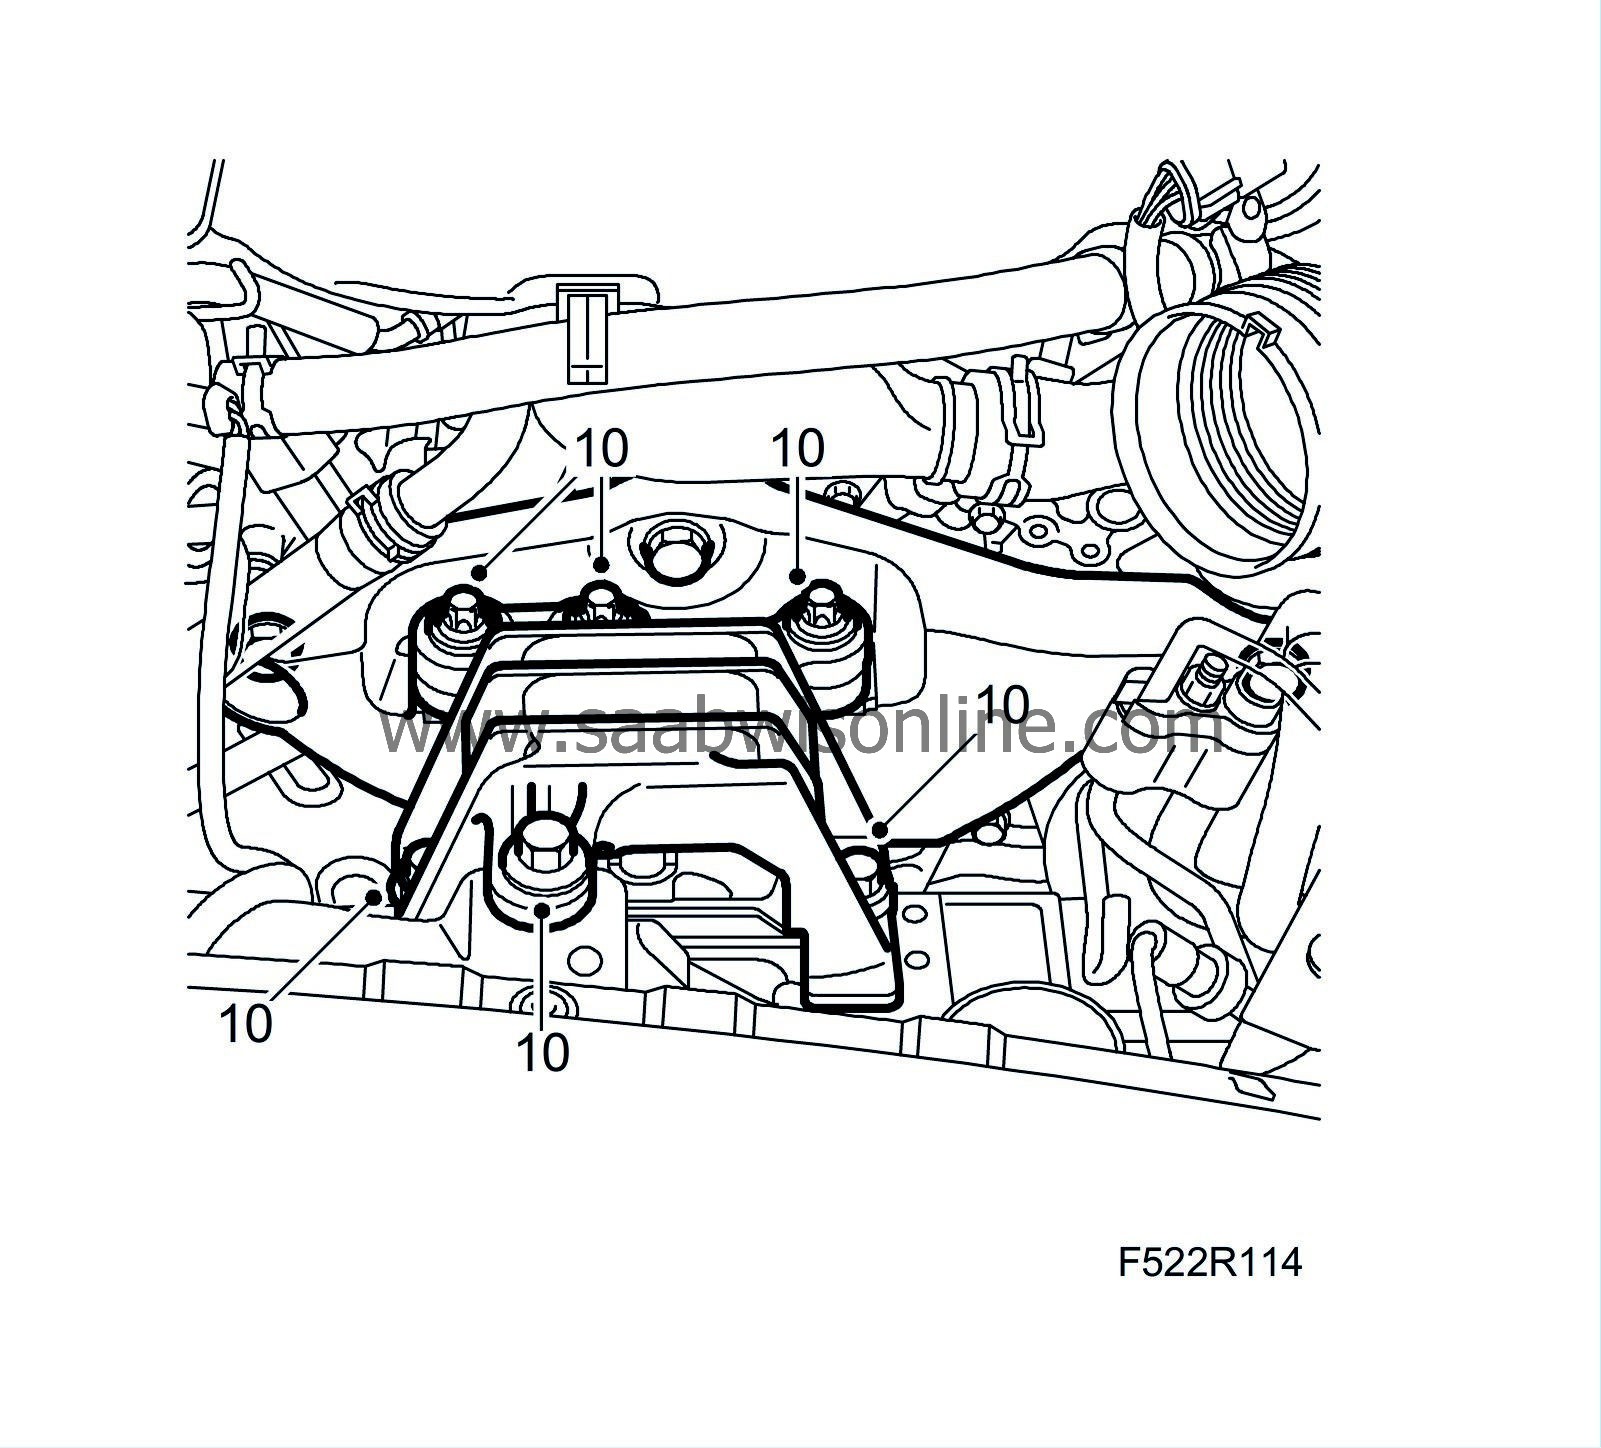
|
|
| 11. |
Raise the car.
|
|
| 12. |
Position the trolley lift under the subframe and lift the subframe into place. Fit
83 96 137 Centring tool, subframe - body
against the guide holes in the body. Fit the rods and tighten the bolts.
Tightening torques subframe: 75 Nm + 135° (56 lbf ft + 135°) torque rod: 90 Nm + 75° (66 lbf ft + 75°) 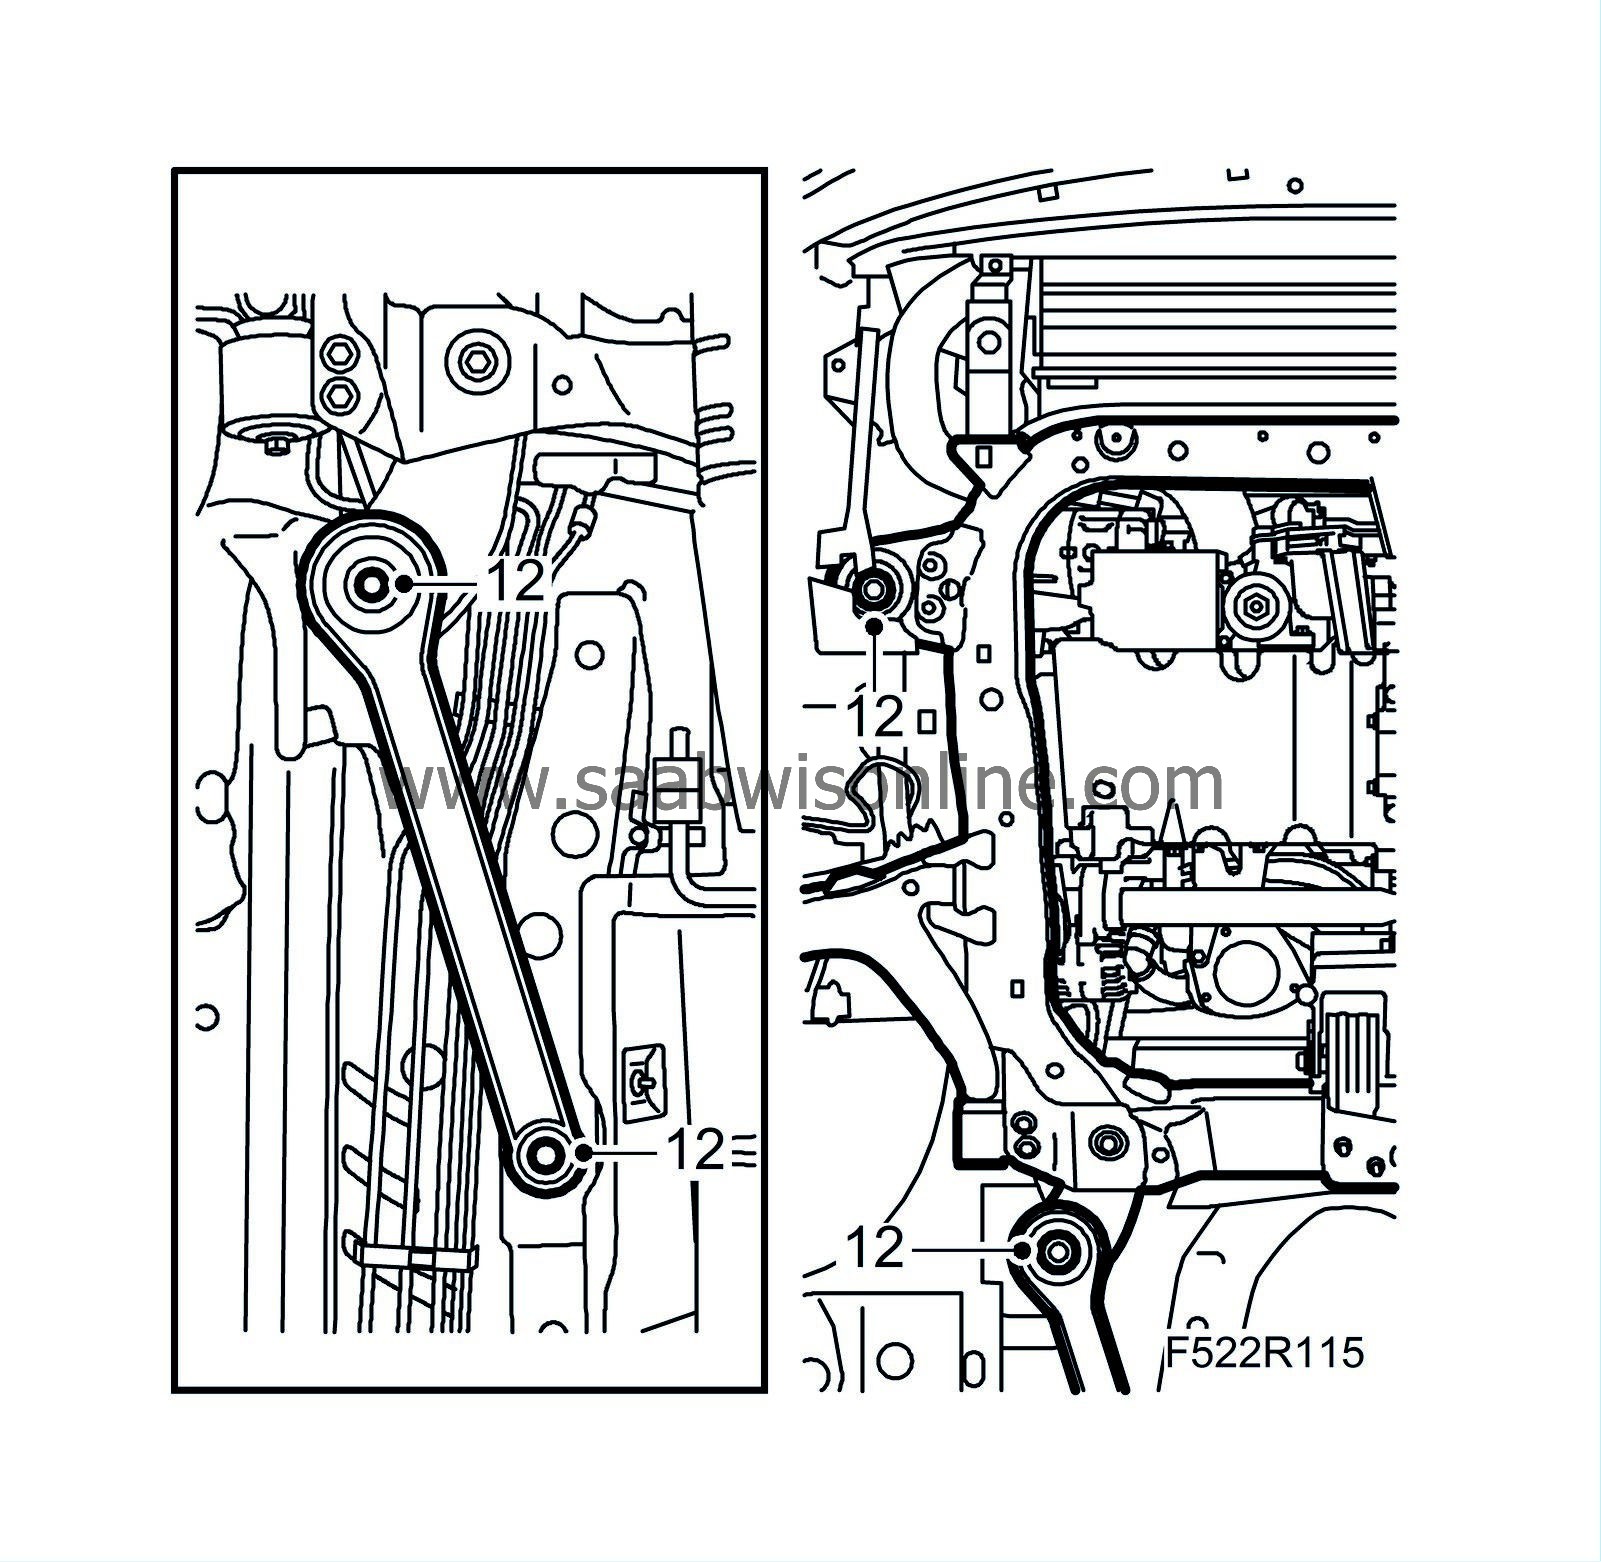
|
|
| 13. |
Lower the trolley lift and move it out of the way. Attach the coolant hose to the holder on the subframe.
|
|
| 14. |
Fit the steering shaft to the steering gear. Clean the threads and apply
Threadlock, Loctite 242
.
Tightening torque: 30 Nm (22 lbf ft) 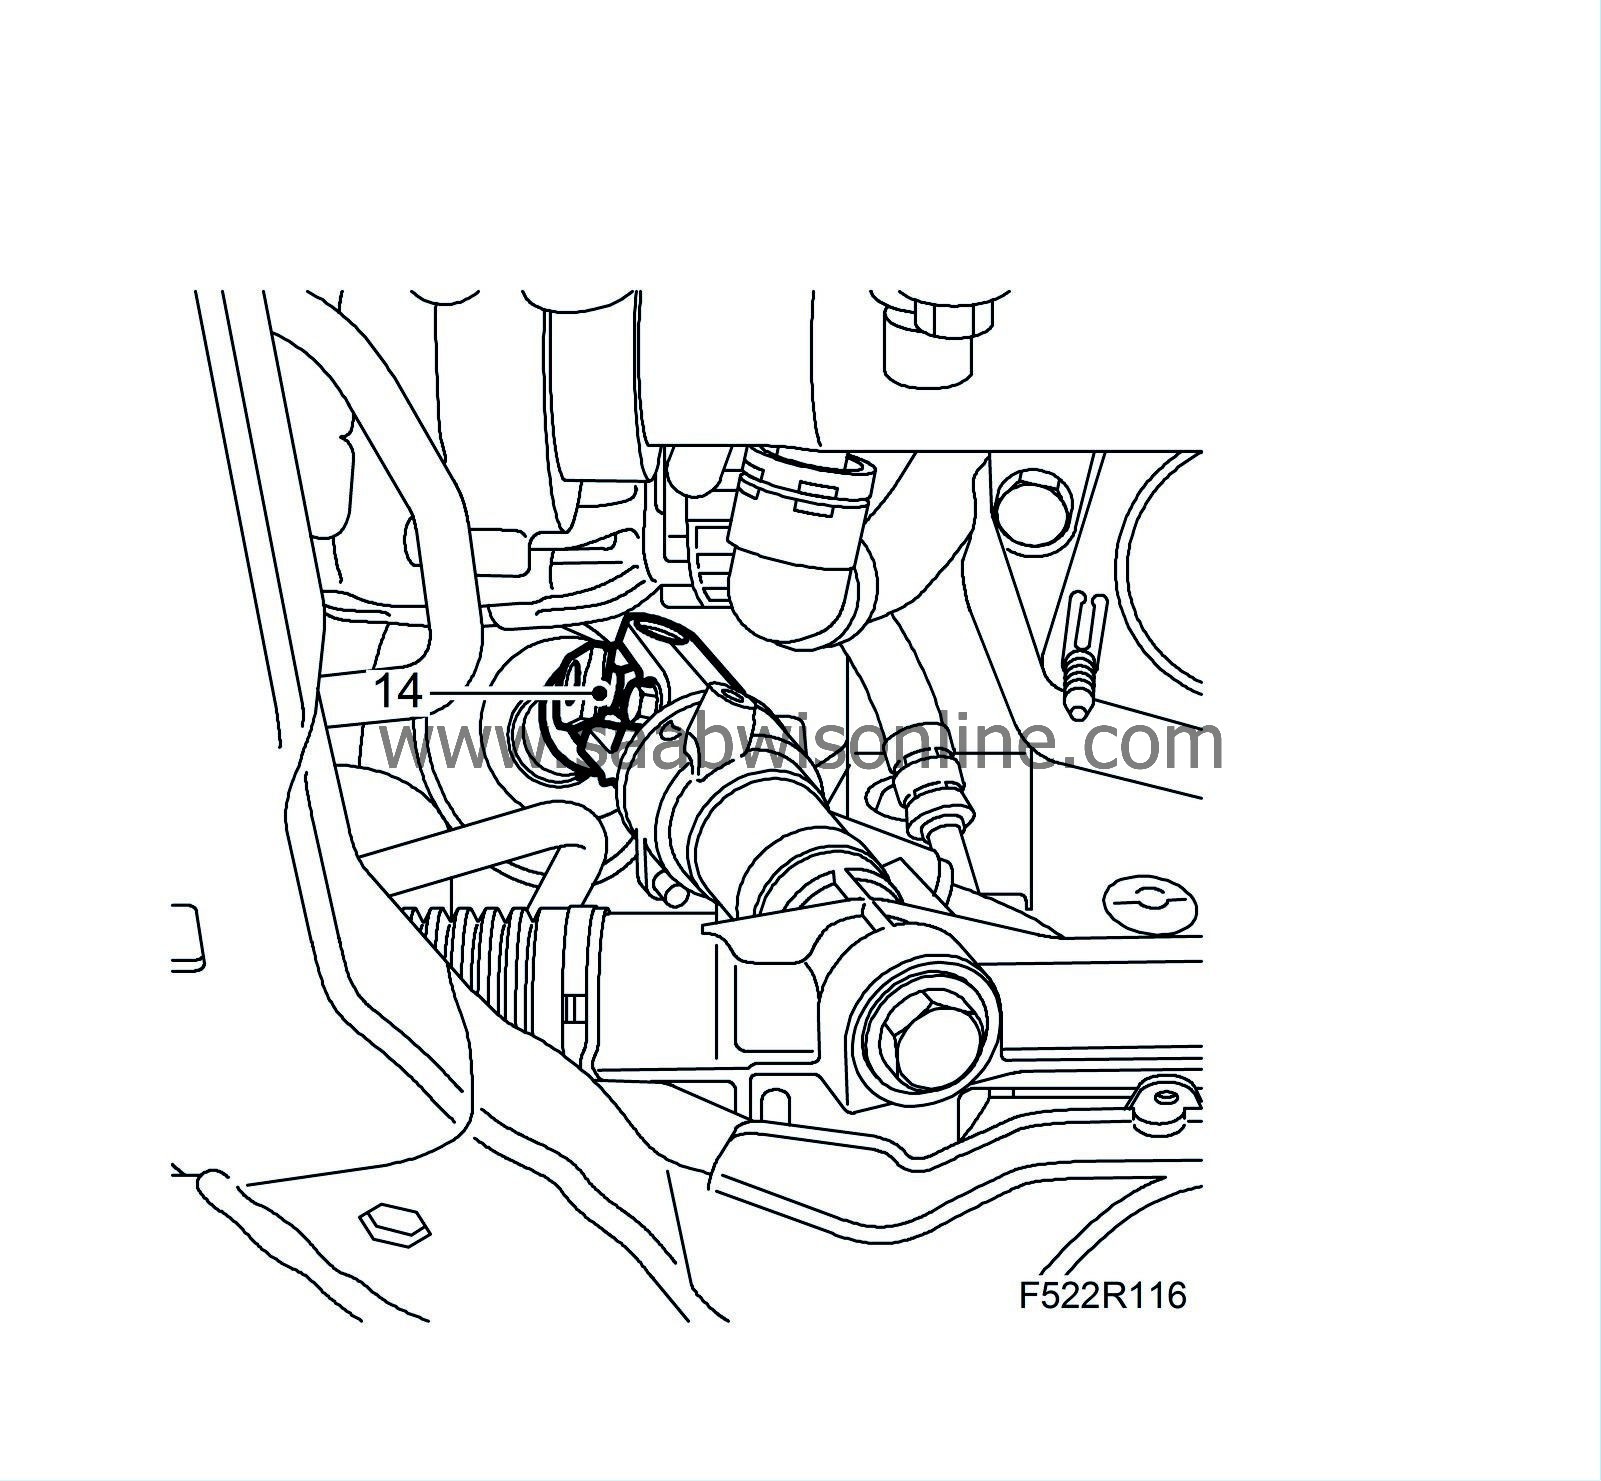
|
|
| 15. |
Fit the front torque rod bolt.
Tightening torque: 60 Nm + 90° (44 lbf ft + 90°) 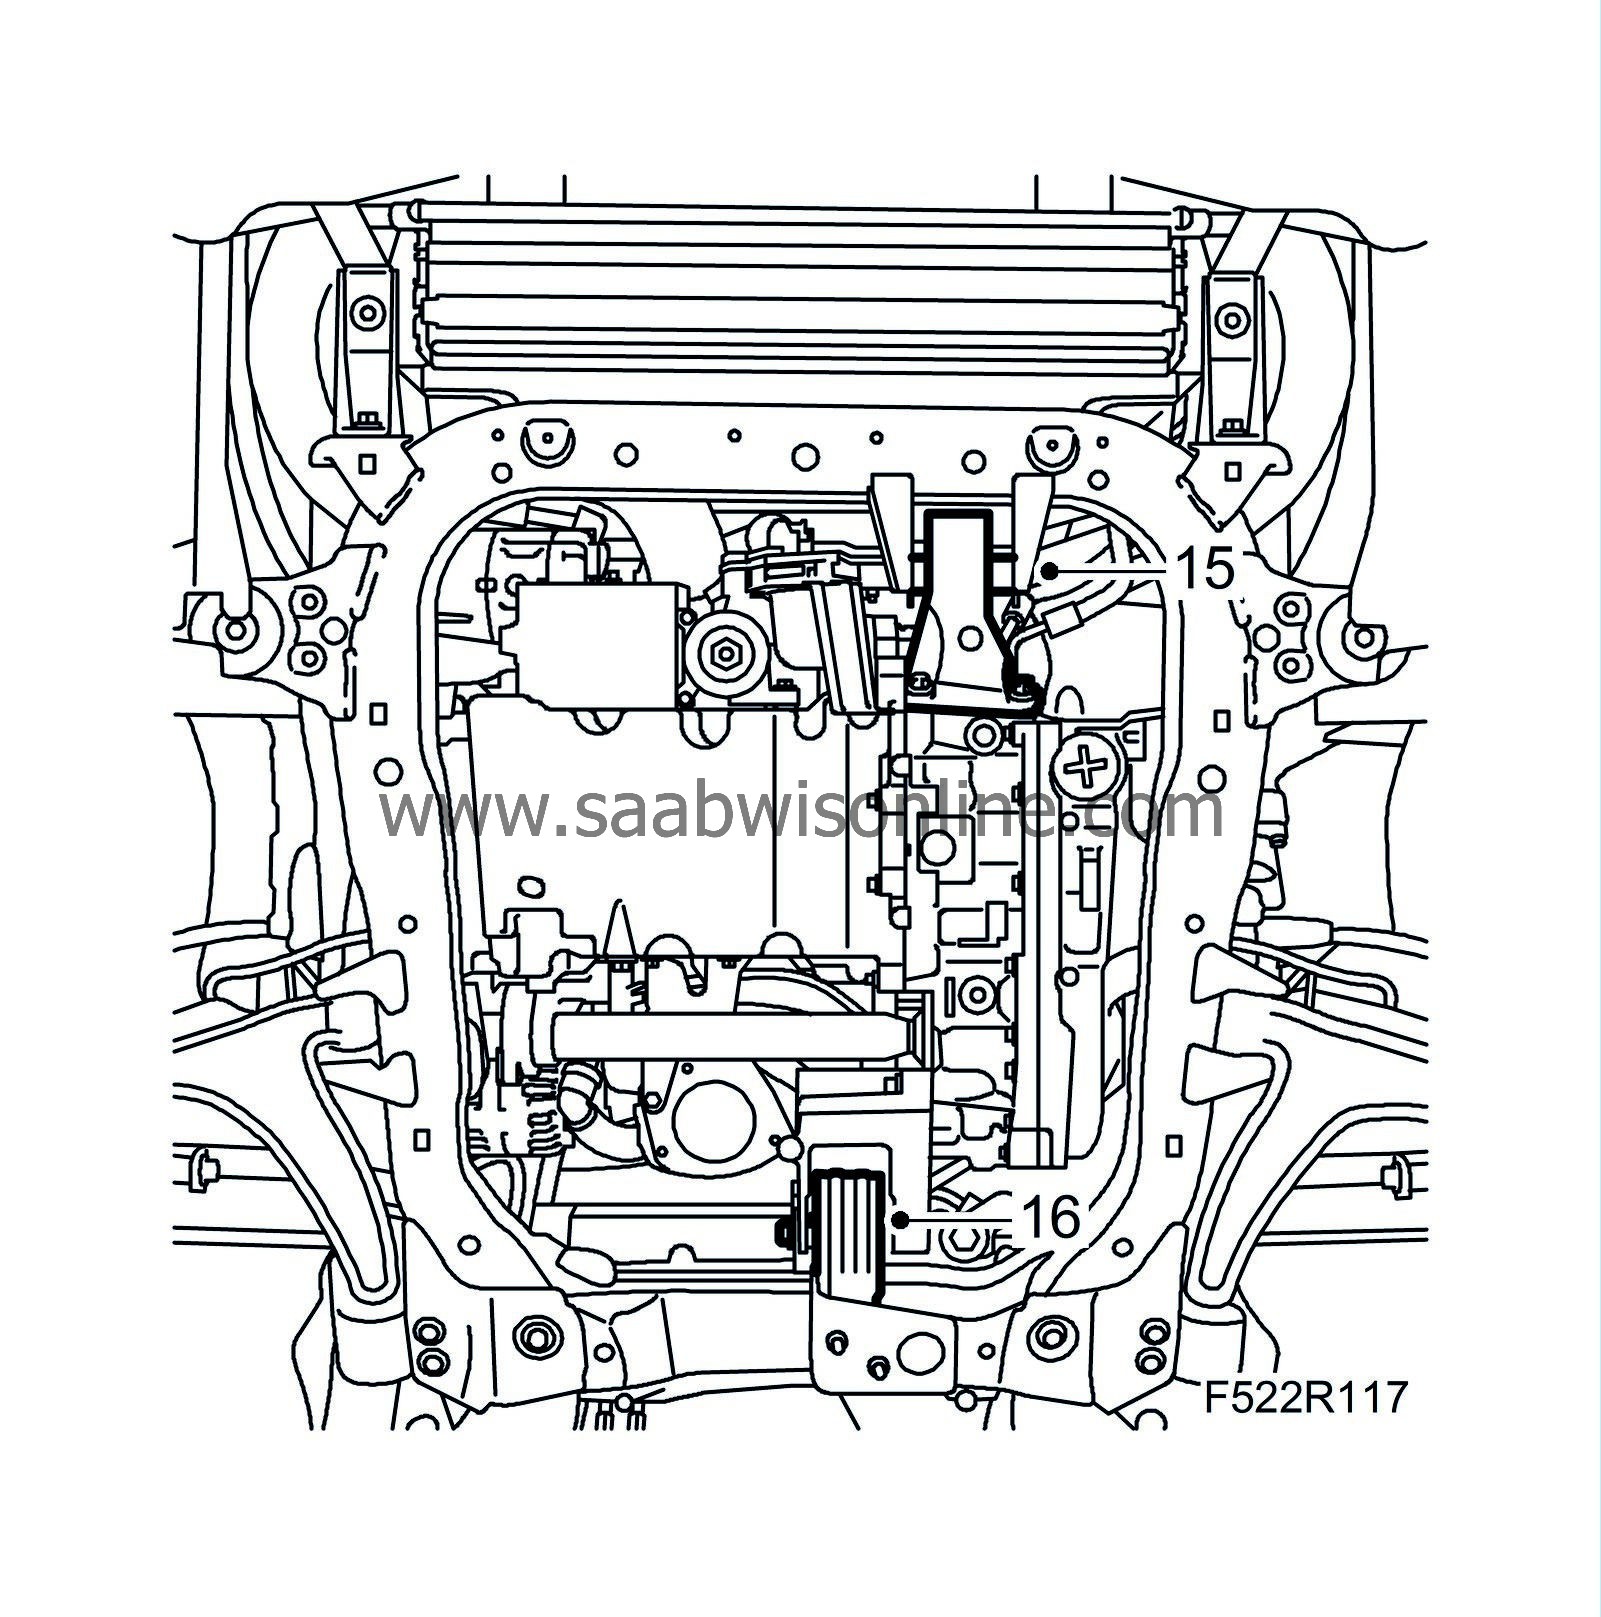
|
|
| 16. |
Fit the rear torque rod bolt.
Tightening torque: 80 Nm (59 lbf ft) |
|
| 17. |
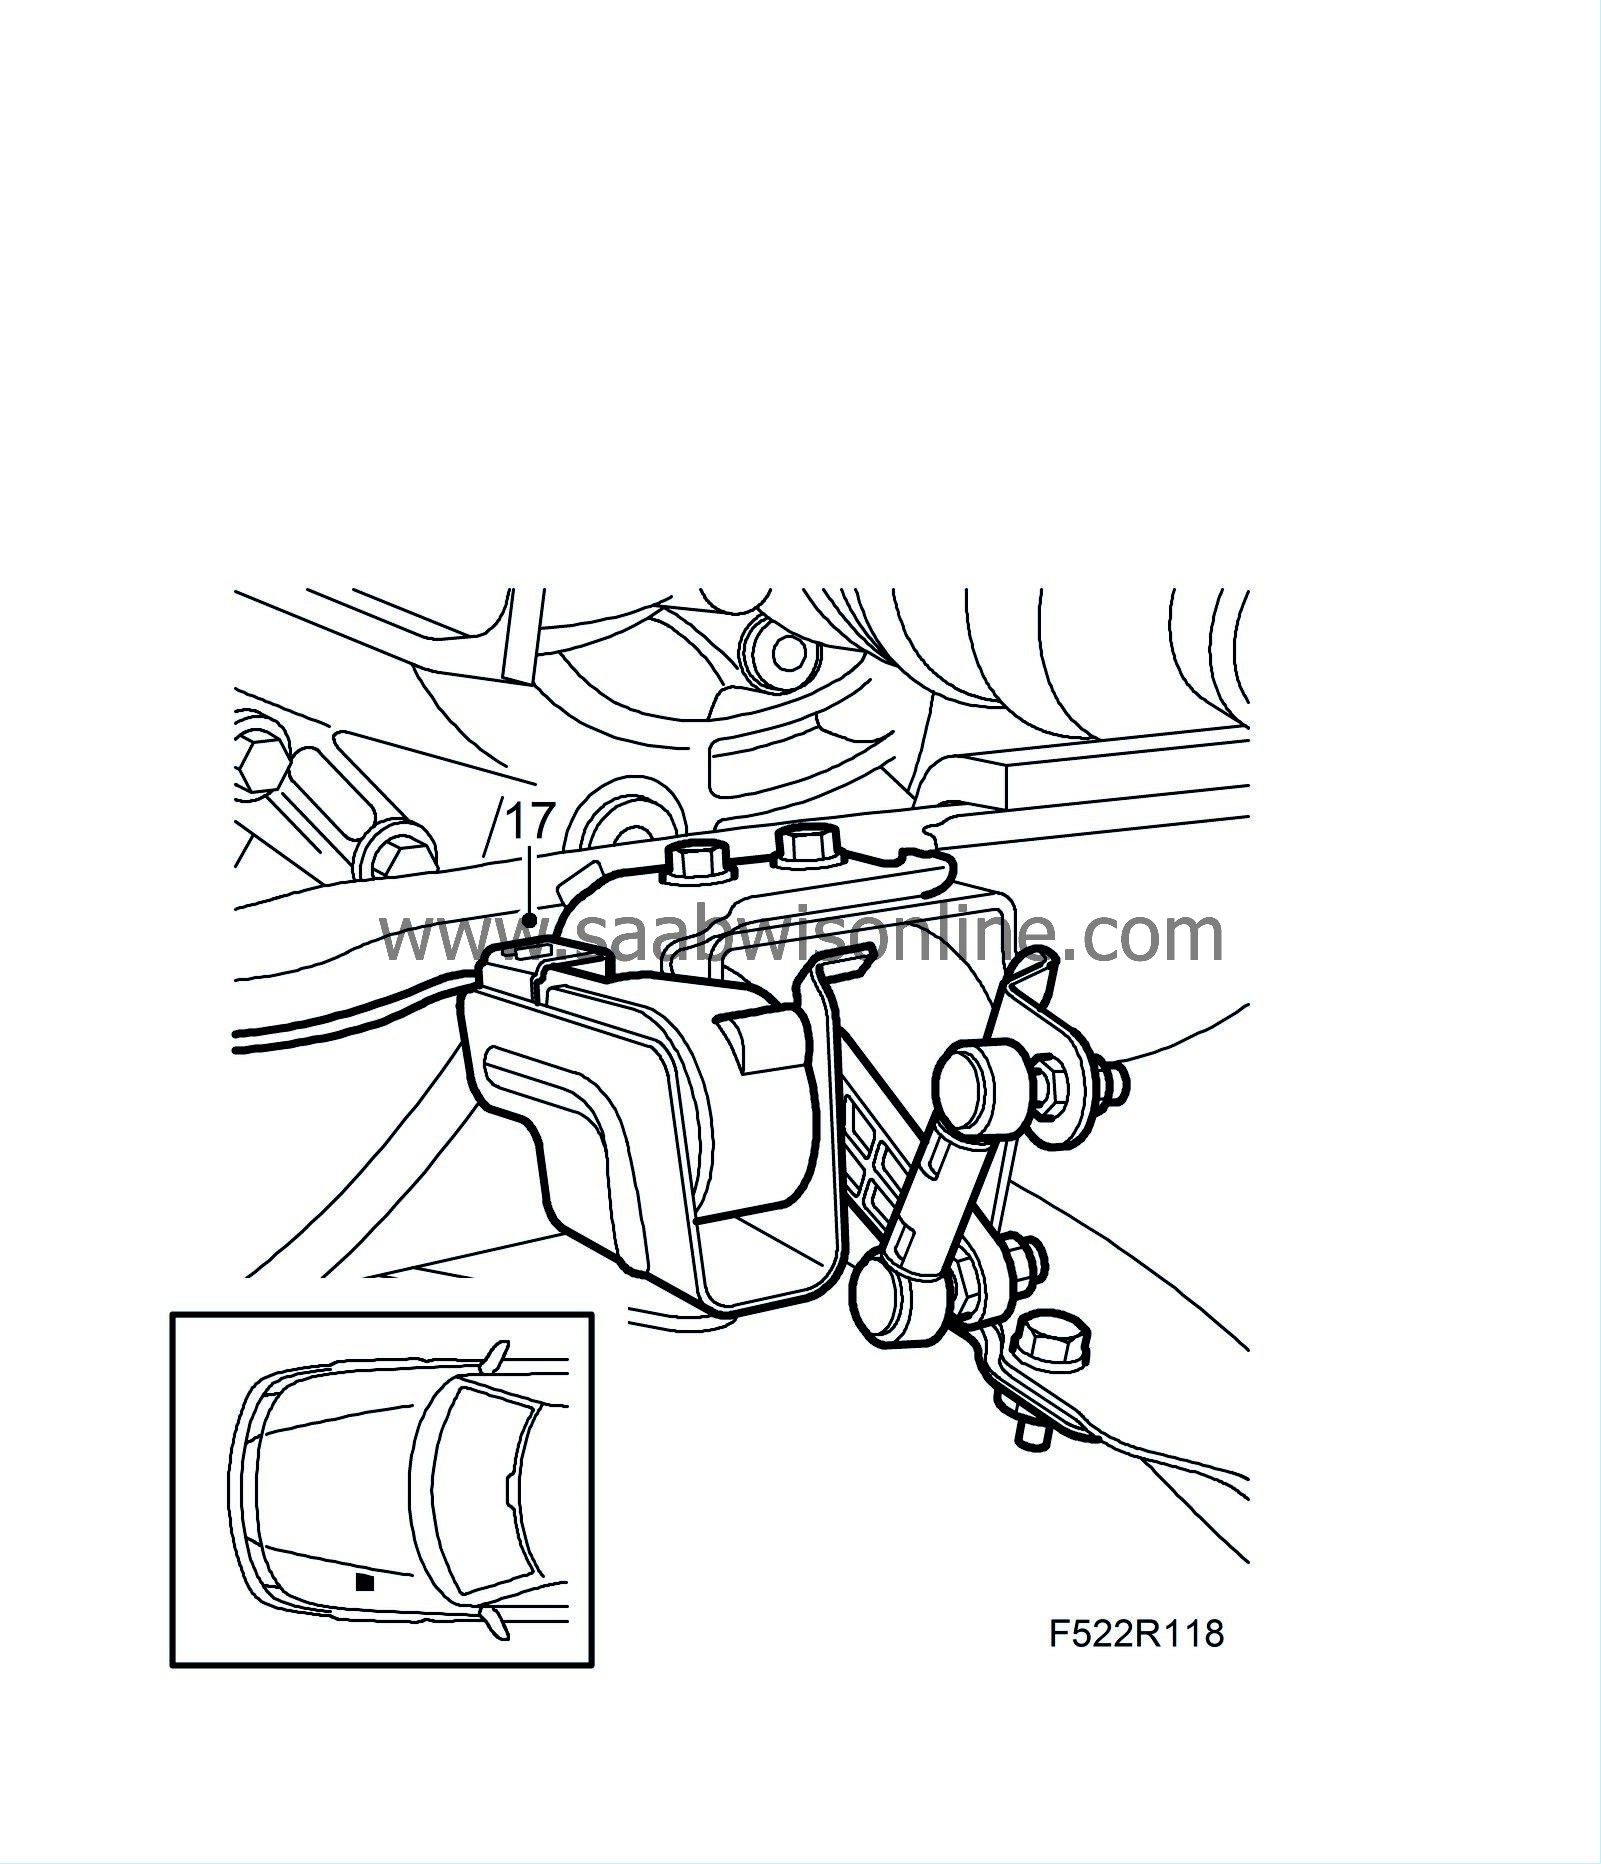
Cars with Xenon headlamps:
Plug in the connector of the load angle sensor and connect the cable clip to the subframe.
|
|
| 18. |
Fit the
rear catalytic converter
.
|
|
| 19. |
Fit the front part of the wheel arch liner.
|
|
| 20. |
Remove the strap holding the radiator core and fit the front lower engine cover.
|
|
| 21. |
Lower the car.
|
|
| 22. |
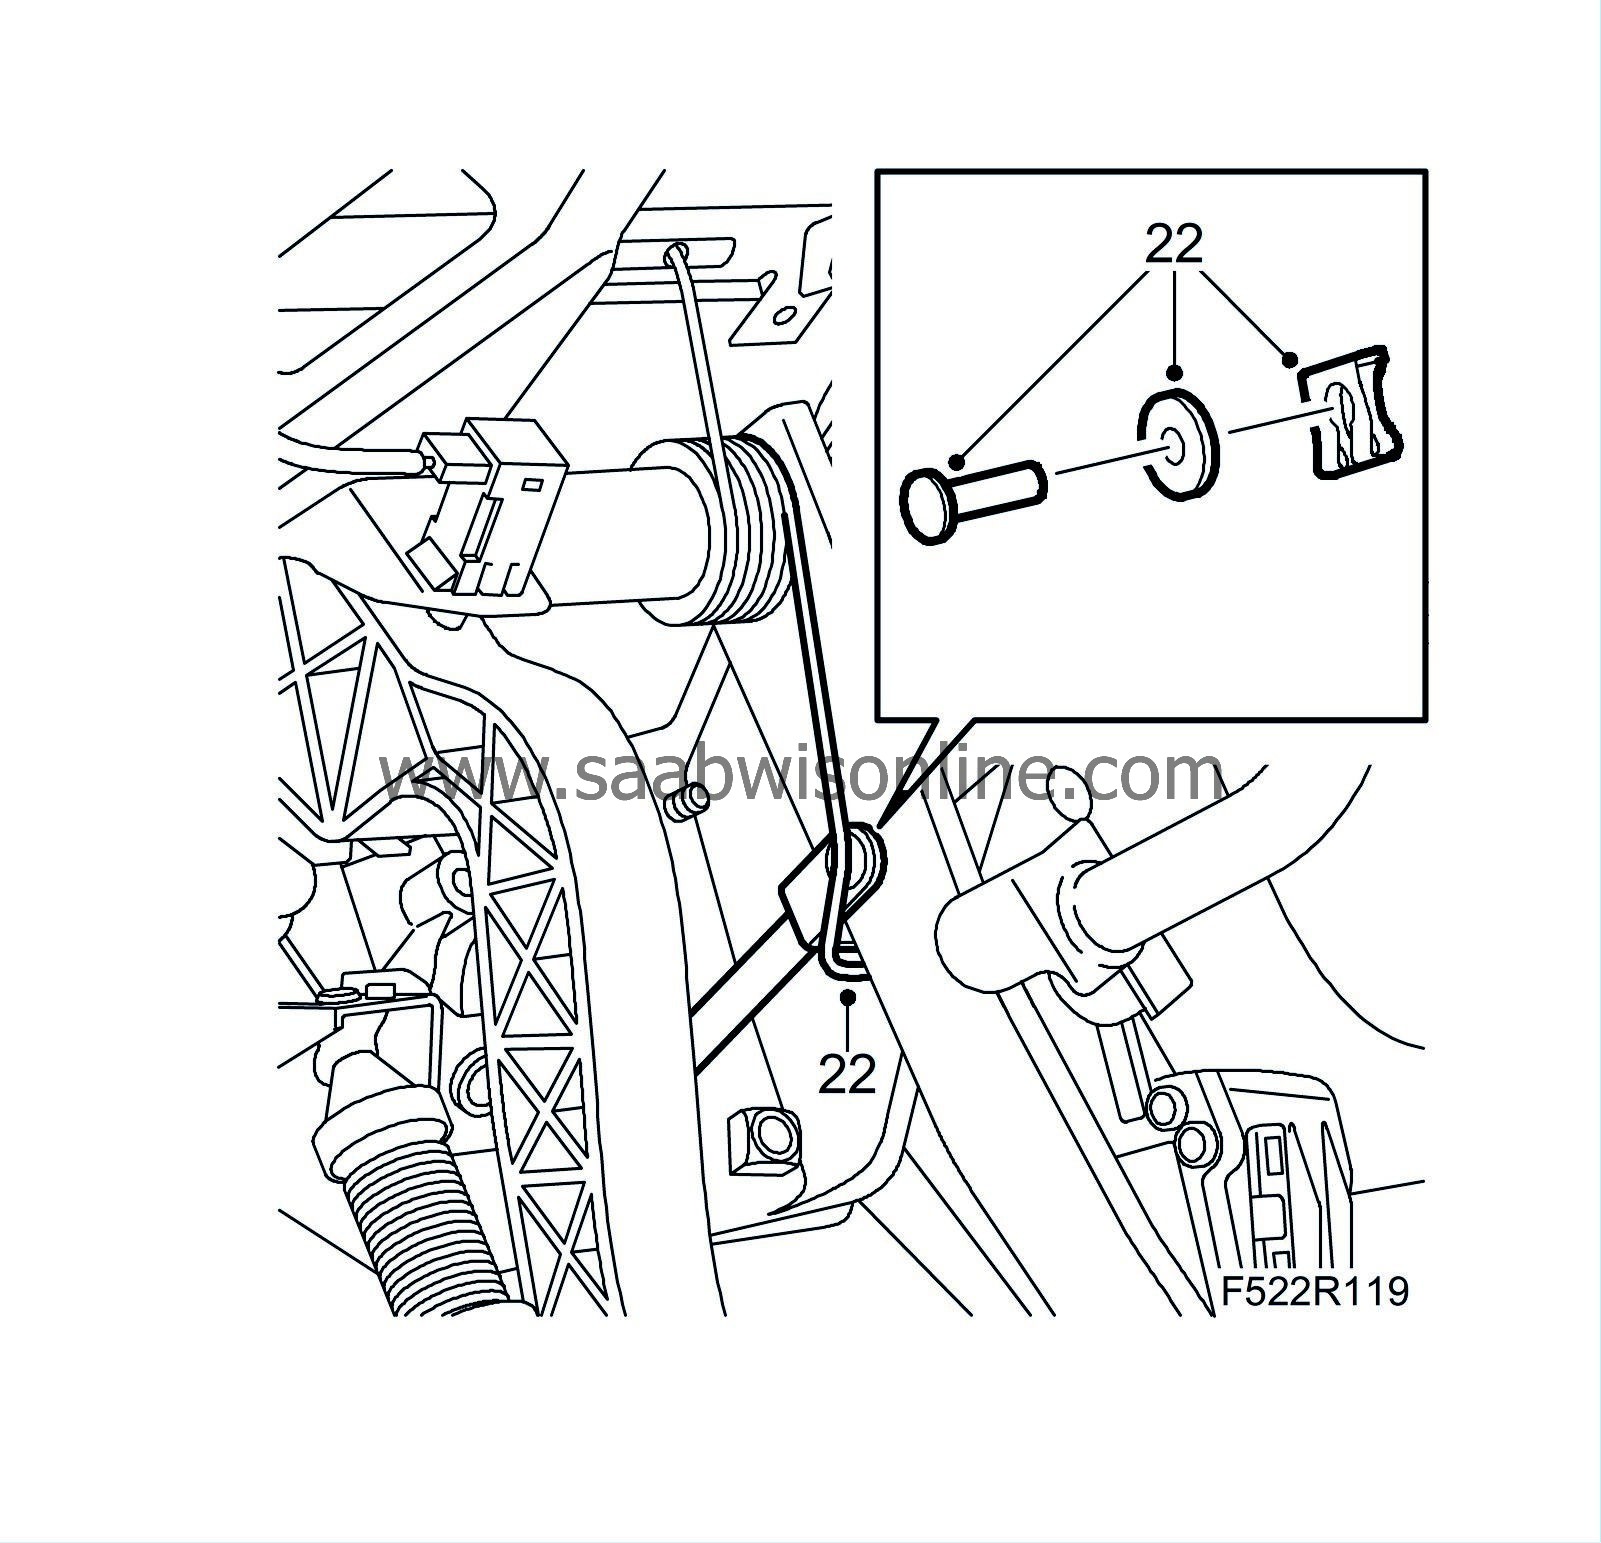
Fit the brake pedal link bolt and hook the return spring into place.
|
|
| 23. |
Depress the brake pedal and pull the pushrods a bit out of the pedal switches. Then release the pedal.
|
|
| 24. |
Fit the sound baffle on the driver's side.
|
|
| 25. |
Lift off the radiator member.
|
|
| 26. |
Fit
the fan cowling
.
|
|
| 27. |
Fit the return hose clip.
|
|
| 28. |
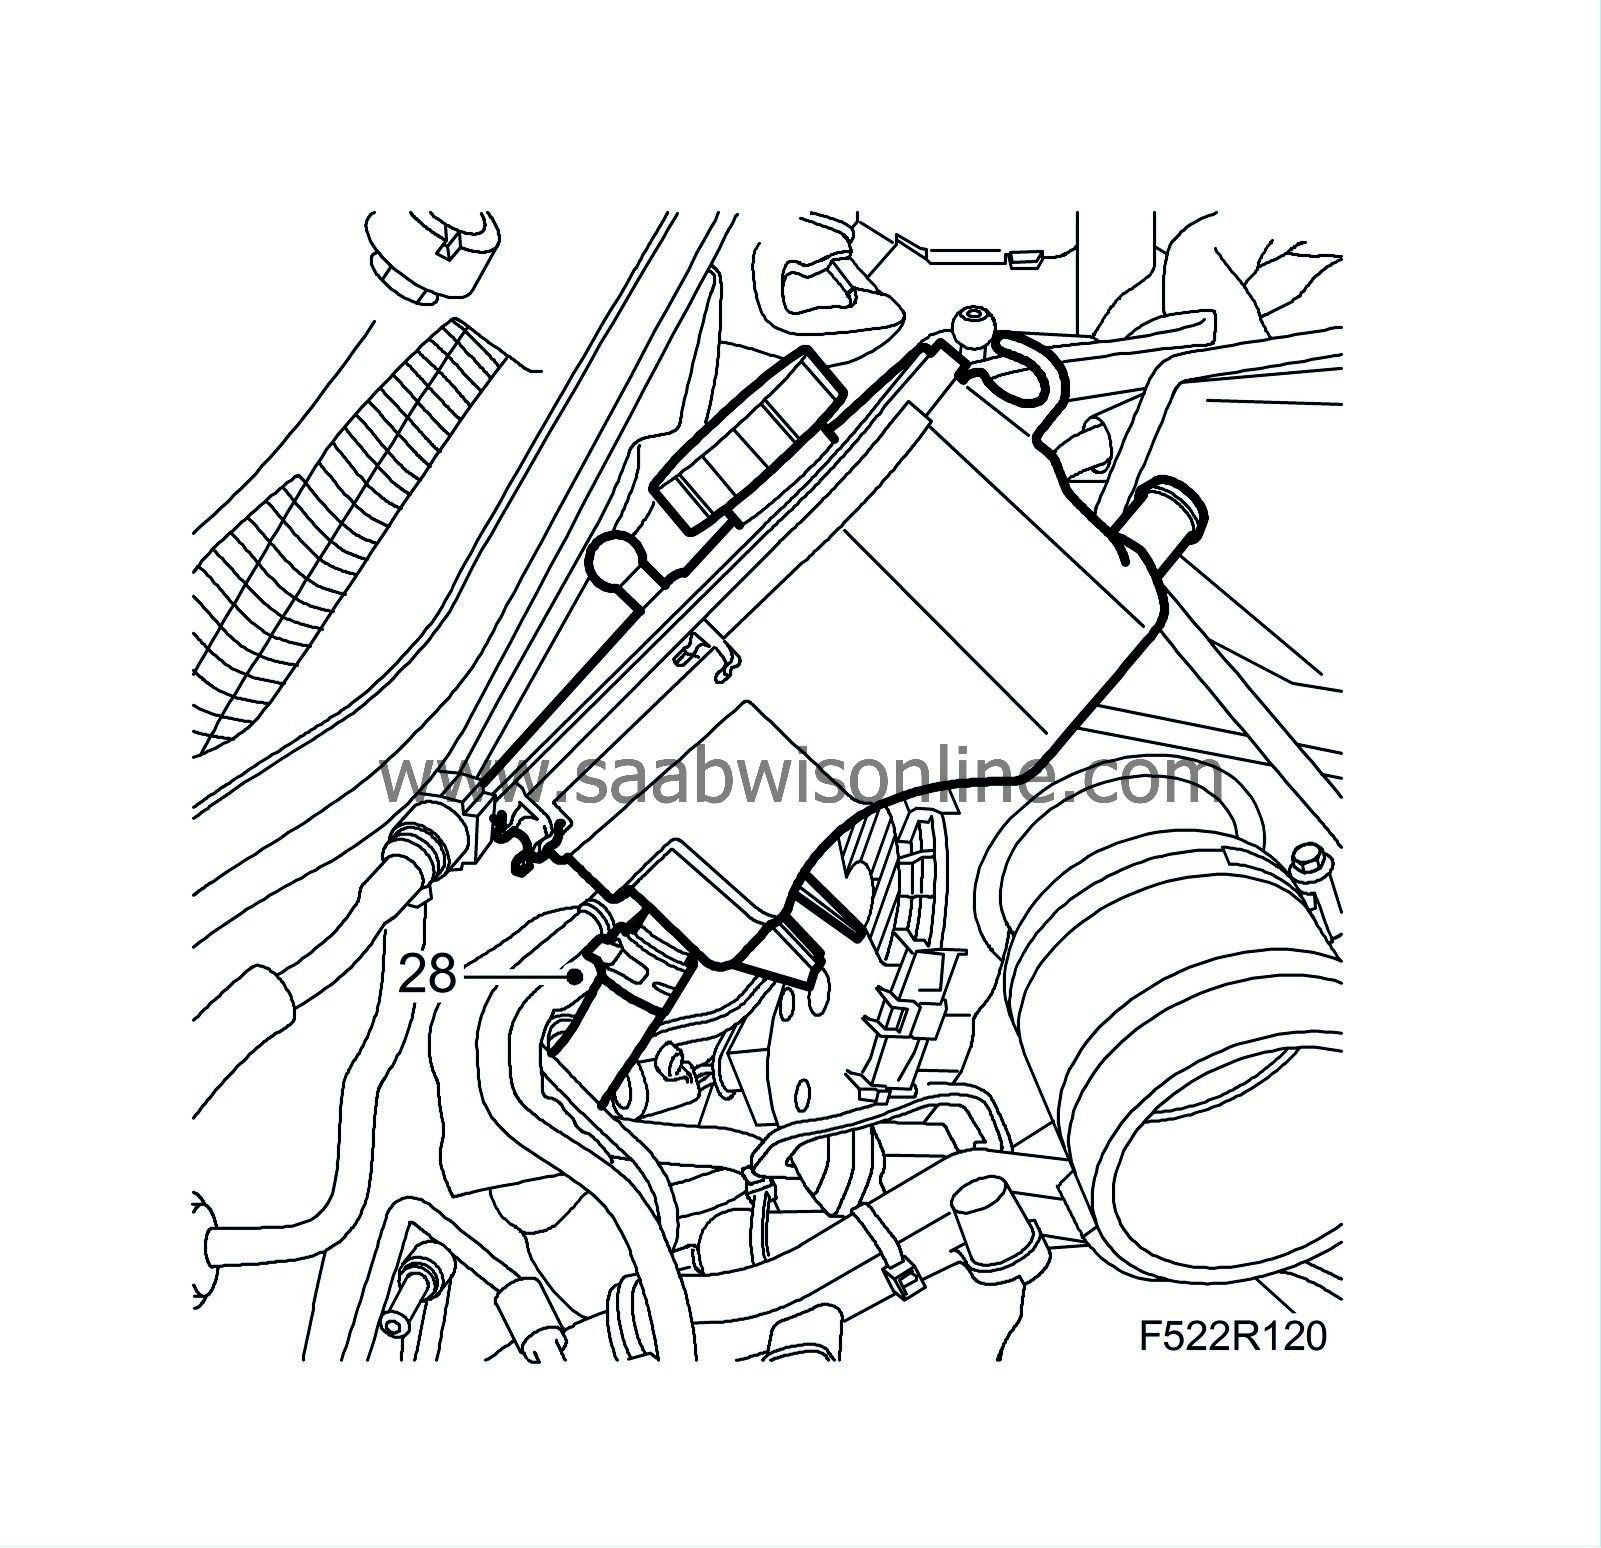
Fit the return hose to the power steering fluid reservoir.
|
|
| 29. |
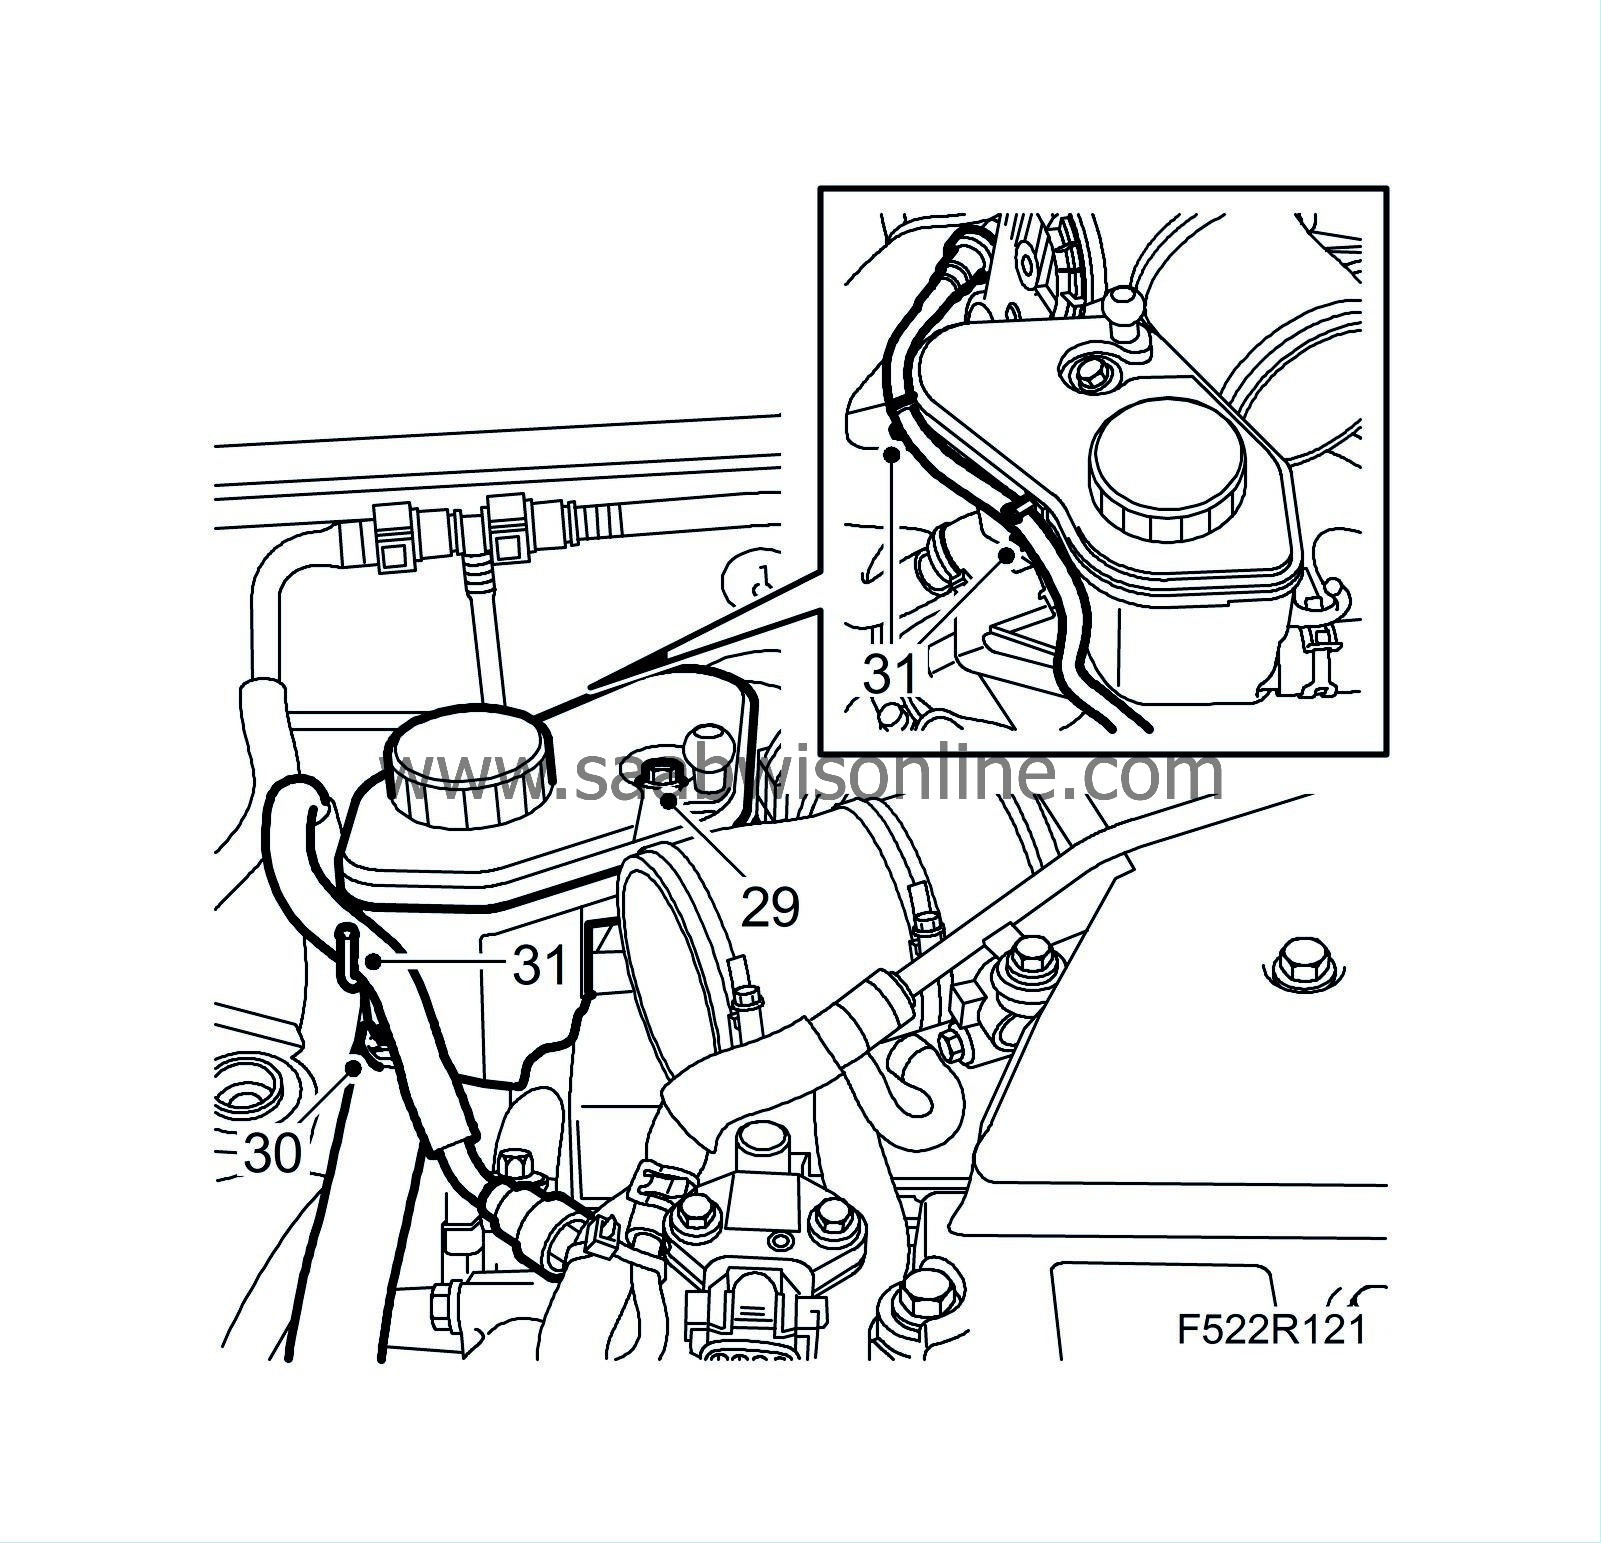
Fit the power steering fluid reservoir.
|
|
| 30. |
Fit the feed hose to the power steering fluid reservoir.
|
|
| 31. |
Fit the tank bleed hose and fuel hose to the power steering fluid reservoir clip.
|
|
| 32. |
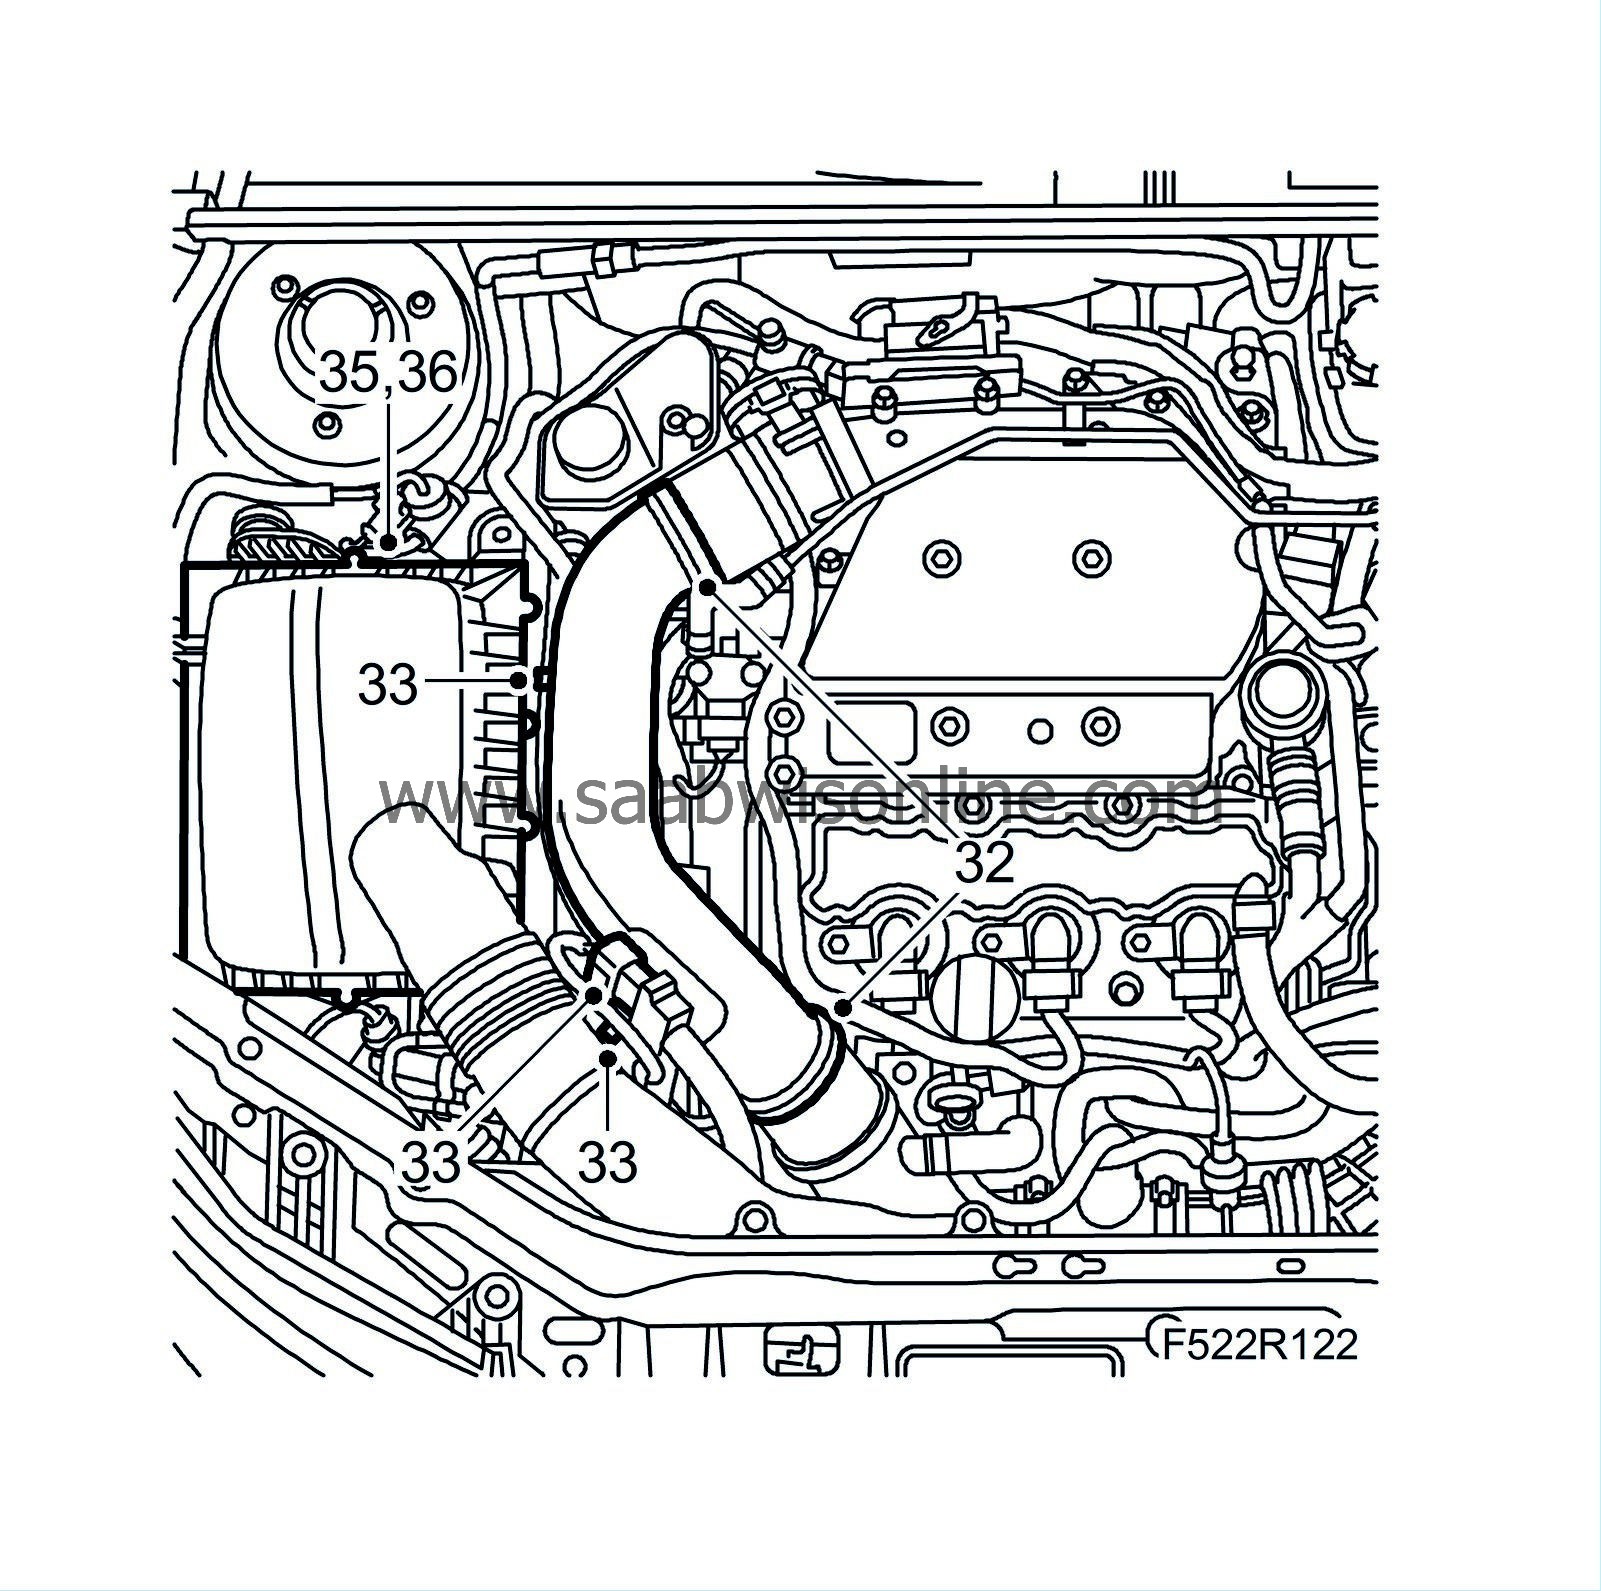
Fit the upper turbo delivery pipe.
|
|
| 33. |
Plug in the pressure sensor connector and fit the feed hose to the turbo delivery pipe.
|
|
| 34. |
Fit the upper engine cover.
|
|
| 35. |
Fit the air filter housing and air filter.
|
|
| 36. |
Fit the air filter cover.
|
||||||||||
| 37. |
Fill the power steering fluid according to specification,
bleed the power steering system
and check for leaks.
|
|
| 38. |
Fill the brake fluid to specification and
bleed the brake system
.
|
|
| 39. |
Remove the steering wheel fixing.
|
|
| 40. |
Road test the car on a flat road and check the position of the steering wheel. Adjust as necessary.
|
|

