Steering wheel lock unit, SCL
|
|
Steering wheel lock unit, SCL
|
|
Note
|
|
The steering column lock must be unlocked for removal. The key must be in the ignition switch in the LOCK position.
|
|
1.
|
Turn the key to LOCK and allow the key remain in the ignition switch.
|
Note
|
|
The steering column lock must be unlocked for this procedure.
|
|
|
3.
|
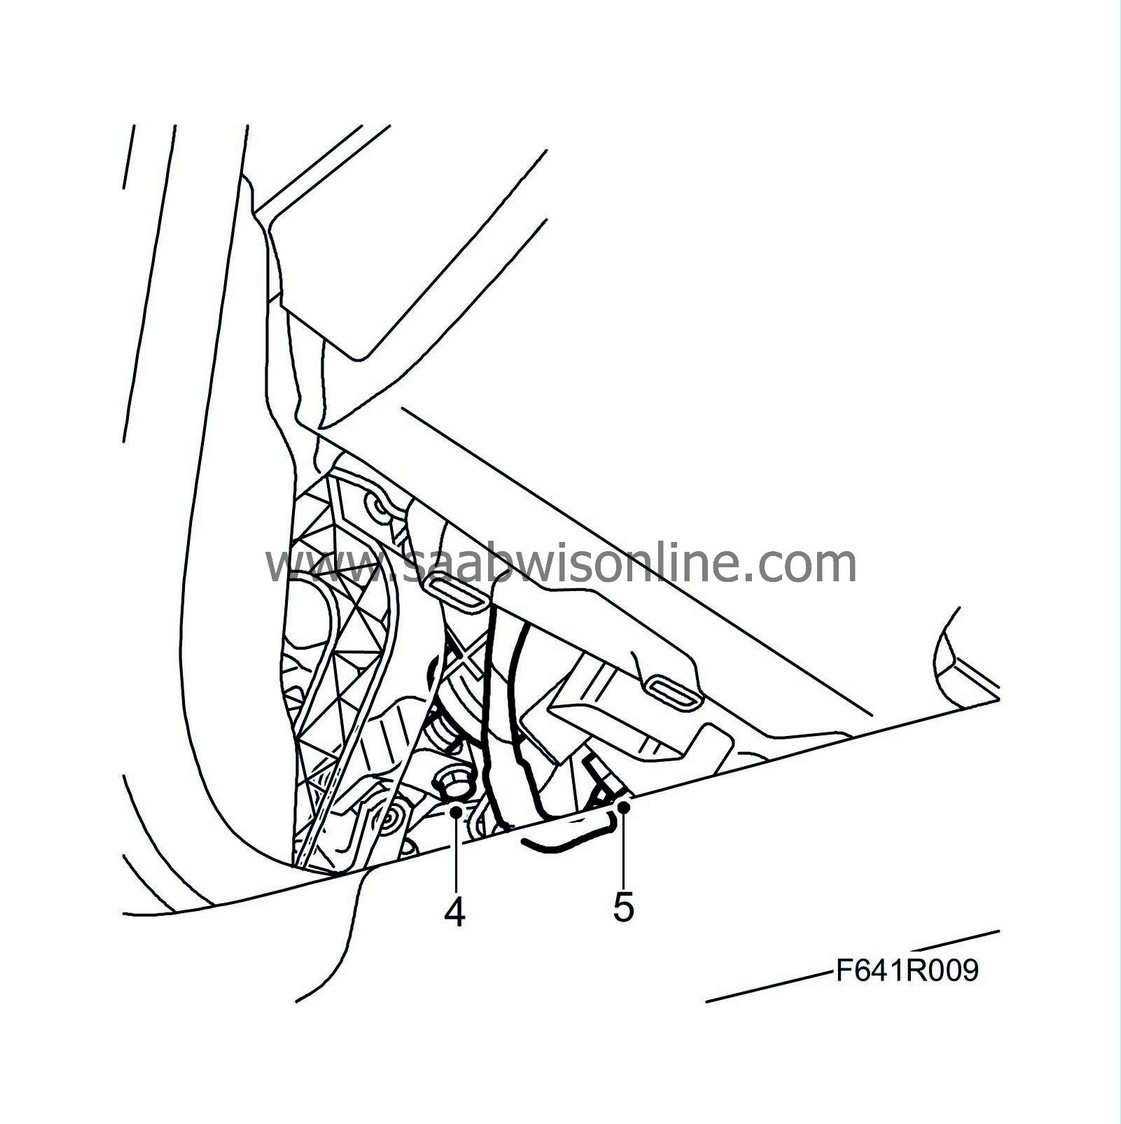
Turn the steering wheel so that the steering shaft joint can be accessed.
Fixate the steering wheel with fabric-backed tape to the instrument panel so as to avoid damaging the contact roller.
|
|
4.
|
Remove the steering shaft joint from the steering shaft.
|
|
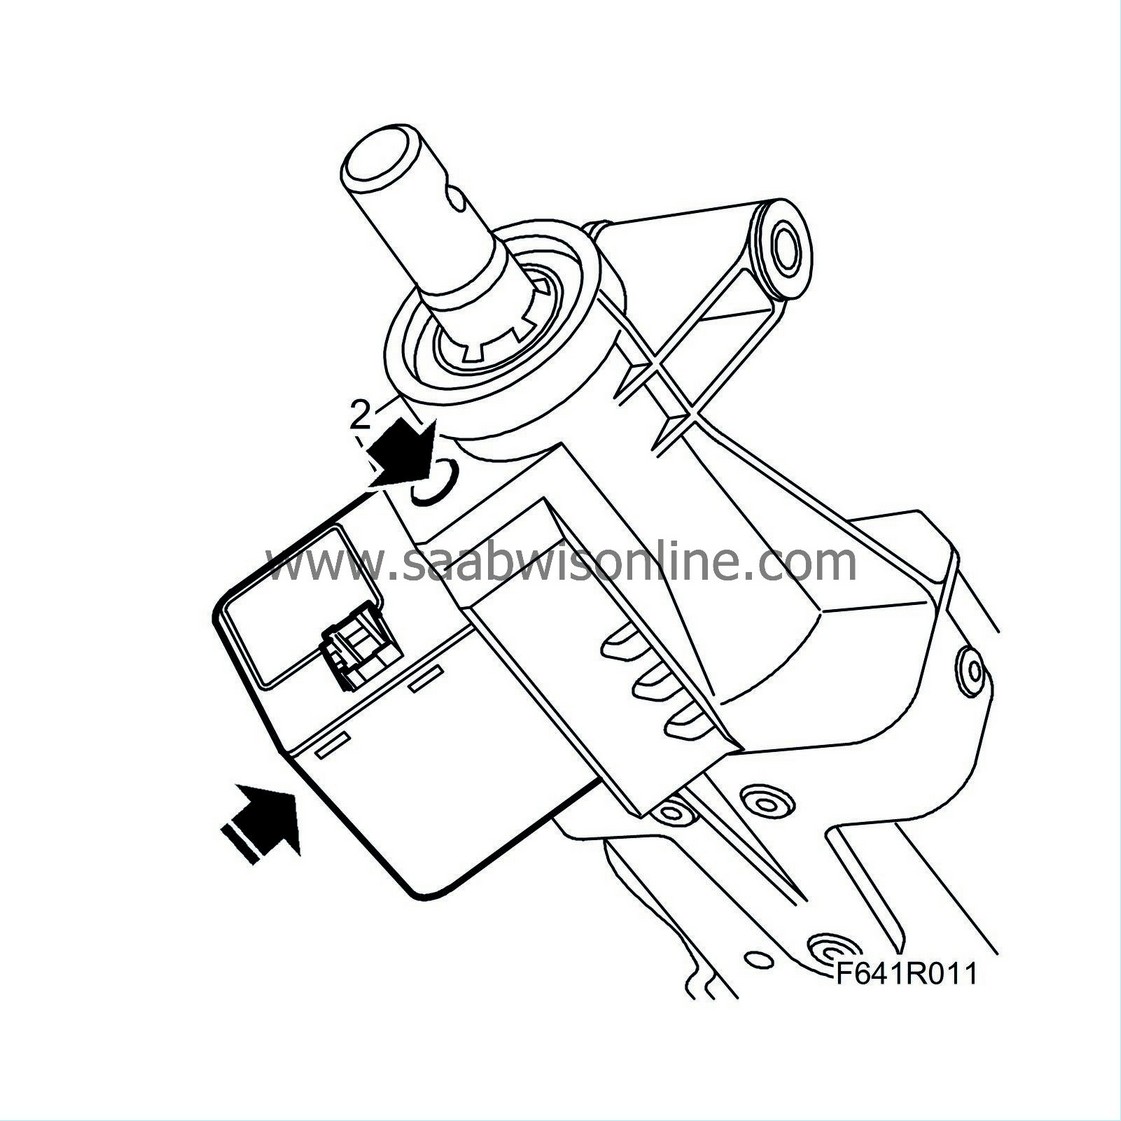
6.
|
Tighten the bolt fully to lift off the lock unit.

|
|
1.
|
If refitting the same lock unit:
Unscrew the bolt fully.
Apply
74 96 268 Threadlock
to the bolt and screw this into the lock unit.
|
|
2.
|
Position the lock unit and screw out the bolt.
Tightening torque 6 Nm (4.5 lbf ft)
|
Important
|
|
Tightening torque that is too high causes the lock piston to bind and as a result not lock/unlock. The message is shown in SID.
|
|
|
|
|
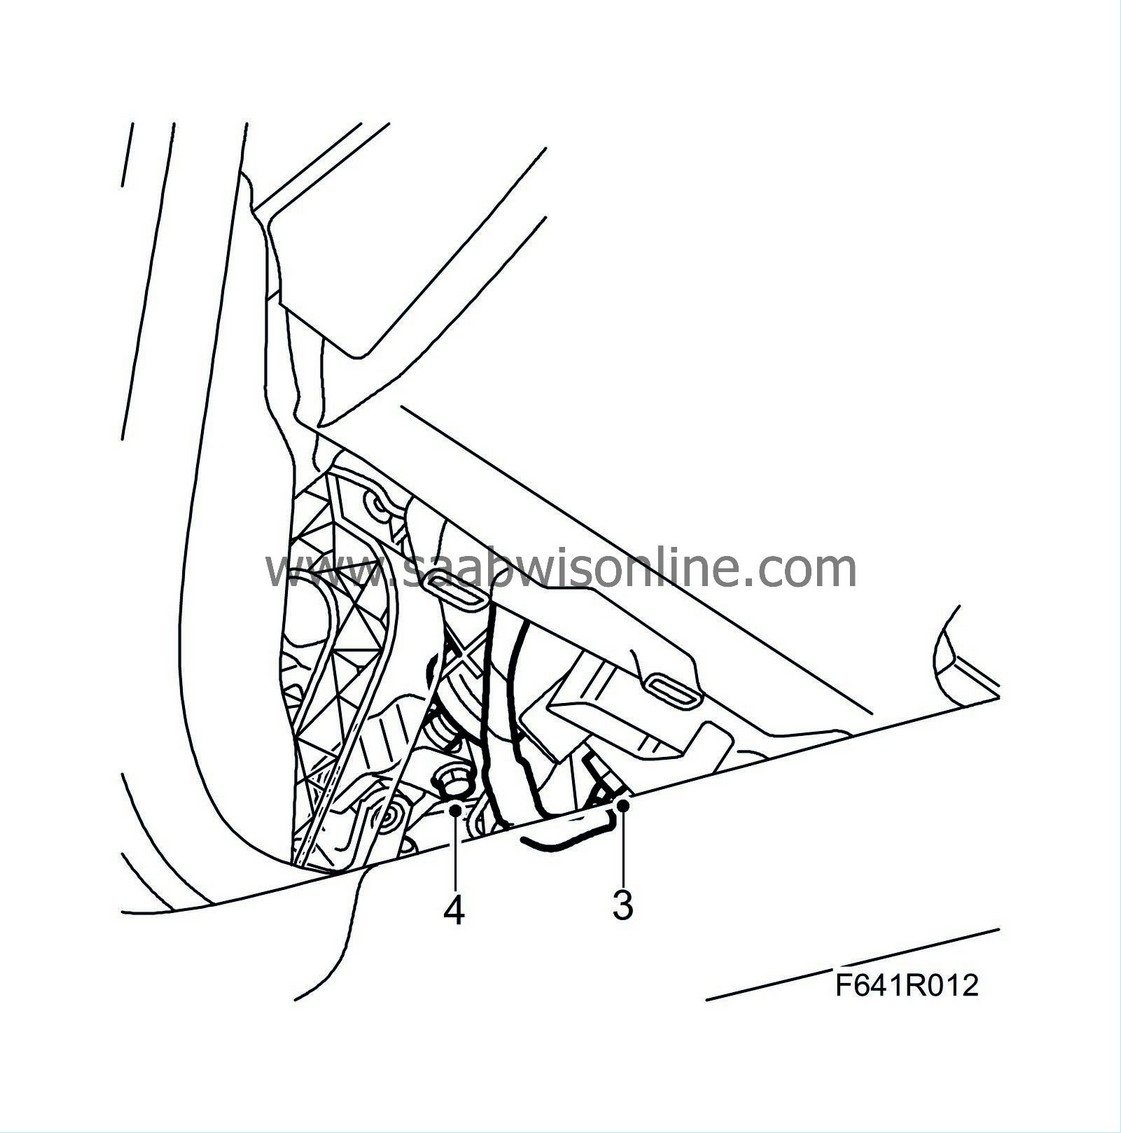
3.
|
Plug in the connector.
|
|
4.
|
Fit the steering shaft joint to the steering shaft. Clean the threads and apply
74 96 268 Threadlock
to the threads.
 Warning
|
|
Make sure the screws fits into the groove in the steering shaft.
|
|
|
|
|
|
Tightening torque 30 Nm (19 lbf ft)
|
|
6.
|
After fitting a new steering column lock unit:
Connect the diagnostic tool and program the unit to the car as follows.
|
|
|
6.b.
|
Select
Model Year(s)
|
|
|
6.c.
|
Select
Vehicle Type(s)
|
|
|
6.f.
|
Select
Other Components
|
|
|
6.i.
|
Follow the instructions in the diagnostic tool
|
|
7.
|
Disconnect the diagnostic tool.
|
|
8.
|
Check the function of the steering column lock.
|
Note
|
|
When the unit has been disconnected from the voltage supply the car must be driven at a speed of at least 7km/h and then stopped before the function is operative.
|
|


