(234-2718) Engine running poorly
Symptom: Engine running poorly and/or CHECK ENGINE Lamp lit. Diagnostic trouble code P0190(07) in EDC16.
|
TECHNICAL SERVICE BULLETIN
|
|
Bulletin Nbr:
|
234-2718
|
|
Date:
...........
|
December 2008
|
|
Market:
|
enl. separat lista
|
Saab 9-3 M05- with engine alternative Z19 DT and Z19 DTH
Saab 9-5 M06- with engine alternative Z19 DTH
Corrosion in the pressure sensor's connector can cause engine to run poorly and/or cause the CHECK ENGINE Lamp to light. Diagnostic trouble code P0190(07) will be shown in EDC16. In some cases, restart is not possible until after 15 minutes.
In the case of customer complaint, the following procedure must be carried out.
Symptom description
Engine running poorly and/or CHECK ENGINE Lamp lit. Diagnostic trouble code P0190(07) in EDC16.
93 185 626 Fuel pressure sensor
93 191 457 Cable kit
51 08 238 Cable sleeves (3 per car)
Removing
|
1.
|
Remove the negative terminal clamp from the battery post.
|
|
2.
|
Remove engine cover and sound insulation.
|
|
3.
|
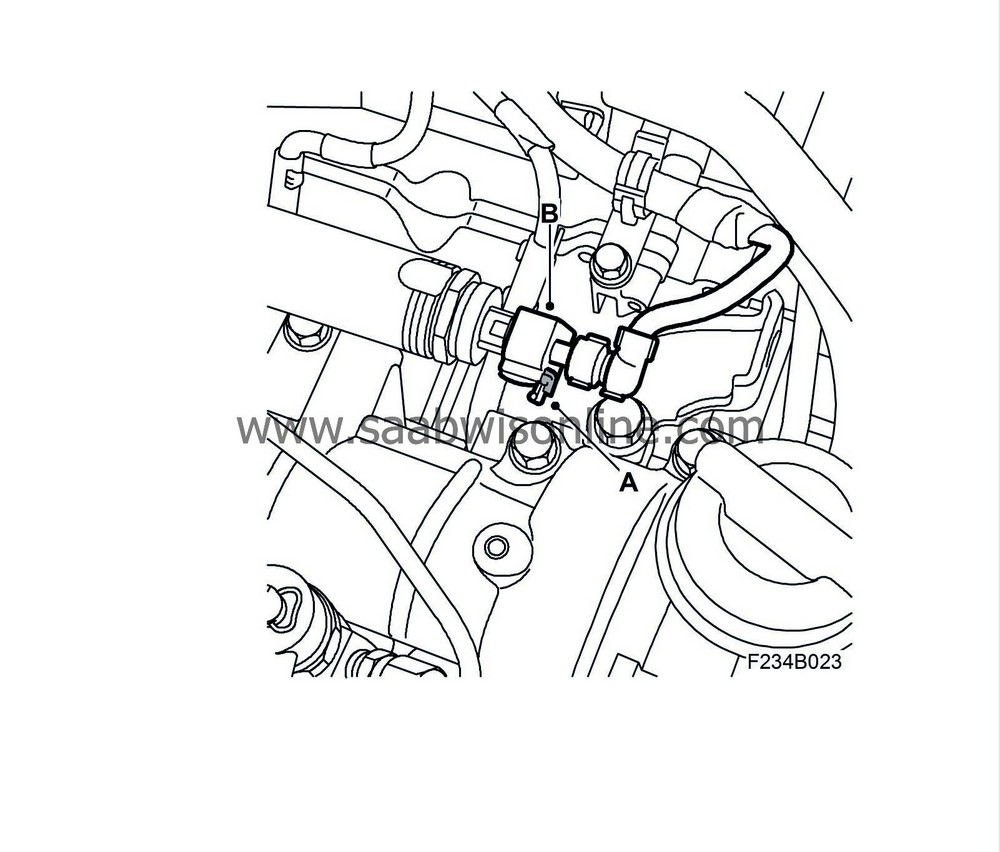
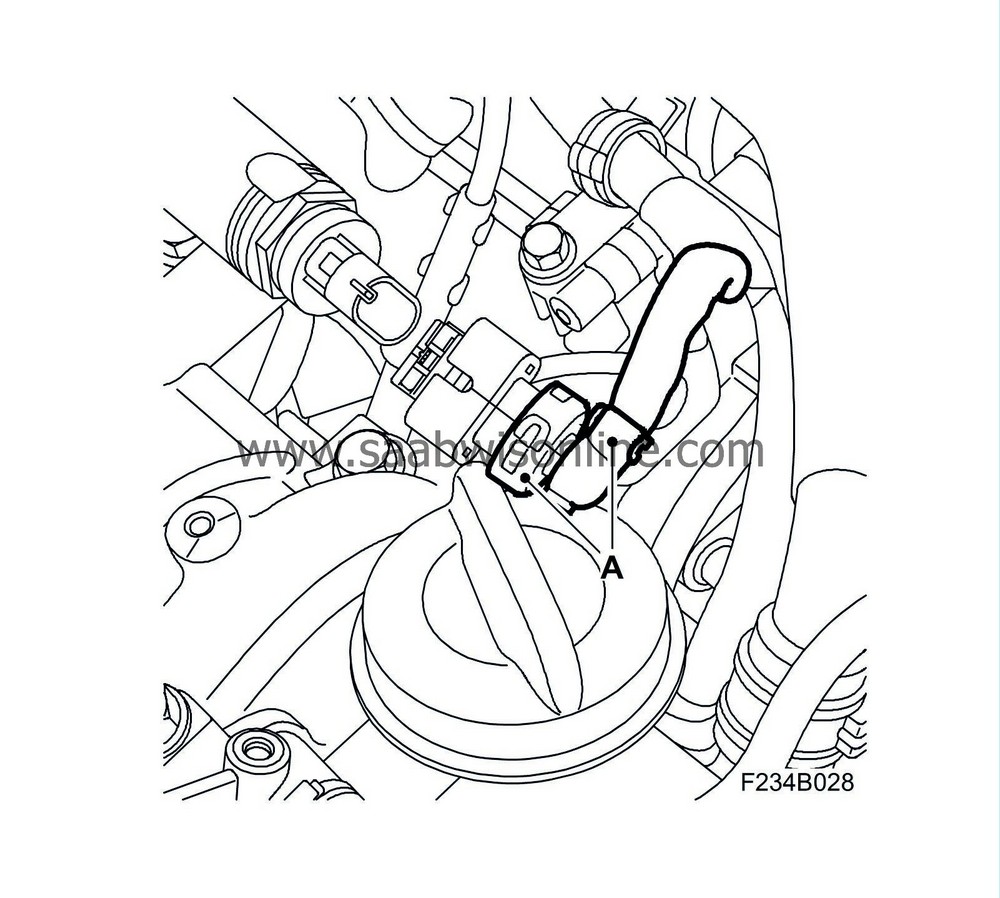
Loosen secondary locking (A) and remove connector (B) from fuel pressure sensor on the injector pipe.
|
|
4.
|
Remove connector's two protective covers and pull the cables out of the protective cover.
|
|
5.
|
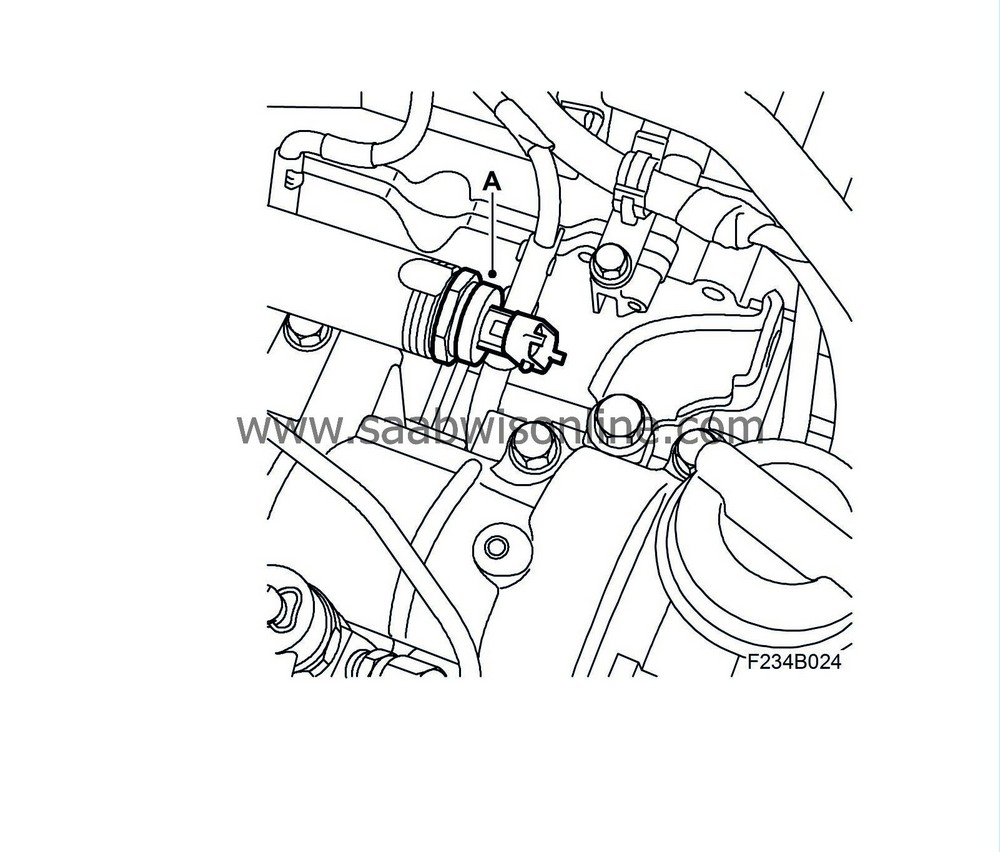
Remove fuel pressure sensor (A) and place a rag underneath to catch diesel fuel from the fuel rail.
|
Fitting
|
1.
|
Fit a new fuel pressure sensor (A).
Torque 35 Nm ± 5 Nm (26 lbf ft ± 4 lbf ft)
|
|
2.
|
Cut the old cables according to the diagram so that the connector sleeves can fit in the protective cover.
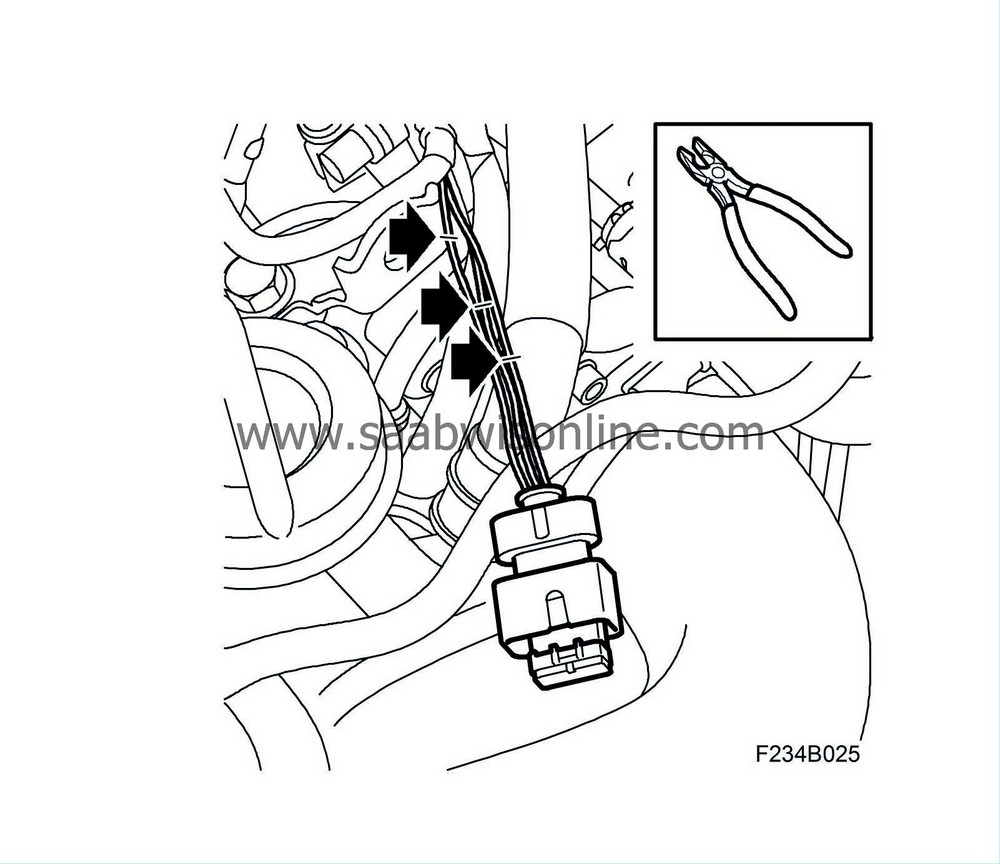
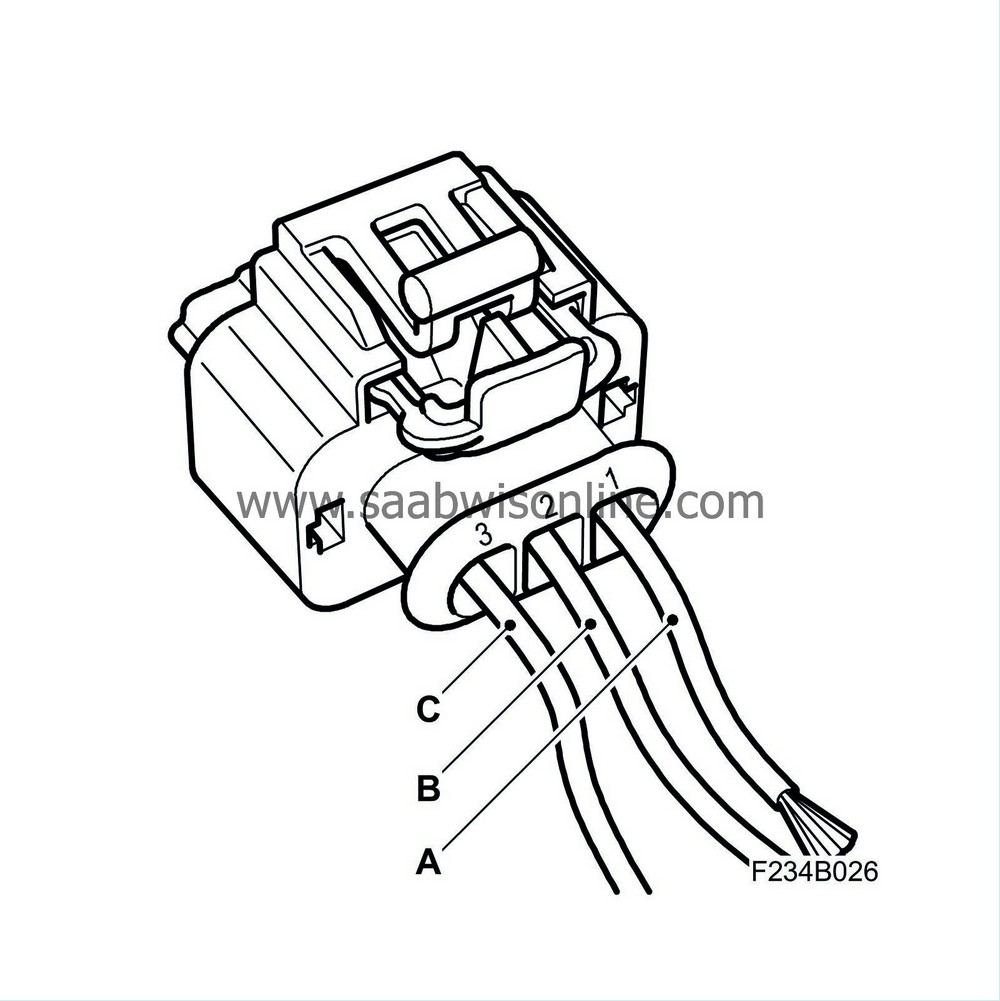
Fit connector sleeve 51 08 238 with plier 86 12 053. Connect the cables according to diagram, see Tis2Web - 9-3 (9440) - 3. Electrical System - Wiring harness and components - Wiring harness - Repair instructions - Repairing wiring harness.
1 - Black/White wiring (A)
2 - Yellow wiring (B)
3 - Red/Green wiring (C)
Be careful not to connect the wiring harness too close to the contact housing as the contact housing's protective cover will lock around the wiring harness' protective cover.
|
Note
|
|
Work with one cable at a time to ensure that the lengths are correct.
|
|
|
3.
|
Thread shrink hoses and secure by heating.
|
|
4.
|
Fit pin to connector's position.
1 - Black/White wiring (A)
2 - Yellow wiring (B)
3 - Red/Green wiring (C)
|
|
5.
|
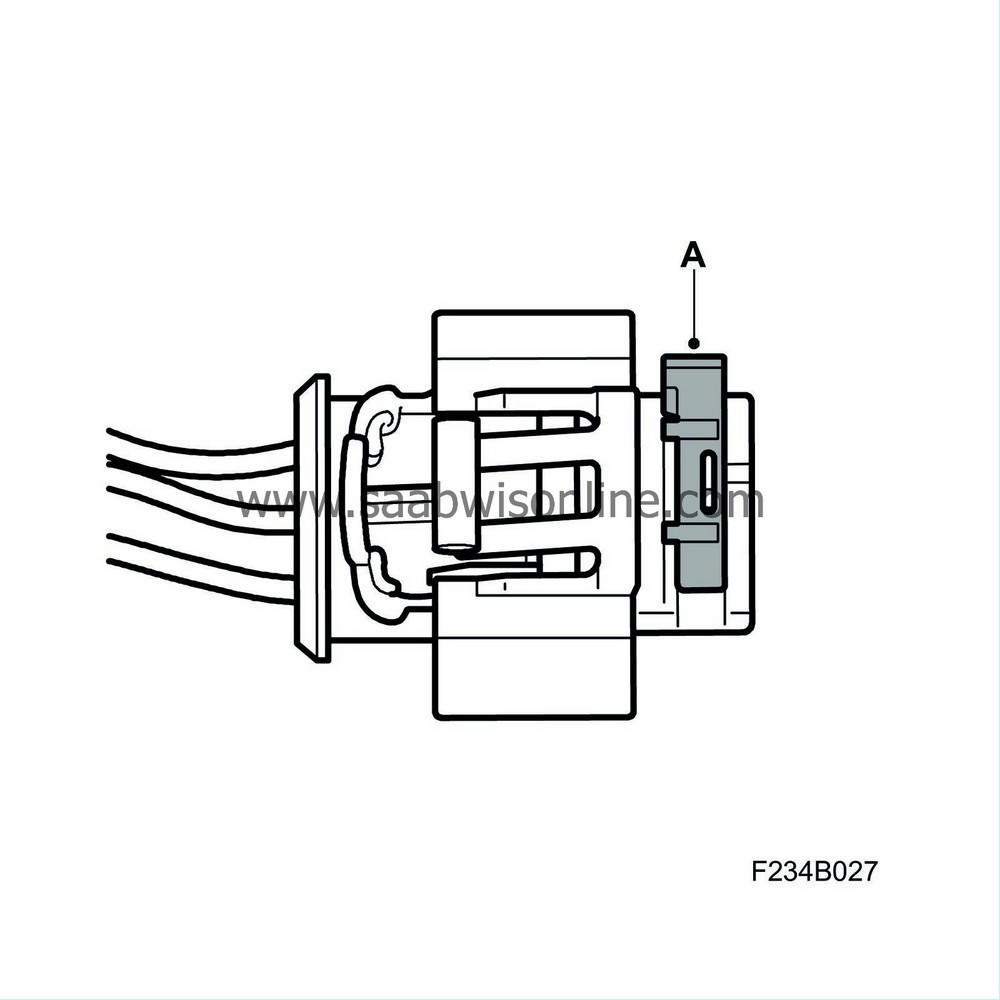
Lock connector sleeves in connector by pushing to secure secondary locking (A).
|
|
6.
|
Fit both of the connector's protective covers (A) supplied with the kit.
|
|
7.
|
Place wiring harness in protective cover, tape with tape intended for use in engine compartments. See www.tesa.com for suitable tapes.
|
|
8.
|
Fit contact housing (B) to the fuel pressure sensor and push secondary locking (A) to secure.
|
|
9.
|
Fit insulation and engine cover.
|
|
10.
|
Fit negative terminal clamp to battery.
|
|
11.
|
Clear diagnostic trouble codes.
|
|
Warranty/Time Information
|
In the case of customer complaint and if the car is
within the warranty period
, use the following information to fill out the claim:
Failed Object: 24120
Fault/Reason code: 66
Location code: 09
Repair/Action code: 01
Time: 0.6 hr


