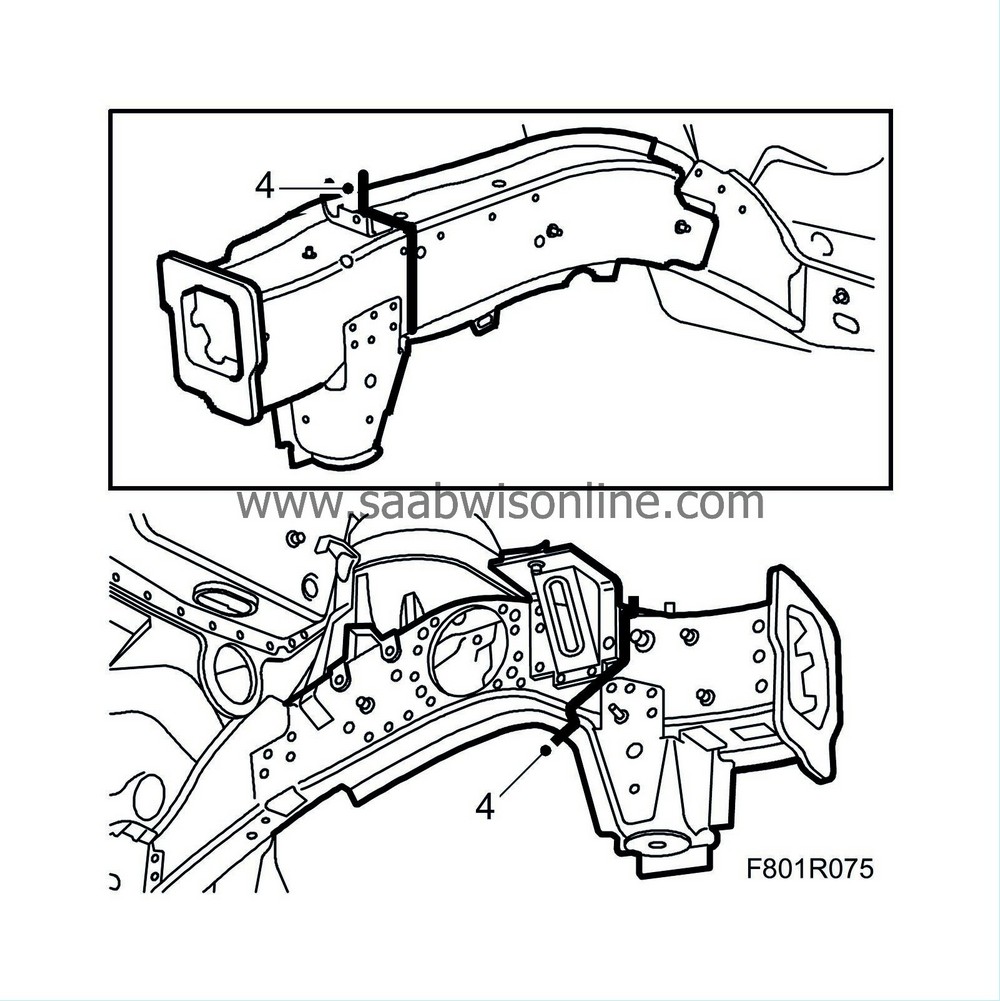
Part of front frame member
|
|
Part of front frame member
|
|
1.
|
Position the car in the alignment jig.
|
|
4.
|
Cut the front frame member in front of the mark depending on the damage. The member is reinforced and must not be cut behind the mark. The top illustration shows the right-hand frame member. The bottom one shows the left-hand member and if the battery bracket has been removed, the cut can be made in the middle of the bracket location.
|
|
5.
|
Cut the outside of the member in front of the mark depending on the damage.
|
|
6.
|
Drill out the necessary spot welds depending on the damage. Knock out the outer panel.
|
|
1.
|
Straighten and grind all surfaces which are to be welded.
|
|
2.
|
Apply welding primer to the surfaces that are to be welded.
|
|
3.
|
Cut the replacement panels so that they fit against the cut surfaces.
|
|
4.
|
Fit the member in place and secure with some clamps.
|
|
5.
|
Position the part and align it using the alignment jig's measuring system.
|
|
6.
|
Weld on the member. Check the weld from the outside before fitting the outer panel.

|
|
10.
|
Wash away surplus welding primer. Welding primer reduces the adhesion of paint, filler and sealant.
|
|
11.
|
Apply primer to all bare metal surfaces.
|
|
12.
|
Seal joints and seams with sealant.
|
|
13.
|
Apply underseal after painting. Use Terostat 9320.
|
|
14.
|
Apply rust protector after painting. Use Terotex HV 400.
|


