PRE-RELEASE
Part of side panel, 5D
| Part of side panel, 5D |
Depending on the damage, there are two method variants with different locations for applying the cut: part of side panel and part of rear side panel.
| Part of side panel |
| 1. |
Remove roof carrier anchor point.
|
|
| 2. |
Protect the roof from weld and grinding spray.
|
||||||||||
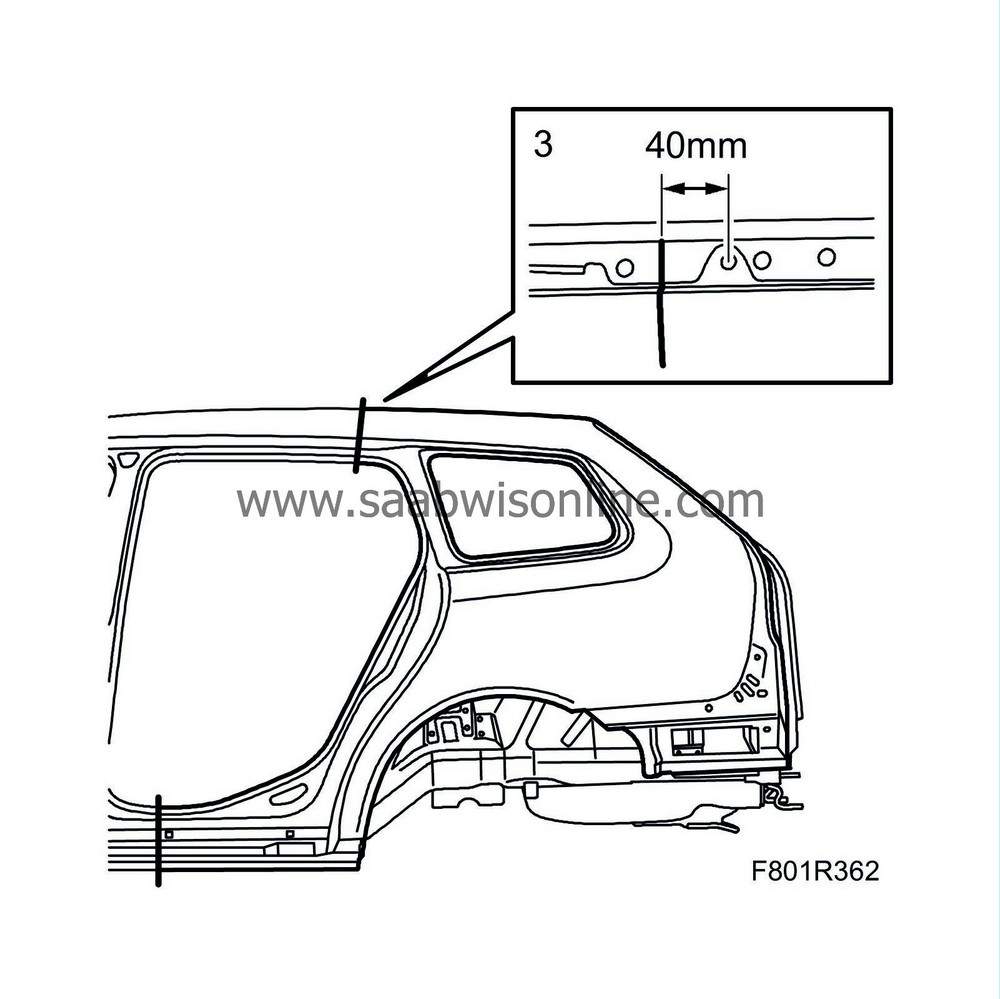
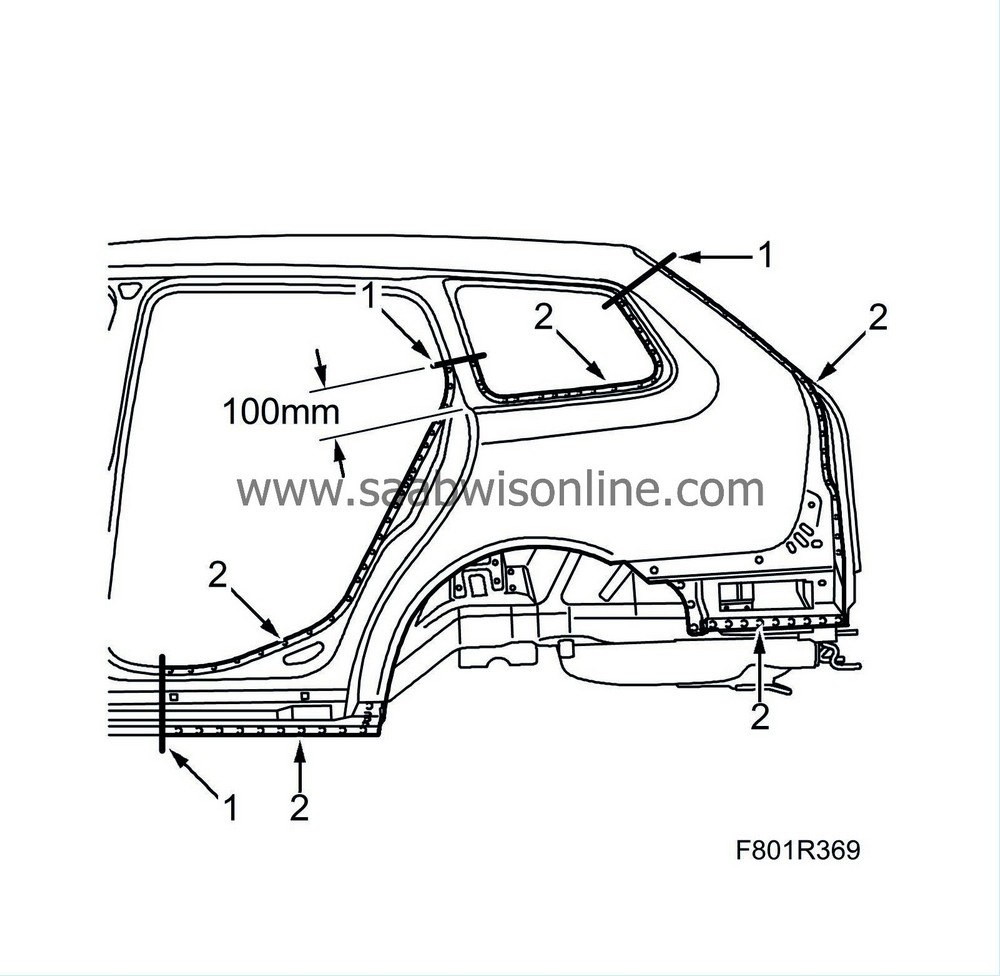
| 3. |
Cut according to the markings. Cut only through the roof panel and side panel.
|
|
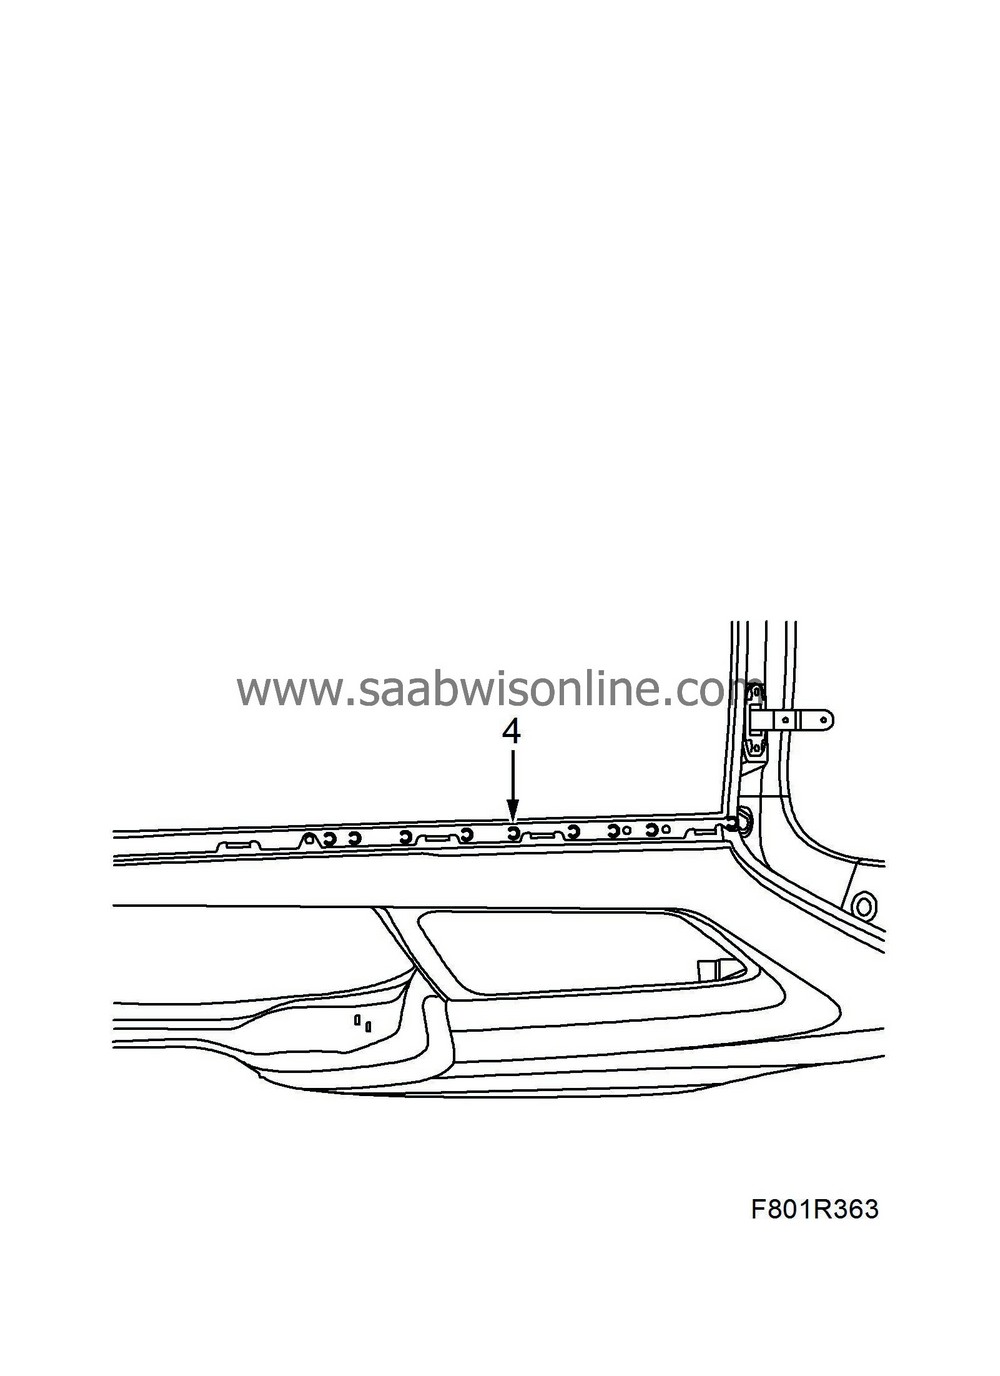
| 4. |
Drill out the spot welds on the roof between the C and D-pillars. Drill only through the roof panel and side panel.
|
|
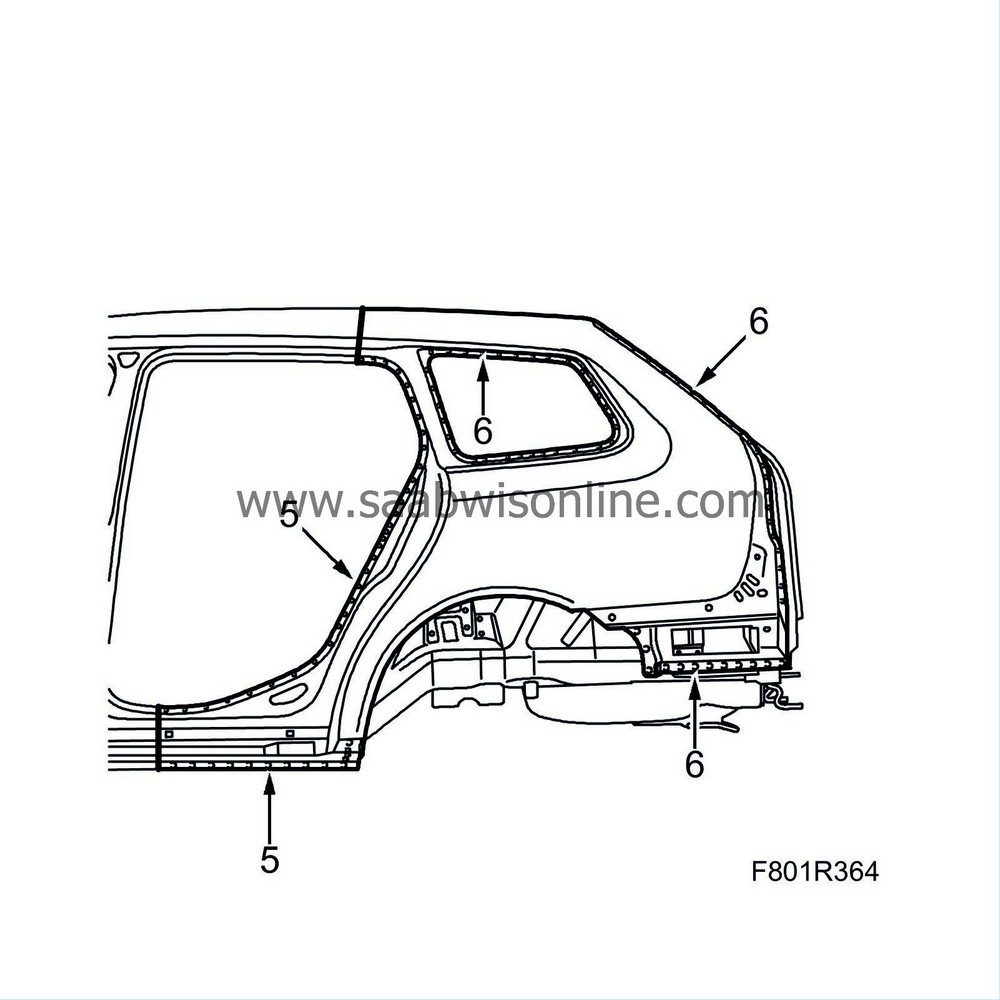
| 5. |
Drill out the spot welds holding the outer side panel in the door aperture and sill.
|
|
| 6. |
Drill out the spot welds holding the outer side panel at the rear side window and rear bumper abutment.
|
|
| 7. |
Knock loose the side panel and bend it off from the adhesive on the edge of the wheel housing. Pull out the side panel from the roof panel above.
|
|
| 8. |
Align any deformed sheet metal or panels.
|
|
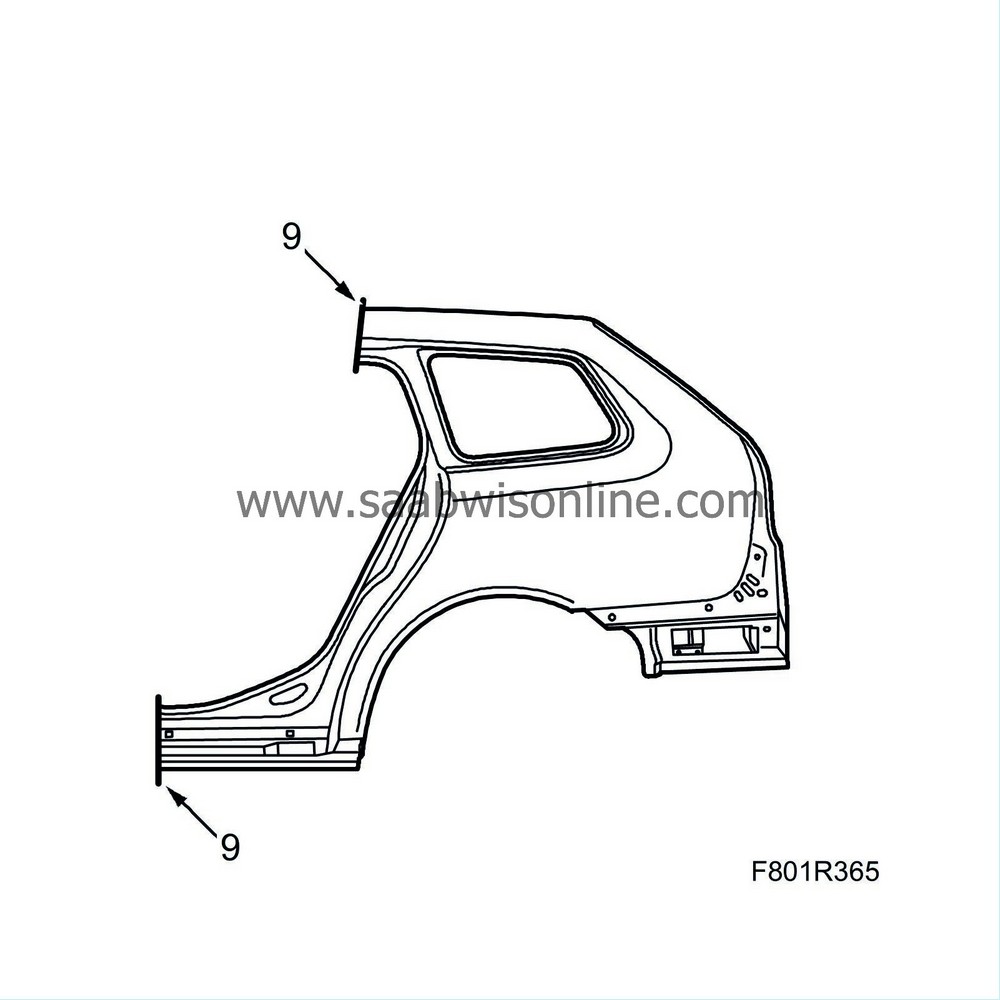
| 9. |
Cut and position the spare part.
|
|
| 10. |
Drill holes for plug-welding in the spare part.
|
|
| 11. |
Grind clean the surfaces to be welded on the body and the spare part.
|
|
| 12. |
Apply welding primer to the surfaces to be spot and plug welded. Use Teroson Zink Spray
|
|
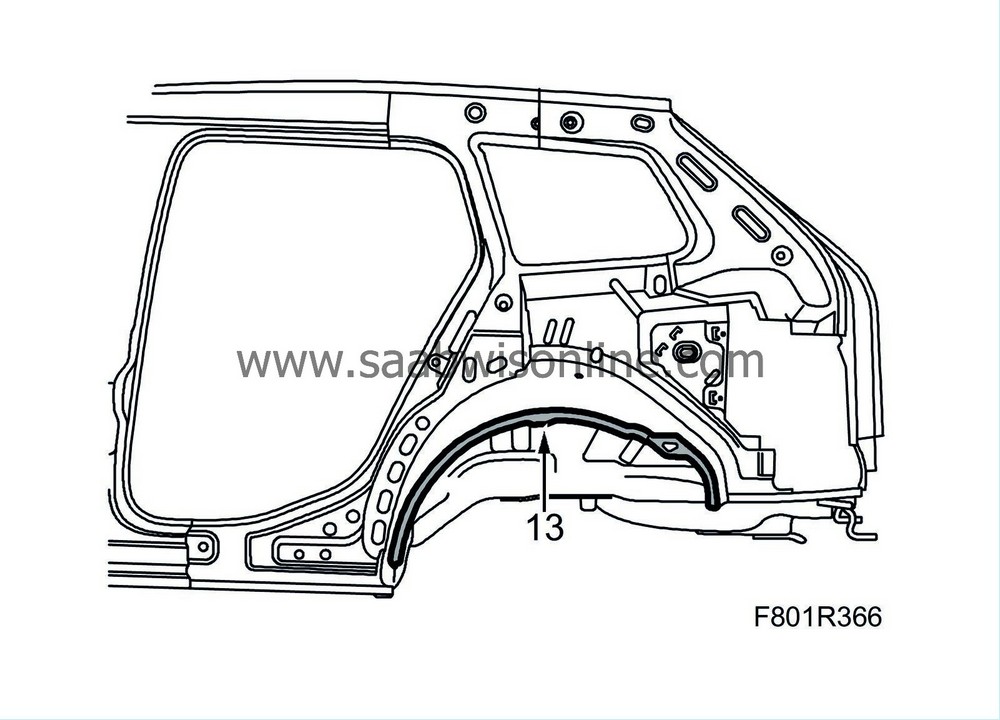
| 13. |
Apply Teroson 6700 to the edge of the outer wheel housing.
|
|
| 14. |
Position the spare part by moving it in under the roof and securing it with a few welding clamps.
|
|
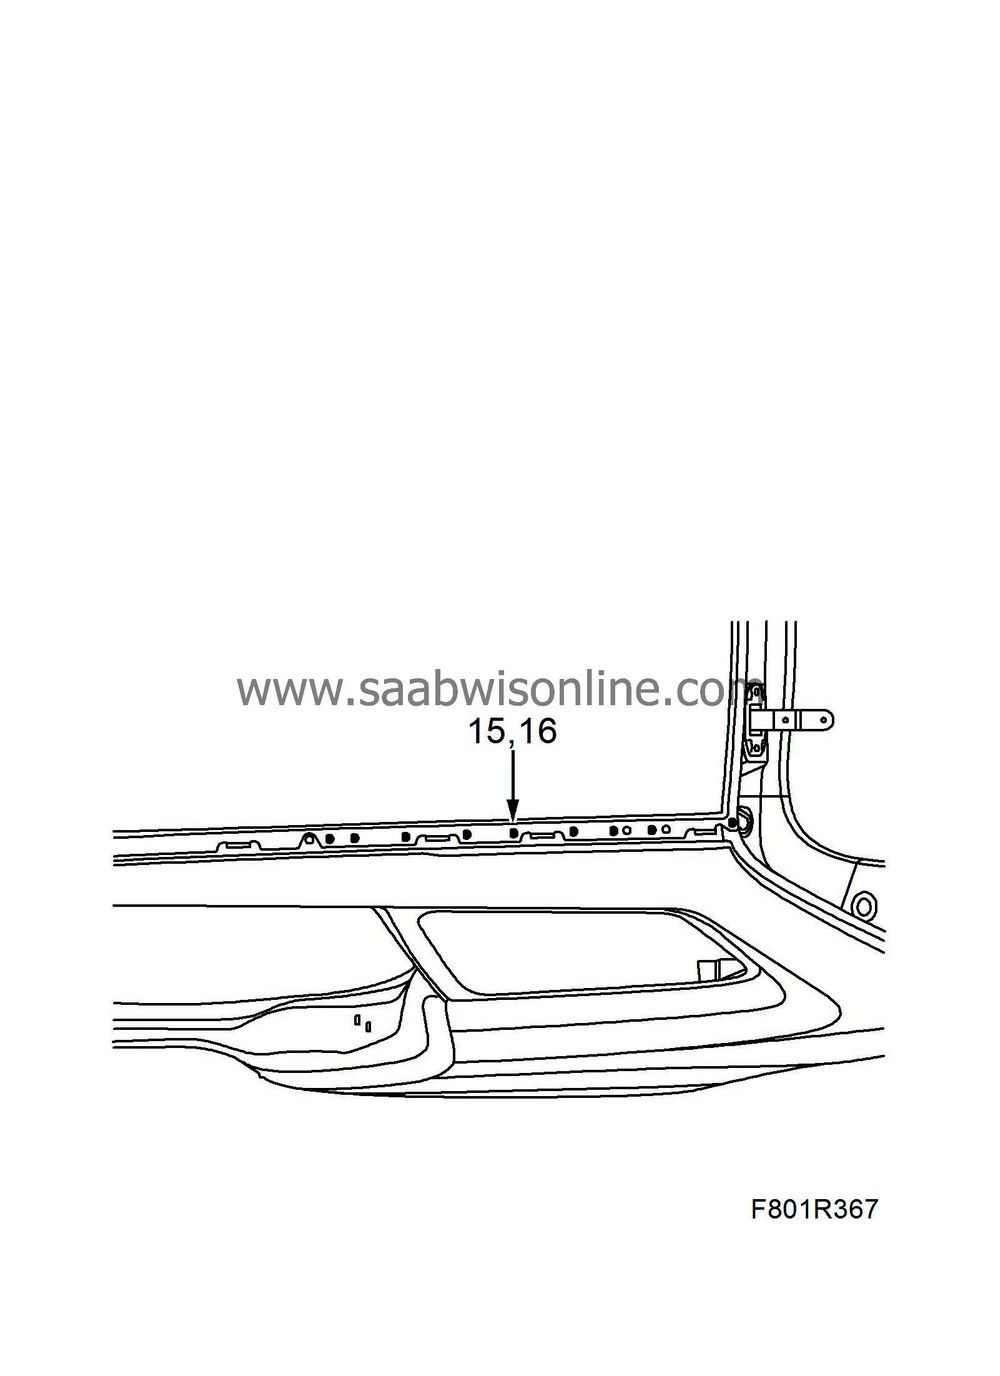
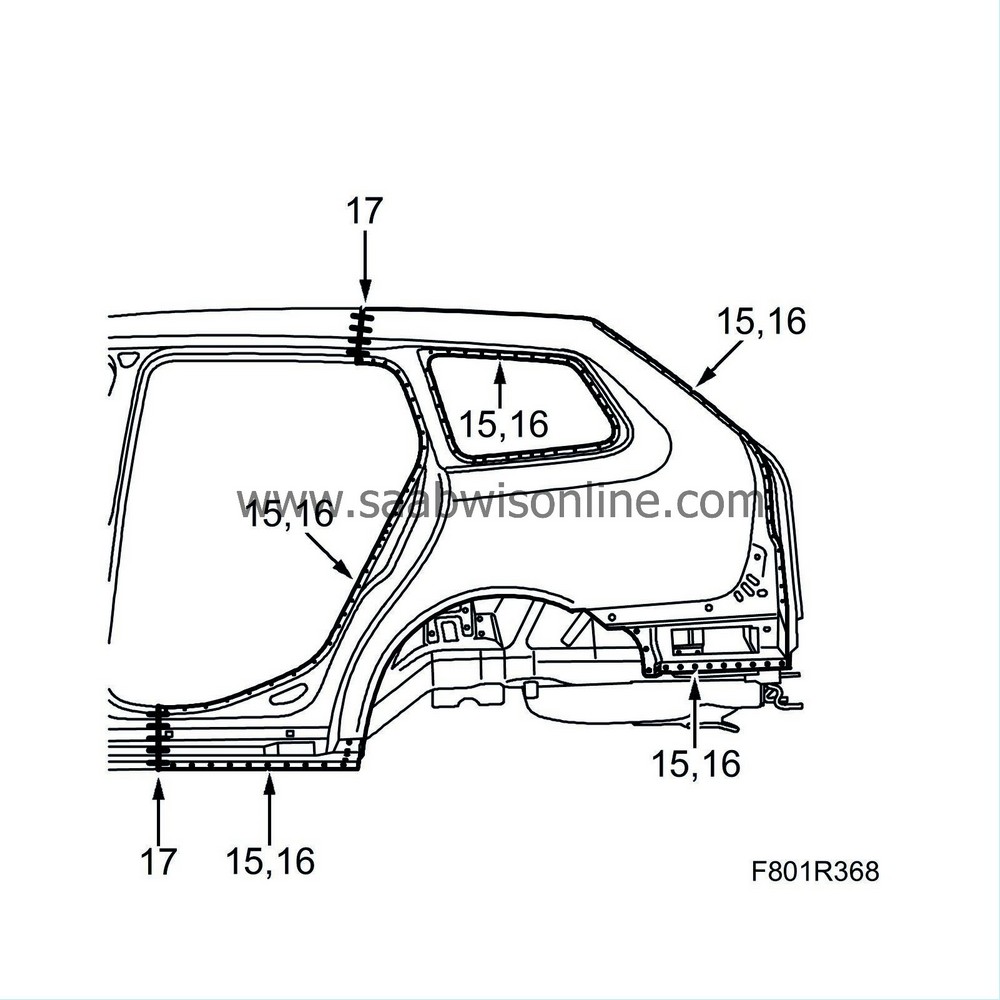
| 15. |
Drill holes for plug welding in the new side panel as illustrated.
|
|
| 16. |
Spot and plug weld on the spare part.
|
|
| 17. |
Seam weld the joints. Note that the weld must go through two panels, the roof panel and the side panel.
|
|
| 18. |
Apply rust protector to the roof edge and side panel after painting.
|
|
| Part of rear side panel |
| Important | ||
|
Do not cut the metal underneath. |
||
| 1. |
Cut according to the markings.
|
|
| 2. |
Drill out the spot welds.
|
|
| 3. |
Knock loose the side panel and bend it loose from the adhesive on the wheel housing. Align any deformed metal.
|
|
| 4. |
Adjust and align all the fitting surfaces
|
|
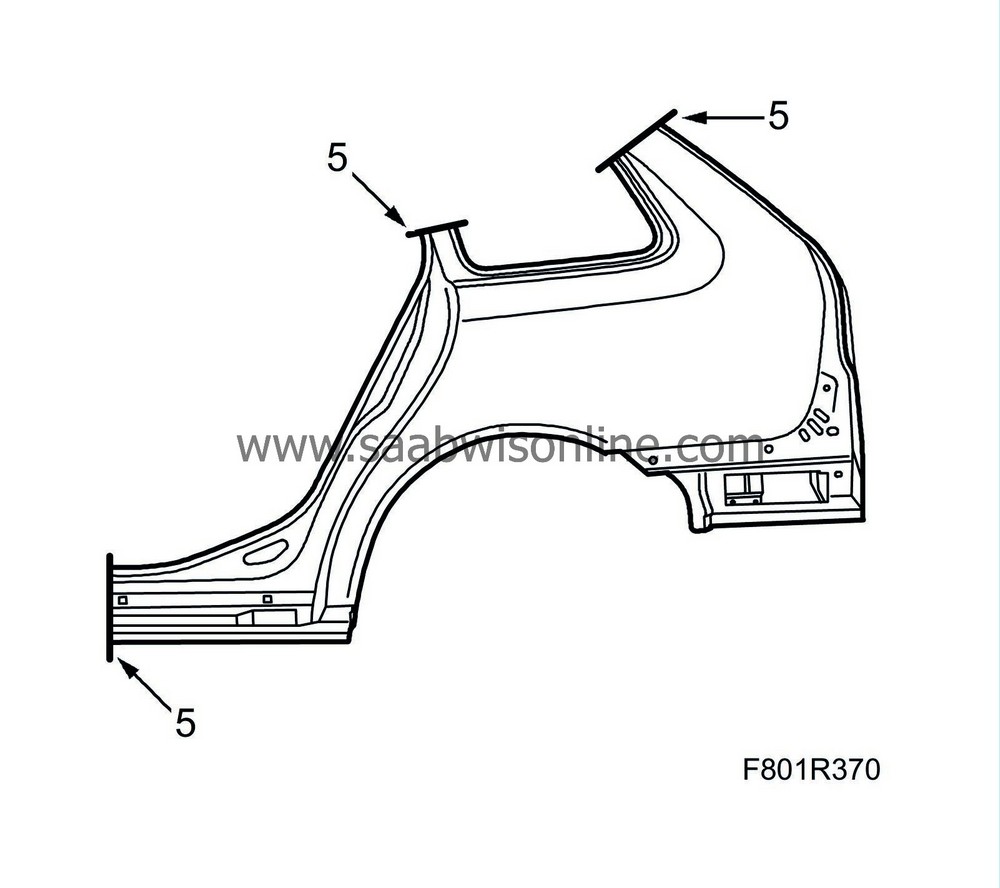
| 5. |
Cut the spare part. Drill holes for plug welds where appropriate.
|
|
| 6. |
Grind clean the surfaces to be welded on the body and the spare part.
|
|
| 7. |
Apply welding primer on the surfaces to be welded. Use Teroson Zink Spray.
|
|
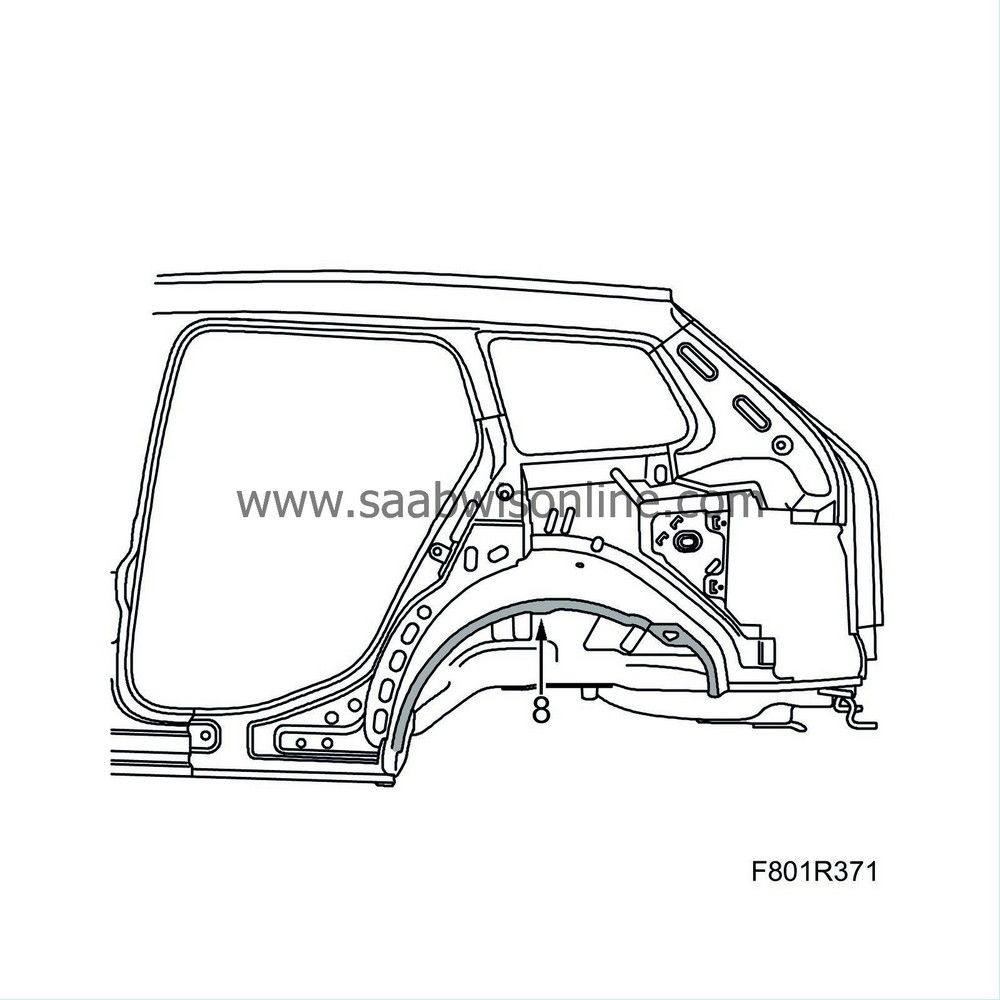
| 8. |
Apply Teroson 6700 to the edge of the outer wheel housing.
|
|
| 9. |
Put in place the spare part and secure it with some welding clamps.
|
|
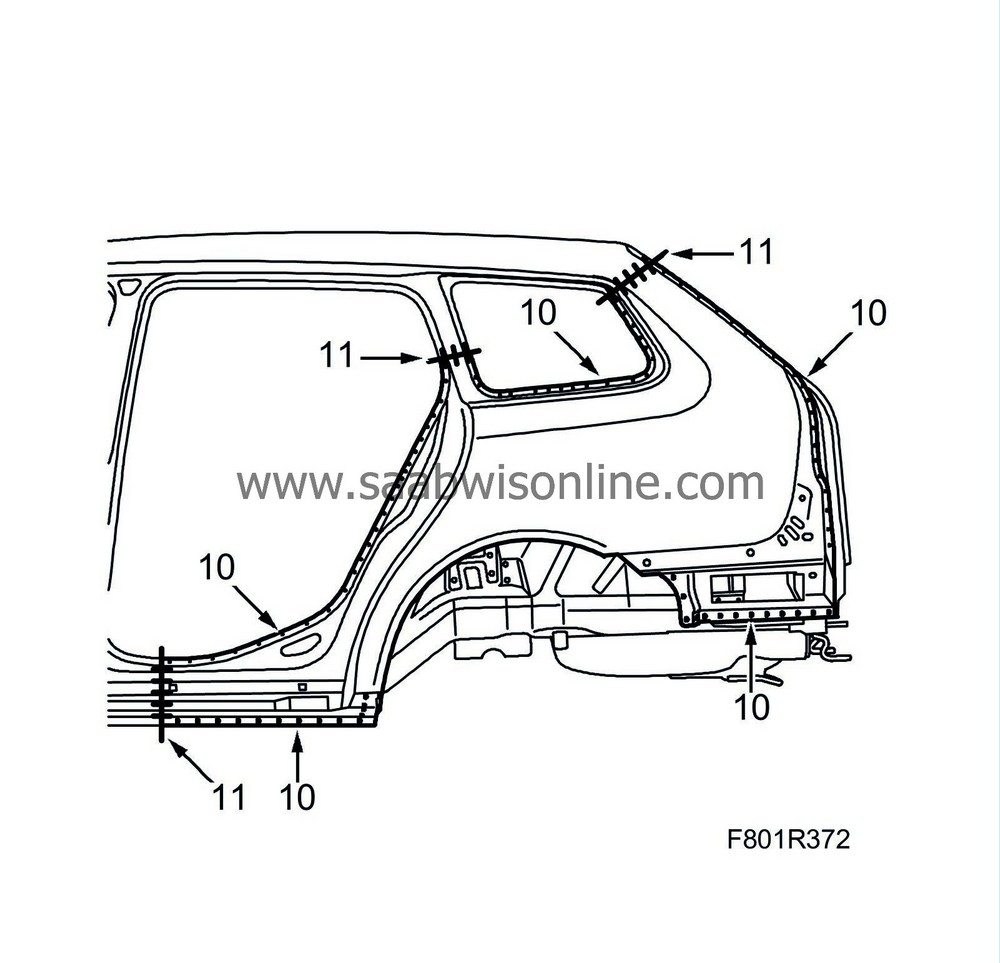
| 10. |
Spot weld on the spare part and plug weld where appropriate.
|
|
| 11. |
All-weld the joints.
|
|
| 12. |
Grind the welds.
|
|
| 13. |
Wash away surplus welding primer. Welding primer reduces the adhesion of paint, filler and sealant.
Apply etching primer to all surfaces that have been ground clean. |
|
| 14. |
Seal joints and seams with sealant.
|
|
| 15. |
Apply rust protector to the side plate after painting. Use Terotex HV 400.
|
|


