PRE-RELEASE
Compressor high and low pressure pipes, Z19DT/DTH
| Compressor high and low pressure pipes, Z19DT/DTH |
| Important | ||
|
The A/C receiver and the compressor oil absorb moisture from the air, which can then not be removed. Plug all connections that are opened immediately. |
||
| To remove |
| 1. |
Put the car on a lift.
|
|
| 2. |
Drain the refrigerant from the A/C system, see
Draining and filling the refrigerant
.
|
|
| 3. |
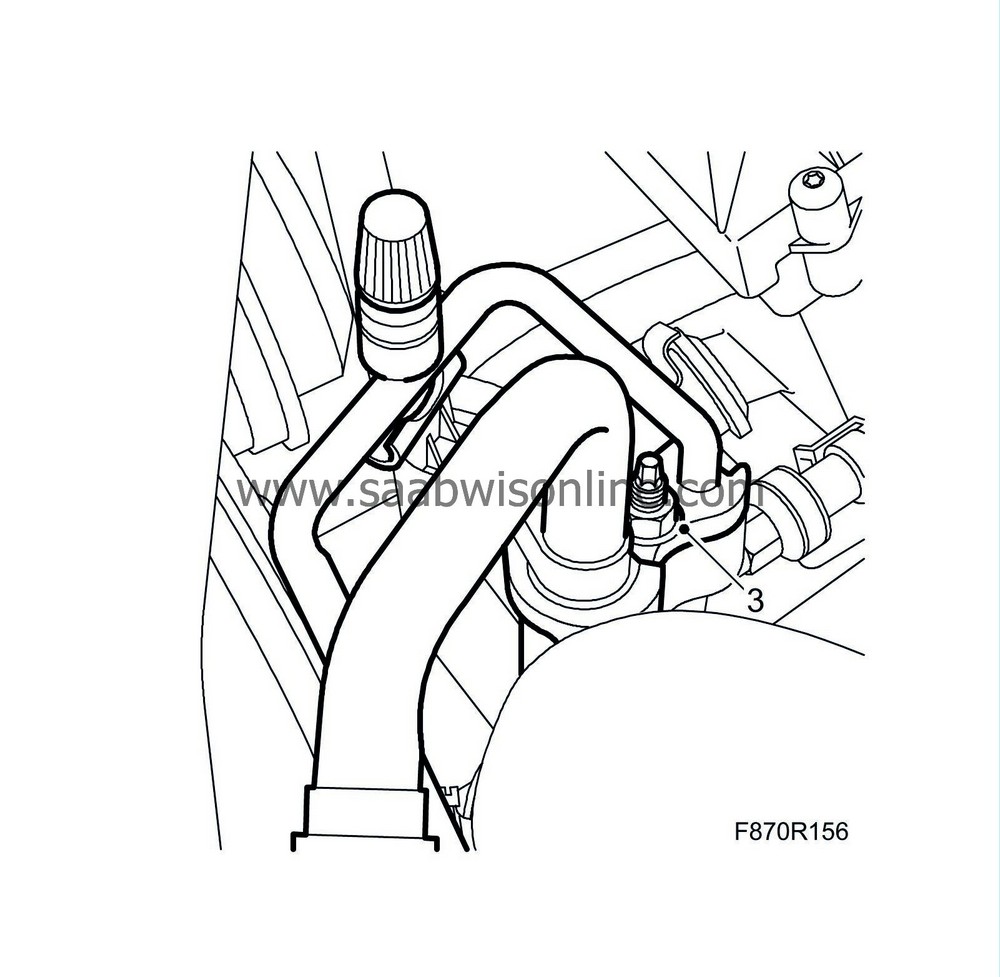
Remove the PAD connection from the front right structural member. Loosen the pipe from the clips and lift up the pipe.
|
|
| 4. |
Raise the car.
|
|
| 5. |
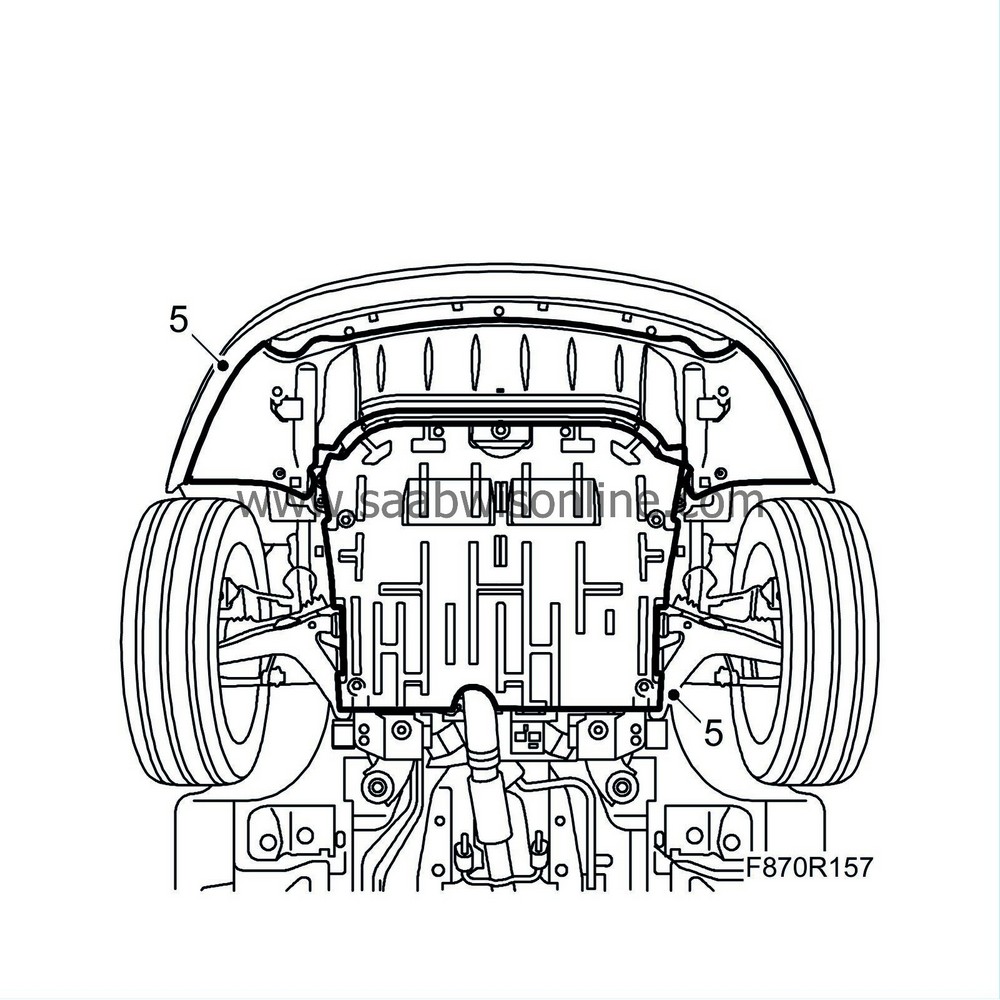
Remove the front and rear lower engine covers.
|
|
| 6. |
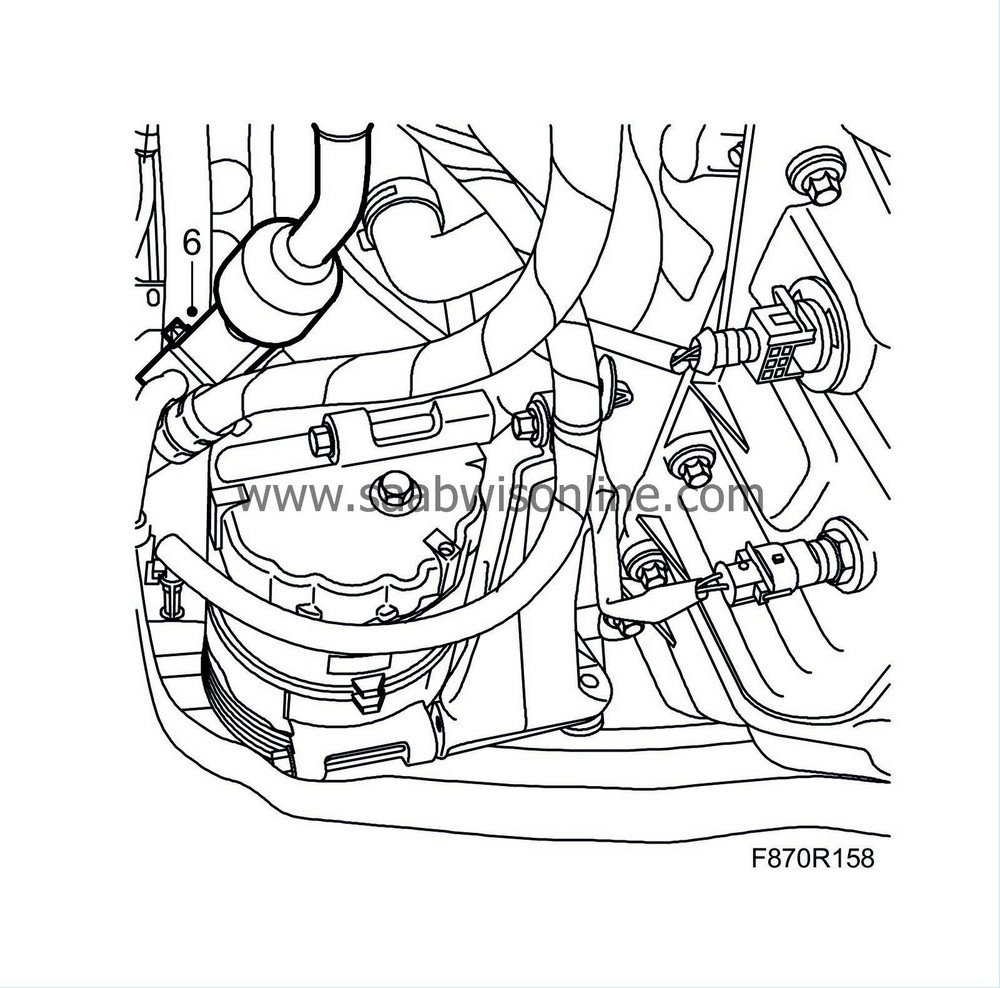
Remove the high and low pressure pipes' PAD connection from the A/C compressor. Plug the openings.
|
|
| 7. |
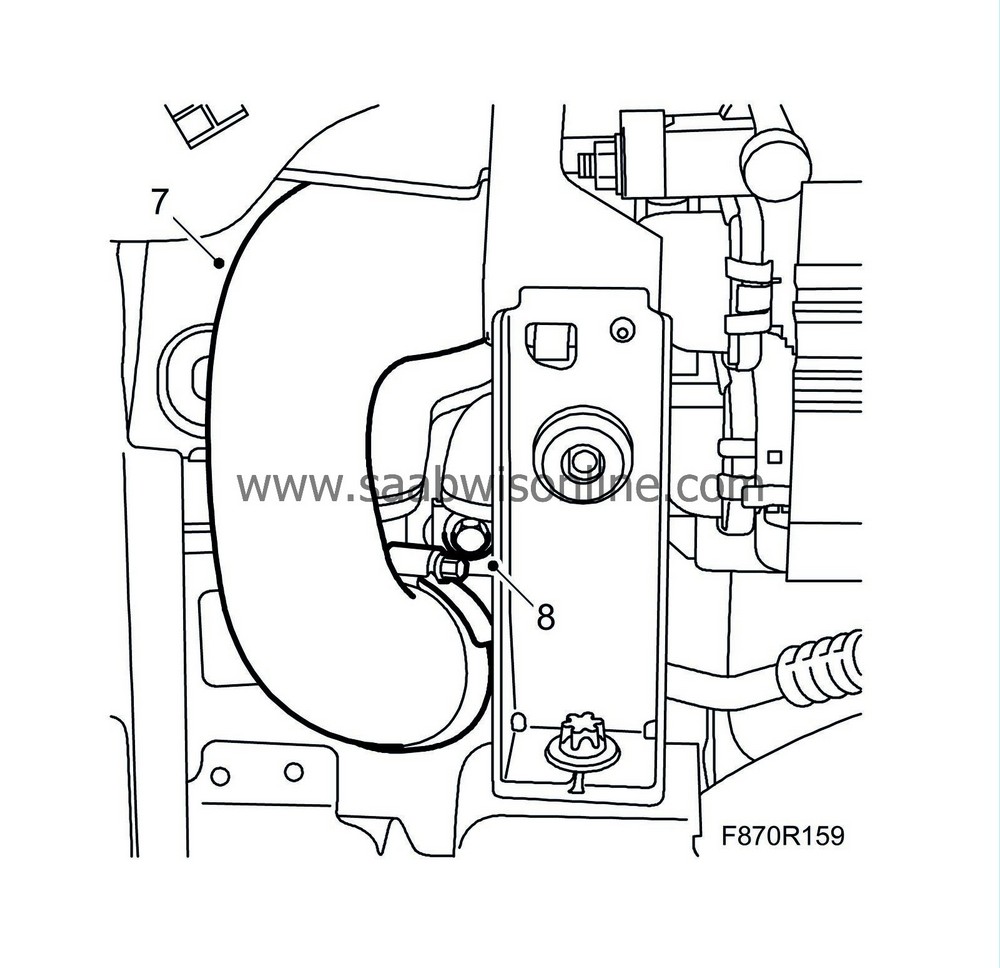
Remove the lower rubber hose from the turbocharger pipe.
|
|
| 8. |
Remove the screw from the turbocharger pipe's lower mounting.
|
|
| 9. |
Lower the car.
|
|
| 10. |
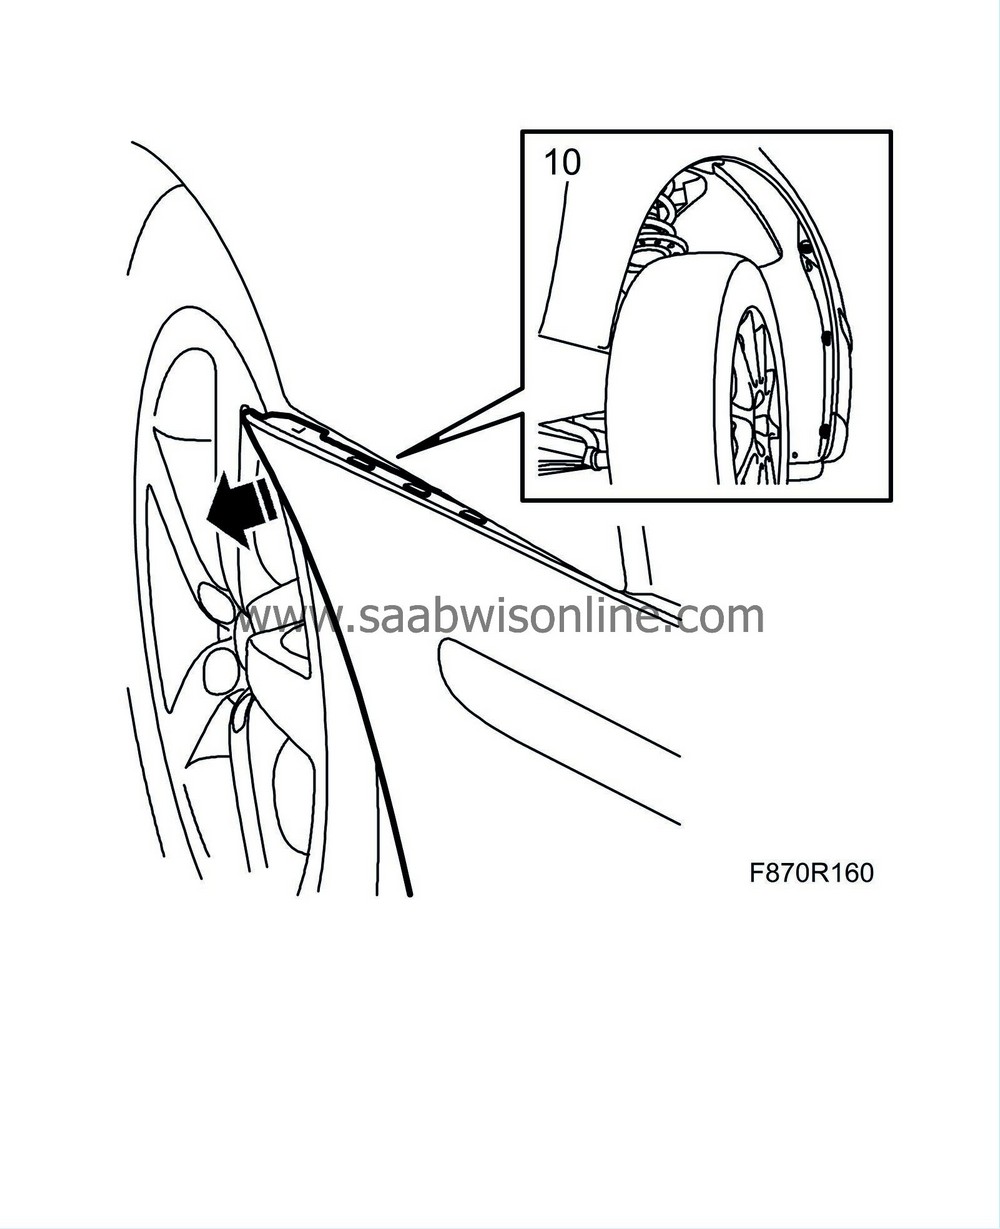
Remove the screws holding the bumper from the right front wing liner.
|
|
| 11. |
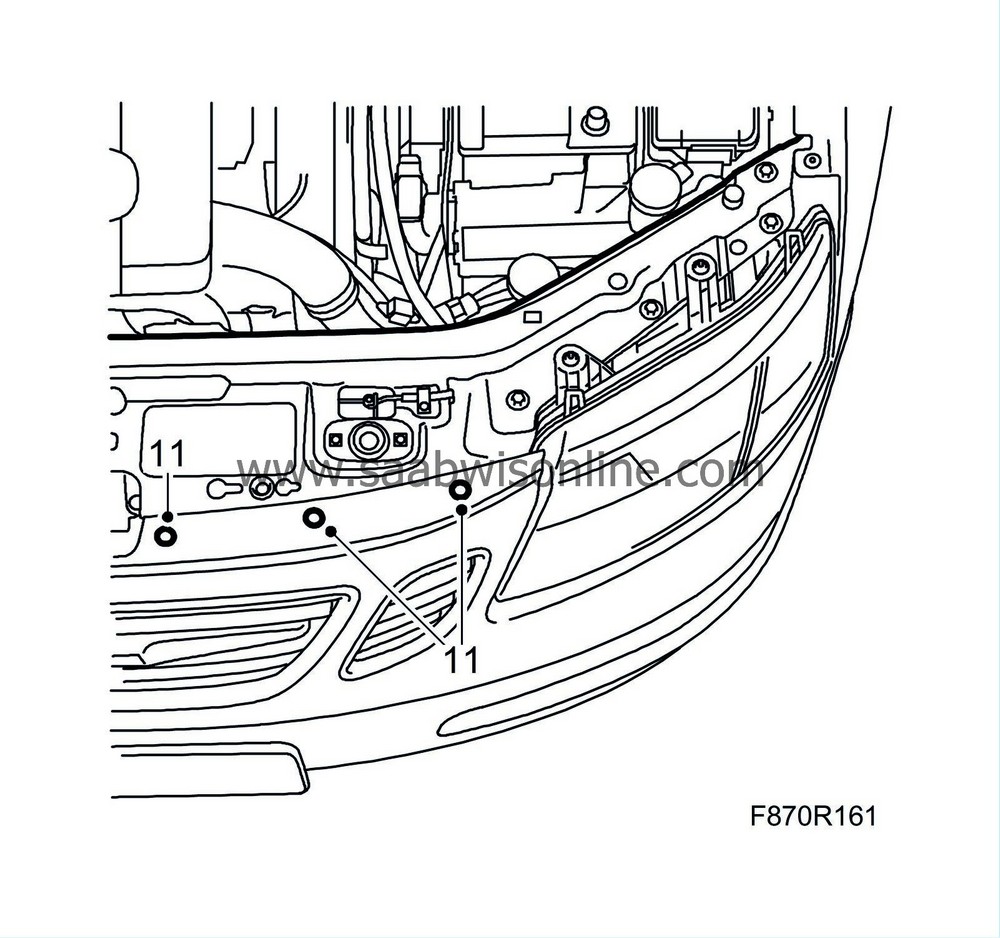
Dismantle the 6 two-stage clips from the top of the bumper.
|
|
| 12. |
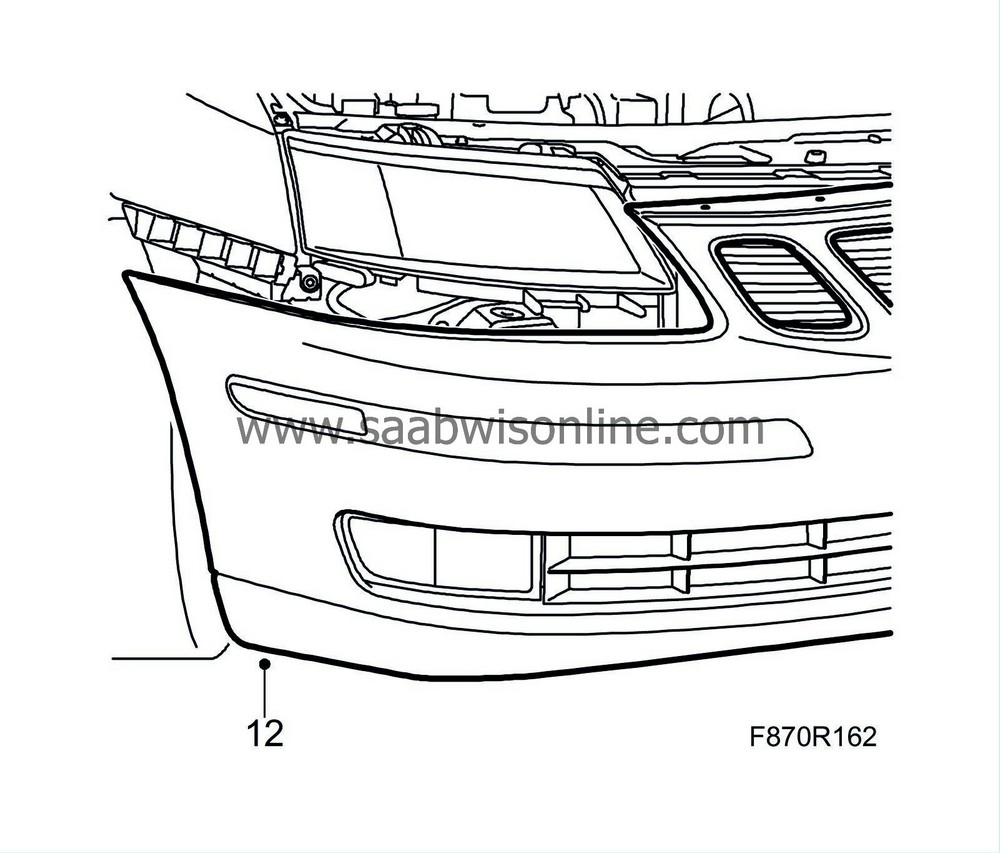
Pull out the right hand side of the bumper a little.
|
|
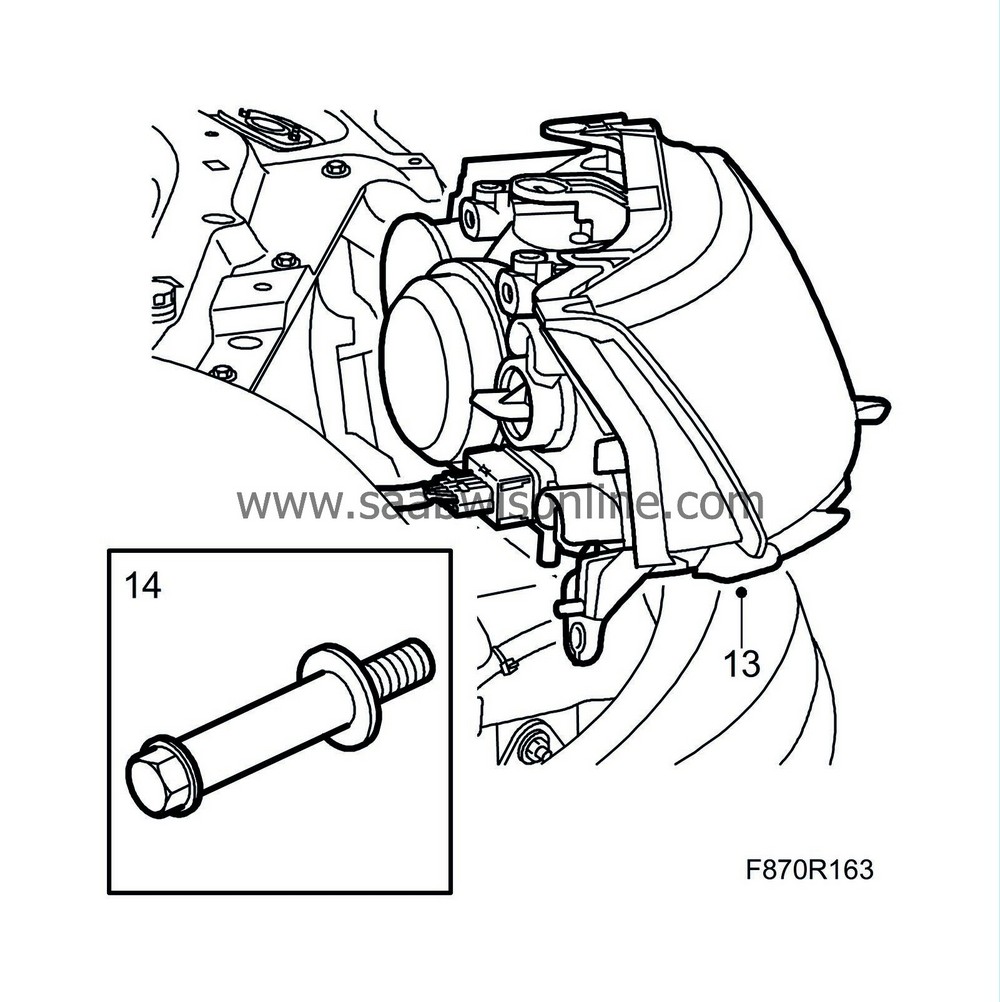
| 13. |
Dismantle the right, 3 screws, headlamp and its connector.
|
|
| 14. |
Remove the screw that holds the headlamp in position.
|
|
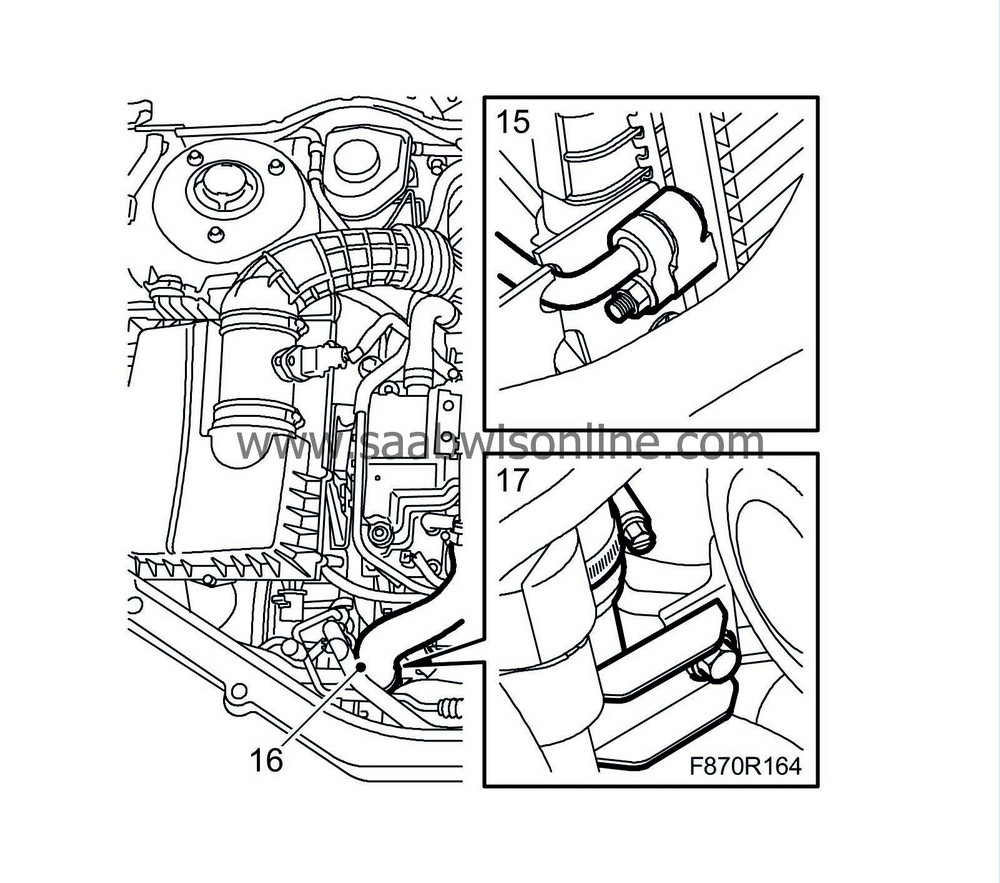
| 15. |
Remove the upper PAD connection from the condenser. Plug the openings.
|
|
| 16. |
Remove the upper rubber hose from the turbocharger pipe.
|
|
| 17. |
Remove the screw from the turbocharger pipe's upper mounting. Lift out the turbocharger pipe.
|
|
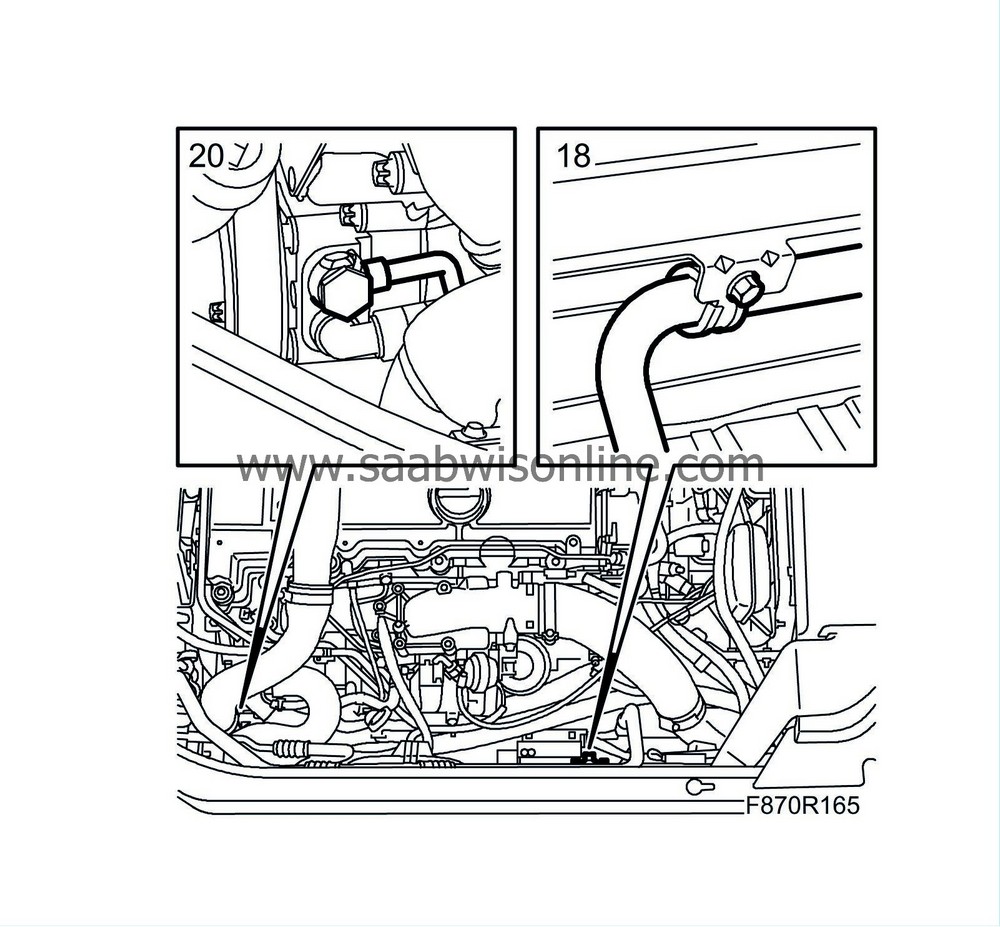
| 18. |
Remove the low pressure pipe's clips from the radiator cross member.
|
|
| 19. |
Fit the hose pinch-off pliers on the hose from the pressure pipe for the power steering.
|
|
| 20. |
Remove the pressure pipe from the power steering pump.
|
|
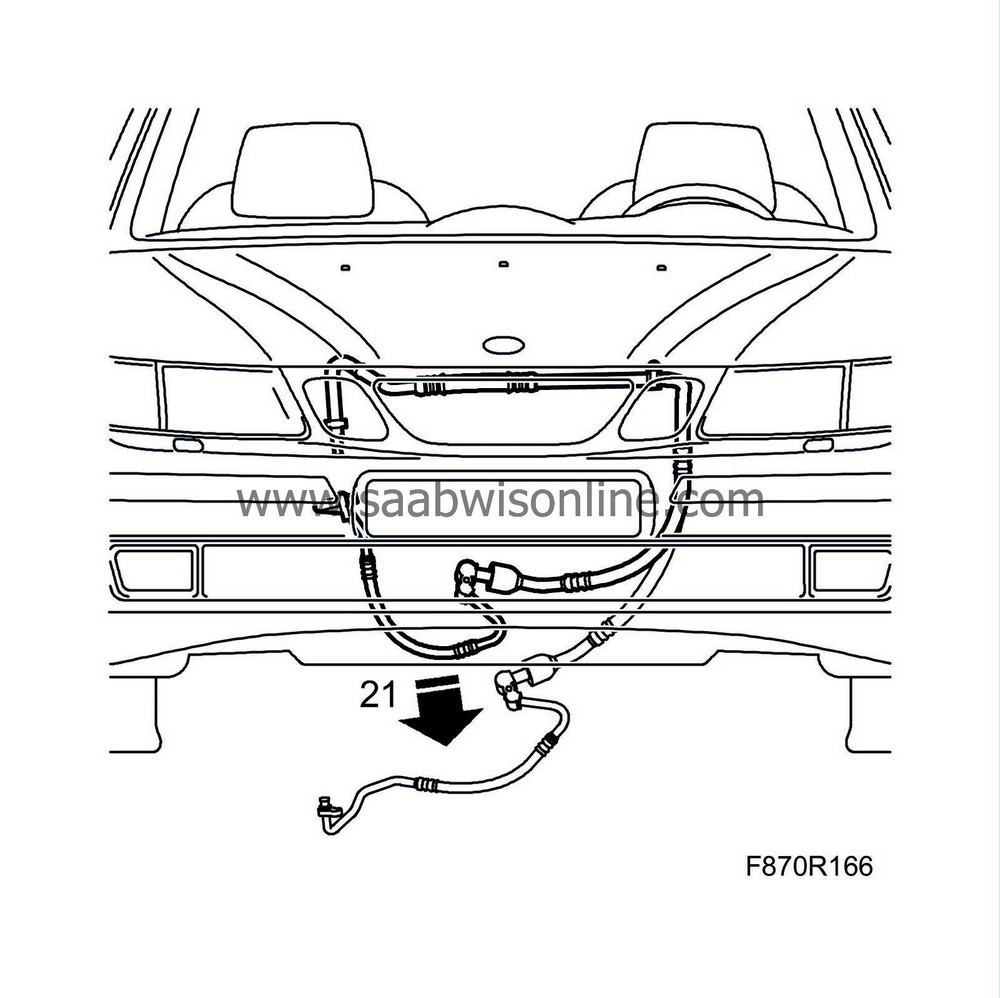
| 21. |
Remove the high and low pressure pipes by first carefully moving out the low pressure pipe's PAD connection through the hole by the radiator core.
|
|
| 22. |
Move the high pressure pipe down behind the engine's subframe.
|
|
| 23. |
Raise the car.
|
|
| 24. |
Carefully coax the low pressure pipe down so that the high and low pressure pipes come behind the subframe.
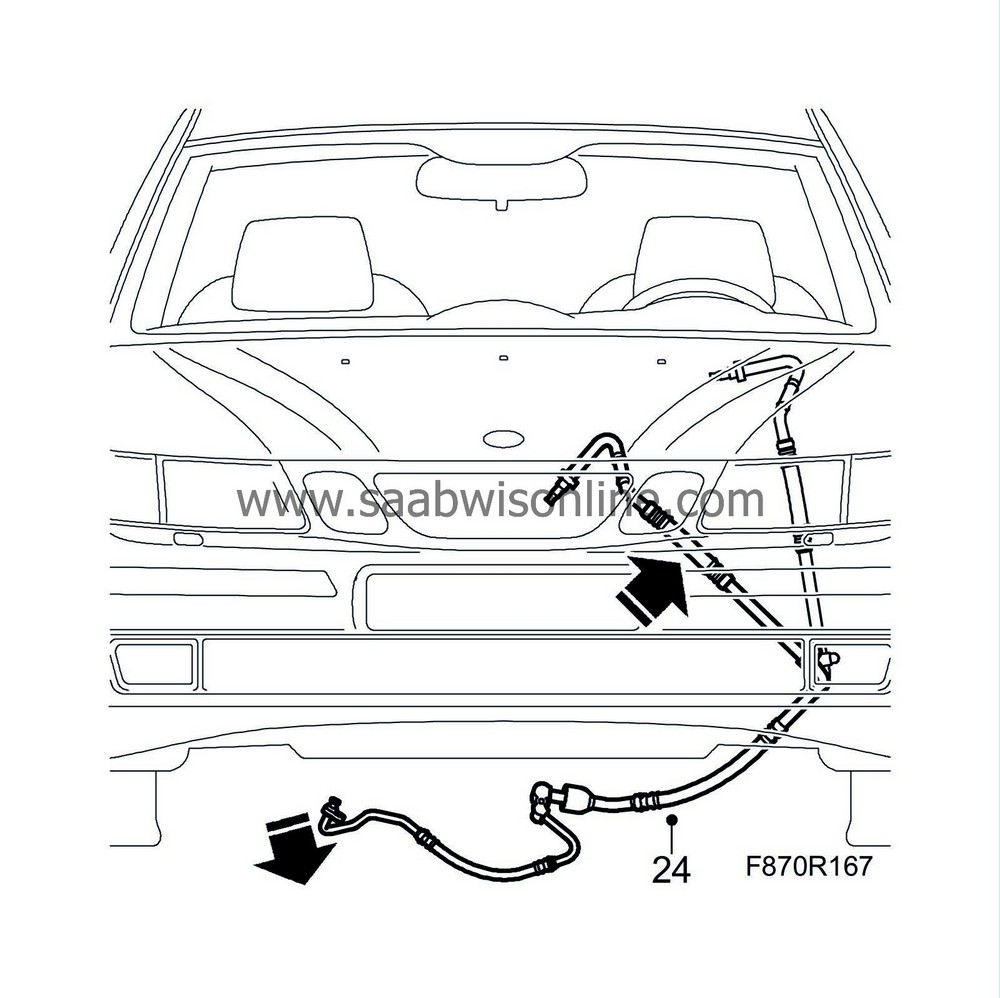
|
|
| To fit |
| 1. |
Fill the compressor oil. See
Filling and adjusting the compressor oil
.
|
|
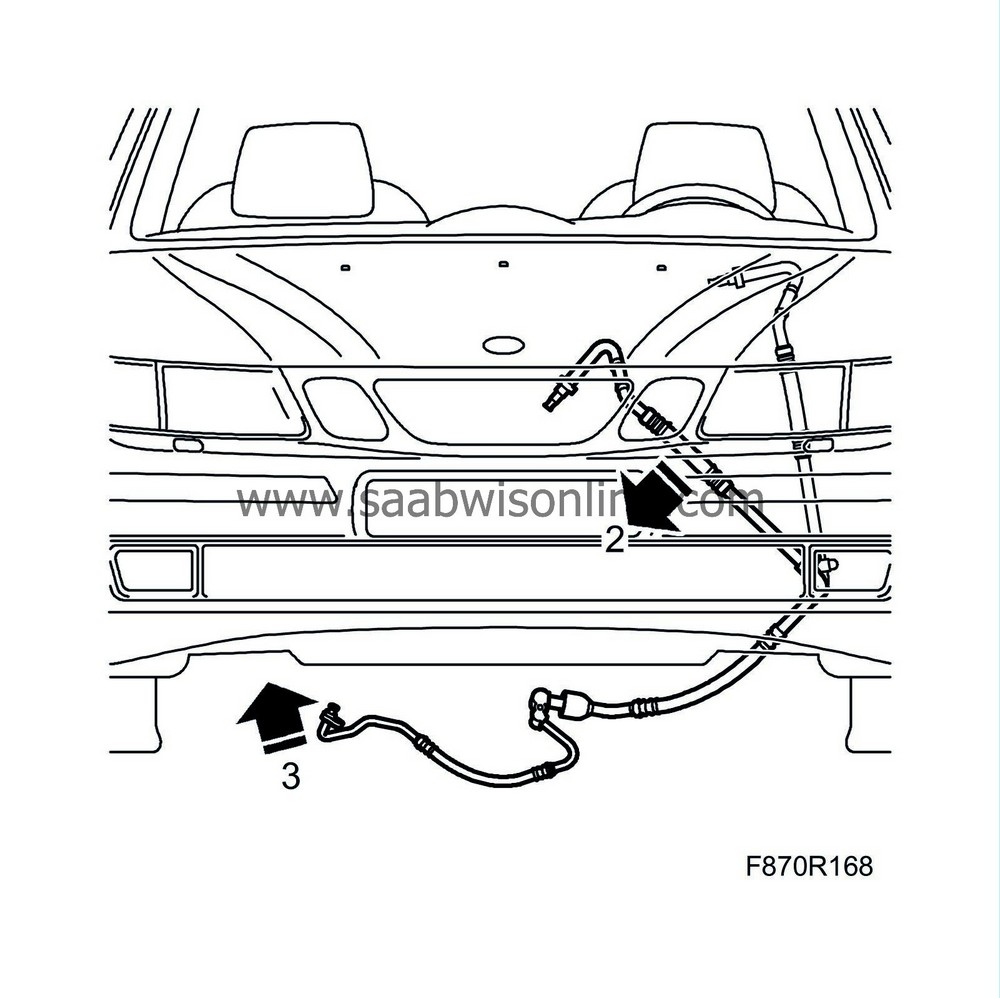
| 2. |
Fit the high and low pressure pipes by moving the low pressure pipe up behind the subframe.
|
|
| 3. |
Move the low pressure pipe up to the hole by the radiator core.
|
|
| 4. |
Lower the car.
|
|
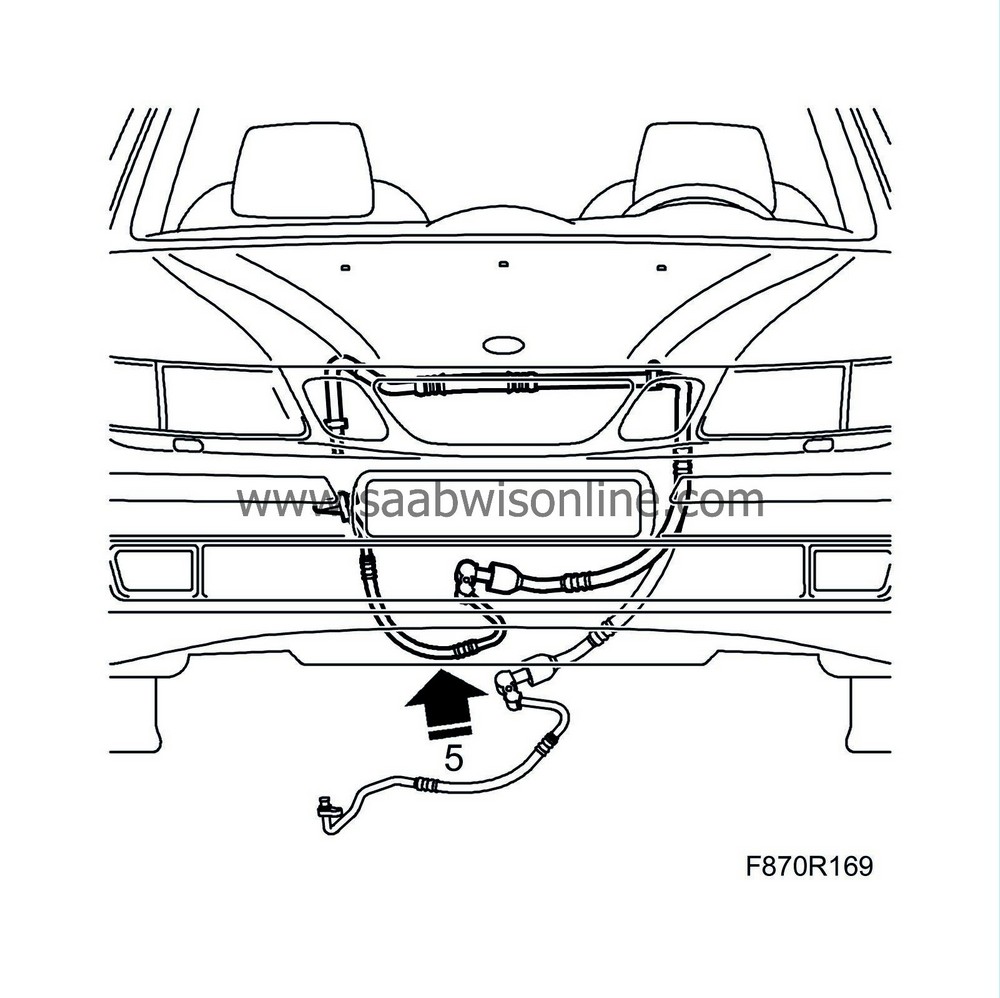
| 5. |
Carefully insert the high pressure pipe's PAD connection through the hole by the radiator core.
|
|
| 6. |
Fit the high pressure pipe's PAD connection to the condenser.
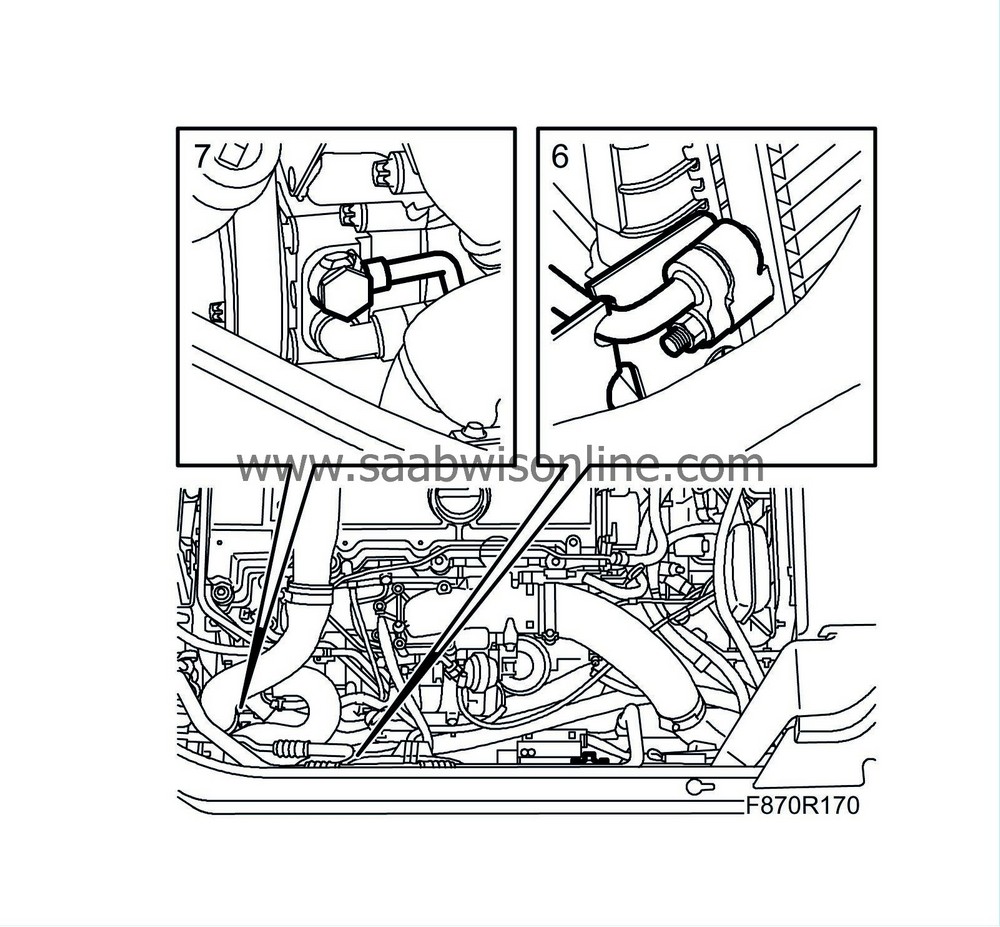
Tightening torque 18 Nm (13 lbf ft) |
|
| 7. |
Change the seal and fit the pressure pipe to the power steering pump.
Tightening torque 32 Nm (24 lbf ft) |
|
| 8. |
Remove the hose pinch-off pliers from the hose on the pressure pipe to the power steering.
|
|
| 9. |
Fit the screw that holds the headlamp in position.
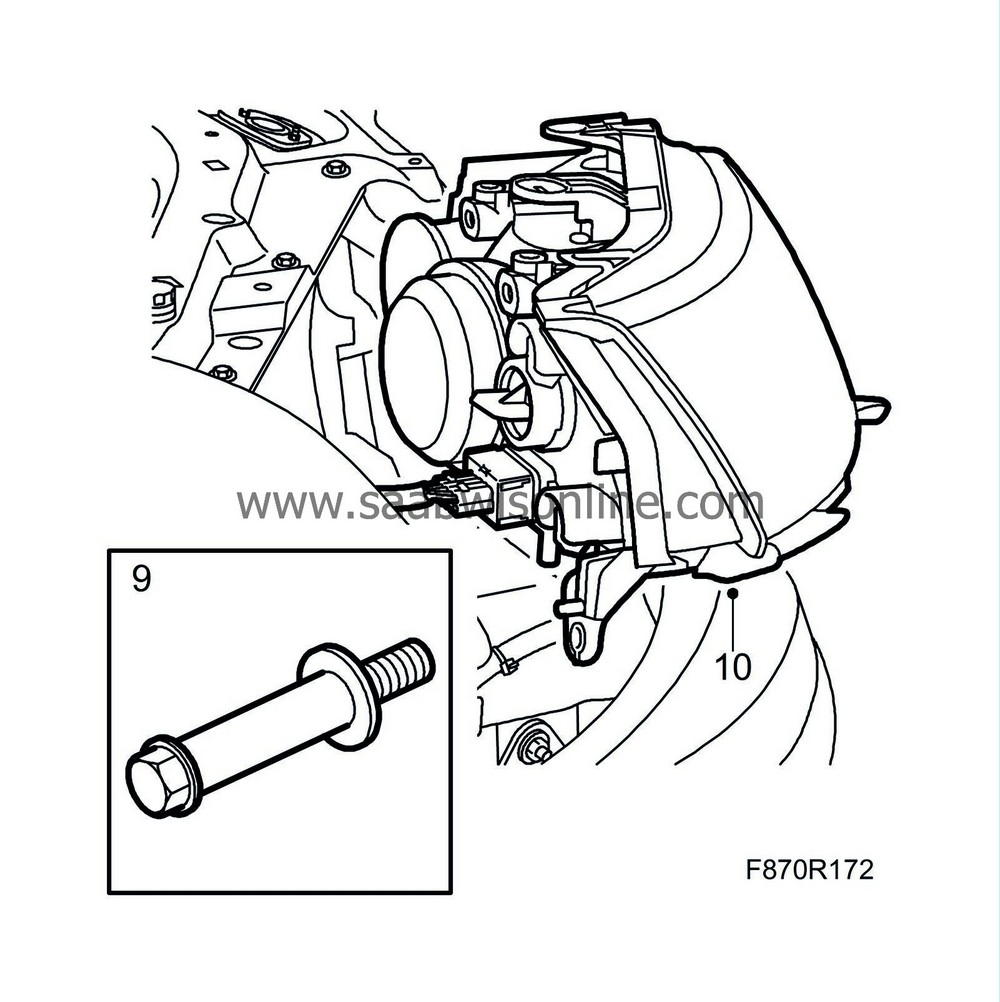
|
|
| 10. |
Connect the right headlamp's connector and fit the headlamp.
|
|
| 11. |
Insert the right hand side of the bumper into position.
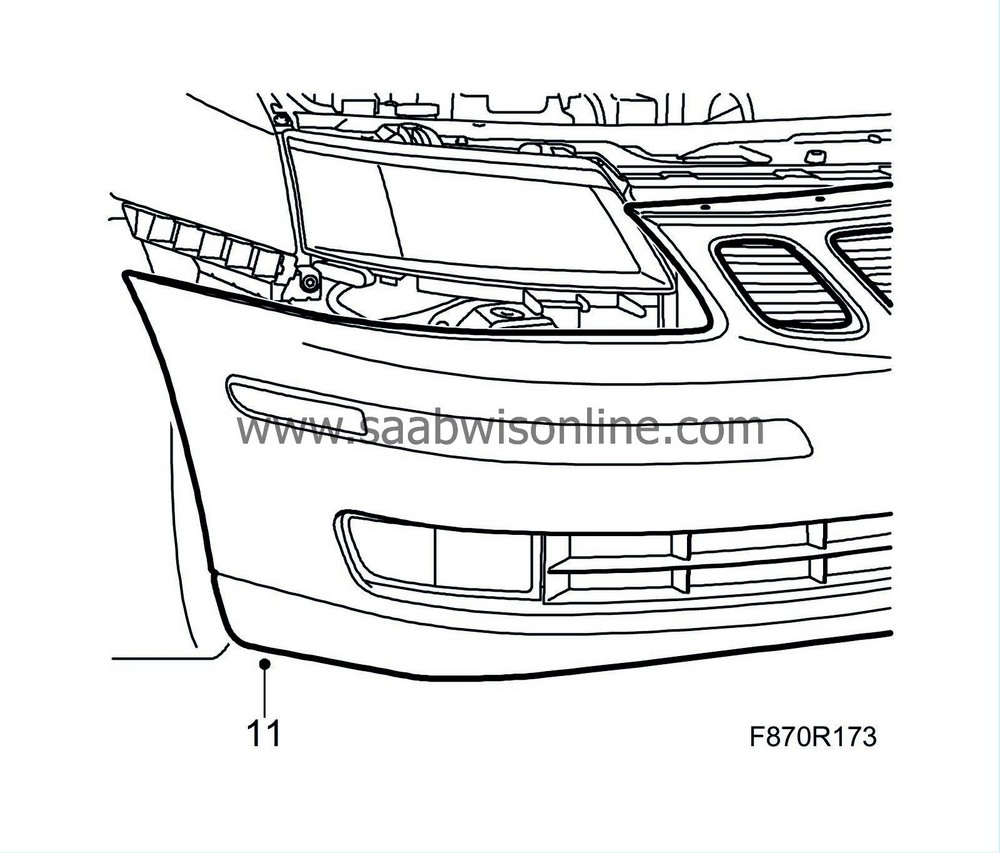
|
|
| 12. |
Fit the screws on the wing liner for the bumper.
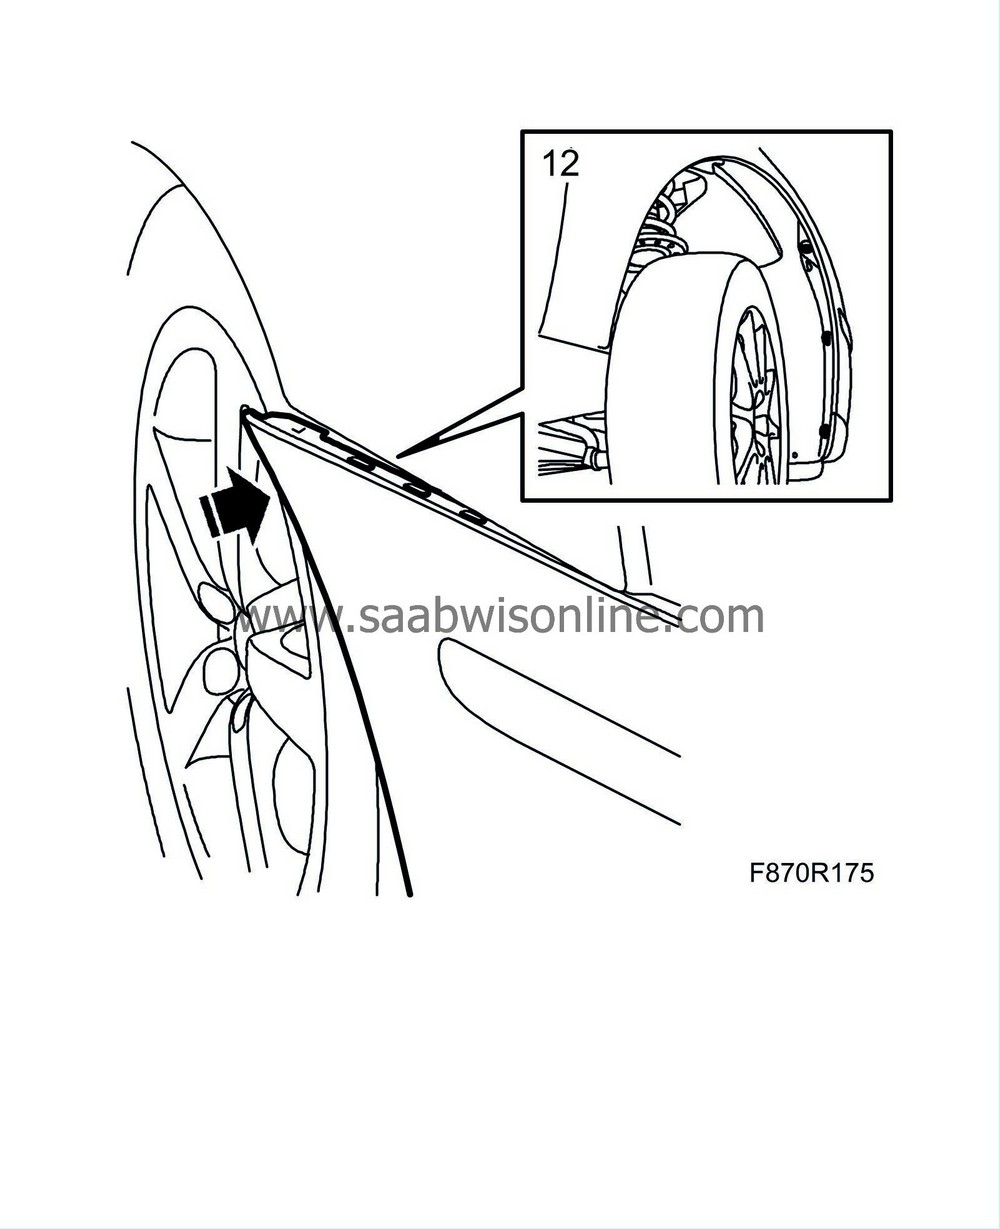
|
|
| 13. |
Fit the 6 two-stage clips on the top of the bumper.
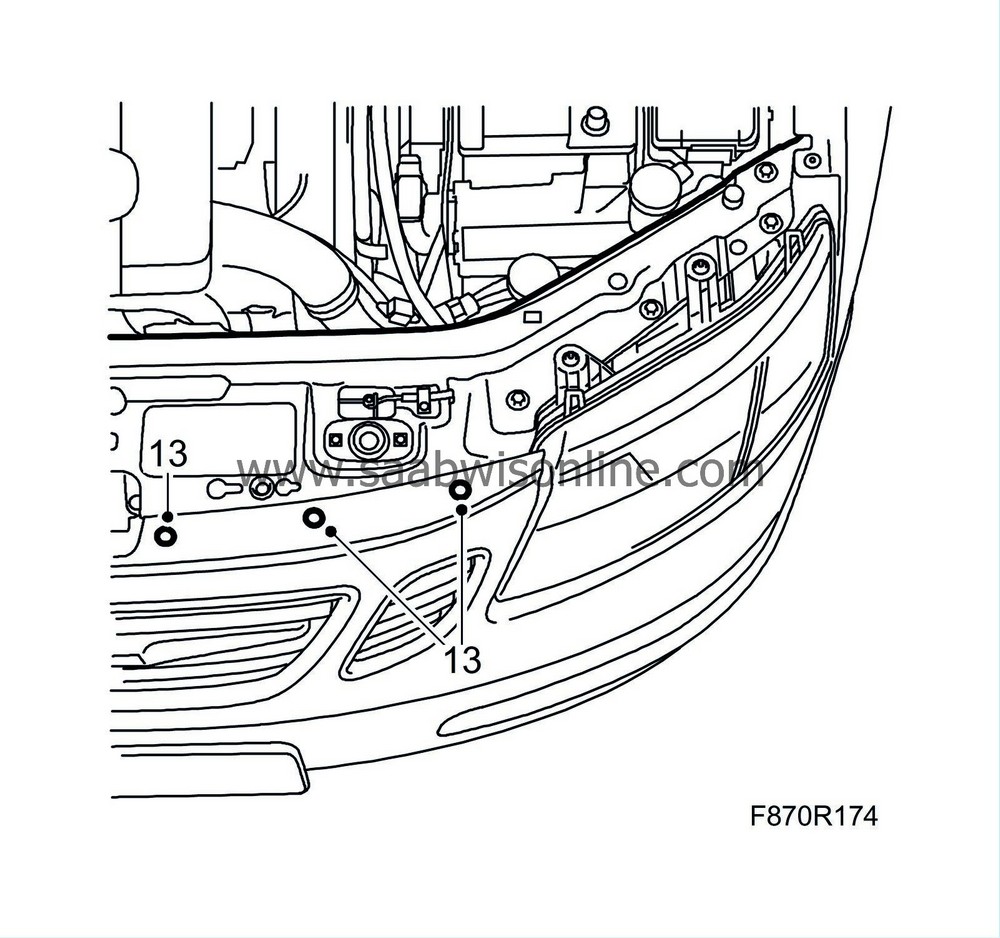
|
|
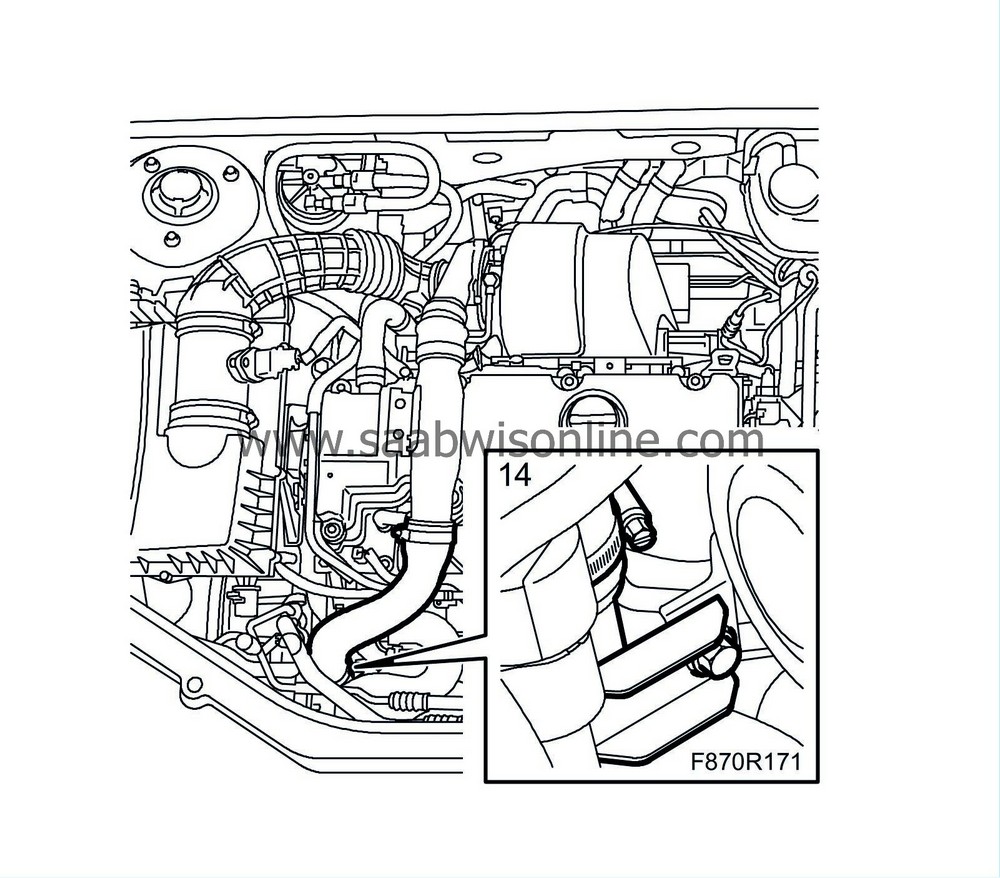
| 14. |
Insert the turbocharger pipe into position, and secure the screw to the turbocharger pipe's upper mounting.
|
|
| 15. |
Raise the car.
|
|
| 16. |
Replace the sealing washer and fit high and low pressure pipes' PAD connection to the A/C compressor.
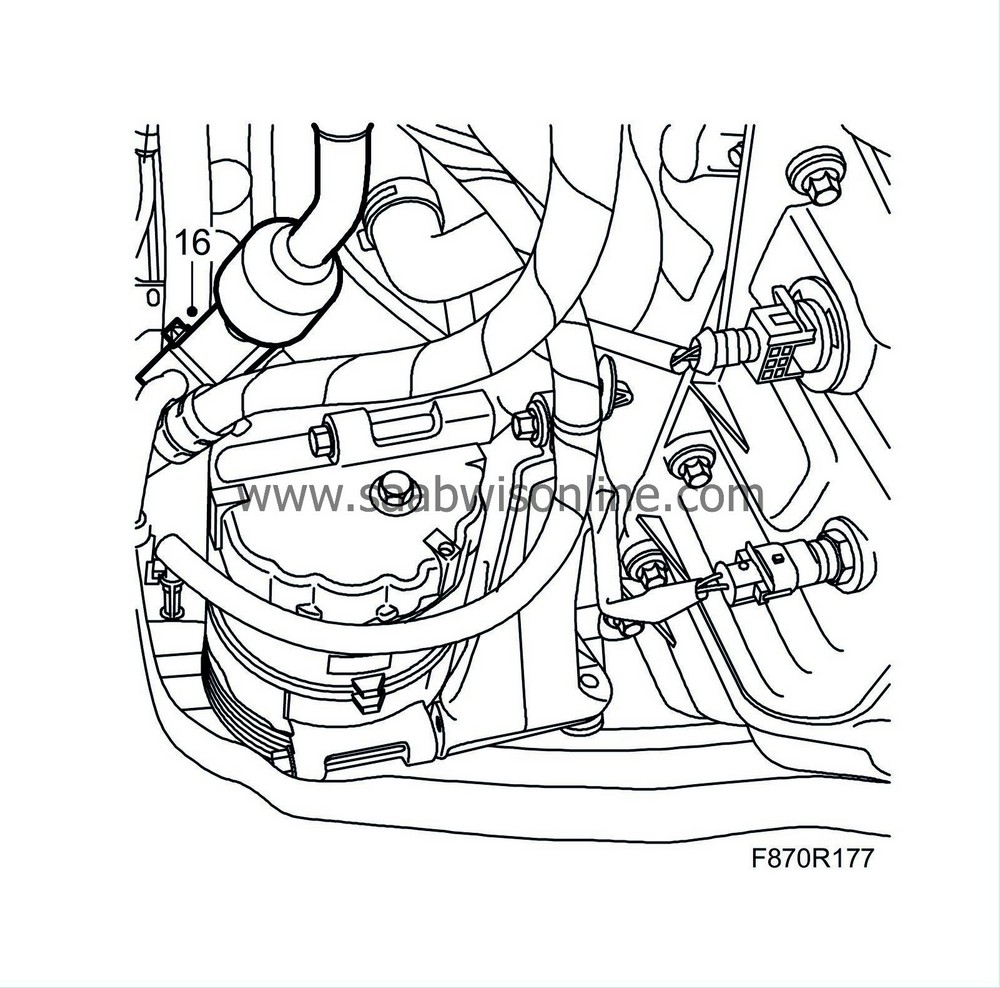
Tightening torque 18 Nm (13 lbf ft) |
|
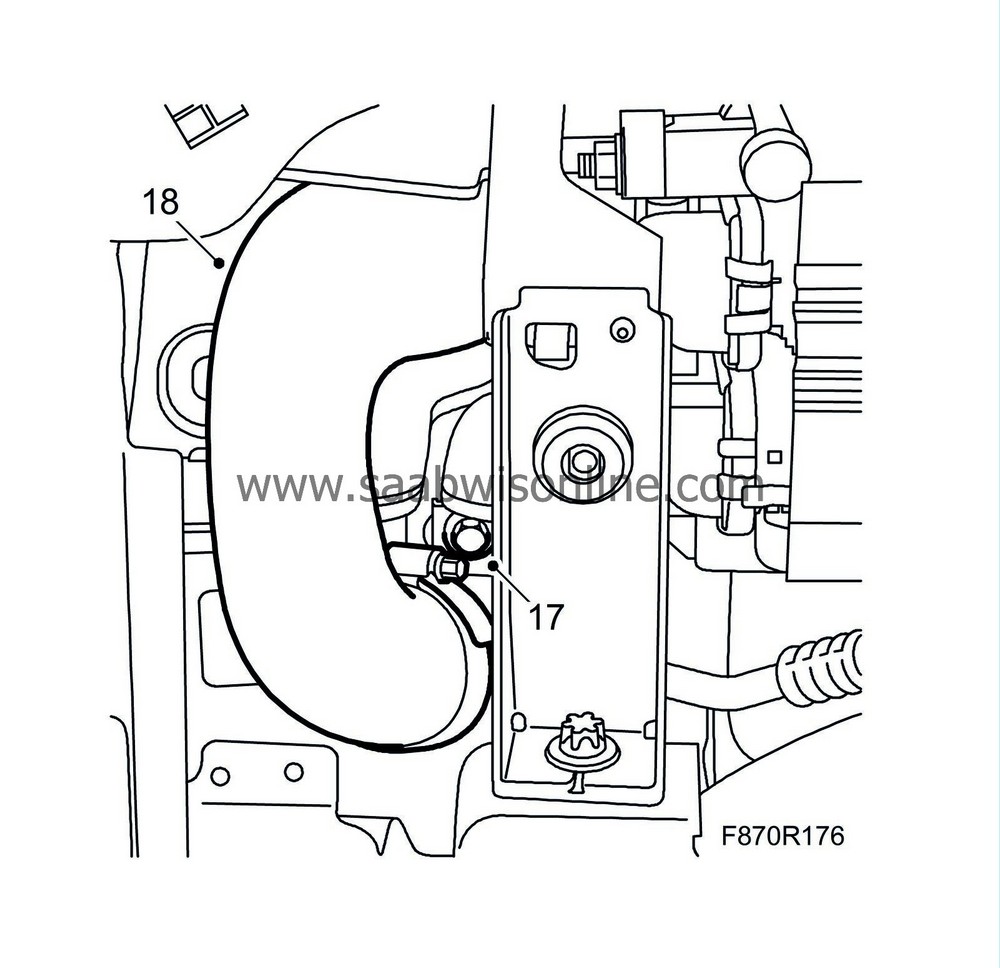
| 17. |
Fit the screw to the turbocharger pipe's lower mounting.
|
|
| 18. |
Fit the lower rubber hose to the turbocharger pipe.
|
|
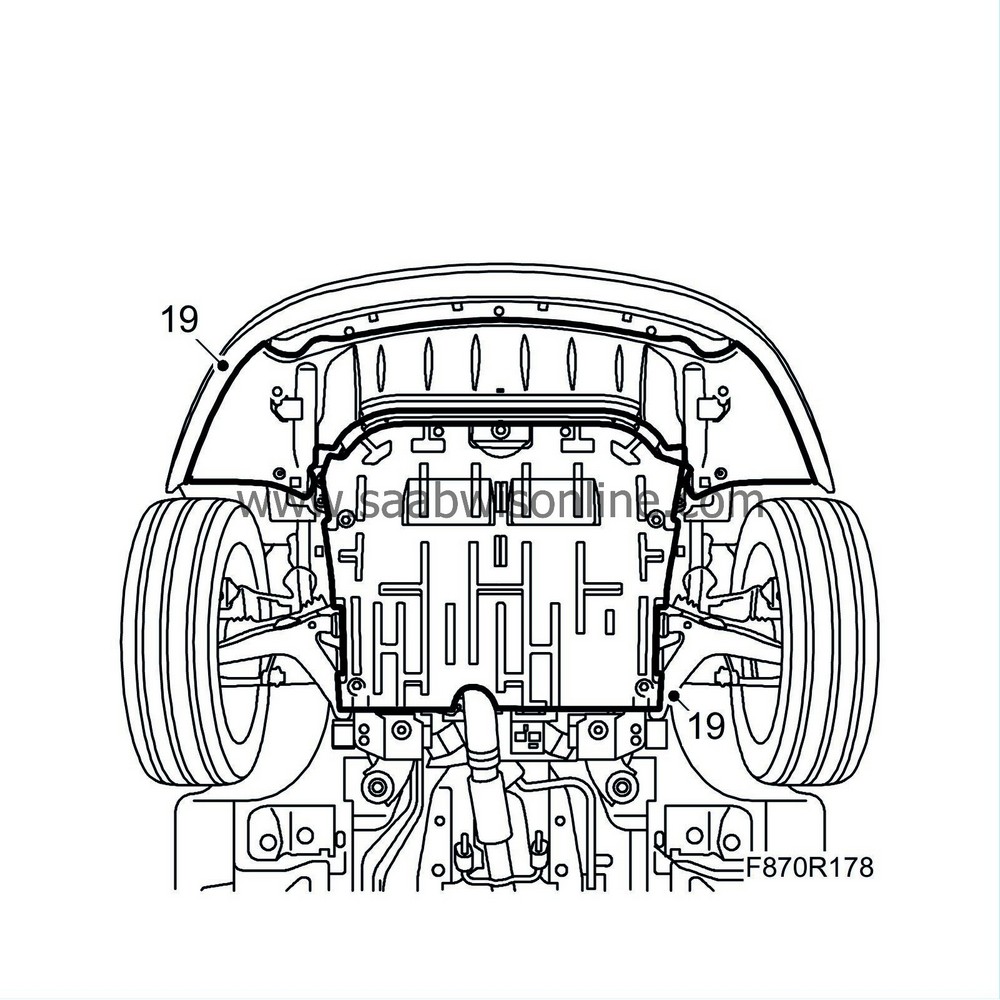
| 19. |
Fit the lower engine covers.
|
|
| 20. |
Lower the car.
|
|
| 22. |
Tighten the screws on the turbocharger pipe's upper mounting.
|
|
| 23. |
Fit the upper rubber hose to the turbocharger pipe.
|
|
| 24. |
Fit the low pressure pipe's clips to the radiator member.
|
|
| 25. |
Vent
the power steering system
.
|
|
| 26. |
Vacuum pump and fill with refrigerant. See
Draining and filling the refrigerant
.
|
|
| 27. |
Check the performance of the A/C system. See
A/C system performance test
.
|
|

