(232-2682) Diagnosing Oil Consumption
|
TECHNICAL SERVICE BULLETIN
|
|
Bulletin Nbr:
|
232-2682
|
|
Date:
...........
|
Mars 2009
|
|
Market:
|
all
|
|
|
Diagnosing Oil Consumption
|
Saab 9-3, M03-04 with engine alternative B207R
Saab 9-3, M05- with engine alternative B207
In order to avoid mis-diagnosis of oil consumption and prevent incorrect turbo replacements, the following steps for checking the crank case ventilation must be followed prior to replacing the turbo for oil consumption.
For checking the check valve:
90 537 718 gasket, throttle body
For replacing the check valve:
12 786 262 gasket, intake manifold
55 557 180 check valve
|
1.
|
Remove the throttle body in accordance with Tis2Web 9-3 - 2. Engine - 4-cylinder petrol - Engine management system Trionic T8 - Repair Instructions - Throttle body actuator (604).
|
|
2.
|
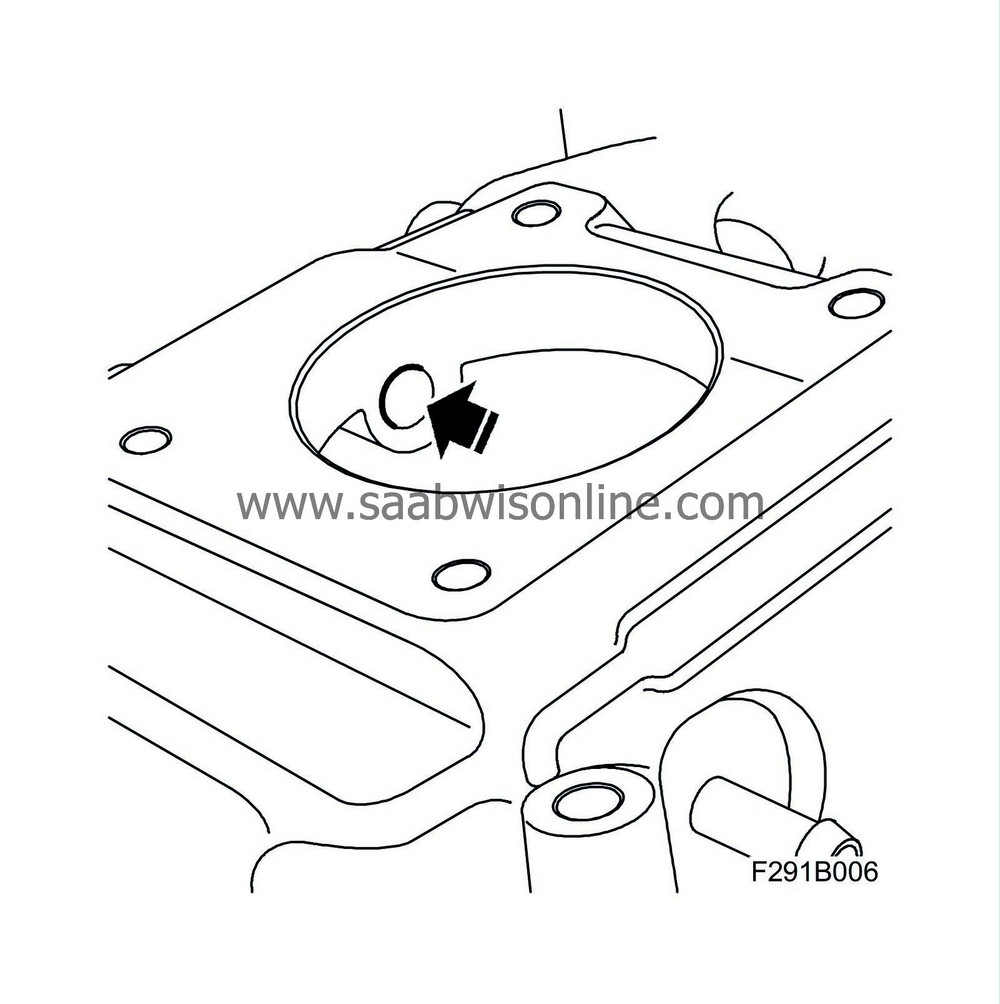
Check the function of the check valve using the pressure/vacuum pump 30 14 883. Connect the pump with a suitable nozzle to the hole for the check valve.
Is it possible to pump up a pressure?
Yes:
The check valve is in order. Refit the throttle body in accordance with Tis2Web.
No:
The check valve is faulty and must be replaced.
Go to step 3.

|
|
3.
|
M03:
Remove the intake manifold in accordance with the following method, "Intake manifold with SAI, M03".
M04-:
Remove the intake manifold in accordance with Tis2Web 9-3 - 2. Engine - 4-cylinder petrol - Intake system - Repair Instructions.
|
|
4.
|
Press out the check valve.
|
|
5.
|
Fit a new check valve.

|
|
6.
|
M03:
Fit the intake manifold in accordance with the following method, "Intake manifold with SAI, M03".
M04-:
Fit the intake manifold in accordance with Tis2Web.
|
|
Intake manifold with SAI, M03
|
To remove
|
1.
|
Remove the Throttle body actuator (604), in accordance with Tis2Web 9-3 - Engine - 4-cylinder petrol - Engine management system Trionic T8 - Repair Instructions.
|
|
2.
|
Remove the Control module, Trionic T8 (589), in accordance with Tis2Web 9-3 - Engine - 4-cylinder petrol - Engine management system Trionic T8 - Repair Instructions.
|
|
3.
|
Remove the battery cover.
|
|
4.
|
Disconnect the battery's negative cable.
|
|
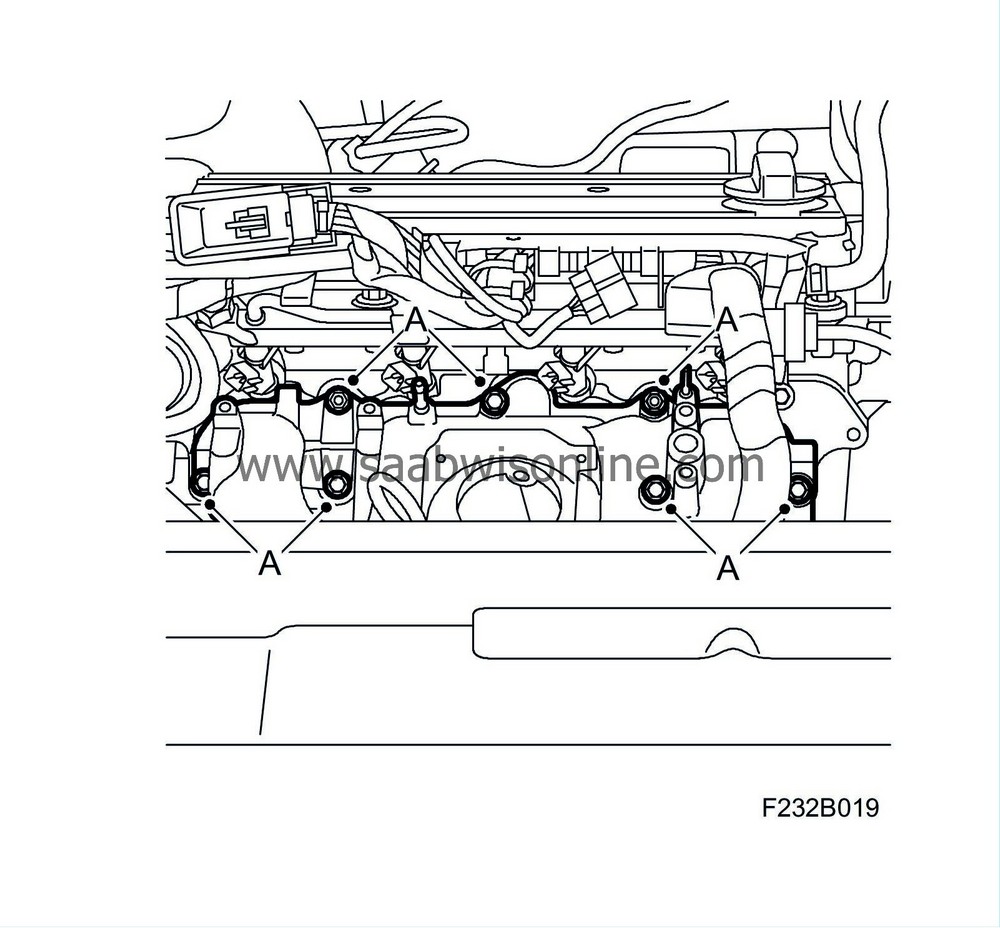
6.
|
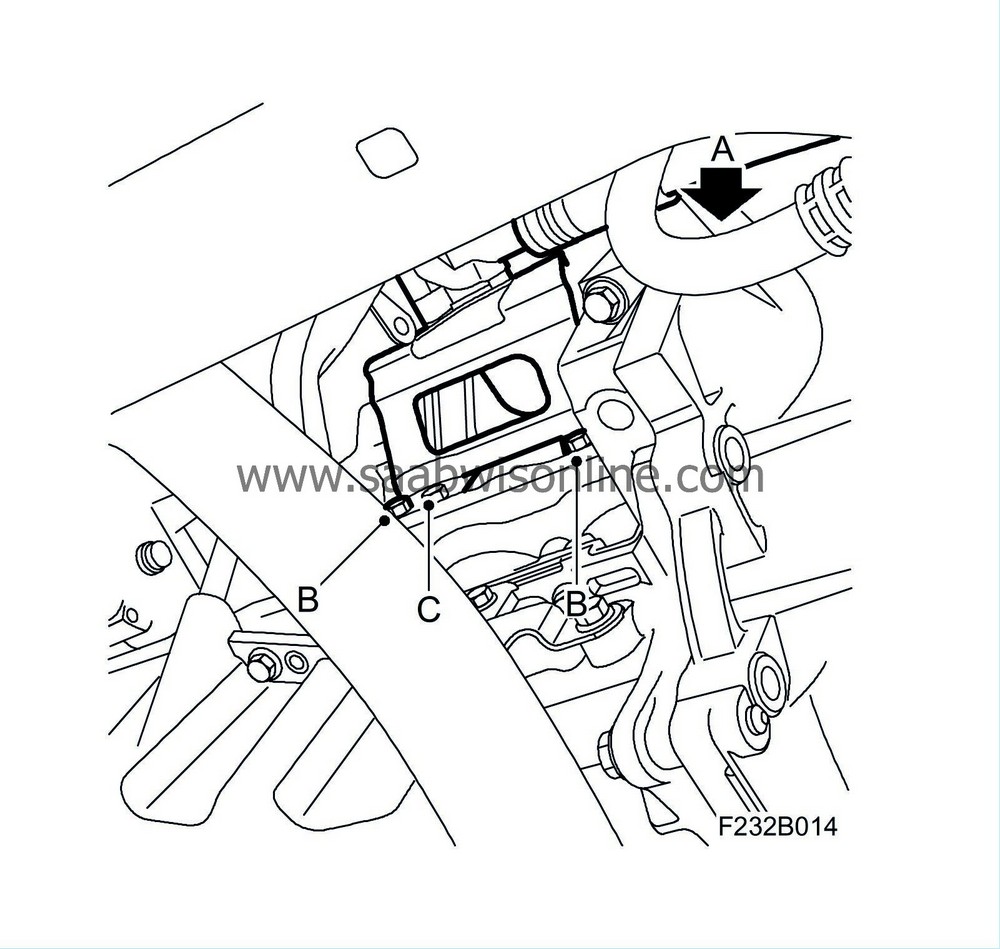
Remove the screw (A) for the SAI pipe's bracket.
|
|
7.
|
Remove the lower screws (B) for the SAI pump's bracket. The starter motor is dismantled in the illustration in order to show the position of the screws.
|
|
8.
|
Loosen the screw (C) for the intake manifold stay several turns.
|
|
10.
|
Remove the solenoid valve's hose (A) from the intake manifold.

|
|
11.
|
Remove the pressure sensor, inlet pipe (431) (B) from the intake manifold. Let the sensor hang in the connector.
|
|
12.
|
Remove the cable duct's nuts (C).
|
|
13.
|
Detach the fuel pressure regulator's hose (D) from the intake manifold.
|
|
14.
|
Remove the SAI pump's inlet hose from the SAI pump and air cleaner.
|
|
15.
|
Loosen the EVAP canister purge valve's hose (A) from the intake manifold and fold it to the side.

|
|
16.
|
Detach the brake servo's plastic hose (B) from the intake manifold.
|
|
17.
|
Unplug the injection valves' connector (B).
|
|
18.
|
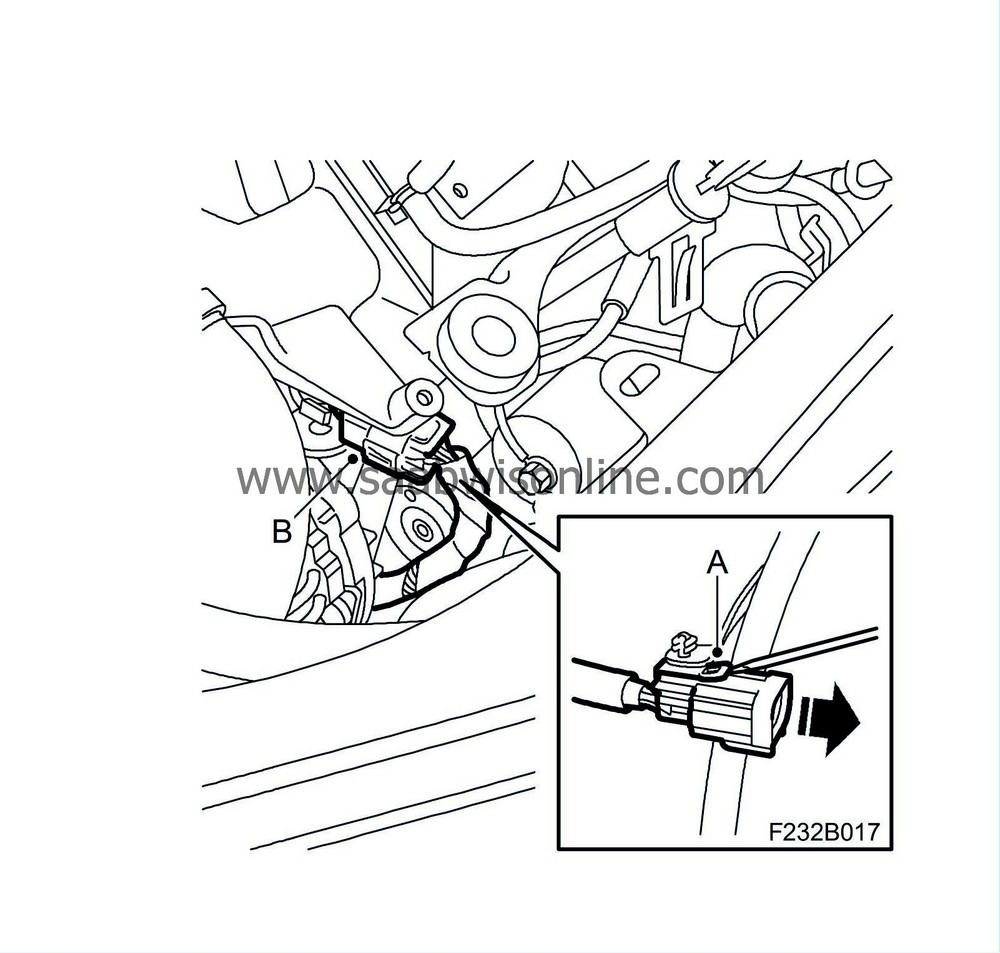
Loosen the wiring harness connector from the clip (A) under the intake manifold.
|
|
19.
|
Route the wiring harness up to the injectors.
|
|
20.
|
Remove the upper bracket for the dipstick tube (A) and loosen it from the oil sump, and fold it to the side.

|
|
21.
|
Remove the intake manifold's stay (B).
|
|
22.
|
Remove the screw (C) to SAI pump's bracket.
|
|
23.
|
Blow clean with compressed air between the intake manifold and cylinder head.
|
|
24.
|
Remove the intake manifold (A). Remove the screws and nuts.
|
To fit
|
1.
|
Clean the sealing surfaces and fit a new gasket. Make sure that the cylinder head's inlet ducts are clean.
|
|
2.
|
Fit the intake manifold and position the cable duct, but without fitting the nuts.
|
|
3.
|
Fit the intake manifold's stay without tightening the screw.
|
|
4.
|
Tighten the intake manifold's screws and nuts (A).
Tightening torque, intake manifold to cylinder head 10 Nm (7 lbf ft)
|
|
5.
|
Fit the dipstick tube (A).
|
|
6.
|
Tighten the intake manifold's stay (B).
Tightening torque, intake manifold stay 22 Nm (16 lbf ft)
|
|
7.
|
Fit the screw (C) to the SAI pump's bracket without tightening it.
|
|
9.
|
Fit the SAI pipe's bracket (A).
Tightening torque, intake manifold stay 22 Nm (16 lbf ft)
|
|
10.
|
Fit the screws (B) to the SAI pump's bracket.
Tightening torque 22 Nm (16 lbf ft)
|
|
11.
|
Tighten the intake manifold's stay (C).
Tightening torque 22 Nm (16 lbf ft)
|
|
13.
|
Tighten the screw to the SAI pump's bracket.
Tightening torque 22 Nm (16 lbf ft)
|
|
14.
|
Route the wiring harness connector under the intake manifold.
|
|
15.
|
Fit the connector (A) to the clip (B).

|
|
16.
|
Plug in the injectors' connector (C) to the engine's wiring harness.
|
|
17.
|
Fit the brake servo's plastic hose (B) to the intake manifold.
|
|
18.
|
Fit the EVAP canister purge valve's hose (A) to the intake manifold.
|
|
19.
|
Fit the fuel pressure regulator's hose (D) to the intake manifold.
|
|
20.
|
Fit the cable duct's nuts (C).
|
|
21.
|
Fit the pressure sensor, inlet pipe (431) (B) to the intake manifold.
|
|
22.
|
Fit the solenoid valve's hose (A) to the intake manifold.
|
|
23.
|
Fit the SAI pump's inlet hose to the SAI pump and air cleaner.
|
|
24.
|
Connect the battery's negative cable.
|
|
25.
|
Fit the battery cover.
|
|
26.
|
Fit the Control module, Trionic T8 (589) in accordance with Tis2Web.
|
|
27.
|
Fit the Actuator, throttle body (604) in accordance with Tis2Web.
|
|
28.
|
Carry out "Procedures after disconnecting the battery" in accordance with Tis2Web.
|
|
Warranty/Time Information
|
In the case of customer complaint and if the car is
within the warranty period
, use the following information to fill out the claim:
Failed Object: 25121
Fault/Reason code: 72
Location code: 09 (US=9)
Warranty Type (US): 01
Repair/Action code: 08/01
Labour Operation (US):
2512103: M03 including checking
2512104: M04- including checking
2512105: checking only
Labour Operation (CA): J6000
Time:
2512103: 1.3 hr (M03 including checking)
2512104: 1.0 hr (M04- including checking)
2512105: 0.2 hr (checking only)


