B-pillar, spare part, complete side
|
|
B-pillar, spare part, complete side
|
Depending on the damage, the B-pillar can be replaced with two alternative spare part configurations. In the method described below, one complete side with reinforcement is used. For replacement of the B-pillar with separate spare parts, see.
|
1.
|
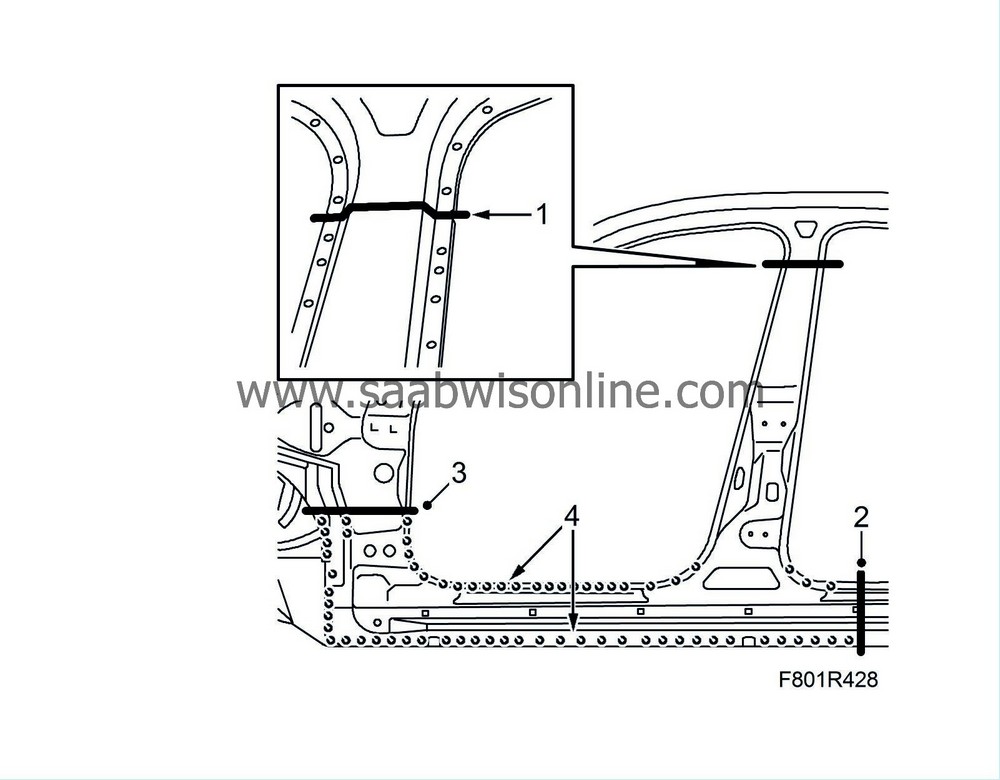
Cut the B-pillar as indicated by the marks. The cut shall be located 60 mm under the B-pillar measurement point. Cut through all the panel layers.
|
|
2.
|
Cut the rear section of the sill as illustrated. Cut only through the outer panel.
|
|
3.
|
Cut the front sill as illustrated. Cut through 2 panels.
|
|
4.
|
Drill out the spot welds.
|
|
5.
|
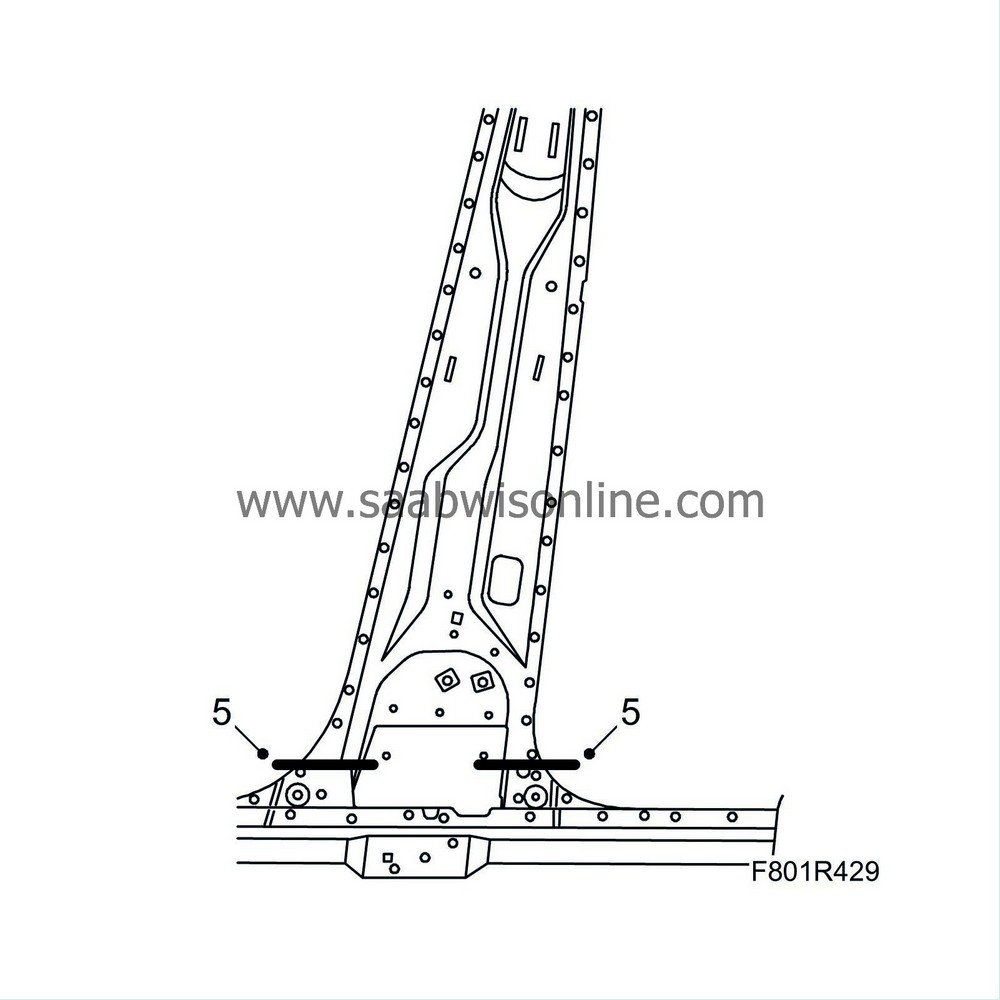
Cut the B-pillar inner panel from the inside of the car as illustrated.
|
|
6.
|
Tap out the outer sill together with the B-pillar.
|
|
7.
|
Protect the roof from welding and grinding splatter.
|
|
8.
|
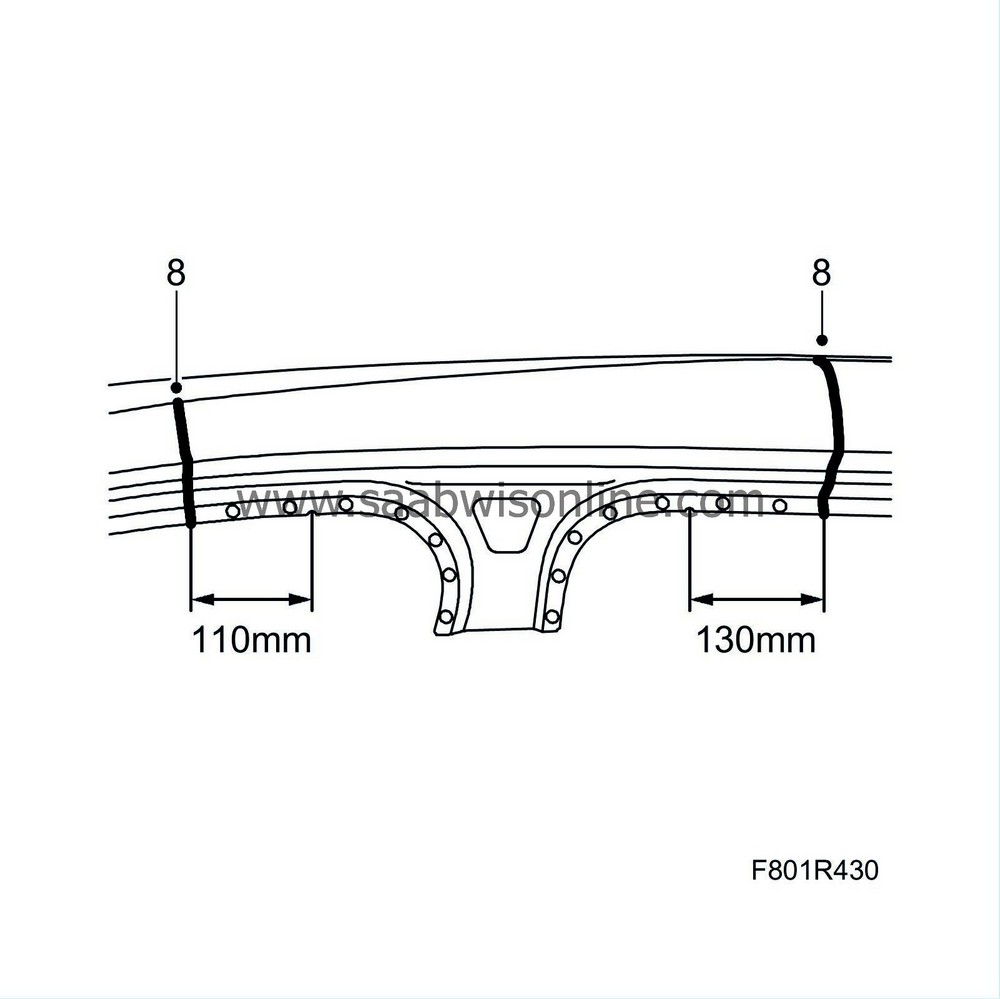
Cut the upper section of the B-pillar's outer panel as illustrated. Measure from the measurement points.
|
|
9.
|
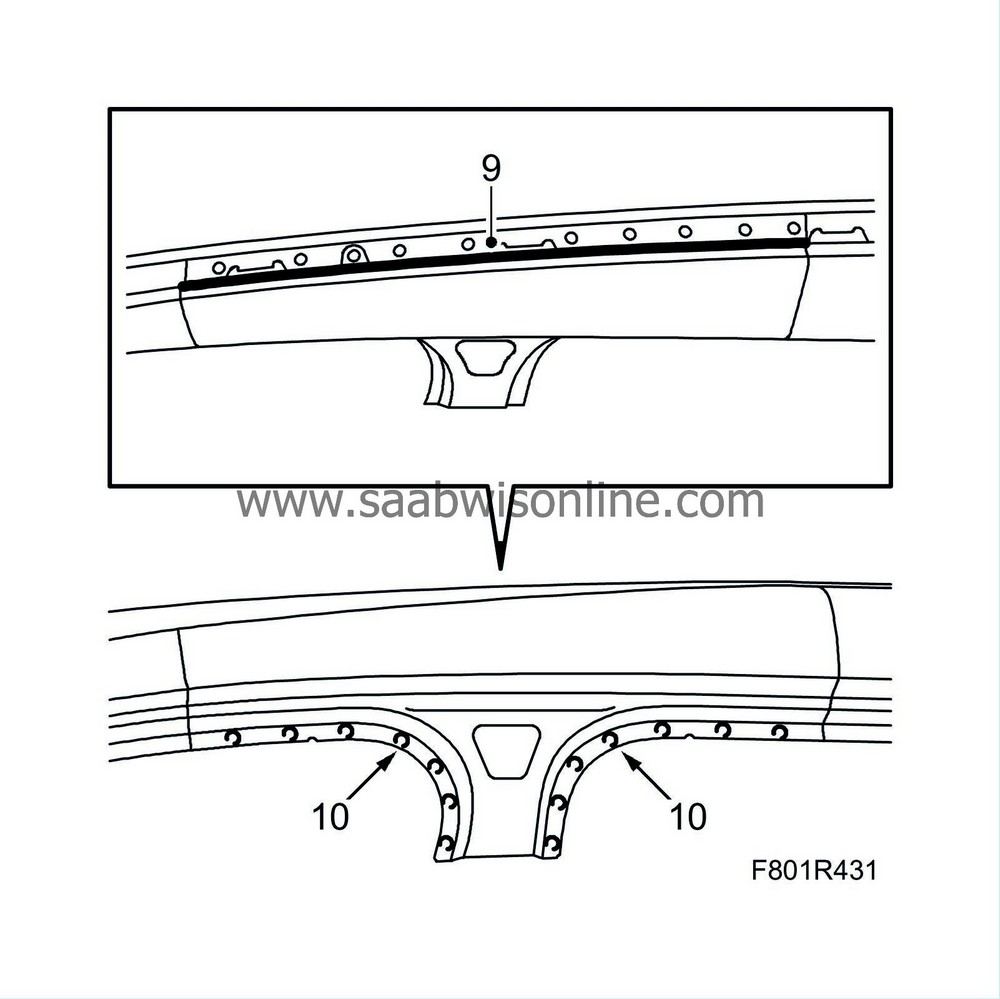
Cut the upper section of the B-pillar's outer panel as illustrated.
|
|
10.
|
Drill out the spot welds. Tap the section away.
|
|
11.
|
Drill out the spot welds at the roof through the roof panel and outer panel.
|
|
12.
|
Carefully tap up the edge of the roof and drill out the spot welds on the remaining section of outer panel. Tap the section of outer panel away.
|
|
13.
|
Drill out the spot welds for the B-pillar reinforcement. Carefully tap away the reinforcement.
|
|
14.
|
Mark out the positions on the inside of the B-pillar's upper and lower sections.
|
|
15.
|
Drill out the spot welds on the inside of the B-pillar's upper section. Tap the section away.
|
|
16.
|
Drill out the spot welds on the inside of the B-pillar's lower section. Tap the section away.
|
|
17.
|
Drill holes for plug welding in the spare part, the inside of the B-pillar.
|
|
18.
|
Grind all surfaces that are to be plug welded.
|
|
19.
|
Apply welding primer to all surfaces that are to be plug or spot welded.
|
|
20.
|
Align the inside of the B-pillar using the earlier markings.
|
|
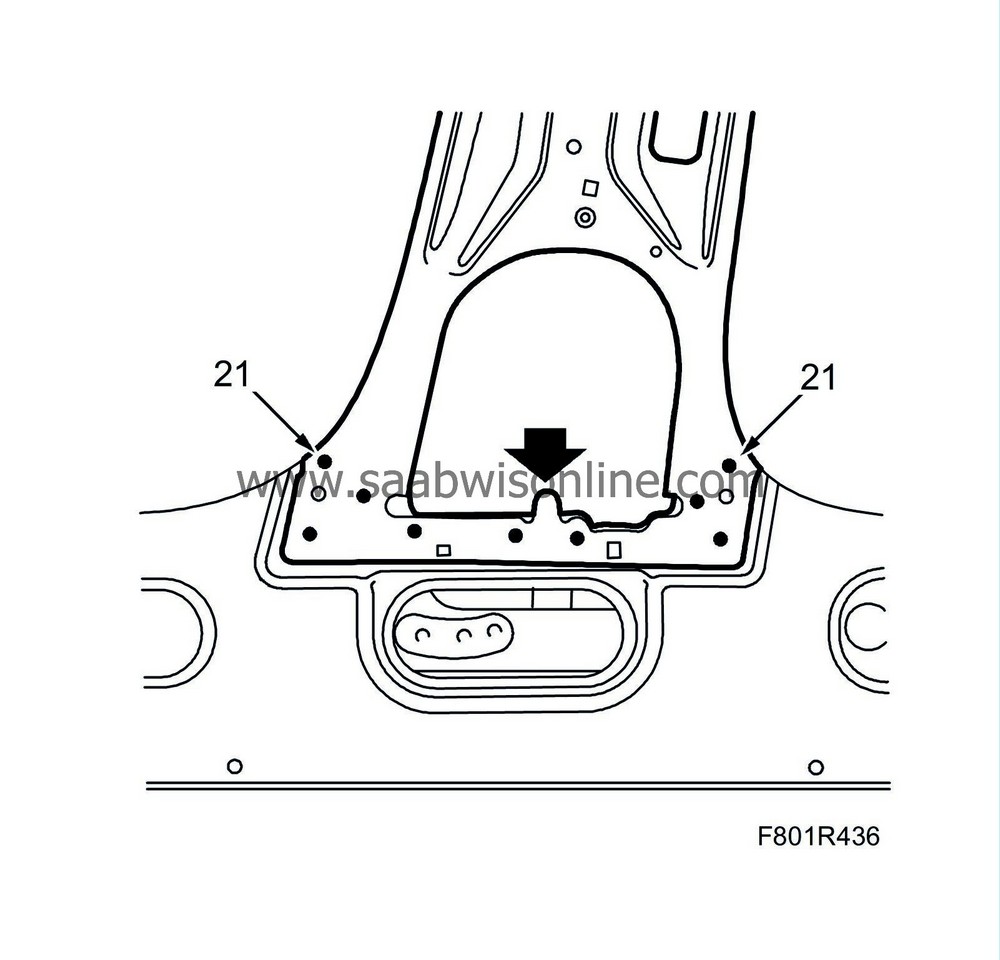
21.
|
Weld in the inside of the B-pillar at the lower edge. Grind in the welds
|
|
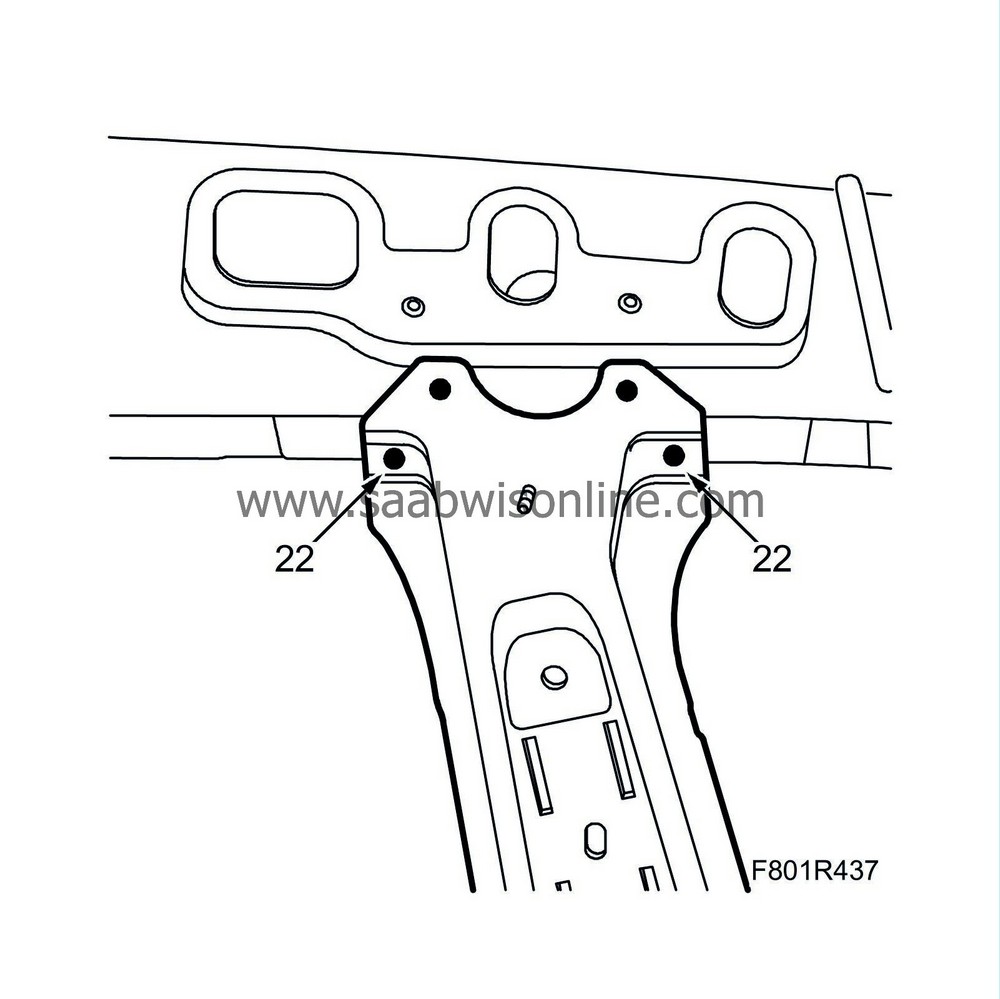
22.
|
Weld in the inside of the B-pillar at the upper edge. Grind in the welds.
|
|
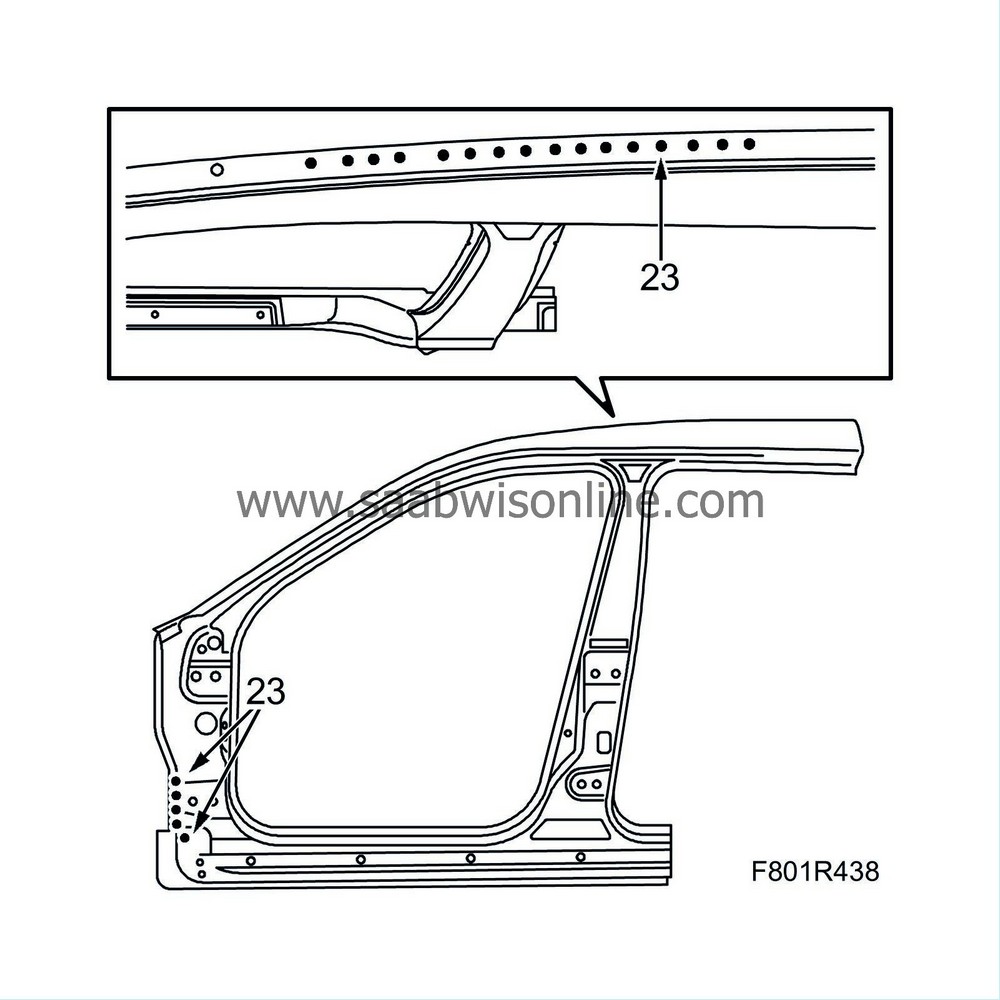
23.
|
Drill through the outer panel and the reinforcement at the upper edge of the spare part for plug welding.
|
|
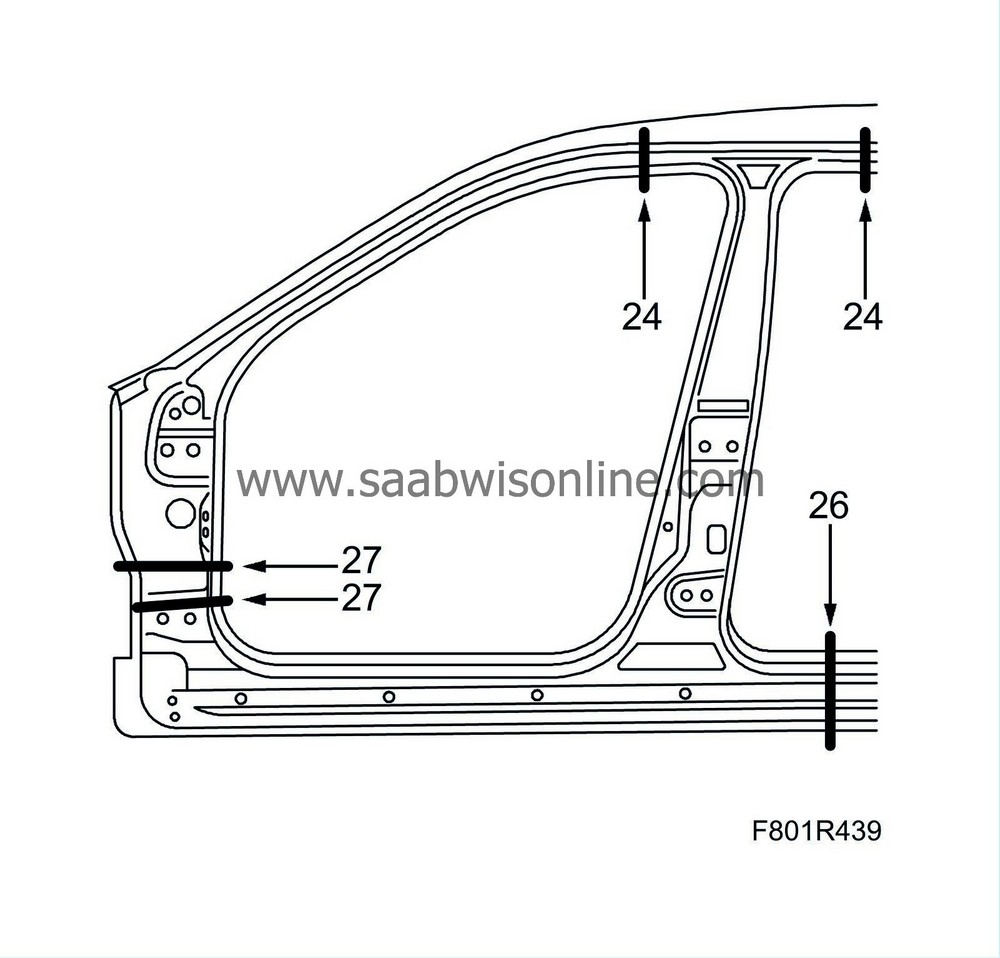
24.
|
Prepare the whole side of the spare part. Cut the spare part's upper edge against the roof so that it fits in with the earlier cutting.
|
|
25.
|
Make a mark on the front sill of the replacement panel. Make the mark so that it matches the cut previously made on the car. The cut should be made a few mm above the mark so the length can be adjusted during mounting. The cut should be made through all panels.
|
|
26.
|
Cut the rear sill of the spare part so that it fits the cut made earlier on the rear sill.
|
|
27.
|
Cut the outer front sill of the replacement panel to be able to weld the reinforcement.
|
|
28.
|
Drill out the spot welds and save the loose piece. Drill out the plug welding on the front sill of the spare part.
|
|
29.
|
Grind all surfaces that are to be welded.
|
|
30.
|
Apply welding primer to all surfaces that are to be plug or spot welded.
|
|
31.
|
Align the spare part by inserting it under the roof, rear sill and front reinforcement.
|
|
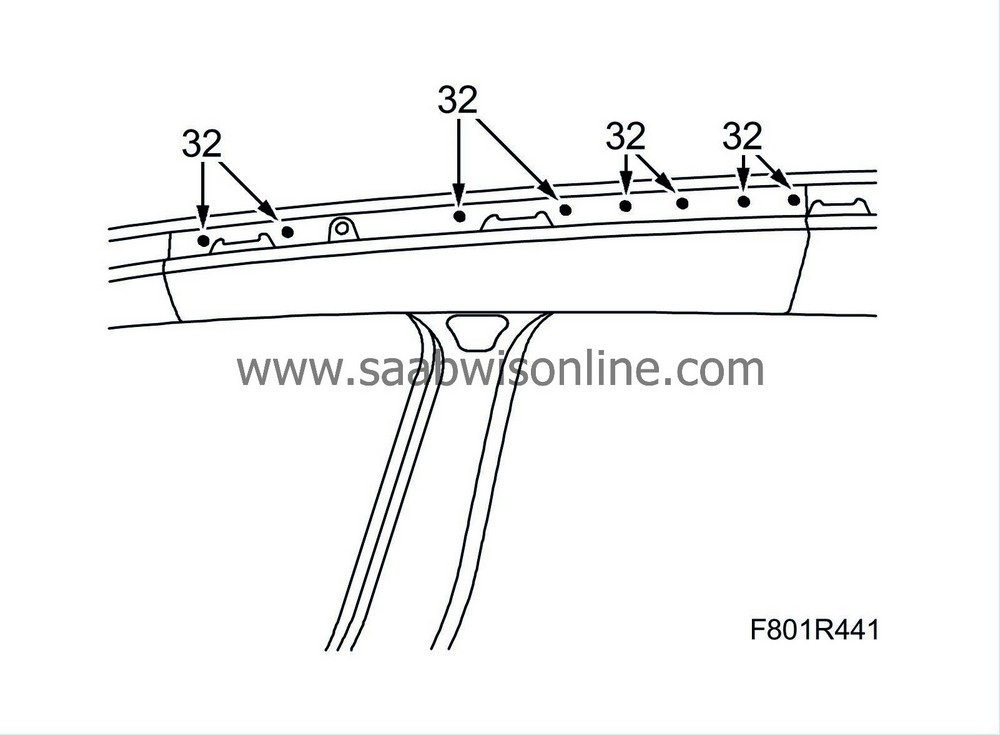
32.
|
Plug weld, all-weld and seam weld the spare part in at the upper edge against the roof. Grind in the welds.
|
|
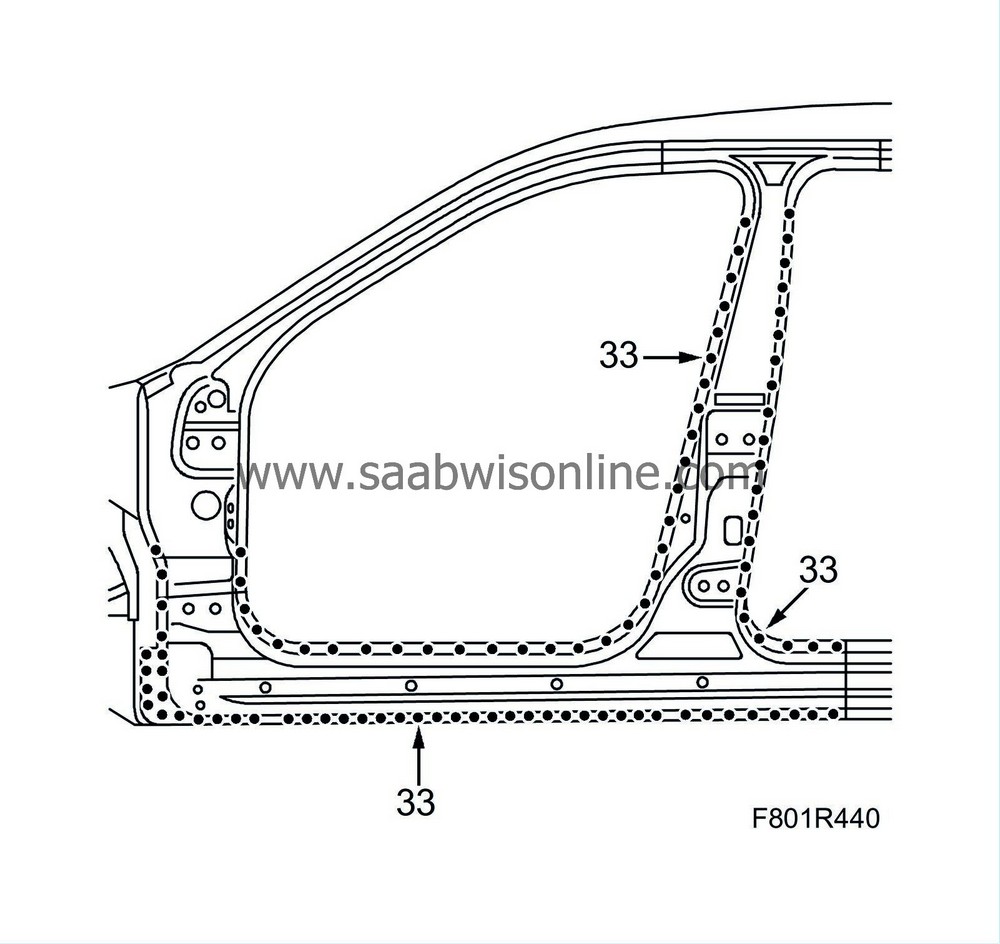
33.
|
Spot-weld the spare part.
|
|
34.
|
Tap down the edge of the roof against the outer panel and the B-pillar reinforcement. Plug weld the drilled-out holes.
|
|
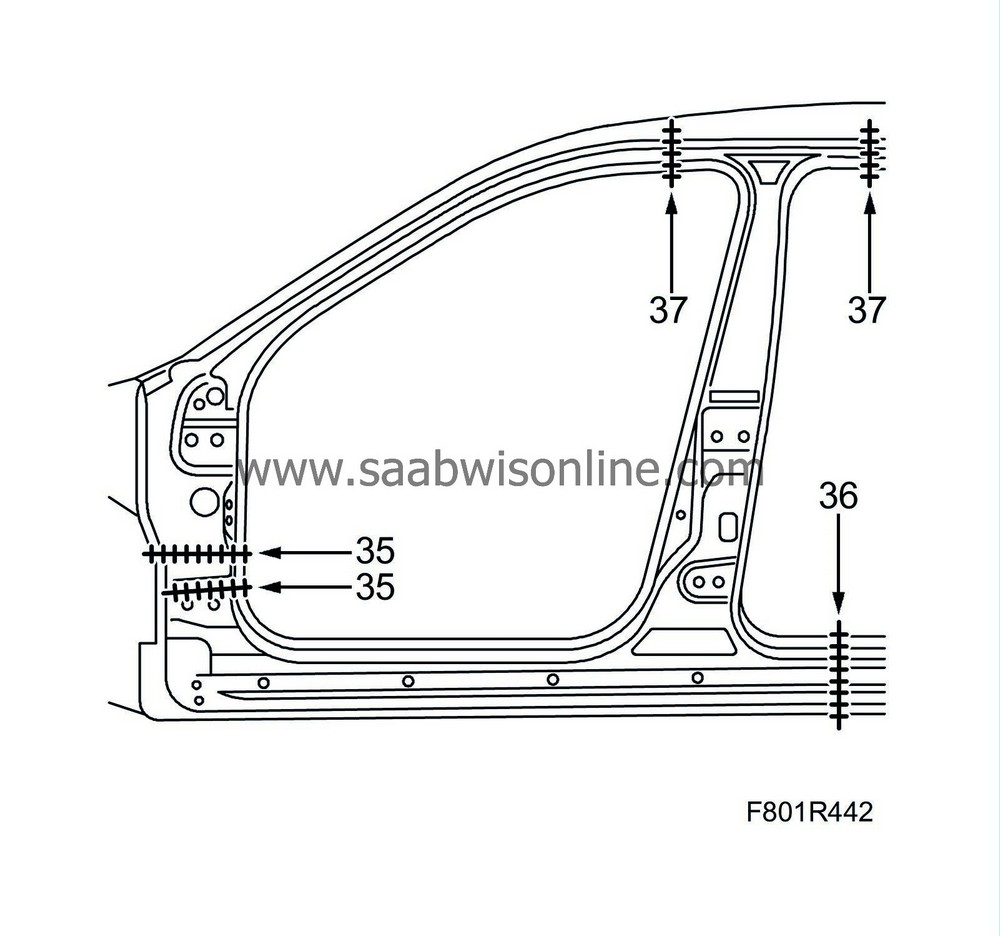
35.
|
All-weld in the front sill reinforcement and the loose piece.
|
|
36.
|
All-weld the rear sill.
|
|
37.
|
All-weld the upper section of the B-pillar.
|
|
39.
|
Wash away surplus welding primer. Welding primer reduces the adhesion of paint, filler and sealant.
|
|
40.
|
Apply primer to all bare metal surfaces.
|
|
41.
|
Seal joints and seams with sealant.
|
|
42.
|
Apply rust protector after painting. Use Terotex HV 400.
|


