PRE-RELEASE
Upper radiator member, Z19DTR
| Upper radiator member, Z19DTR |
| To remove |
| 1. |
Remove the
front bumper shell.
|
|
| 2. |
Remove the left-hand
Headlight
.
|
|
| 3. |
Remove the screw for the A/C pipe's holder.
|
|
| 4. |
Remove the screws for the boost pressure valves' mounting.
|
|
| 5. |
Remove the screws for the control module's holder, glow plug.
|
|
| 6. |
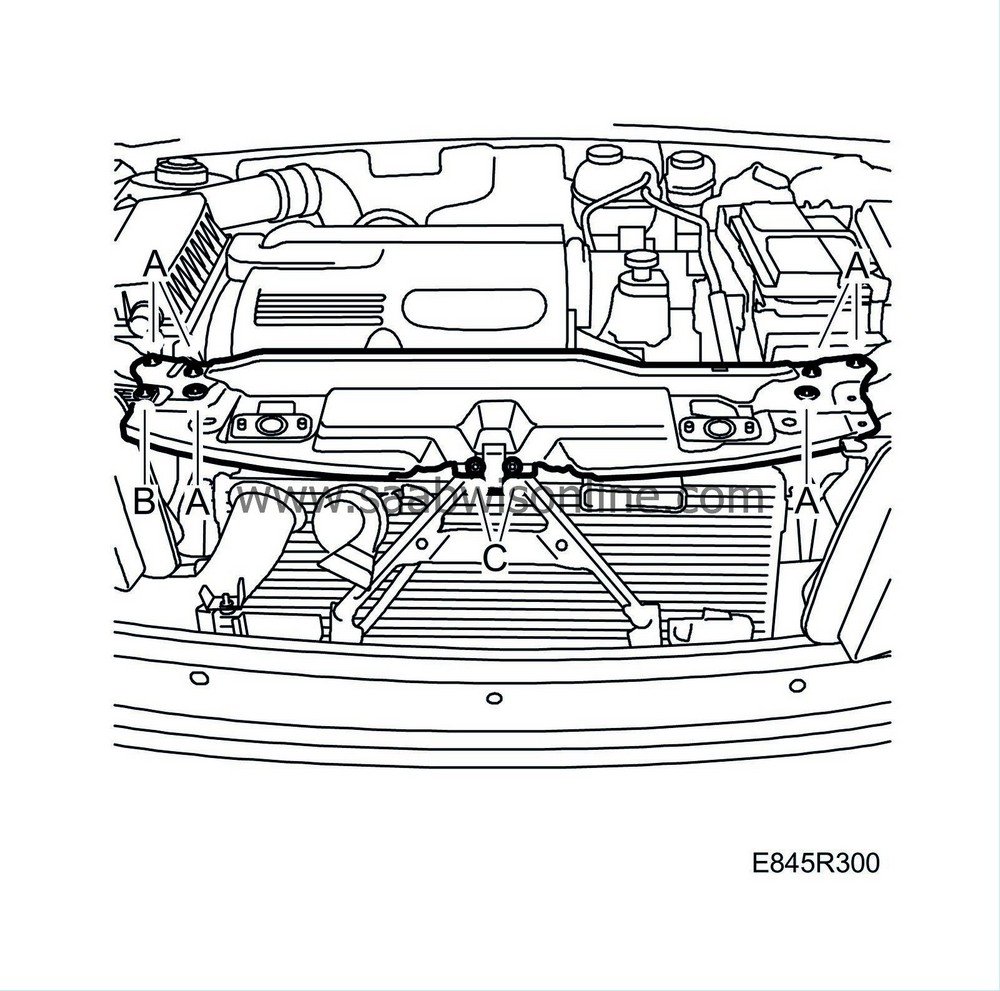
Remove the bolts (A) holding the radiator member.

|
|
| 7. |
Remove the left-hand bolt (B) on the right-hand headlight.
|
|
| 8. |
Remove the bolts (C) securing the centre stay.
|
|
| 10. |
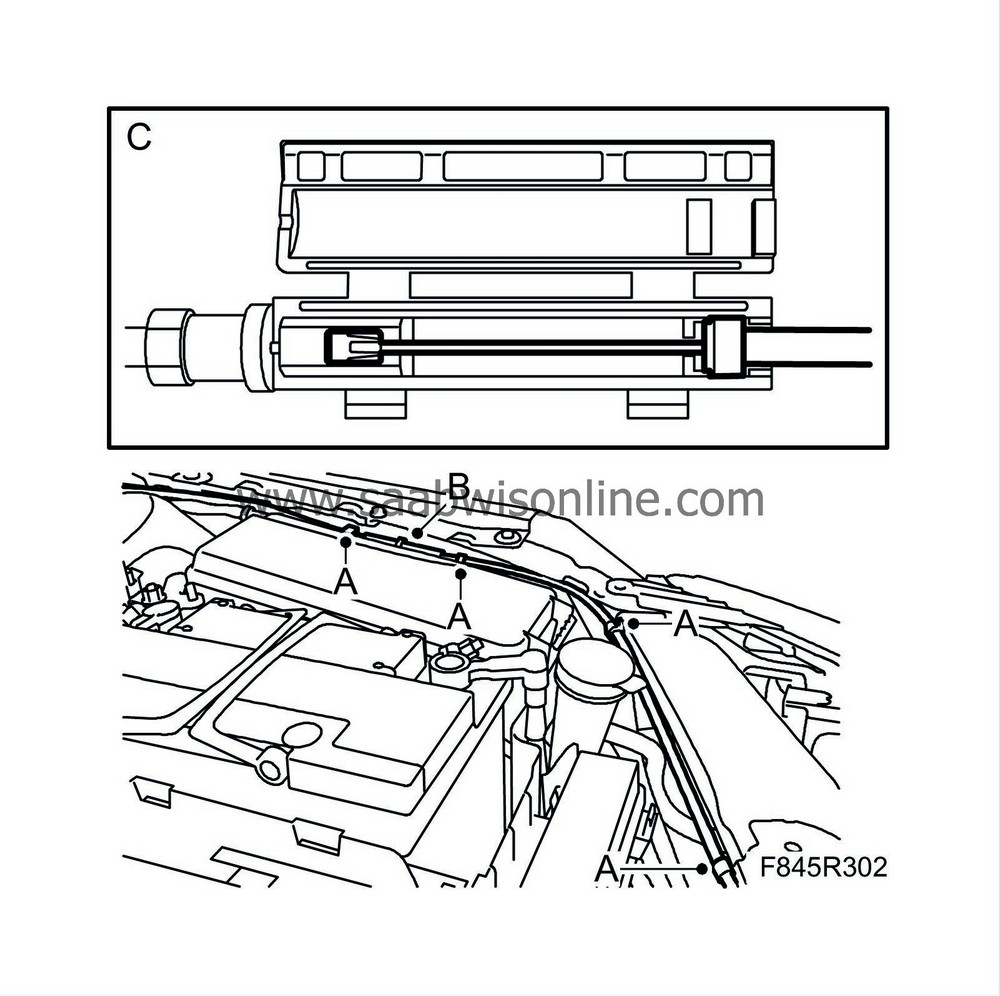
Remove the bonnet catch cable.
|
|
| • |
Detach the clips (A) for the body.

|
| • |
Cut off the cable tie (B)
|
| • |
Split the quick coupling (C). Use a screwdriver.
|
| To fit |
| 1. |
Fit the bonnet catch cable.
|
|
| • |
Assemble the quick coupling (C)

|
| • |
Fit the cable tie (B)
|
| • |
Fit the cable to the clips (A)
|
| 2. |
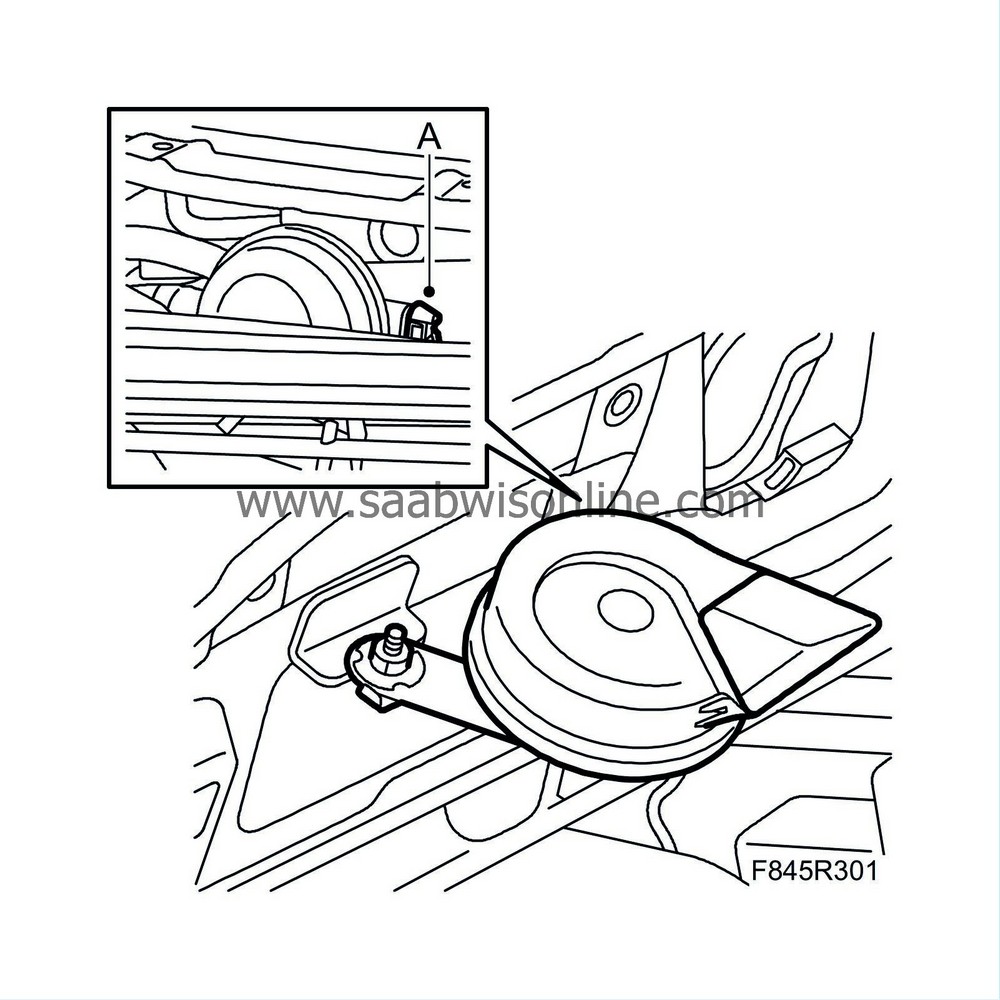
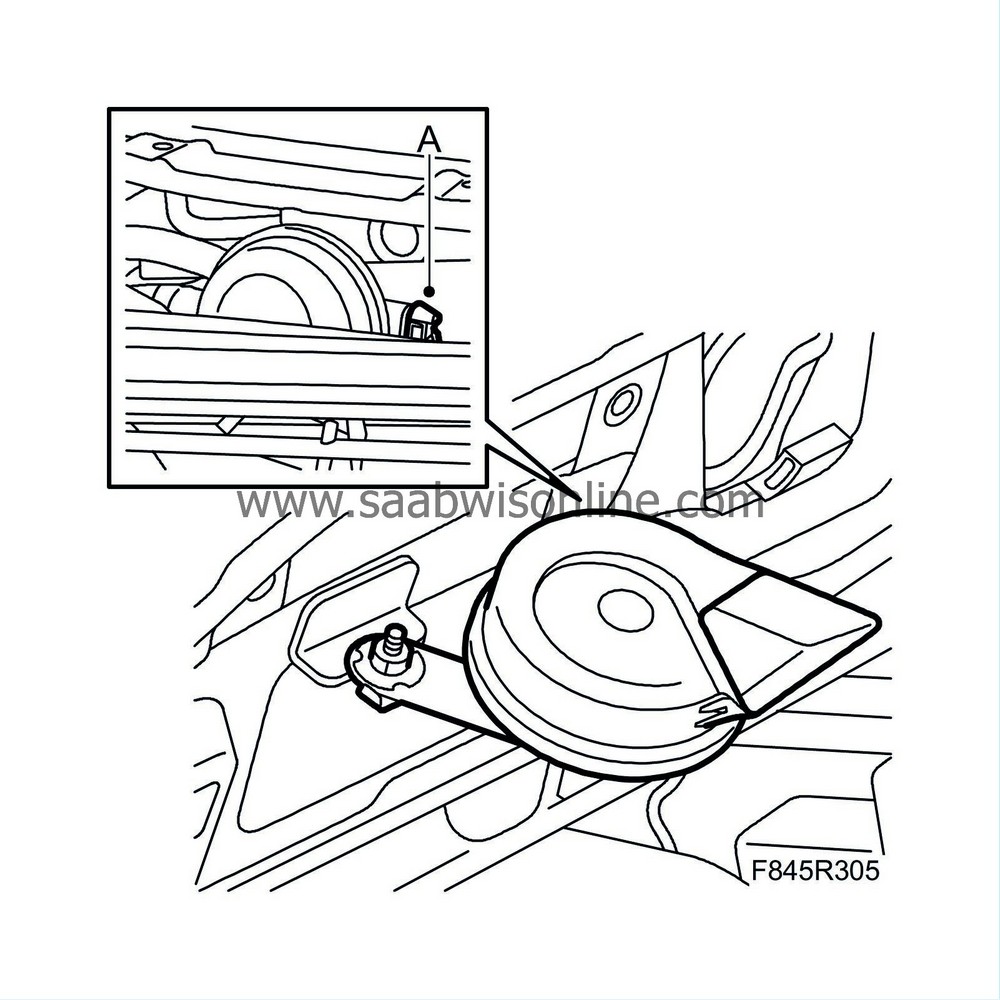
Fit the radiator member in position and plug in the horn connector (A) at the same time.

|
|
| 3. |
Make sure the centre stay is positioned behind the member. Press in the stay into its correct position.
|
|
| 4. |
Thread the centre stay's bolts (C) and the radiator member's bolt's (A).

|
|
| 5. |
Tighten the centre stay's bolts (C) first to ensure a good fit.
|
|
| 6. |
Tighten the bolts (A) holding the radiator member to the body.
|
|
| 7. |
Fit the left-hand bolt (B) on the right-hand headlight.
|
|
| 8. |
Fit the left-hand
headlight
.
|
|
| 9. |
Fit the screws for the boost pressure valves' mounting to the radiator member.
|
|
| 10. |
Fit the screw for the A/C pipe's holder.
|
|
| 11. |
Fit the screws for the control module's holder, glow plug.
|
|
| 12. |
Fit the
front bumper shell
.
|
|
| 13. |
Check that the bonnet catch is functioning correctly.
|
|
| 14. |
Check headlight alignment.
|
|

 Warning


