PRE-RELEASE
Rear torque arm, B207, 4WD
| Rear torque arm, B207, 4WD |
| To remove |
| 1. |
Remove the upper mountings of the bumper shell.
|
|
| 2. |
Hang two
83 95 212 Straps
across the radiator member and radiator assembly so that they can be accessed from underneath.
|
|
| 3. |
Raise the car.
|
|
| 4. |
Remove the front lower cover (A).

|
|
| 5. |
Secure the radiator assembly with the straps.
|
|
| 6. |
Remove the radiator brackets (B) from the subframe.
|
|
| 7. |
Remove the
propeller shaft
.
|
|
| 8. |
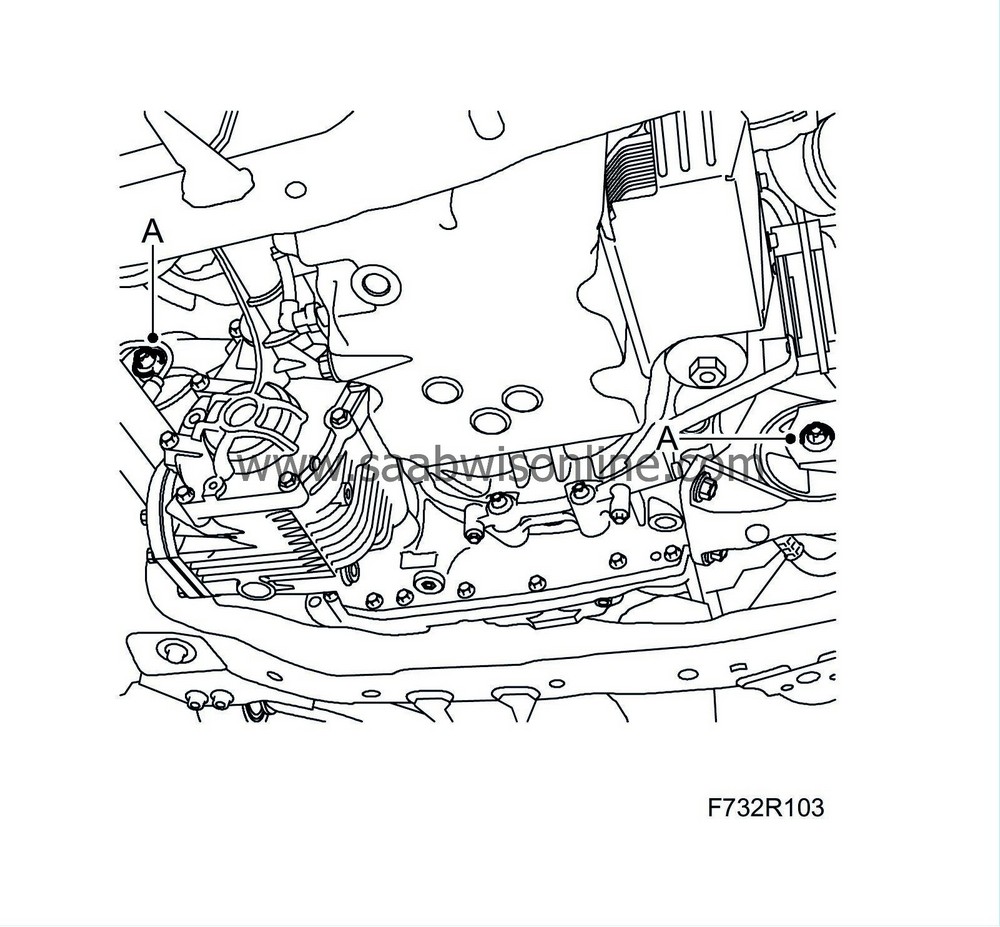
Detach the front and rear torque arms (A) of the engine from the subframe.
|
|
| 9. |
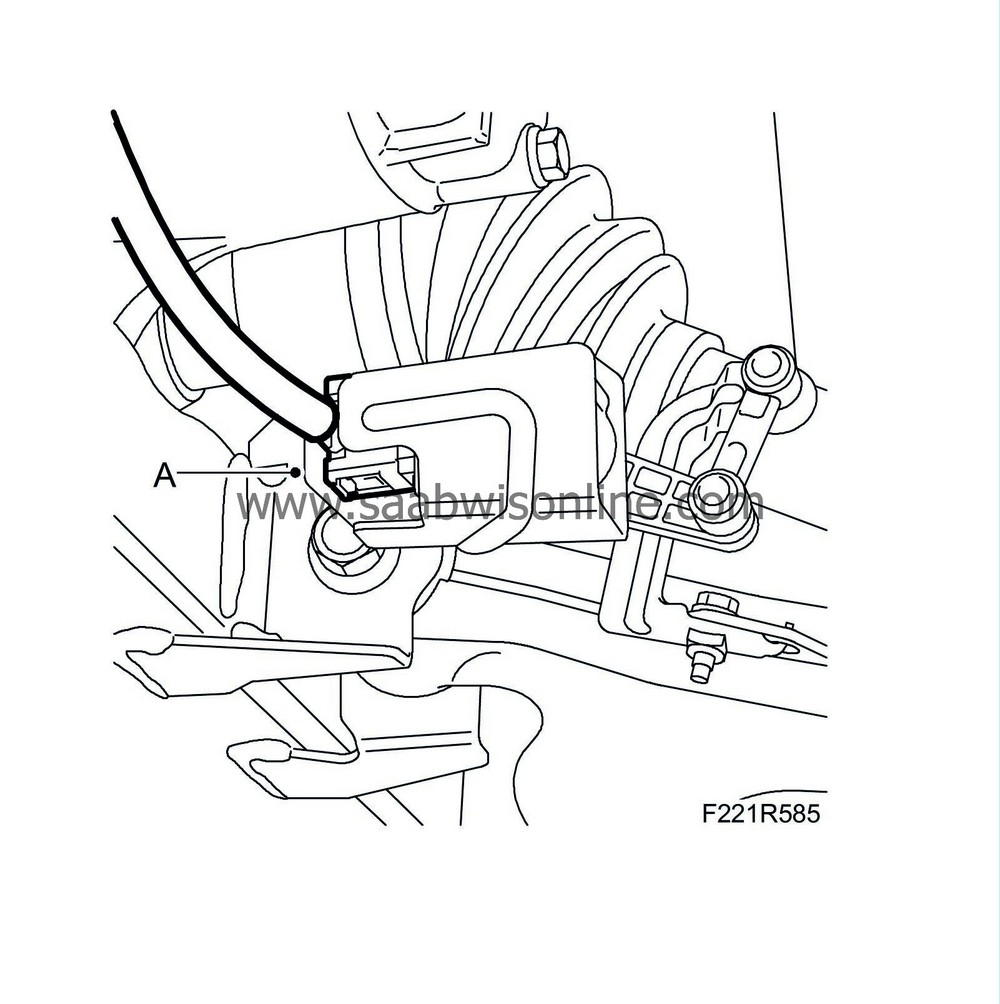
Cars with Xenon lamps:
Remove the level sensor (A) on the left suspension arm and remove the wiring harness clips.
|
|
| 10. |
Remove the steering gear from the subframe (A). Keep track of the nuts and washers. Let the steering gear hang in place.

|
|
| 11. |
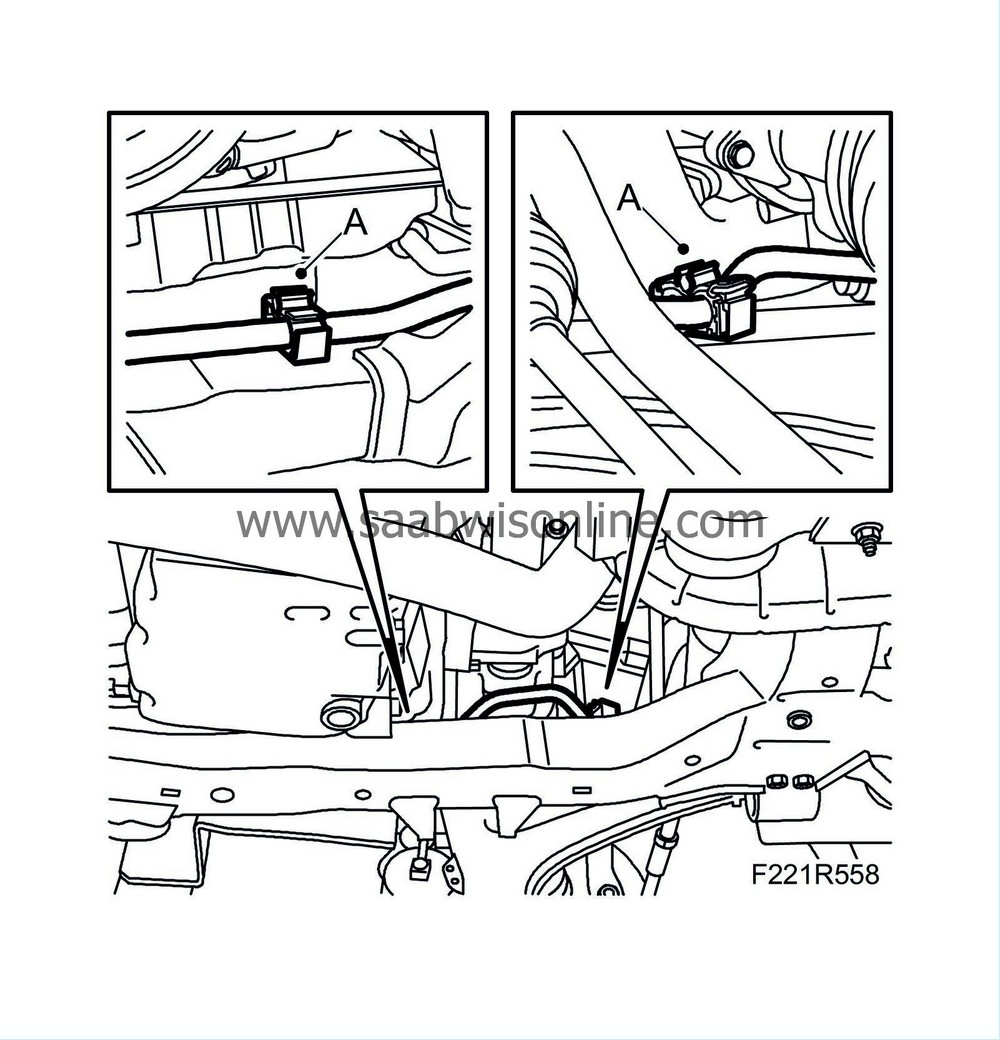
Release the clamps (A) holding the power steering pipe to the subframe.
|
|
| 12. |
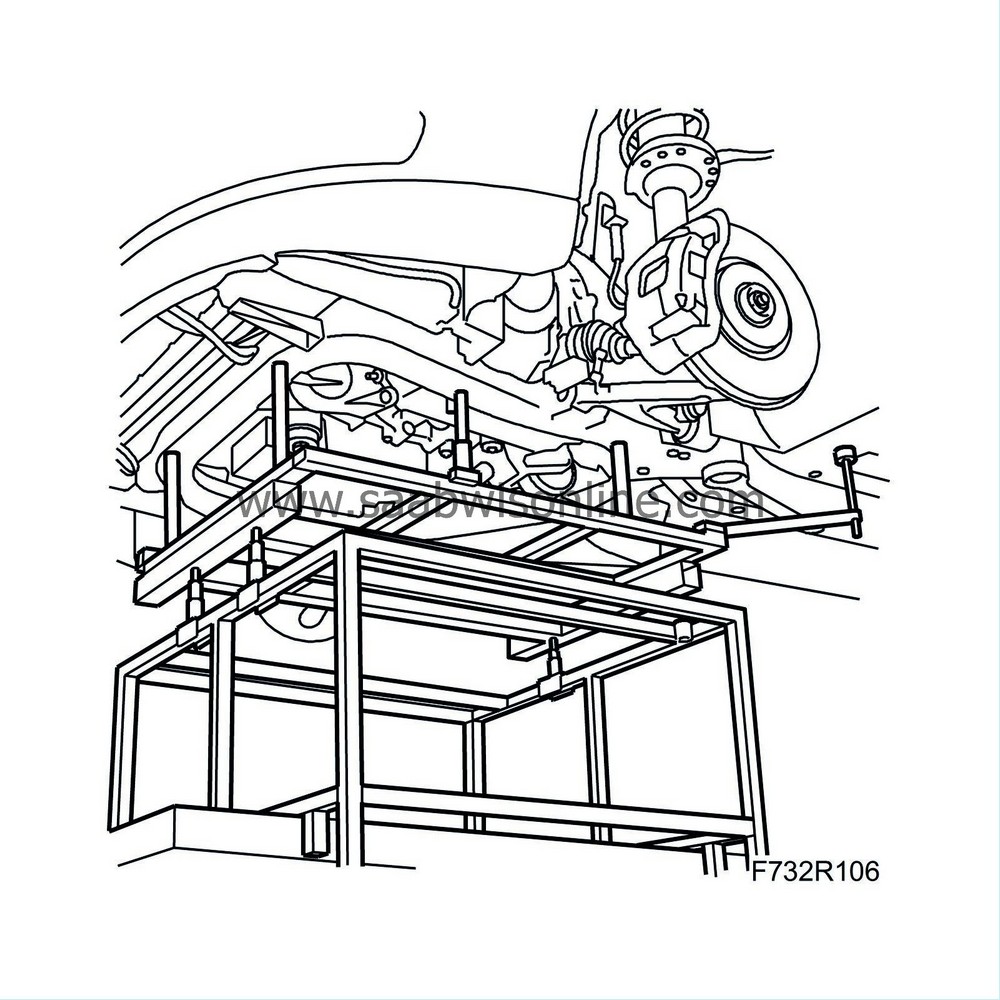
Position
83 95 311 Trolley lift
med
83 94 801 Parent fixture
and
83 96 137 Centring tool, subframe - body
.
|
|
| 13. |
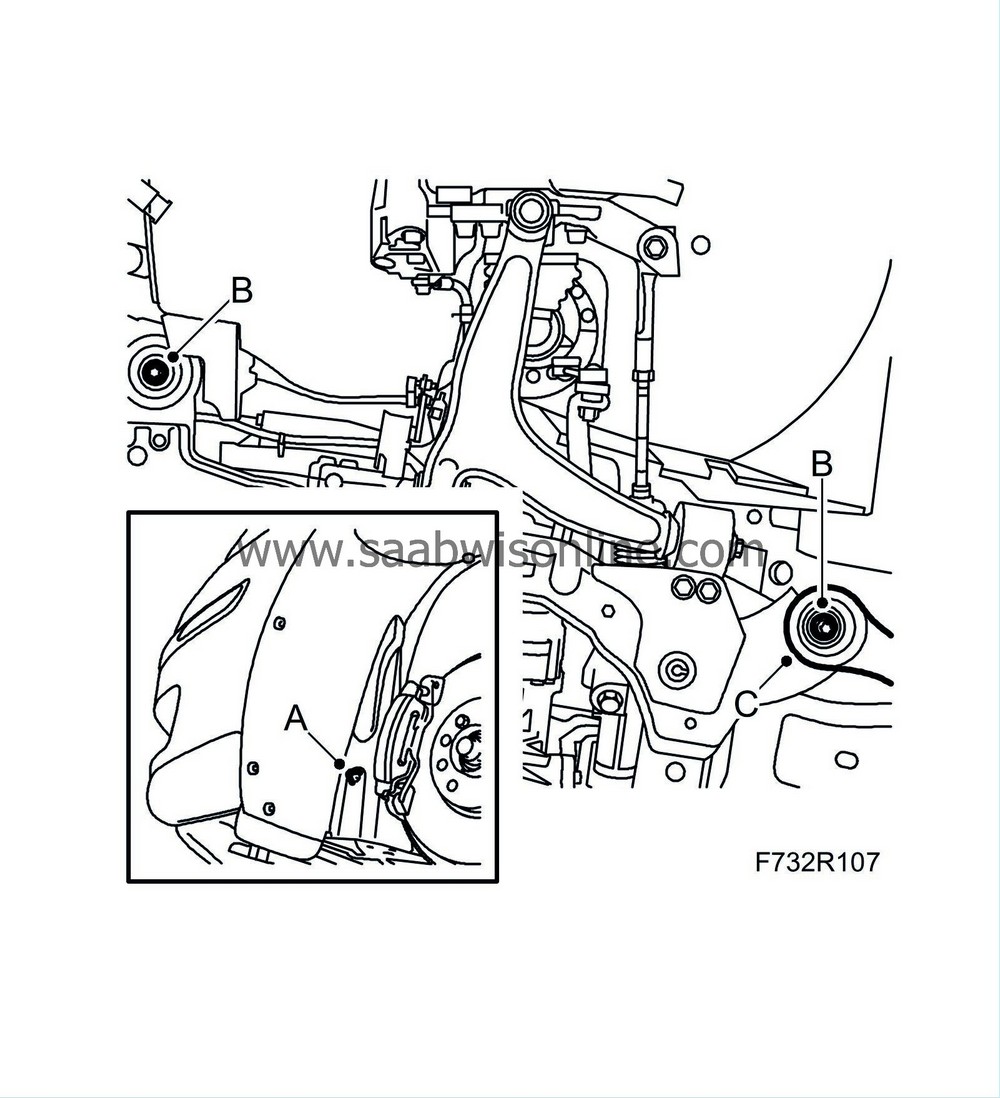
Detach the front part of the wing liners (A) and bend away slightly.
|
|
| 14. |
Remove the subframe bolts (B) on both sides. Remove the torque arms (C) from the body.
|
|
| 15. |
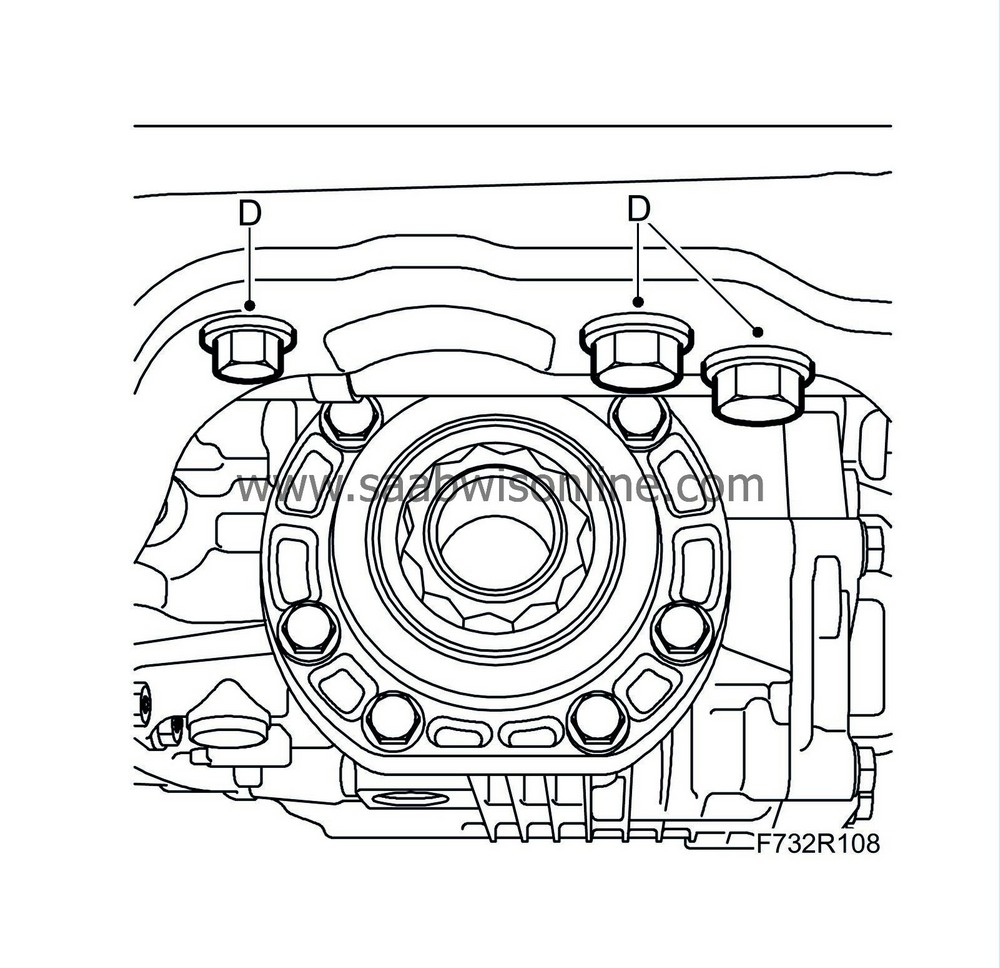
Remove the bolts (D) securing the rear torque arm to the subframe.
|
|
| 16. |
Lower the subframe slightly.
|
|
| 17. |
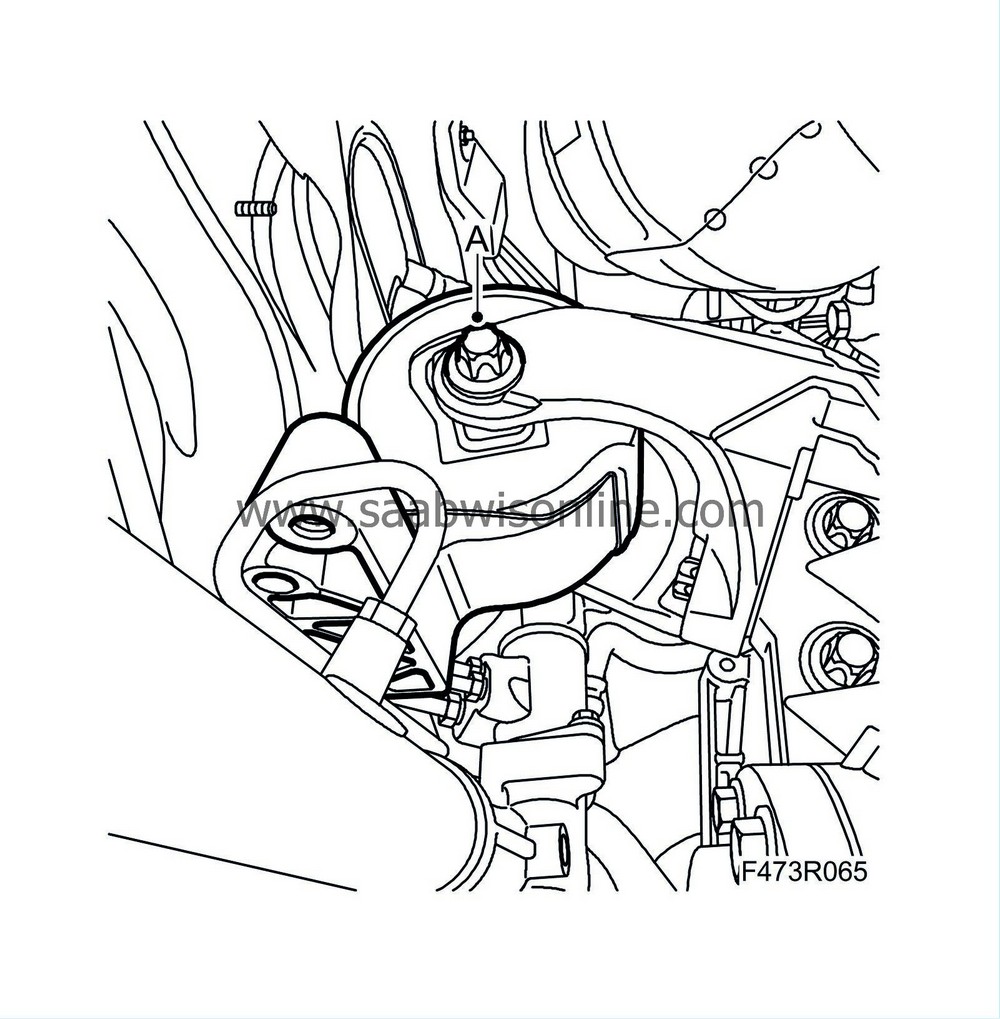
Remove the rear torque arm (A).
|
|
| To fit |
| 1. |
Fit the rear torque arm, tightening the bolts (A) slightly.

|
|
| 2. |
Lift the subframe into place and fit
83 96 137 Centring tool, subframe - body
to the guide holes in the body.
|
|
| 3. |
Fit the bolts (D) securing the rear torque arm to the subframe.
Tightening torque: M10 65 Nm (48 lbf ft) M12 120 Nm (88 lbf ft) 
|
|
| 4. |
Raise the subframe so that the inner part of the bushings is pressed against the body. Fit the front bolts (B) of the subframe on both sides.
Tightening torque 75 Nm + 135° (55 lbf ft +135°) 
|
|
| 5. |
Fit the front bolts (B) of the subframe on both sides.
Tightening torque 75 Nm + 135° (55 lbf ft +135°) |
|
| 6. |
Fit the torque arms and rear subframe bolts (B) on both sides. Insert the rear torque arm bolts (C) before tightening the subframe bolts.
Tightening torque 75 Nm + 135° (55 lbf ft +135°) |
|
| 7. |
Lower and move aside the trolley lift.
|
|
| 8. |
Tighten the torque arms' rear bolts (C).
Tightening torque 90 Nm +45° (66 lbf ft +45°) |
|
| 9. |
Fit the front part of the wing liners (A).
|
|
| 10. |
Fit the power steering pipe to the plastic clips on the subframe (A).

|
|
| 11. |
Fit the steering gear to the subframe (A).
Tightening torque 50 Nm +60° (37 lbf ft +60°) 
|
|
| 12. |
Cars with xenon lights:
Fit the level sensor (C) on the left suspension arm.

|
|
| 13. |
Fit the engine's front torque arm (A) to the subframe.
Tightening torque 60 Nm +90° (44 lbf ft +90°). 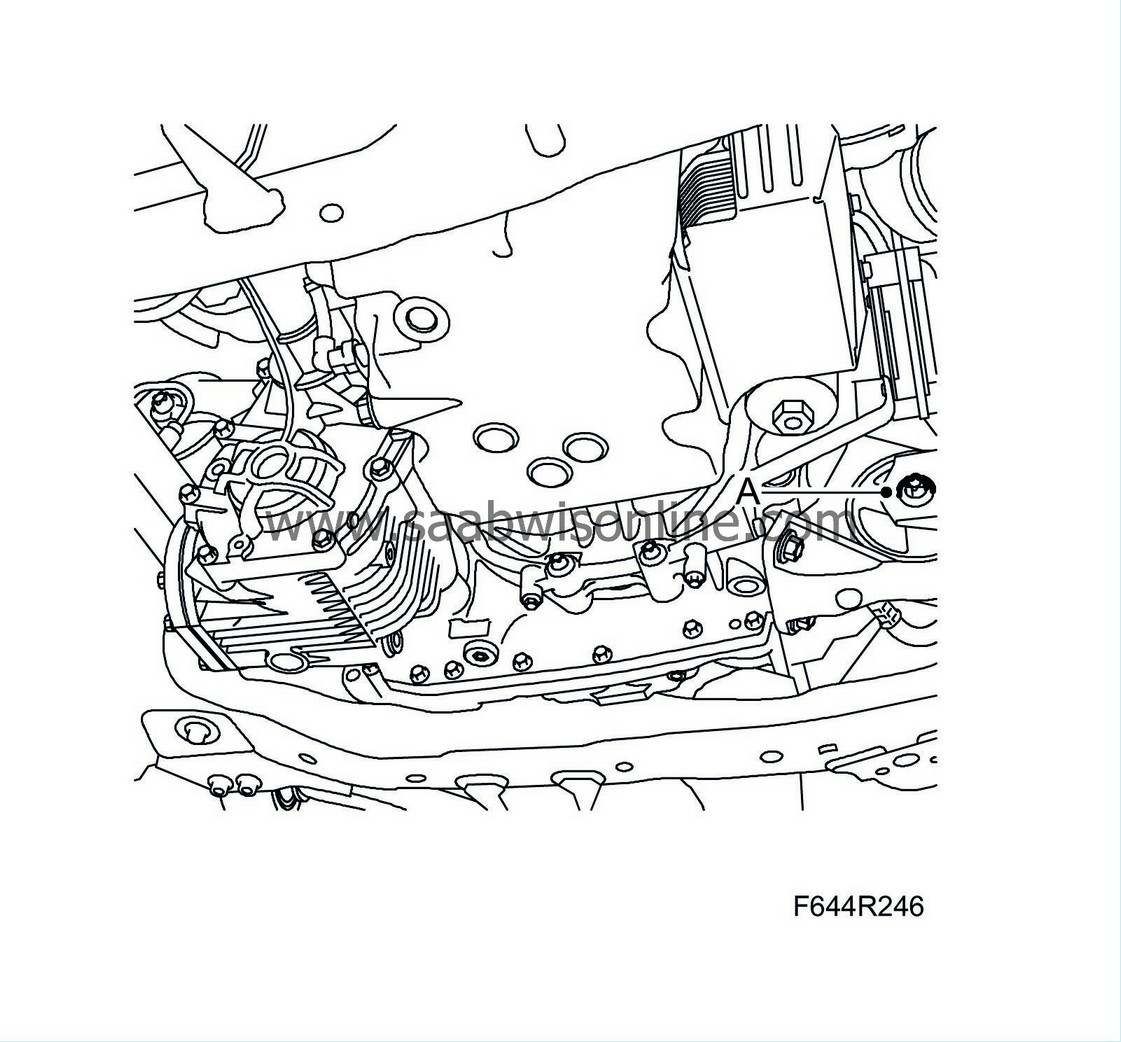
|
|
| 14. |
Tighten the rear torque arm (A) to the torque rod bracket.
Tightening torque 60 Nm +90° (44 lbf ft +90°). 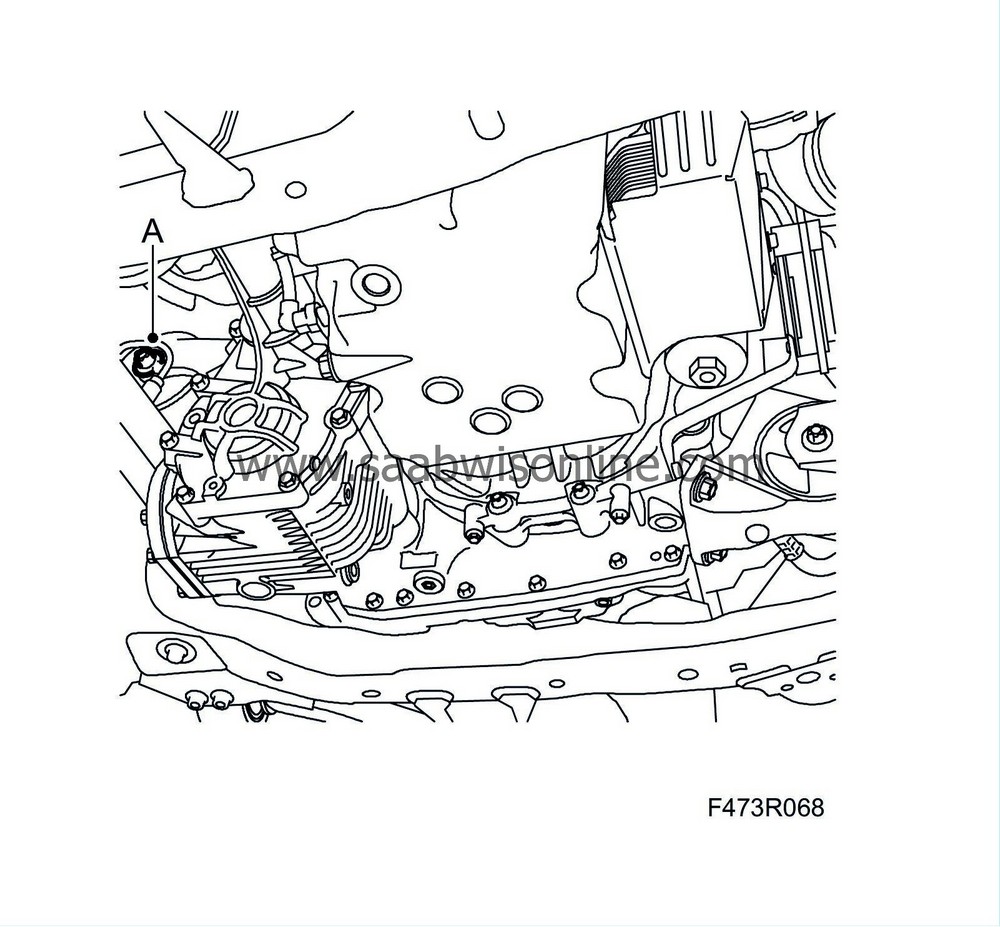
|
|
| 15. |
Fit
83 96 145 Centring tool, subframe - engine
and check that the engine is correctly positioned in relation to the subframe. Remove the centring tool.
|
|
| 16. |
Fit the
propeller shaft
.
|
|
| 17. |
Fit the radiator brackets (B) to the subframe.
Tightening torque 47 Nm (35 lbf ft) 
|
|||||||
| 18. |
Remove the straps.
|
|
| 19. |
Fit the front lower cover (A).
|
|
| 20. |
Lower the car.
|
|
| 21. |
Fit the upper mountings of the bumper shell.
|
|
| 22. |
Check the position of the steering wheel when driving straight ahead on a flat road surface. Adjust if necessary.
|
|


