PRE-RELEASE
Checking and adjusting basic charging pressure
| Checking and adjusting basic charging pressure |
| Checks |
| 1. |
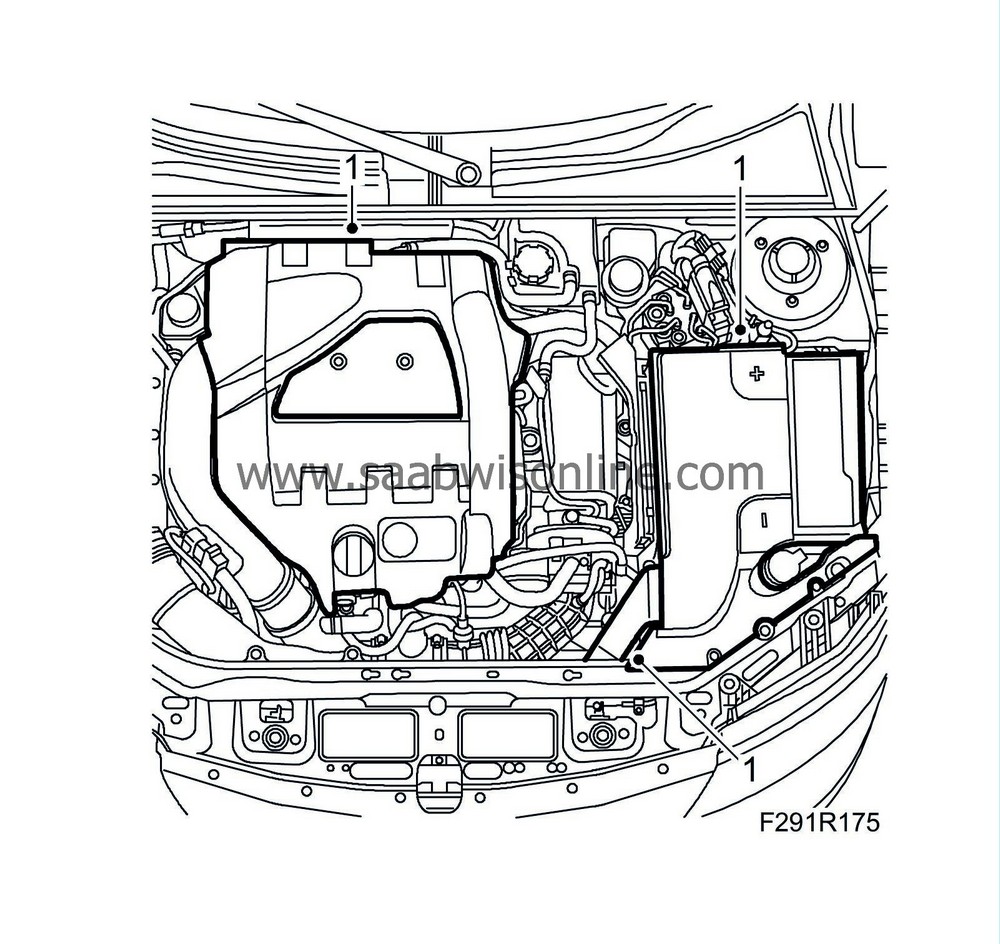
Remove the battery cover, the radiator pipe and engine cover.
|
|
| 2. |
Attach the battery cables and fit the battery.
|
|
| 3. |
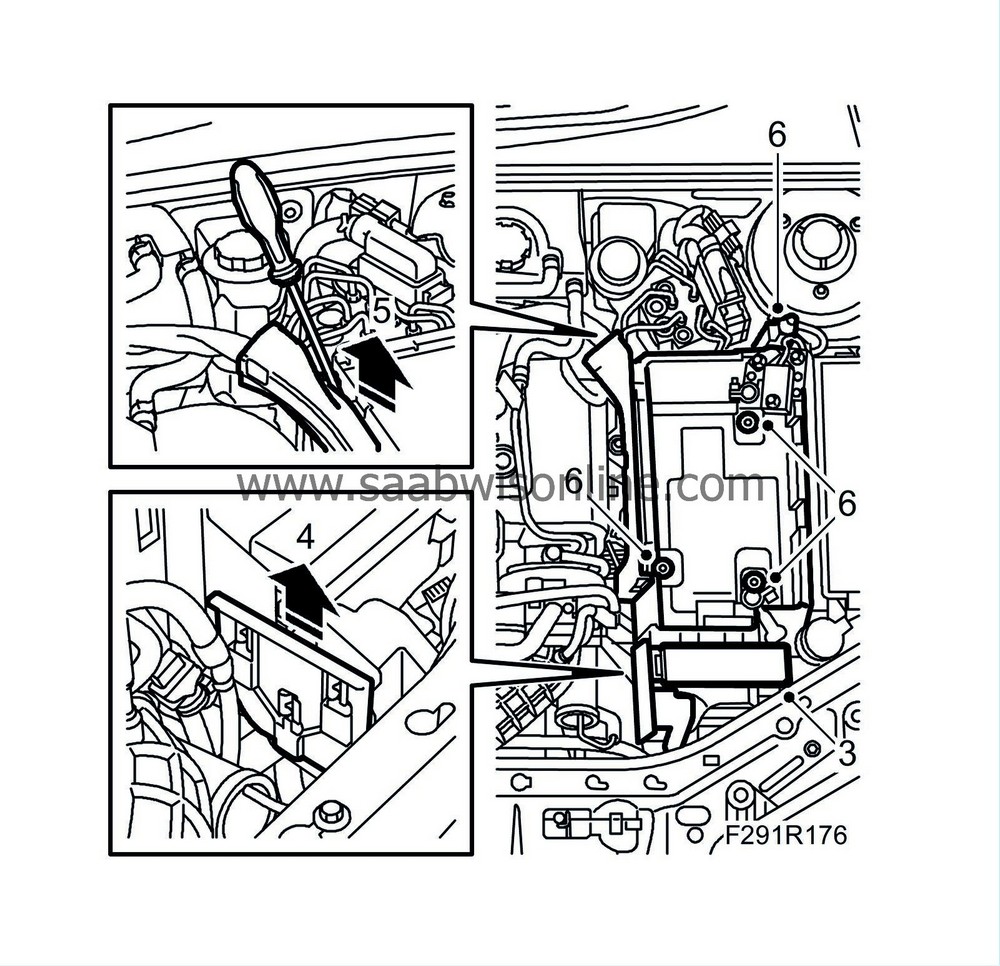
Undo the main fuse box in front of the battery tray and move it aside.
|
|
| 4. |
Detach the fuse holder from the battery tray.
|
|
| 5. |
Remove the cable duct from the battery tray.
|
|
| 6. |
Unplug the bonnet switch connector, undo the cable clip and remove the battery tray.
|
|
| 7. |
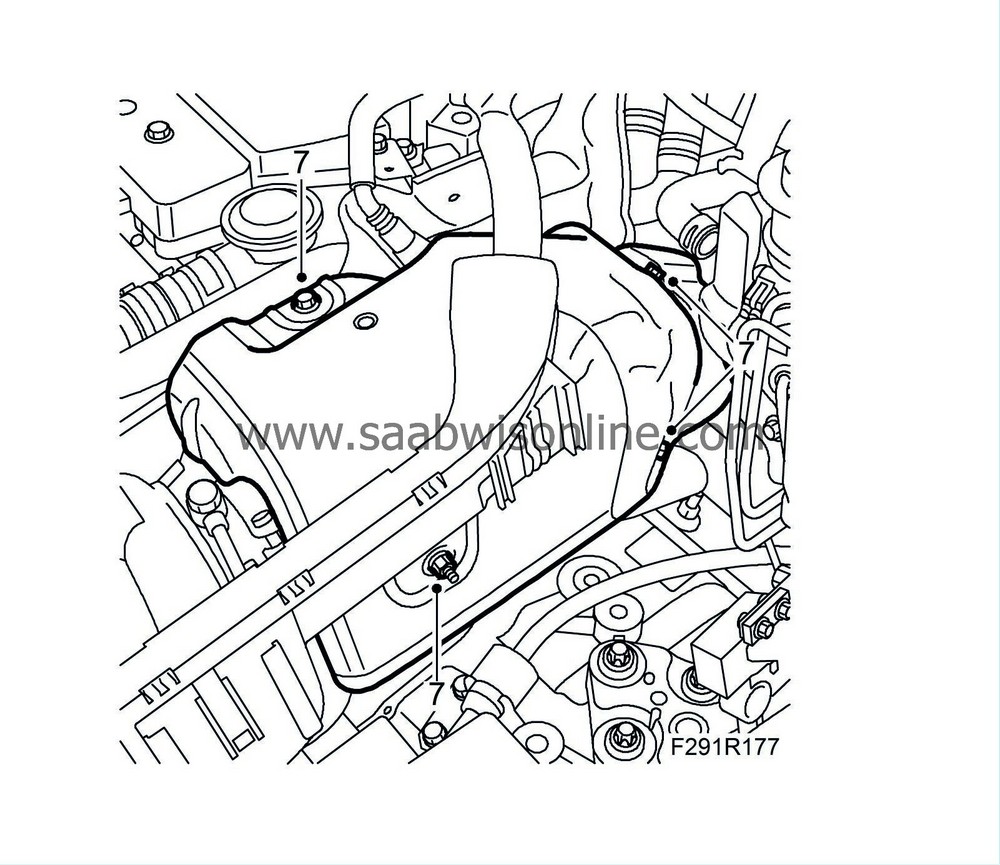
Remove the turbocharger's upper heat shield.
|
|
| 8. |
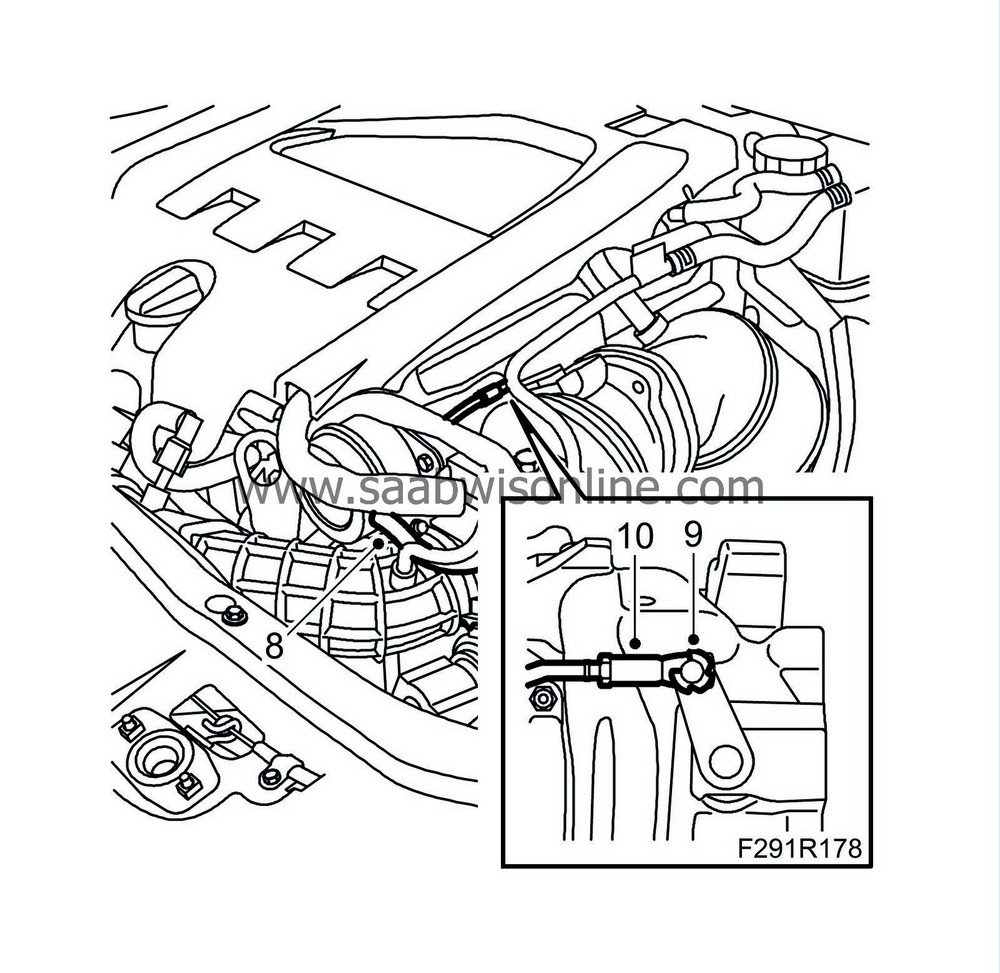
Detach the hose from the diaphragm box.
|
|
| 9. |
Remove the control arm circlip with
83 94 538 Circlip tool
.
|
|||||||
| 10. |
Grip the pushrod with
83 94 066 Pliers
or similar and undo the lock nut.
|
|
| 11. |
Detach the pushrod from the control arm.
|
|
| 12. |
Move the control arm on the wastegate to the "Closed" position and adjust the end piece so that the pushrod can easily be fitted on the control arm pin.
|
|
| 13. |
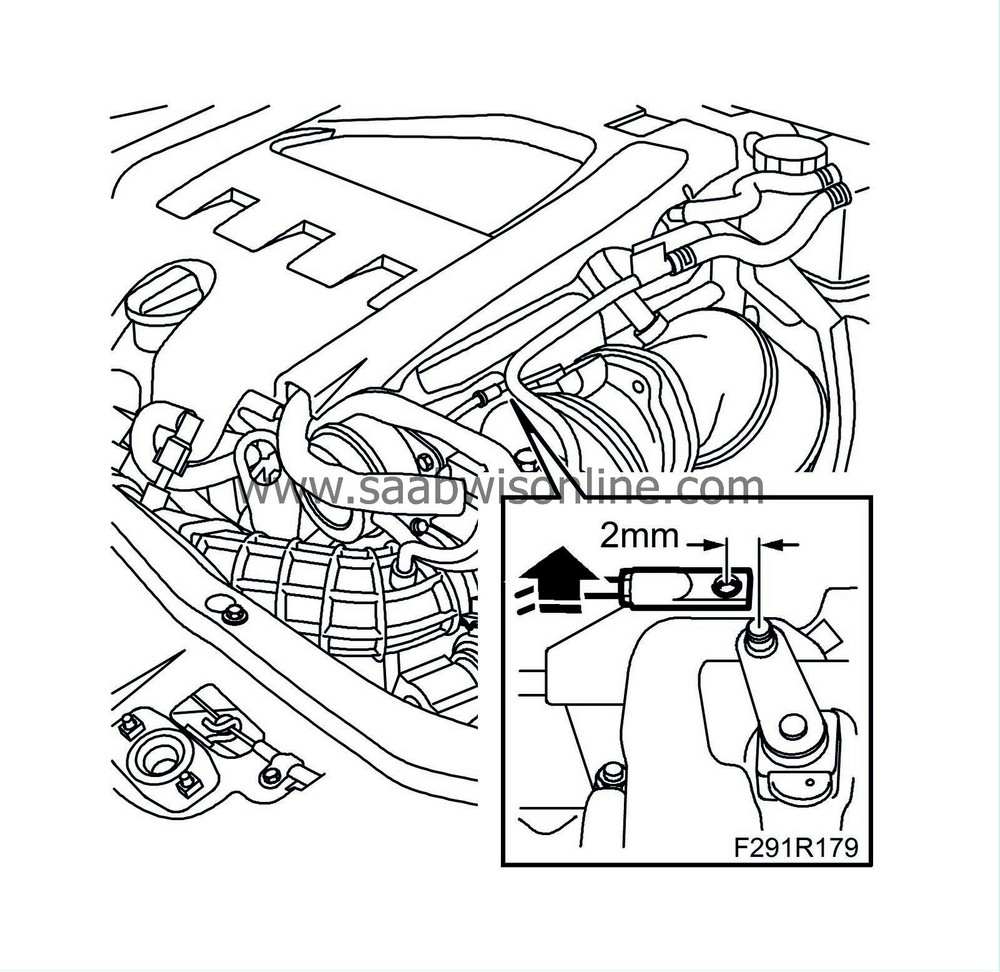
Detach the pushrod from the control arm pin. Turn the end piece clockwise about 2 turns to attain a tension of 2 mm. Hook the pushrod to the control arm pin.
|
|
| 14. |
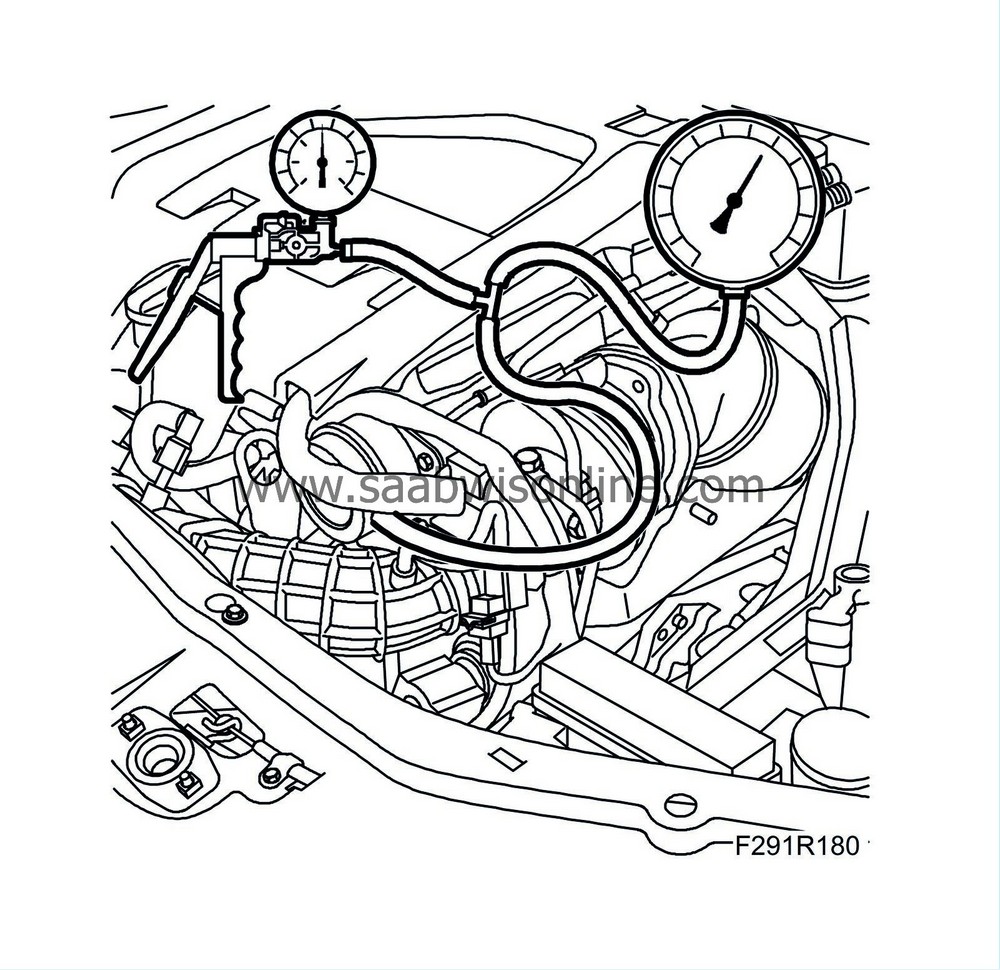
Connect
30 14 883 Pressure/vacuum pump
to the diaphragm box and
83 93 514 Charge pressure meter
.
|
|
| 15. |
Carefully pump up an overpressure and read off the pressure on the pressure gauge just as the control rod starts to move (approx. 1 mm). The pressure should be 26.5 - 28.5 kPa.
|
|
| 16. |
If the pressure is too low, shorten the rod until the correct pressure is obtained.
|
|
| 17. |
Undo the control rod and apply a thin layer of
90 513 210 Universal paste
or similar to the control arm pin.
|
|
| 18. |
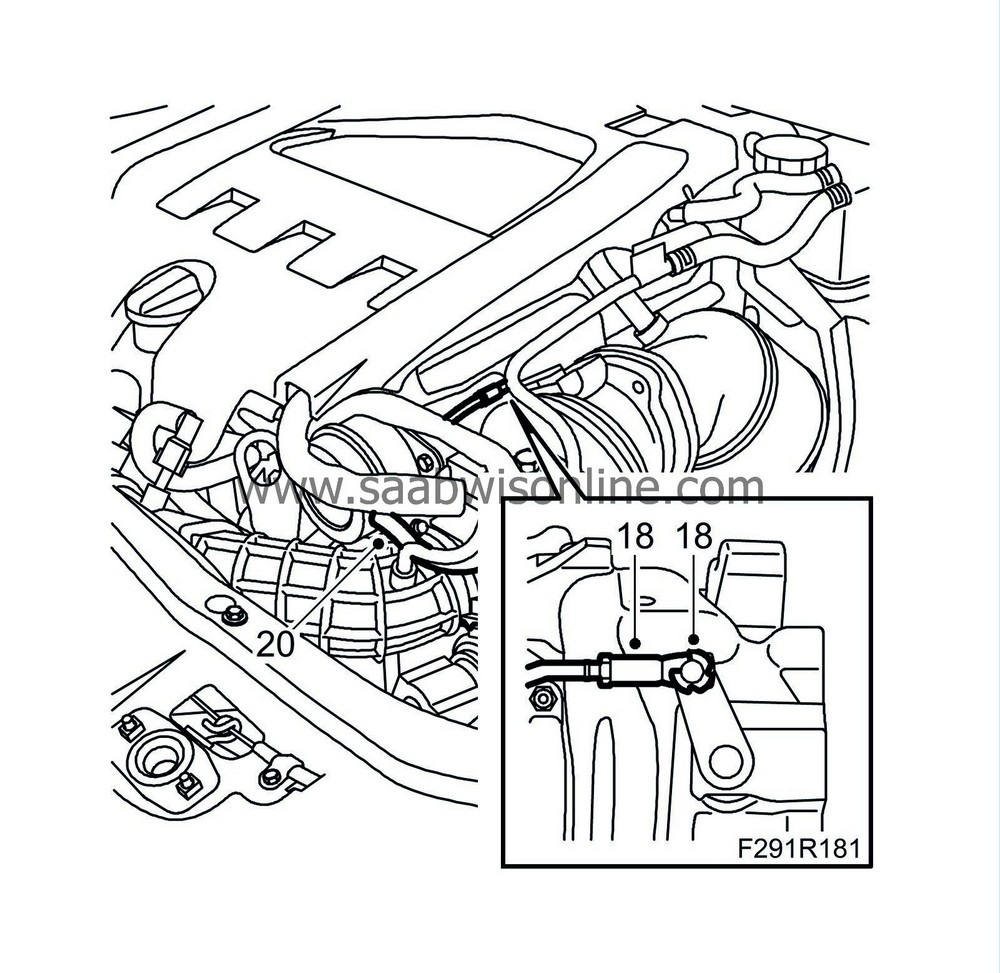
Fit the control rod with a new clip. Use bottle-nose pliers.
|
|
| 19. |
Remove the pressure gauge and pump.
|
|
| 20. |
Refit the hose to the diaphragm box.
|
|
| 21. |
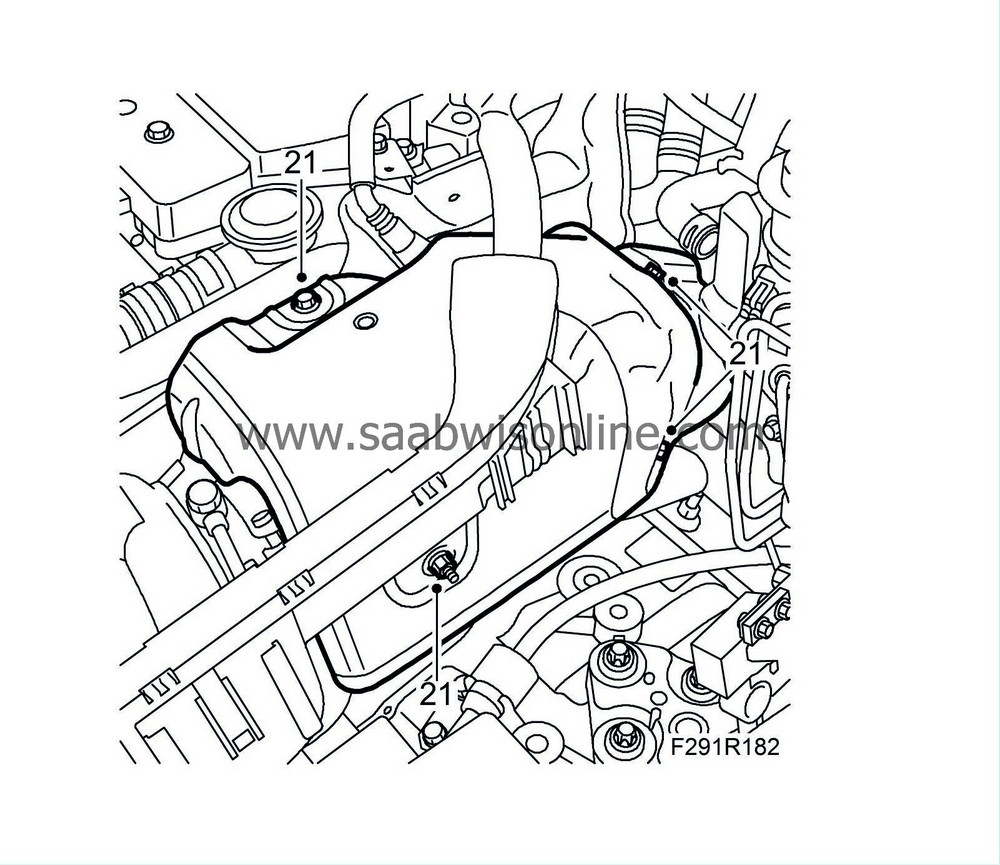
Fit the turbocharger's upper heat shield.
|
|
| 22. |
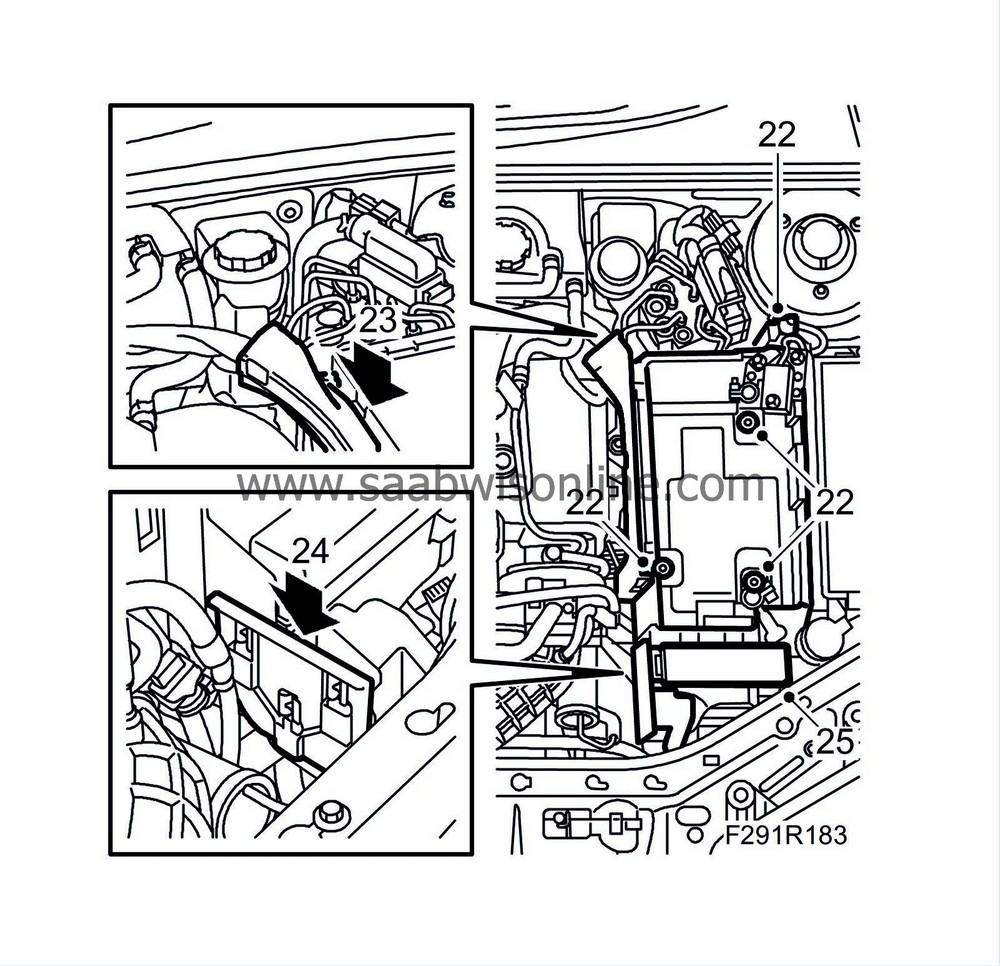
Plug in the bonnet switch connector, fit the cable clip and install the battery tray.
|
|
| 23. |
Fit the cable duct on the battery tray.
|
|
| 24. |
Fit the fuse holder on the battery tray.
|
|
| 25. |
Install the main fuse box in front of the battery tray.
|
|
| 26. |
Fit the battery and attach the cables.
|
|
| 27. |
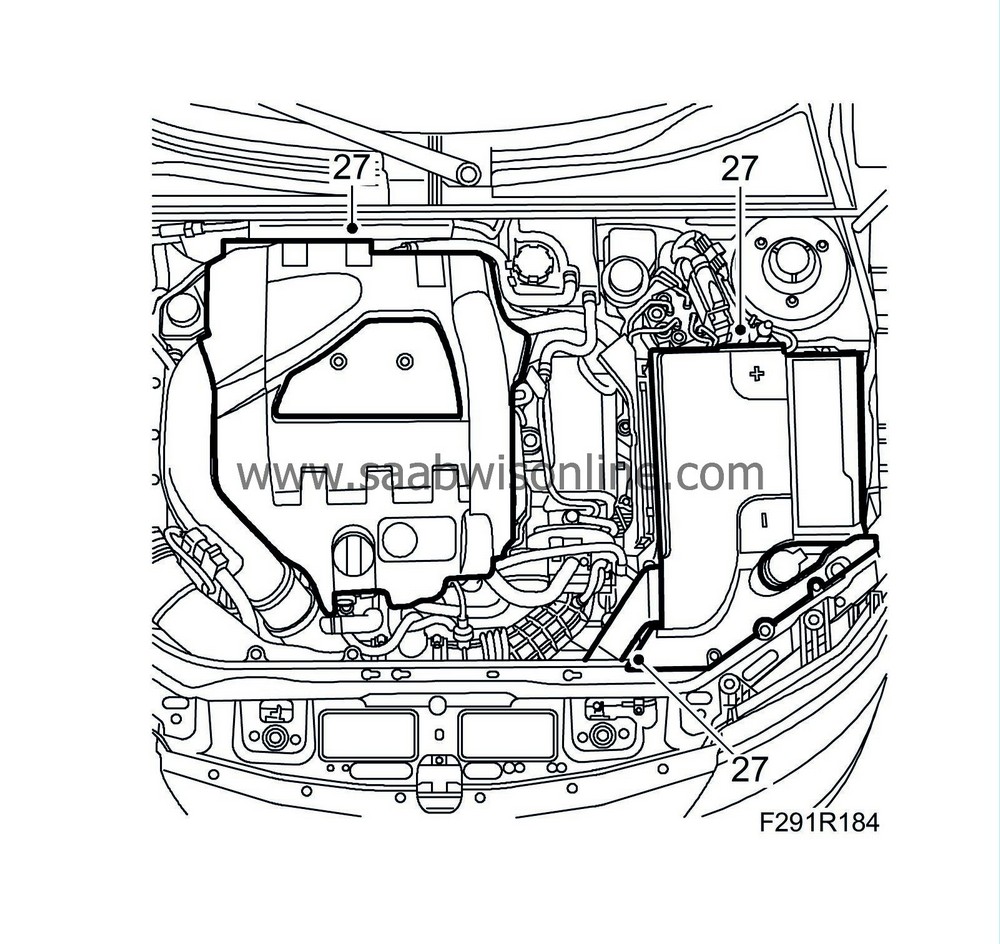
Fit the engine cover, radiator pipe and battery cover.
|
|
| 28. |
Restore the car, see
Procedures after reconnecting the battery
.
|
|
| 29. |
Carry out charge air adaptation:
|
|||||||
| 29.a. |
Warm up the engine.
|
| 29.b. |
Accelerate full throttle at 2000 rpm a few times. The time the engine speed is in the range 2000-4000 rpm must exceed 2 seconds.
|


