Anti-roll bar, front, Z19
|
|
Anti-roll bar, front, Z19
|
|
1.
|
Set the front wheels in the straight-ahead position and lock the steering wheel.
|
|
2.
|
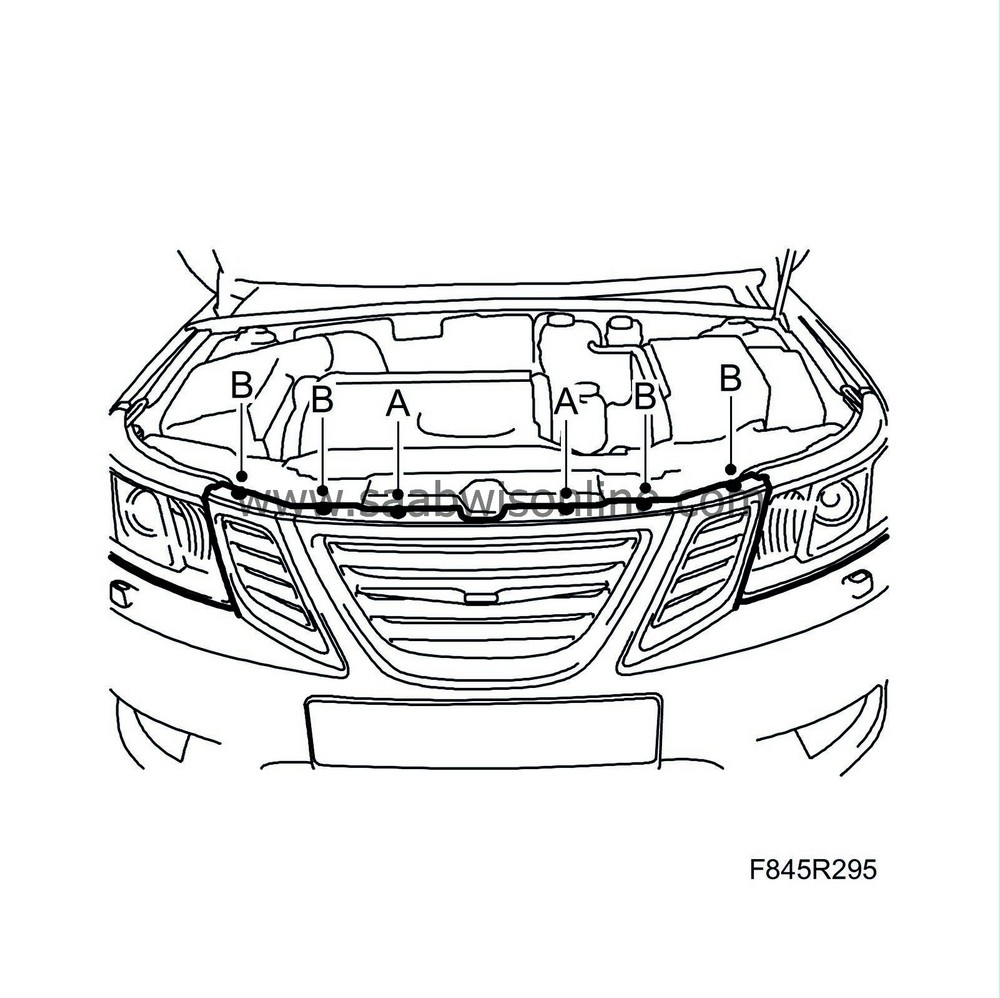
Remove the bumper shell's upper mounting, 4 x bolts (B) and 2 x clips (A).
|
|
3.
|
Hang two 83 95 212 straps over the radiator member.

|
|
6.
|
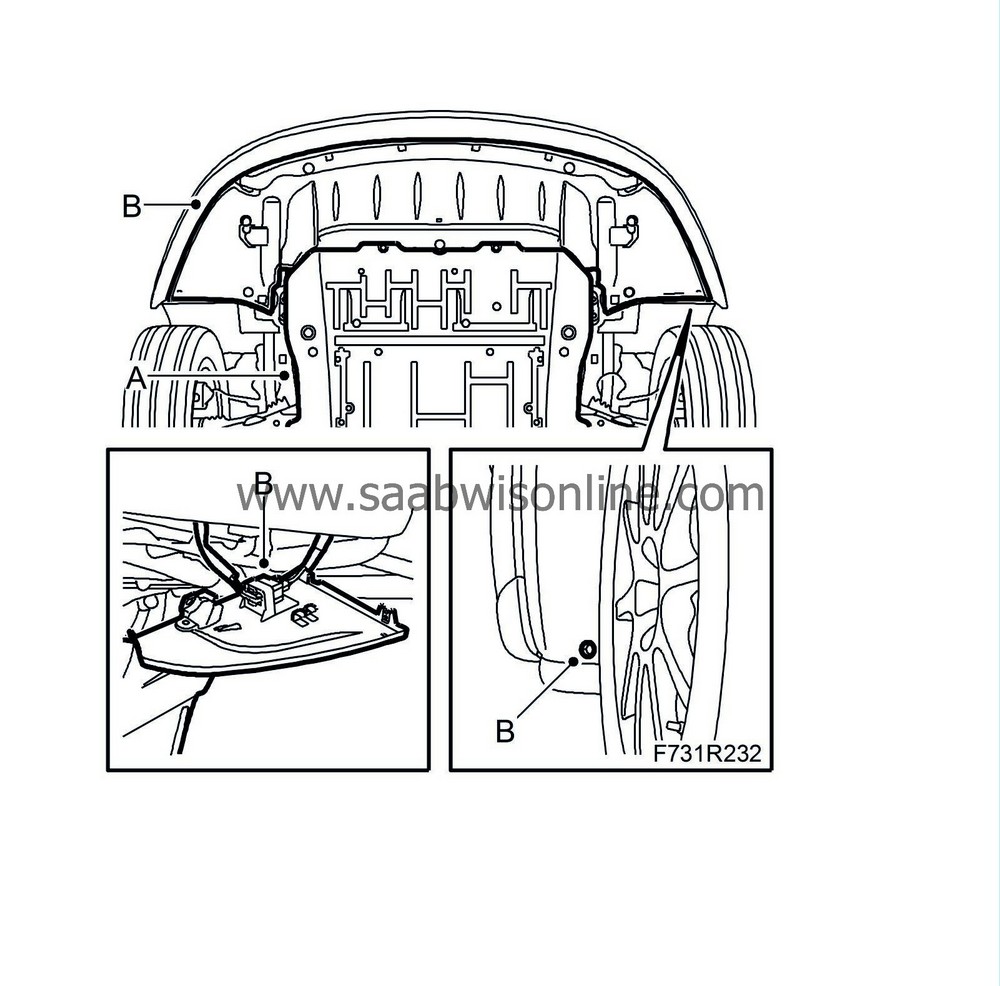
Z19: Remove the lower engine cover (A).
|
|
7.
|
Remove the lower front cover. (B).
|
|
8.
|
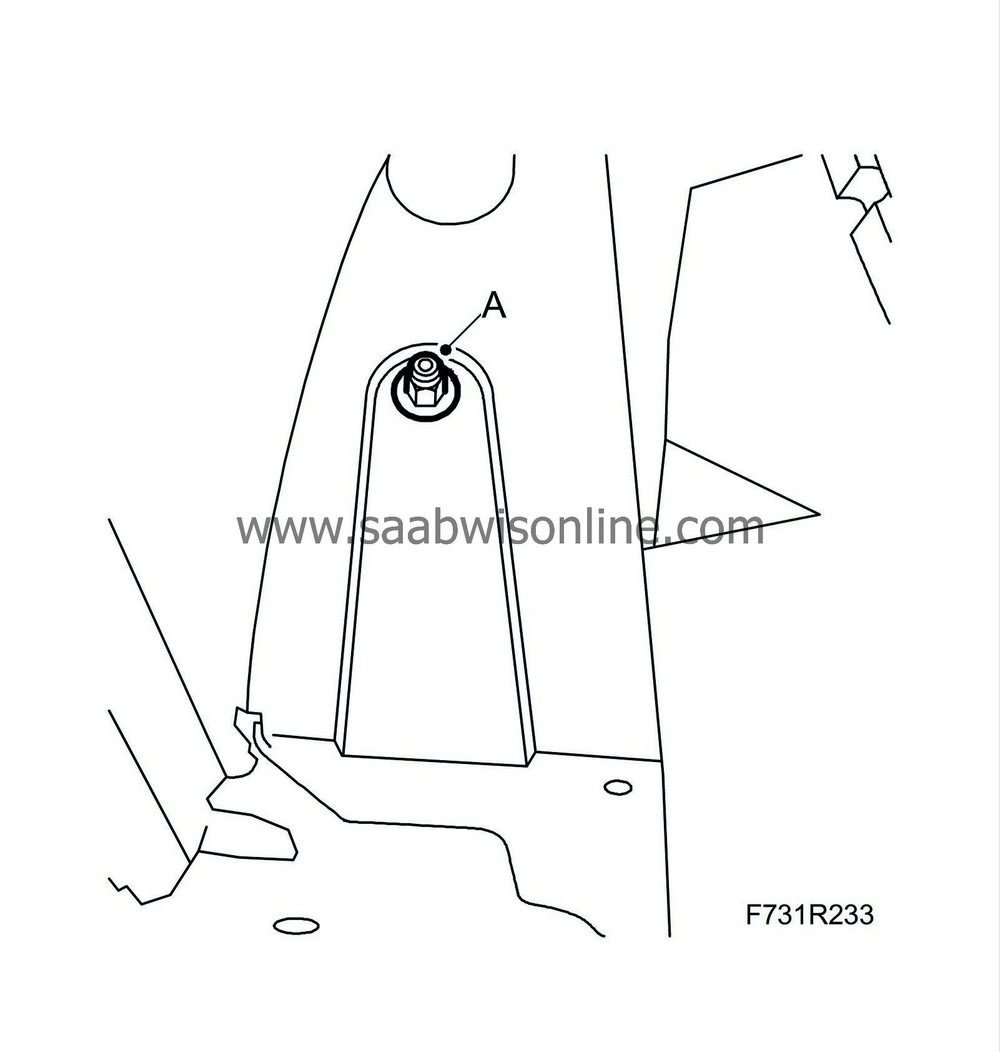
Remove the front section of the wing liners, 1 x nut (A), and fold aside slightly.
|
|
10.
|
Remove the front exhaust pipe, (A) or the whole exhaust system.

|
|
11.
|
Remove the bolts (B) for the engine's torque rod.
|
|
12.
|
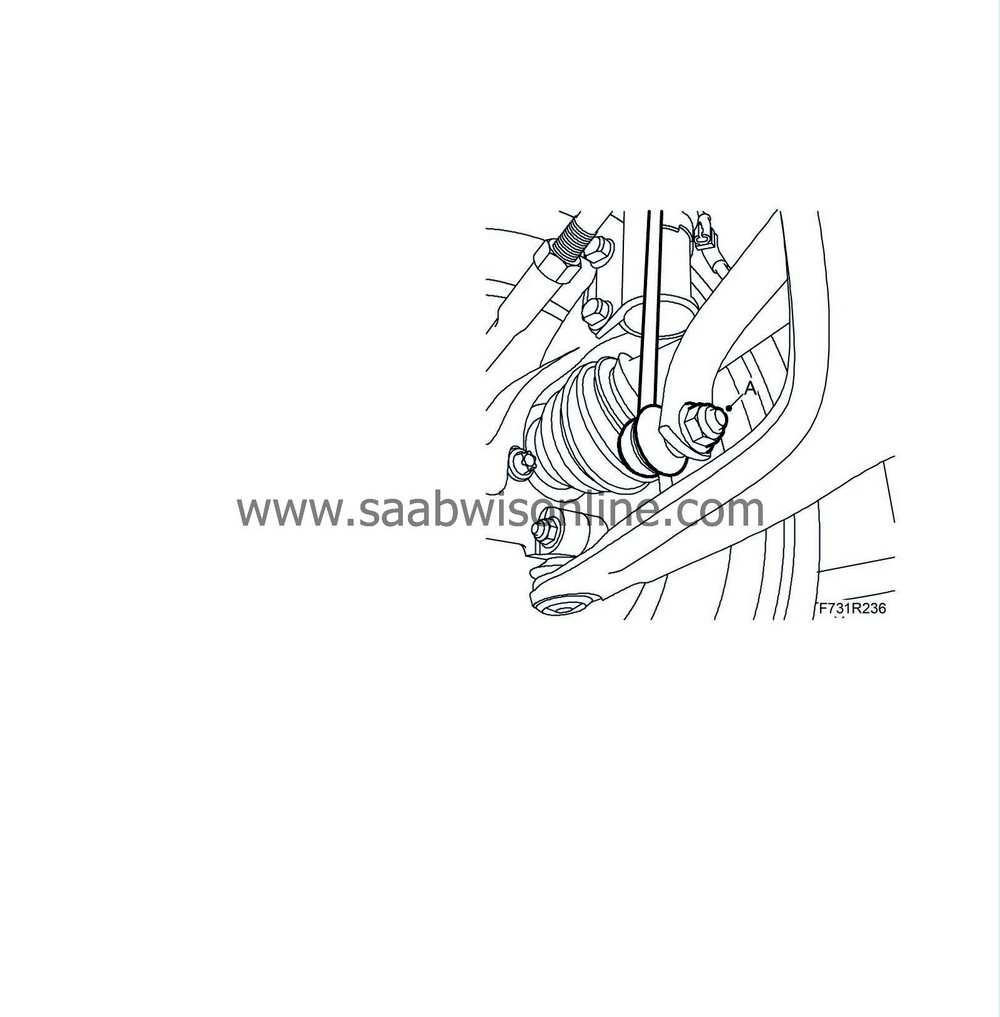
Detach the anti-roll bar links (A) from the anti-roll bar. Counterhold with a thin 17 mm open wrench to ensure that the ball joint is not rotated.
|
|
13.
|
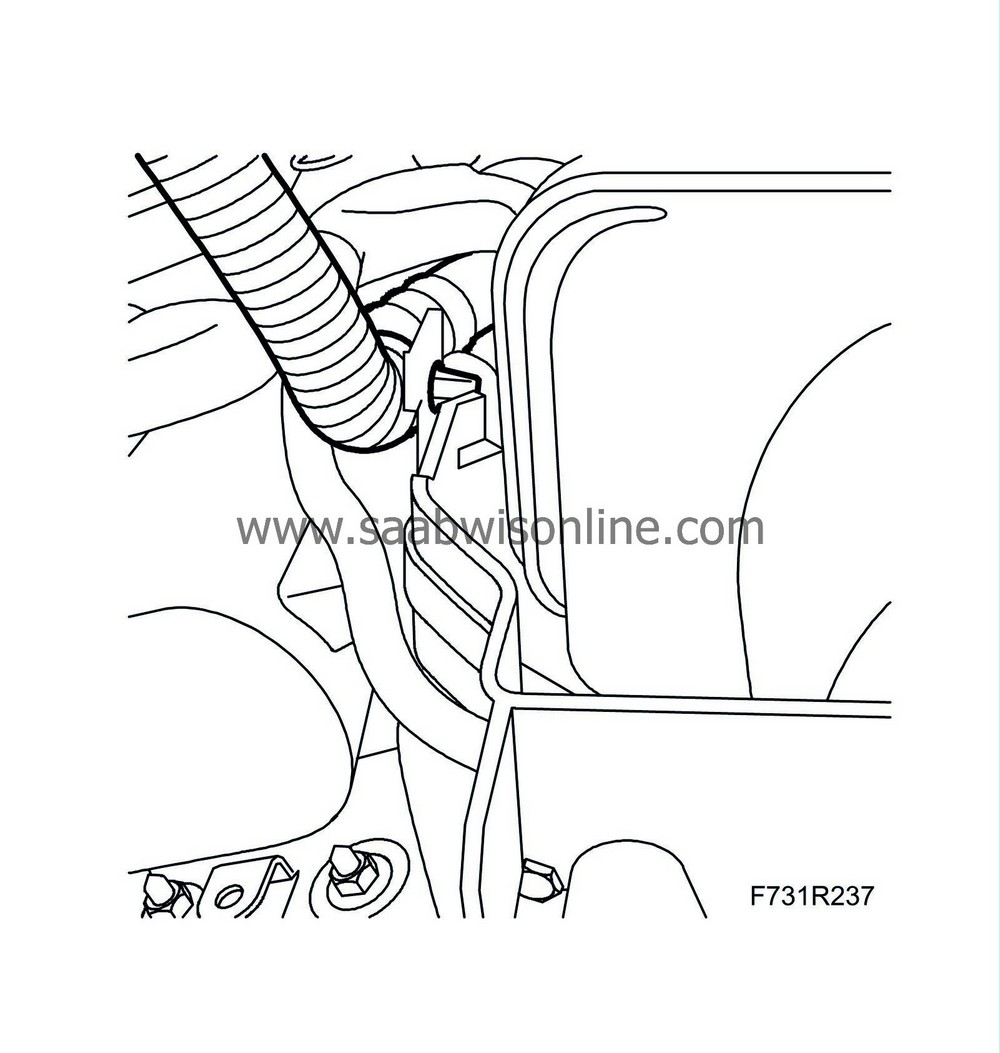
Remove the steering shaft joint (A) from the steering gear.

|
|
14.
|
Undo the EHPS wiring harness clips from the holder.
|
|
15.
|
On cars with Xenon headlamps:
Unplug the connector and undo the cable clip for the headlamps' angle sensors.
|
|
16.
|
Set under 83 95 311 Trolley lift with 83 94 801 Parent fixture, 83 95 188 Basic fixture and 83 96 137 Centring tool, subframe - body
|
|
17.
|
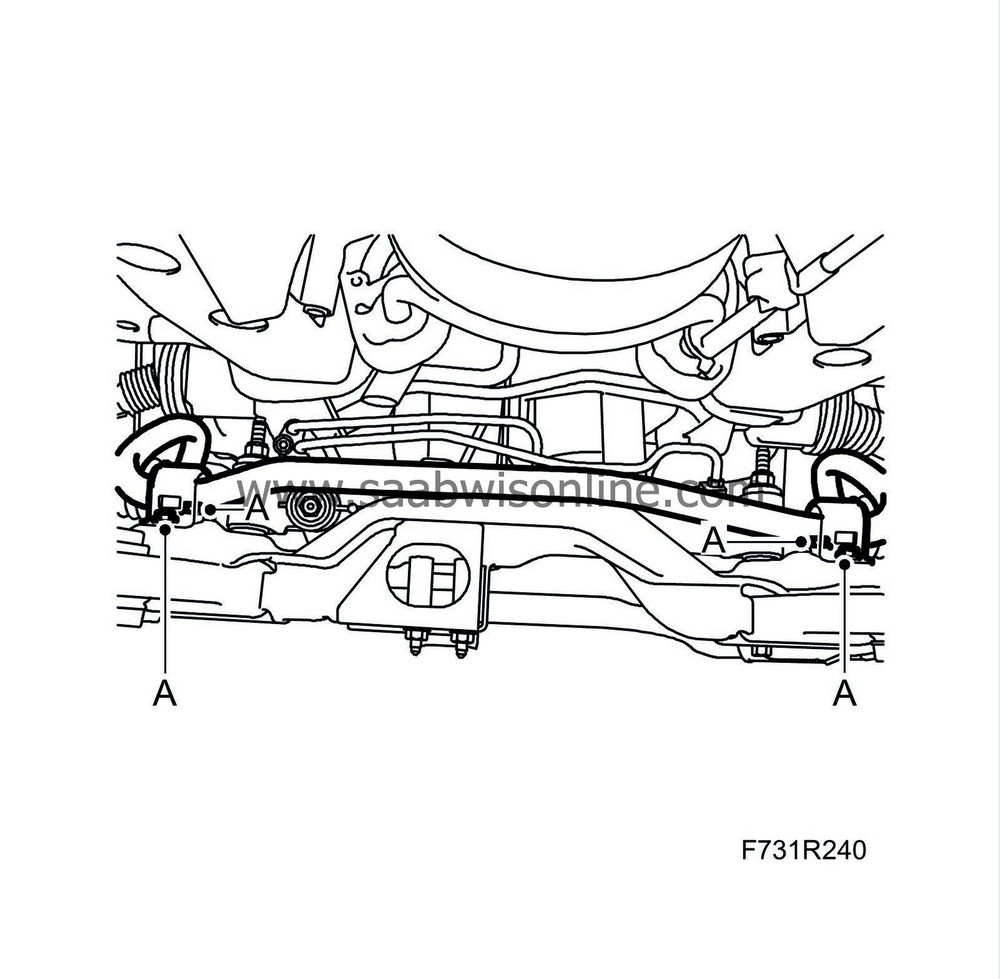
Remove the subframe's front bolts on both sides (A).

|
|
18.
|
Remove the subframe's rear bolts (A) and remove the rear bolts (B) for the stays and then the stays.

|
|
19.
|
Lower the subframe
approx. 160 mm
|
|
20.
|
Remove the anti-roll bar from the subframe, 4 x bolts (A).
|
|
21.
|
Lift down the anti-roll bar.
|
|
1.
|
Fit the anti-roll bar to the subframe, 4 x bolts (A).
Tightening torque 18 Nm
|
|
2.
|
Lift the subframe into place and align 83 96 137 Centring tool, subframe - body with the locating holes in the body. Before fitting: press up the locating pins on both sides (B). Check that the pins on both sides of the radiator are correctly seated in the subframe's holder. Apply Vaseline to the rubber guides.

|
|
3.
|
Lift the subframe so that the inner sections of the bushes are pressing against the body. Fit the subframe's front bolts on both sides (A).
Tightening torque 75 Nm +135° (55 lbf ft +135°)
|
|
4.
|
Fit the stays and the subframe's rear bolts (A) on both sides. Insert the rear stay bolts before tightening the subframe bolts.
Tightening torque 75 Nm +135° (55 lbf ft +135°)
|
|
5.
|
Tighten the rear stay bolts (B).
Tightening torque 90 Nm +45° (66 lbf ft +45°)
|
|
6.
|
Lower and pull away the trolley lift.
|
|
7.
|
Set up 83 96 145 Centring fixture, subframe - engine. Check that the engine is correctly positioned in relation to the subframe. Remove the centring fixture.
|
|
8.
|
Fit the anti-roll bar links (A) to the anti-roll bar. Counterhold with a thin 17 mm open wrench to ensure that the ball joint is not rotated.
Tightening torque 65 Nm (48 lbf ft)
|
|
9.
|
Fit the bolts (B) for the engine's torque rod.
Tightening torque, front bolt 60 Nm +90° (44 lbf ft +90°)
Tightening torque, rear bolt 80 Nm (59 lbf ft)
|
|
10.
|
Fit the front exhaust pipe (A). Lubricate the threads using 30 20 971 Screw-thread paste.
Tightening torque, exhaust flanges 22 Nm (16 lbf ft)
Tightening torque, mounting to gearbox 19 Nm (14 lbf ft)
|
|
11.
|
Fit the EHPS wiring harness clips to the holder.
|
|
12.
|
On cars with Xenon headlamps:
Plug in the connector for the headlamps' angle sensors and fit the cable clip to the subframe.
|
|
13.
|
Fit the steering shaft joint (A) to the steering gear. Check that the front wheels are in the straight-ahead position. Clean the threads and apply 74 96 268 Thread locking adhesive to the threads.
Tightening torque 30 Nm (22 lbf ft)
 Warning
|
|
Check that the bolt fits into the groove on the pinion shaft.
|
|
|
|
|
|
|
|
15.
|
Fit the lower engine cover (A).
|
|
16.
|
Fit the lower front cover. (B)
|
|
17.
|
Fit the front section of the wing liners using 1 x nut (A).
|
|
18.
|
CV: Fit chassis reinforcement, front subframe, petrol / diesel.
|
|
19.
|
Lower the car to the floor
|
|
20.
|
Fit the bumper shell's upper mounting, 4 x bolts (B) and 2 x clips (A).
|


