Upper windscreen frame assembly, CV
|
|
Upper windscreen frame assembly, CV
|
|
1.
|
Position the car in an aligning bench and cross-measure if necessary.
|
|
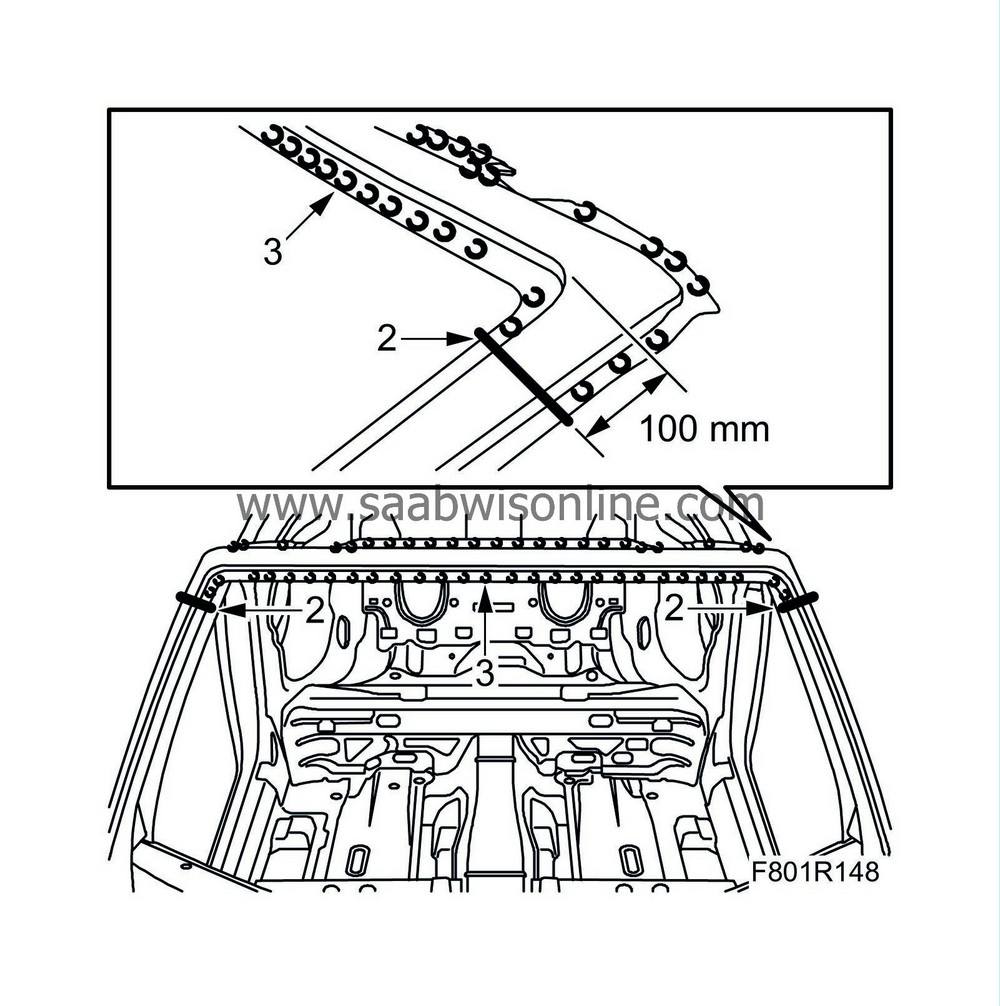
2.
|
Cut the windscreen frame outer panel on both sides. Cut 100 mm as illustrated. Cut the outer plate only to avoid damaging the inner A-pillar reinforcement.
|
|
3.
|
Drill out the spot welds securing the windscreen frame outer panel.
|
|
4.
|
Tap the windscreen frame outer panel loose.
|
|
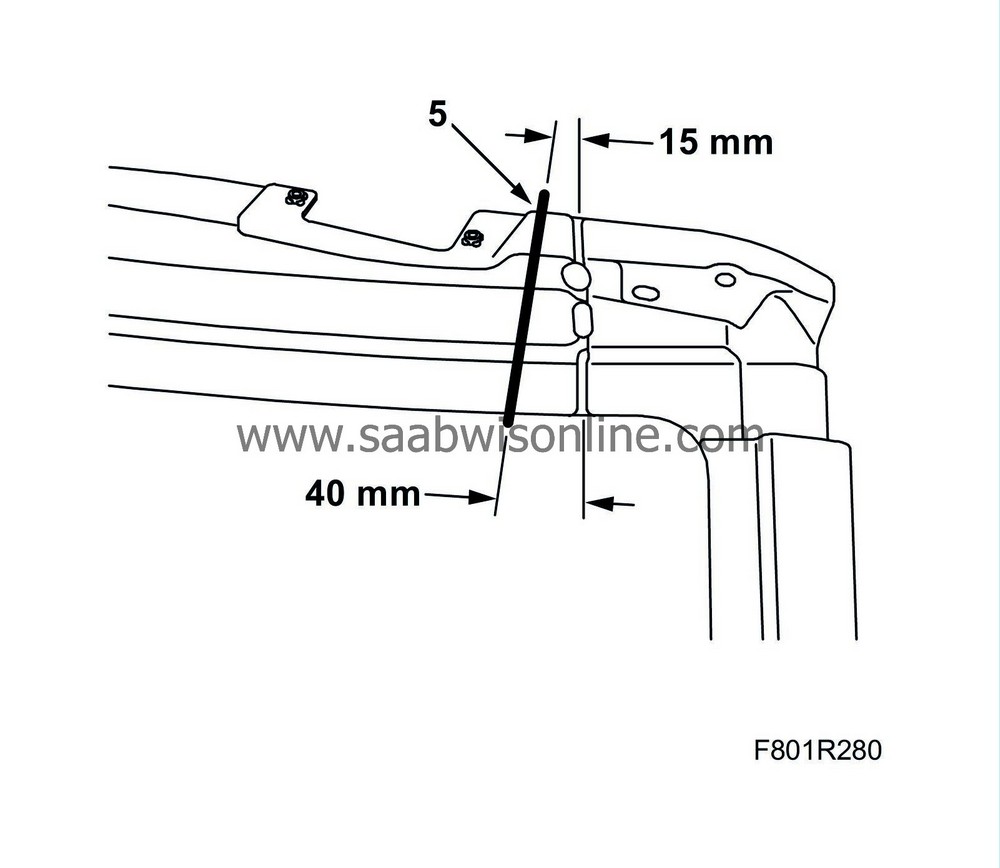
5.
|
Cut the car's inner windscreen member as illustrated.
|
|
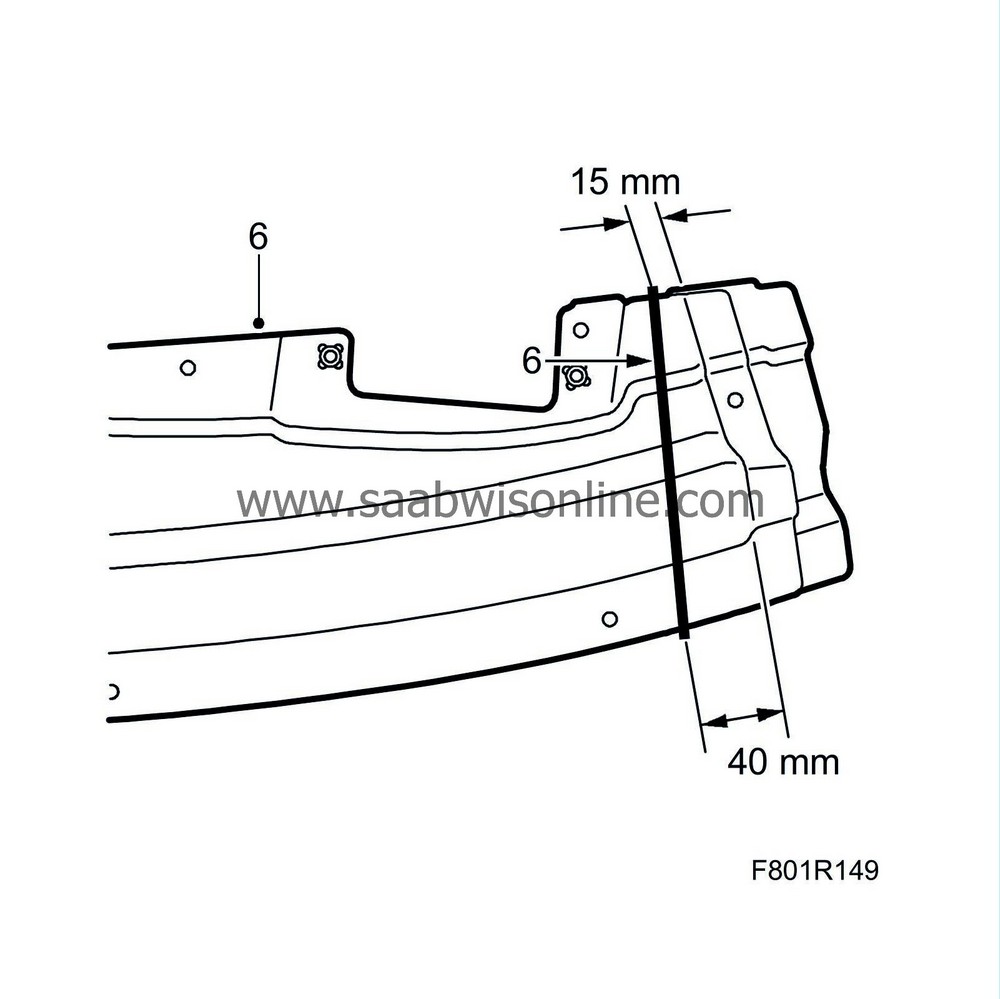
6.
|
Cut and align the replacement panel as illustrated.
|
|
7.
|
Place the windscreen frame replacement panel in fitting position and secure it with welding clamps. Secure with some welds in the corners.
|
|
8.
|
Roughly cut of the windscreen frame outer panel and align it. Make sure the windscreen frame's width is exact.
|
|
9.
|
Remove the windscreen frame outer panel. All-weld the top and underside of the inner windscreen frame.
|
|
10.
|
Place the windscreen frame outer panel into position.
|
|
11.
|
Drill holes for plug welding in the corners of the windscreen frame.
|
|
12.
|
Apply welding primer to the surfaces to be plug welded. Use Teroson Zink Spray
|
|
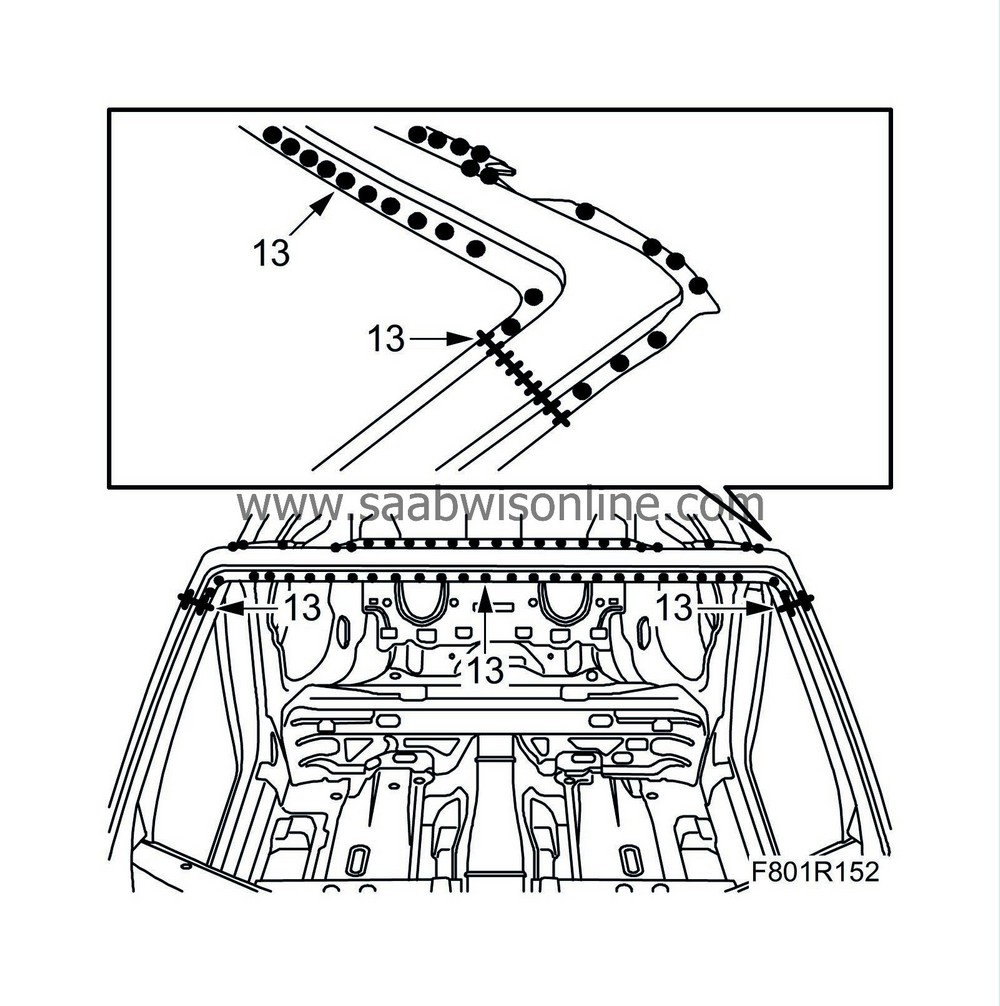
13.
|
Spot and plug weld the windscreen frame outer panel in place. All-weld the outer panel cut.
|
|
14.
|
Smooth off the welds.
|
|
15.
|
Wash away surplus welding primer. Welding primer reduces the adhesion of paint, filler and sealant.
|
|
16.
|
Apply primer to all bare metal surfaces. Use Standox 1K.
|
|
17.
|
Seal joints and seams with sealant. Use 1K-PUR.
|
|
18.
|
Apply anti-corrosion agent to internal surfaces after painting. Use Terotex HV 400.
|


