PRE-RELEASE
Evaporator's high and low-pressure pipes, Z19DTR
| Evaporator's high and low-pressure pipes, Z19DTR |
| Important | ||
|
The A/C receiver and the compressor oil absorb moisture from the air, which can then not be removed. Plug all connections that are opened immediately. |
||
| To remove |
| 1. |
Put the car on a lift.
|
|
| 2. |
Drain the refrigerant from the A/C system, see
Draining and filling the refrigerant
.
|
|
| 3. |
Remove the windscreen wipers. Use the puller
85 80 144 Puller, windscreen wiper arm
.
|
|
| 4. |
Remove the
cover on the bulkhead partition space
.
|
|
| 5. |
RHD:
Remove the
Windscreen wiper assembly
.
|
|
| 6. |
LHD:
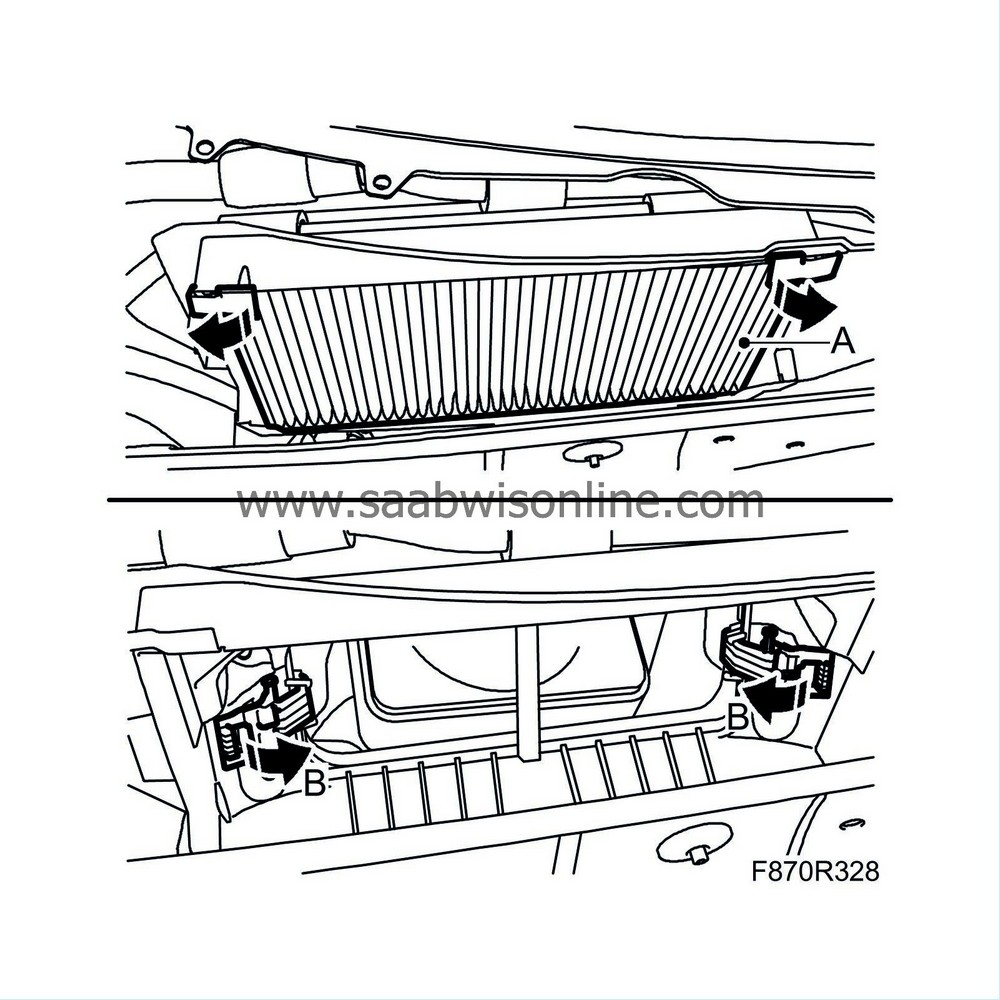
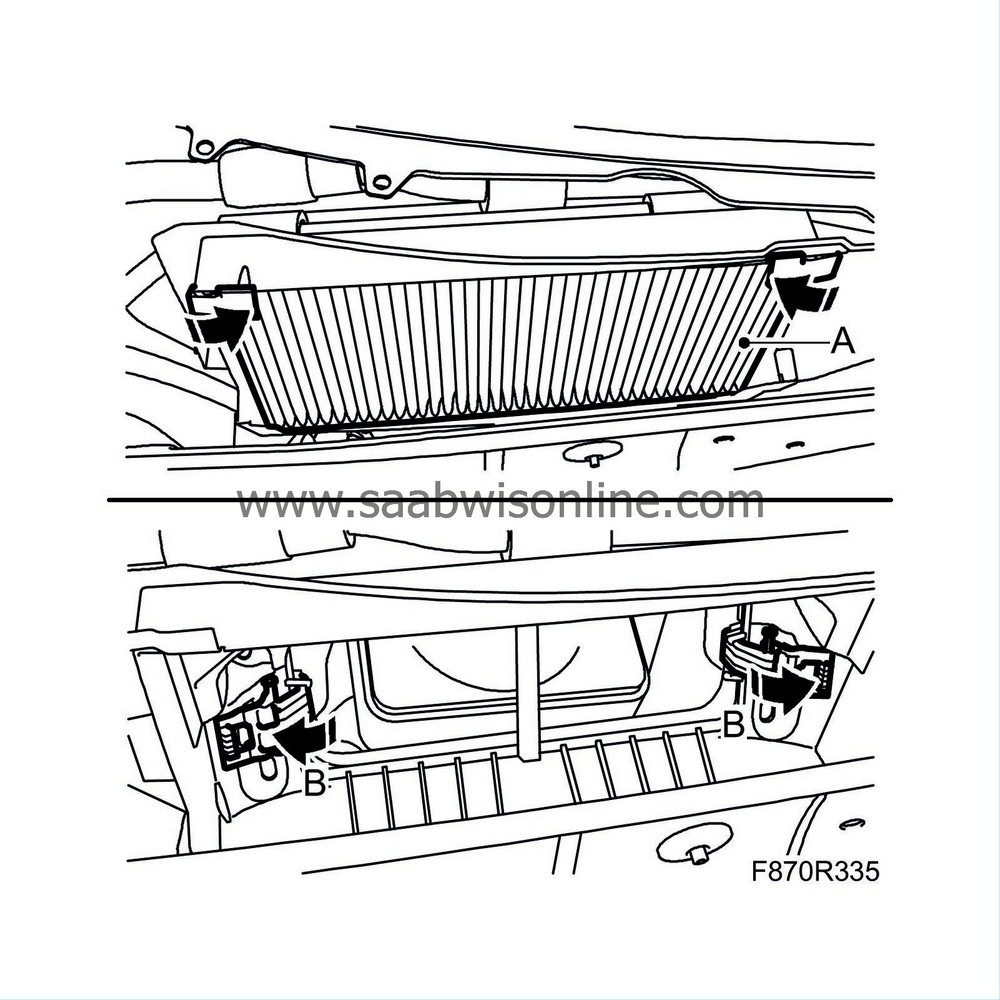
Remove the fresh-air filter (A) and the fresh-air filter housing (B).
|
|
| 7. |
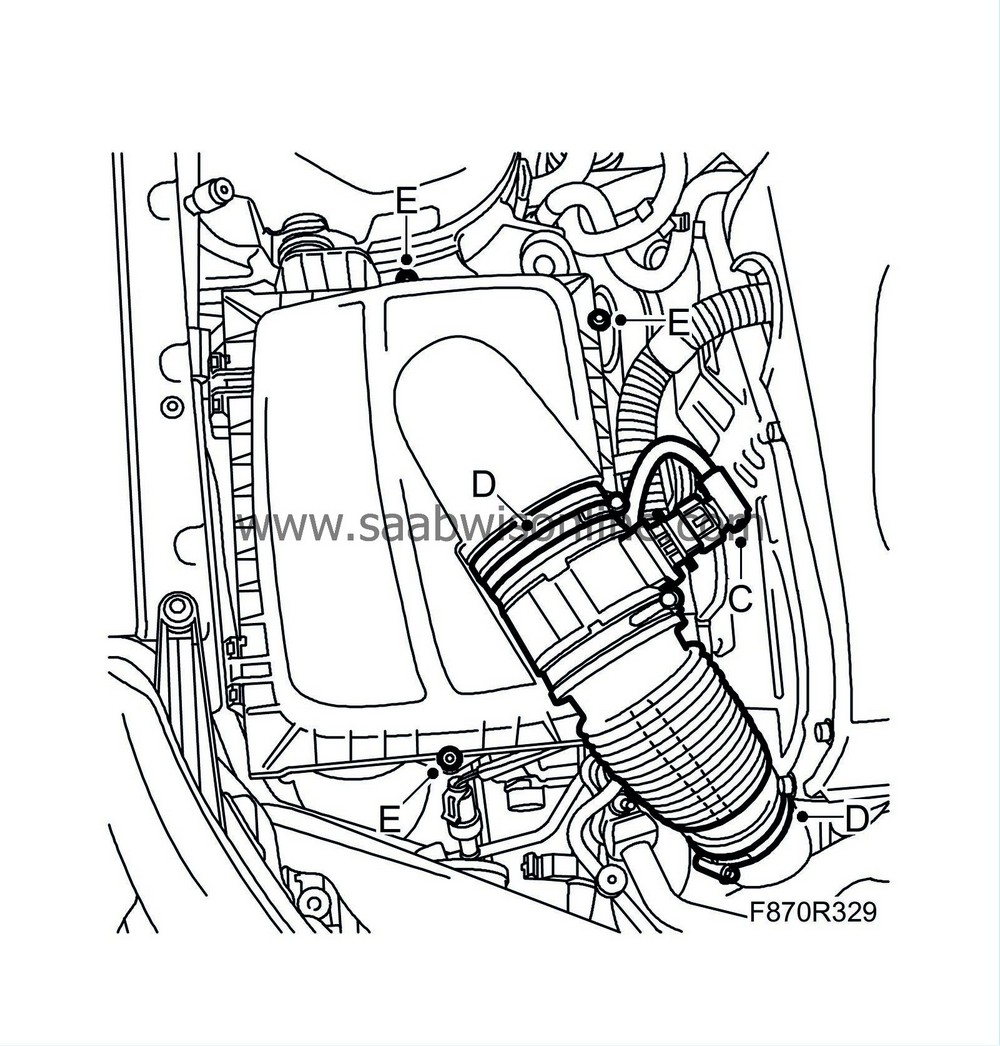
Unplug the mass air flow sensor connector (C).
|
|
| 8. |
Remove the hose between the turbo intake manifold and the air cleaner housing.
|
|
| 9. |
Remove the cover from the air filter housing (E).
|
|
| 10. |
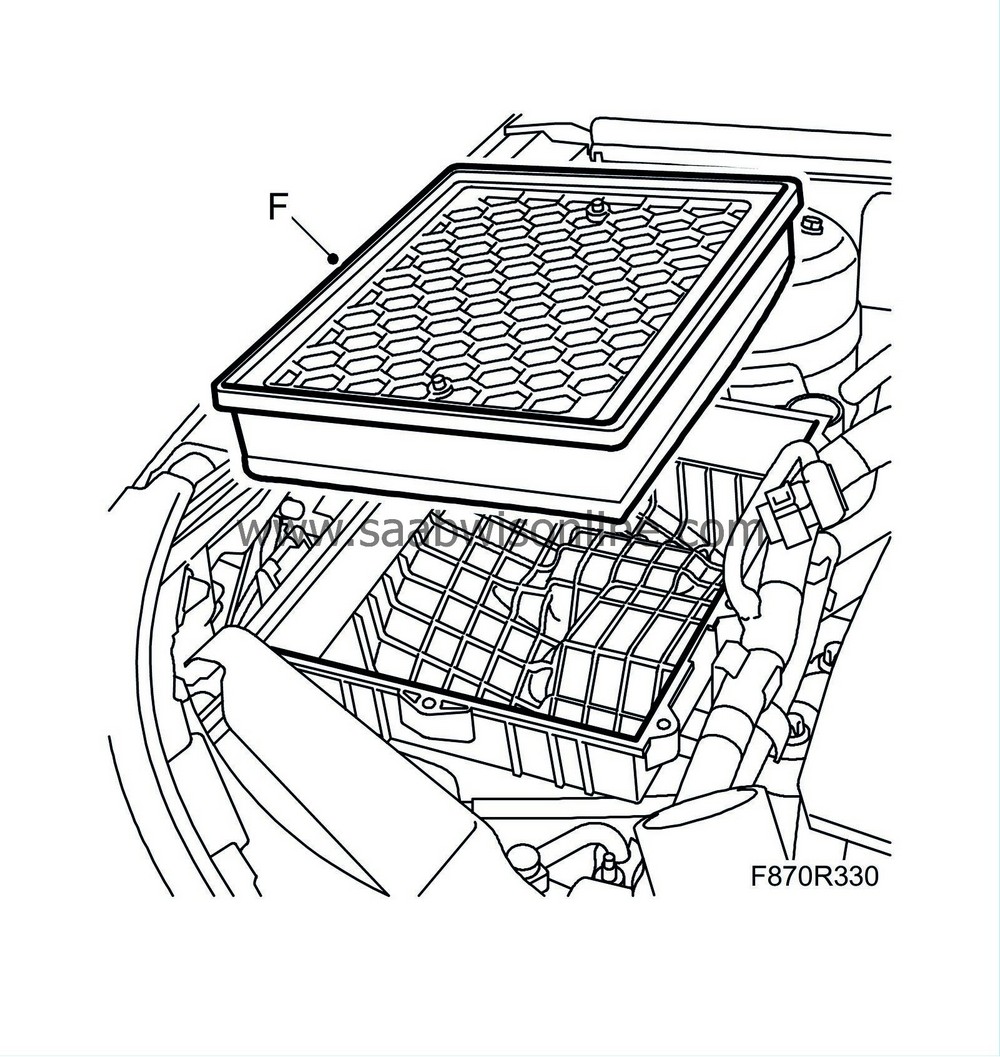
Remove the filter (F).
|
|
| 11. |
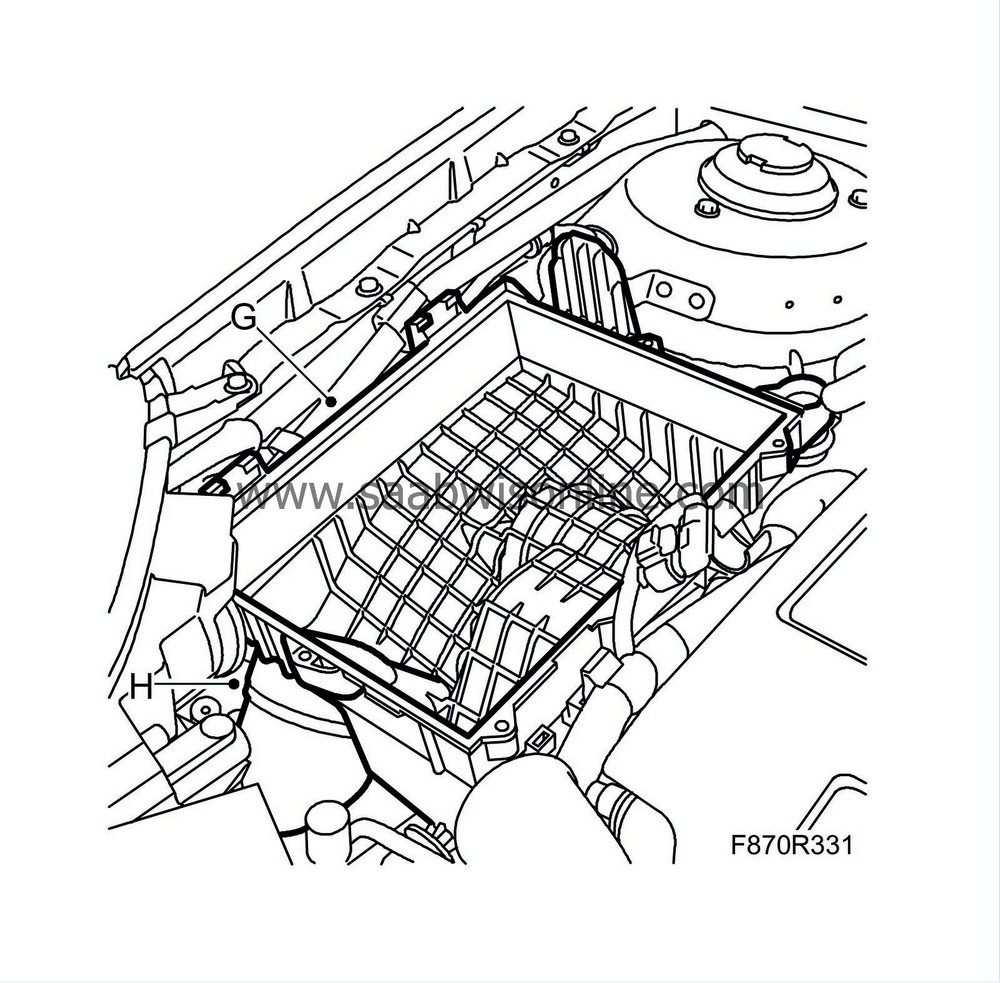
Remove the lower part of the air filter housing (G). Press out the intake manifold (H) so that it becomes loose before the air filter housing is lifted out.
|
||||||||||
| 12. |
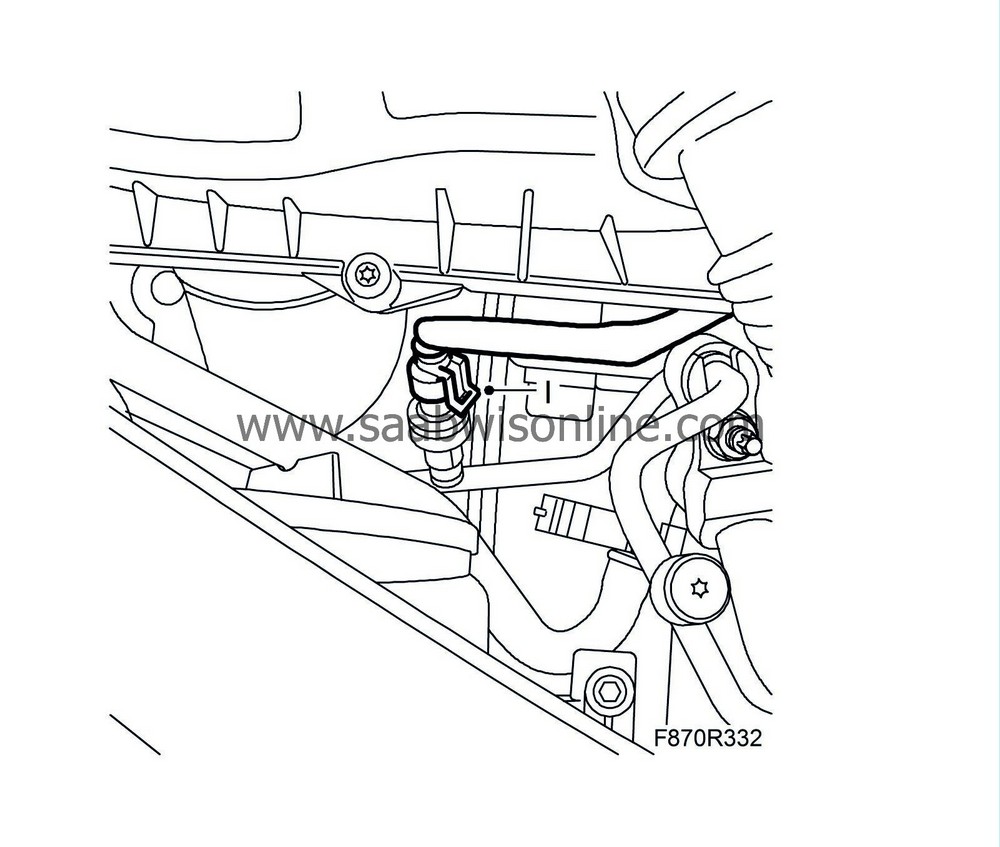
Unplug the pressure sensor connector (I). Take care that the pressure sensor is not damaged.
|
|
| 13. |
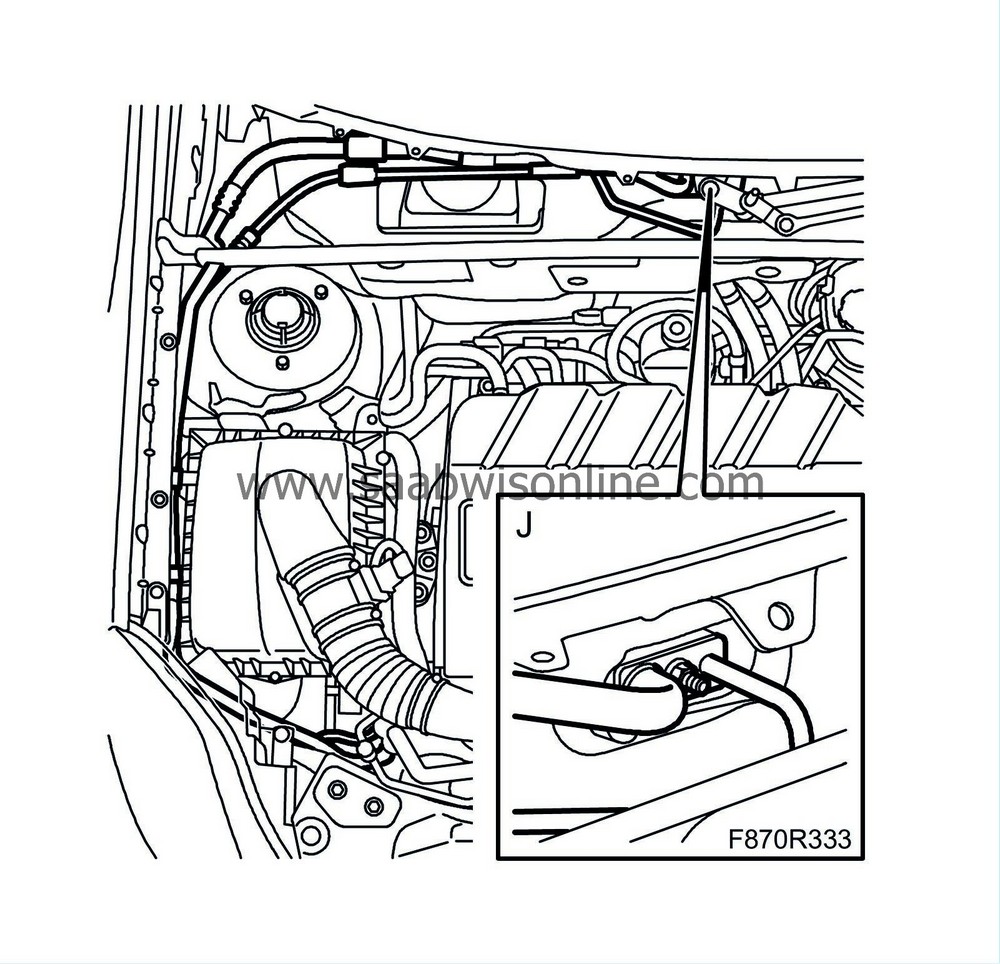
Detach the high and low pressure pipes' PAD connection (J) from the expansion valve. Plug the openings.
|
|
| 14. |
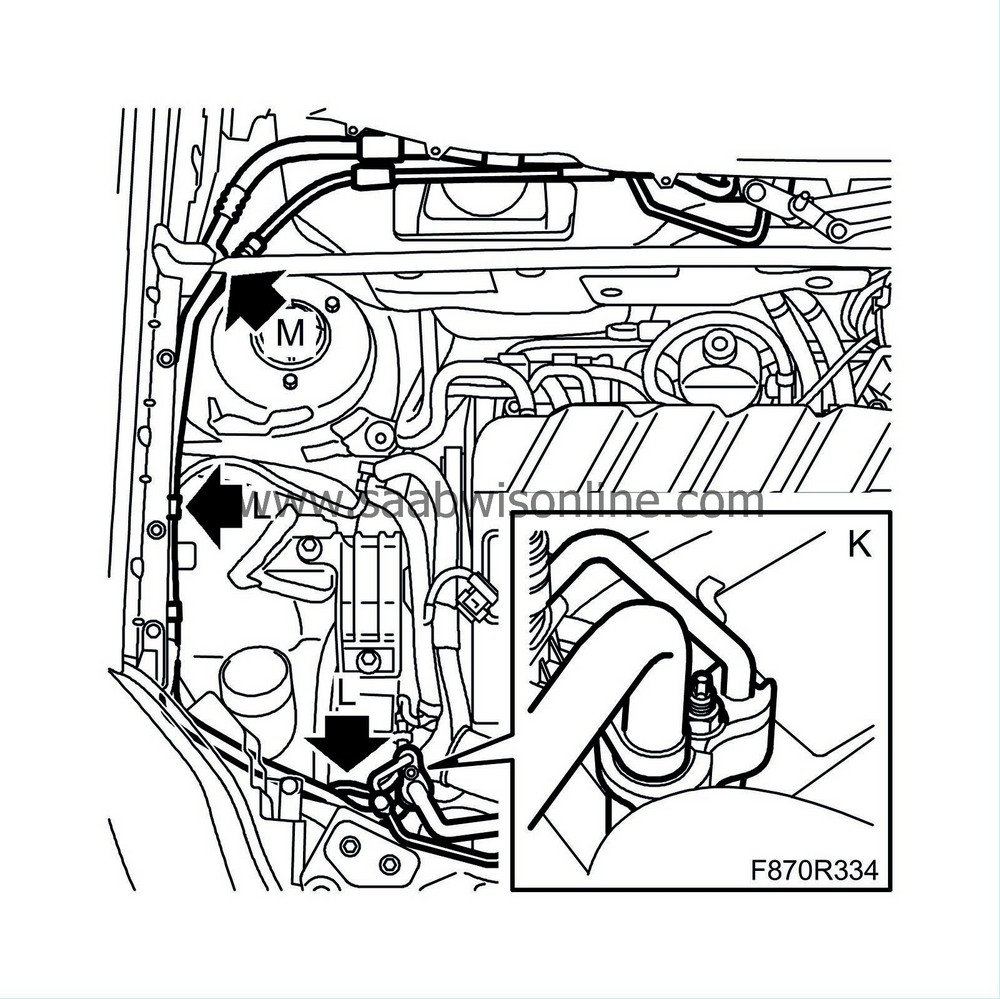
Detach the high and low pressure pipes' PAD connection (K) by the right-hand front structural member. Plug the openings.
|
|
| 15. |
Detach the evaporator's high and low pressure pipes from the clips (L) and the seal (M). Lift out the pipe.
|
|
| To fit |
| 1. |
Adjust the oil quantity in the A/C system. See
Filling and adjusting the compressor oil
.
|
|
| 2. |
Move the high and low pressure pipes into position, and secure the pipes in the clip (L) and the seal (M).
|
|
| 3. |
Replace the sealing washers and attach the high and low pressure pipes' PAD connection (J) to the expansion valve.
Tightening torque 18 Nm (13 lbf ft) 
|
|
| 4. |
Replace the sealing washers and attach the high and low pressure pipes' PAD connection (K) by the right-hand front structural member.
Tightening torque 15 Nm (11 lbf ft)

|
||||||||||
| 5. |
Plug in the pressure sensor connector (I).

|
|
| 6. |
Fit the lower part of the air filter housing (G). Make sure the intake manifold (H) is positioned correctly in the lower part of the air filter housing.

|
|
| 7. |
Fit the air filter (F).

|
|
| 8. |
Fit the cover for the air filter housing (E). Fit the hose (D) between the intake manifold and the turbo.

|
|
| 9. |
Plug in the mass air flow sensor connector (C).
|
|
| 10. |
LHD
: Fit the fresh-air filter (A) and the fresh-air filter housing (B).
|
|
| 11. |
RHD
: Fit the
windscreen wiper assembly
.
|
|
| 12. |
Fit
Bulkhead partition space cover
.
|
|
| 13. |
Fit the windscreen wipers
Tightening torque 20 Nm (15 lbf ft) |
|
| 14. |
Vacuum pump and fill the A/C system with refrigerant R134a. See
Draining and filling the refrigerant
.
|
|
| 15. |
Test the A/C system. See
A/C system performance test
.
|
|


