(201-2457) Piston rings as spare parts
|
TECHNICAL SERVICE BULLETIN
|
|
Bulletin Nbr:
|
201-2457
|
|
Date:
...........
|
Maj 2004
|
|
Market:
|
all
|
|
|
Piston rings as spare parts
|
9-3 (9440) with engine variant B207
Piston rings are now available as separate spare parts. In order to replace piston rings, use the following methods.
|
Removing the cylinder head
|
|
1.
|
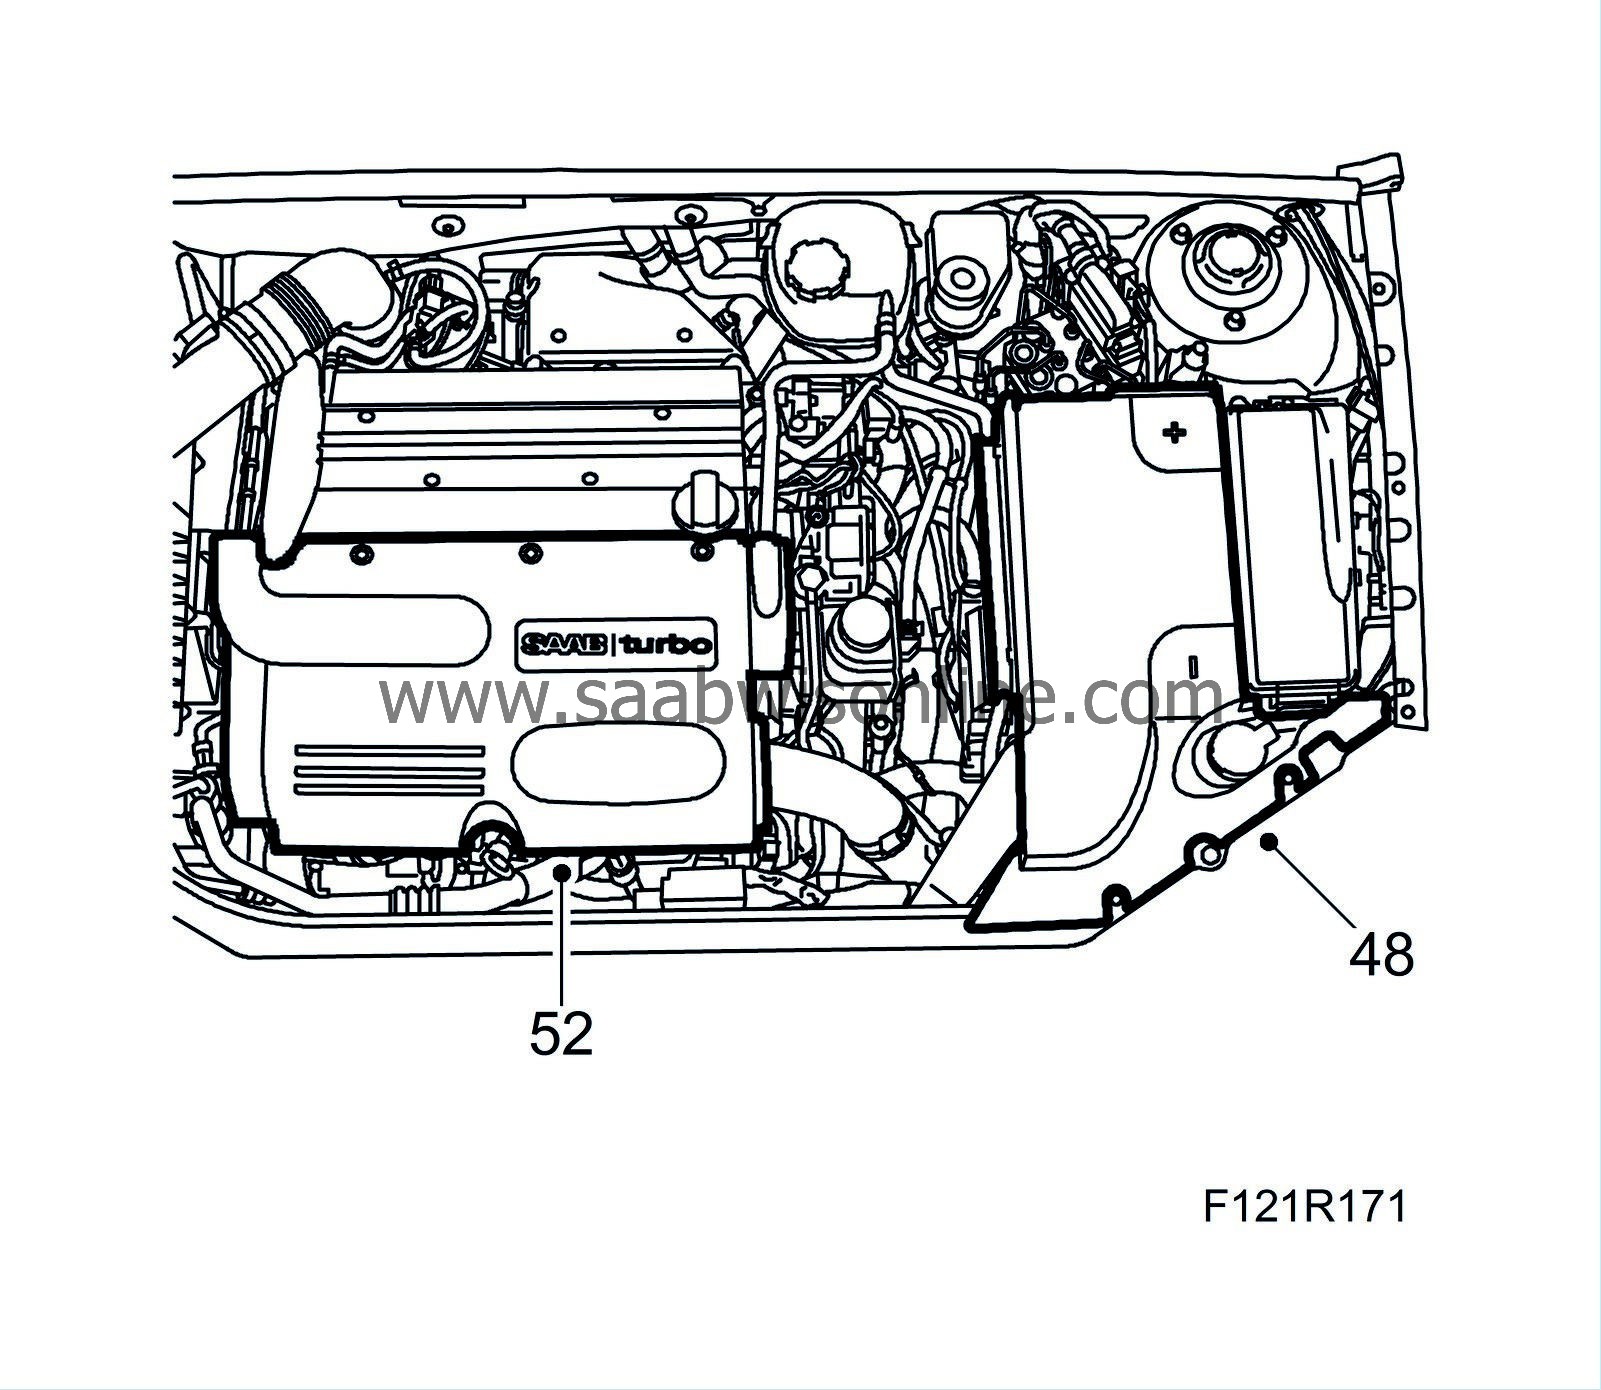
Fit the wing cover and remove the battery cover and the battery negative cable.
|
|
2.
|
Remove the cap to the expansion tank.
|
|
3.
|
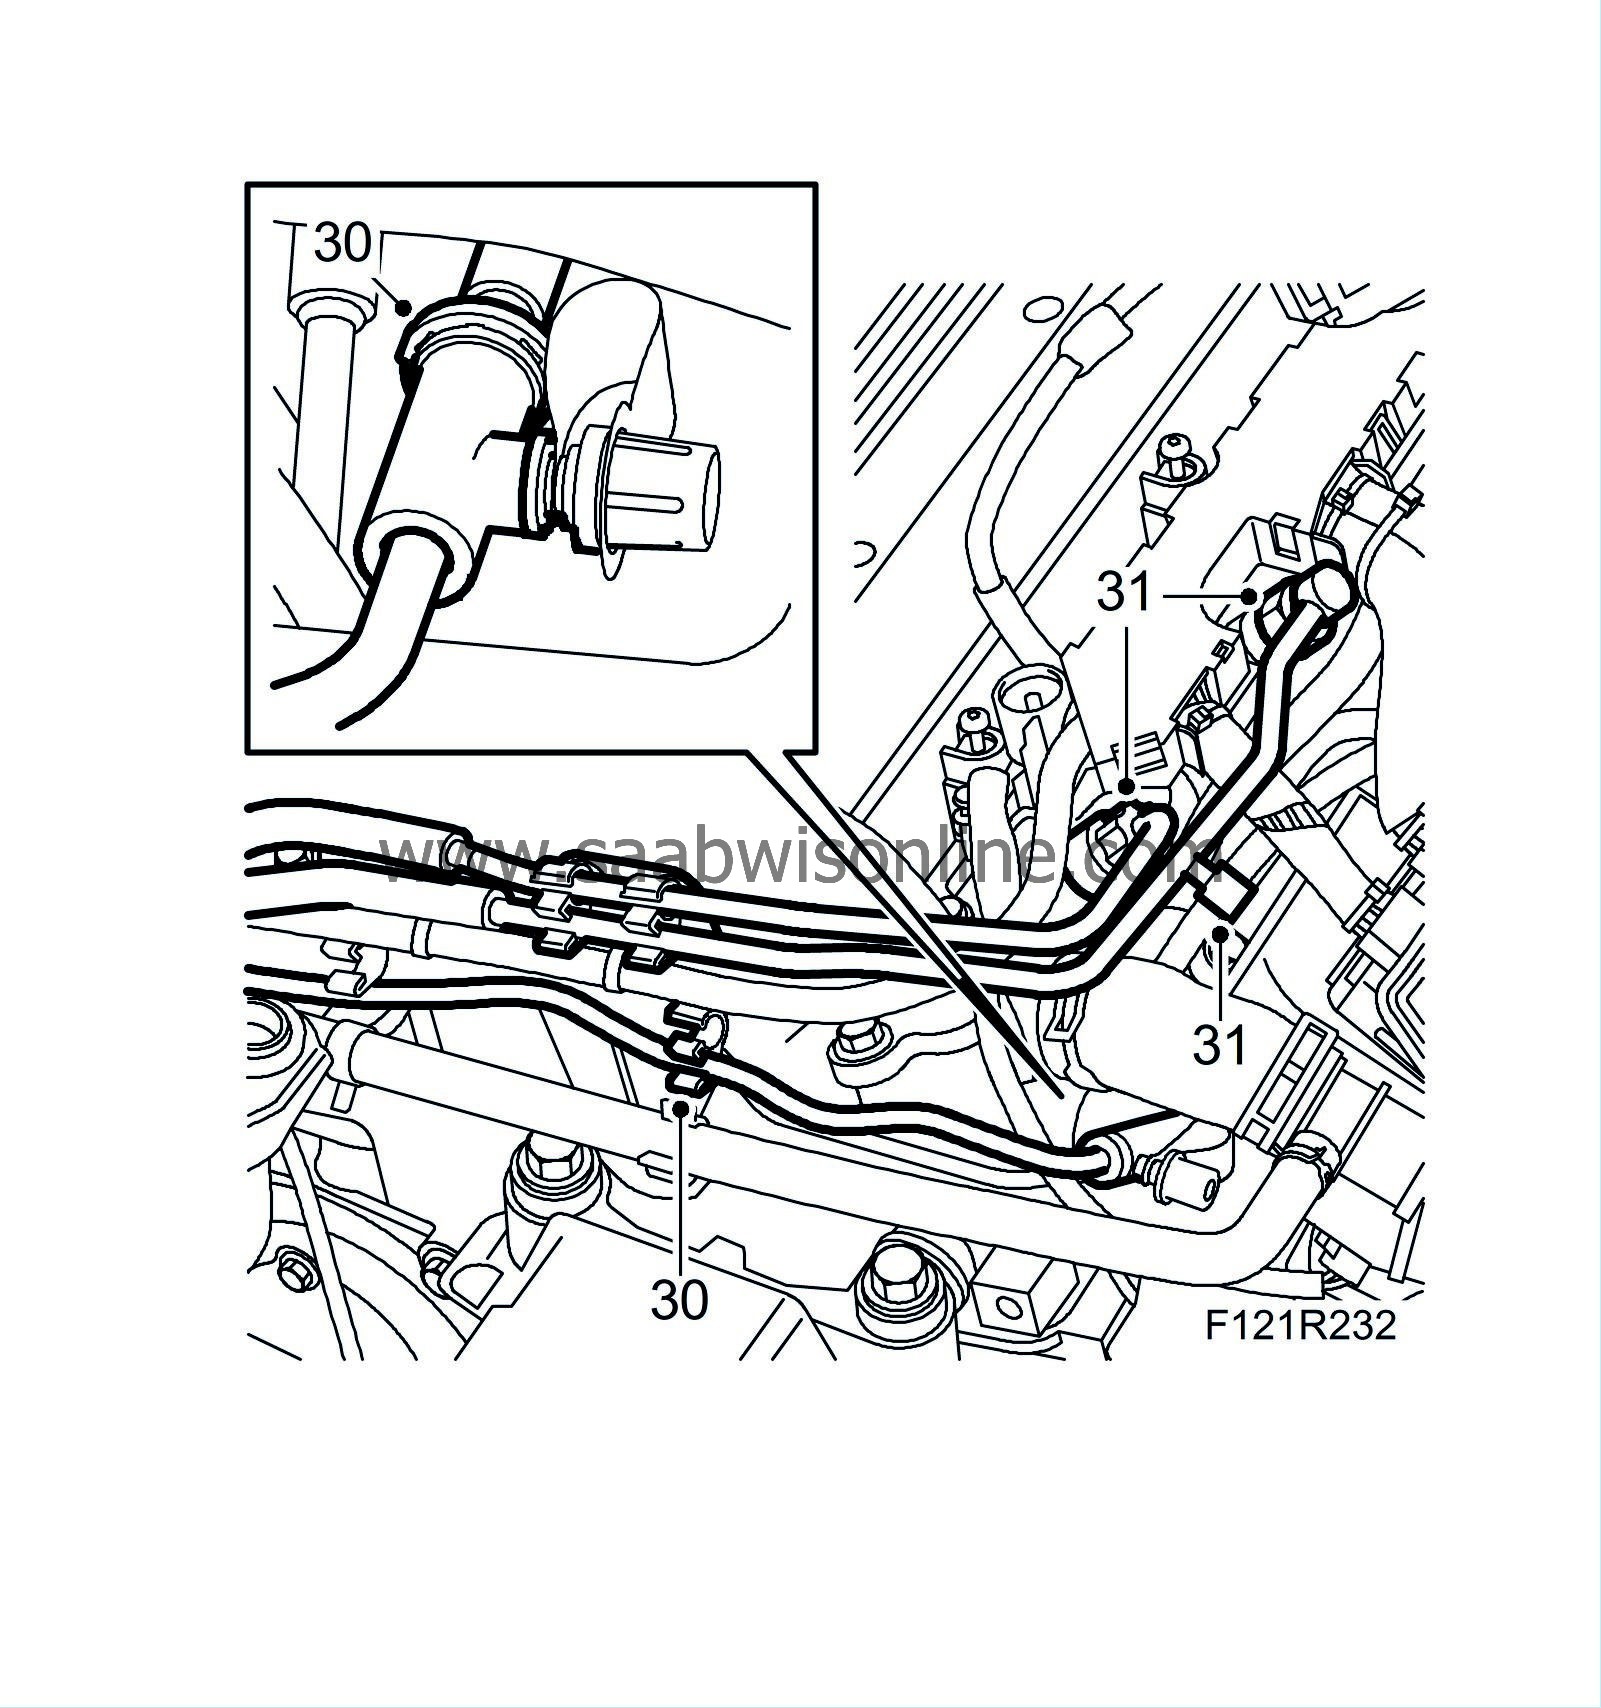
Unplug the connectors for the heated oxygen sensors and carefully guide down the cables.

|
|
4.
|
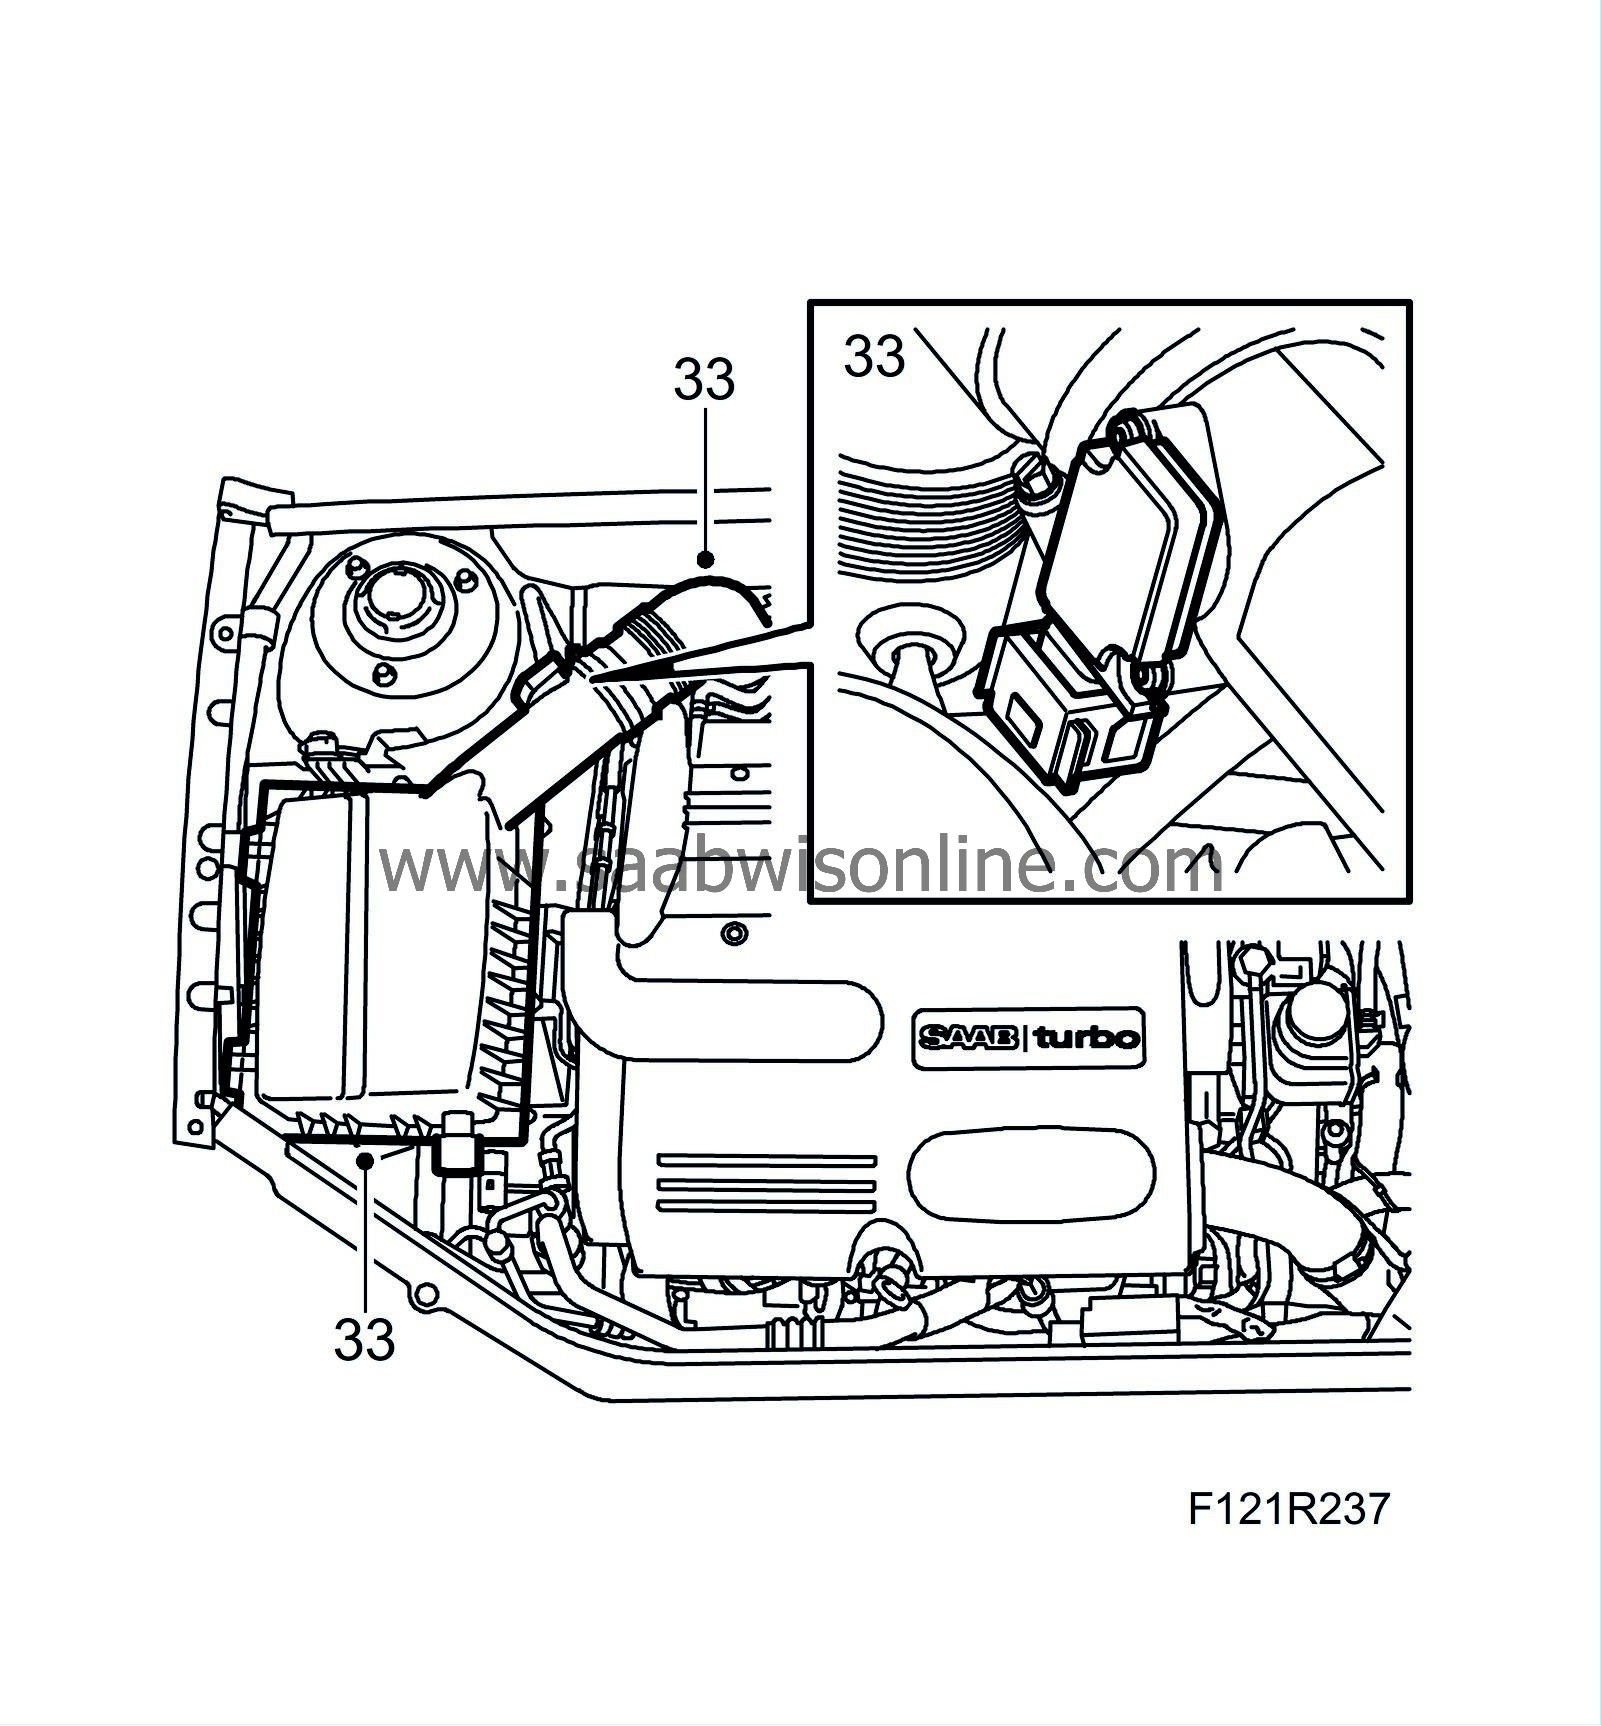
Remove the heat shield over the turbo.
|
|
5.
|
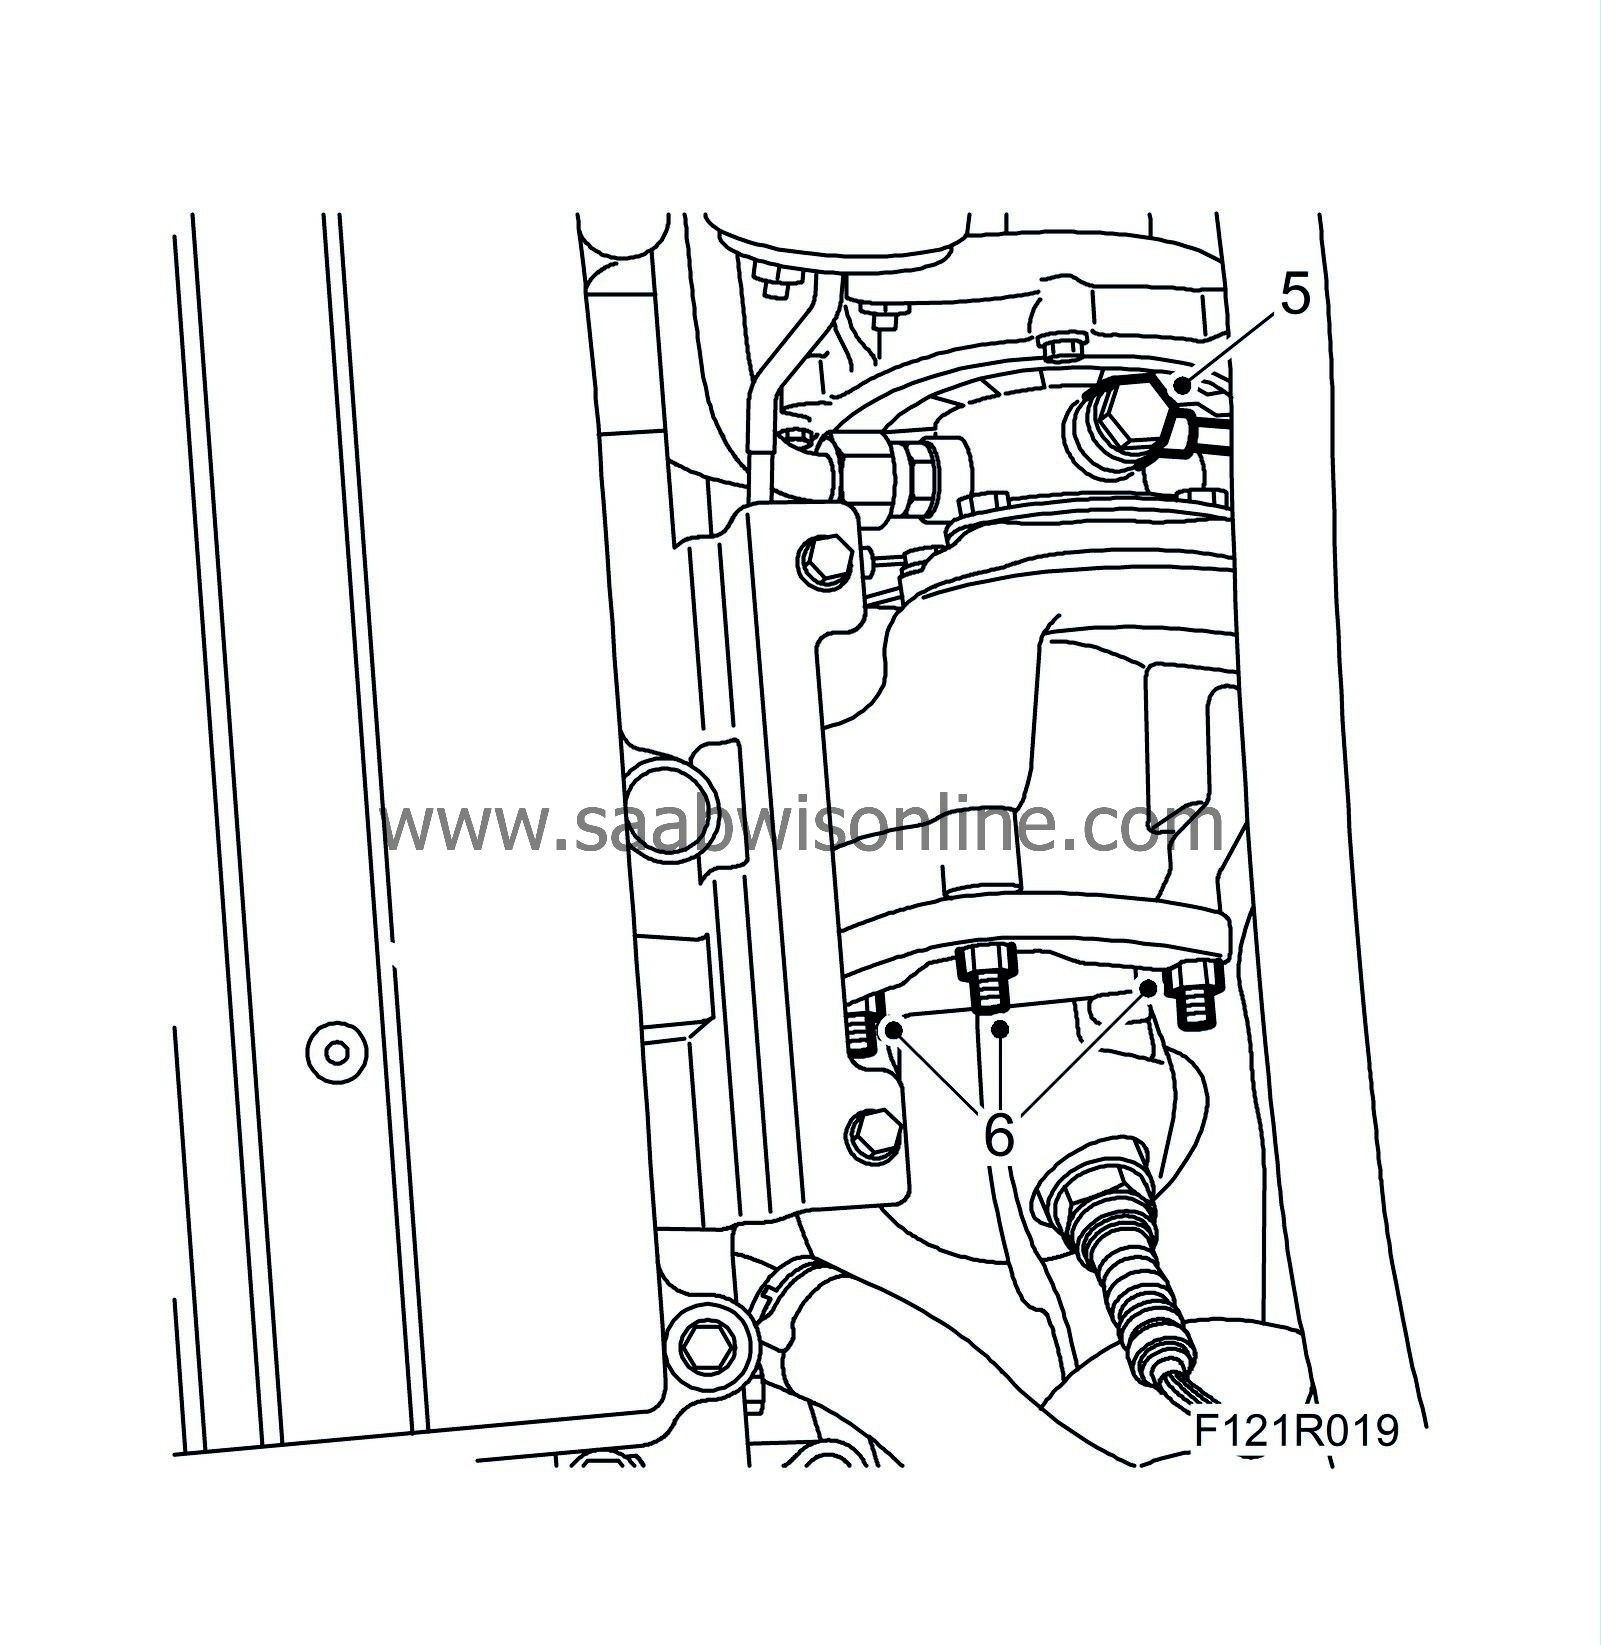
Detach the turbo oil delivery pipe.
|
|
6.
|
Remove the nuts for the catalytic converter connection to the turbo.
|
|
7.
|
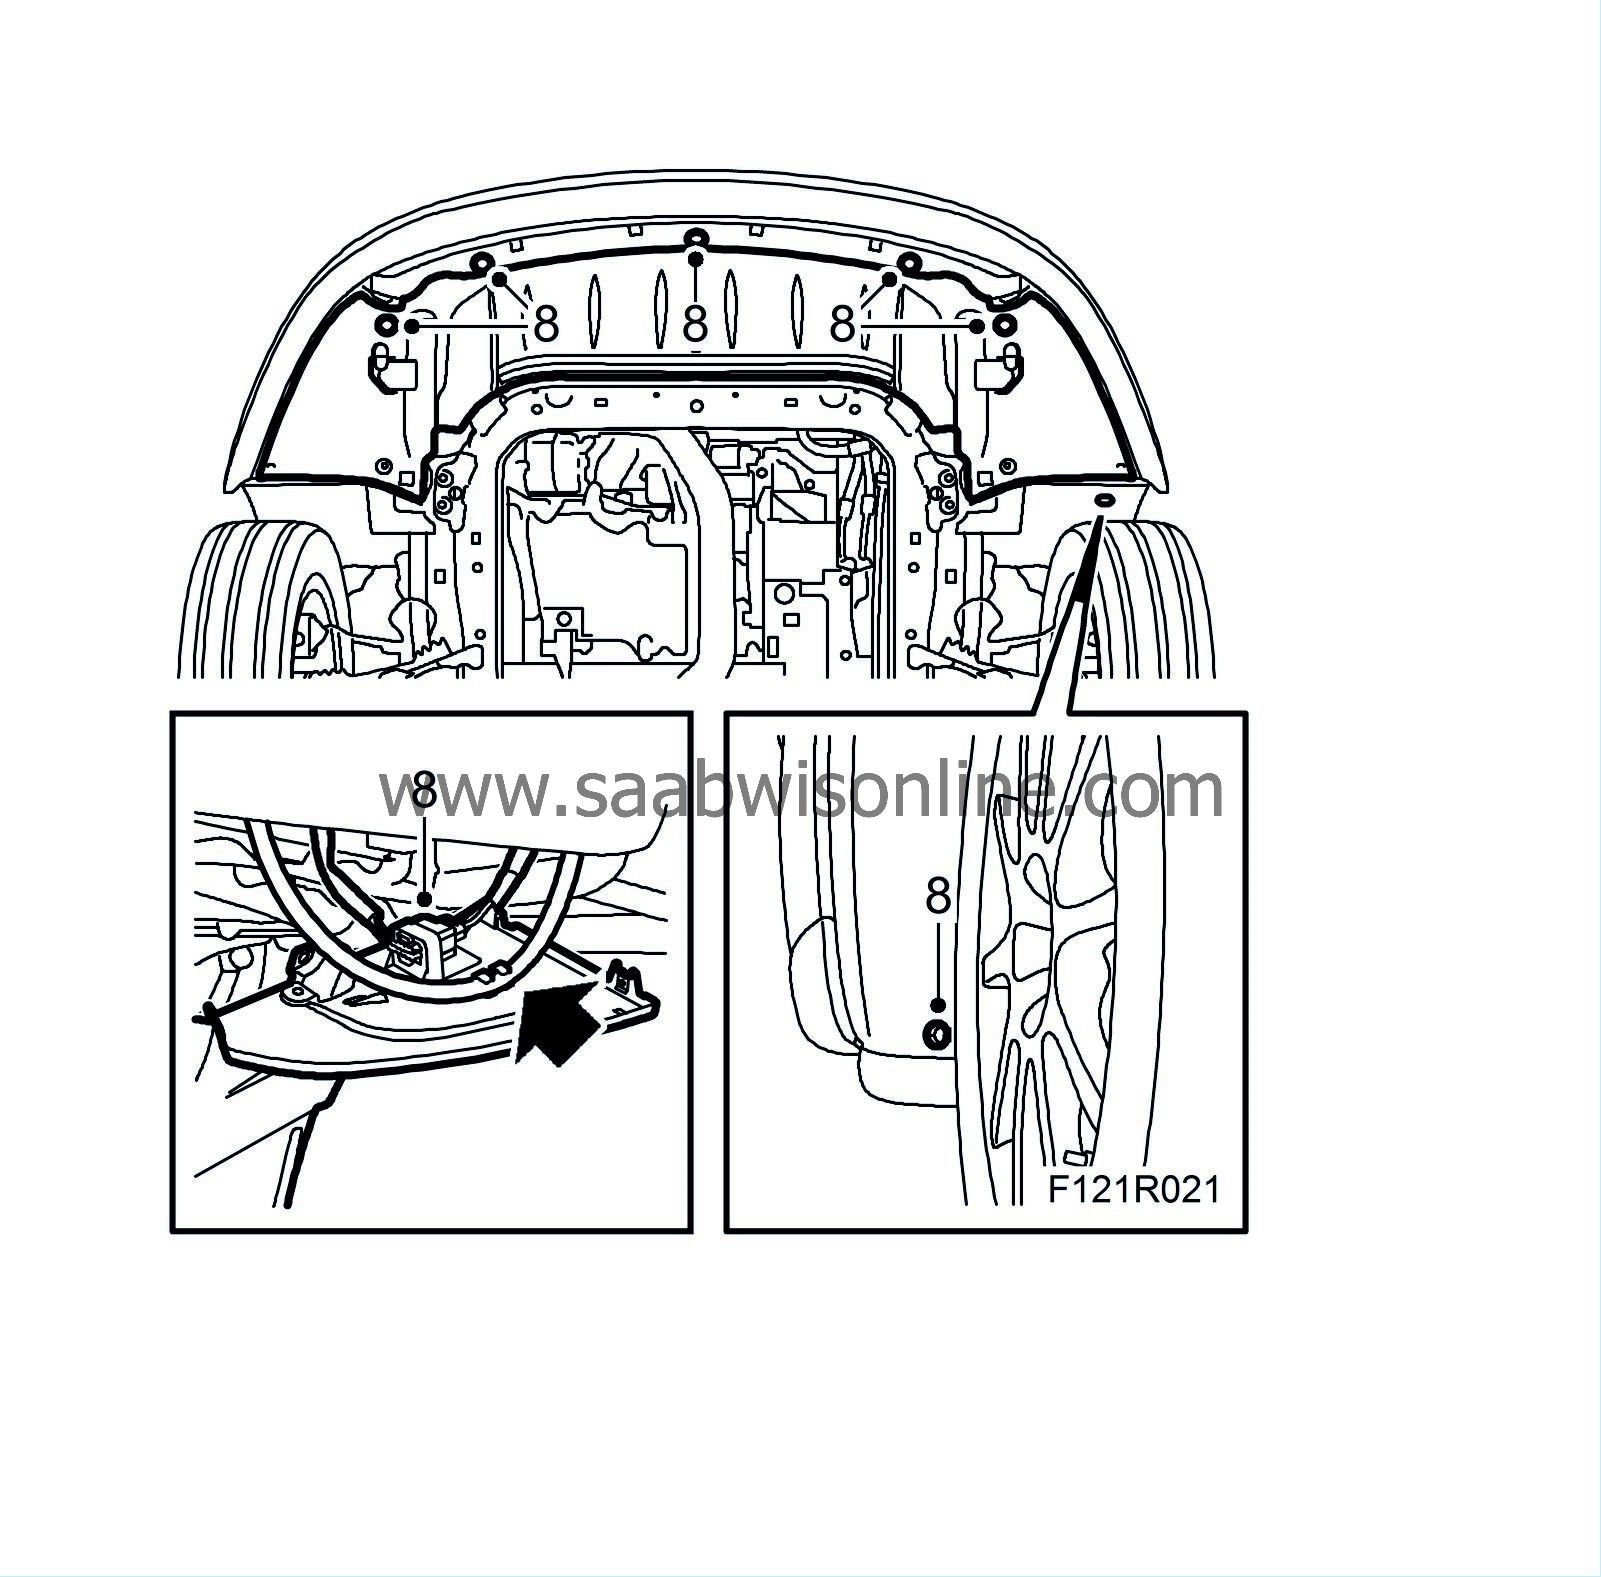
Raise the car and remove the right-hand front wheel and the right-hand wing liner.

|
|
8.
|
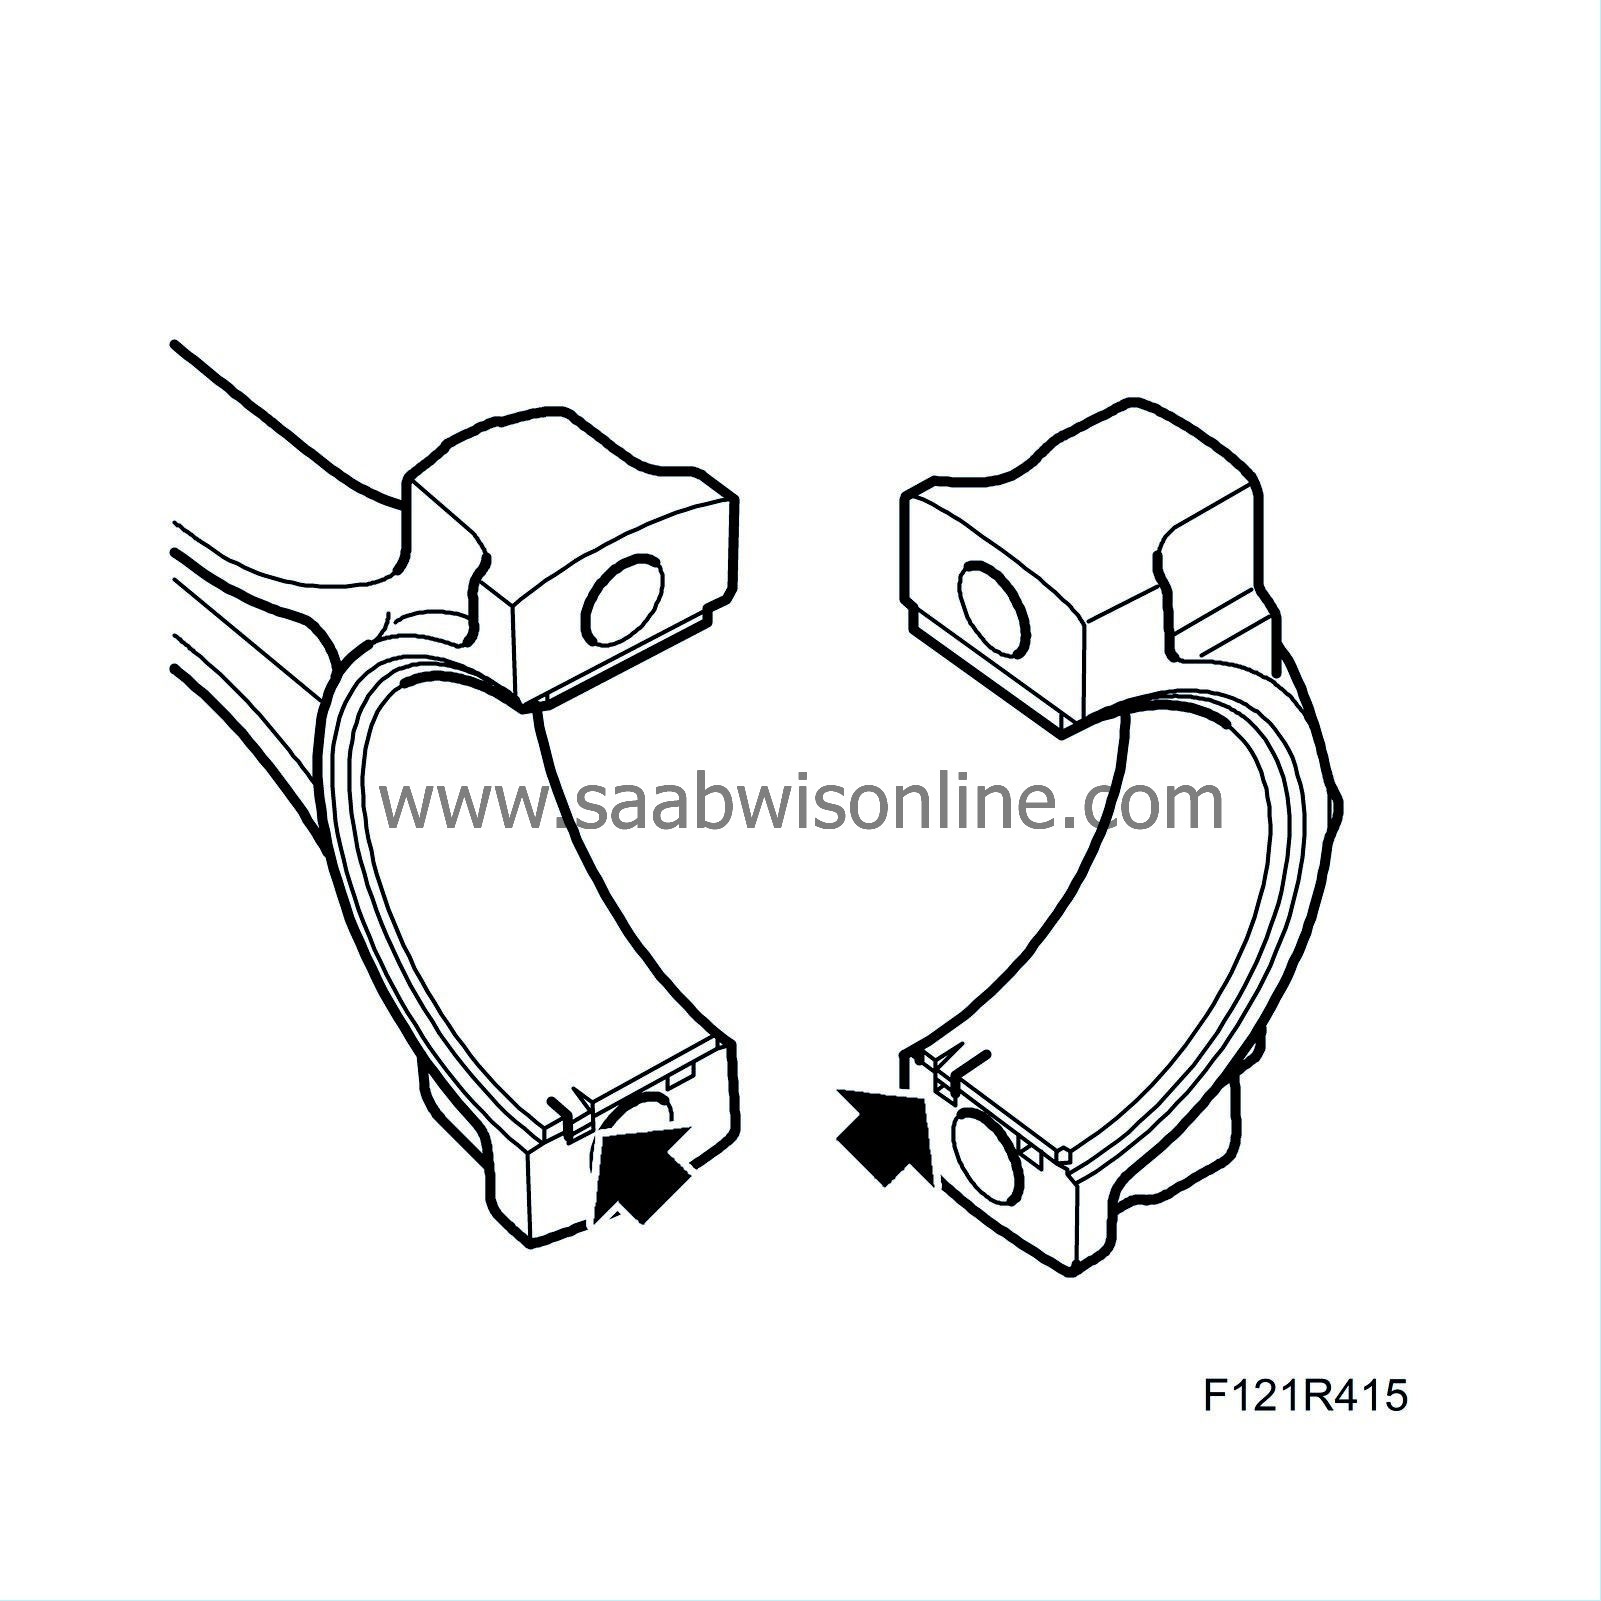
Remove the lower spoiler shield. Detach the hose to the headlight washer and unplug and remove the connector.
CV
: Remove the chassis reinforcement, front subframe.
|
|
9.
|
Position a container under the car, connect a hose to the radiator and drain the coolant.

|
|
10.
|
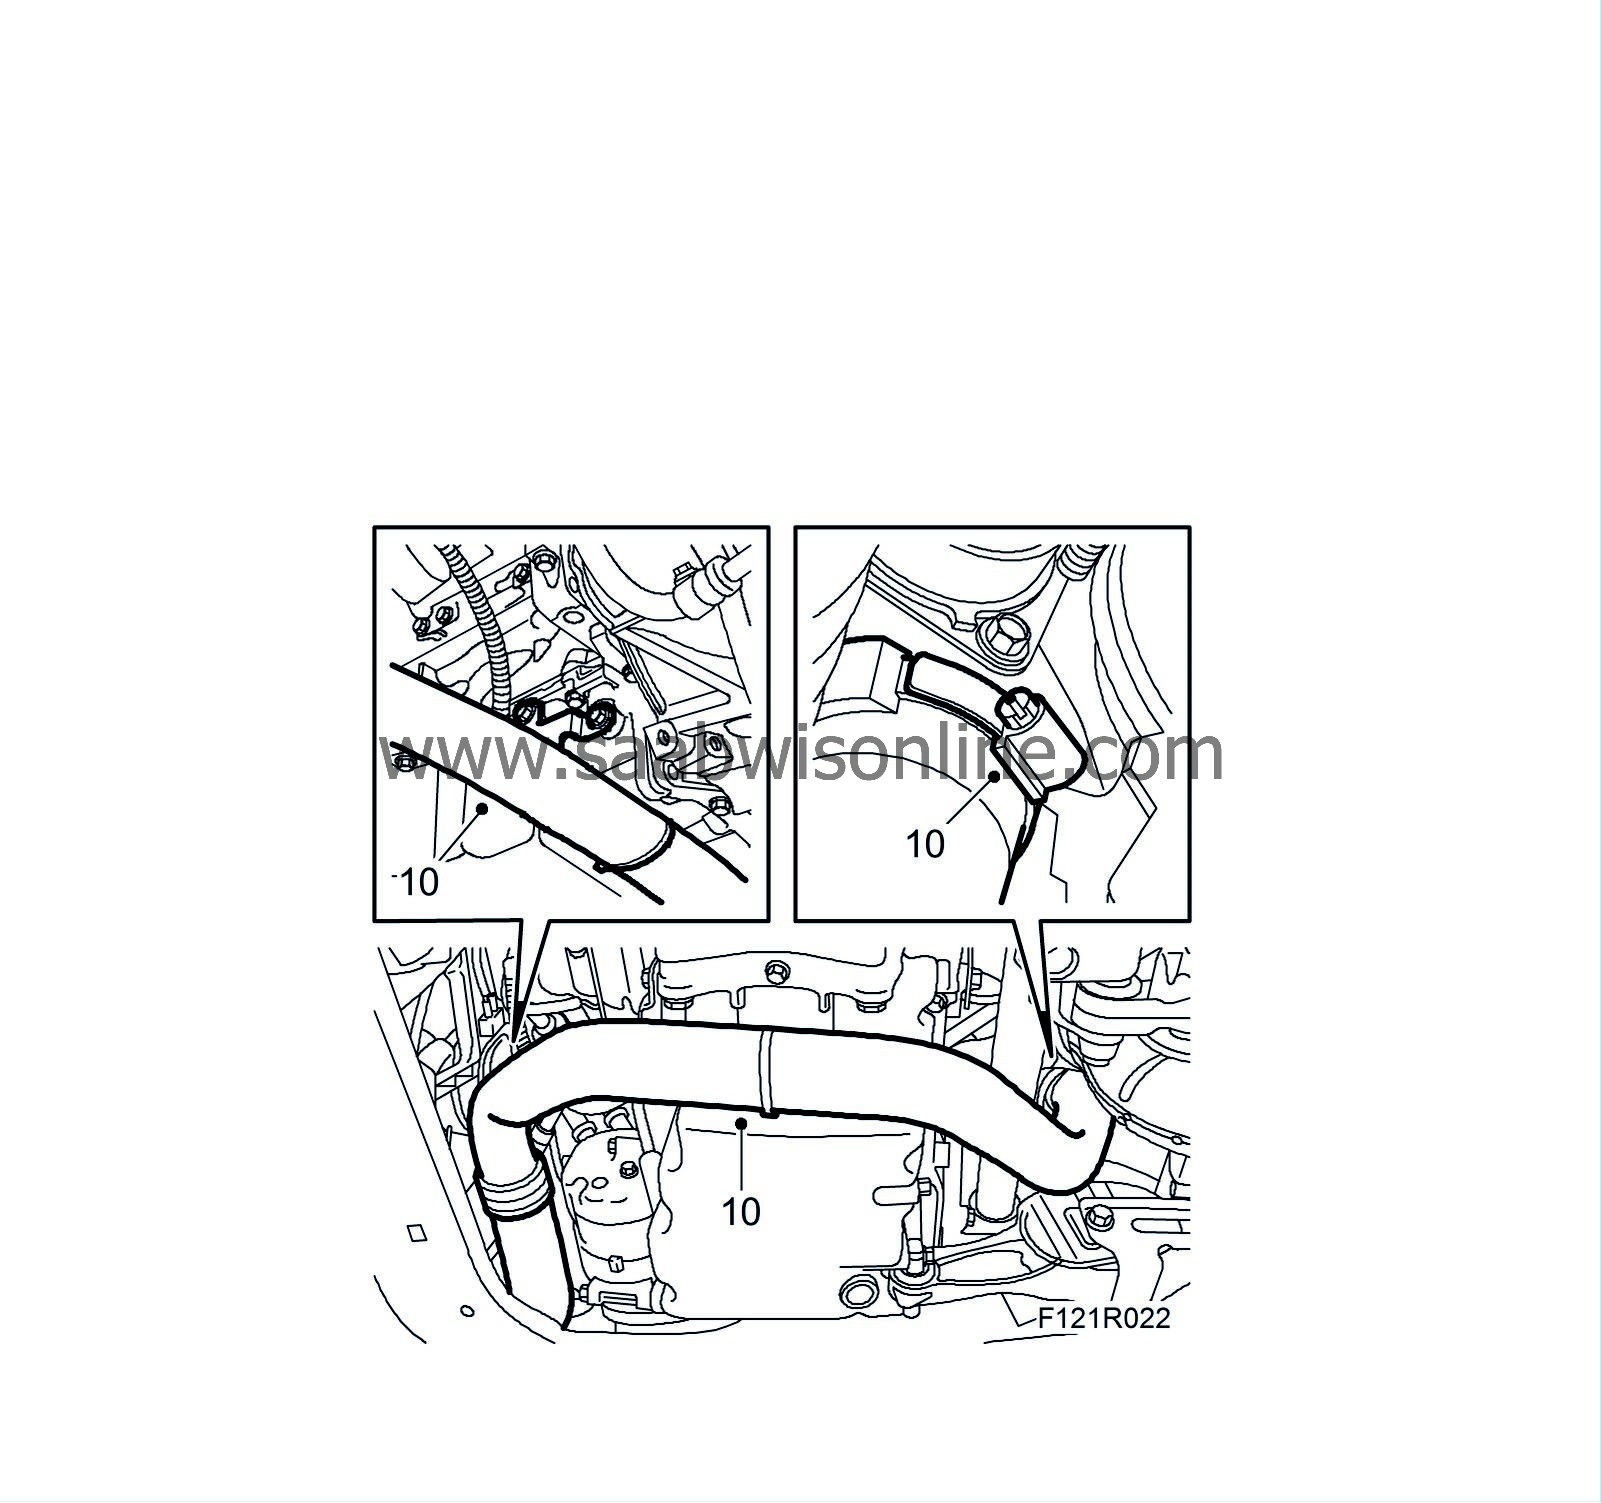
Remove the lower turbocharger delivery pipe.
|
|
11.
|
Detach the catalytic converter mounting from the cylinder block.
|
|
12.
|
Use protective safety glasses. Position a container under the car, connect a hose and open the cock on the coolant pump and drain the remaining coolant.

|
|
13.
|
Close the cock.
Tightening torque 20 Nm (15 lbf ft)
|
|
14.
|
Detach the turbo coolant pipe.
|
|
15.
|
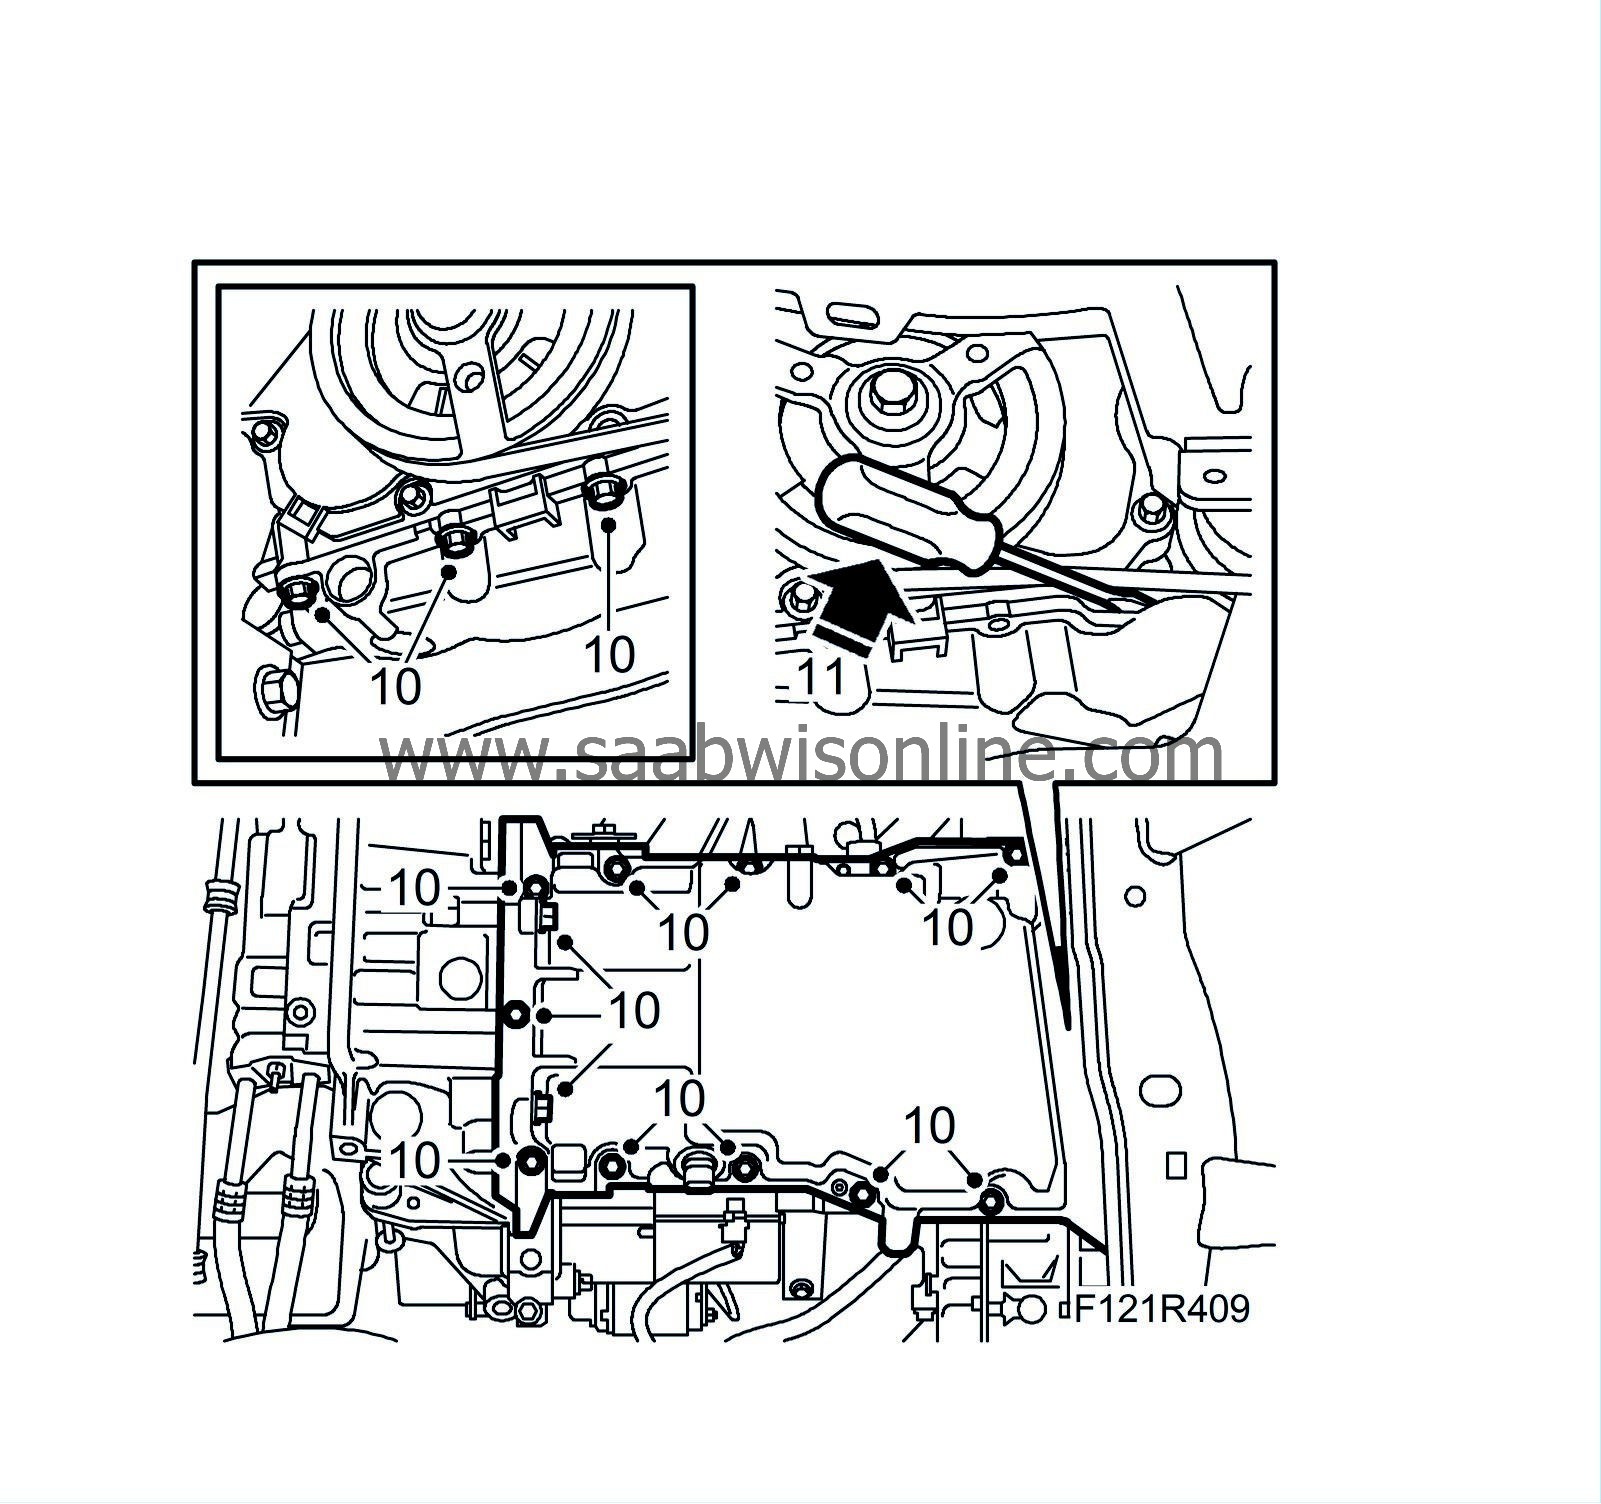
Remove the stay between the exhaust manifold and the cylinder block.
|
|
16.
|
Remove the oil return pipe from the turbo.
|
|
17.
|
Remove the stay between the intake manifold and the cylinder block.

|
|
18.
|
Remove the starter motor positive cable.
|
|
19.
|
Lower the car and remove the upper engine cover.
|
|
20.
|
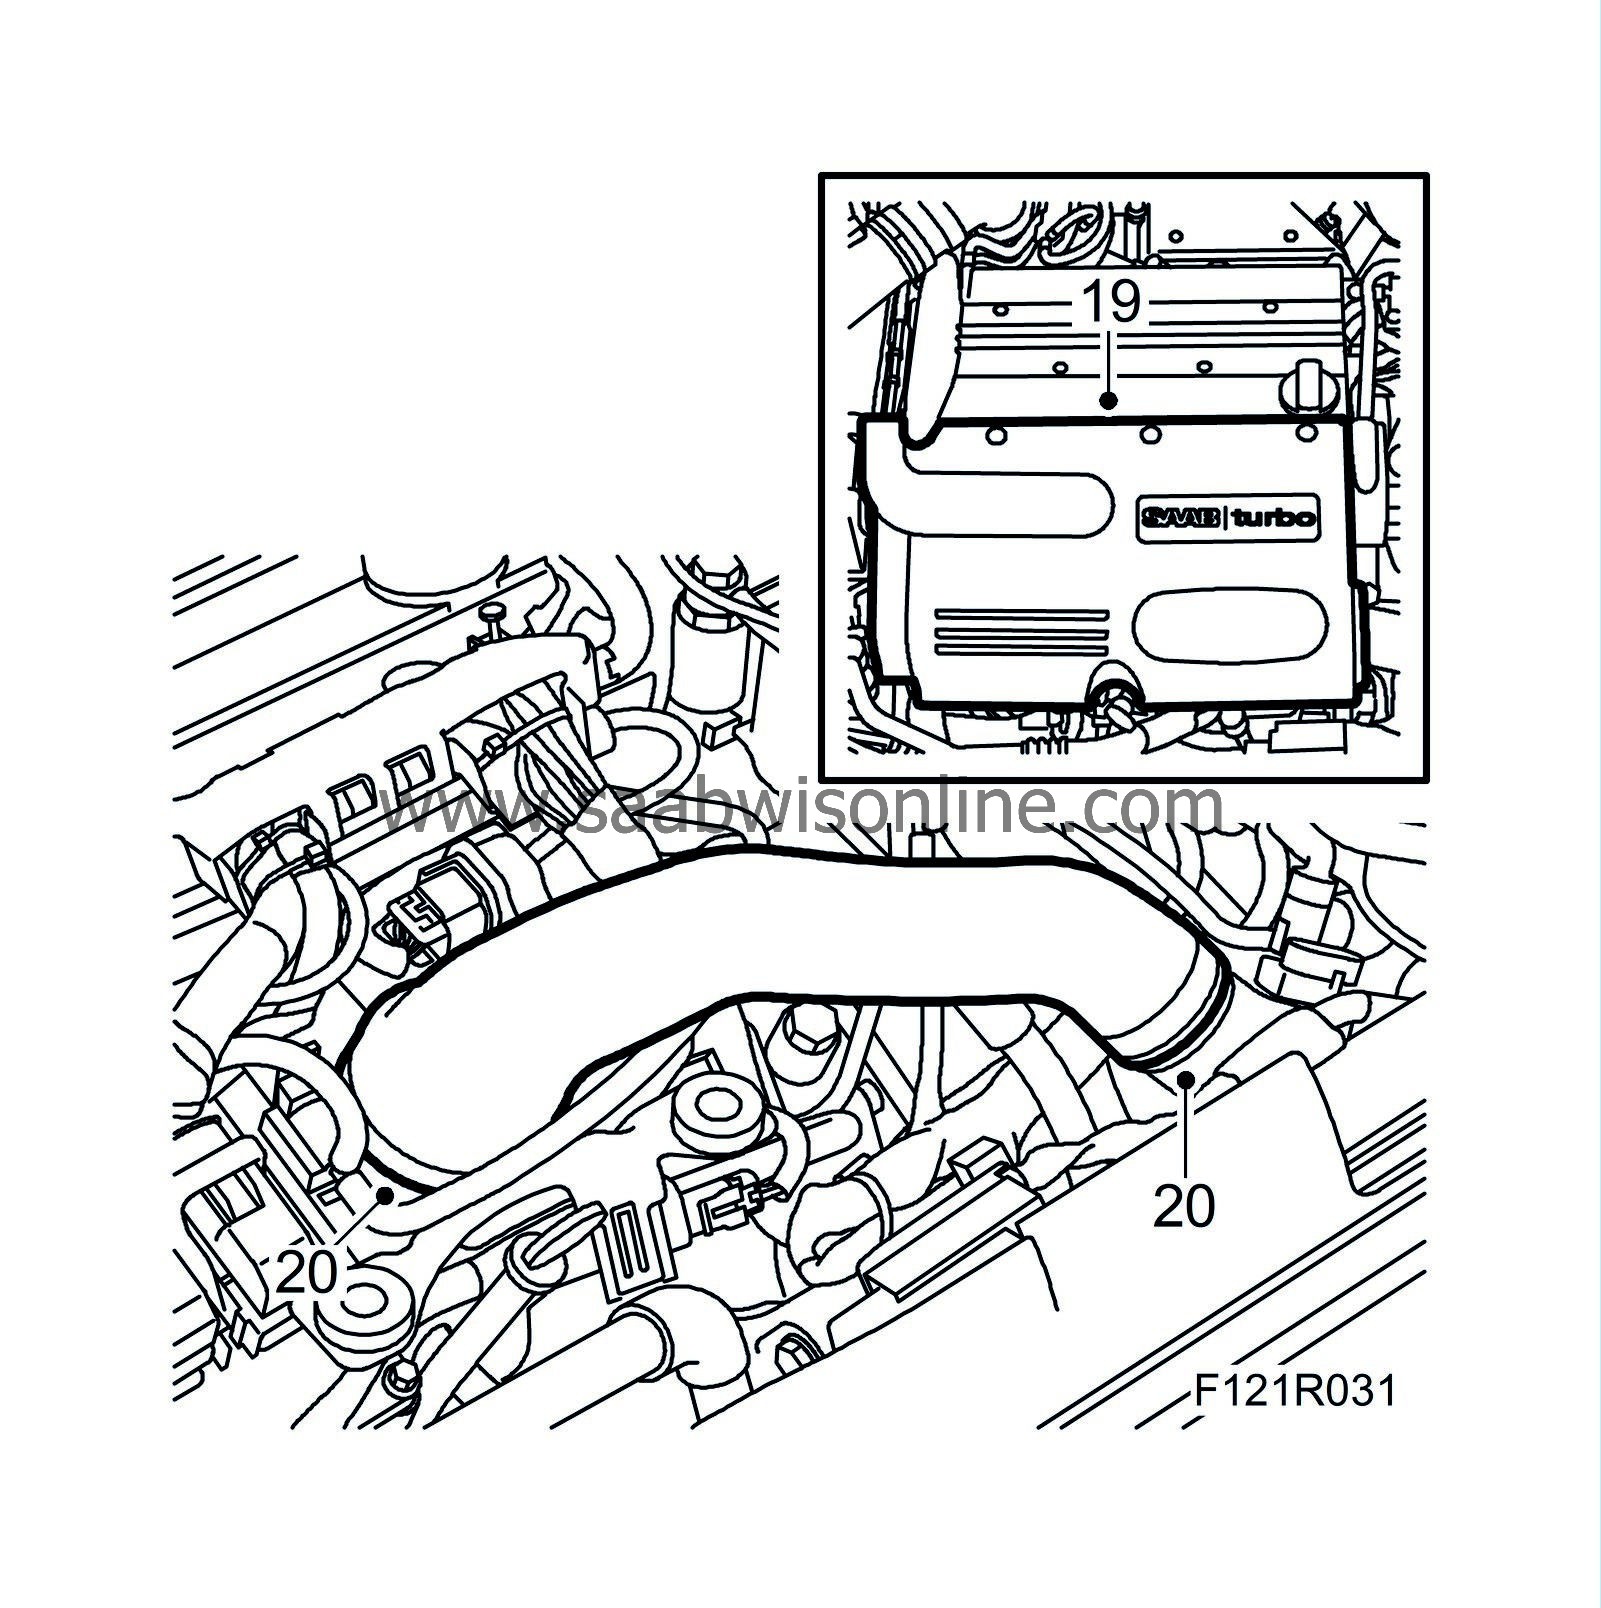
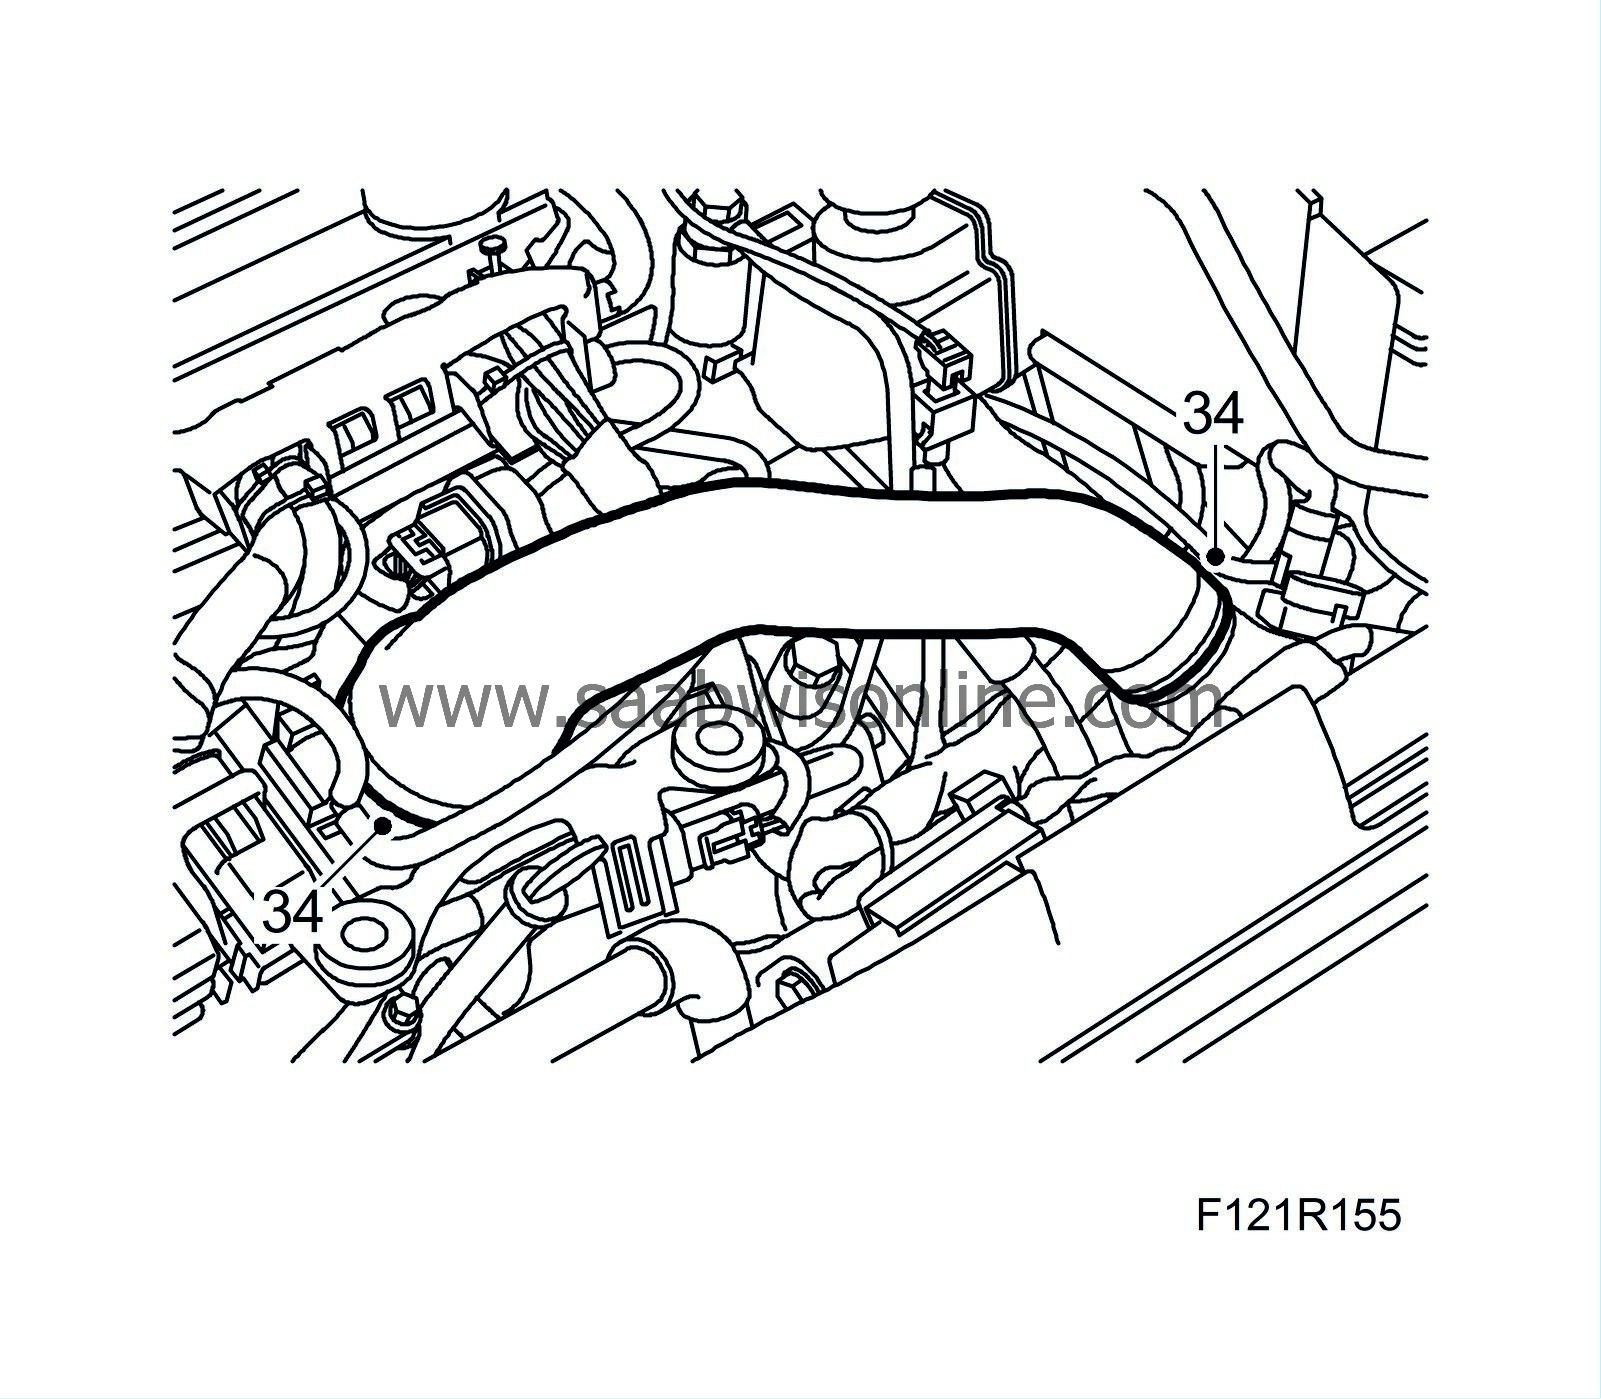
Remove the turbocharger delivery hose from the throttle body and the turbocharger delivery pipe.
|
|
21.
|
Detach the hoses and remove the turbo intake manifold. Detach the mass air flow sensor connector. Plug the turbo inlet.
|
|
22.
|
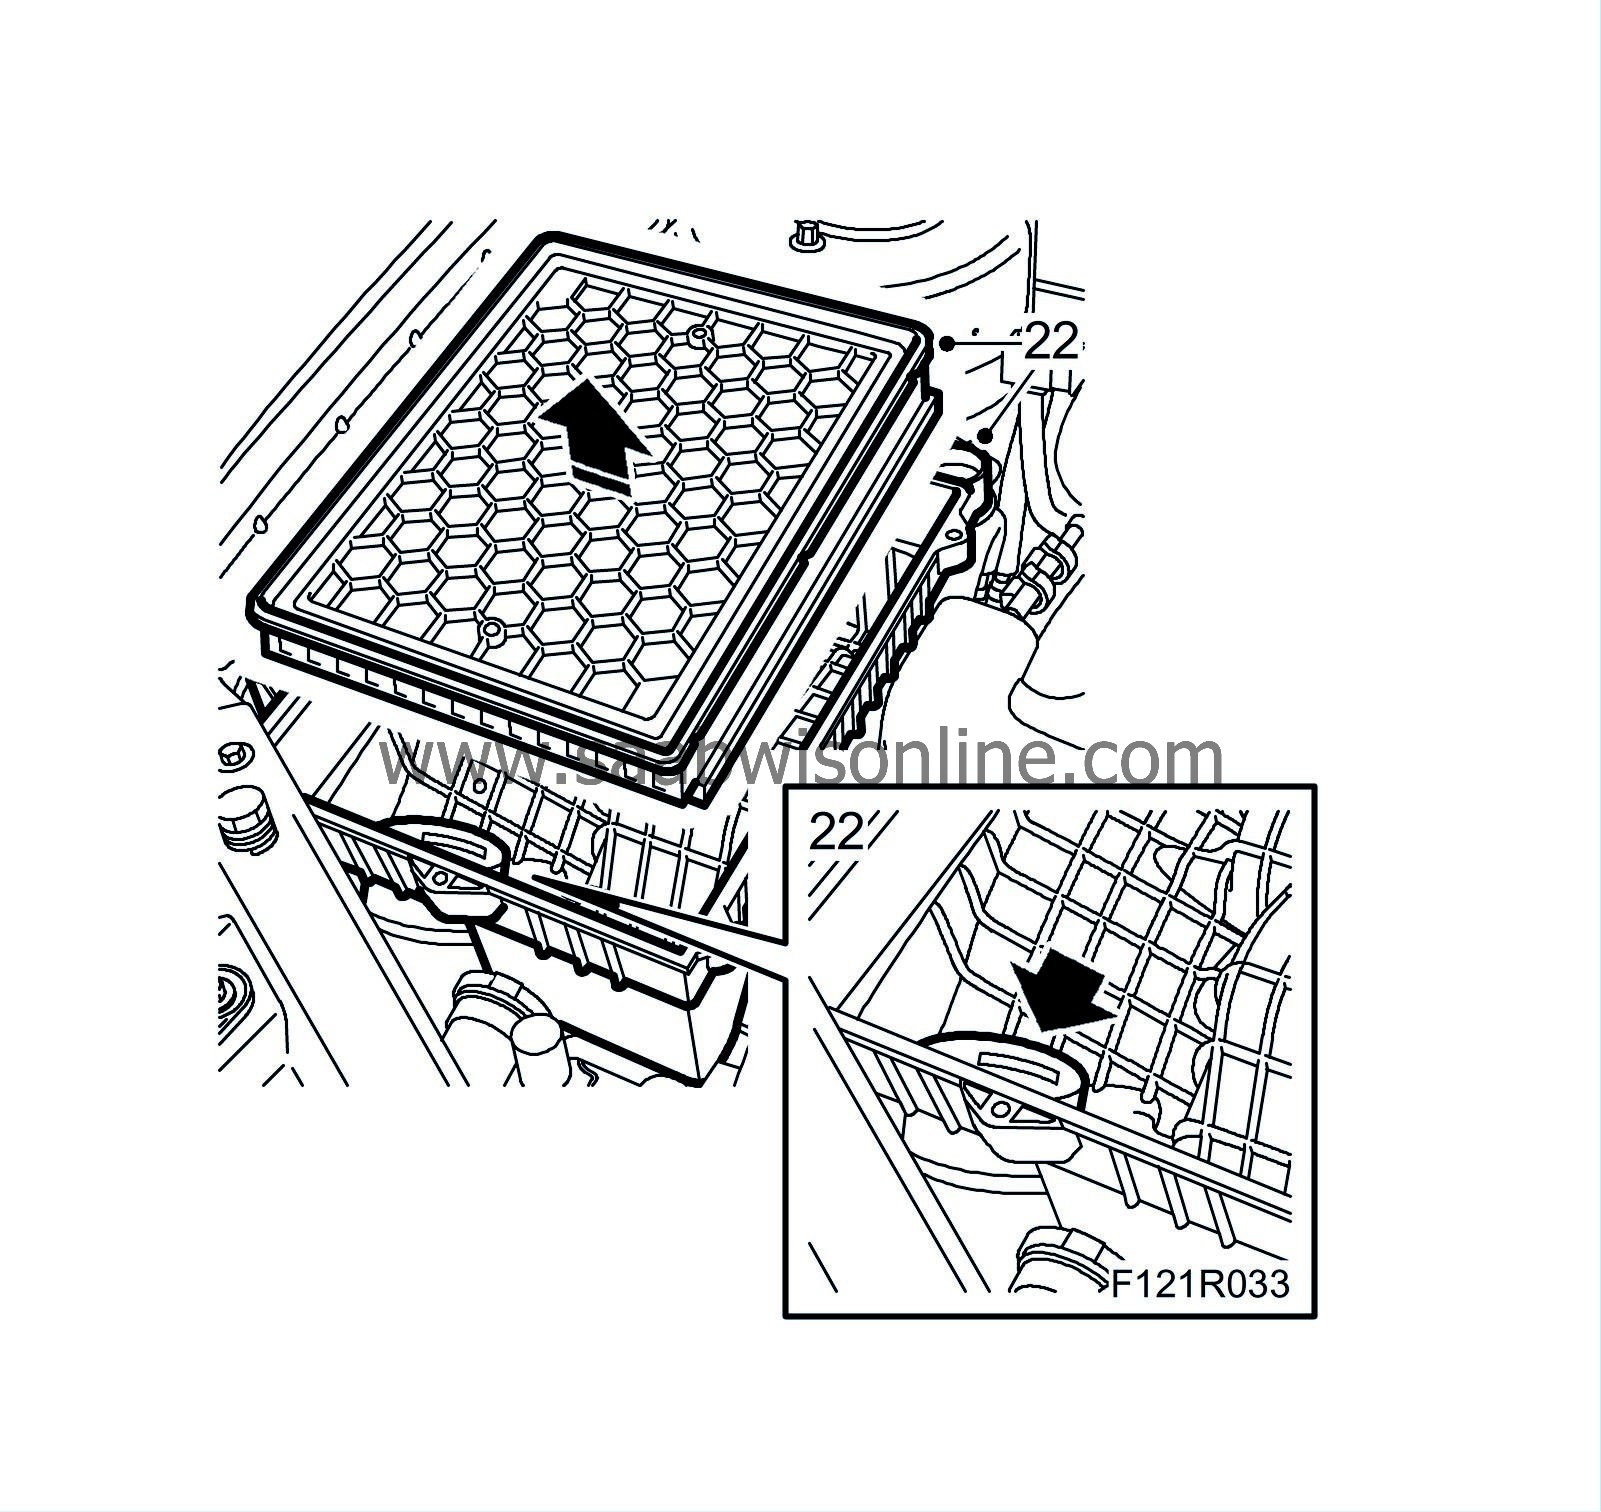
Remove the air filter housing cover and the air filter. Detach the inlet hose and remove the air filter housing.
|
|
23.
|
Release any pressure in the fuel system by carefully pressing the service valve needle. Collect any fuel spill. Detach both fuel lines from the fuel rail while gripping the lower nut. Plug the fuel lines. Use 82 92 948 Plugs, A/C system, kit.

|
|
24.
|
Disconnect the quick-release coupling for the breather line and detach the fuel lines and ventilation lines from the clips on the camshaft cover. Bend up the breather hose from the intake manifold and place it on the camshaft cover.
|
|
25.
|
Remove the cover over the ignition coils.
|
|
26.
|
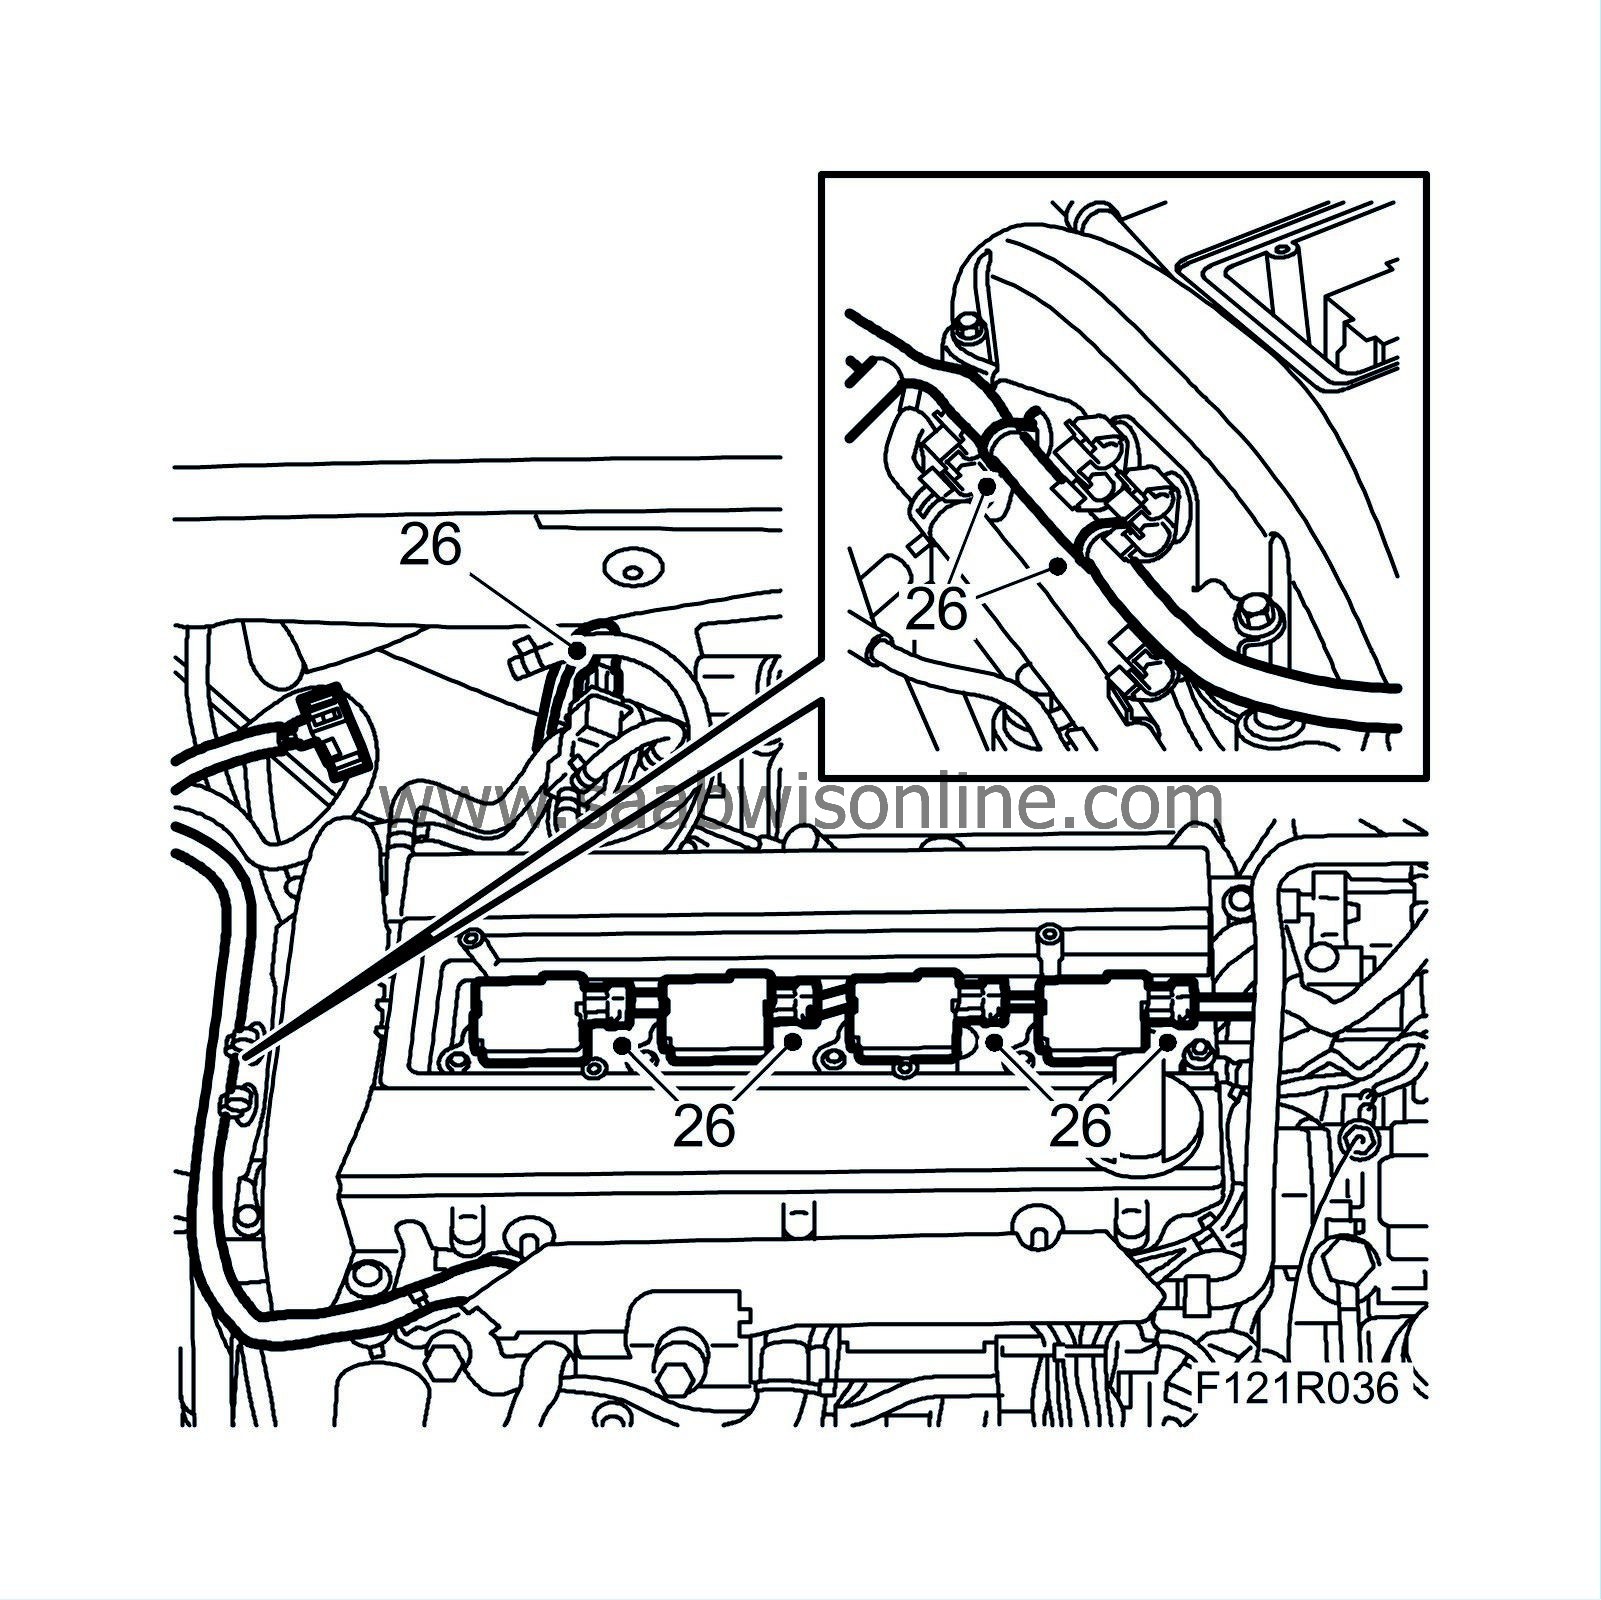
Unplug the ignition coil connectors. Unplug the connectors to the turbo solenoid valve and undo the cable clips.
|
|
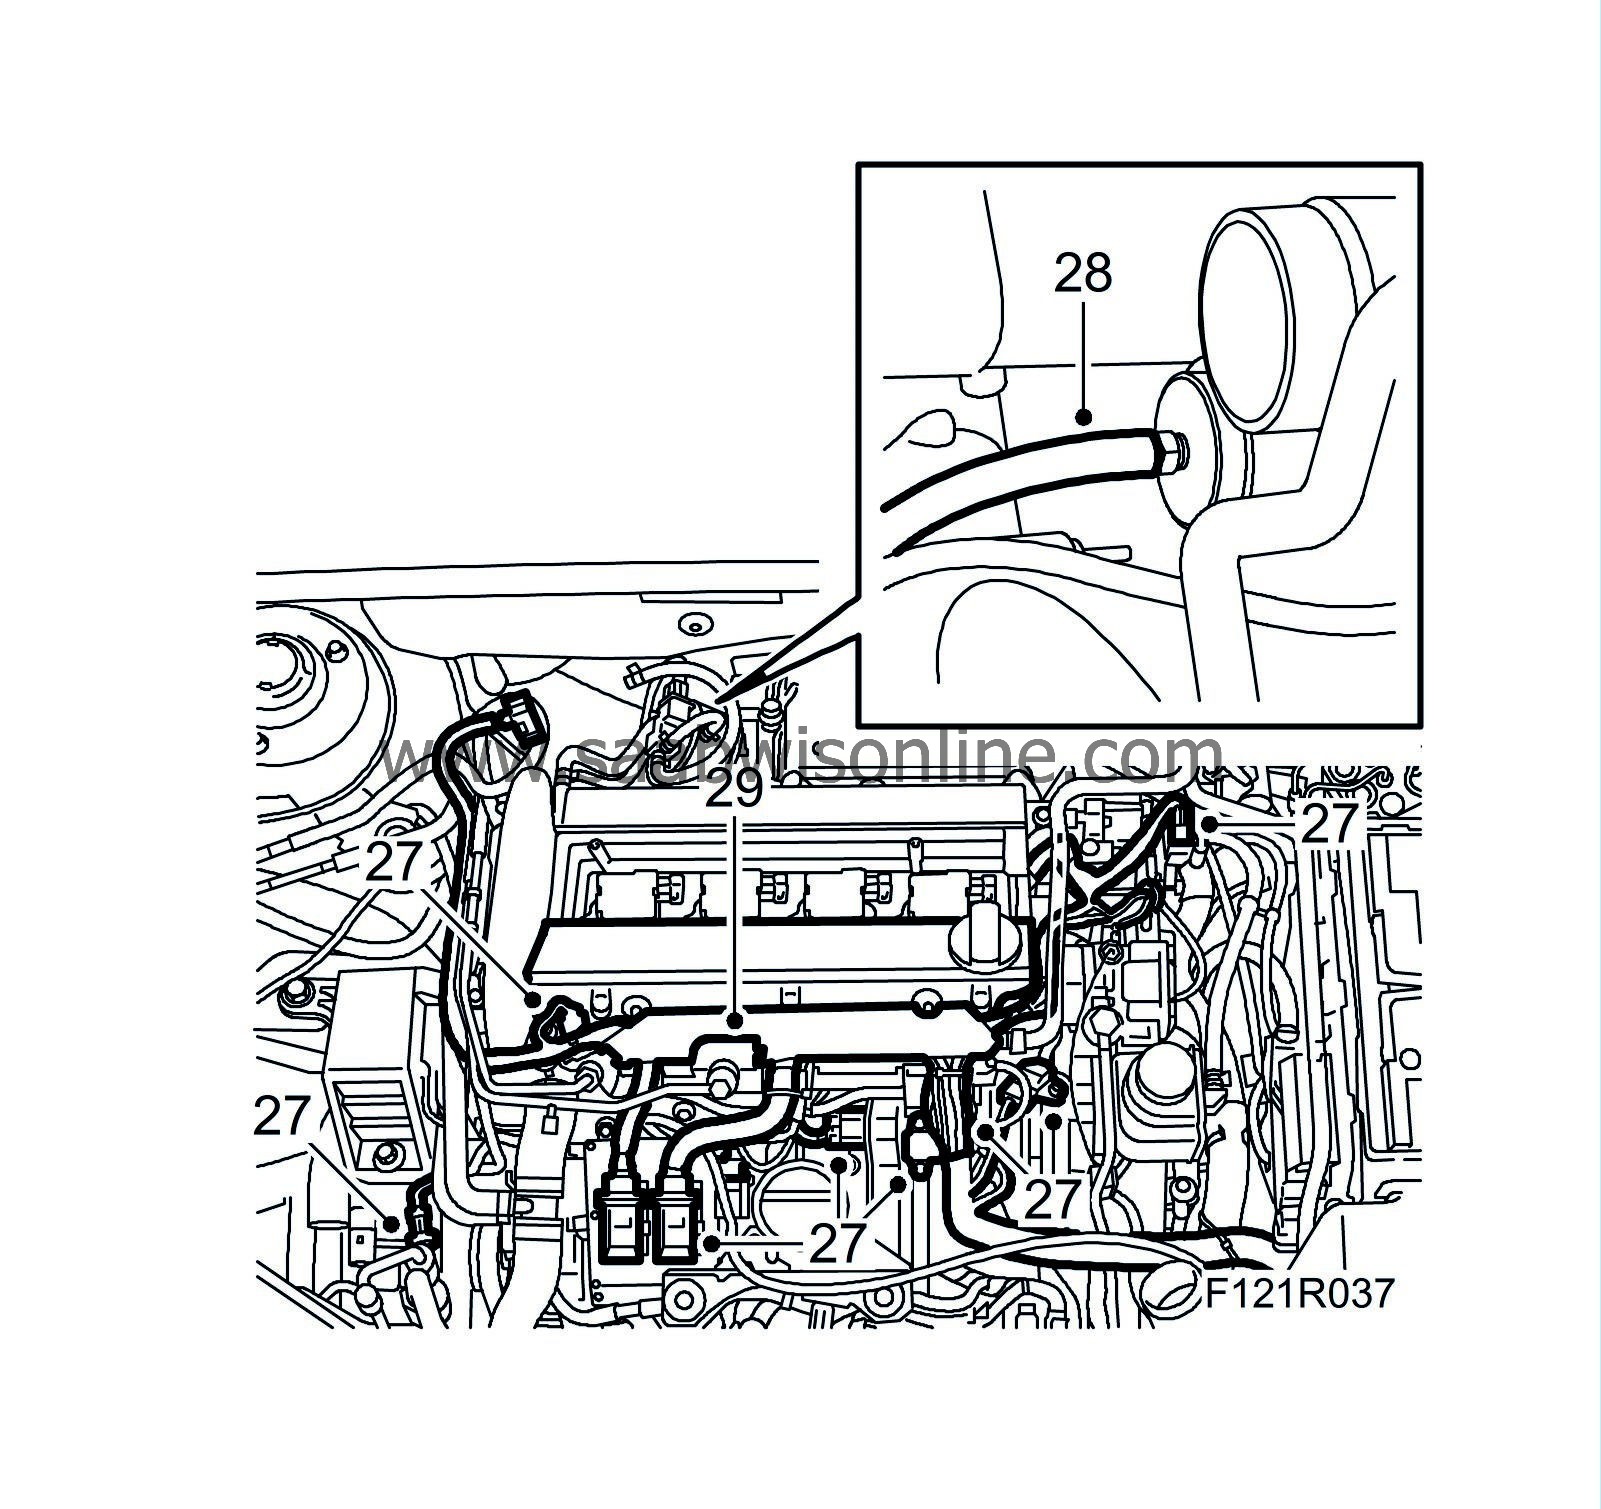
27.
|
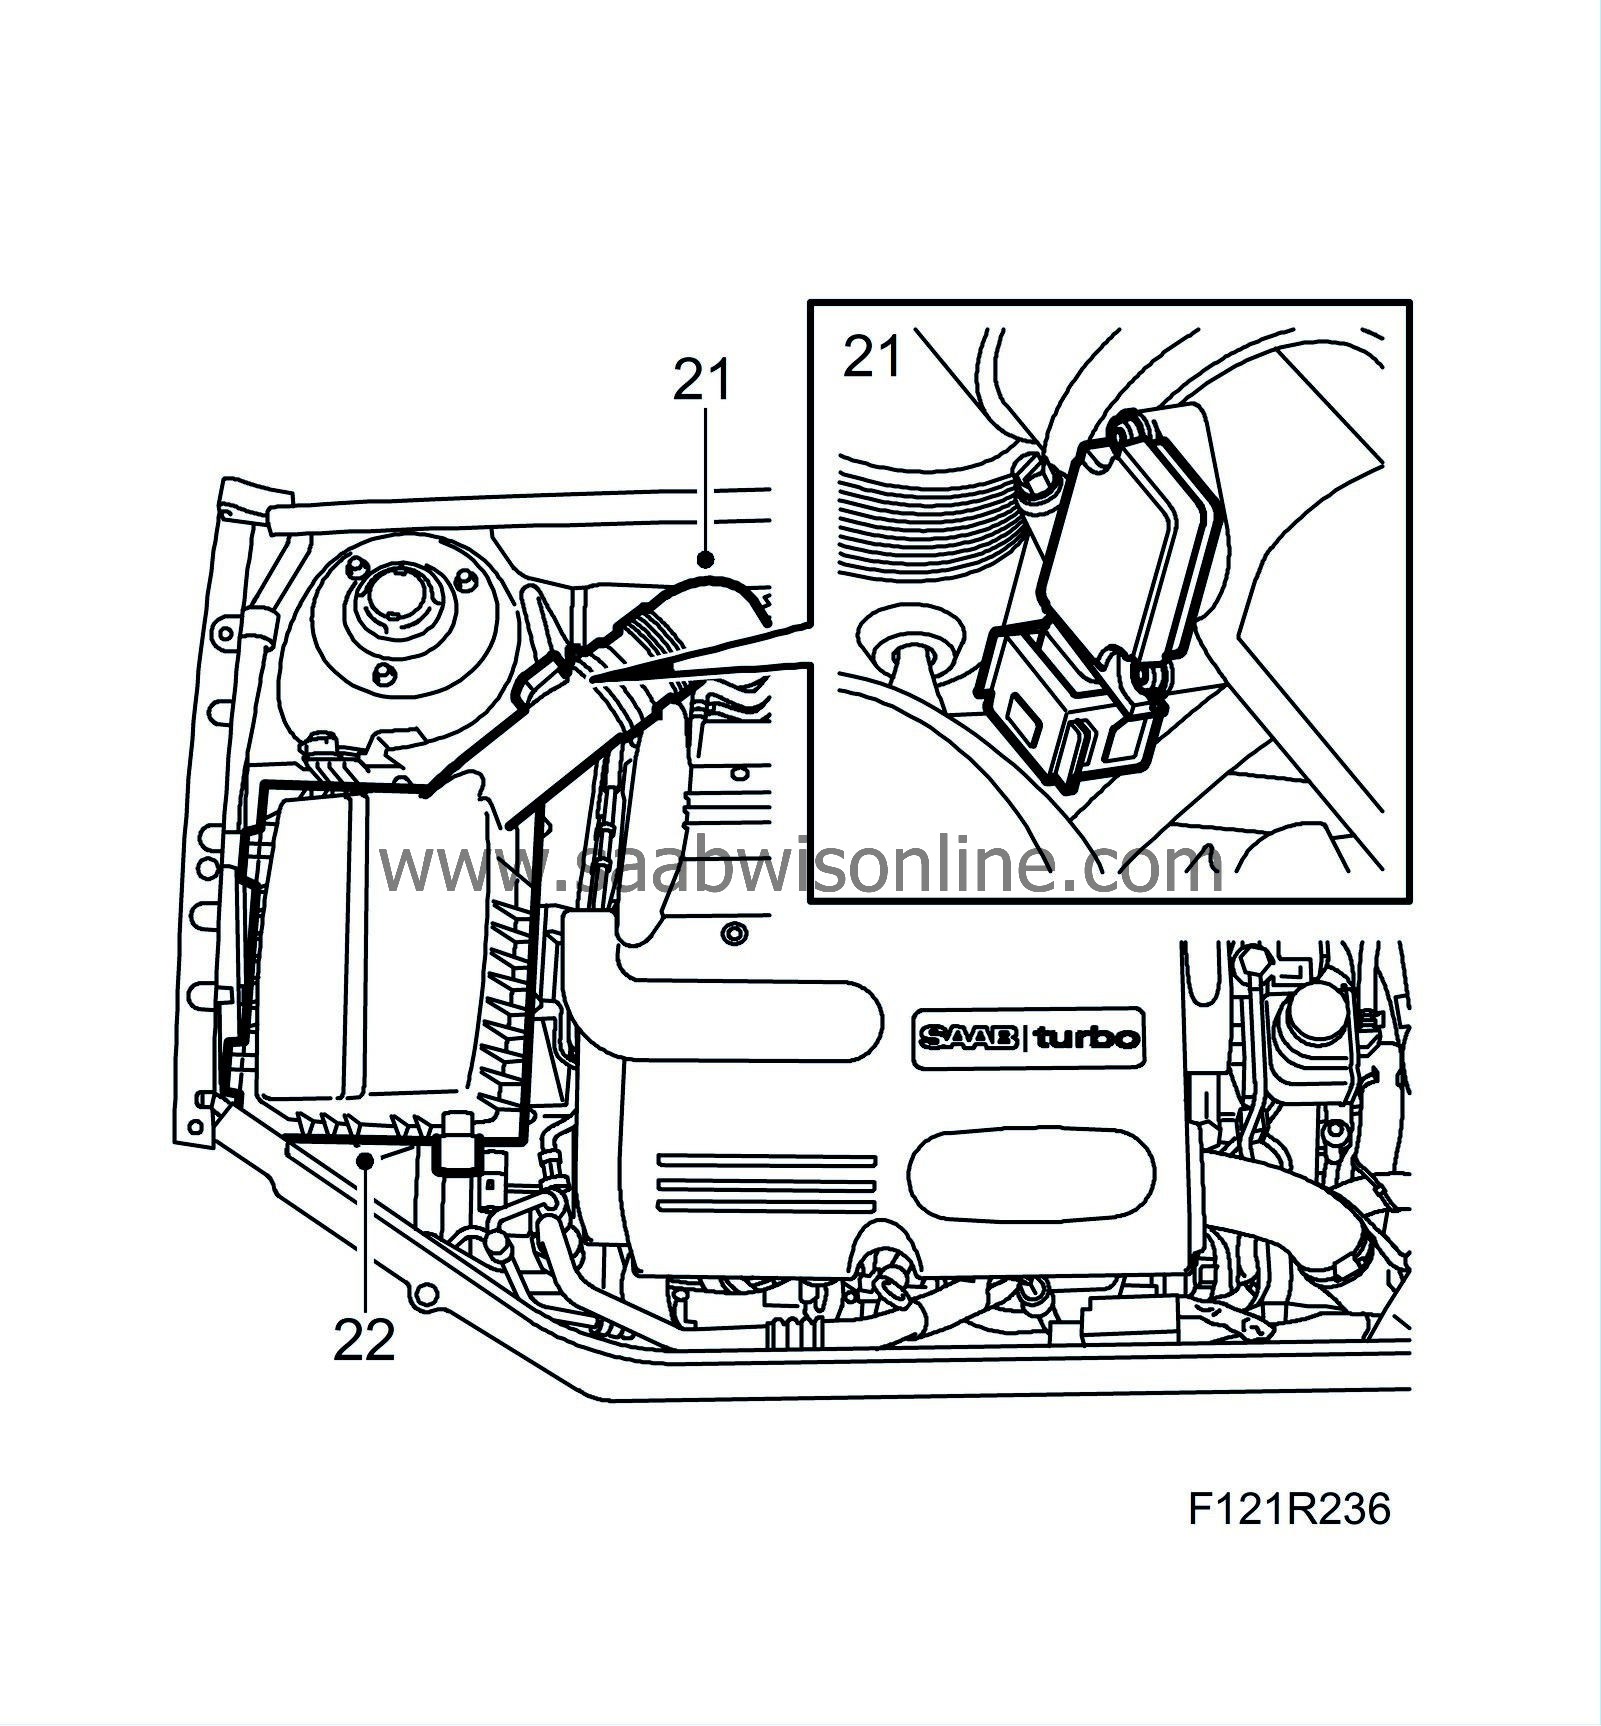
Unplug the A/C pressure sensor connector, the connectors to the coolant temperature sensor, the engine control module, the solenoid valve for the bypass valve, the throttle body, the intake manifold pressure sensor, the atmospheric pressure sensor, the IDM module, the oil pressure sensor and the ground cable to the engine control module.
|
|
28.
|
Disconnect the hose from the turbo bypass valve and the solenoid valve.
|
|
29.
|
Detach the cable duct and bracket from the camshaft cover. Fold aside the engine's wiring harness.
|
|
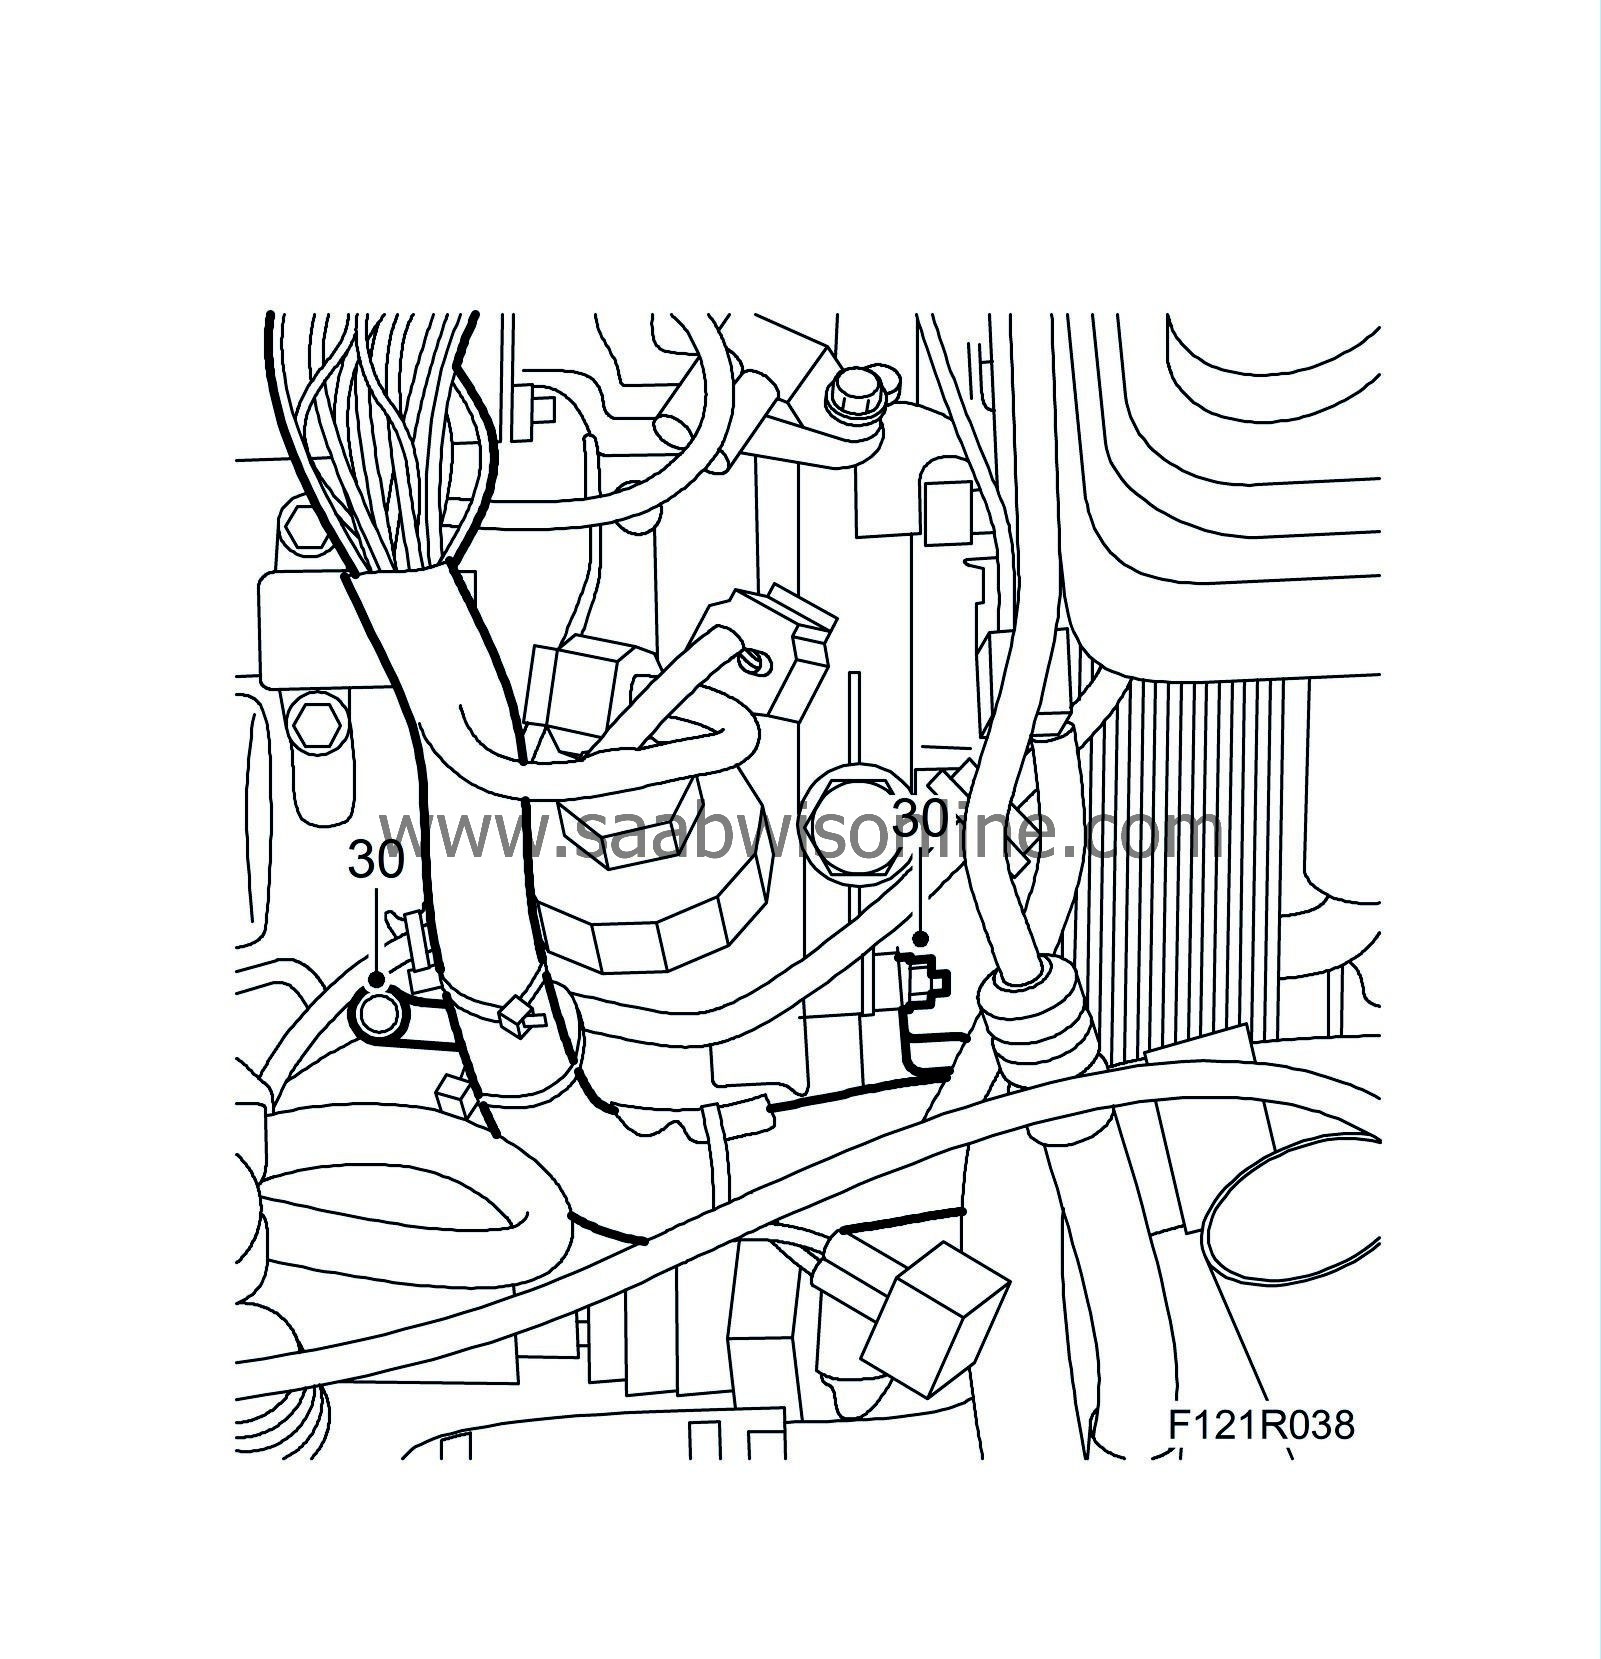
30.
|
Remove the wiring harness nuts from the oil filter housing and the intake manifold and detach the wiring harness.
|
|
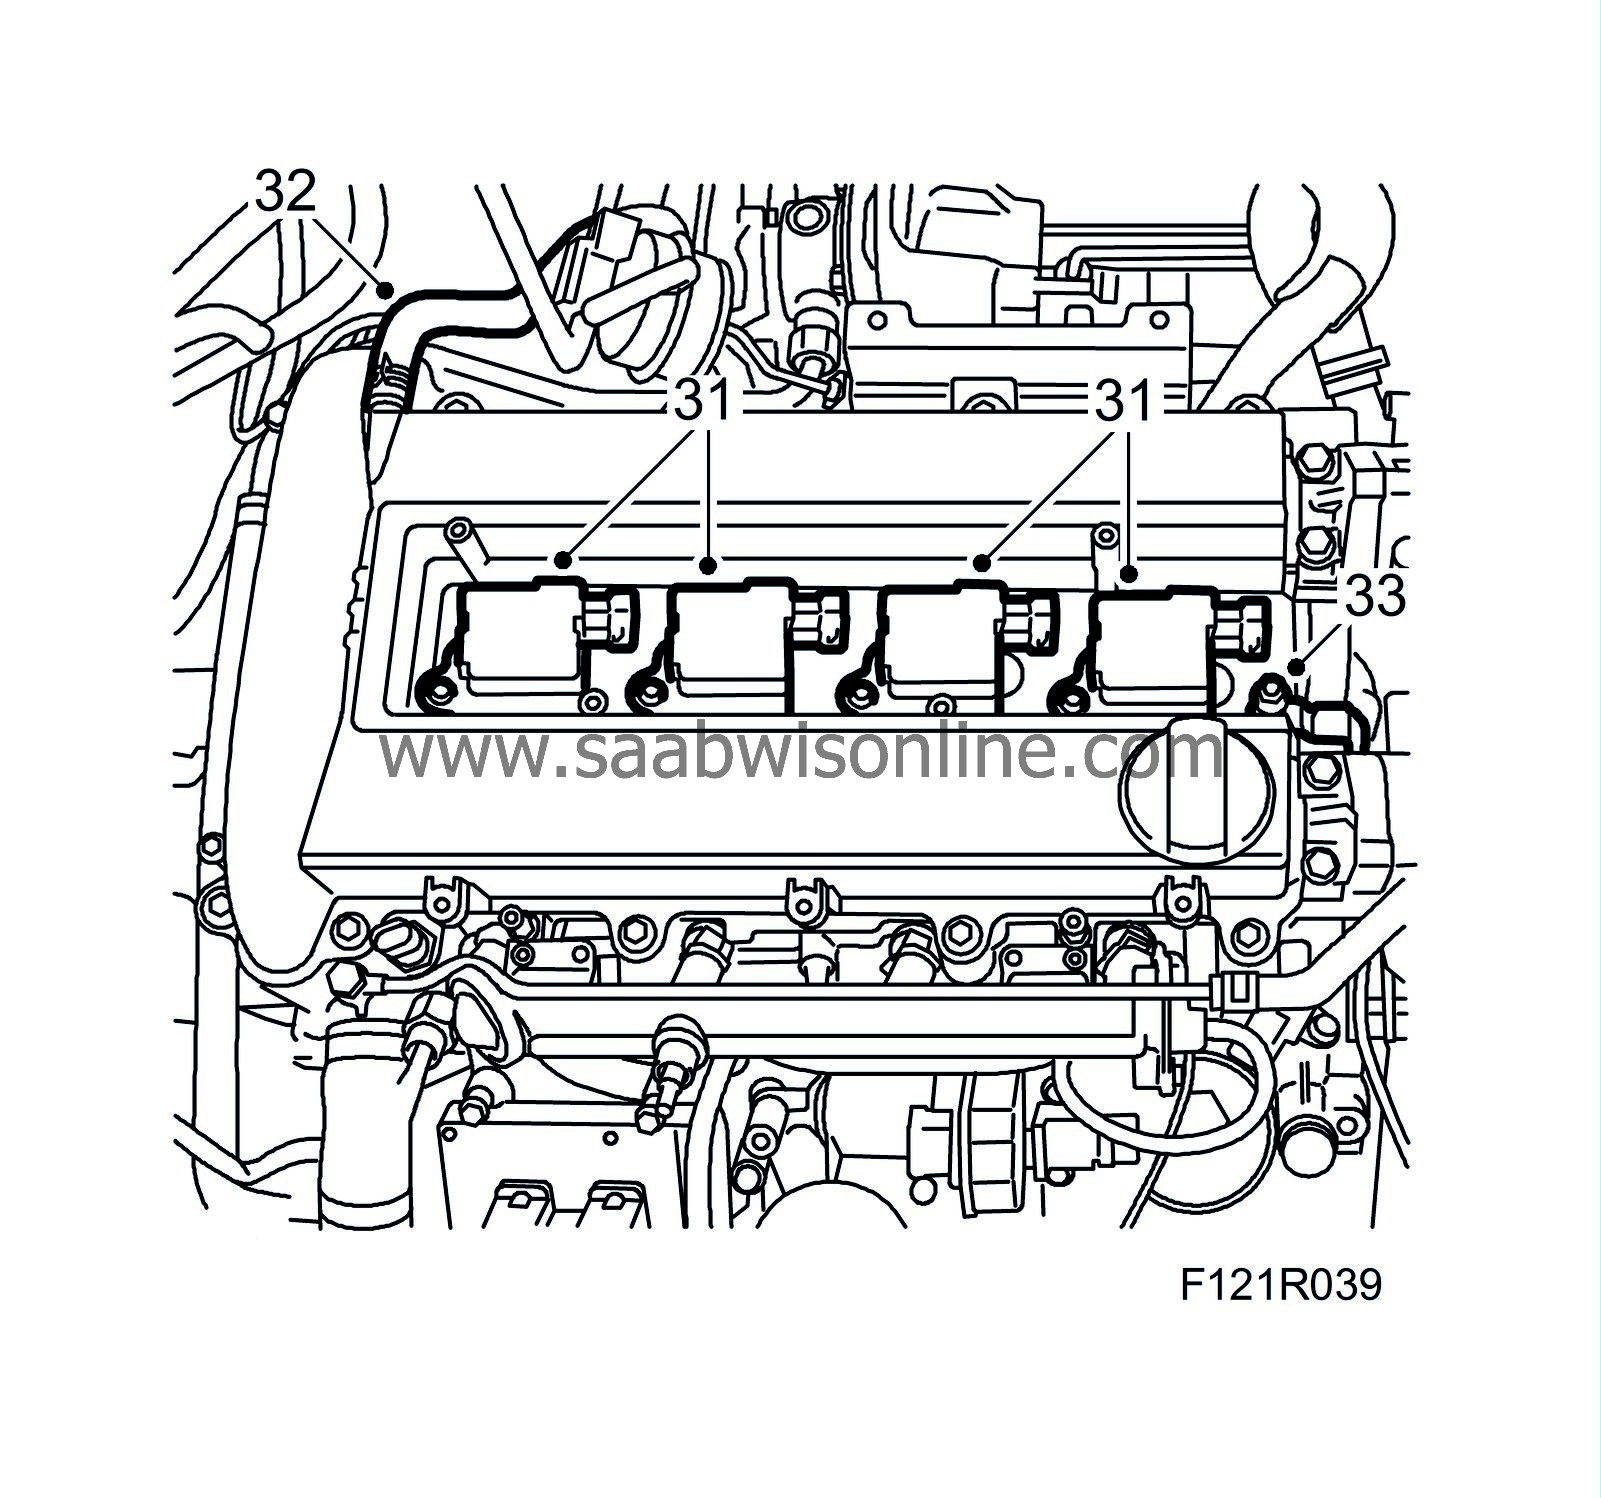
31.
|
Remove the ignition coils.
|
|
32.
|
Detach the crankcase ventilation hose from the camshaft cover.
|
|
33.
|
Detach the ground cable from the camshaft cover.
|
|
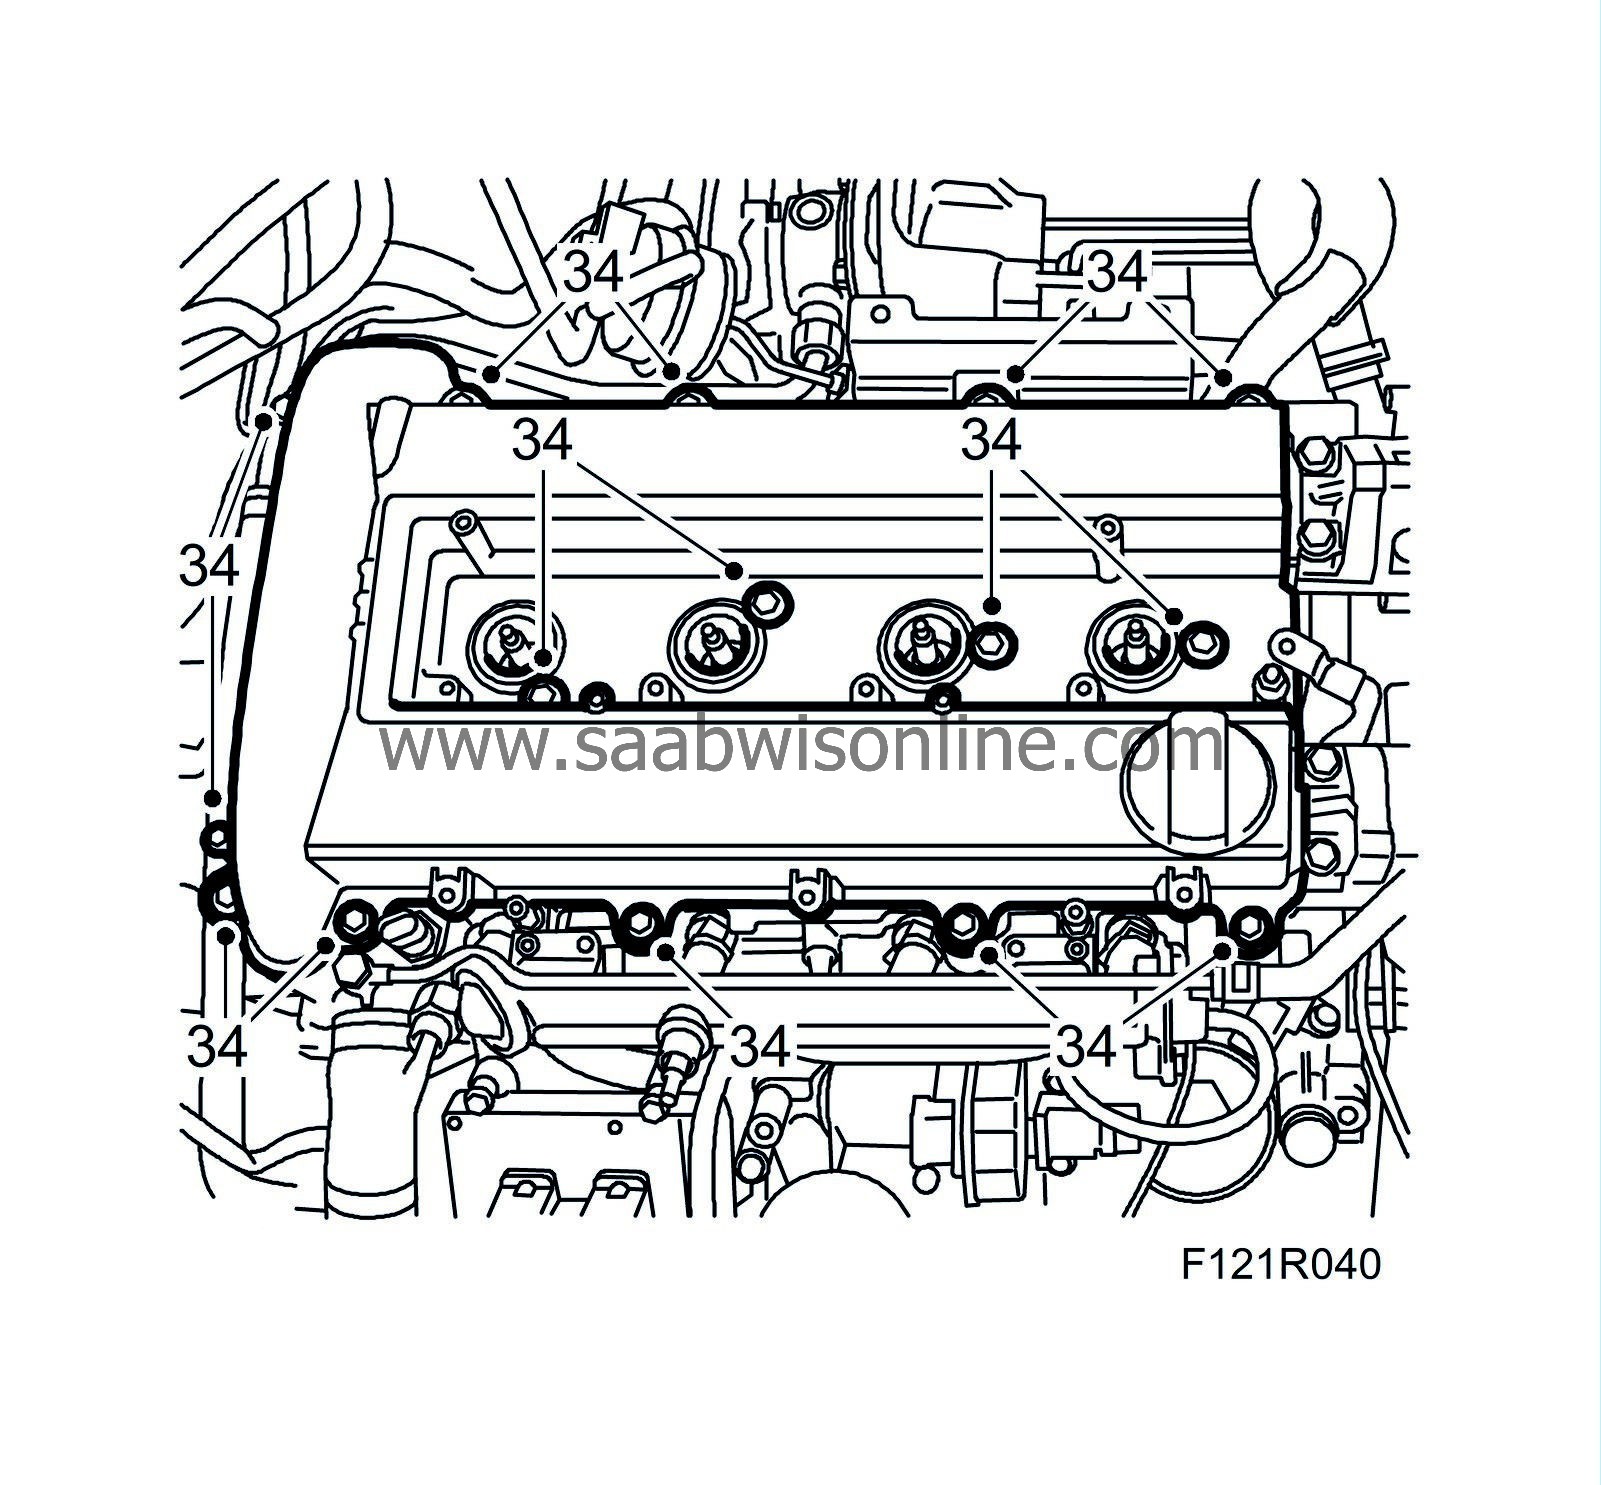
34.
|
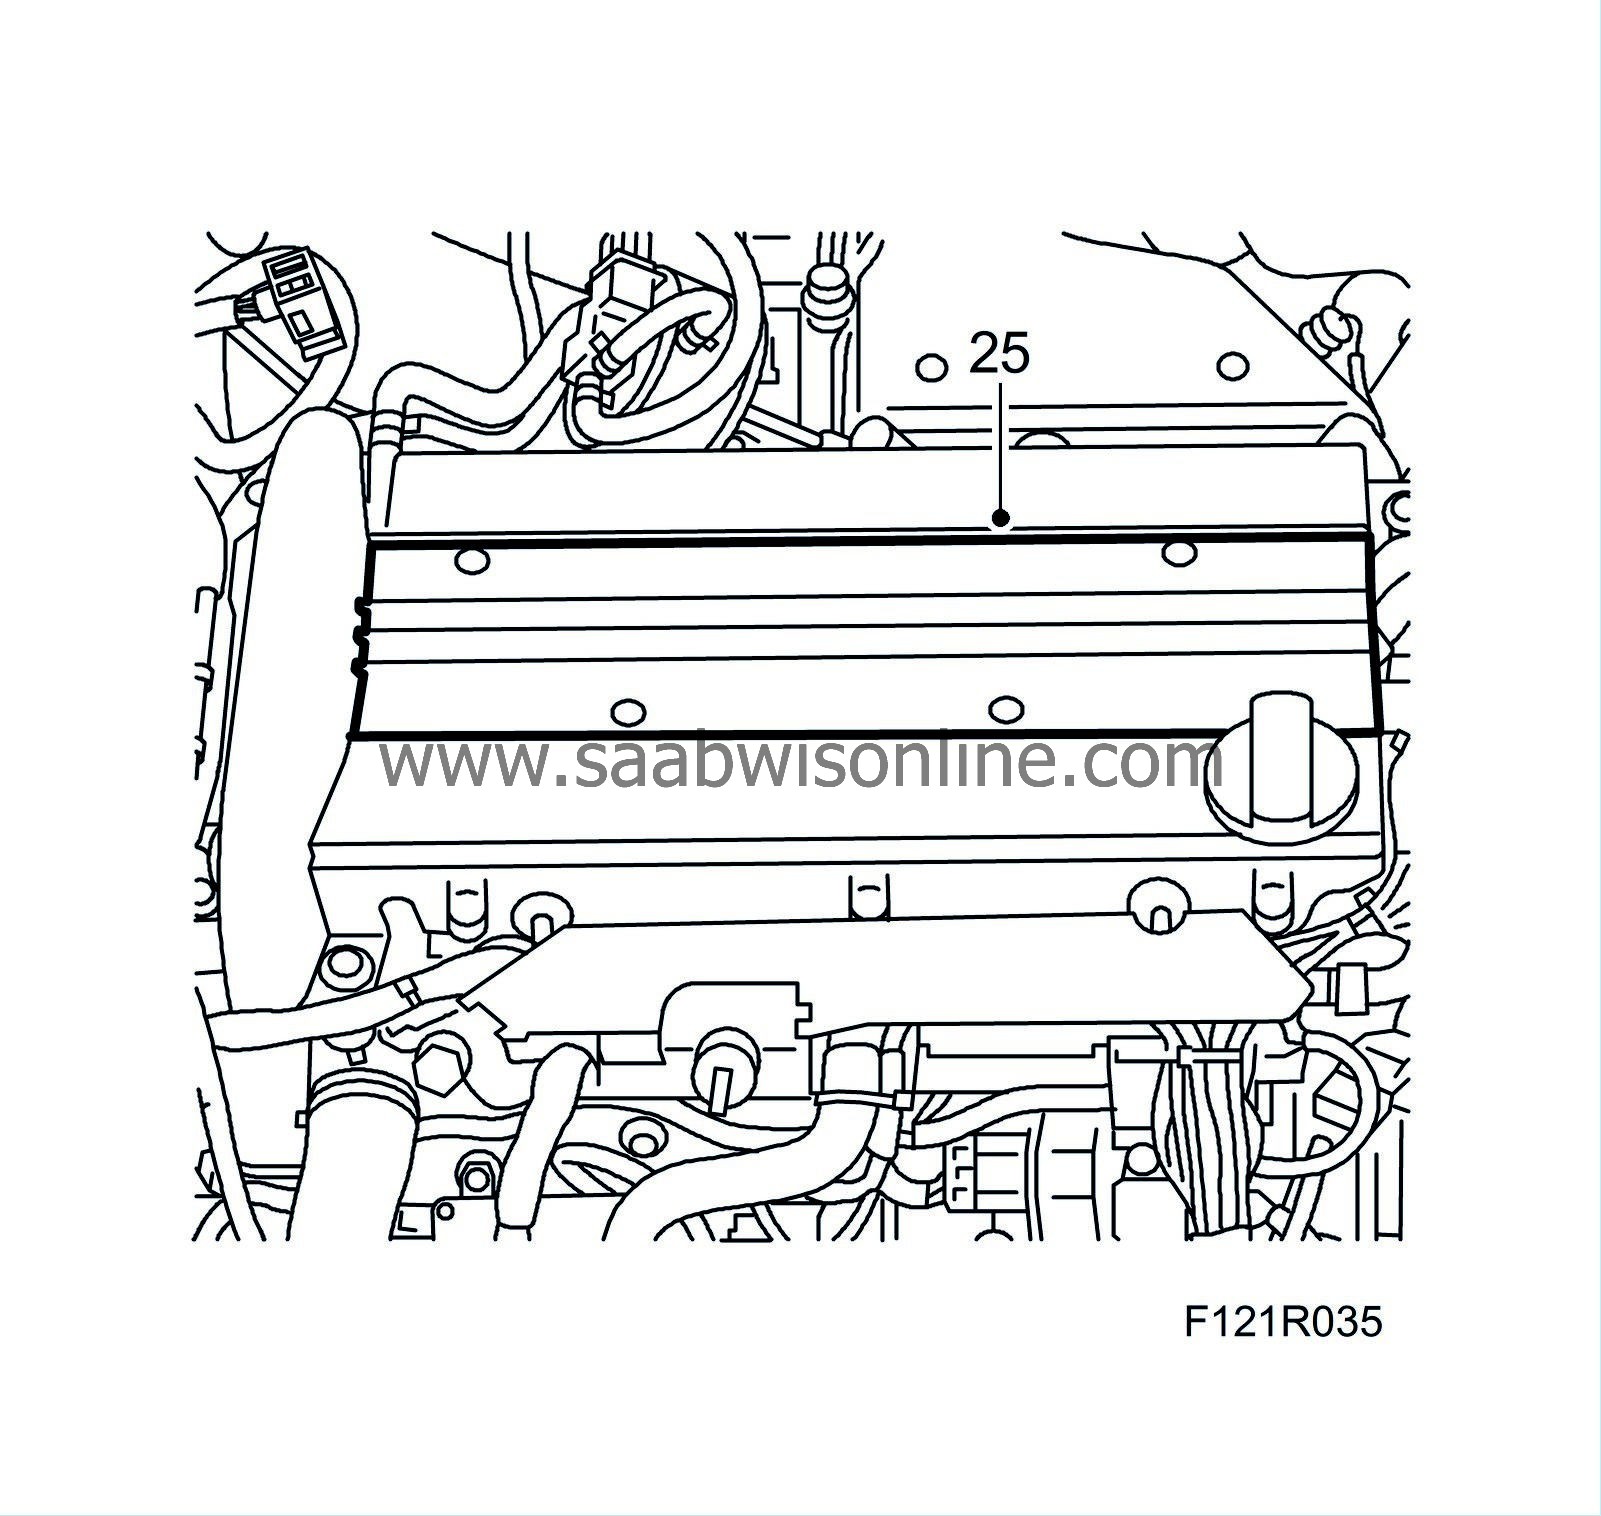
Remove the camshaft cover.
|
|
35.
|
Reset the engine to zero by turning the crankshaft clockwise until the marking on the crankshaft pulley is aligned with the marking on the timing cover. The cyl. 1 cams on the intake and exhaust camshafts should be pointing up/in.

|
|
36.
|
Disconnect the coolant hose from the pipe and the cylinder head.
|
|
37.
|
Position a jack with a wood block under the oil sump and relieve the right-hand engine pad. Detach the right-hand engine mounting.
|
|
38.
|
Disconnect the coolant hose from the pipe on the cylinder head. Detach the vacuum hose from the brake servo.
|
|
39.
|
Cars with secondary air injection pump
: Remove the pump pipe and upper retaining bolt from the intake manifold.
|
|
40.
|
Detach the power steering pump.
|
|
41.
|
Remove the bolt to the dipstick pipe. Detach the connector and unplug it from the pipe.

|
|
42.
|
Remove the chain tensioner. Use 83 96 129 Oil filter tool B207.
|
|
43.
|
Detach the camshaft pinions. Hold with a wrench on each respective camshaft flat.
|
|
44.
|
Fit a cable tie to the exhaust camshaft pinion and chain, remove the camshaft pinions and guide down the exhaust camshaft pinion and chain.
|
|
45.
|
Remove the plug from the cylinder head.
|
|
46.
|
Remove the bolt to the chain guide at the intake side, move the guide away and refit the bolt.
|
|
47.
|
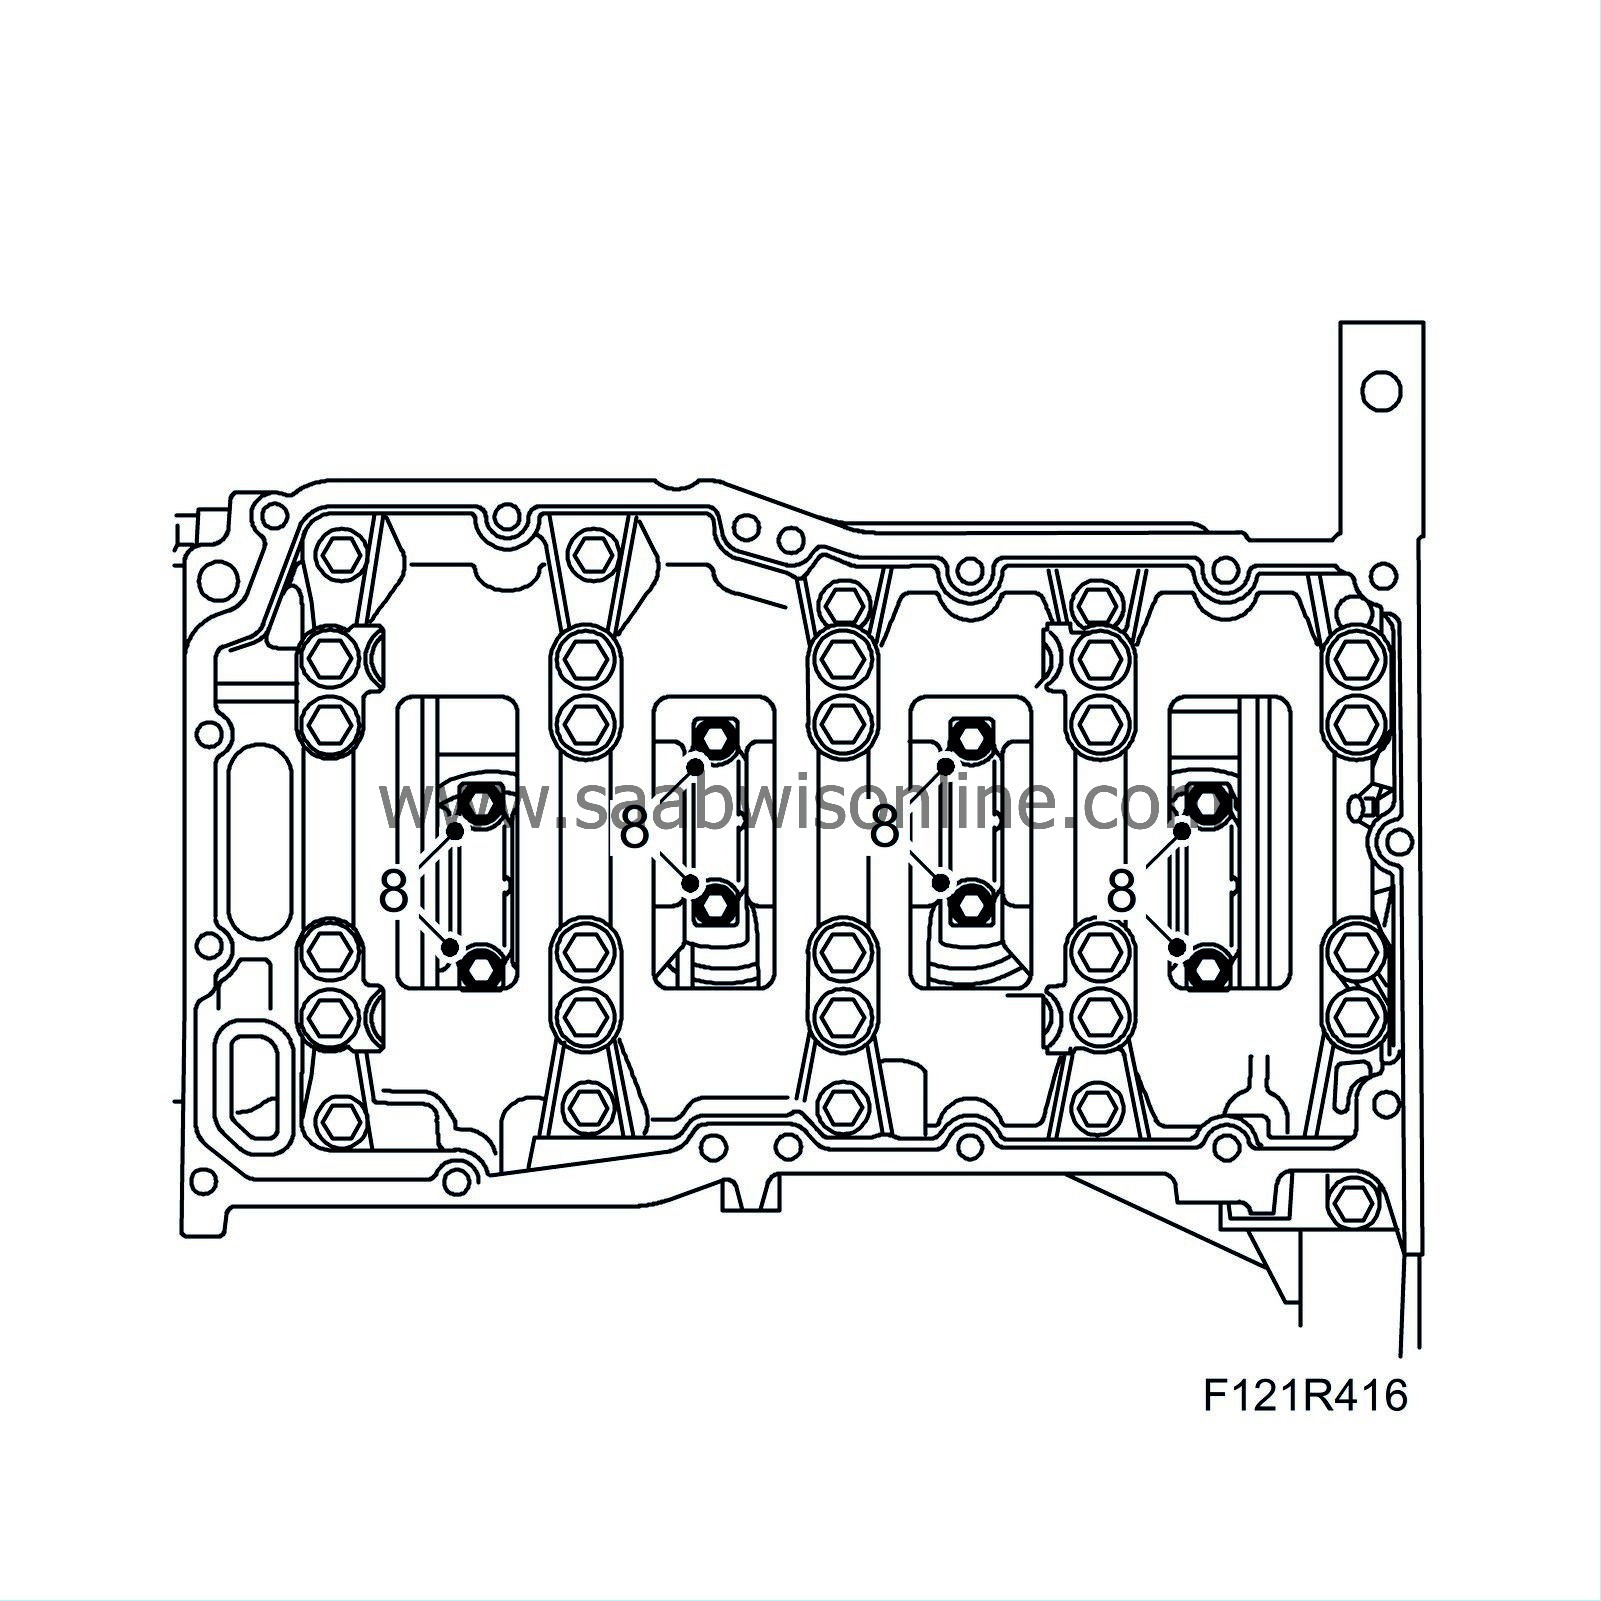
Remove the cylinder head bolts in accordance with the sequence indicated in the illustration.

|
|
1.
|
Fit the right-hand engine mounting. Following which, remove the jack and wood block under the oil sump.

|
|
2.
|
Pull up the dipstick pipe from the oil sump.
|
|
3.
|
Scrape away any carbon deposits at the tops of the cylinders.
|
|
5.
|
Position a container under the car and drain the engine oil.
|
|
6.
|
Fit the oil plug with a new seal.
Tightening torque 25 Nm (18 lbf ft)
|
|
7.
|
Unplug the oil level sensor connector.
|
|
8.
|
Remove the A/C compressor lower retaining bolt.
|
|
9.
|
Undo the torque arm rear bolt and remove the front bolts.
|
|
10.
|
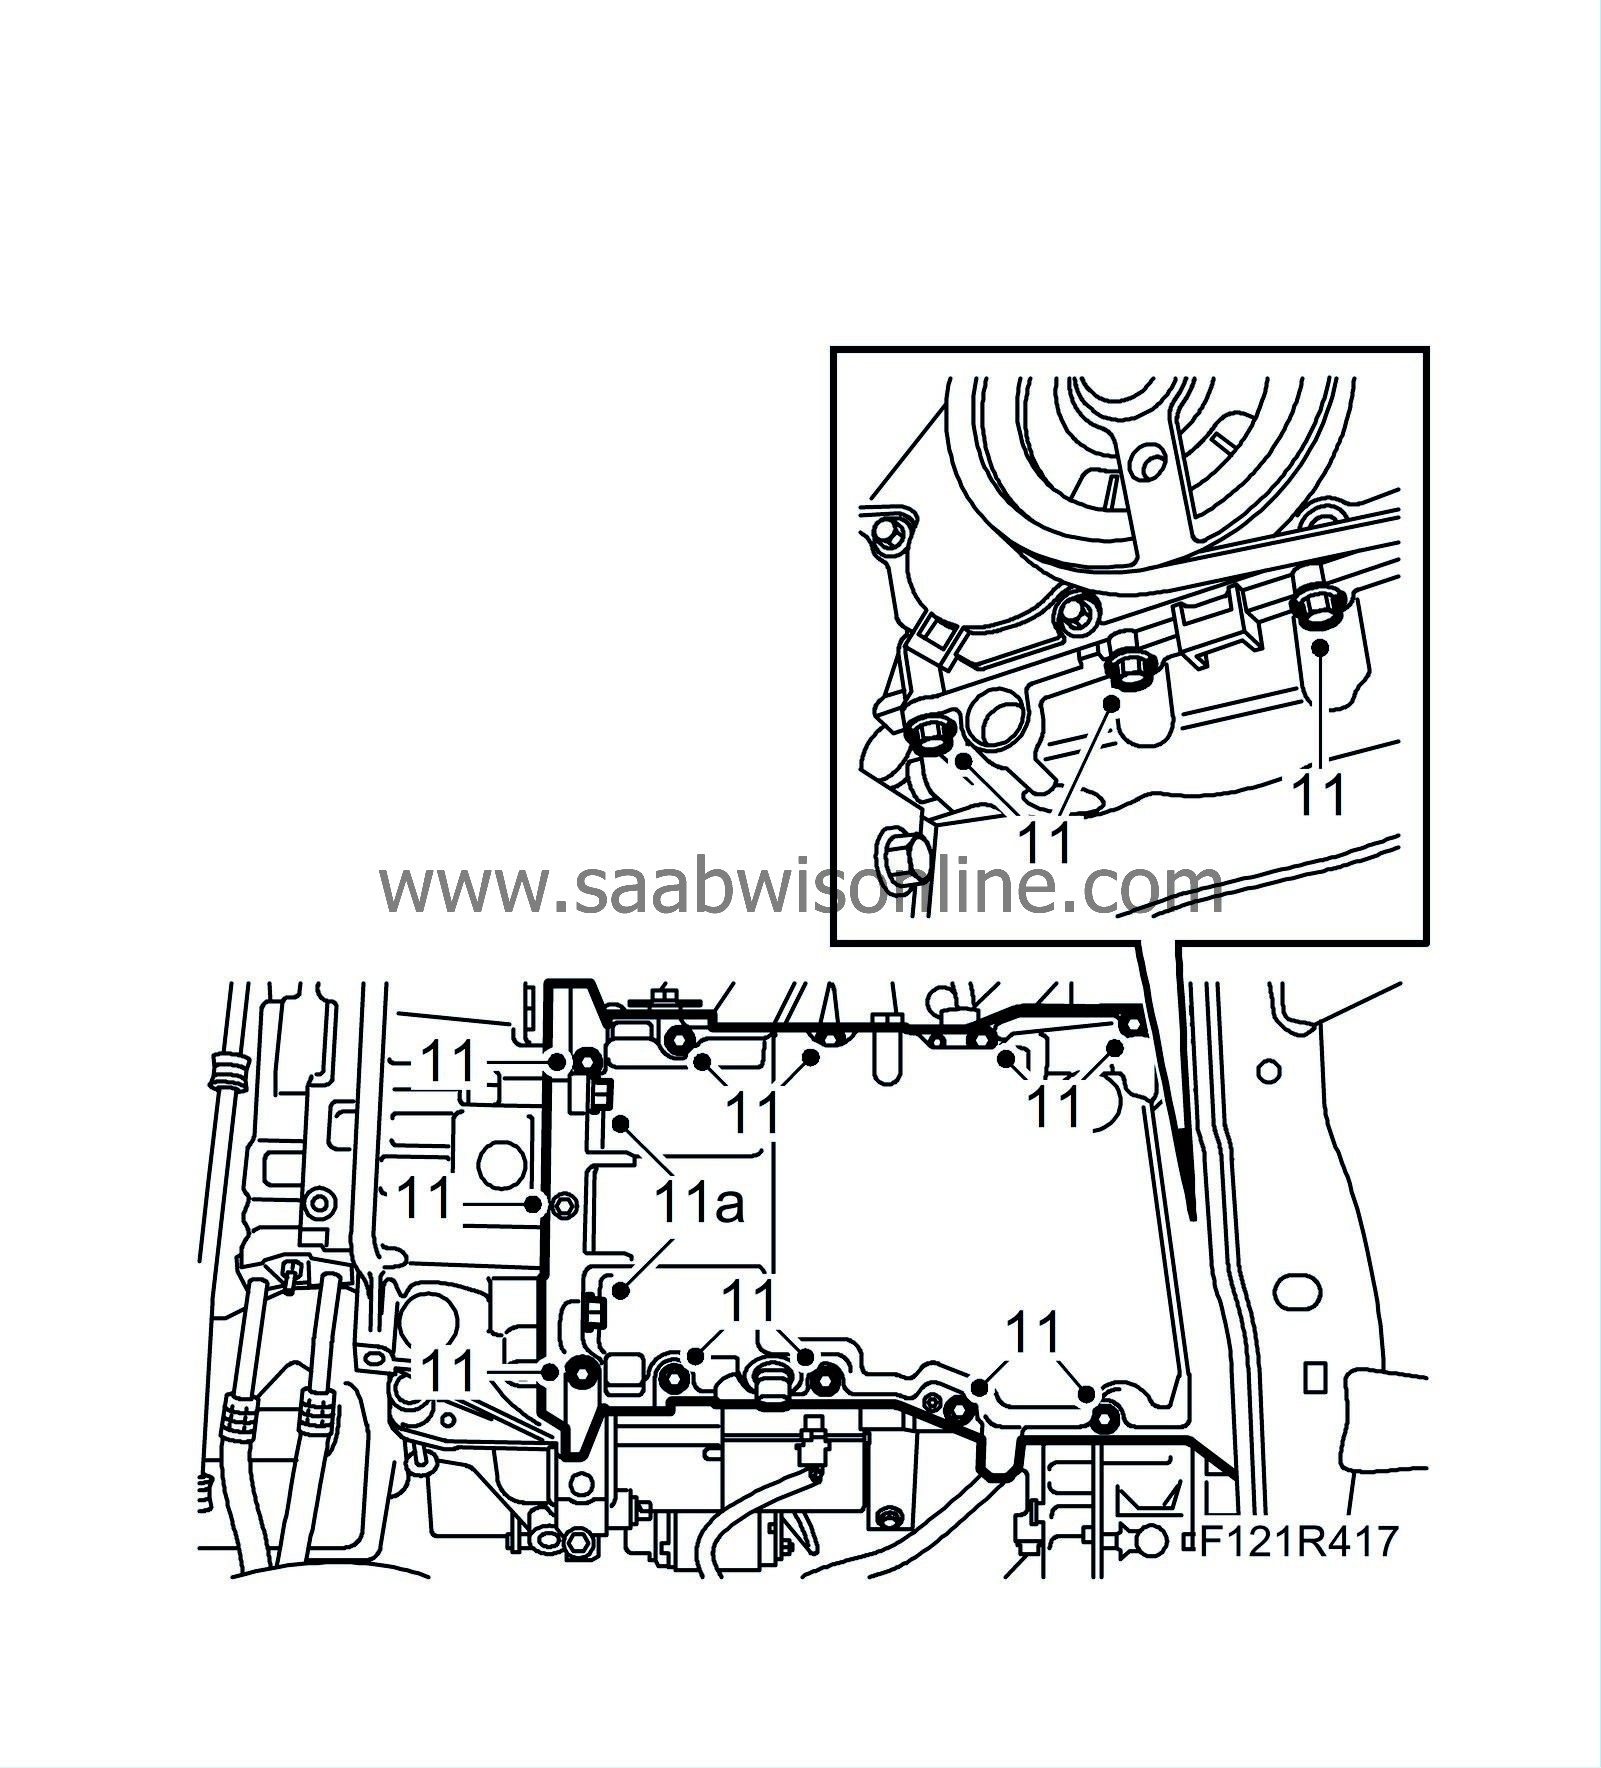
Remove the oil pan retaining bolts.
|
|
11.
|
Position a screwdriver between the oil pan and the timing cover at the A/C compressor and carefully prize away the oil sump.
|
|
12.
|
Remove the connecting rods' bearing caps. Push the pistons and connecting rods up from the cylinder bores.

|
|
13.
|
Lower the car and carefully lift out the pistons. Note the marking on the pistons and connecting rods so that they can be refitted in their original positions. Fit the bearing shells and bearing caps loosely on the connecting rods so that the parts are not mixed.
|
|
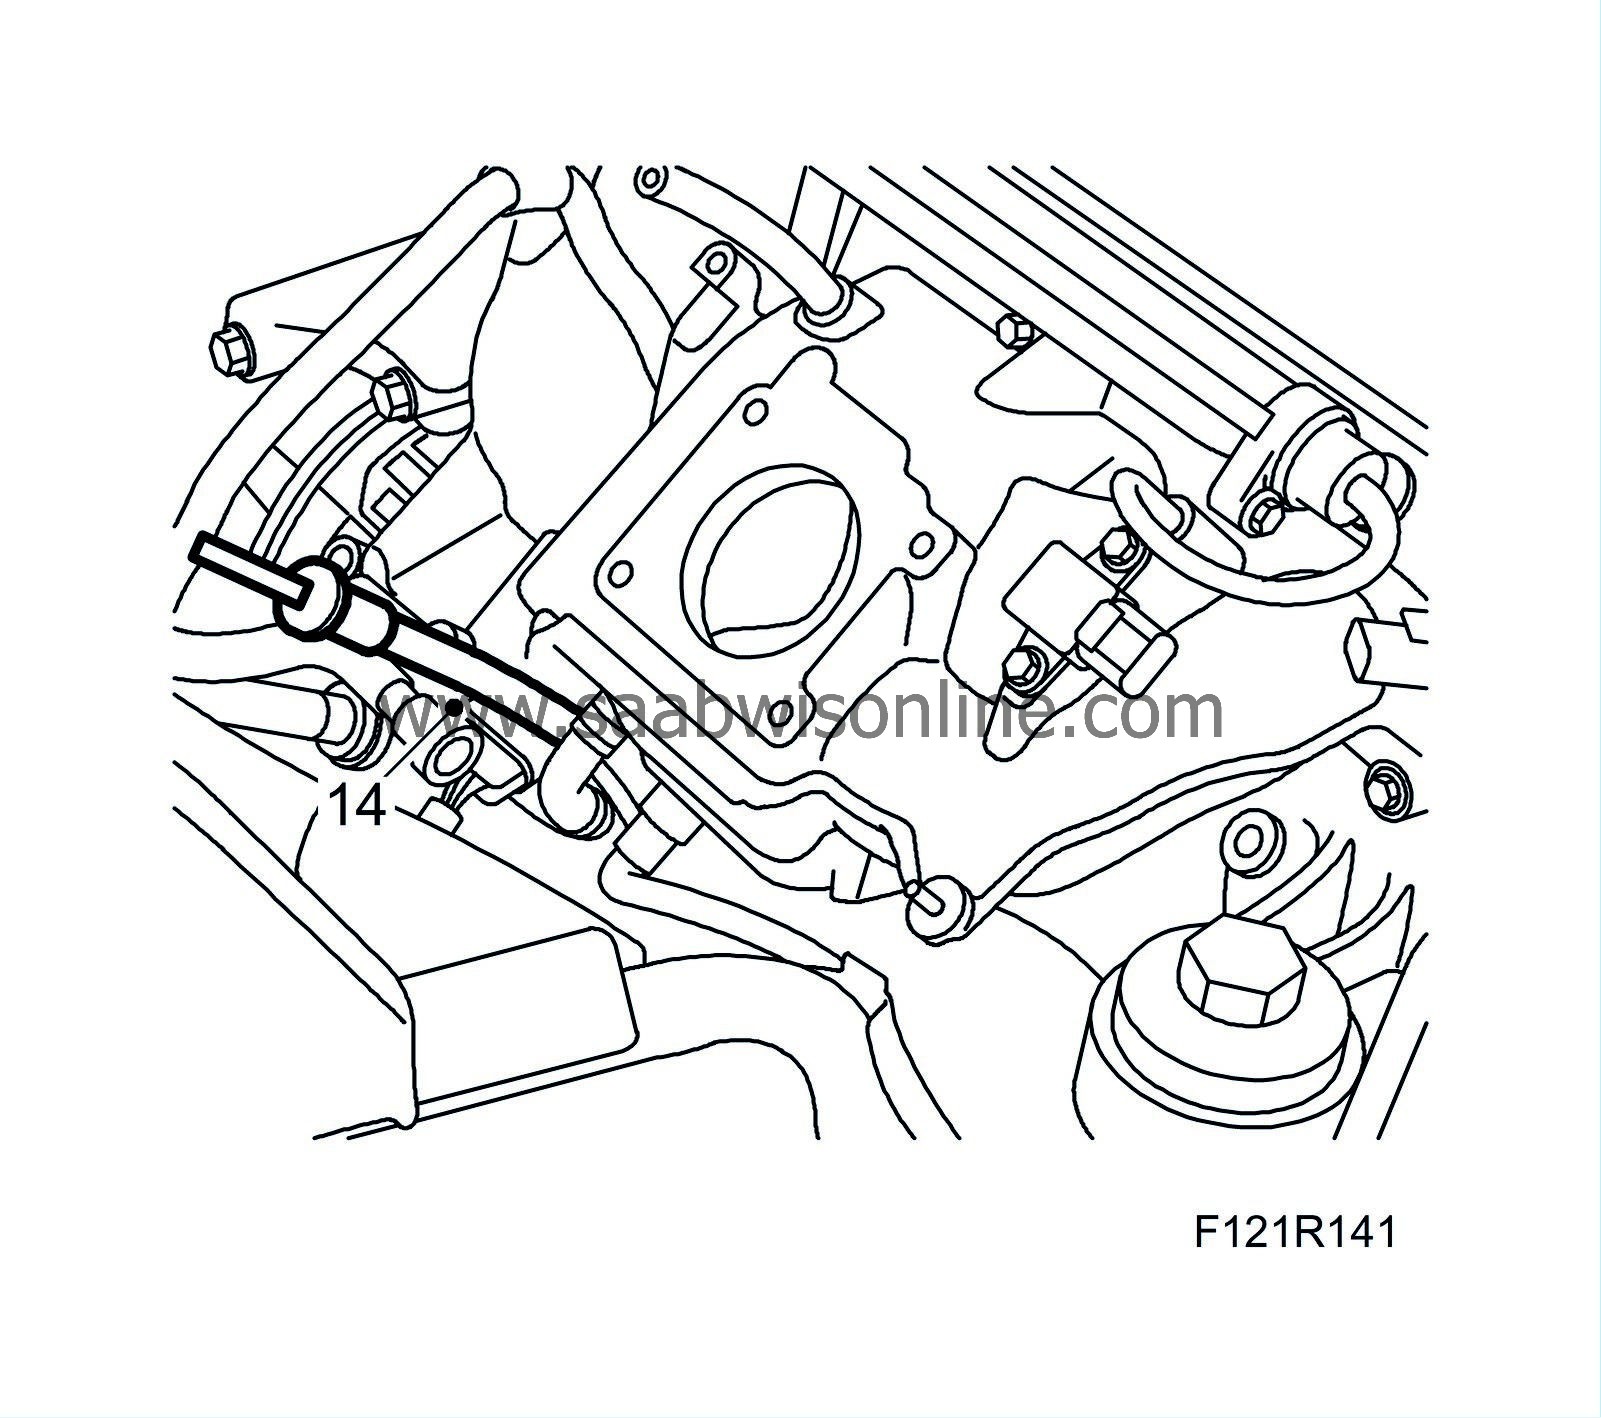
14.
|
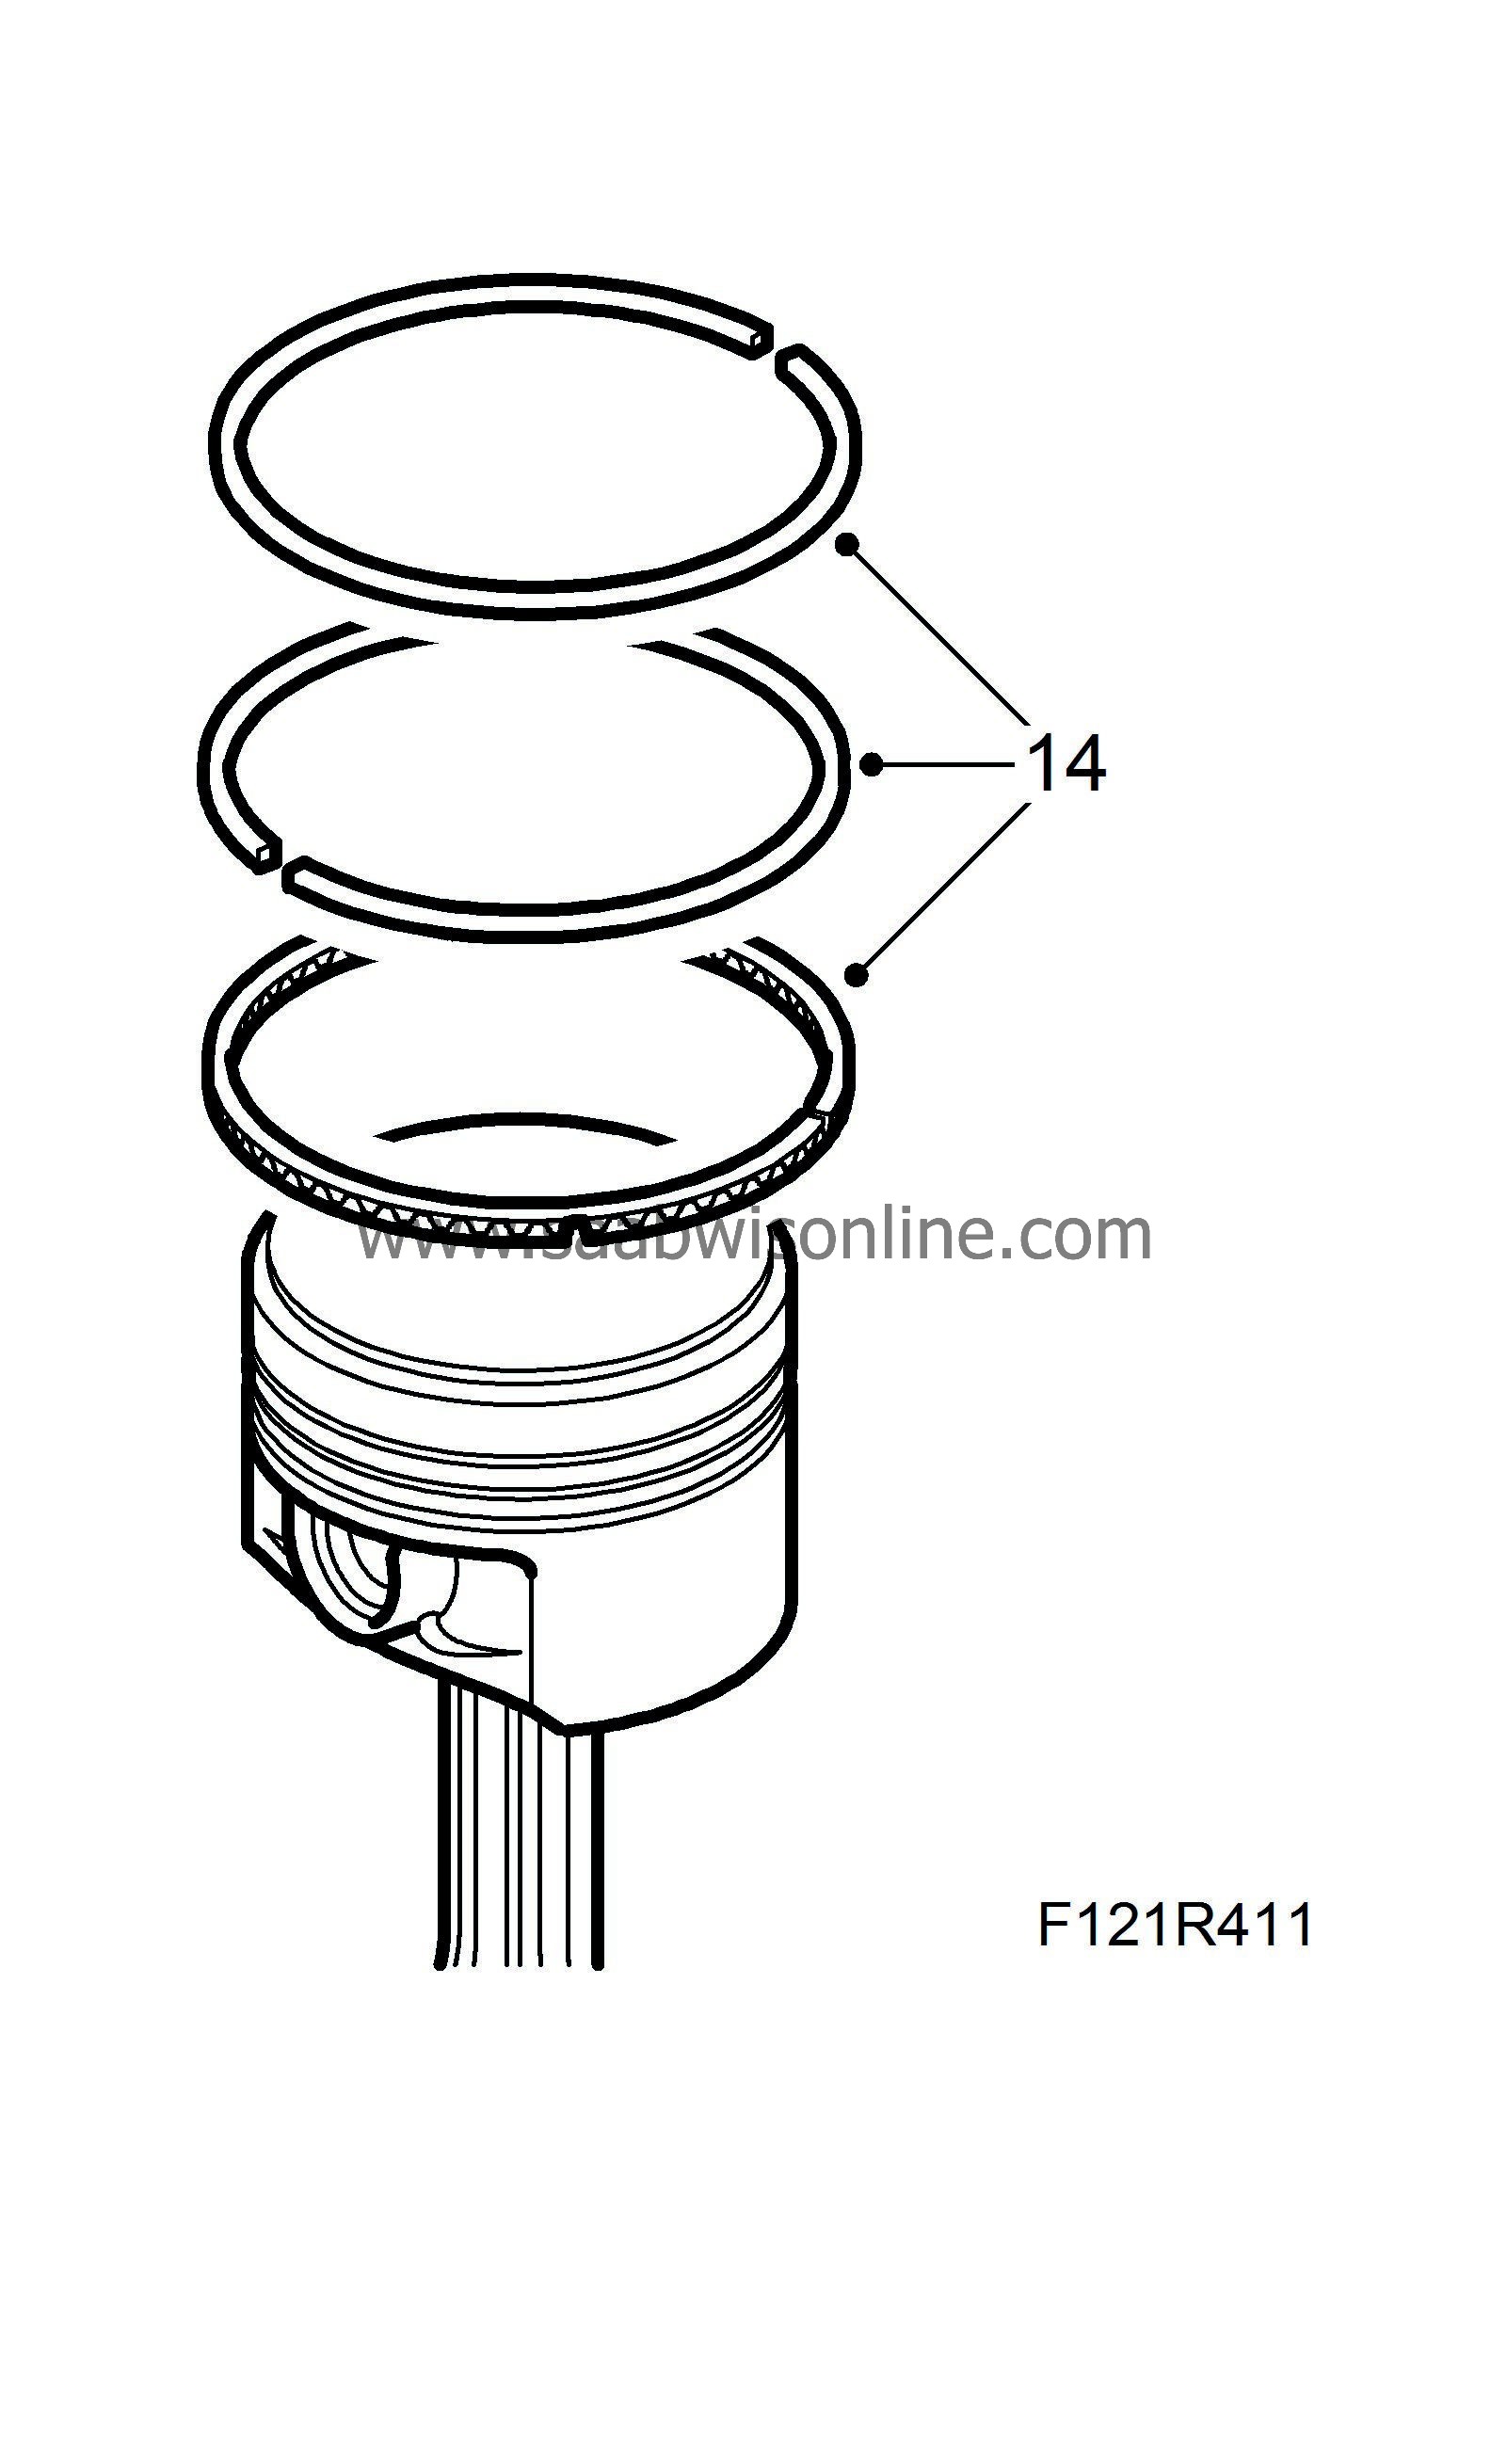
Remove the piston rings.
|
|
15.
|
Clean the piston ring grooves in the pistons from carbon and oil.
|
|
1.
|
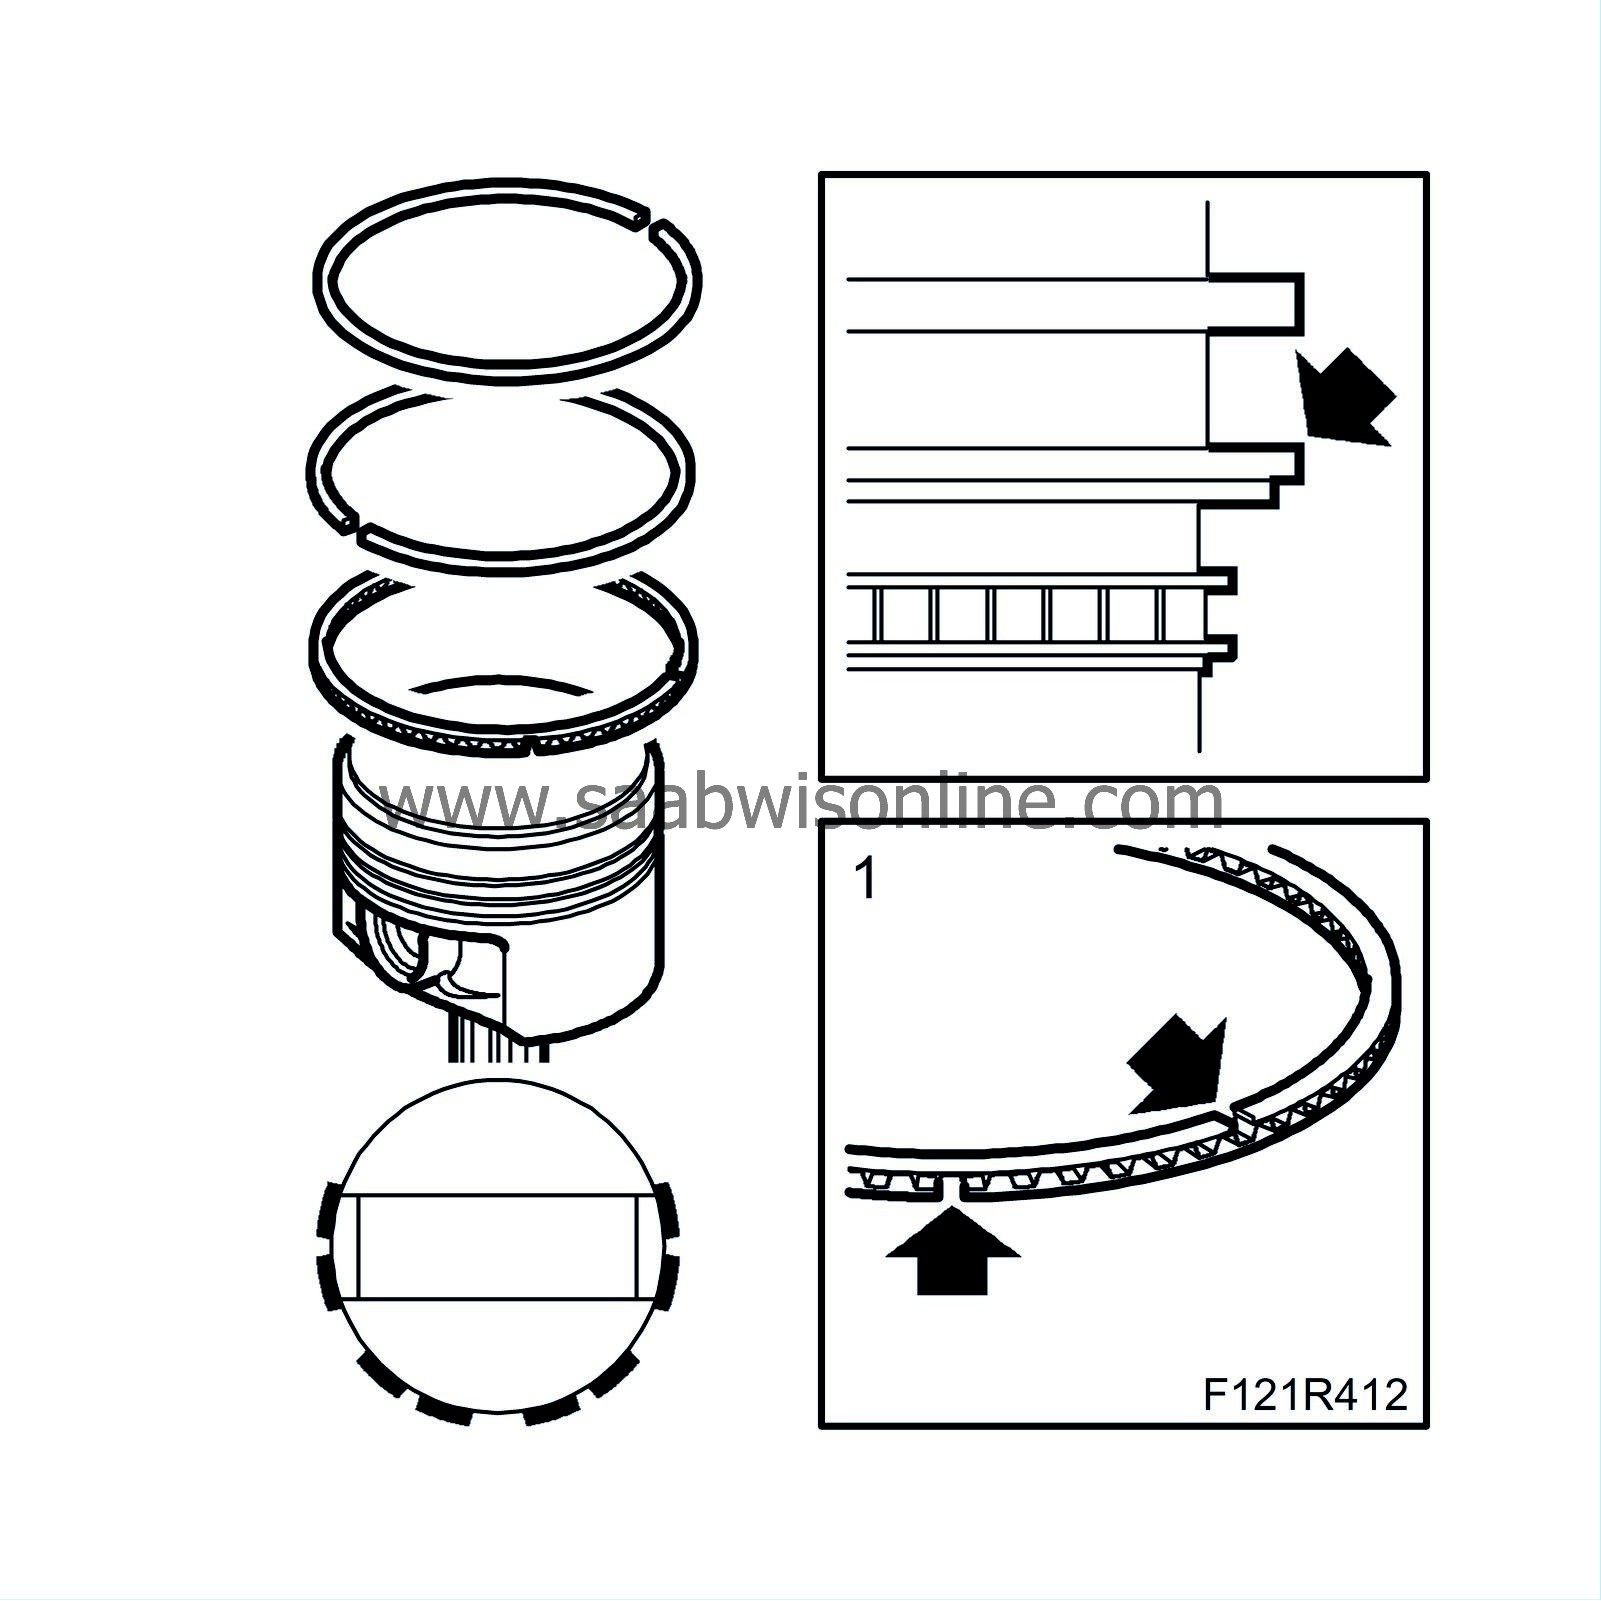
Fit the oil scraper ring.
|
|
2.
|
Use a piston ring expander when fitting the rings on the piston.

|
|
3.
|
The compression rings must be turned with the marking "TOP" upward.
|
|
4.
|
Oil the piston and ring before fitting. Turn the compression rings so that the rings' openings are displaced 180° from each other and fit them directly in front of the gudgeon pin ends.
|
|
5.
|
Oil in the piston rings, bearings and cylinder.
|
|
6.
|
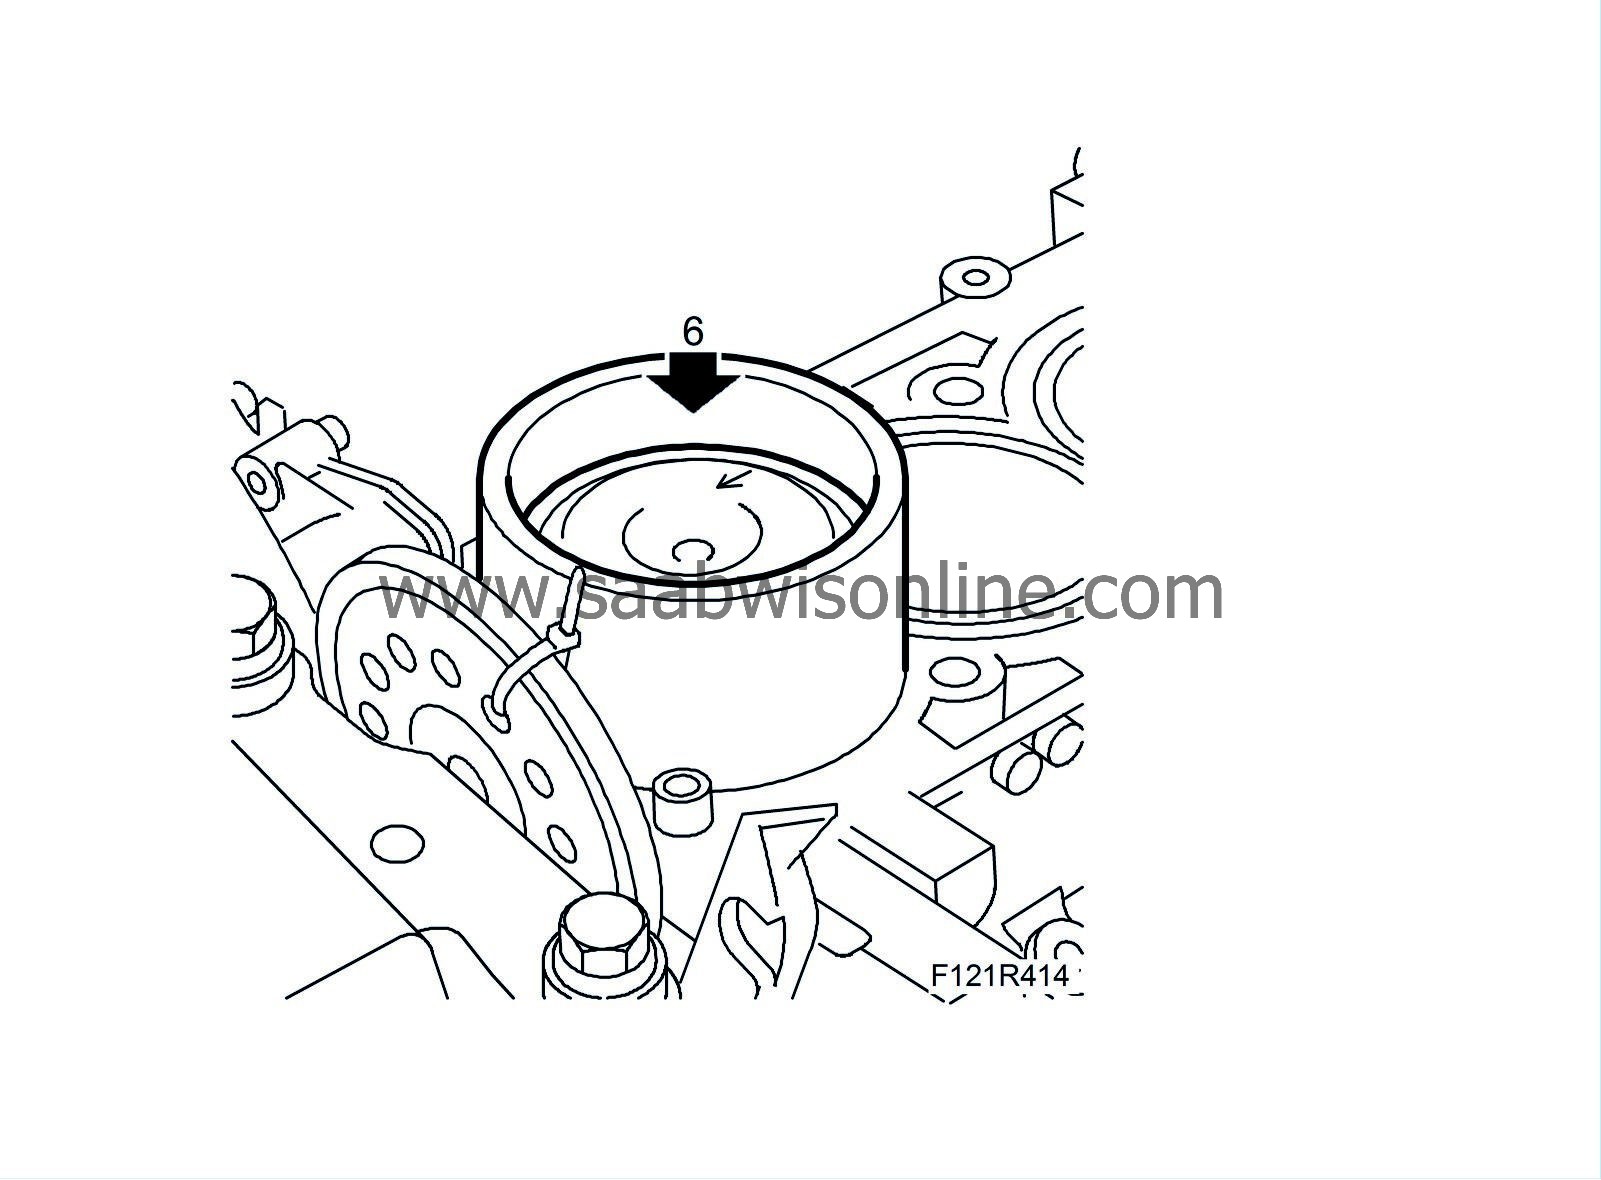
Fit the pistons using Piston fitting tool 83 95 113. The pistons must be fitted with the arrow pointing toward the timing chain.
|
|
8.
|
Fit the bearing caps with bearing shells. The outer bevelling of the connecting rod and bearing cap must butt up against each other.
Tightening torque 25 Nm + 100° ( 18 lbf ft + 100°)
|
|
9.
|
Clean the engine block and oil sump sealing surfaces. Remove any contaminants in the oil sump.
|
|
10.
|
Lay a 2 mm thick line of 83 95 691 Flange sealant on the oil sump sealing surface and on the connection to the oil strainer suction pipe.
|
|
11.
|
Fit the oil sump carefully so that the sealing compound is not scraped away.
Tightening torque, oil sump 22 Nm (16 lbf ft)
(11a) Tightening torque, bolts to the gearbox 70 Nm (52 lbf ft)
|
|
12.
|
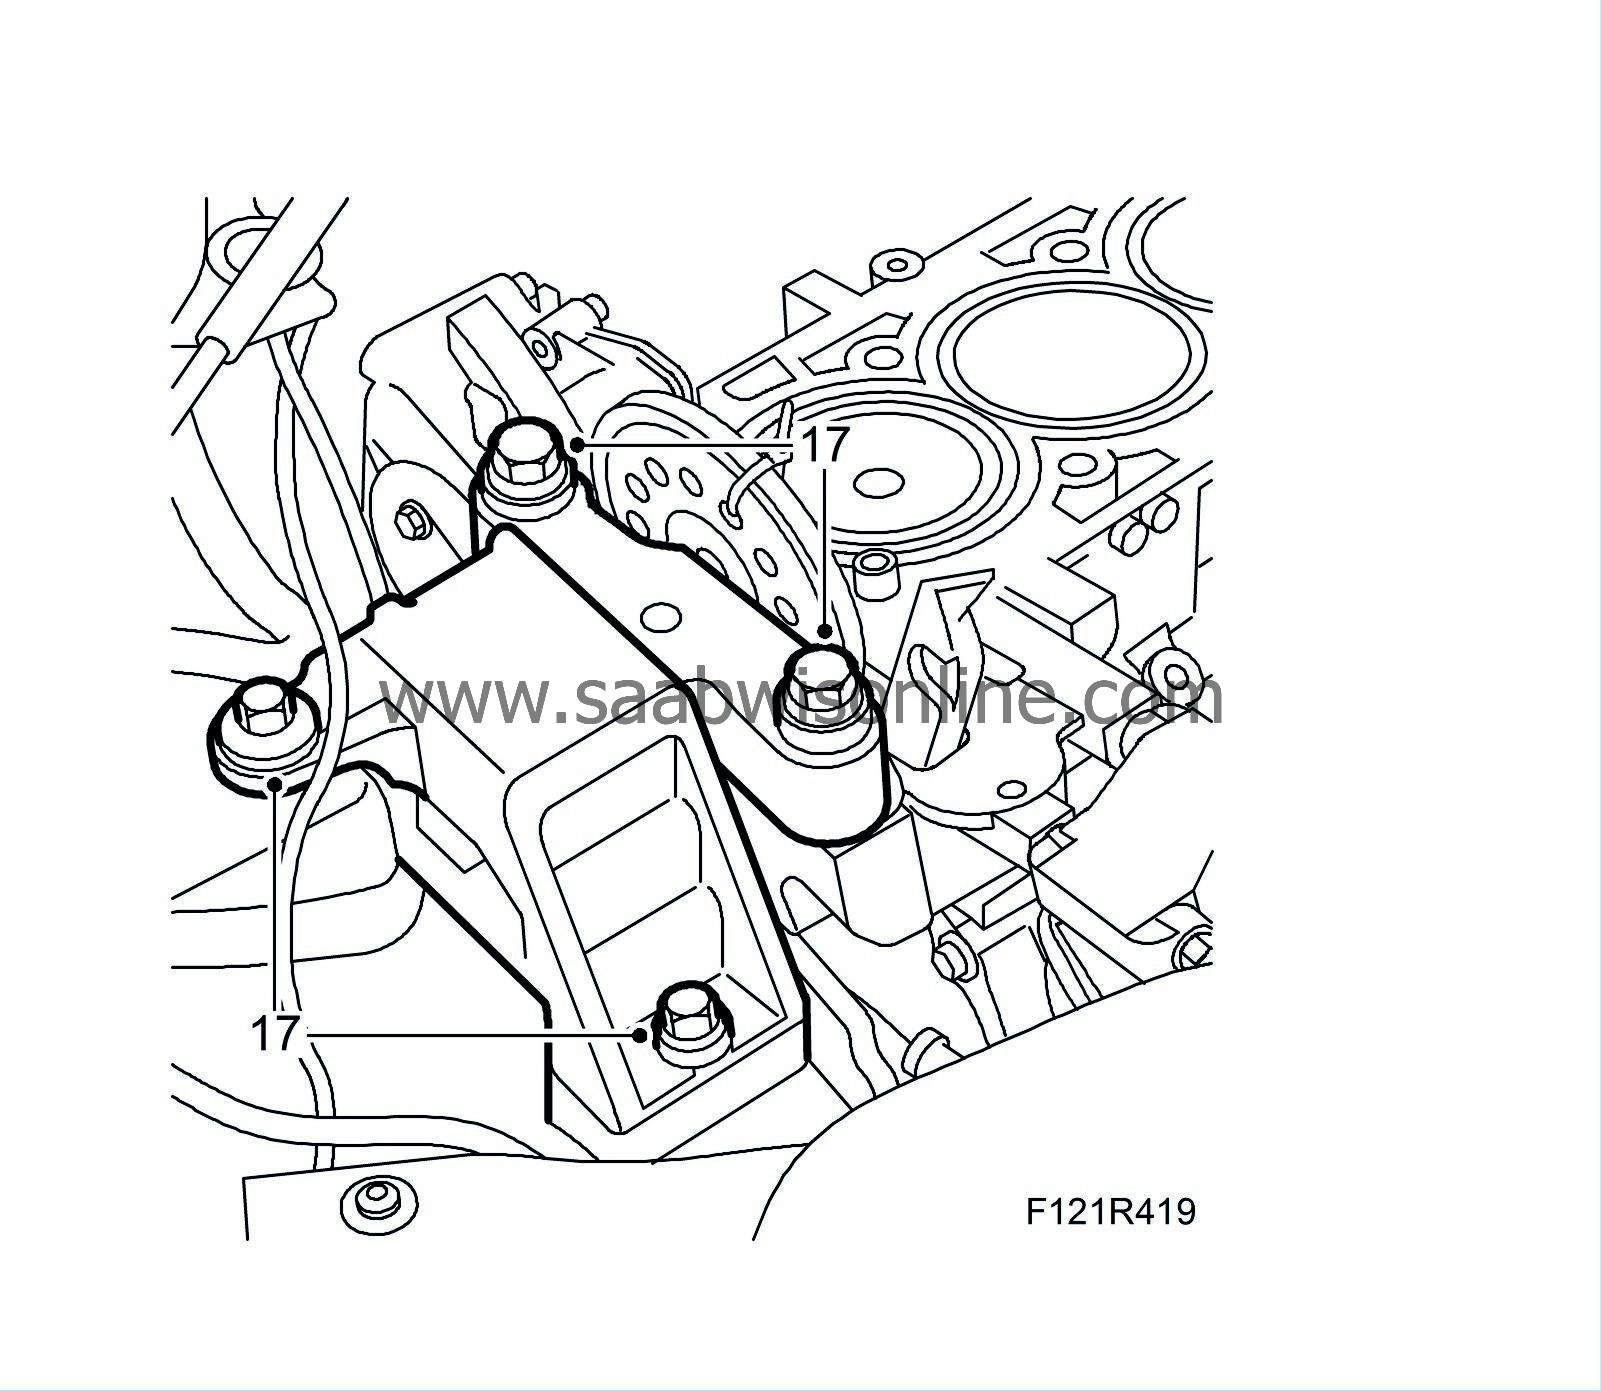
Fit the torque arm front bolts to the oil sump and tighten the rear bolt.
Tightening torque, front bolts 37 Nm (27 lbf ft) Tightening torque, rear bolt 70 Nm + 90° (52 lbf ft + 90°)

|
|
13.
|
Fit the A/C compressor lower retaining bolt.
Tightening torque 24 Nm (18 lbf ft)
|
|
14.
|
Plug in the oil level sensor connector.
|
|
16.
|
Fit the dipstick pipe in the oil sump with a new O-ring, greased with 30 06 665 Vaseline.
|
|
17.
|
Position a jack with a wood block under the oil sump and relieve the right-hand engine pad. Detach the right-hand engine mounting
|
|
Fitting the cylinder head
|
|
1.
|
Carefully blow around the bolt holes in the cylinder block with compressed air.
|
|
2.
|
Clean the cylinder head and cylinder block sealing surfaces from any gasket residue. Check with a steel ruler that the cylinder head and cylinder block are level and do not have any damage to the sealing surfaces.
|
|
3.
|
Check that the engine is reset to zero via the marking on the pulley and timing cover.
|
|
4.
|
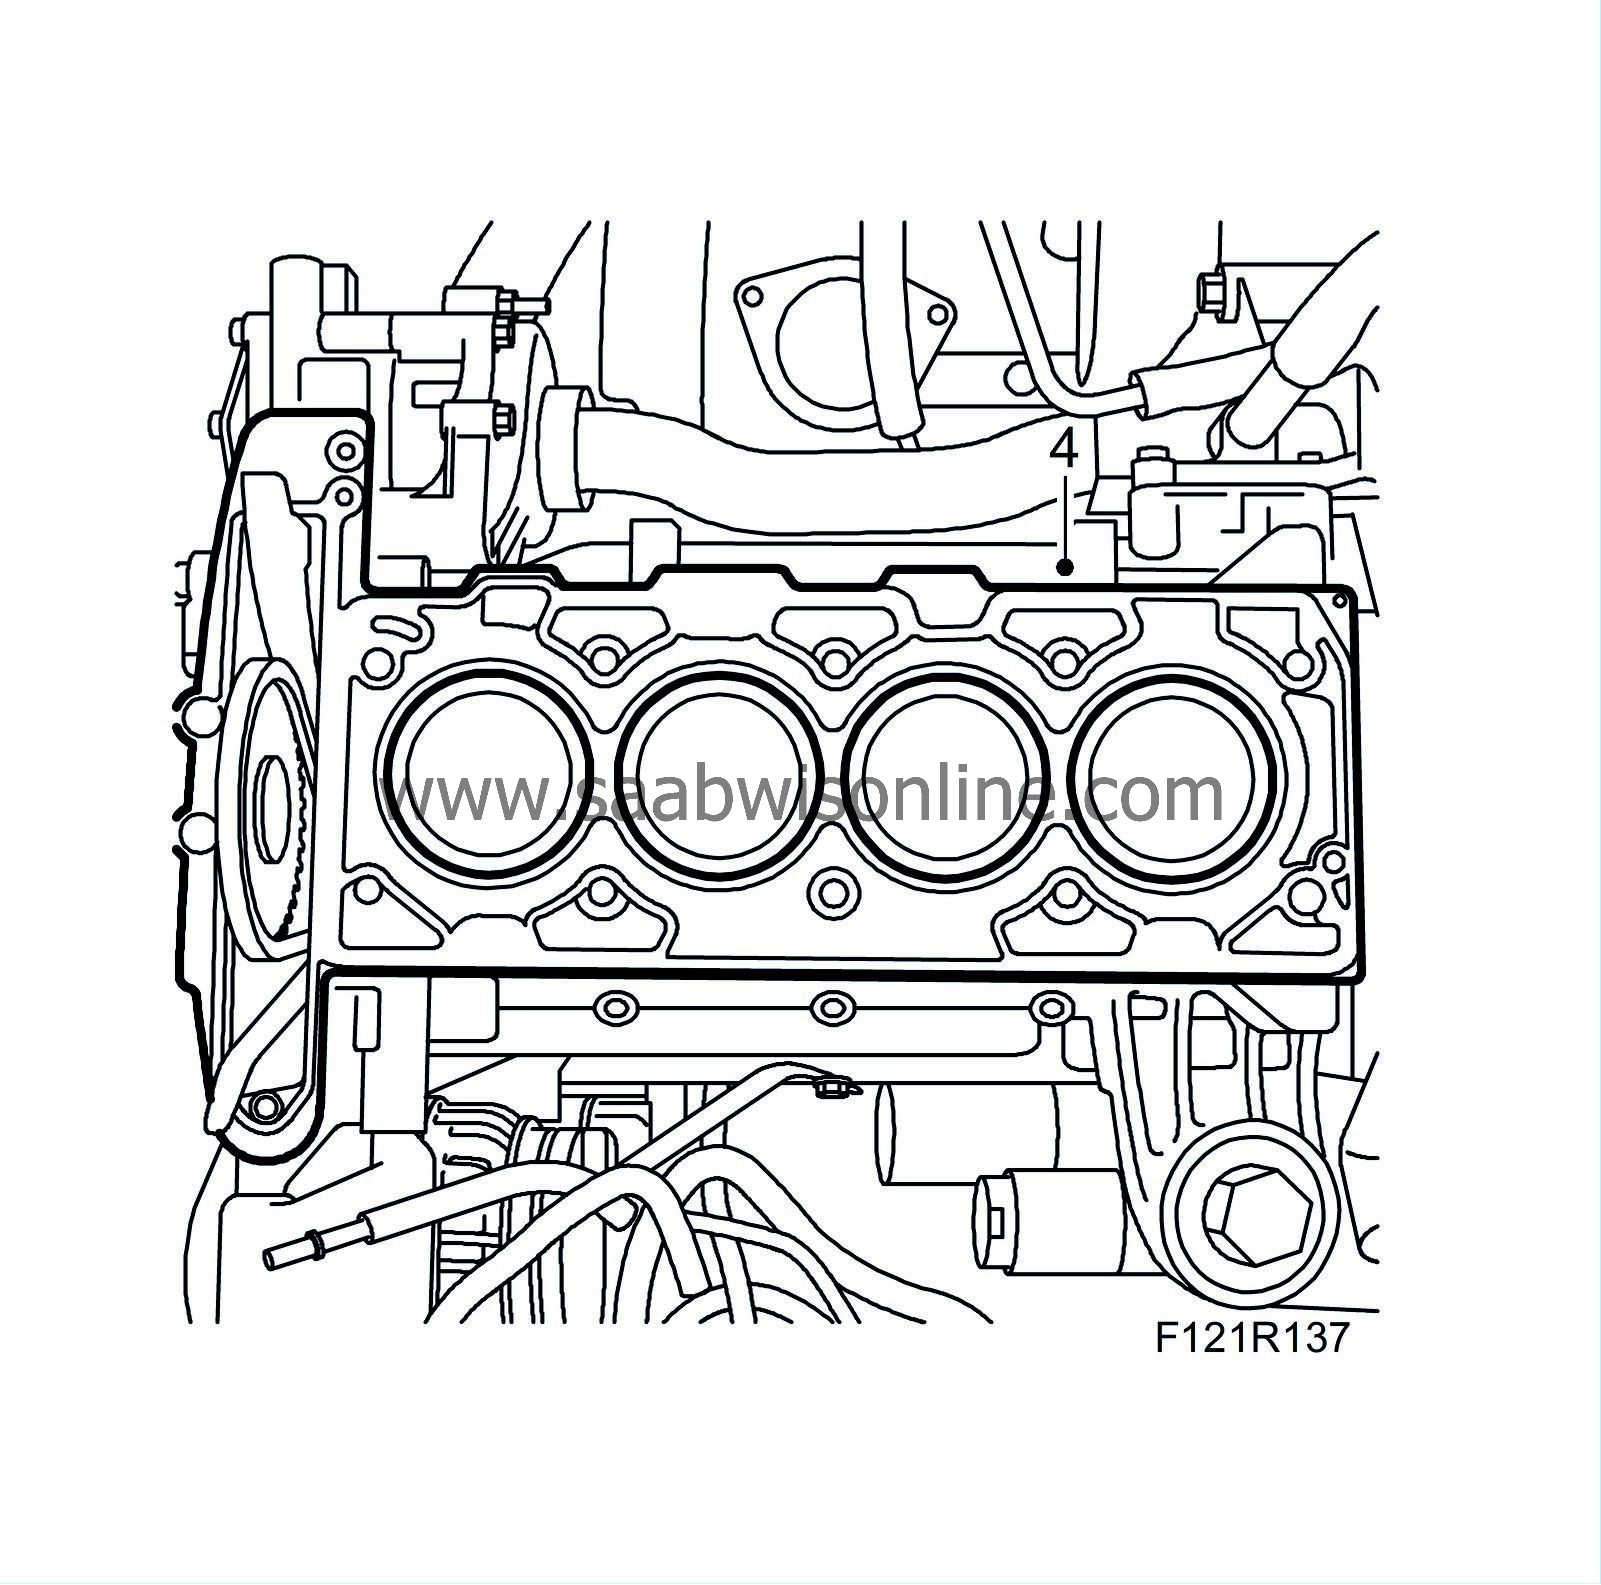
Fit a new gasket to the cylinder block. Guide the sprocket up and pull the chain guides together to move the cylinder head down.
|
|
5.
|
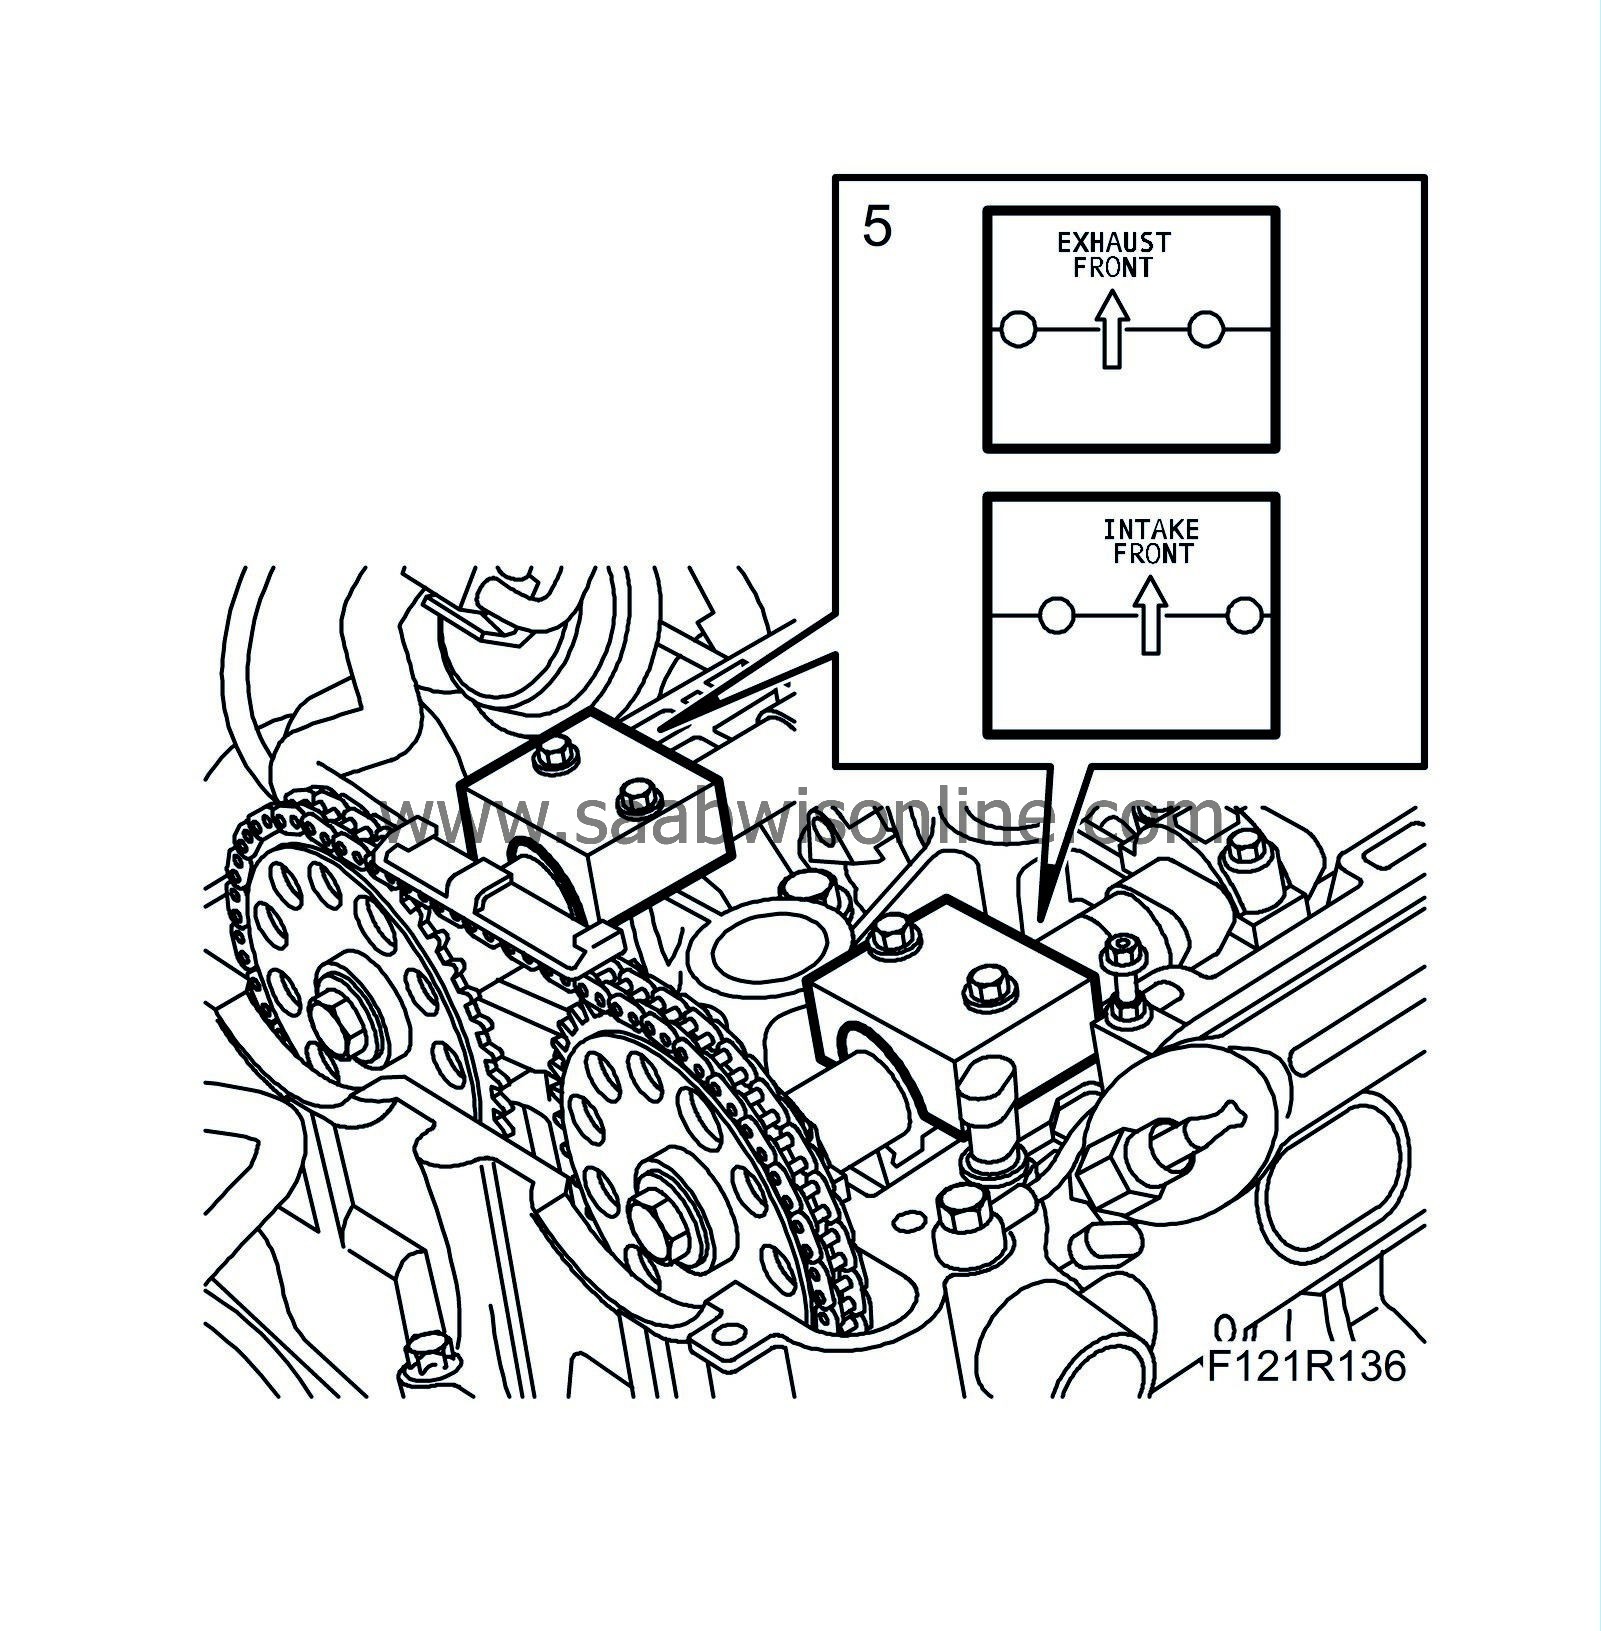
Remove the camshafts' bearing cap no. 2. Fit 83 96 046 kit adjustment tool, camshaft, or 83 96 079 adjustment tool, camshaft (B207 210 hp) on the camshafts.
Tightening torque 10 Nm (7 lbf ft).
|
|
6.
|
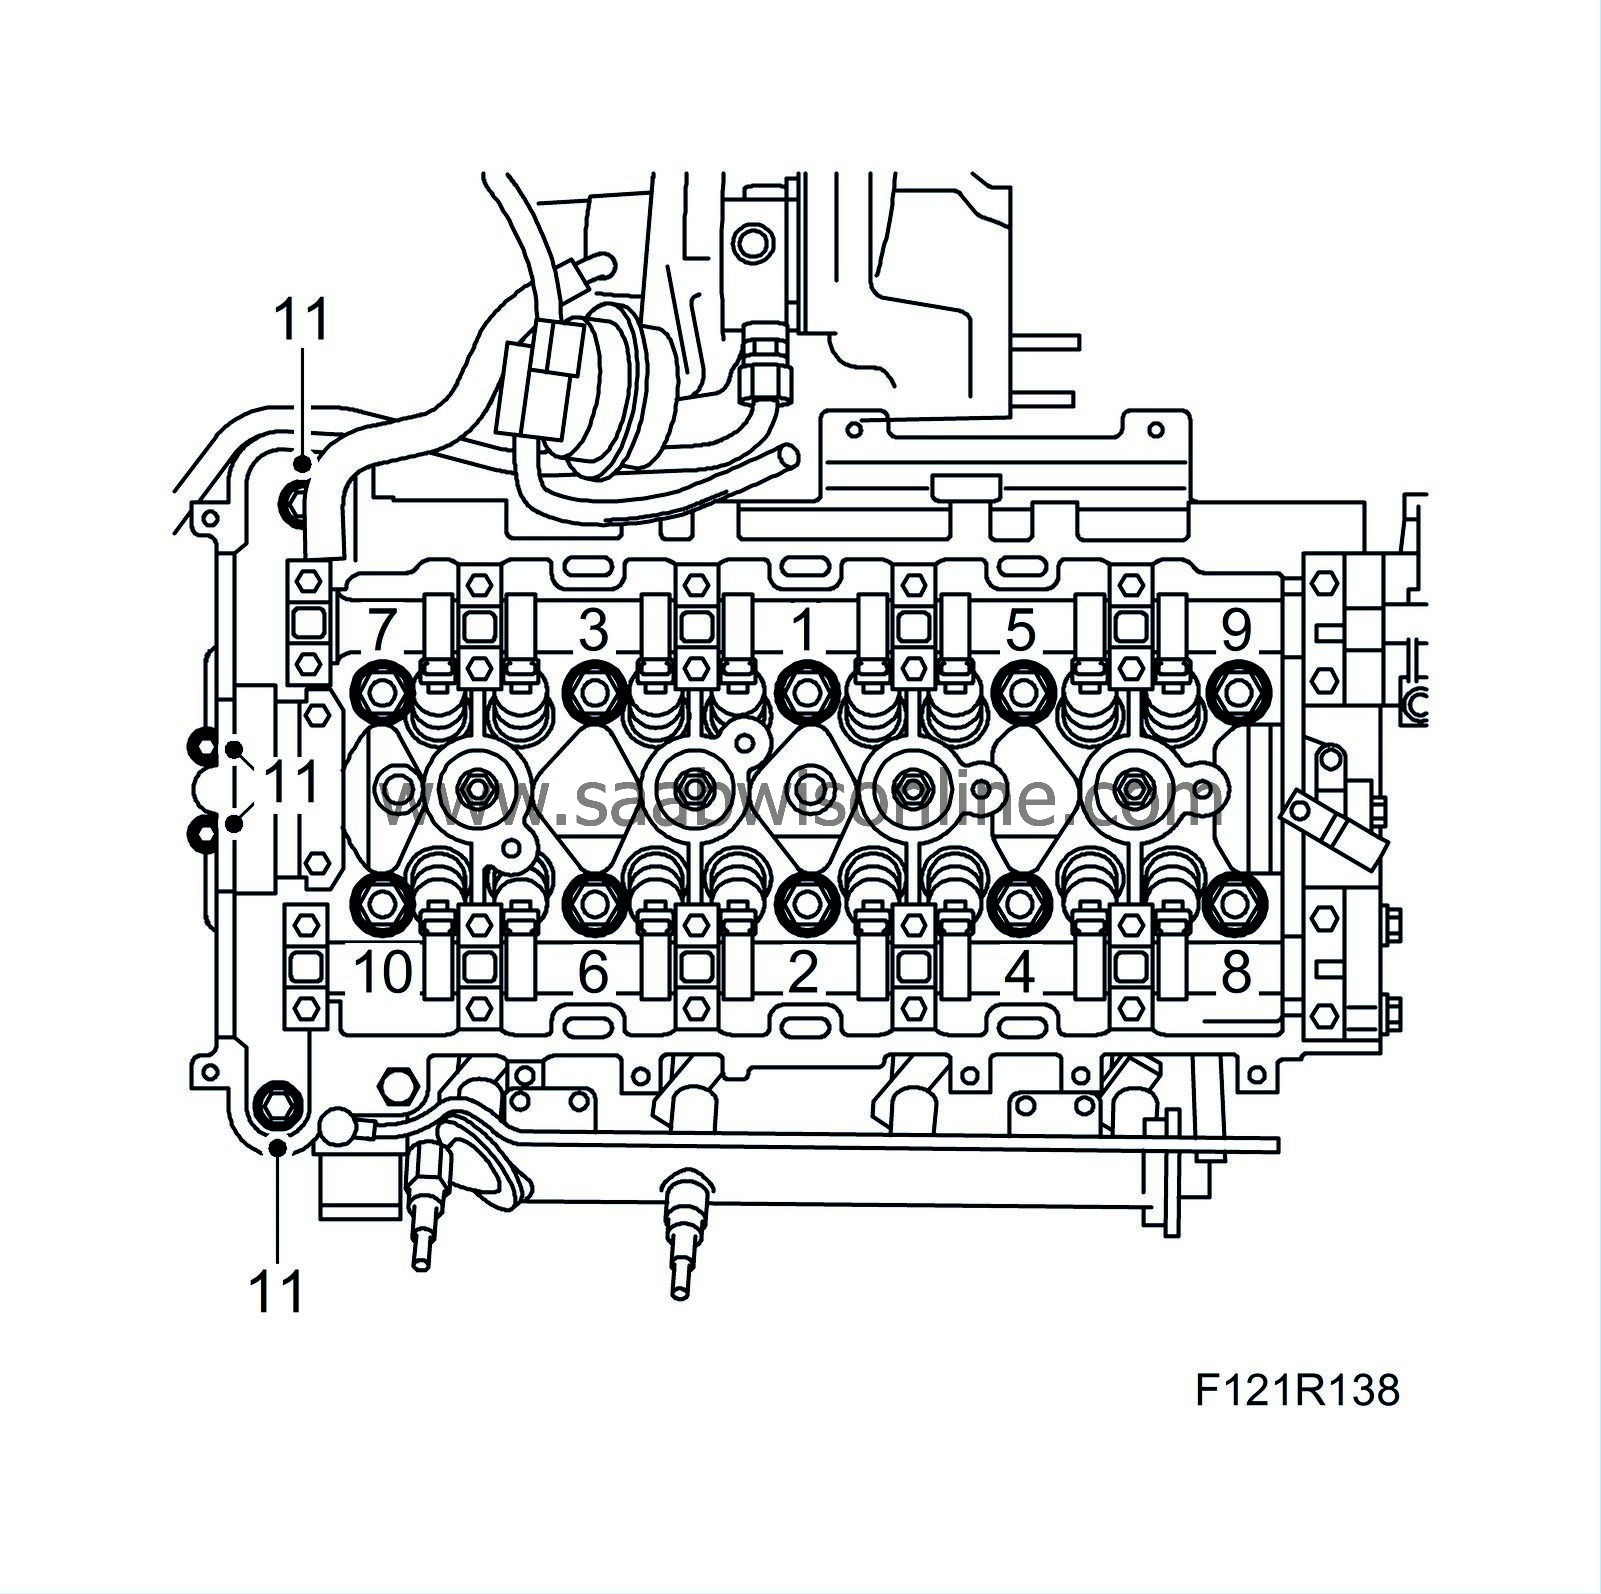
Fit the cylinder head and fit the bolts in accordance with the sequence indicated in the illustration. Fit the bolts carefully, the threads in the cylinder block are damaged if they are lowered quickly.
Tightening torque step 1: 30 Nm (22 lbf ft)
Tightening torque step 2: 75°
Tightening torque step 3: 80°
Tightening torque, bolts for shaft drive, 25 Nm (18 lbf ft)
|
|
7.
|
Remove the bolt to the chain guide. Move the guide back and fit the bolt.
Tightening torque 10 Nm (7 lbf ft).

|
|
8.
|
Fit the plug on the cylinder head.
Tightening torque 25 Nm (18 lbf ft)
|
|
9.
|
Fit the pinion on the exhaust camshaft and intake camshaft without tightening. Check that the engine is reset to zero.
|
|
10.
|
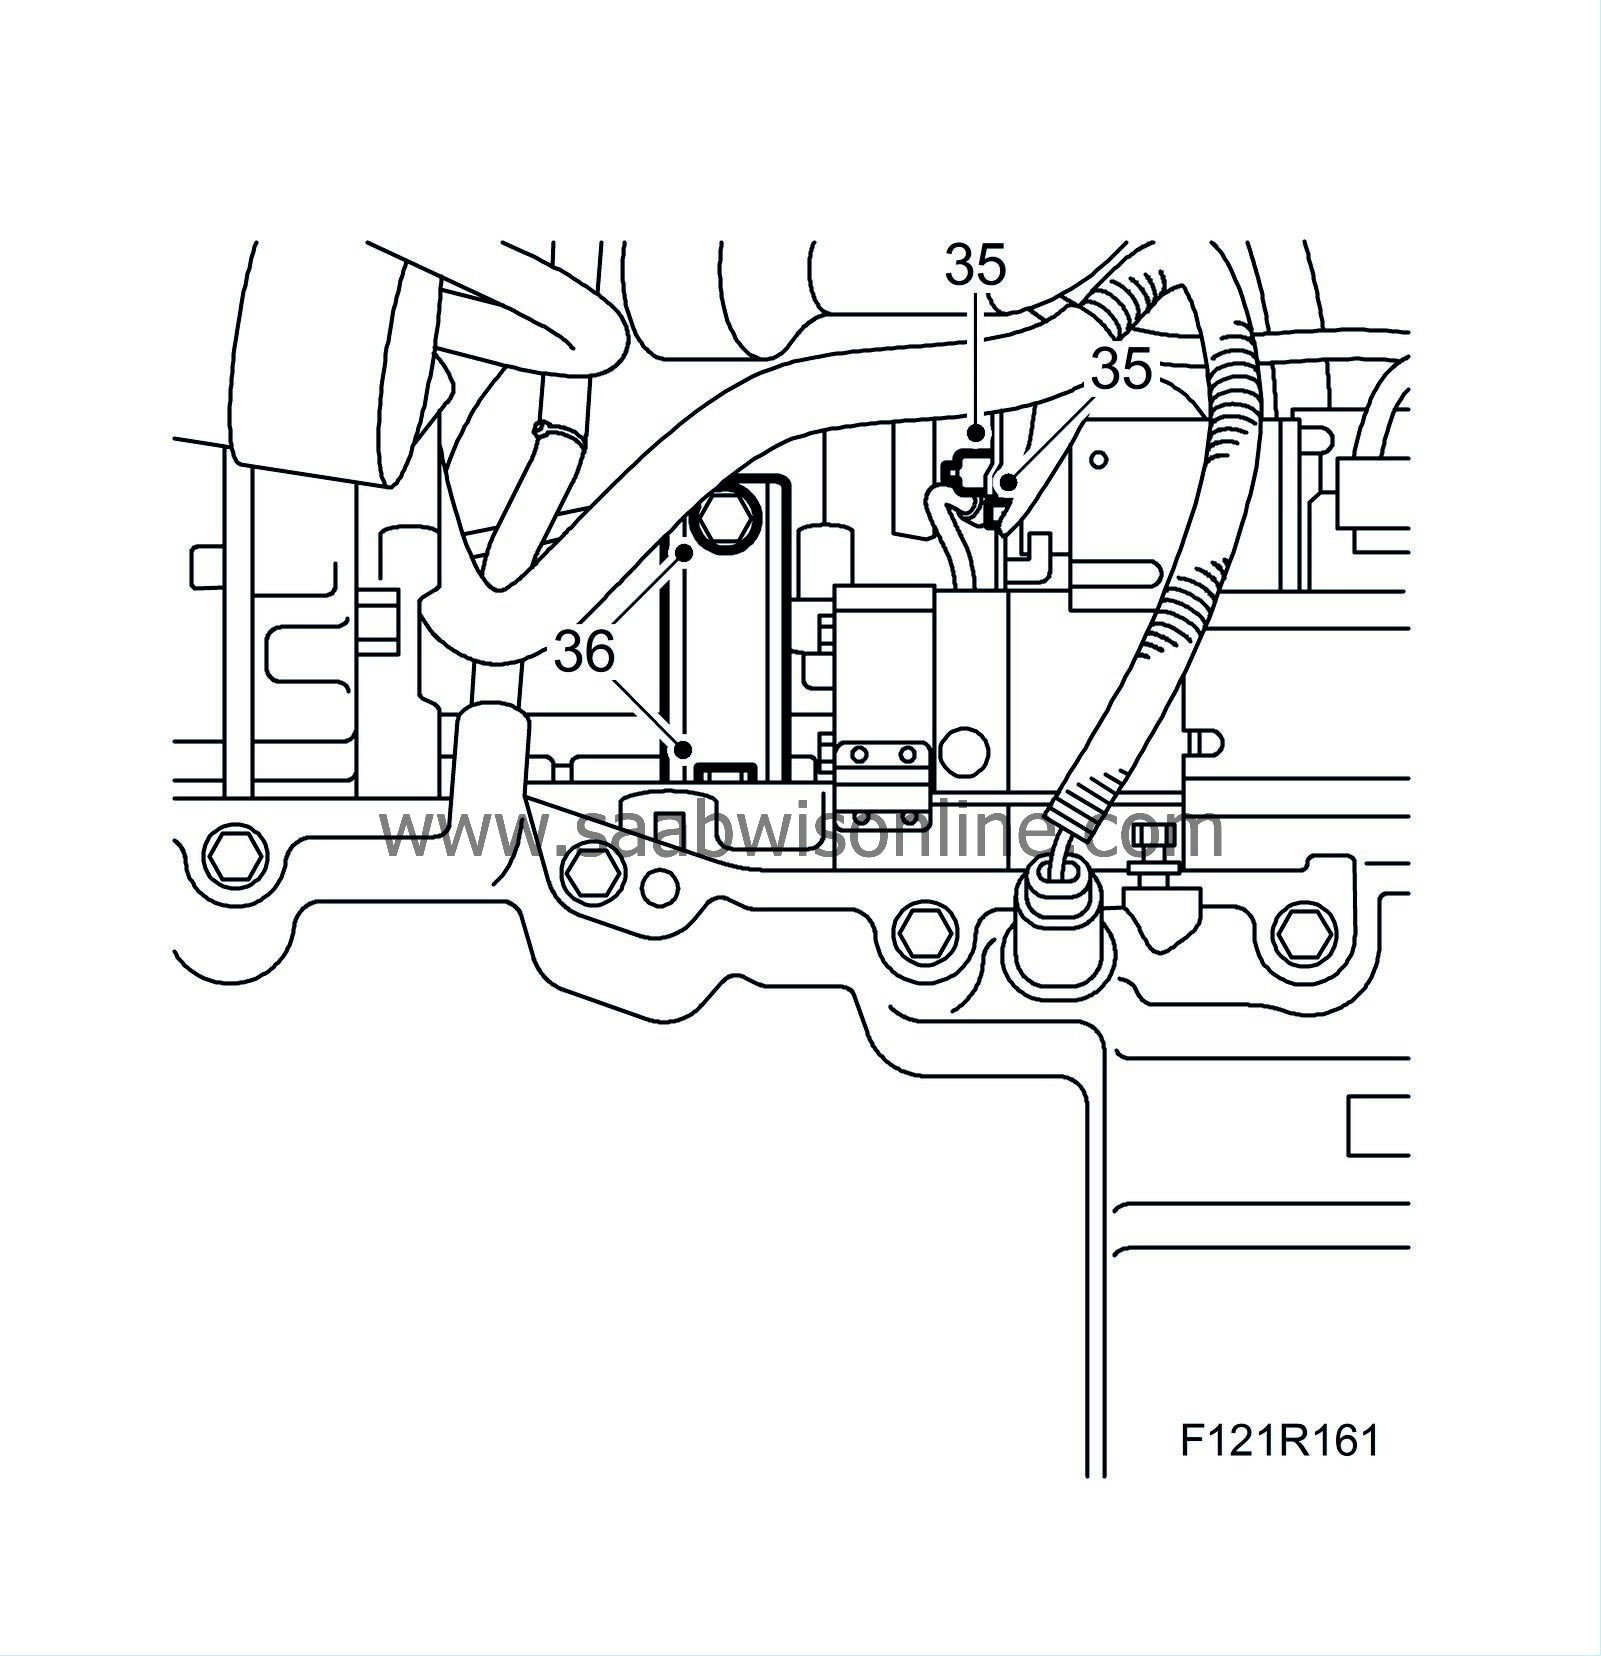
Fit the chain tensioner "zeroed". The groove on the end of the chain tensioner must be down when fitting. See Timing chain tensioner - fitting in accordance with WIS 9-3 (9440) - Engine 4-cyl (petrol) - Basic engine - Adjustment/Replacement. Use 83 96 129 Oil filter tool B207, and chain tensioner, camshaft drive.
|
Note
|
|
Check that the chain tensioner O-ring and gasket are intact. In the event of damage the complete chain tensioner must be replaced.
|
Tightening torque 75 Nm (55 lbf ft)
|
|
11.
|
Tighten the camshaft pinions. Hold with a wrench on each respective camshaft flat. Remove the cable tie.
Tightening torque 85 Nm +30° (63 lbf ft +30°)
|
|
12.
|
Remove the camshaft adjustment tool and fit the camshafts' bearing cap.
Tightening torque 8 Nm (6 lbf ft)
|
|
13.
|
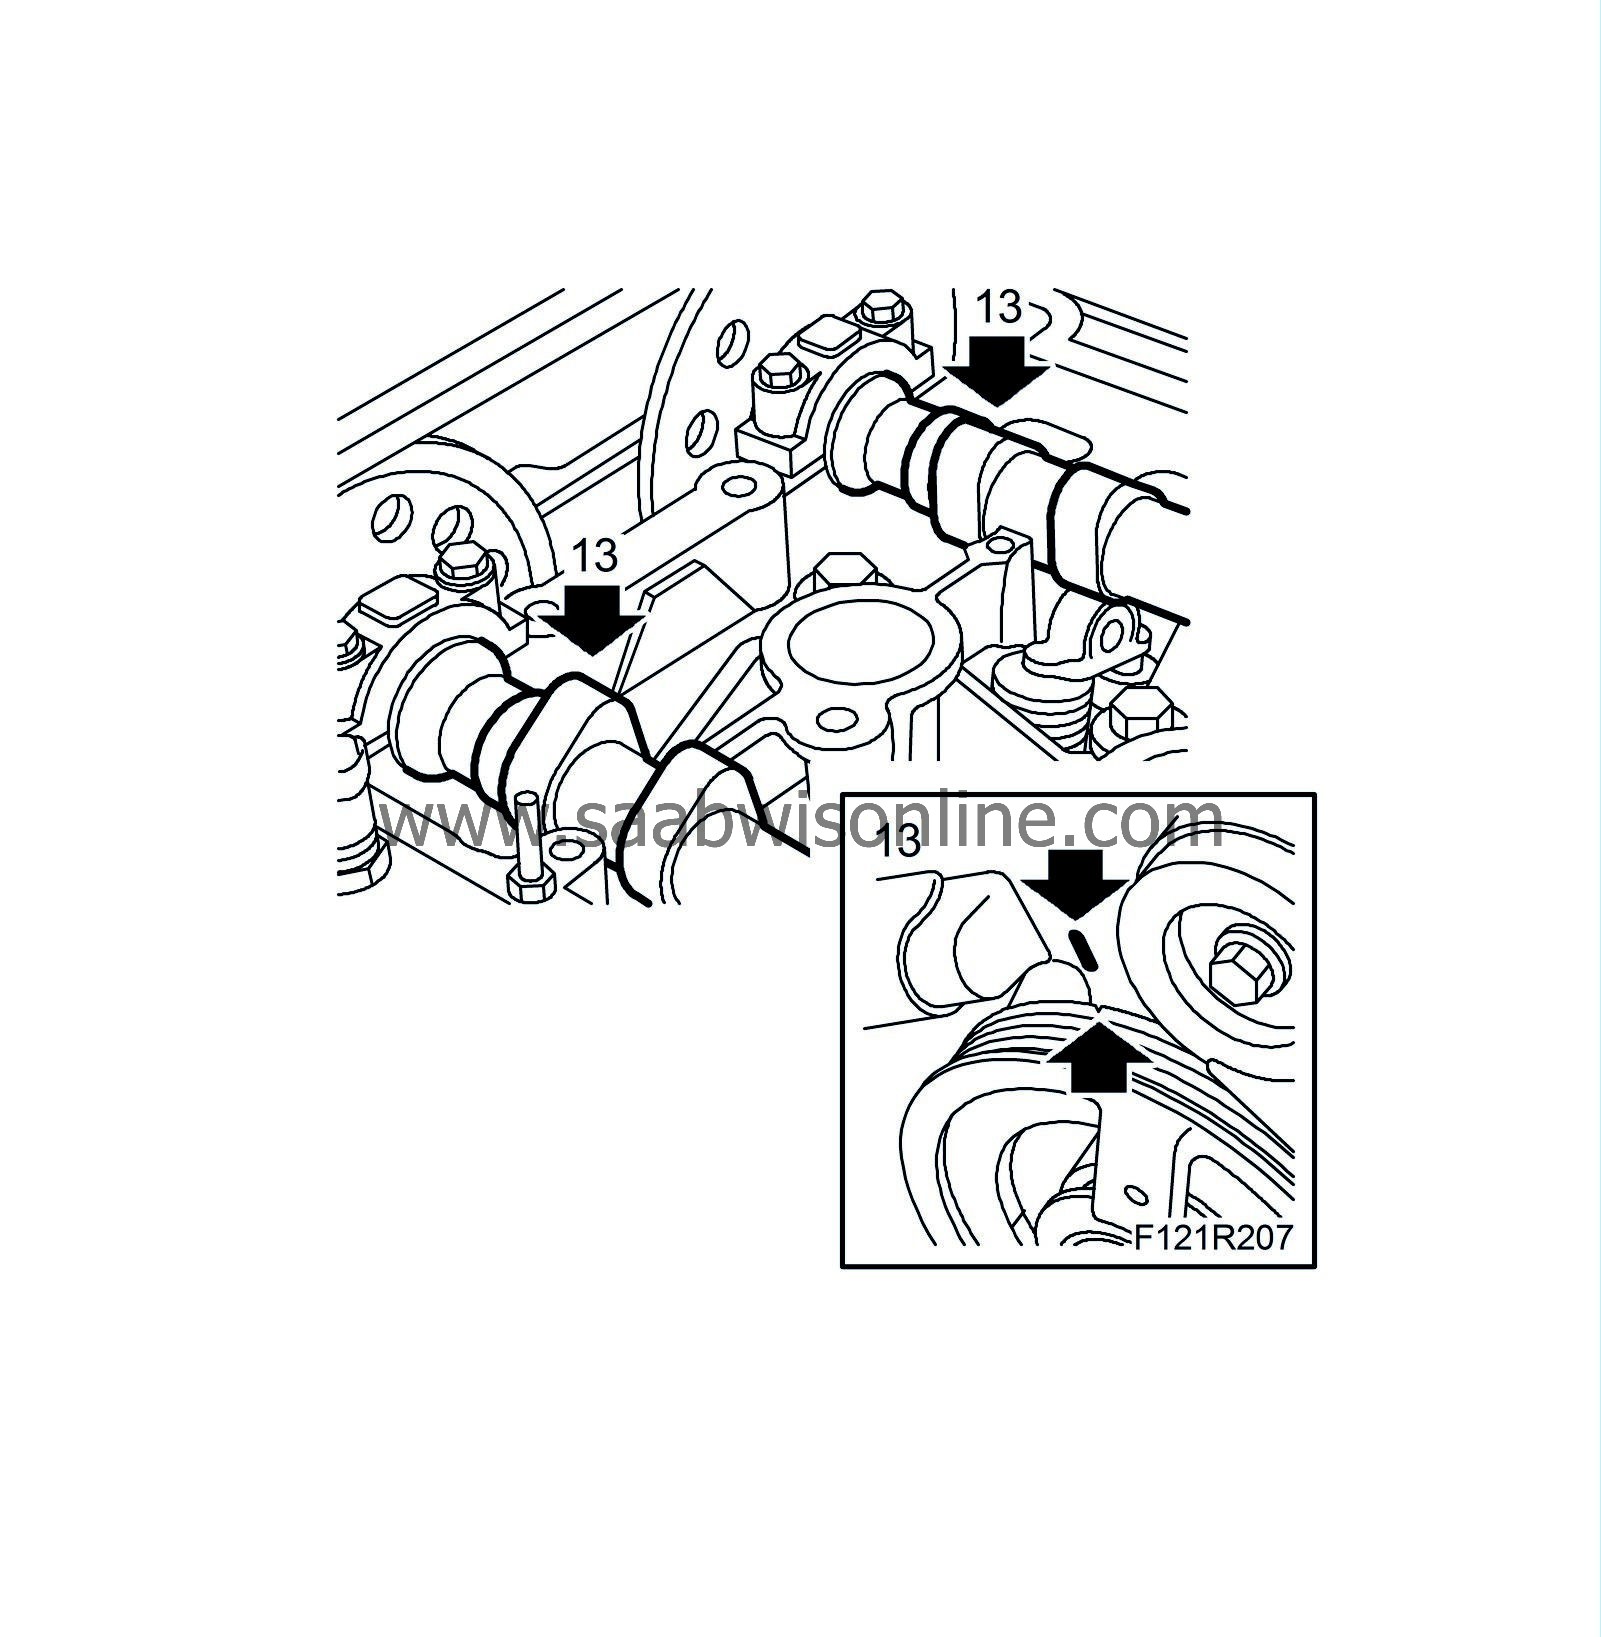
Turn over the engine twice and reset to zero so that the markings on the pulley and the timing cover are aligned. Remove the camshafts' bearing caps no. 2 and 7 and refit 83 96 046 kit, adjustment tool, camshaft 175 hp or 83 96 079 adjustment tool, camshaft (B207 210 hp) to check that the camshaft setting is correct. Remove the adjustment tools and fit the camshafts' bearing caps.
|
|
14.
|
Fit the bolt to the dipstick pipe. Attach the connector and plug it on the pipe.
|
|
15.
|
Cars with secondary air injection pump
: Fit the pump upper retaining bolt. Fit the pipe between with pump and the valve.
|
|
16.
|
Fit the power steering pump with a new seal.
Tightening torque 22 Nm (16 lbf ft).

|
|
17.
|
Connect the coolant hose to the pipe on the cylinder head. Fit the hose to the brake servo.
|
|
18.
|
Fit the right-hand engine pad.
Tightening torque, bolts to body 40 Nm + 60° (30 lbf ft + 60°)
Tightening torque, bolts to bracket 70 Nm + 60° (52 lbf ft + 60°)
|
|
19.
|
Remove the jack. Connect the coolant hose to the pipe and the cylinder head.
|
|
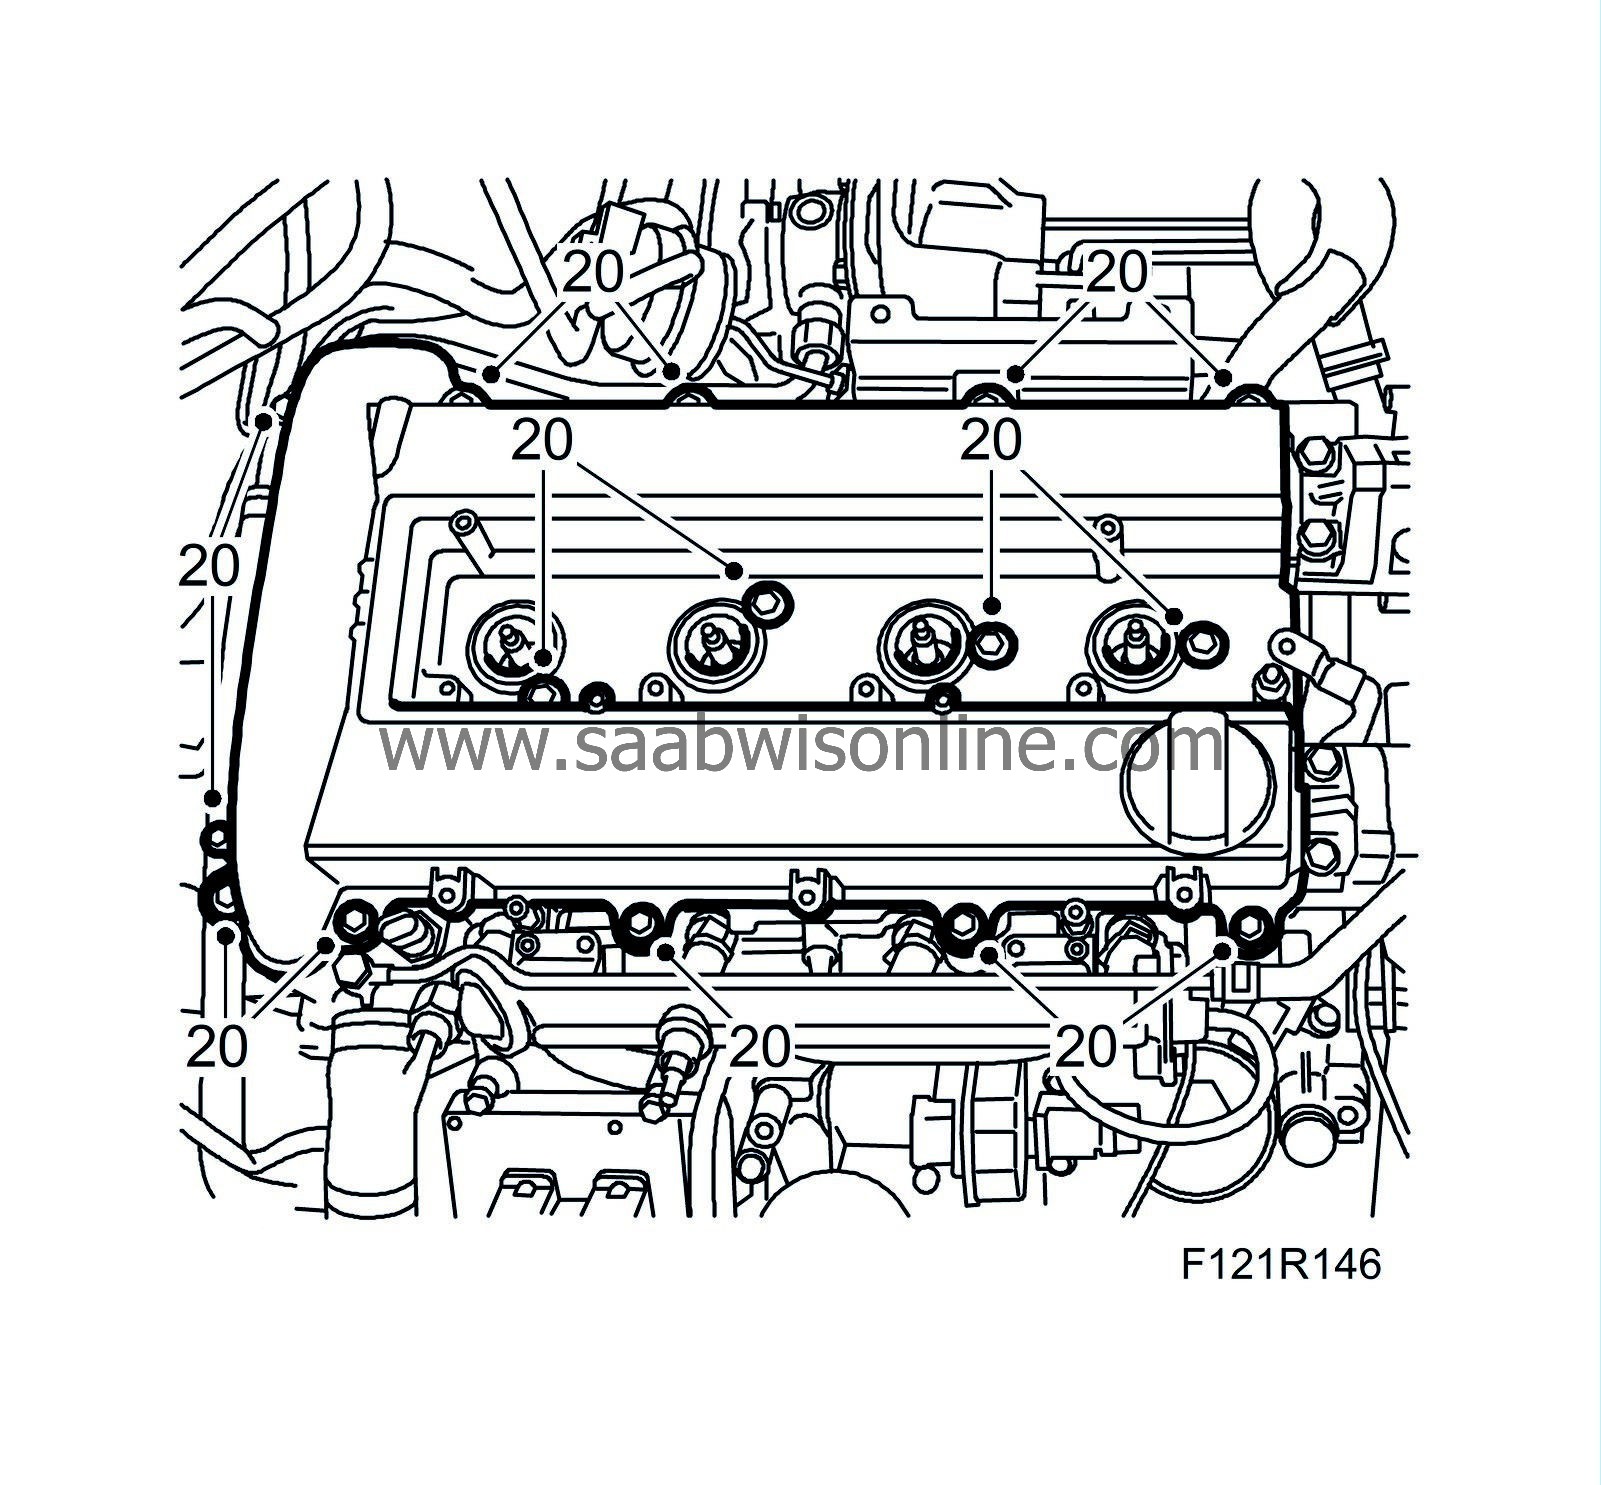
20.
|
Fit the camshaft cover with a new seal.
Tightening torque 10 Nm (7 lbf ft).
|
|
21.
|
Connect the ground cable to the camshaft cover.

|
|
22.
|
Connect the crankcase ventilation hose to the camshaft cover.
|
|
23.
|
Fit the ignition coils.
Tightening torque 8 Nm (6 lbf ft)
|
|
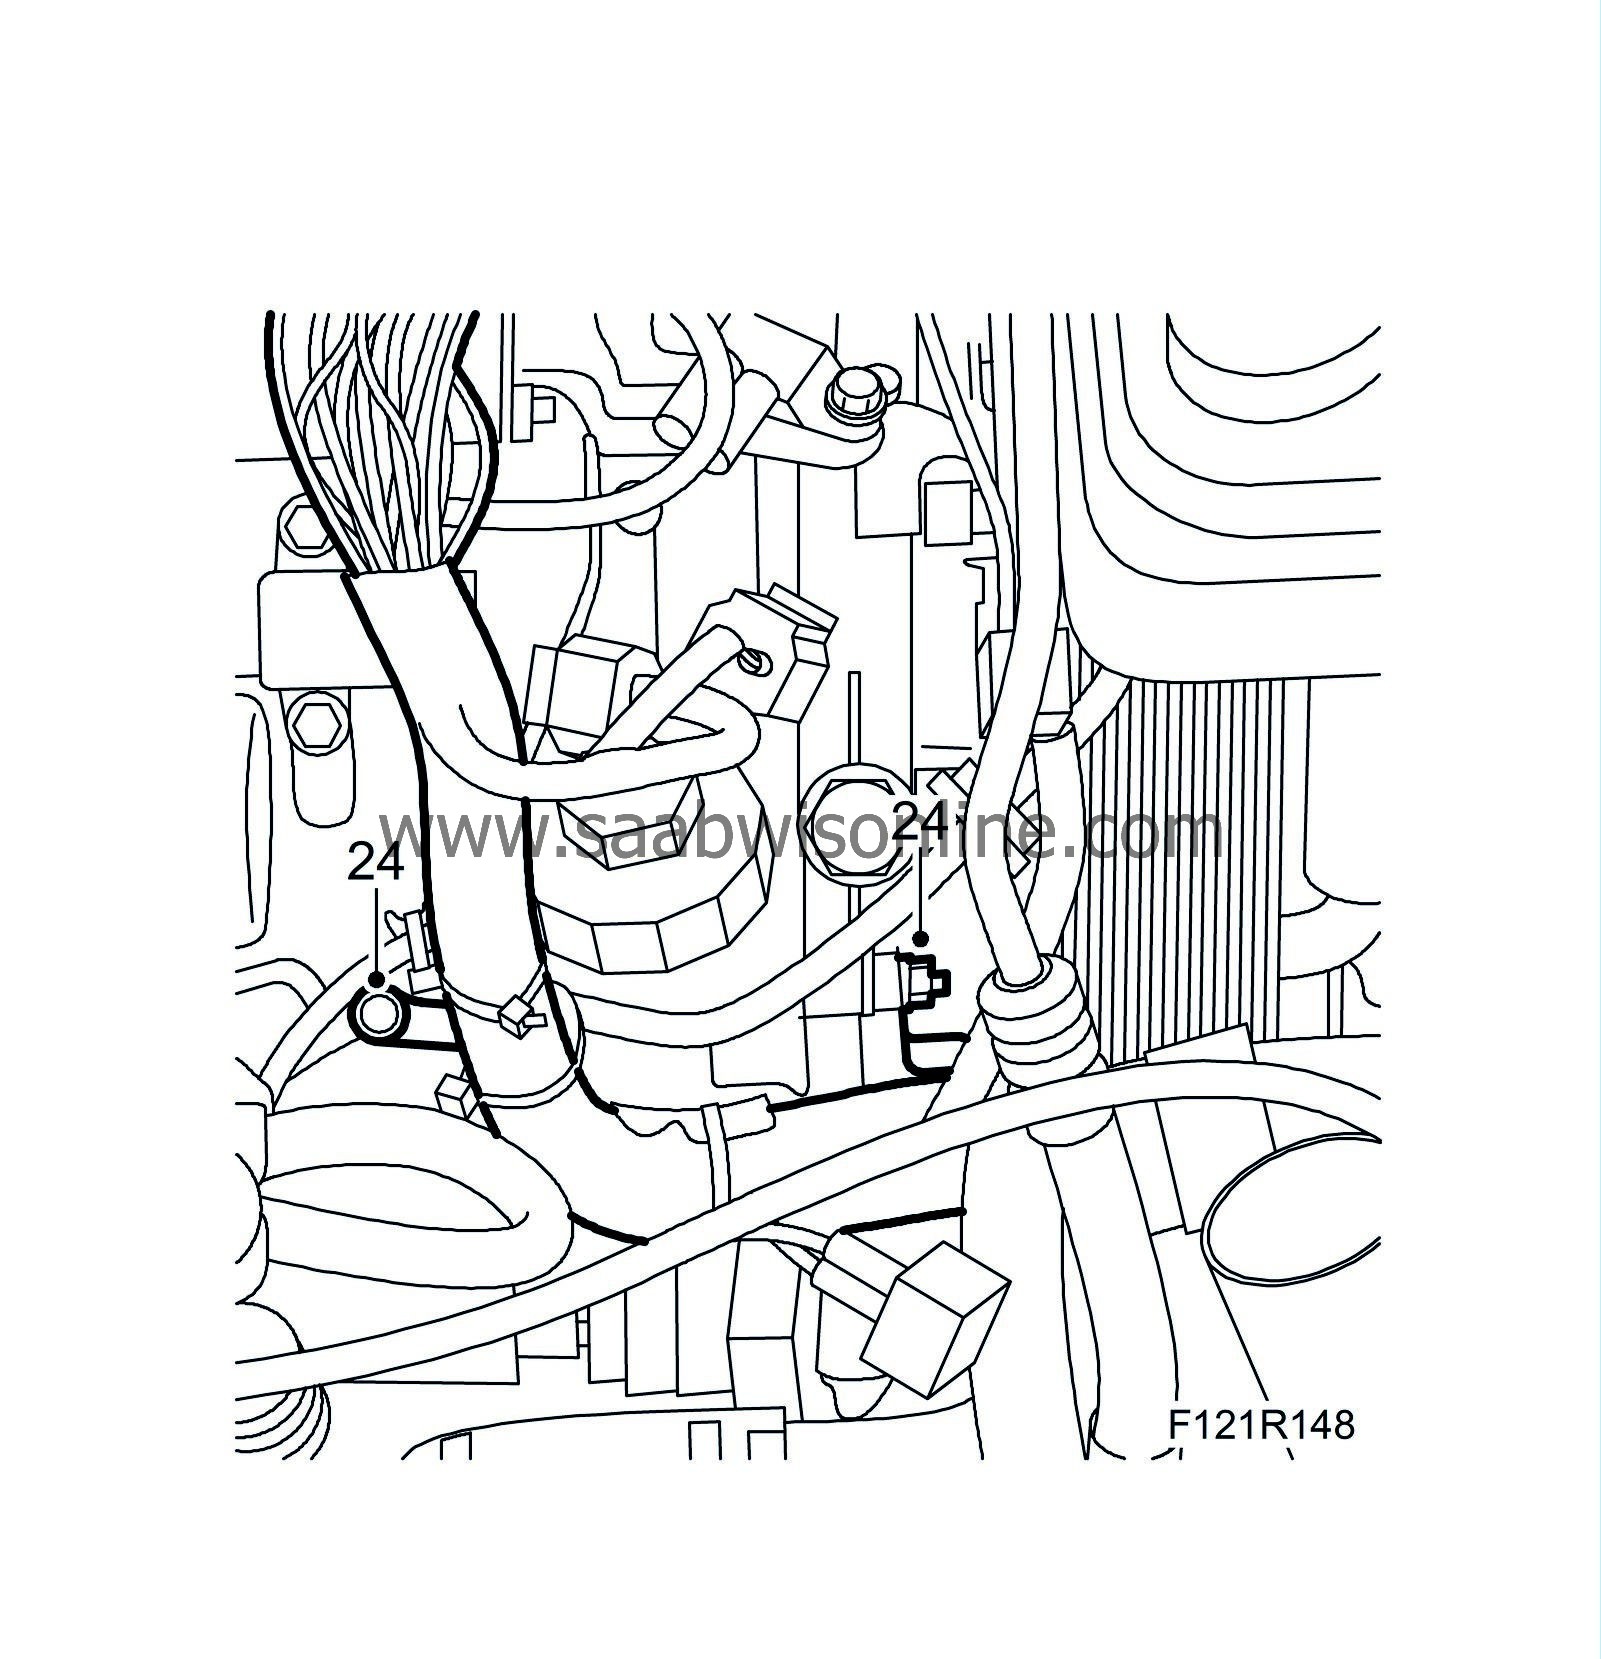
24.
|
Fit the wiring harness to the intake manifold and the oil filter housing.
|
|
25.
|
Fit the cable duct and bracket to the camshaft cover.

|
|
26.
|
Connect the hose to the turbo bypass valve and the solenoid valve.
|
|
27.
|
Plug in the A/C pressure sensor connector, the connectors to the coolant temperature sensor, the engine control module, the solenoid valve for the bypass valve, the throttle body, the intake manifold pressure sensor, the atmospheric pressure sensor, the IDM module, the oil pressure sensor and the ground cable to the engine control module.
|
|
28.
|
Plug in the ignition coil connectors. Make sure that the cable is fitted correctly so that it is not trapped by the cover. Plug in the connectors to the turbo solenoid valve and fit the cable clips.

|
|
29.
|
Fit the cover over the ignition coils.

|
|
30.
|
Press the fuel lines and the ventilation lines into the clips on the camshaft cover. Connect the quick-release coupling for the breather line.
|
|
31.
|
Connect both fuel lines to the fuel rail, hold the lower nut. Use new seals.
Tightening torque 10 Nm (7 lbf ft).
|
|
32.
|
Fit the air filter housing and connect the inlet hose. Fit the air filter.

|
|
33.
|
Fit the air filter housing cover. Plug in the mass air flow sensor connector and fit the turbo intake manifold. Connect the hoses to the turbo intake manifold.
|
|
34.
|
Fit the turbocharger delivery hose to the throttle body and the turbocharger delivery pipe.
|
|
35.
|
Raise the car. Connect the starter motor positive cable.
|
|
36.
|
Fit the stay between the intake manifold and the cylinder block.
Tightening torque 22 Nm (16 lbf ft).
|
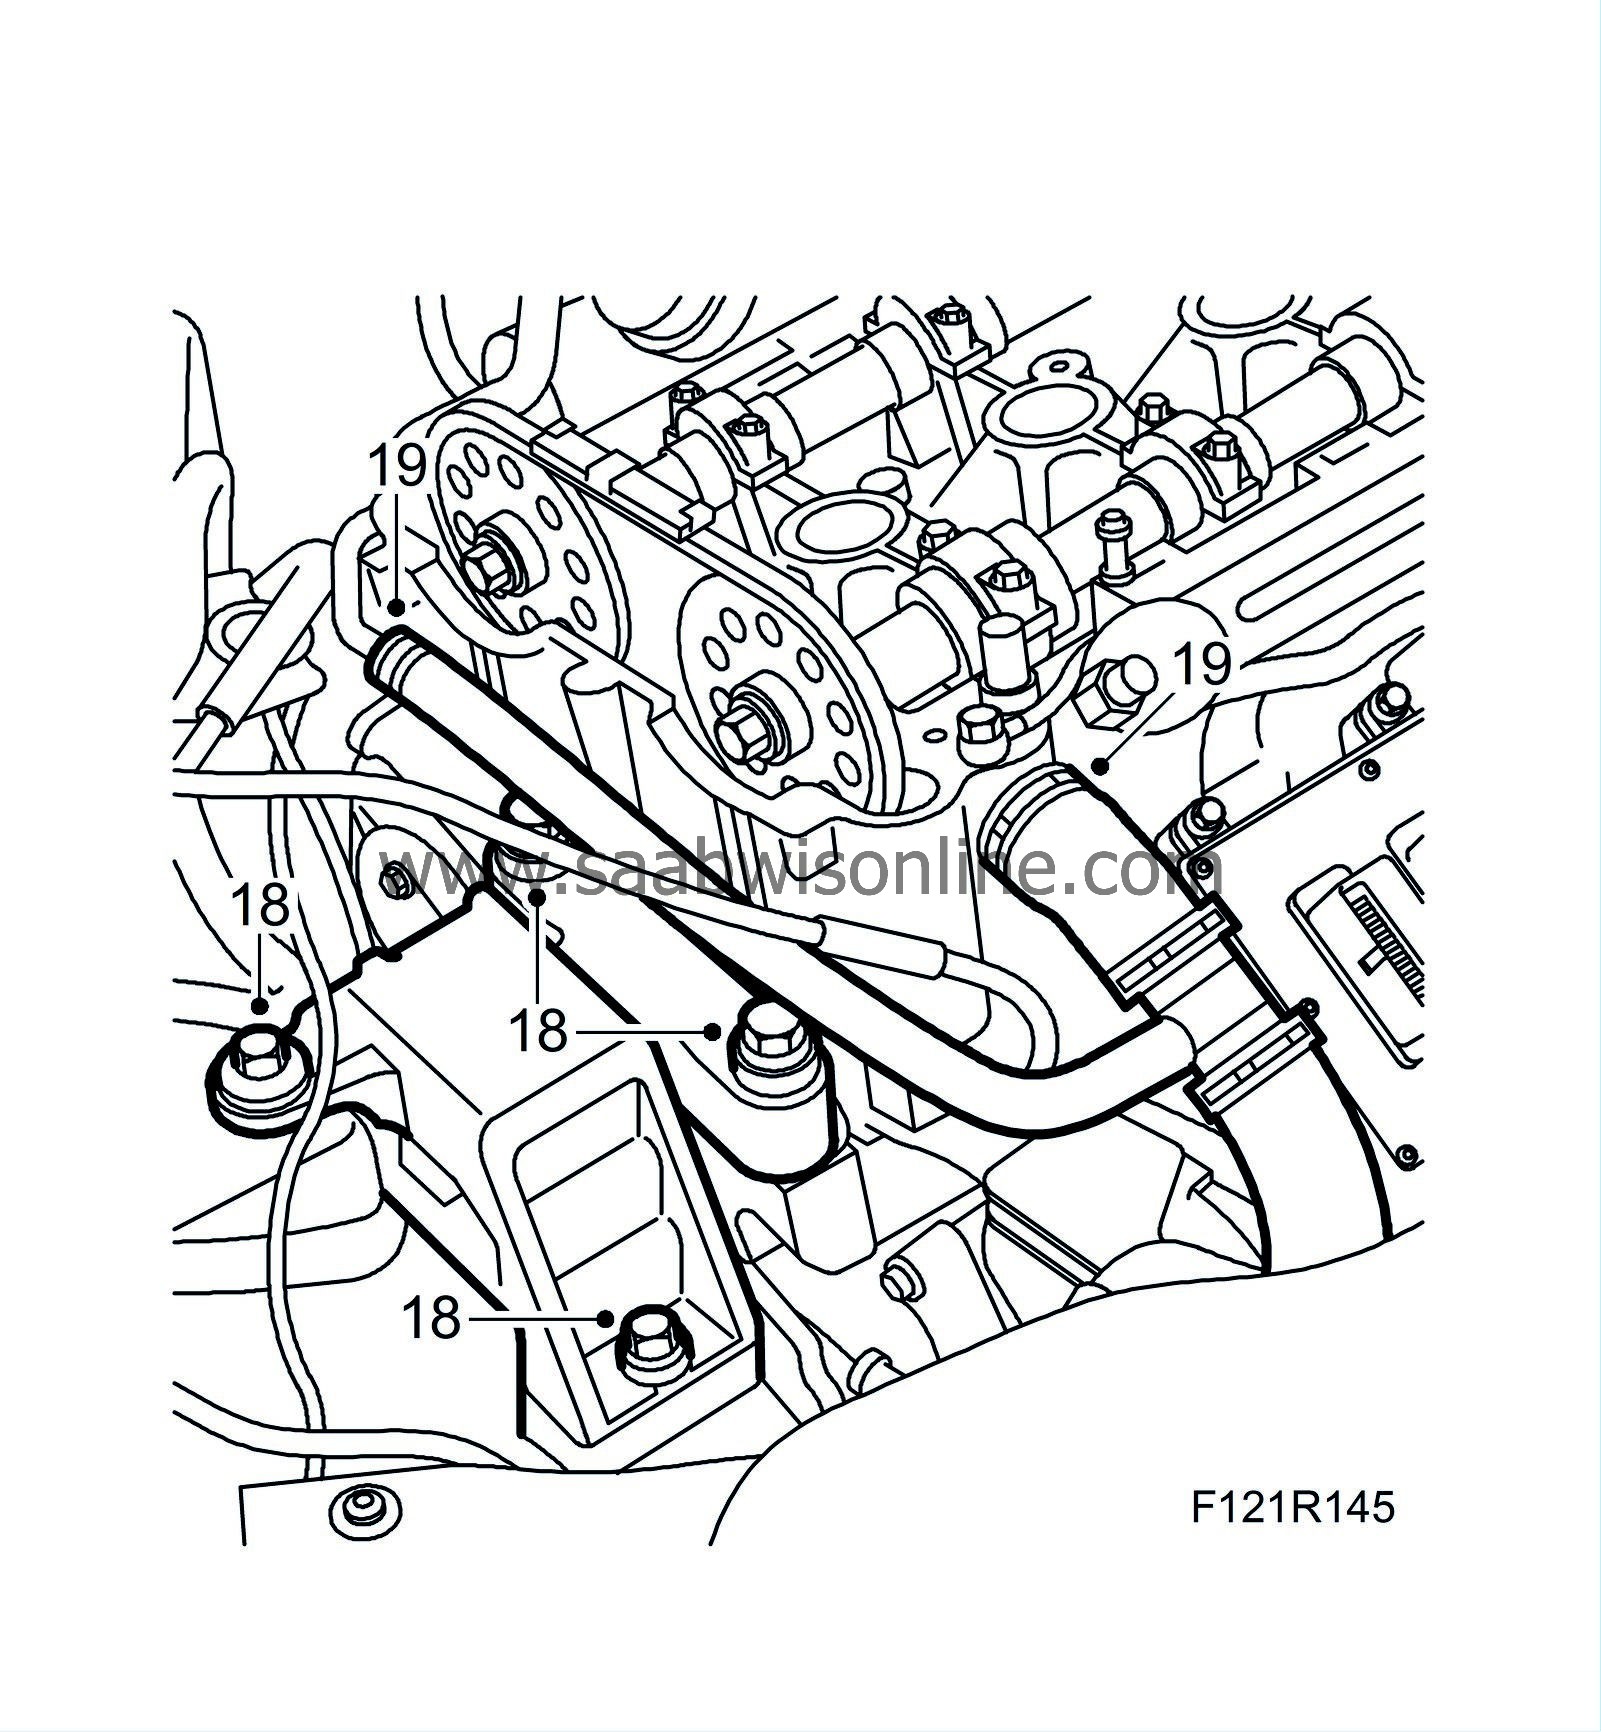
|
37.
|
Fit the oil return pipe to the turbo. Use a new gasket and a new O-ring.
Tightening torque 15 Nm (11 lbf ft)
|
|
38.
|
Fit the stay between the exhaust manifold and the cylinder block.
Tightening torque 22 Nm (16 lbf ft).
|
|
39.
|
Fit the turbo coolant pipe with new seals.
Tightening torque 40 Nm (30 lbf ft)
|
|
40.
|
Lower the car and fit the catalytic converter, using new nuts, so that it butts up level to the turbo. Use 30 20 971 Screw-thread paste for the studs.
Tightening torque 25 Nm (18 lbf ft)

|
|
41.
|
Raise the car and tighten the bolts to the catalytic converter mounting.
Tightening torque 25 Nm (18 lbf ft)
|
|
42.
|
Fit the lower turbocharger delivery pipe.

|
|
43.
|
Connect the hose to the headlamp washer and fit and plug in the connector. Fit the lower spoiler shield.
CV
: Fit the chassis reinforcement, front subframe.
|
|
44.
|
Lower the car slightly and fit the right-hand wing liner and the right-hand front wheel. See WIS - 9-3 (9440) - Suspension, wheels - Wheels and tyres - Adjustment/Replacement - Wheels.
|
|
45.
|
Fit the turbo oil delivery pipe, use new seals, and hold it so that the pipe does not turn.
Tightening torque 22 Nm (16 lbf ft).

|
|
46.
|
Plug in the connectors for the heated oxygen sensors.
|
|
47.
|
Fit the heat shield over the turbo.
|
|
48.
|
Connect the battery negative cable and the battery cover.
|
|
49.
|
Check the oil level and top up as necessary.
|
|
50.
|
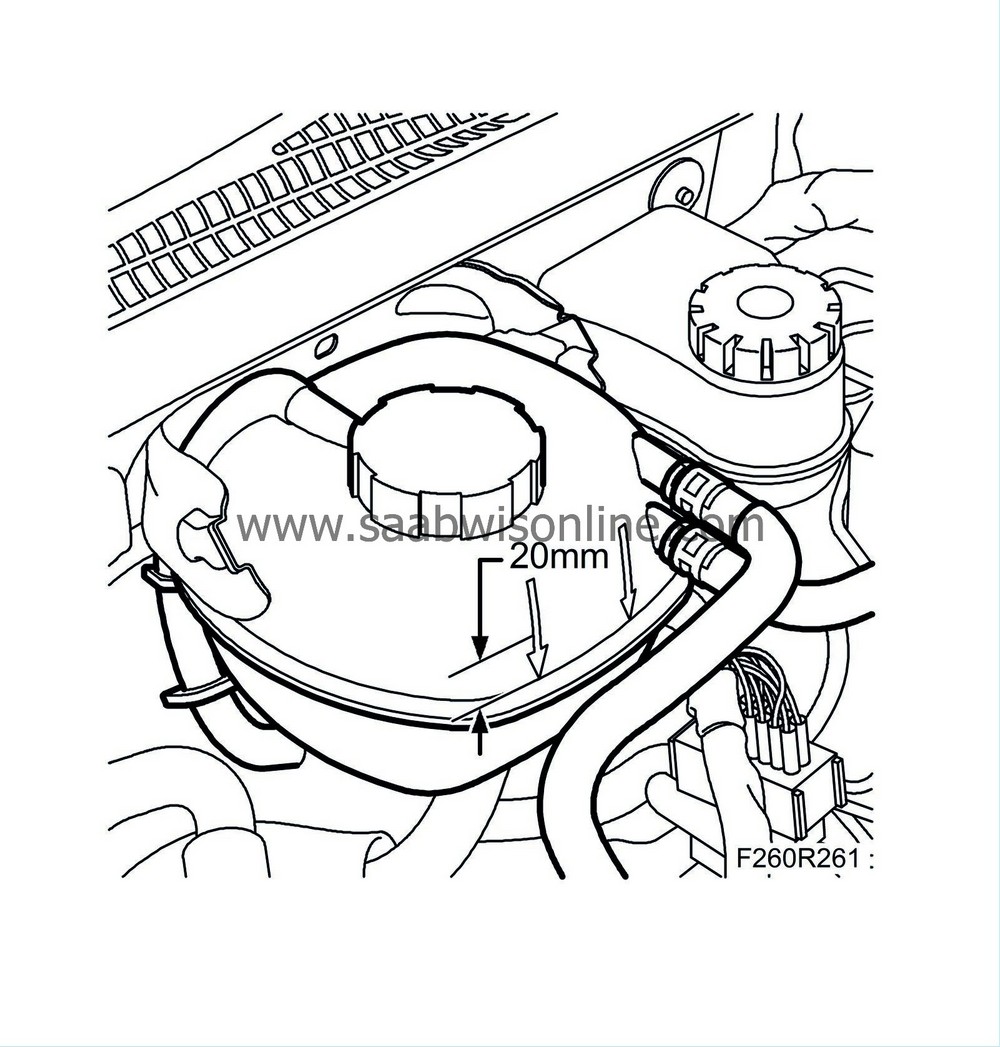
Fill with coolant to approx. 20 mm above the marking for the expansion tank.
|
|
51.
|
Remove the wing cover and reset the car's electrical functions, see WIS - 9-3 (9440) - Engine - 4 cyl (petrol) - Basic engine - Adjustment/Replacement - Measures after disconnecting the battery.
|
|
52.
|
Fit the upper engine cover.
|
Failed Object: 21230
Failed Object, supplement CV: 71102
Repair/Action code: 01
Labour Operation (US):
Cars without secondary air injection pump: 2123001
Cars with secondary air injection pump: 2123002
Supplement CV: 7110201
Time:
Cars without secondary air injection pump: 6.7 hr
Cars with secondary air injection pump: 6.8 hr
Supplement CV: 0.2 hr


