PRE-RELEASE
Gear cable
| Gear cable |
| To remove |
| 1. |
Put the gear lever in neutral.
|
|
| 2. |
V6:
Remove the battery and the battery tray.
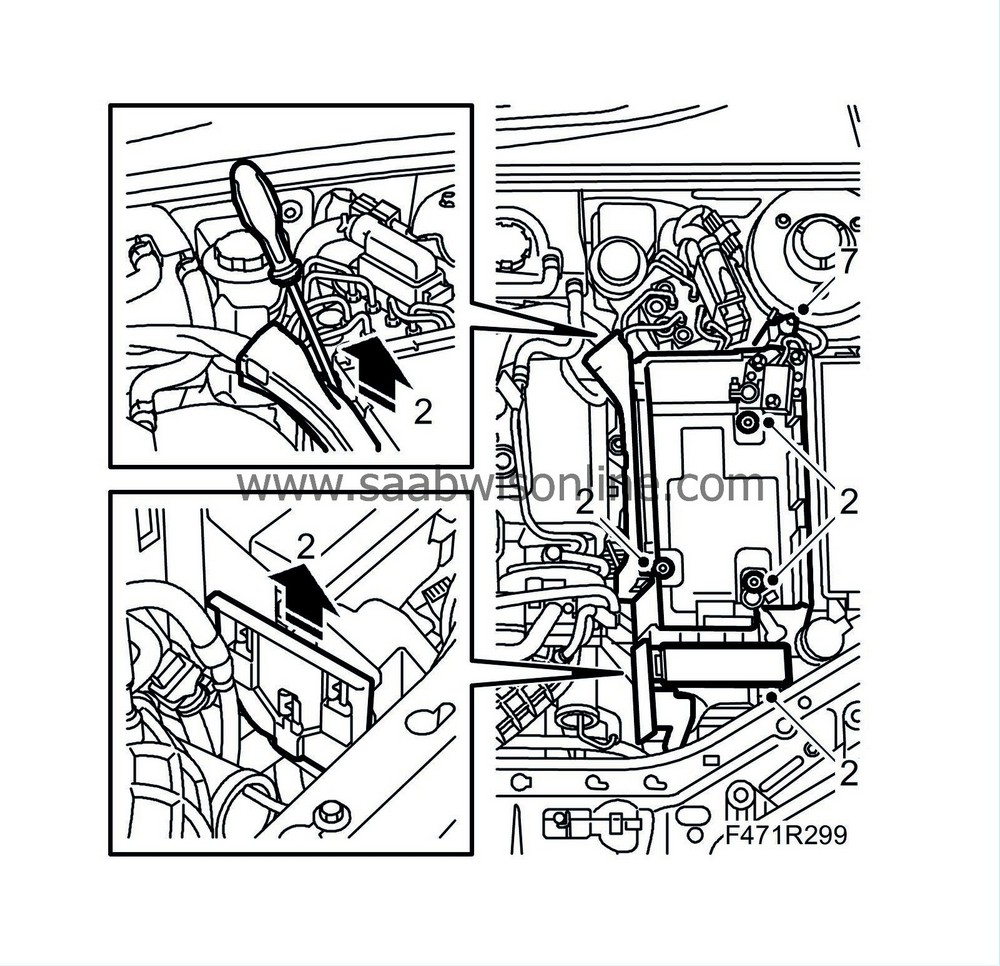
|
|
| 3. |
Lift the cable connections from the selector arms on the gearbox.
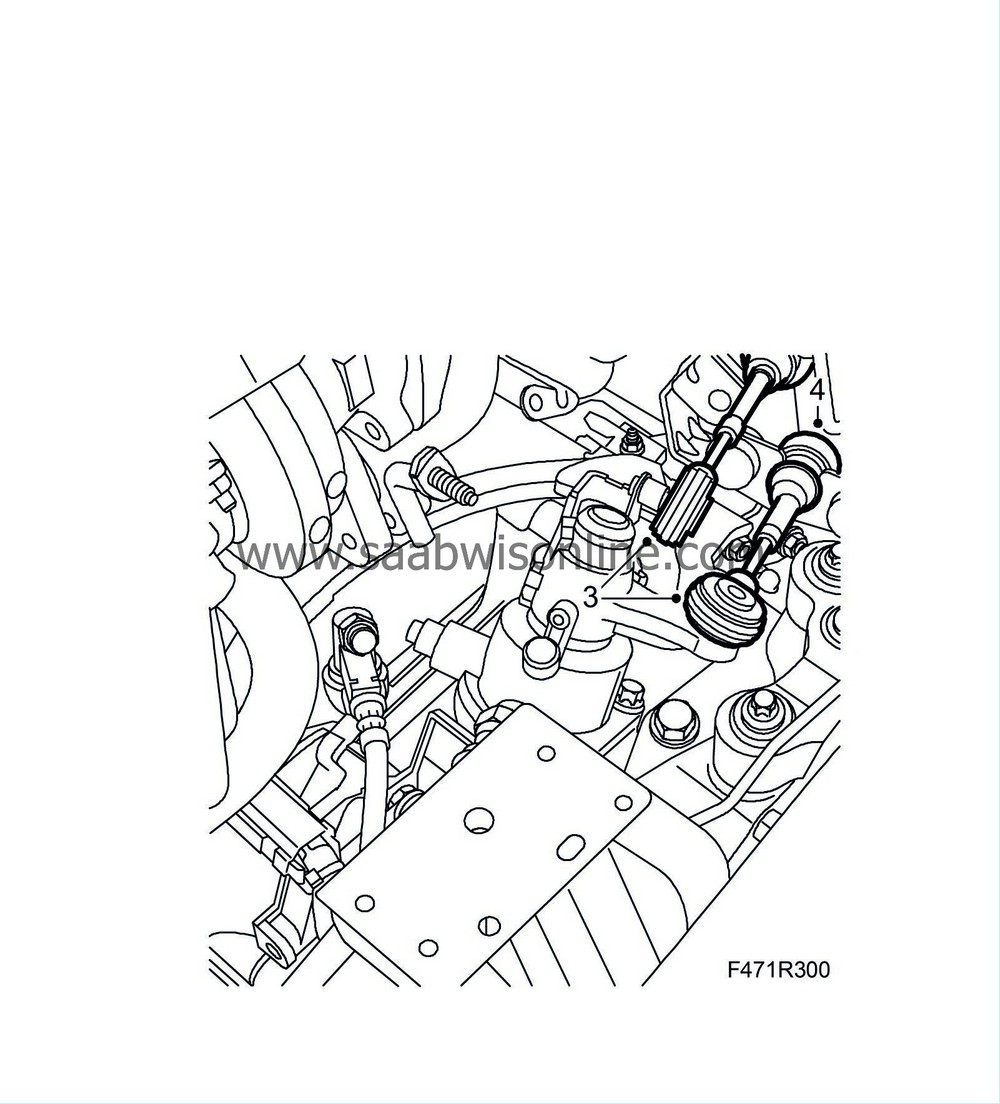
|
|
| 4. |
Detach the cables from the cable retainers on the gearbox by pulling back the locking sleeves.
|
|
| 5. |
V6:
Raise the car
|
|
| 6. |
Loosen the rubber seal in the bulkhead wall and then the plastic grommet.
V6:
Lower the car.
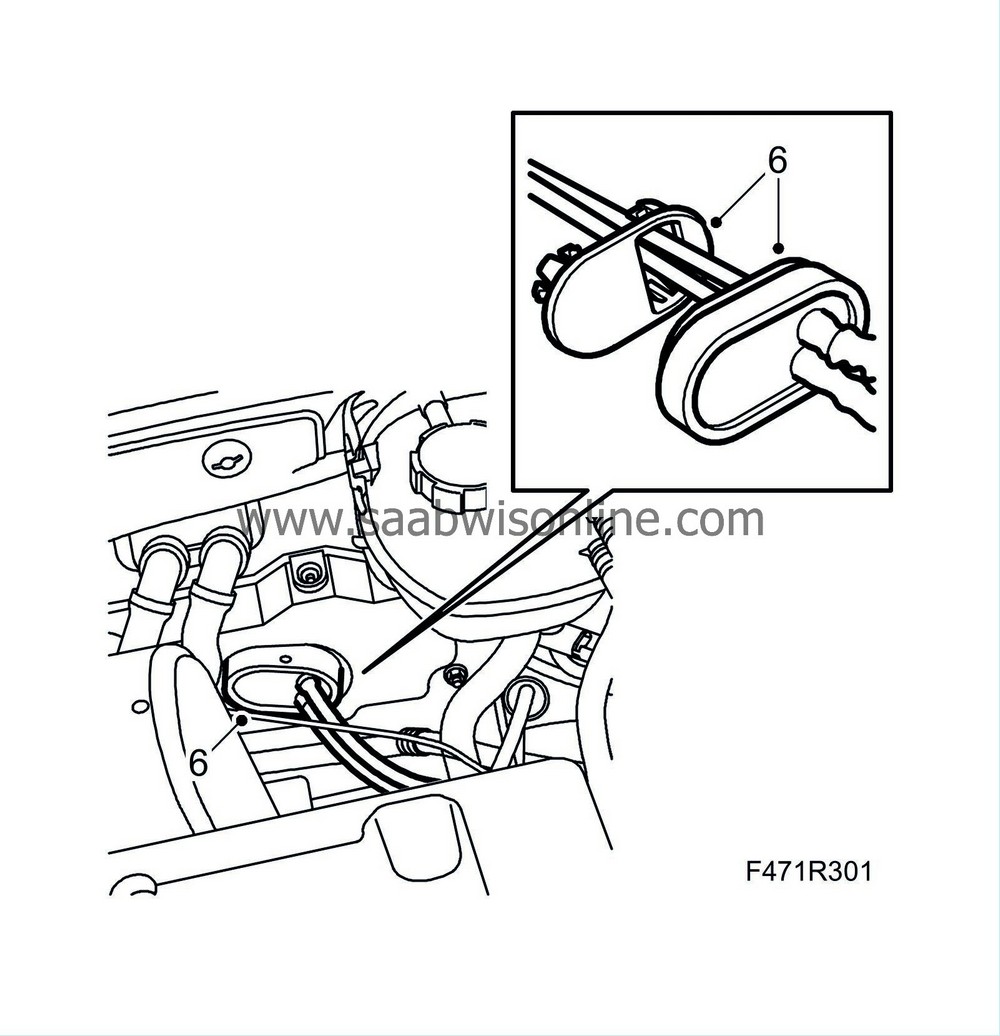
|
|
| 7. |
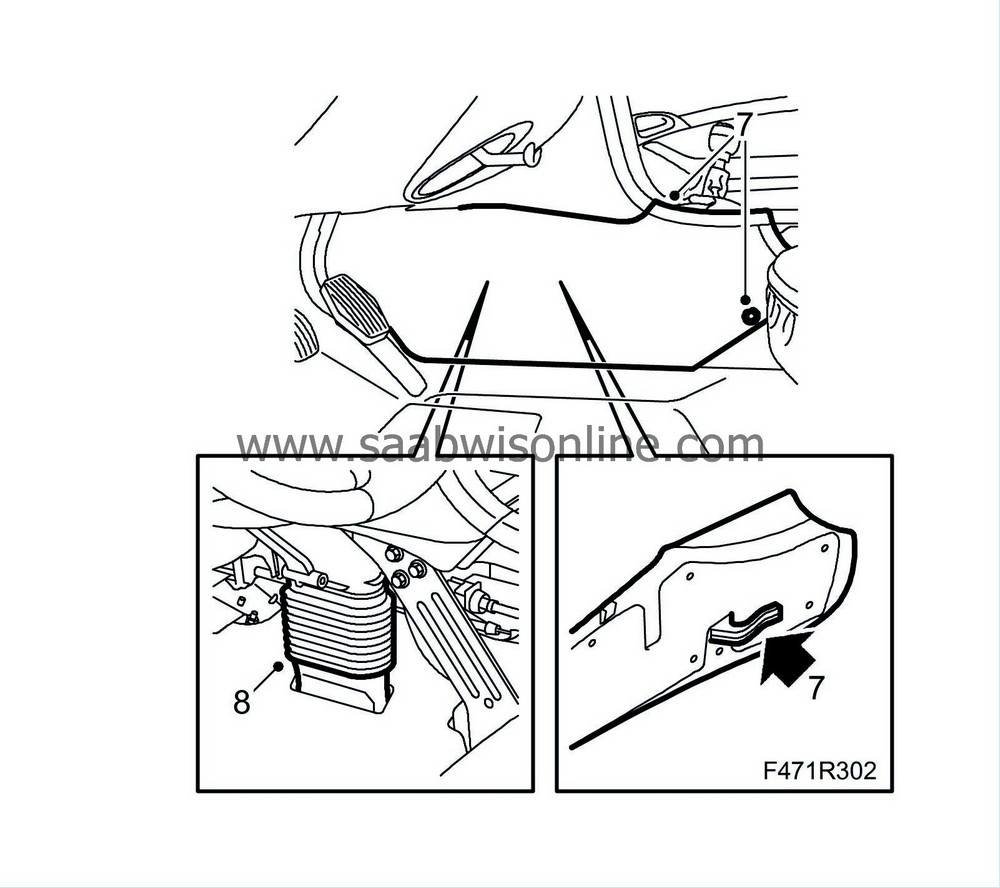
Remove the centre console left-hand front side panel.
|
|
| 8. |
Remove the gaiter for the air duct.
|
|
| 9. |
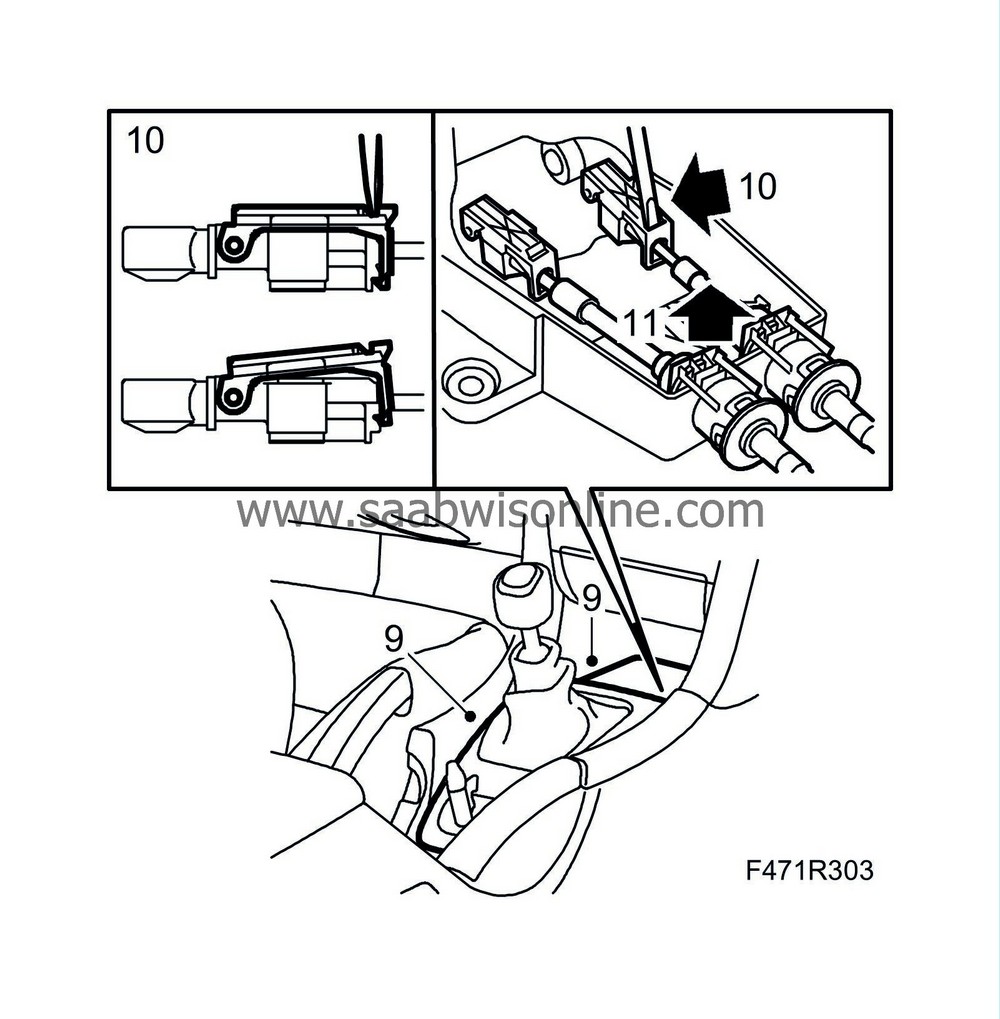
Undo the plastic cover for the gear lever and the rubber mat in the storage compartment and fold up. Use
82 93 474 Removal tool.
|
|
| 10. |
Loosen the cable adjusters in the gear lever housing with a screwdriver. Press down the blade carefully with a screwdriver in the cable adjuster and prise slightly towards the gear lever. A click will be heard when the adjuster catch has engaged. Repeat the procedure on the other side of the cable adjuster.
|
||||||||||
| 11. |
Press the catches and detach the cable sheaths from the gear lever housing. Lift the air duct slightly with a large screwdriver when the detaching the cable sheaths.
|
|
| 12. |
Pull out the cables through the engine bay.
|
|
| To fit |
| 1. |
Insert the cable through the engine bay.
|
|
| 2. |
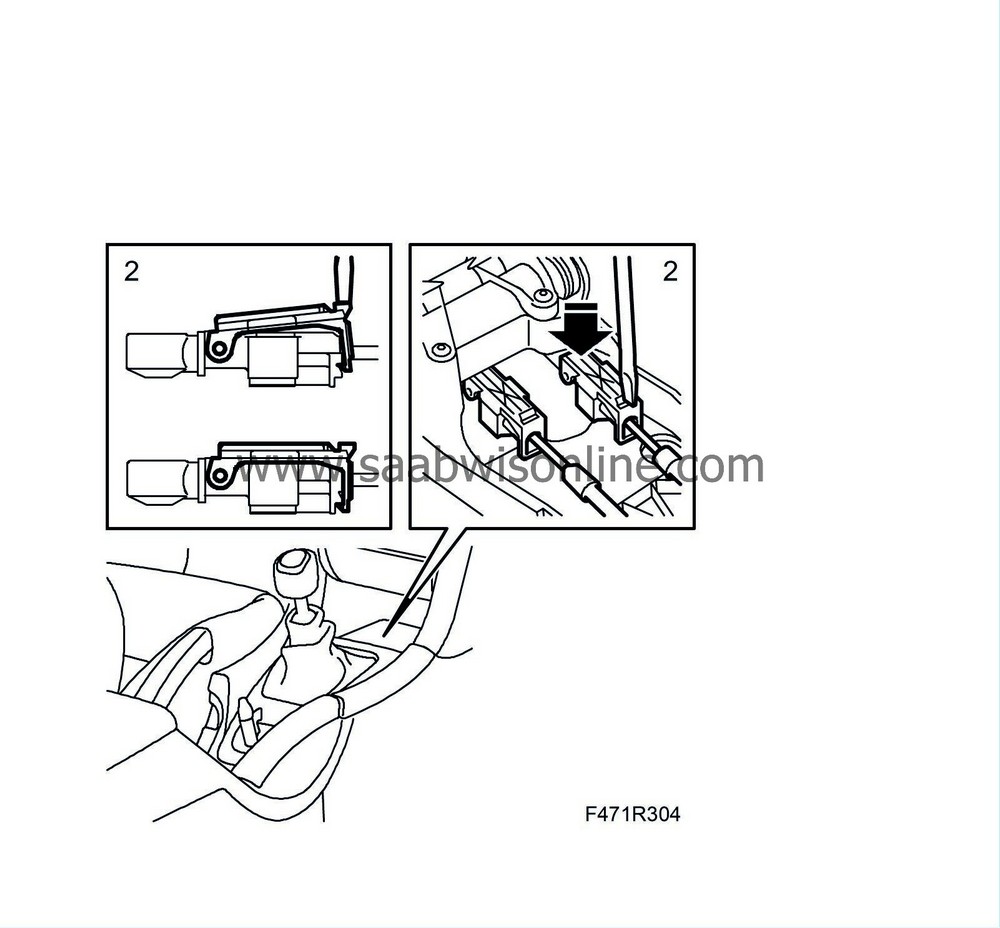
Attach the cable sheaths and cables to the gear lever housing. Fit the black and white cables on the black and white adjusters respectively.
|
|
| 3. |
V6:
Raise the car.
|
|
| 4. |
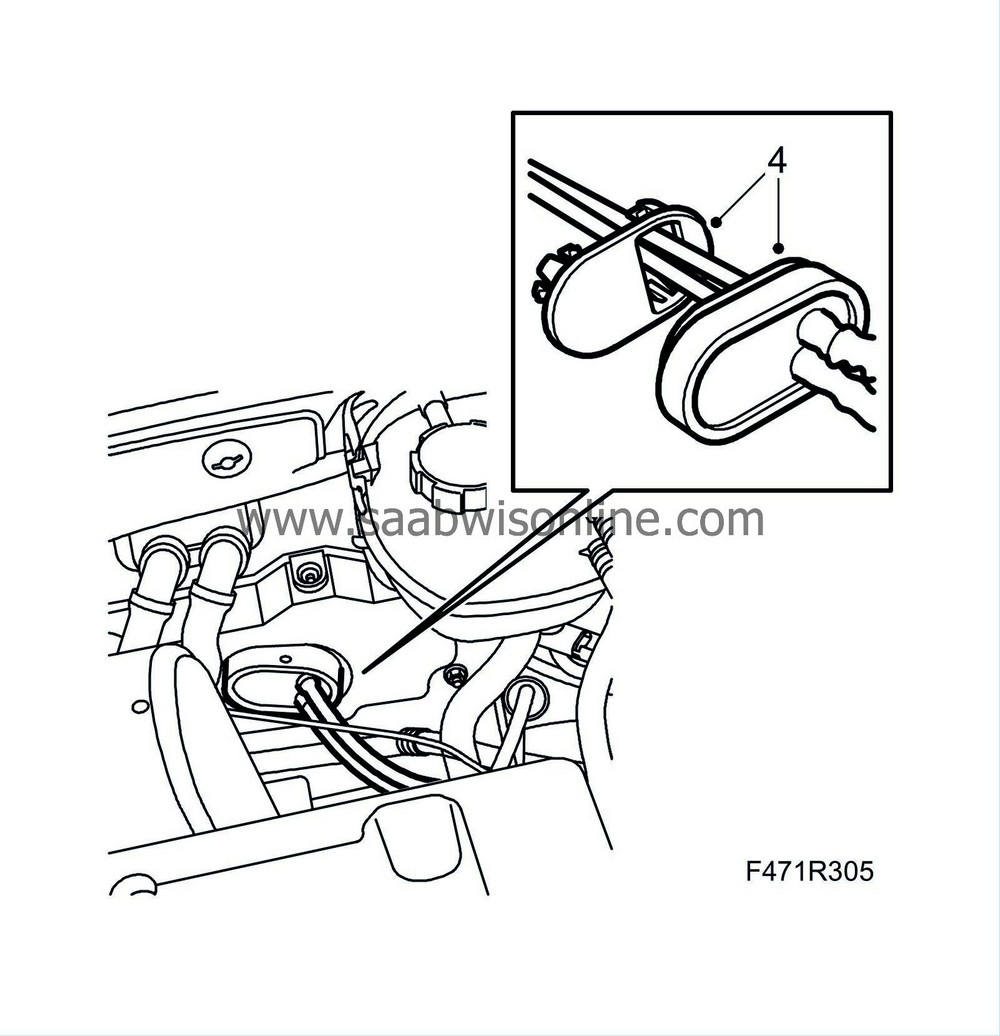
Fit the plastic grommet into the bulkhead wall and the rubber seal.
V6:
Lower the car.
|
|
| 5. |
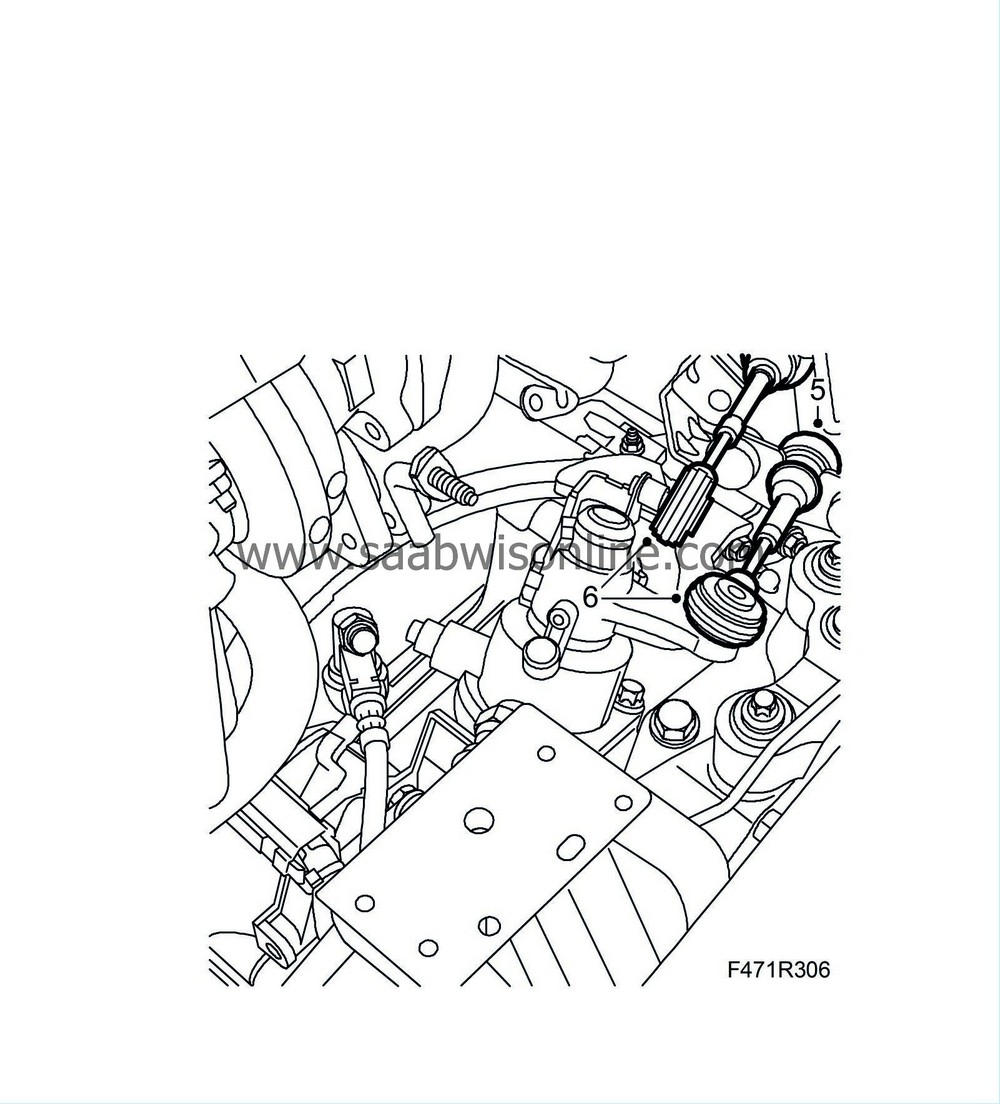
Fit the cables to the cable retainers on the gearbox by pulling back the locking sleeves. (White to lower retainer and black to upper one)
|
|
| 6. |
Attach the cable connections to the selector arms.
|
|
| 7. |
Adjust the gear change 6-speed:
Gear cable adjustment.
|
|
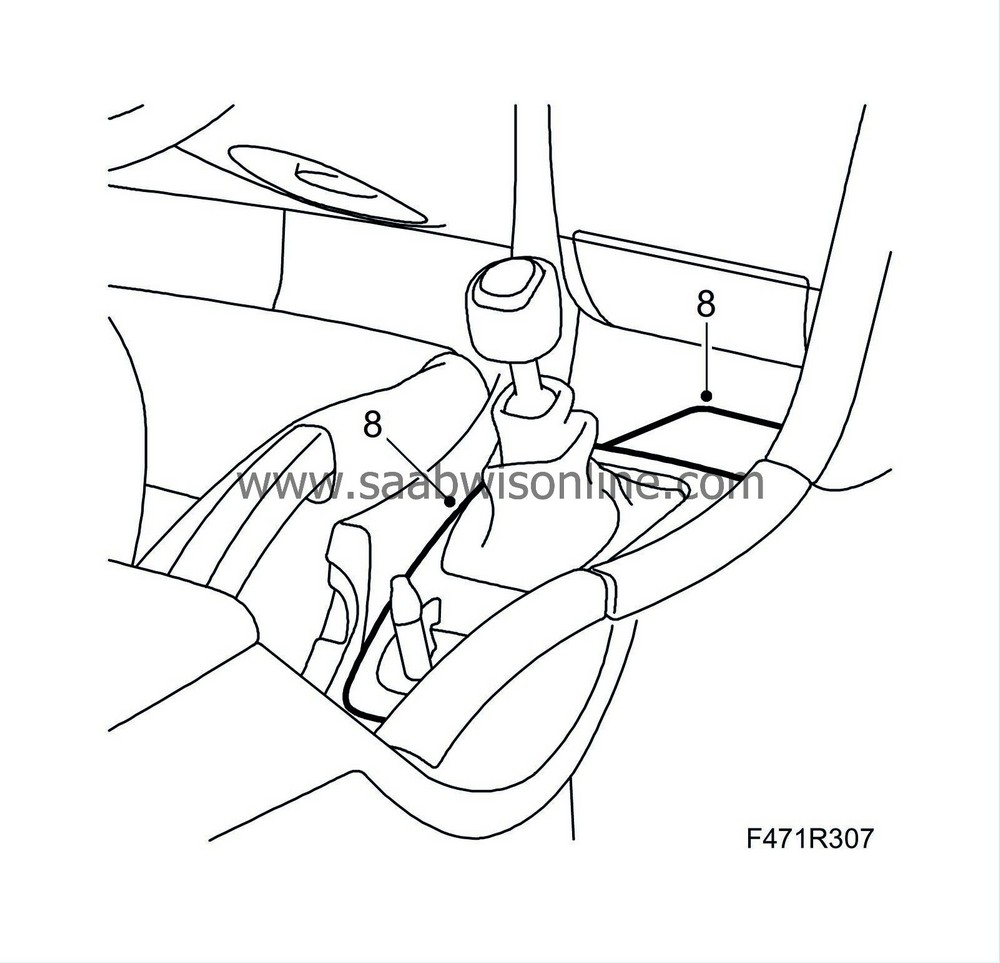
| 8. |
Fit the plastic cover for the gear lever and the rubber mat in the storage compartment.
|
|
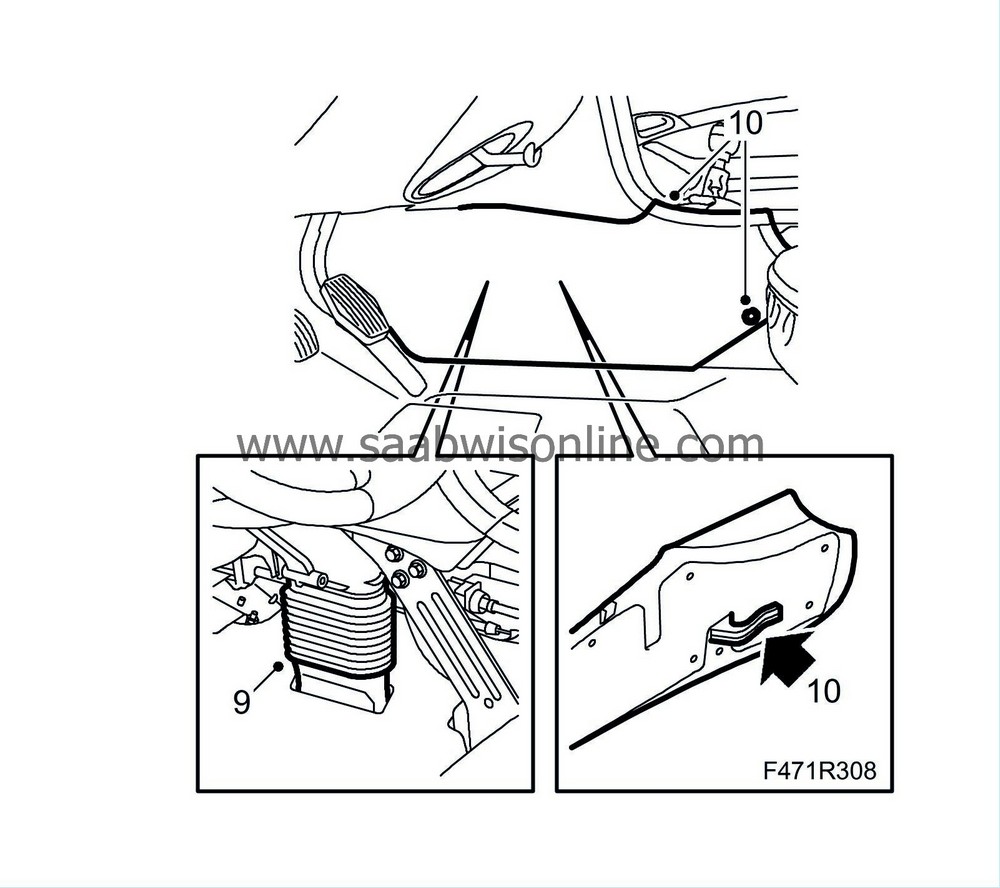
| 9. |
Fit the gaiter for the air duct.
|
|
| 10. |
Fit the centre console left-hand front side panel.
|
|
| 11. |
Check the shifting positions.
|
|
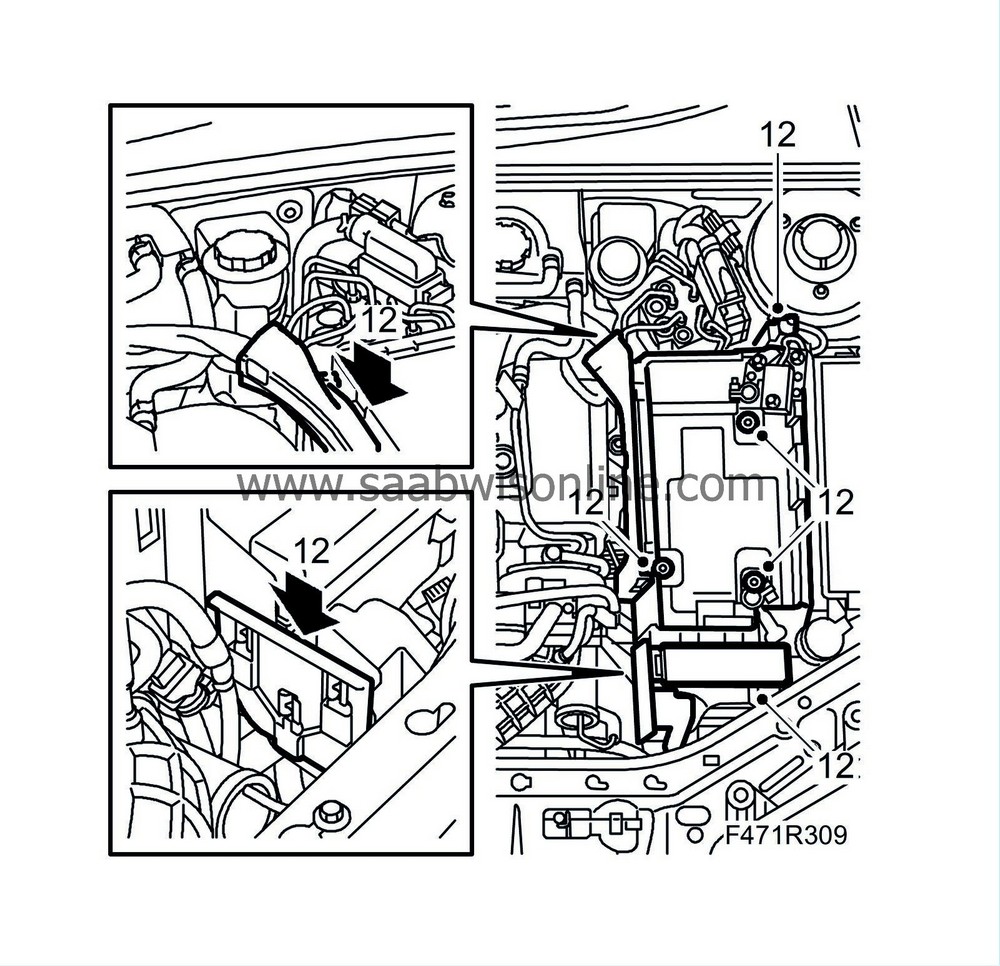
| 12. |
V6:
Fit the battery tray.
|
|
| 13. |
V6:
Fit the battery.
|
|
| 14. |
V6:
Carry out
Measures after disconnecting the battery
.
|
|


