PRE-RELEASE
Anti-roll bar, RHD, 4WD
| Anti-roll bar, RHD, 4WD |
| To remove |
| 1. |
Place the wheel in a straight forward position using cloth tape on the instrument panel, for example.
|
|
| 2. |
Remove the upper bumper shell attachments.
|
|
| 3. |
Hang two
83 95 212 Straps
in place over the radiator member and the radiator unit so that they are accessible from below.
|
|
| 4. |
Raise the car.
|
|
| 5. |
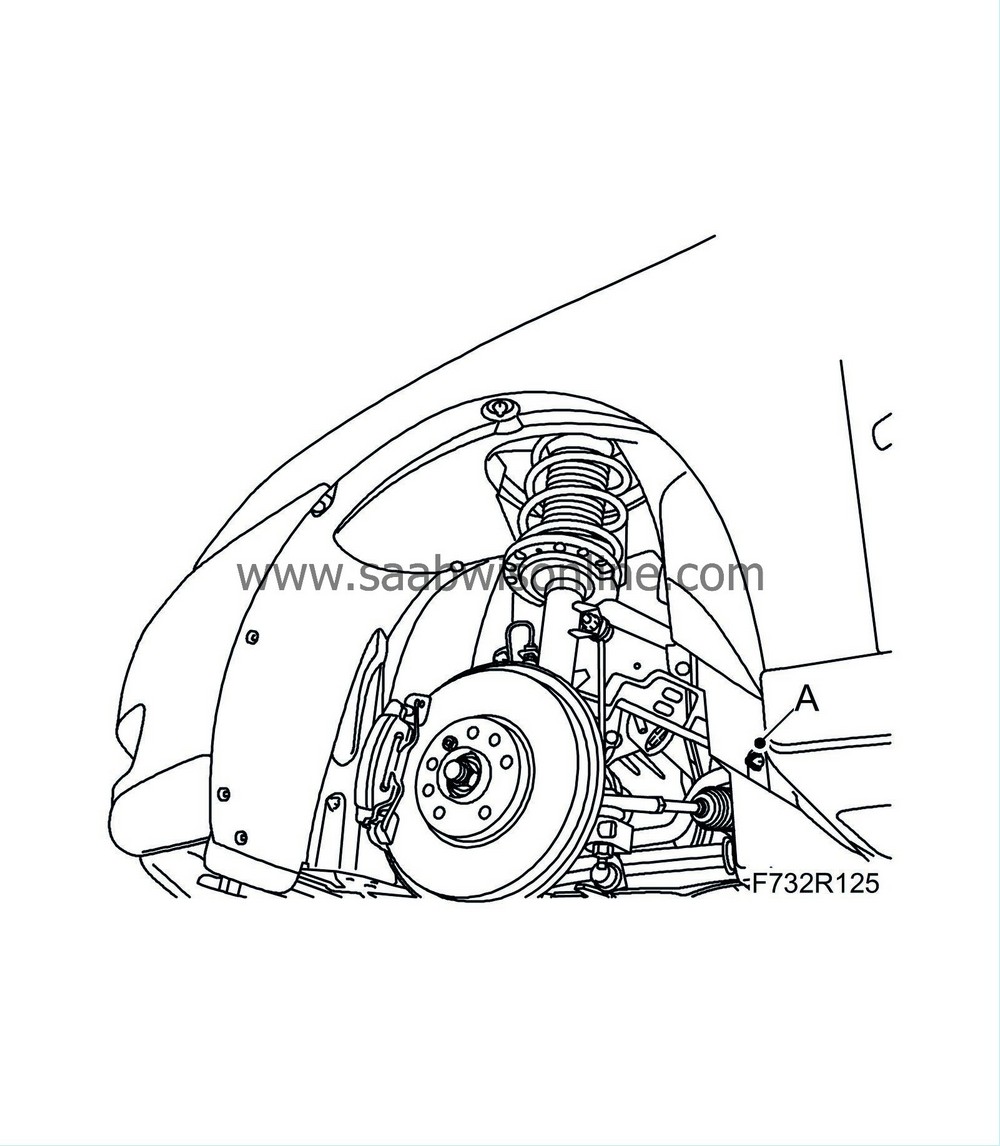
Remove the rear nut (A) from the wing liner on the right-hand side.
|
|
| 6. |
Remove the spoiler shield.
|
|
| 7. |
Bind the radiator unit tightly with the straps.
|
|
| 8. |
Remove the
propeller shaft
.
|
|
| 9. |
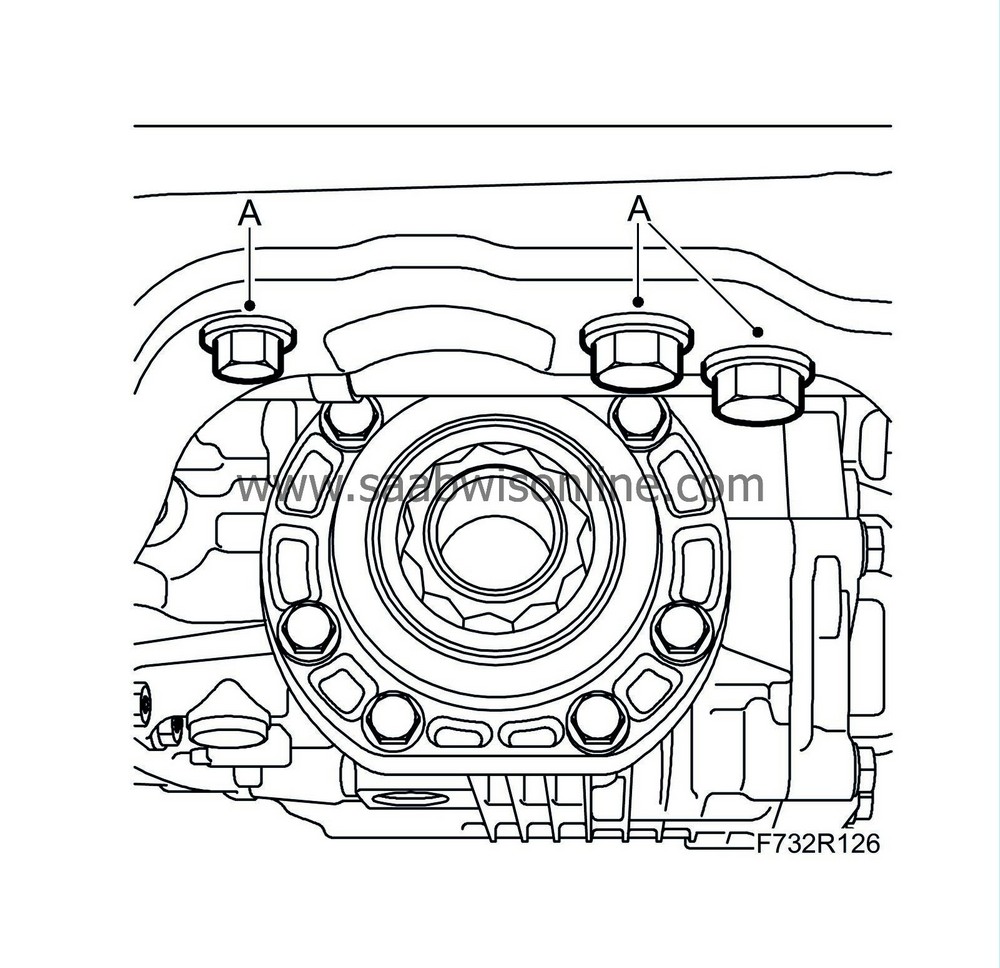
Remove the bolts (A) securing the rear torque rod to the subframe.
|
|
| 10. |
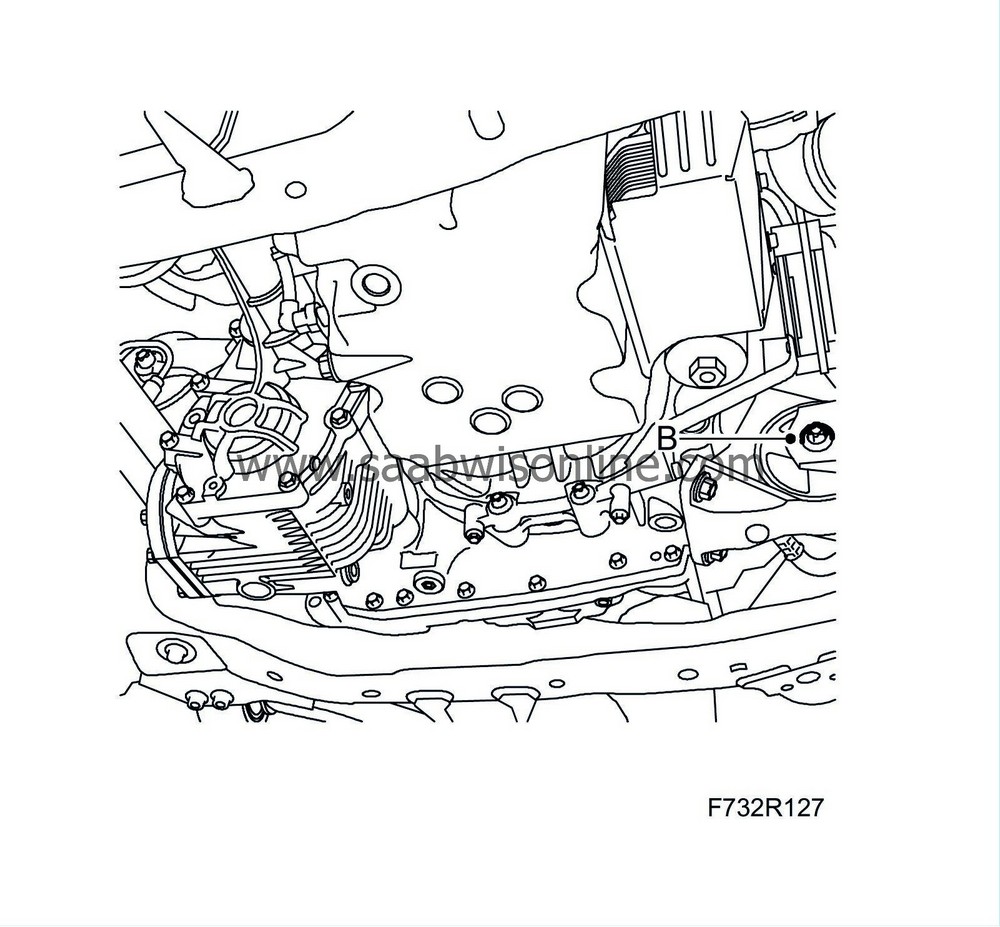
Remove the front torque rod (B).
|
|
| 11. |
Cars with xenon headlights:
Remove the level sensor (C) on the left-hand suspension arm.

|
|
| 12. |
Remove the steering gear from the subframe (D). Look after the nuts and washers. Allow the steering gear to remain suspended.
|
|
| 13. |
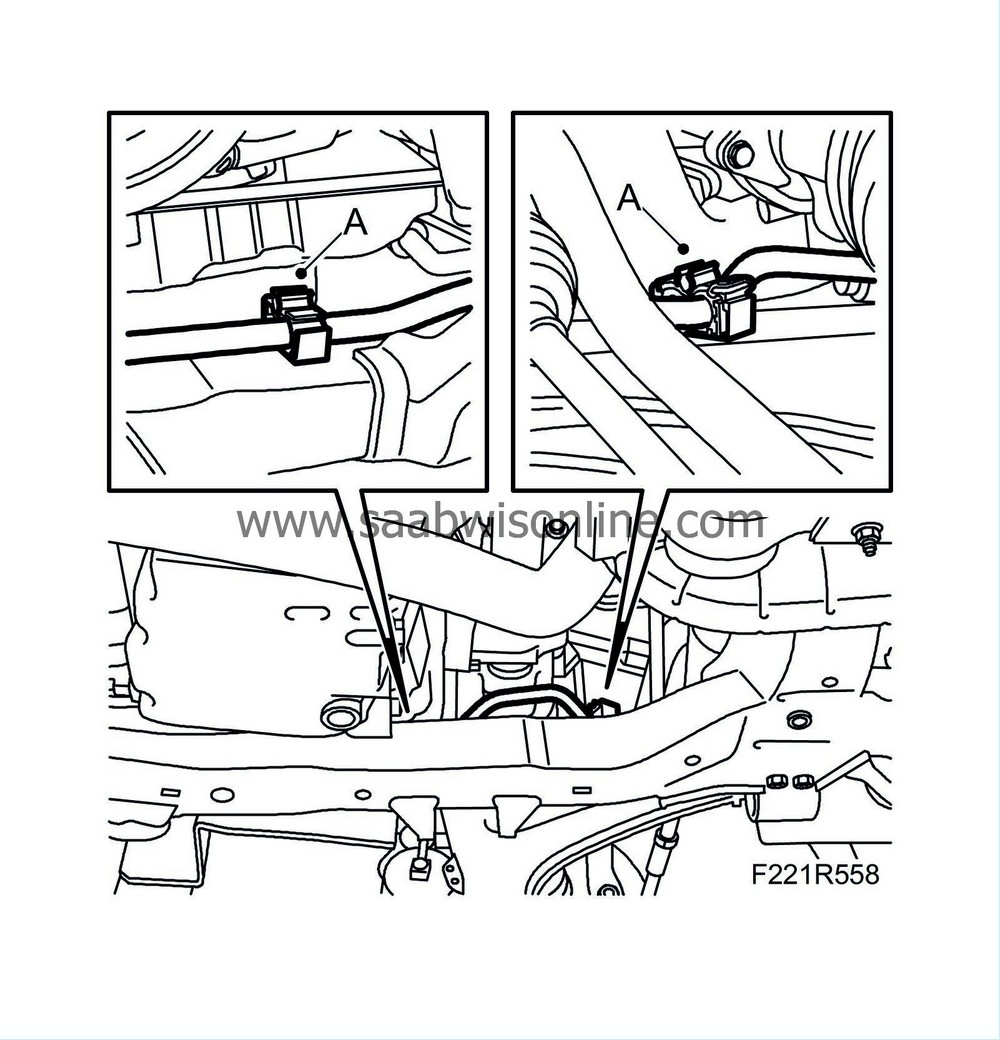
Open the clips (A) that secure the power steering pipe to the subframe.
|
|
| 14. |
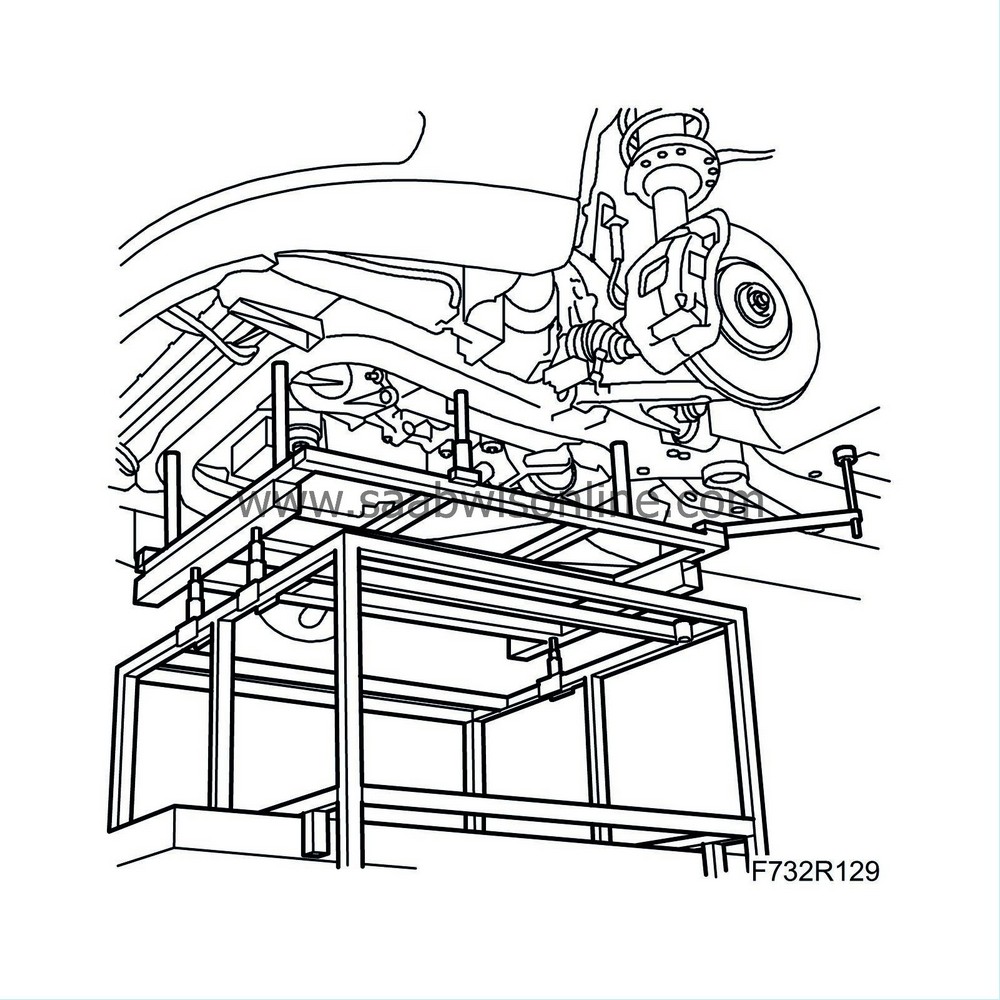
Position
83 95 311 Trolley lift
with
83 94 801 Parent fixture
and
83 96 137 Centring tool, subframe/body
.
|
|
| 15. |
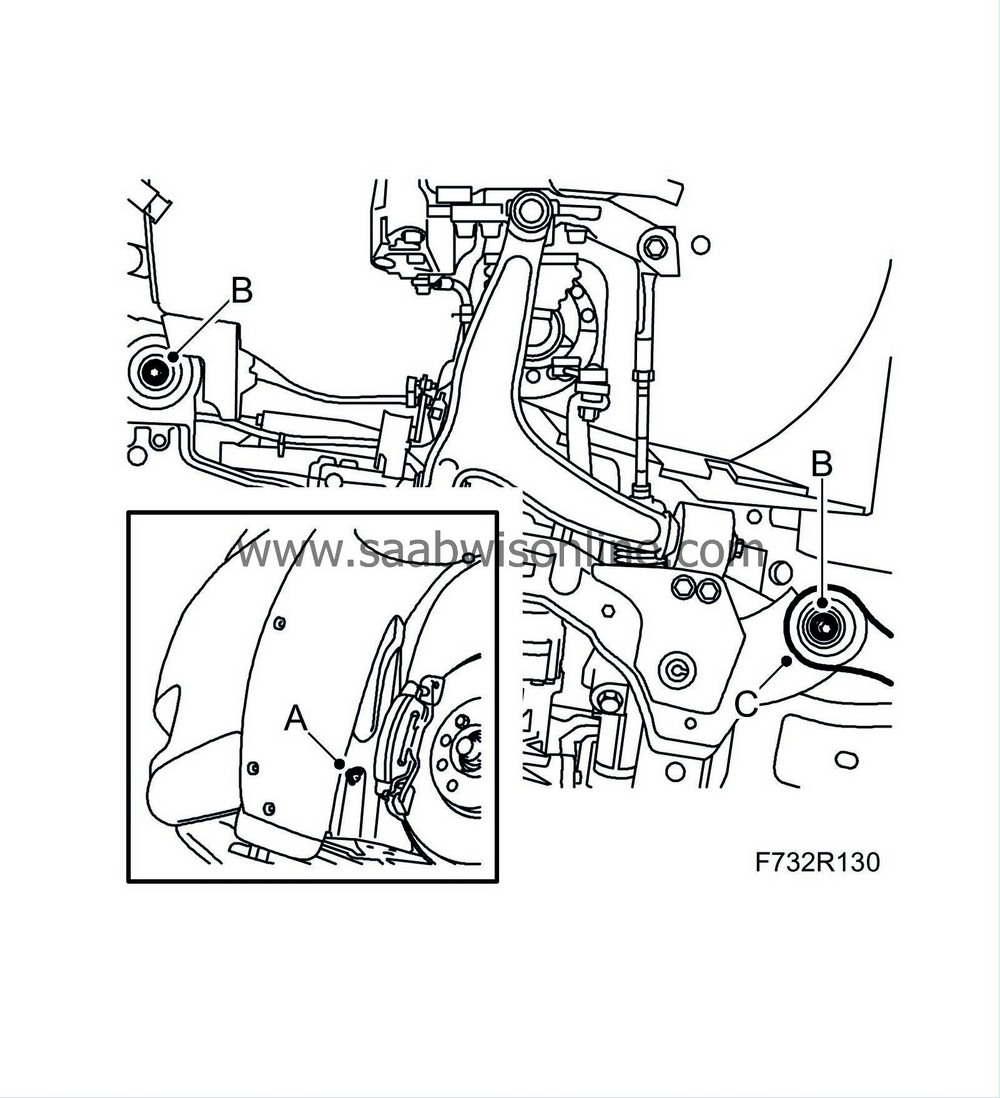
Remove the front part of the wing liner (A) and fold away slightly.
|
|
| 16. |
Remove the subframe bolts (B) on both sides. Remove the stays (C) from the body.
|
|
| 17. |
Lower the subframe slightly.
|
|
| 18. |
Remove the anti-roll bar (D) from the subframe.

|
|
| 19. |
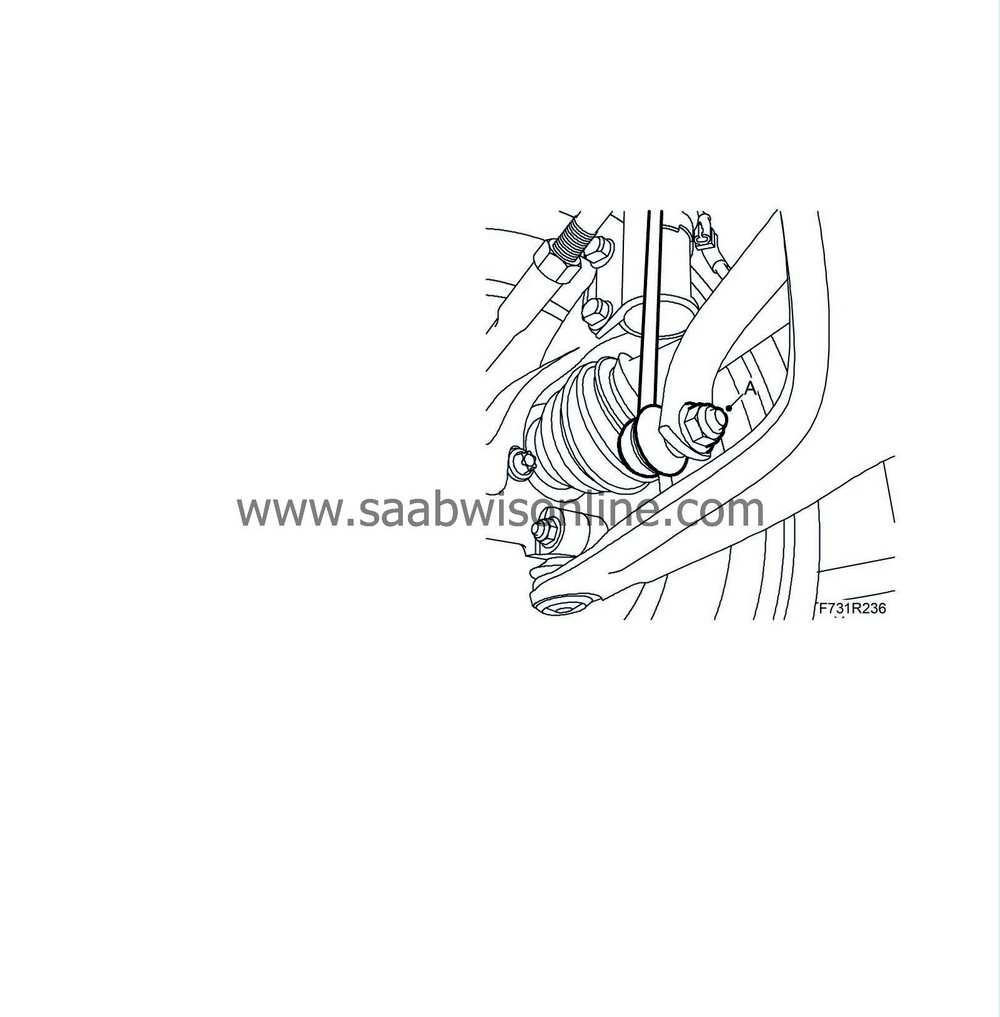
Remove the anti-roll links (A) from the anti-roll bar. Hold with a 17 mm open, thin wrench.
|
|
| 20. |
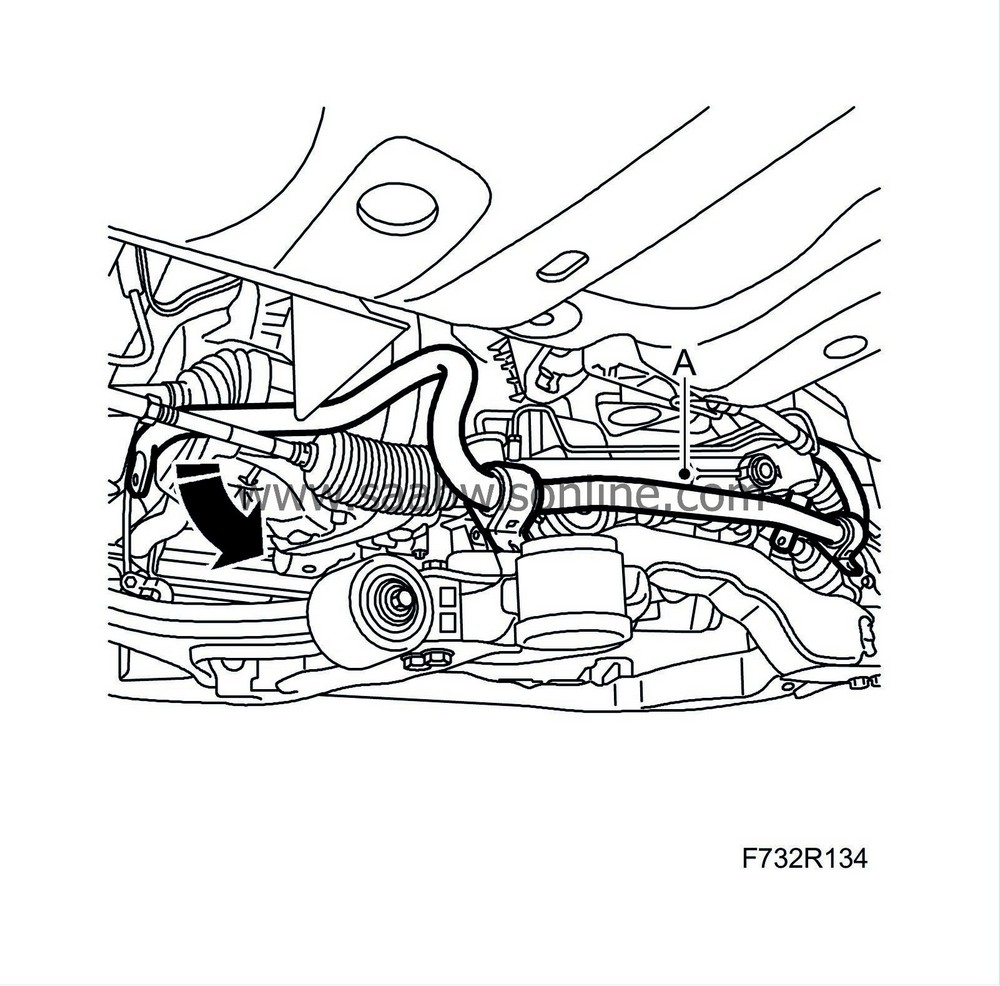
Lower the subframe until the anti-roll bar can be guided out, left side first (A).
|
|
| To fit |
| 1. |
Insert the anti-roll bar, right side first (A).

|
|
| 2. |
Fit the anti-roll links (A) to the anti-roll bar. Hold with a 17 mm open, thin wrench.

|
|
| 3. |
Fit the anti-roll bar (D) to the subframe.

|
|
| 4. |
Lift up the subframe to the body. Insert the subframe and stay bolts on both sides. Check that the radiator pins are correctly housed in the front axle member retainer on both sides. Apply Vaseline to the rubber guides.
|
|
| 5. |
Lift up the subframe with
83 95 311 Trolley lift
with
83 94 801 Parent fixture
and
83 96 137 Centring tool, subframe/body
. Fit the tool to the guide holes in the body. Fit the stays (C) and the bolts (B).
Tightening torque 75 Nm +135° (55 lbf ft +135°) 
|
|
| 6. |
Lower and pull away the trolley lift.
|
|
| 7. |
Tighten the rear stay bolts.
Tightening torque 90 Nm +45° (66 lbf ft +45°) |
|
| 8. |
Fit the front part of the wing liner (A).
|
|
| 9. |
Close the clips (A) that secure the power steering pipe to the subframe.

|
|
| 10. |
Fit the steering gear to the subframe (A).

|
|
| 11. |
Cars with xenon headlights:
Fit the level sensor (C) on the left-hand suspension arm.
|
|
| 12. |
Fit the front torque rod (B).

|
|
| 13. |
Fit the bolts (A) securing the rear torque rod to the subframe.
Tightening torques: M10 65 Nm (48 lbf ft) M12 120 Nm (88 lbf ft) 
|
|
| 14. |
Fit the
propeller shaft.
|
|
| 15. |
Remove the radiator unit straps.
|
|
| 16. |
Fit the spoiler shield.
|
|
| 17. |
Lower the car to the floor.
|
|
| 18. |
Fit the upper bumper shell attachments.
|
|


