Fuel level sensor, (46LH), 4WD
|
|
Fuel level sensor, (46LH), 4WD
|
 Warning
|
|
Dismantling the fuel reservoir (incl. fuel level sensor) involves work on the car's fuel system. The following points must therefore be observed in conjunction with these measures:
|
|
•
|
Ensure good ventilation! If there is approved ventilation for extraction of fuel fumes then this must be used.
|
|
•
|
Wear protective gloves! Prolonged exposure of the hands to fuel can cause irritation of the skin.
|
|
•
|
Have a fire extinguisher suitable for flammable liquids and electrical equipment at hand! Be aware of the risk for sparks, i.e. in connection with circuit breaking, short-circuiting, etc.
|
|
•
|
Absolutely No Smoking!
|
|
•
|
Wear protective glasses.
|
|
|
|
|
|
|
Important
|
|
Be particulary observant regardning cleanliness when working on the fuel system. Loss of function may occur due to very small particles. Prevent dirt and grime from entering the fuel system by cleaning the connections and plugging pipes and lines during disassembly. Use 82 92 948 Plugs, A/C system assembly. Keep components free from contaminants during storage.
|
|
|
|
1.
|
Remove
Fuel tank, 4WD
.
|
Important
|
|
Take care when releasing the locking mechanism on the connector so as not to damage the connector. Pull the halves straight apart to avoid bending the pins. For further information regarding connectors, refer to
Connectors, handling and inspection
.
|
|
|
|
|
2.
|
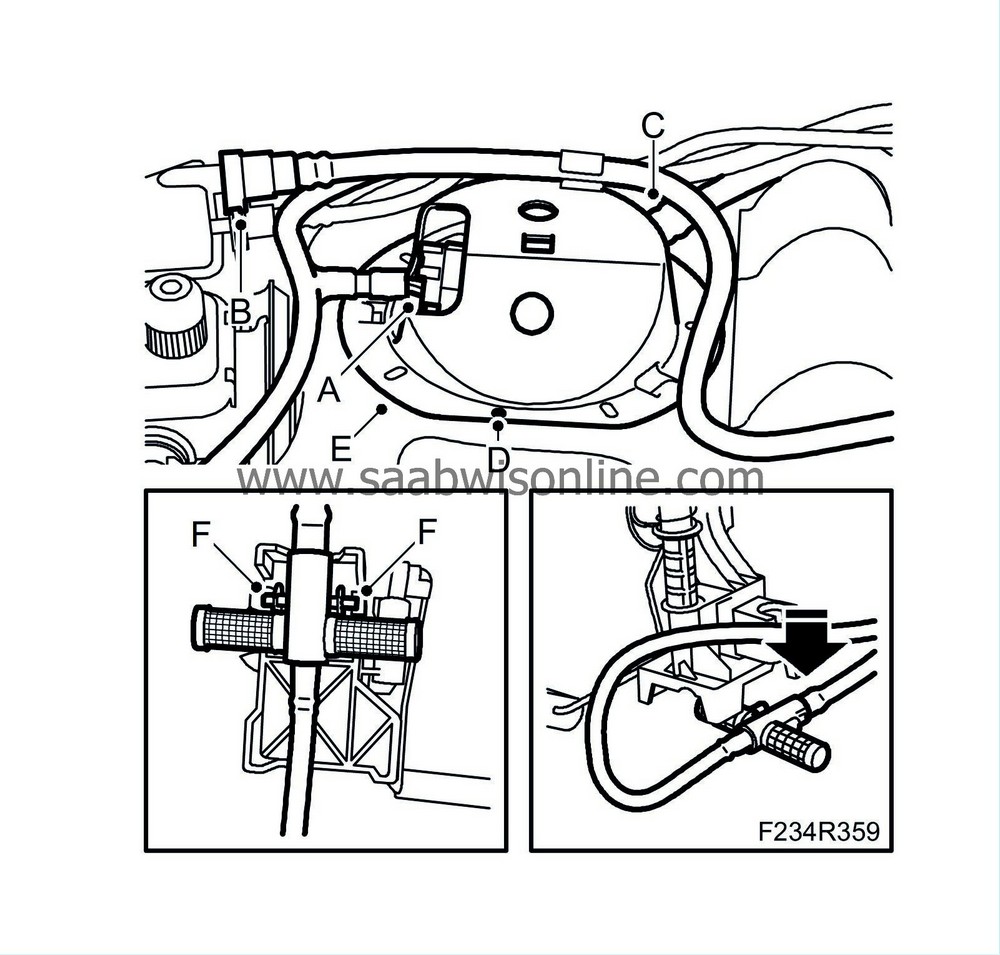
Remove the connector (A) from the fuel level sensor, the quick coupling (B) to the carbon canister and the quick coupling (C) to the fuel level sensor.
|
|
3.
|
Put a plate as protection between the rivet and the tank. Carefully drill out the head (D) of the rivet using a drill, 8 mm, and push out the rivet.
|
|
4.
|
Remove the protective cover (E), use a 1/2" drawbar handle and turn counterclockwise.
|
|
5.
|
Remove the fuel level sensor by removing the circlip, then turn counterclockwise. Use tool
EN-49232 Removal/fitting tool, fuel tank
. Lift carefully, watch out for the float. Note how the sensor's bracket (F) is snapped over the venturi unit.
|
|
6.
|
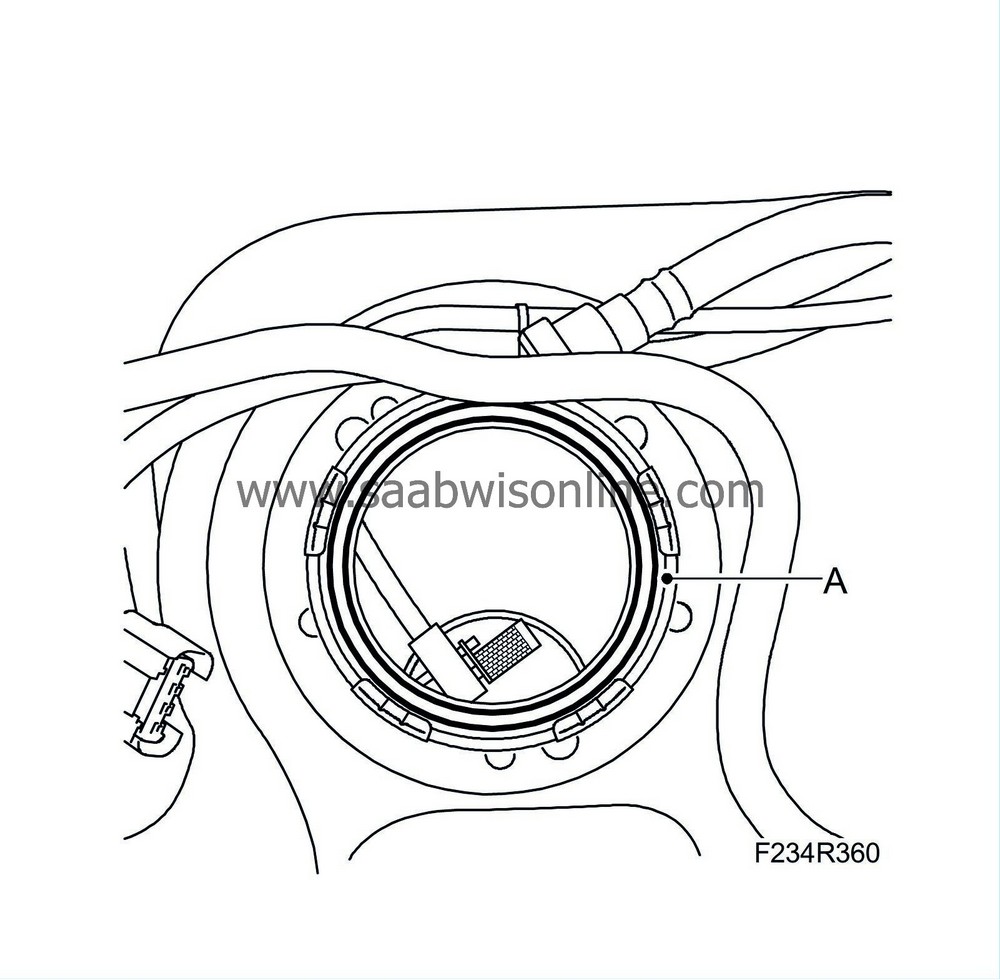
Remove the seal (A).
|
|
2.
|
Insert the fuel level sensor in the tank and snap on the sensor's bracket (F) in the right position.
|
|
4.
|
Fit the protective cover (E) on the fuel level sensor circlip, turn clockwise. Fit a new rivet (D) to lock the protective cover.
|
|
5.
|
Fit the connector (A) to the fuel level sensor, the quick coupling (B) to the carbon canister and the quick coupling (C) to the fuel level sensor.
|


