Checking and adjusting the basic charge pressure, A20NFT/LHU
|
|
Checking and adjusting the basic charge pressure, A20NFT/LHU
|
|
1.
|
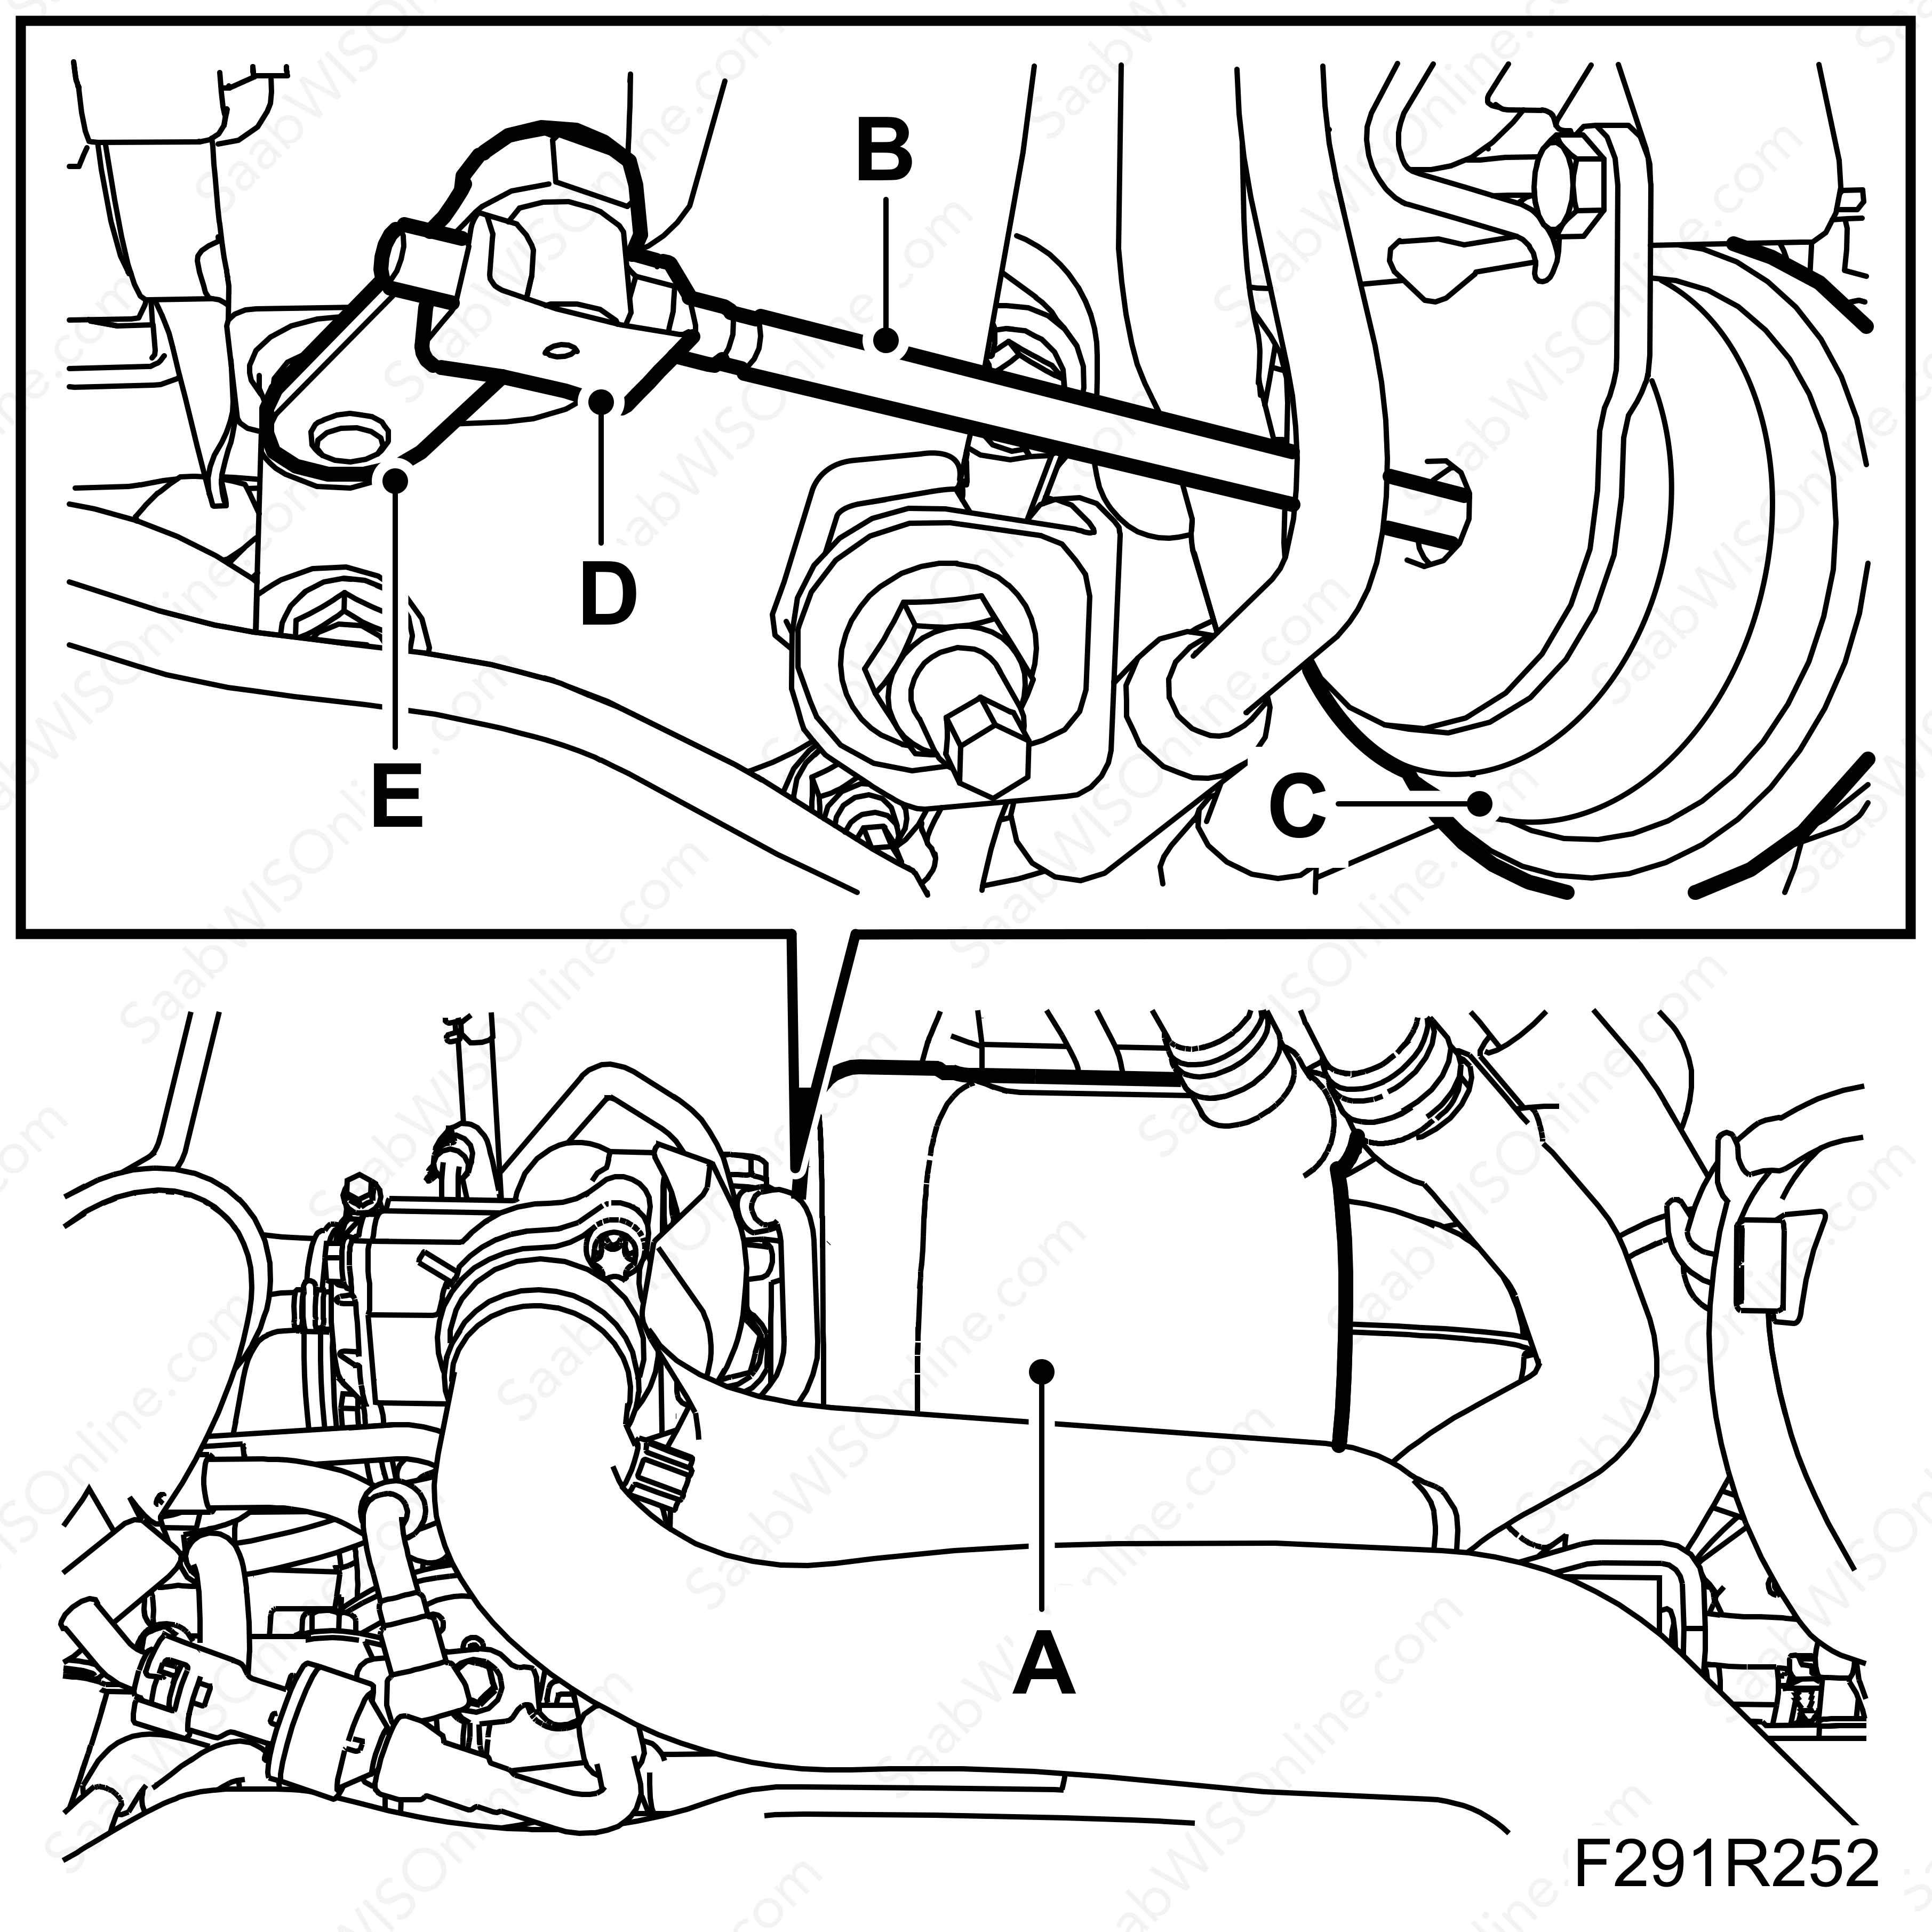
Remove the turbocharger heat shield (A).
|
|
2.
|
Detach the hose from the diaphragm box (C).
|
|
3.
|
Secure the control arm (E), otherwise there is a risk of the control arm (E) falling over.
|
|
4.
|
Remove the control arm's (E) retaining clip (D) and undo the lock nuts.
|
|
5.
|
Move the control arm (E) on the charge pressure regulator towards "Closed" position and adjust the control rod (B) so that a pretension of 2mm is achieved.
|
|
7.
|
Pump up the pressure carefully and read off the pressure on the pressure gauge just as the control rod (B) starts to move (approx. 1 mm). The pressure should be 0.25 - 0.27 bar.
|
|
8.
|
If the pressure is too low, shorten the rod (B) until the correct pressure is obtained.
|
|
10.
|
Remove the pressure gauge and pump.
|
|
11.
|
Replace the hose on the diaphragm box (C).
|
|
12.
|
Fit the turbocharger heat shield (A).
|
|
13.
|
Carry out charge air adaptation:
|
|
|
13.1.
|
Run the car to heat up the engine.
|
|
|
13.2.
|
Accelerate full throttle at 2000 rpm a few times. The time the engine speed is in the range 2000-4000 rpm must exceed 2 seconds.
|
Note
|
|
Charge air adaptation must be carried out in as high a gear as possible. If charge air adaptation is not carried out, the customer must be made aware that engine torque may fluctuate slightly the first few times during hard acceleration.
|
|


