PRE-RELEASE
A-pillar, upper section, complete, 4D/5D
| A-pillar, upper section, complete, 4D/5D |
Some weld joints on the car may be MIG brazed, with brazing material of bronze wire. An MIG braze can be identified by its yellow colour. Always replace an MIG braze with another MIG braze.
|
|||||||
| To remove |
| 1. |
Remove the
Roof.
|
|
| 2. |
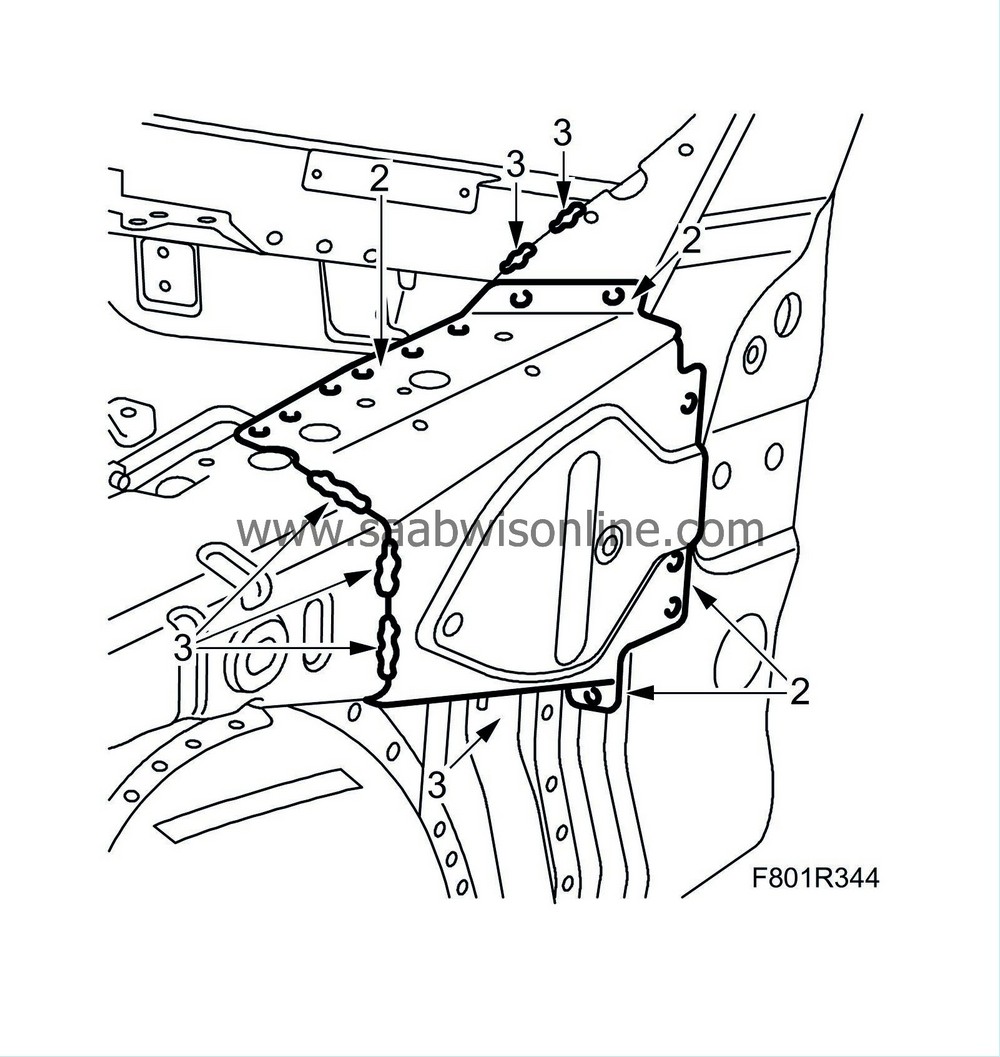
Drill out the spot welds. Drill out the inner welds only so that the hinge's nut piece follows.
|
|
| 3. |
Grind away the seam welds and all-welds. Note that the welds could be MIG brazed.
|
|
| 4. |
Knock loose the reinforcement.
|
|
| 5. |
Position a door opening support between the floor and front roof member so that the roof member does not sag when the A-pillar is removed.
|
|
| 6. |
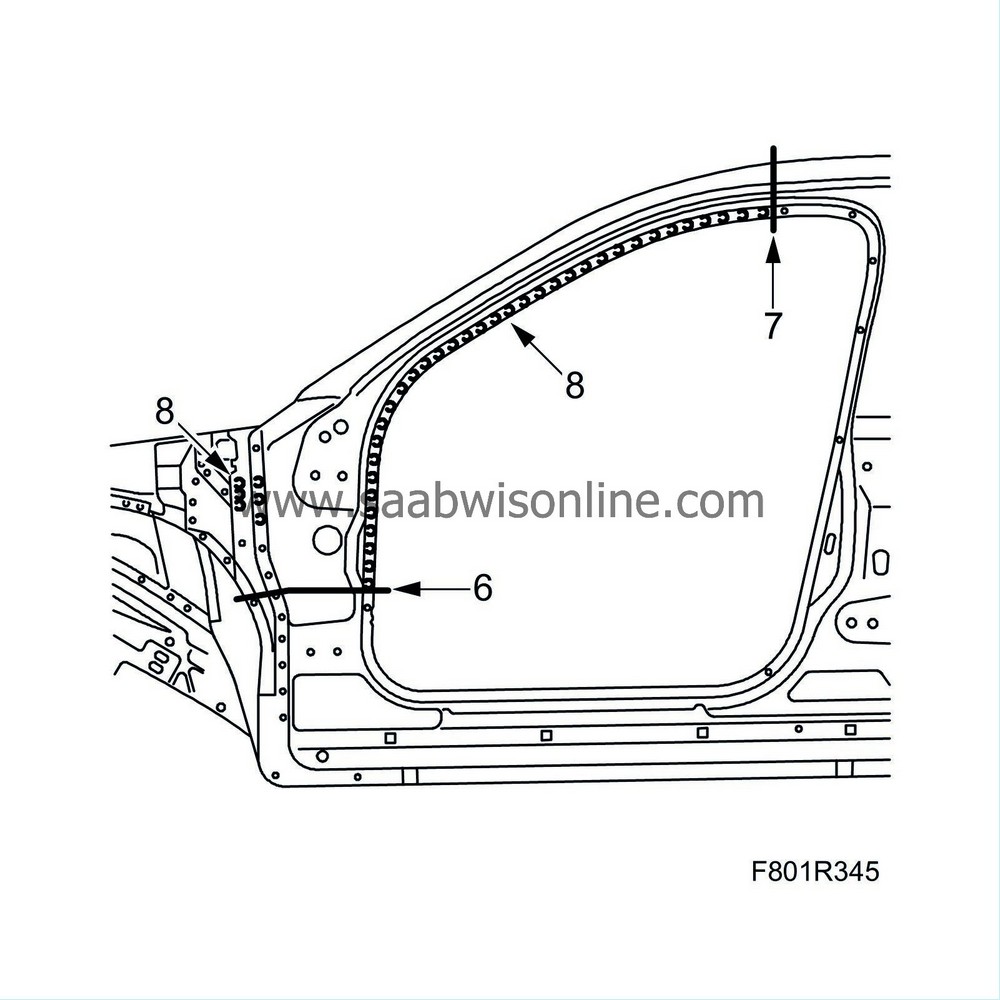
Cut the front of the sill as illustrated. Cut 40 mm above the measurement point. Cut through both plates.
|
|
| 7. |
Cut the outer, upper A-pillar as marked. Cut at the measurement point.
|
||||||||||
| 8. |
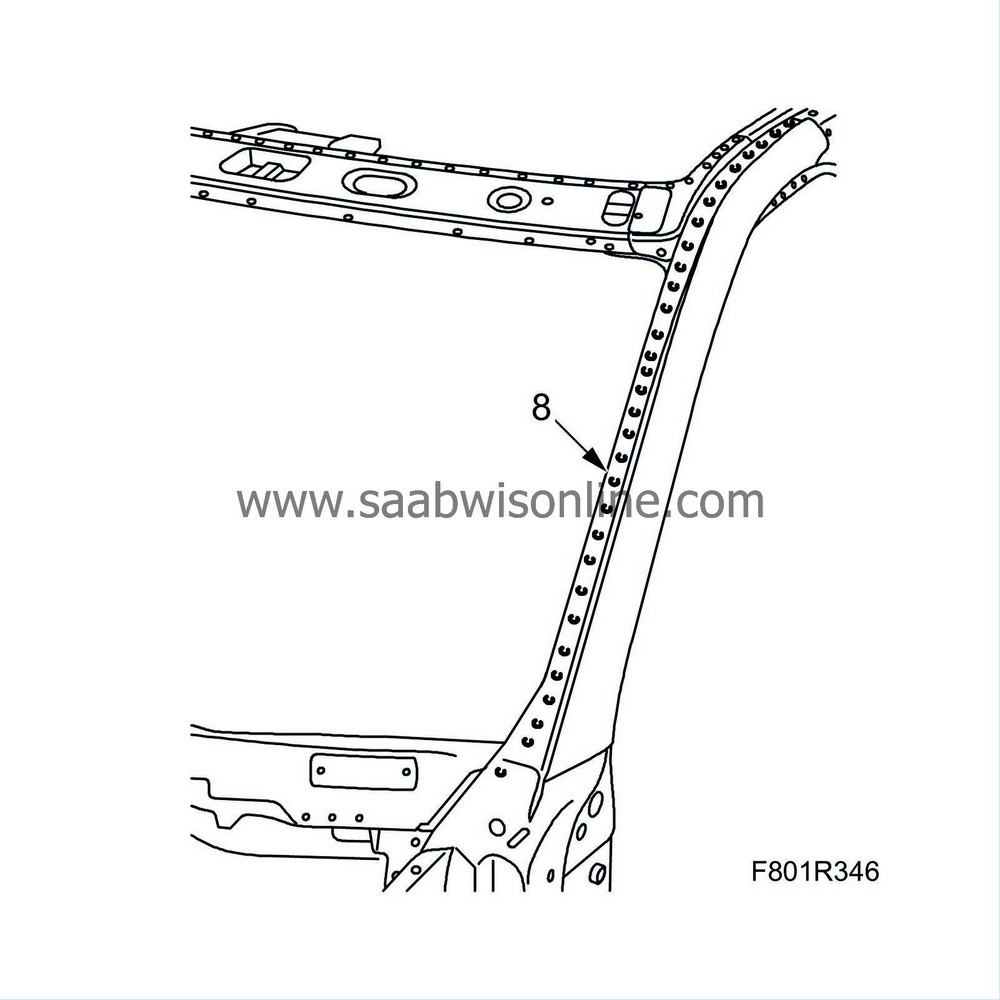
Drill out the spot welds. In some places it is necessary to drill through two plates to free the reinforcement.
|
|
| 9. |
Tap off the outer A-pillar.
|
|
| 10. |
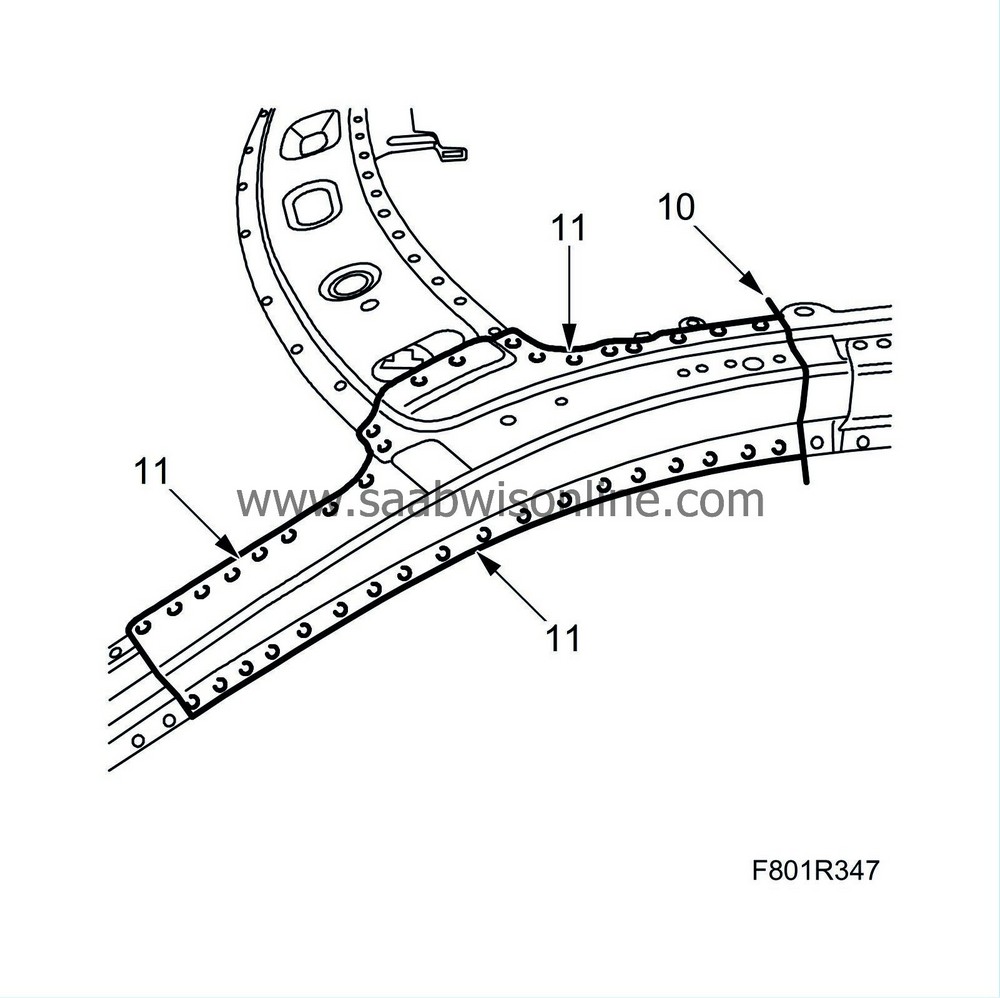
Cut the inner cover plate as illustrated.
|
|
| 11. |
Drill out the spot welds.
|
|
| 12. |
Tap off the cover plate.
|
|
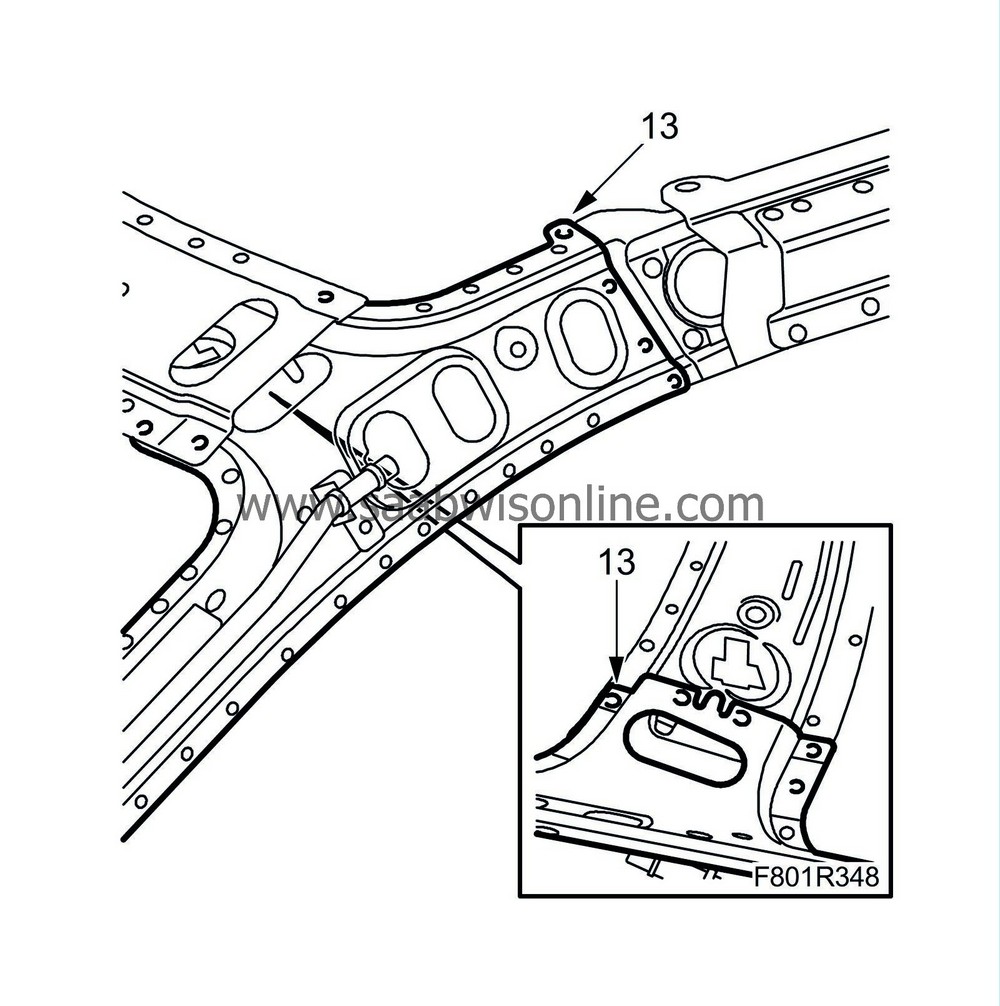
| 13. |
Drill out the spot welds between the A-pillar and roof member and those on the B-pillar.
|
|
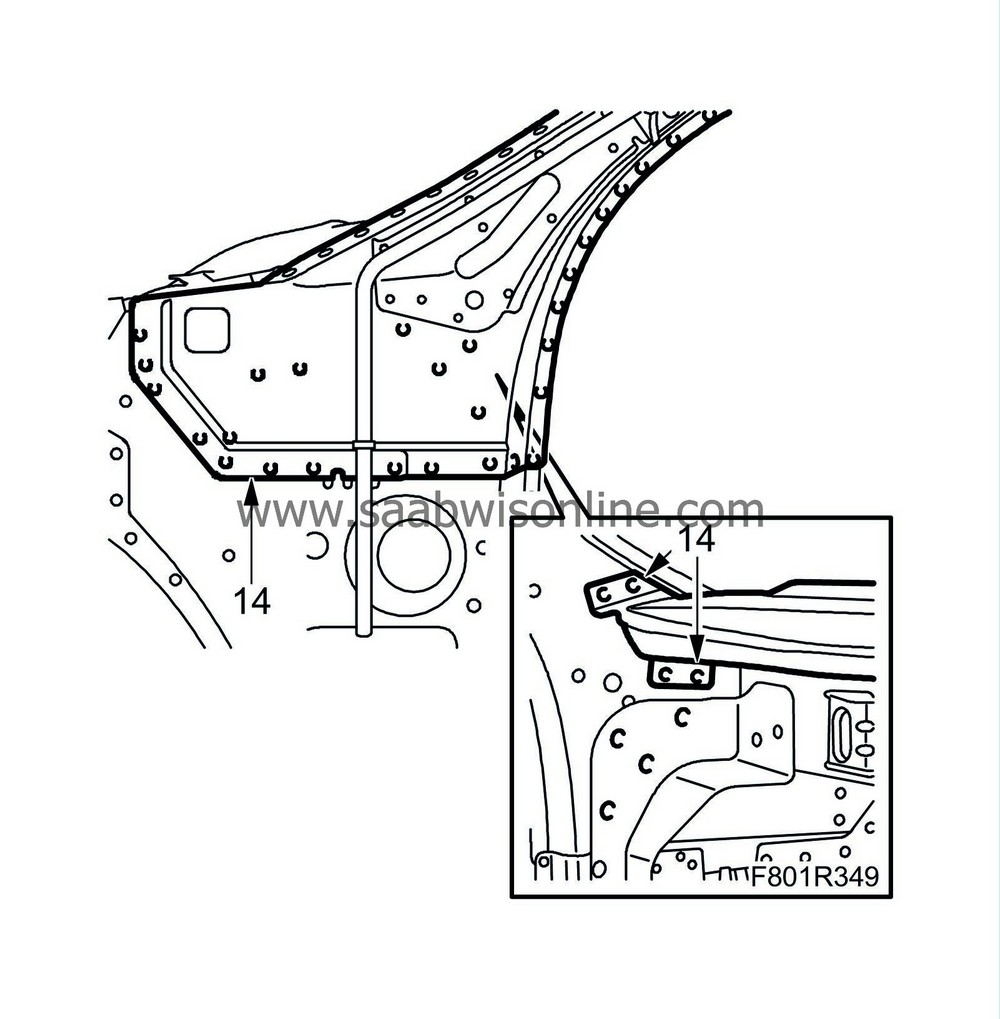
| 14. |
Drill out the spot welds on the lower A-pillar.
|
|
| 15. |
Tap loose the A-pillar.
|
|
| 16. |
Align any deformed plates.
|
|
| 17. |
Grind the surfaces which are to be welded.
|
|
| 18. |
Fit the replacement panel (inner A-pillar) in place and secure with welding clamps.
|
|
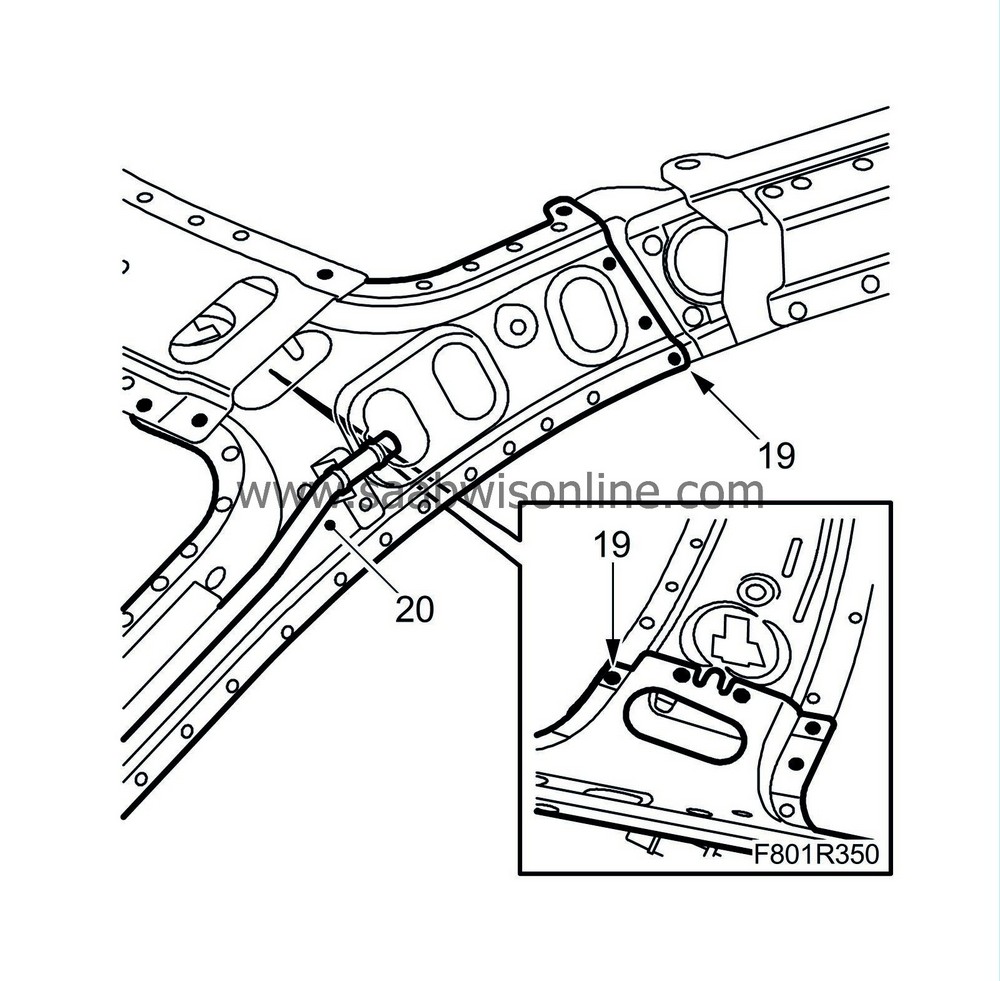
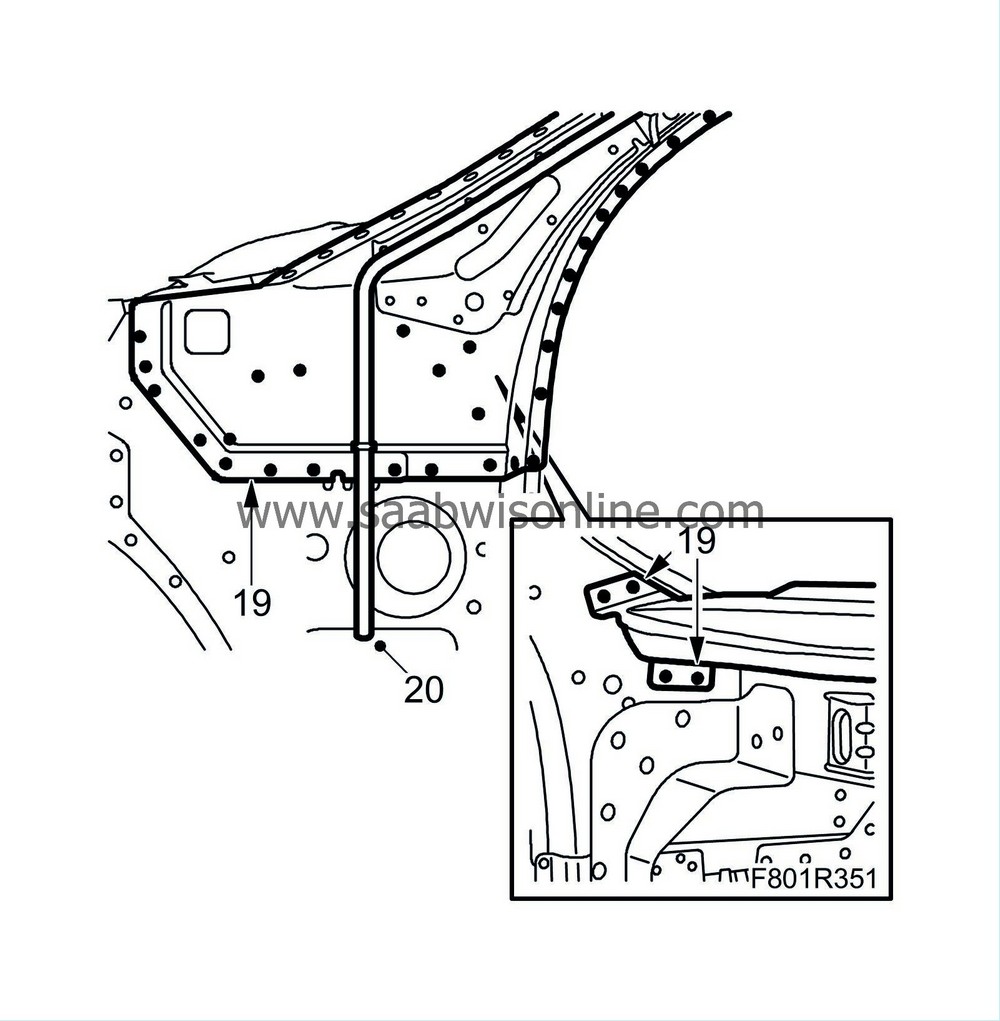
| 19. |
Spot and plug weld the inner A-pillar.
|
|
| 20. |
Cars with sunroof
: Weld on the drain pipe.
|
|
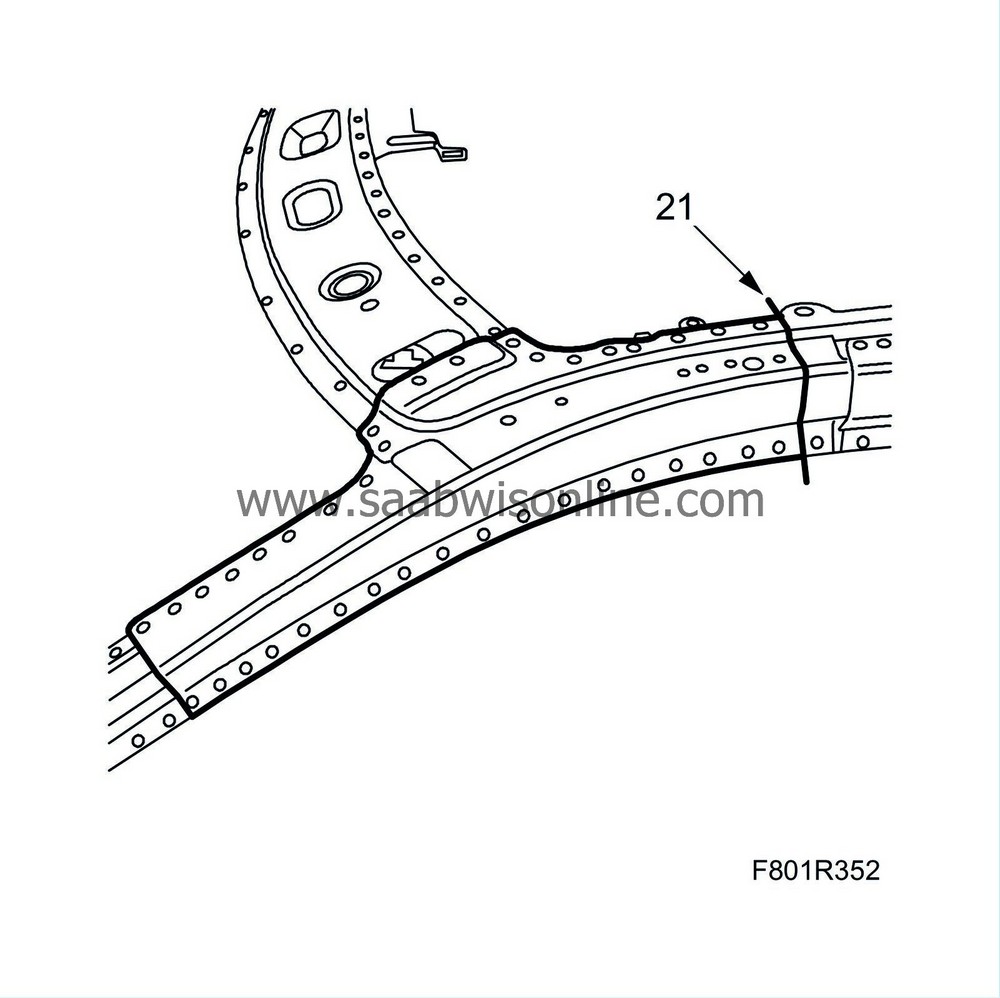
| 21. |
Cut the A-pillar's cover plate so that it matches the previous cut.
|
|
| 22. |
Fit the cover plate and secure with welding clamps.
|
|
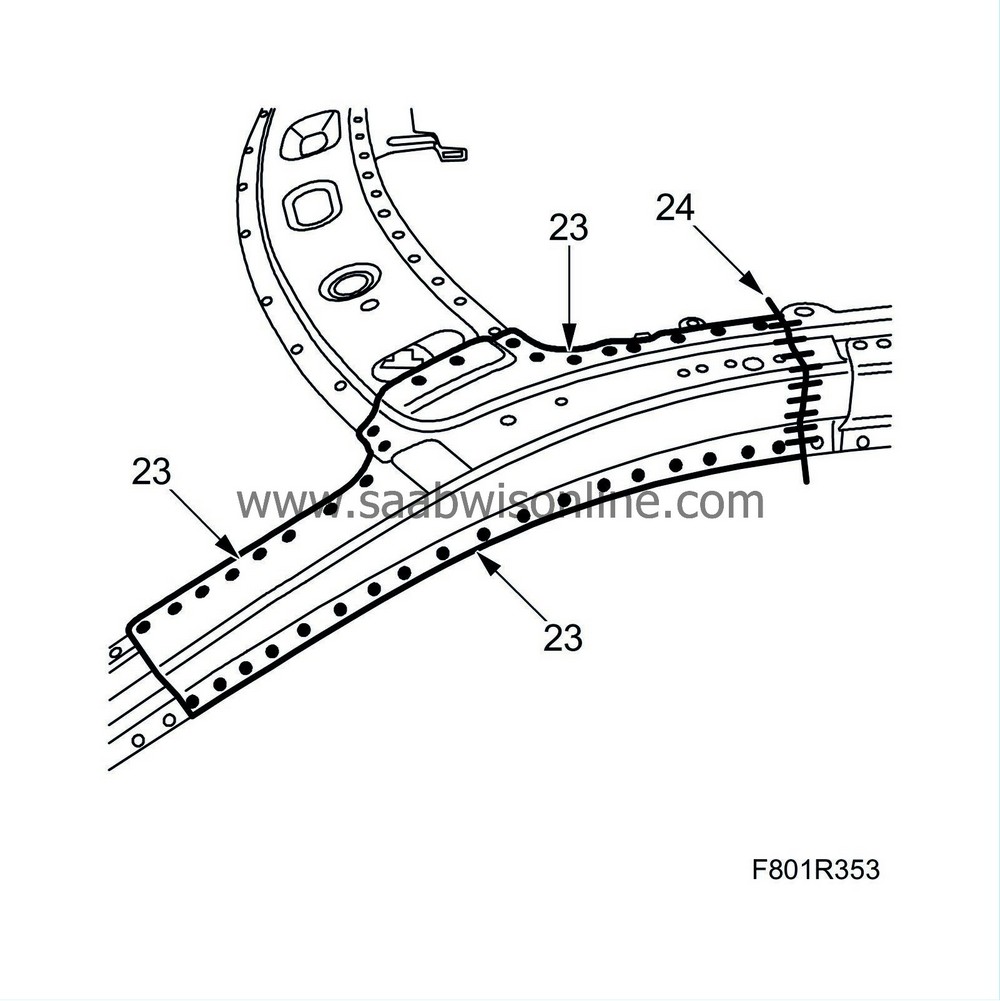
| 23. |
Spot and plug weld the cover plate.
|
|
| 24. |
Seam weld the cover plate.
|
|
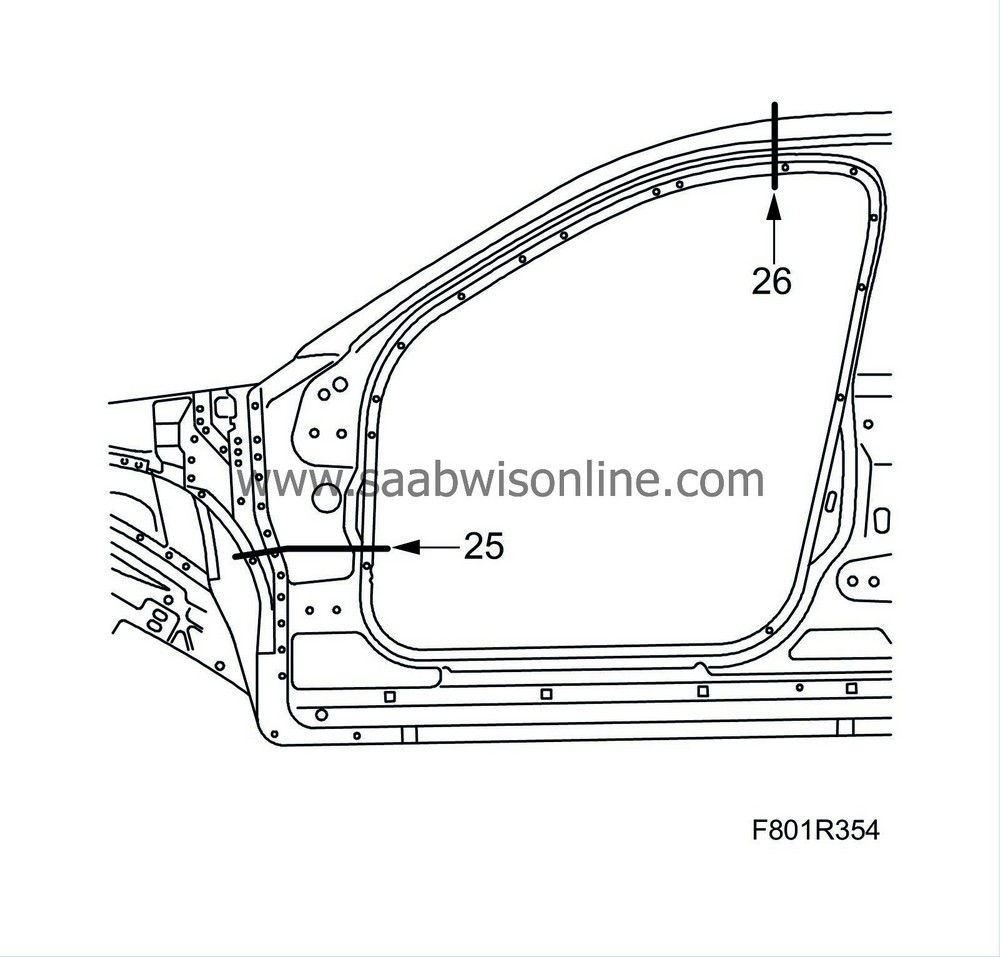
| 25. |
Cut the lower part of the spare part to fit (use front side panel, complete with reinforcement). It is necessary to cut through two sheets of metal.
|
|
| 26. |
Cut the upper part of the A-pillar to match the previous cut.
|
|
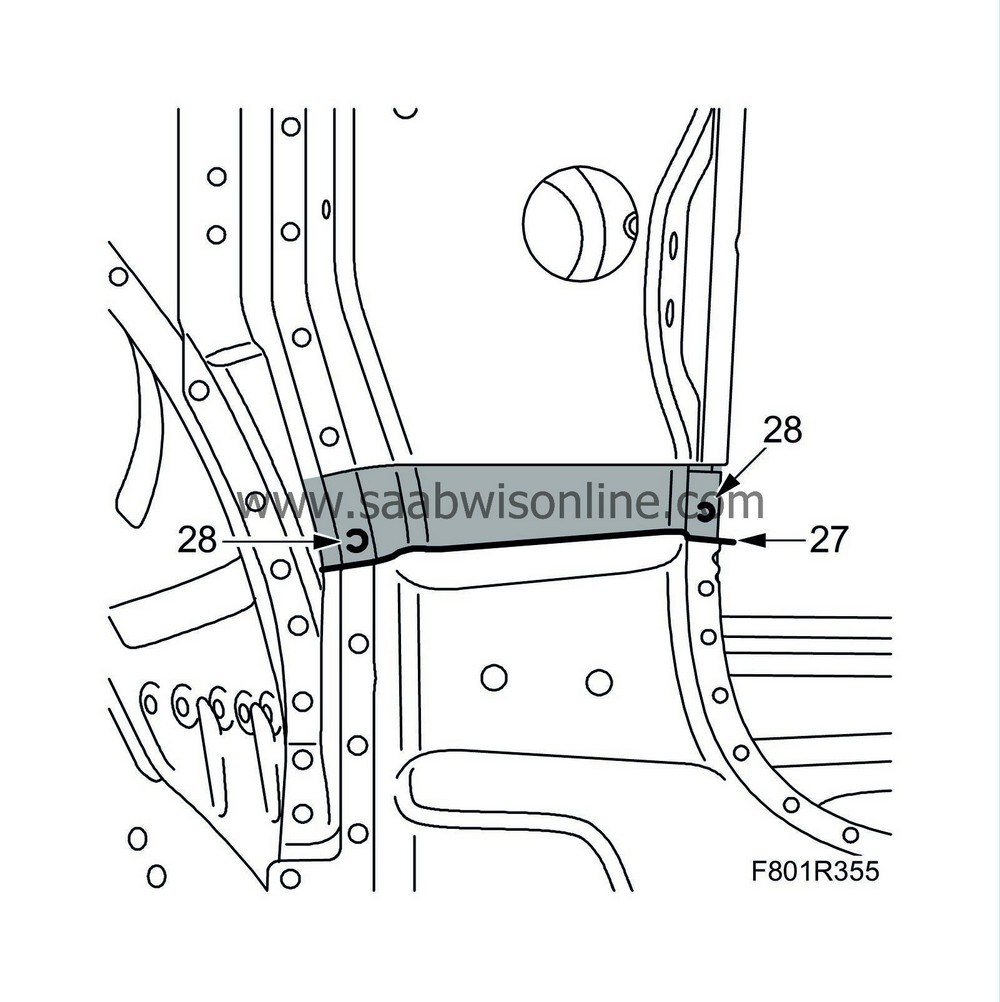
| 27. |
Cut the outer sill panel to enable access to weld the reinforcement. Keep the loose piece.
|
|
| 28. |
Drill out the plug welds on the loose piece.
|
|
| 29. |
Grind the surfaces which are to be welded.
|
|
| 30. |
Apply welding primer to the surfaces to be spot and plug welded. Use Teroson Zink Spray
|
|
| 31. |
Fit the replacement panel in place and secure with clamps. Check and adjust the fit.
|
|
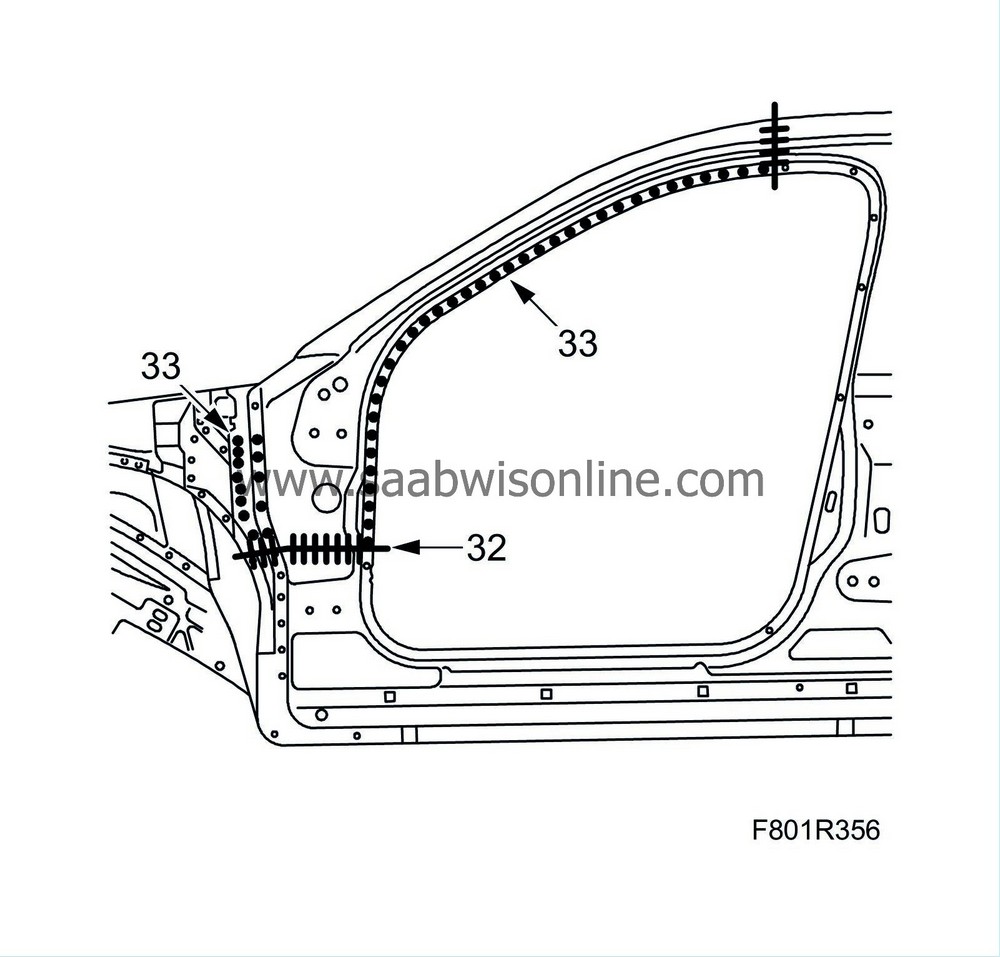
| 32. |
All-weld the sill reinforcement.
|
|
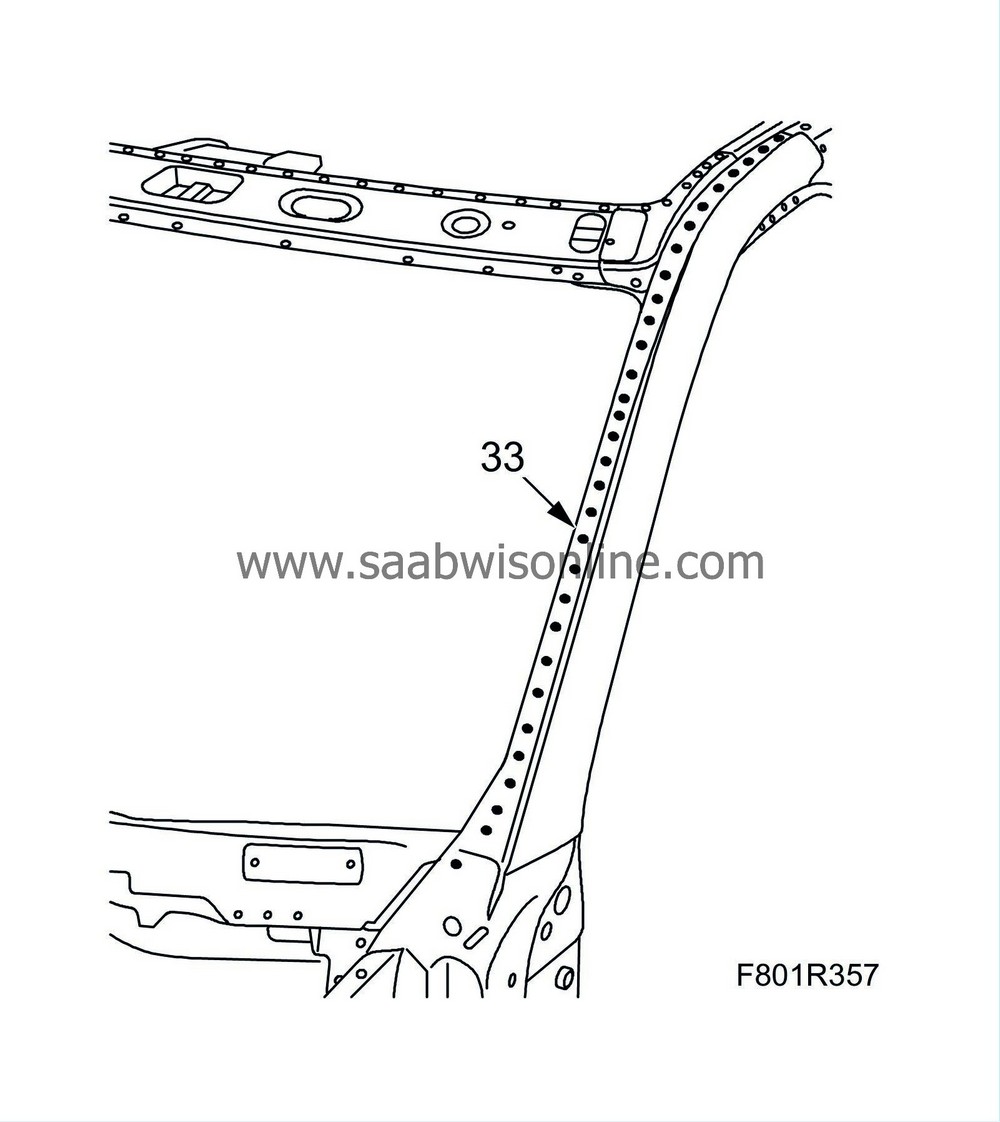
| 33. |
Spot and plug weld the spare part.
|
|
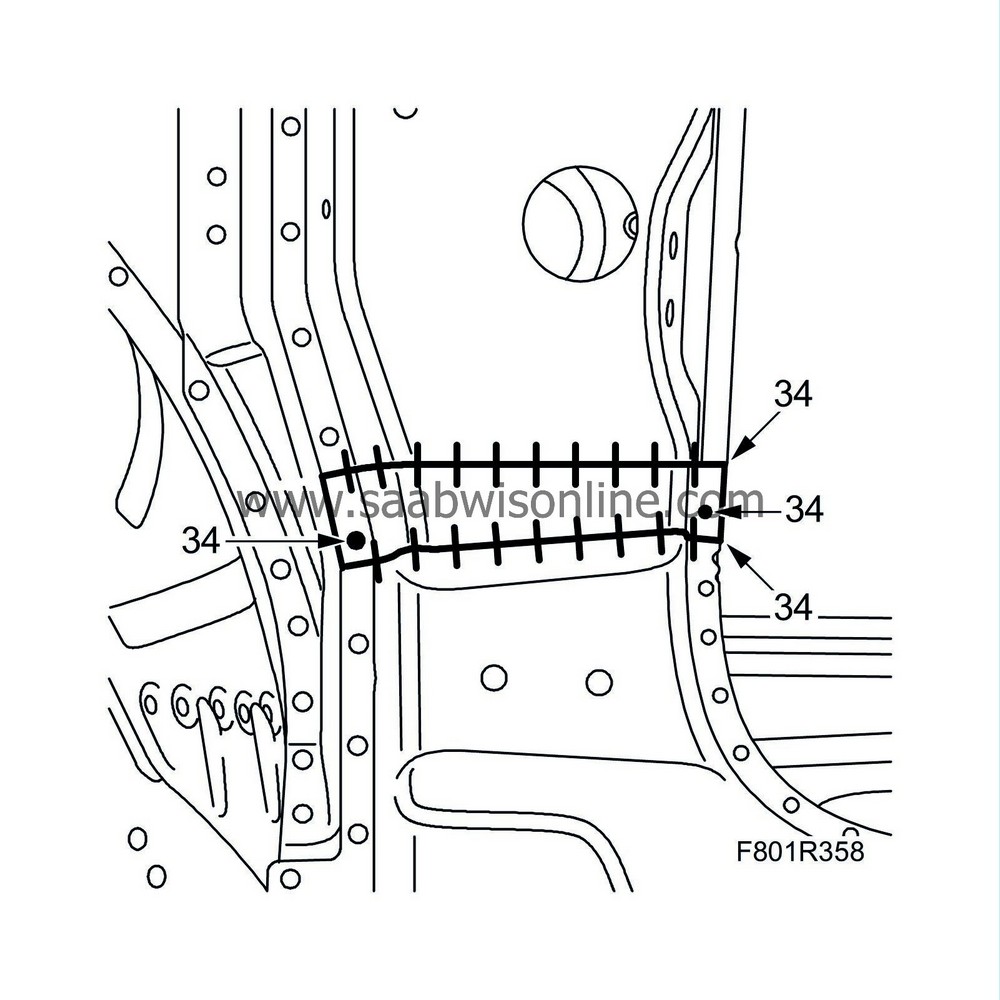
| 34. |
Position the loose piece. All-weld and plug weld the loose piece into place.
|
|
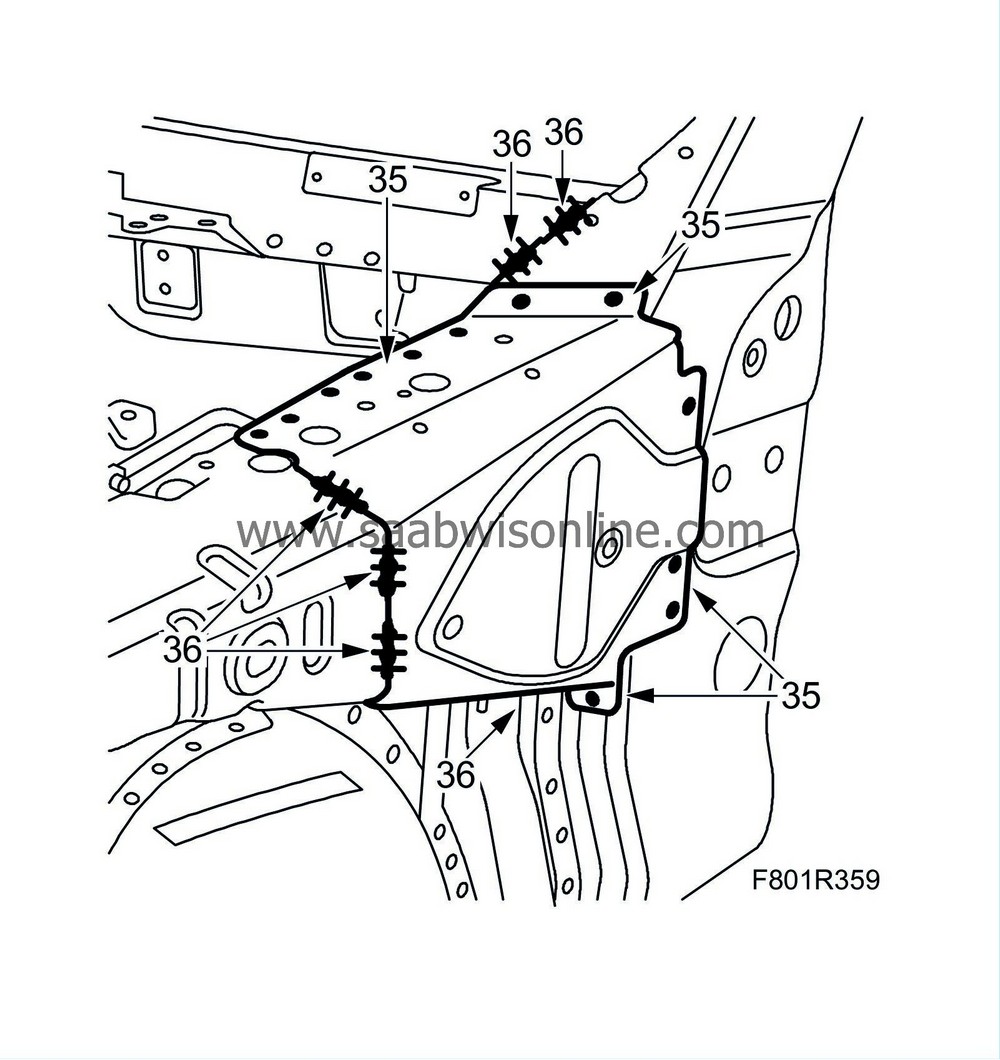
| 35. |
Position the front reinforcement. Spot and plug weld.
|
|
| 36. |
Seam and all-weld as illustrated.
Some cars: Note that the seam welds must be MIG brazed. |
|||||||||
| 37. |
Smooth off the welds.
|
|
| 38. |
Fit the
Roof
.
|
|
| 39. |
Wash away surplus welding primer. Welding primer reduces the adhesion of paint, filler and sealant.
|
|
| 40. |
Apply primer to all bare metal surfaces.
|
|
| 41. |
Seal joints and seams with sealant.
|
|
| 42. |
Apply rust protector after painting. Use Terotex HV 400.
|
|

 Warning

