PRE-RELEASE
Camshaft Cover Cleaning and Inspection
| Camshaft Cover Cleaning and Inspection |
| Cleaning Procedure |
| 1. |
Clean the camshaft covers in solvent.
|
|
| 2. |
Refer to
Safety Glasses Warning
.
Dry the camshaft covers with compressed air. |
|
| Inspection Procedure |
| 1. |
Inspect each camshaft cover for the dents or damage to the exterior. A dented or damaged camshaft cover may:
|
|
| • |
Leak engine oil
|
| • |
Effect crankcase ventilation
|
| • |
Interfere with the camshafts
|
| • |
Interfere with the ignition coil sealing
|
| • |
Allow water or condensation to enter the engine
|
| 2. |
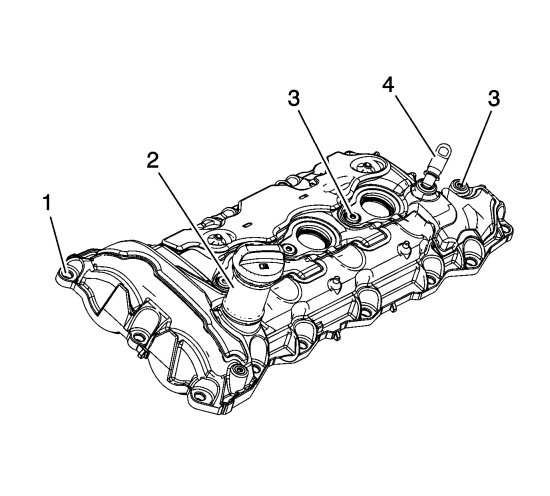
Inspect the exterior of the left camshaft cover for the following conditions:
|
|
| • |
Damage to the camshaft cover bolt holes (1)
|
| • |
Damage to the oil fill tube (2)
|
| • |
Damage to the mounting holes (3) for the ignition coil assembly and fuel injector sight shield ballstud.
|
| • |
Damage to the positive crankcase ventilation (PCV) hose connector (4)-A damaged PCV hose connector is replaceable.
|
| 3. |
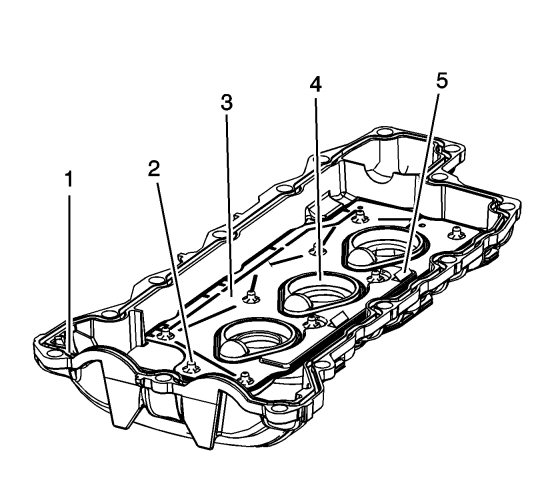
Inspect the interior of the left camshaft cover for the following conditions:
|
|
| • |
Gouges or damage to the camshaft cover sealing groove (1)
|
| • |
Damaged, loose or missing baffle fasteners (2)
|
| • |
Damaged, loose or missing baffle (3)
|
| • |
Gouges or damage to the spark plug shield seal bore (4)
|
| • |
Restrictions to the ventilation system (5)
|
| 4. |
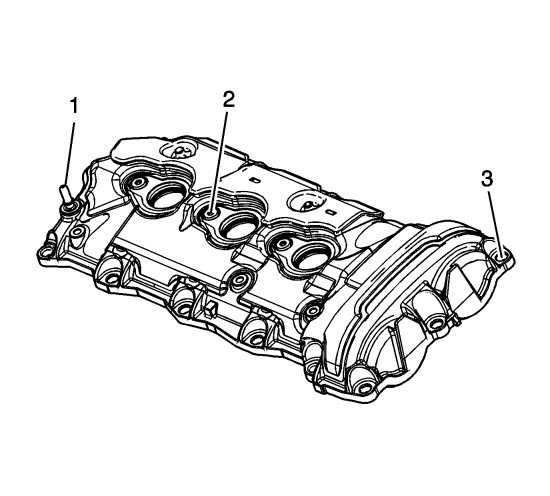
Inspect the exterior of the right camshaft cover for the following conditions:
|
|
| • |
Damage to the PCV orifice (1)-A damaged PCV orifice can be replaced. Refer to PCV Orifice Replacement.
|
| • |
Damage to the mounting holes (2) for the ignition coil assembly
|
| • |
Damage to the camshaft cover bolt holes (3)
|
| 5. |
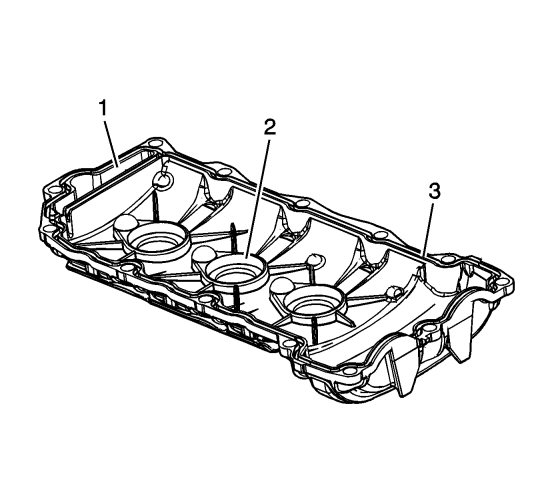
Inspect the interior of the right camshaft cover for the following conditions:
|
|
| • |
Restrictions to the ventilation system (1)
|
| • |
Gouges or damage to the spark plug shield seal bore (2)
|
| • |
Gouges or damage to the camshaft cover sealing groove (3)
|
| 6. |
Repair or replace the camshaft cover or covers as necessary.
|
|
| PCV Orifice Replacement |
| 1. |
Remove the old PCV orifice by gripping the neck of the orifice with pliers and twisting and pulling out of the right camshaft cover. 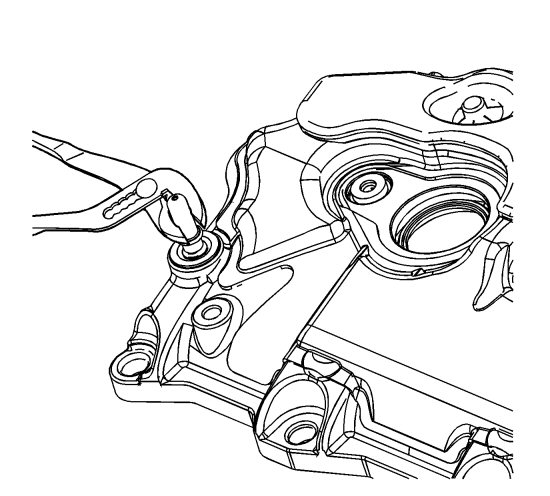
|
|||||||
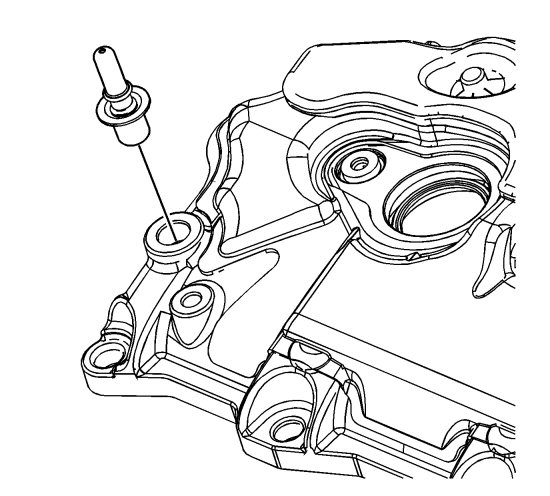
| 2. |
Apply sealant GM P/N 12378521 (Canadian P/N 88901148) or equivalent to the NEW PCV orifice (1).

|
|
| 3. |
Install the NEW PCV orifice into the right camshaft cover. After insertion, twist the PCV orifice in order to eliminate any vertical leak paths in the sealant.
|
|
| PCV Fitting Replacement |
| 1. |
Remove the old PCV fitting. 
|
|||||||
| 2. |
Install the new PCV fitting with a NEW O-ring.
|
|
