PRE-RELEASE
Primary Camshaft Intermediate Drive Chain Tensioner Installation
| Primary Camshaft Intermediate Drive Chain Tensioner Installation |
Special Tools
| • |
EN-45027
Tensioner Tool
|
|
| • |
EN-46112
Tensioner Retraction Pins
|
|
| • |
EN-48383
Camshaft Retaining Tools
|
|
| • |
EN-48589
Crankshaft Rotation Socket
|
|
For equivalent regional tools, refer to Special Tools .
| 1. |
Ensure that the primary camshaft drive chain tensioner (3) is being installed.

|
|
| 2. |
Using the
EN-45027
tool , reset the primary camshaft drive chain tensioner plunger.
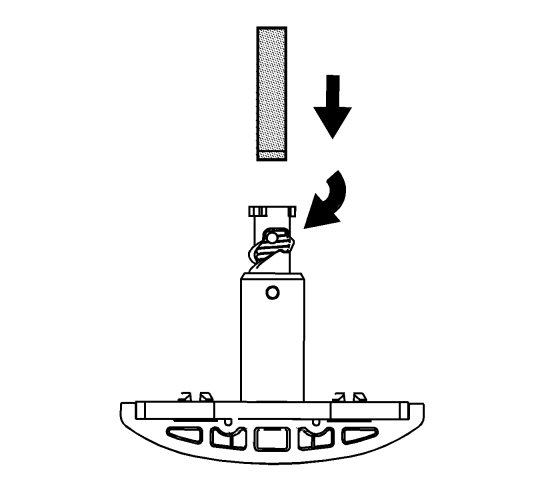
|
|
| 3. |
Install the plunger into the primary camshaft drive chain tensioner body.

|
|
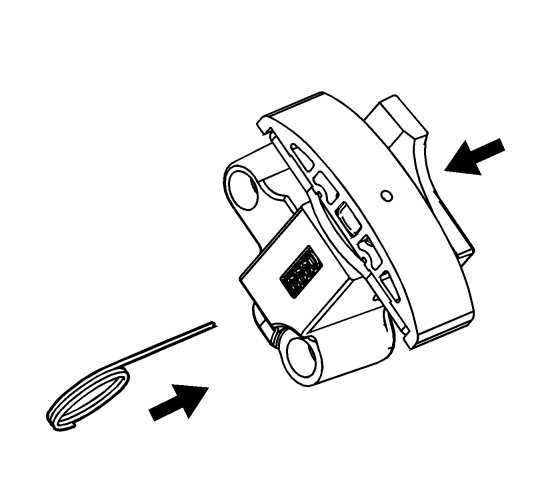
| 4. |
Compress the plunger into the body and lock the primary camshaft drive chain tensioner by inserting the
EN-46112
pins into the access hole in the side of the primary camshaft drive chain tensioner body.
|
|
| 5. |
Slowly release pressure on the primary camshaft drive chain tensioner. The primary camshaft drive chain tensioner should remain compressed.
|
|
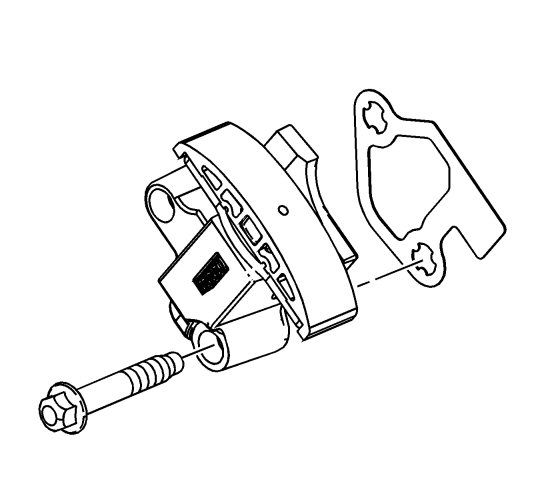
| 6. |
Install a NEW primary camshaft drive chain tensioner gasket to the primary camshaft drive chain tensioner.
|
|
| 7. |
Install the primary camshaft drive chain tensioner bolts through the primary camshaft drive chain tensioner and gasket.
|
|
| 8. |
Ensure the primary camshaft drive chain tensioner mounting surface on the engine block does not have any burrs or defects that would degrade the sealing of the NEW primary camshaft drive chain tensioner gasket.
|
|
| 9. |
Place the primary camshaft drive chain tensioner into position and loosely install the bolts to the block.

|
|
| 10. |
Refer to
Fastener Caution
.
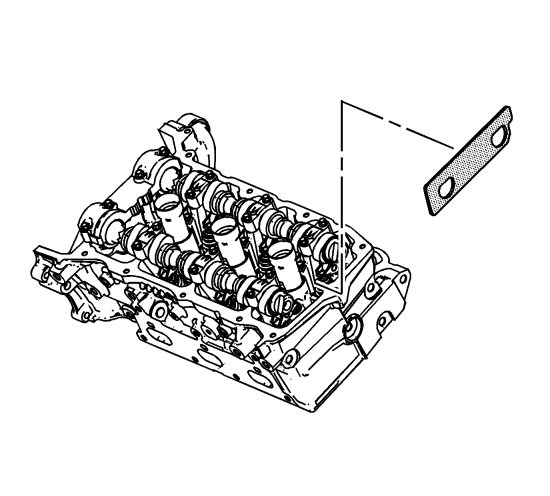
Verify the proper placement of the left secondary camshaft drive chain tensioner gasket tab (1). 
|
|
| 10.1. |
First Pass
Tighten the primary camshaft drive chain tensioner bolts to 5 Nm (44 lb in) . |
| 10.2. |
Final Pass
Tighten the primary camshaft drive chain tensioner bolts to 25 Nm (18 lb ft) . |
| 11. |
Release the primary camshaft drive chain tensioner by pulling out the
EN-46112
pins and unlocking the tensioner plunger.

|
|
| 12. |
Verify the primary and left secondary camshaft drive chain timing mark alignments. Refer to
Timing Chain Alignment Diagram
- Stage One.
|
|
| 13. |
Remove the EN 48383-1 from the rear of the left camshafts.
|
|
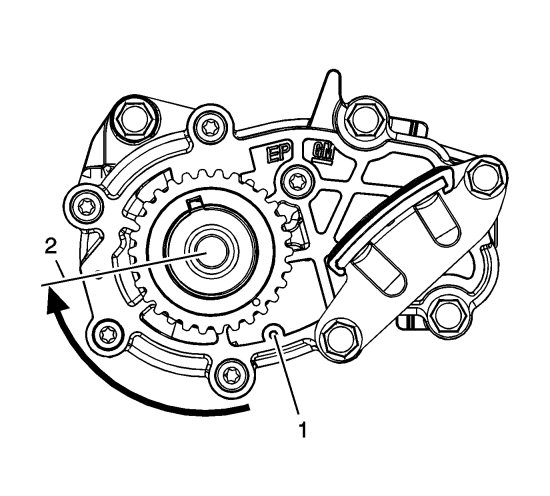
| 14. |
Using the
EN-48589
socket , rotate the crankshaft and crankshaft sprocket from the stage 1 alignment position (1) to the stage 2 alignment position (2), 115 crankshaft degrees, in order to install the right secondary camshaft drive chain components.
|
|
| 15. |
Install the EN 48383-2 onto the rear of the left camshafts.

|
|
| 16. |
Install the EN 48383-3 onto the rear of the right camshafts.

|
|
