PRE-RELEASE
Transfer Case Assemble
| Transfer Case Assemble |
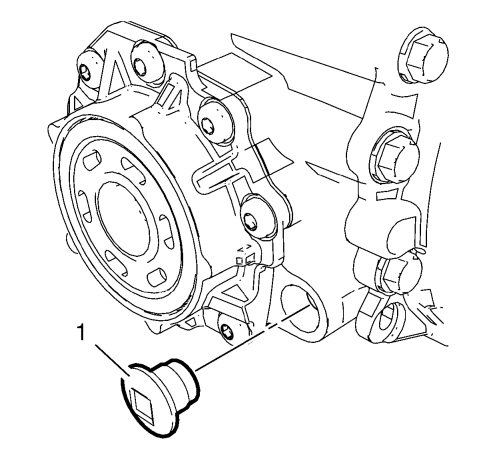
| Front Wheel Drive Intermediate Shaft Seal Installation |
Special Tools
| • |
DT-305-1/KM-305-1
Remover/Installer
|
|
| • |
DT-49953
Seal Installer
|
|
For equivalent regional tools, refer to Special Tools .
| Input Shaft Bearing Retainer Rear Seal Installation |
Special Tools
| • |
DT-305-1/KM-305-1
Remover/Installer
|
|
| • |
DT-49952
Seal Installer
|
|
For equivalent regional tools, refer to Special Tools
| 1. |
Clean the transfer case rear extension housing threaded bolt holes. A thread repair tool may be used to clean the threads of old threadlocking material.
|
|
| 2. |
Spray thread cleaner into the holes. Refer to
Adhesives, Fluids, Lubricants, and Sealers
.
|
|
| 3. |
Clean the transfer case housing and rear extension housing bolt holes with compressed air. |
|||||||||
 Warning
| 4. |
Install the NEW input shaft rear seal (1) to the rear extension housing using the DT-49952 installer (2) and DT-305-1/KM-305-1 remover/installer (3). 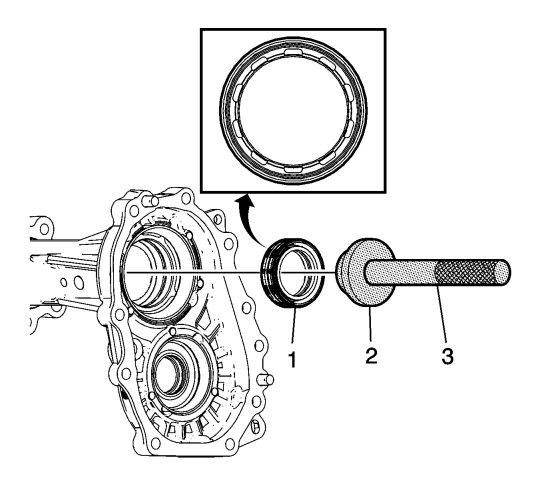
|
|||||||
| Idler Gear Shaft Rear Seal Installation |
Install a NEW idler gear shaft rear seal (1) to the rear extension housing. - RPO MXE
| Idler Gear Shaft Front Seal Installation |
Install a NEW transfer case idler gear shaft front seal (1) to transfer case. - RPO MXE
| Input Shaft Bearing Retainer Front Seals Installation |
Special Tools
| • |
DT-305-1/KM-305-1
Remover/Installer
|
|
| • |
DT-49952
Installer
|
|
For equivalent regional tools, refer to Special Tools .
| 1. |
Install the front input shaft (inner) seal (1) to the transfer case using the DT-49952 installer (2) and DT-305-1/KM-305-1 remover/installer (3). 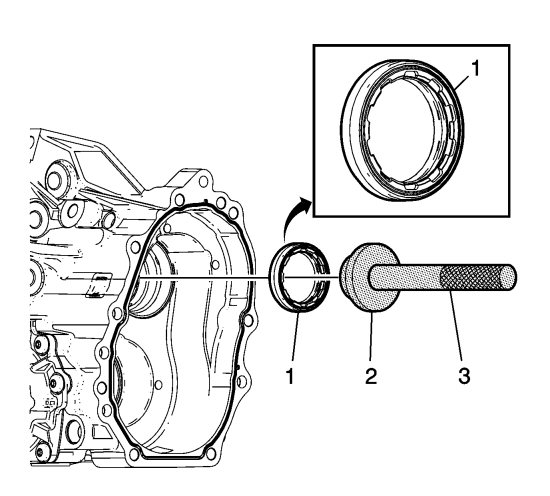
|
|||||||
| 2. |
Install the front input shaft (outer) seal (1) to the transfer case using the DT-49952 installer (2) and DT-305-1/KM-305-1 remover/installer (3). 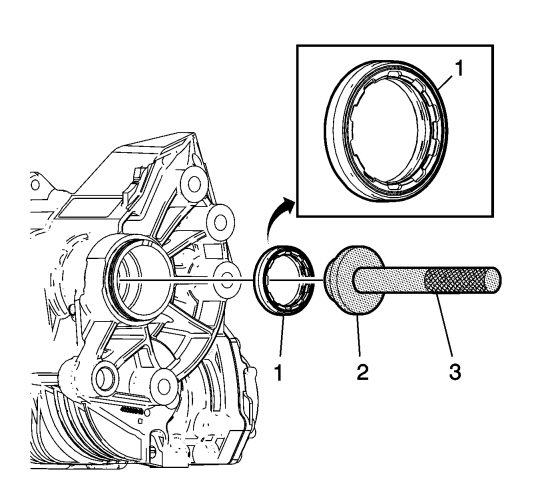
|
|||||||
| Input Shaft and Idler Gear Installation |
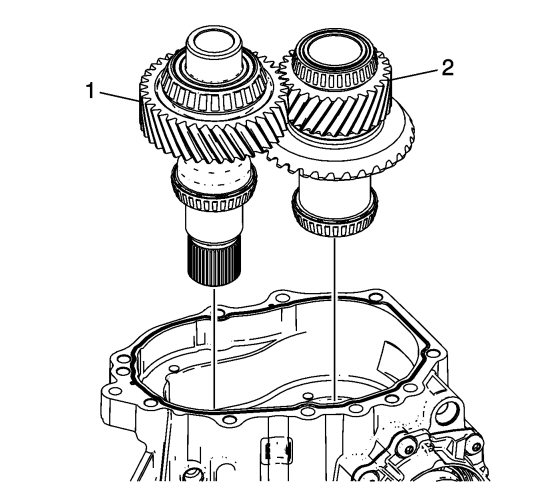
Install input shaft (1) and idler gear (2).
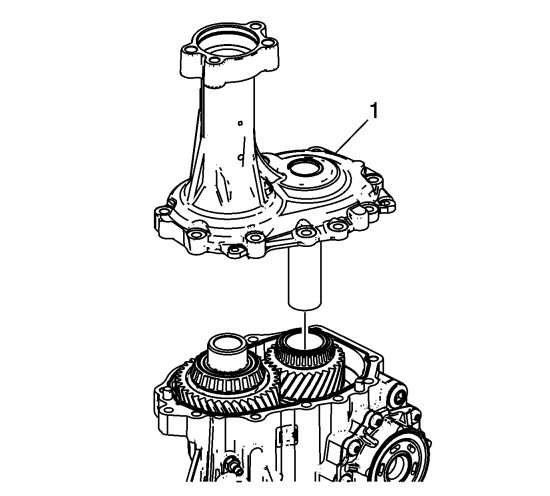
| Rear Extension Housing Installation - RPO MXE |
| 1. |
Install the idler gear shaft (1) to the rear extension housing - RPO MXE.
|
|
| 2. |
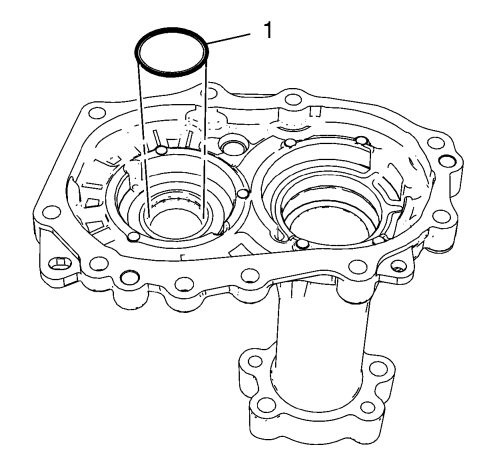
Install a NEW rear extension housing-to-transfer case seal (1).
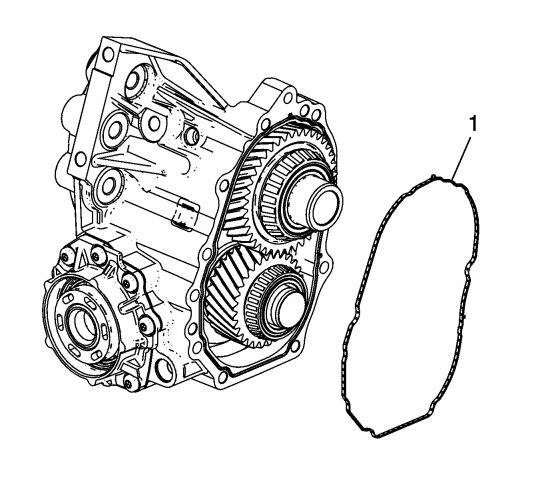
|
|
| 3. |
Install the rear extension housing (1) and idler gear shaft to the transfer case housing. Position the idler gear shaft into the center opening of the idler gear.
|
|
| 4. |
Refer to
Fastener Caution
.
Apply threadlock to the threads on the NEW bolts for the transfer case to the extension housing (1). See Adhesives, Fluids, Lubricants, and Sealers . 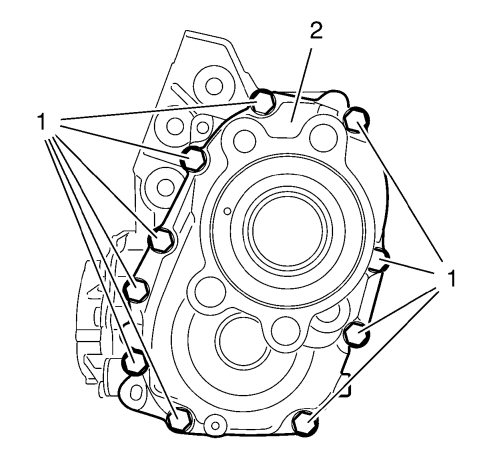
|
|
| 5. |
Install the NEW transfer case-to-rear extension housing bolts (1).
|
|
| 5.1. |
Tighten the 10 transfer case-to-rear extension housing bolts (1) a first pass to
25 Nm (18 lb ft)
.
|
| 5.2. |
Tighten the 10 transfer case-to-rear extension housing bolts (1) a second pass 130 degrees.
|
| Rear Extension Housing Installation - RPO MH4 |
| 1. |
Install a NEW rear extension housing-to-transfer case seal (1).
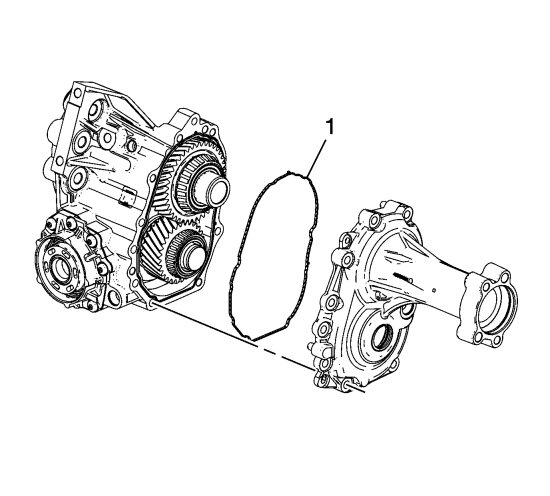
|
|
| 2. |
Install the rear extension housing onto the transfer case housing.
|
|
| 3. |
Refer to
Fastener Caution
.
Apply threadlock to the threads on the NEW bolts for the transfer case to the extension housing. See Adhesives, Fluids, Lubricants, and Sealers .
|
|
| 4. |
Install the NEW transfer case-to-rear extension housing bolts (1).
|
|
| 4.1. |
Tighten the 10 transfer case-to-rear extension housing bolts (1) a first pass to
25 Nm (18 lb ft)
.
|
| 4.2. |
Tighten the 10 transfer case-to-rear extension housing bolts (1) a second pass 130 degrees.
|
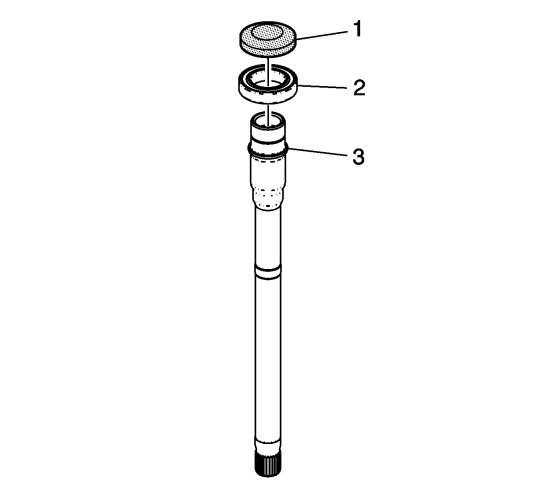
| Rear Output Shaft Seal Installation |
Special Tools
| • |
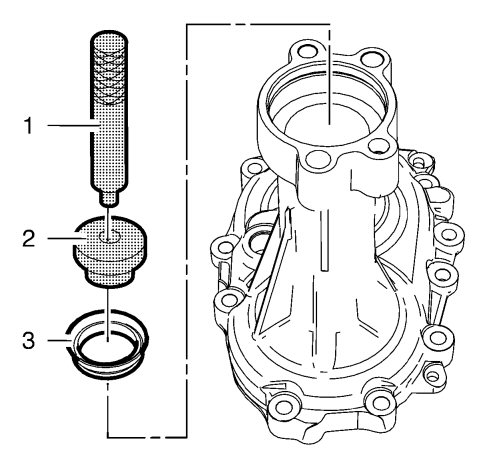
DT-305-1/KM-305-1
Remover/Installer
|
|
| • |
DT-49954-A
Seal Installer
|
|
For equivalent regional special tools, refer to Special Tools .

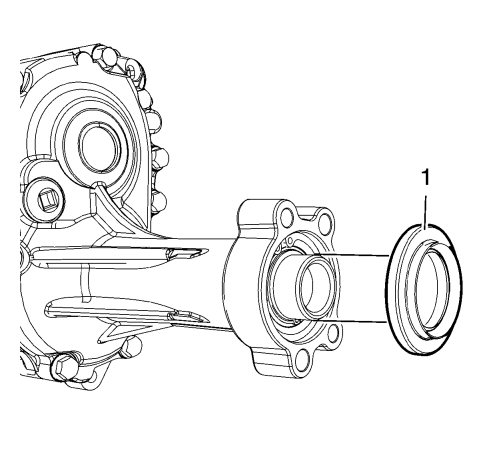
Install the rear output shaft seal (3), using the DT-49954-A installer (2) and DT-305-1/KM-305-1 remover/installer (1).
| Front Wheel Drive Intermediate Shaft Bearing Installation |
Special Tools
DT-48076 Bearing InstallerFor equivalent regional tools, refer to Special Tools .
| 1. |
Press on the intermediate shaft bearing (2) onto the intermediate shaft (3), using
DT-48076
Bearing installer
(1) and a hydraulic press.
|
|
| 2. |
Install the transfer case intermediate shaft bearing retaining ring (2) to intermediate shaft (1), using suitable pliers.
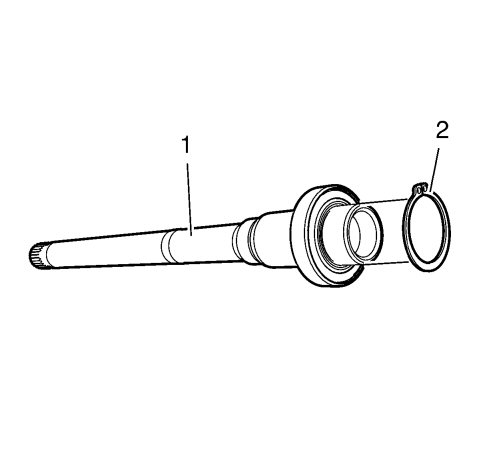
|
|
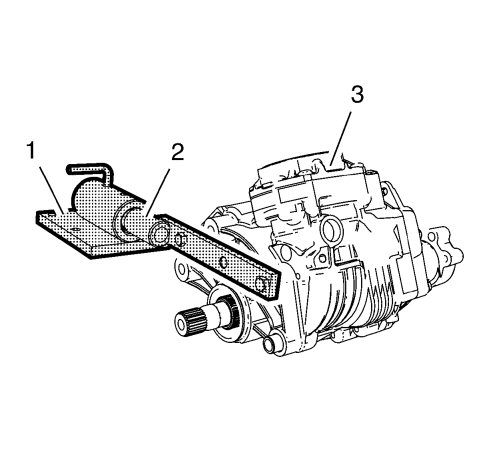
| Front Wheel Drive Intermediate Shaft Installation |
Special Tools
| • |
DT-113-2-A
Holder
|
|
| • |
DT-622-A
Transmission Bracket
|
|
| • |
DT-48076
Bearing Installer
|
|
| • |
DT-49104
Protective Collar
|
|
For equivalent regional tools, refer to Special Tools .
| 1. |
Install the
DT-49104
protective collar (1) to the intermediate shaft (2), and tap in the intermediate shaft using the
DT-48076
installer (3) and a rubber mallet.
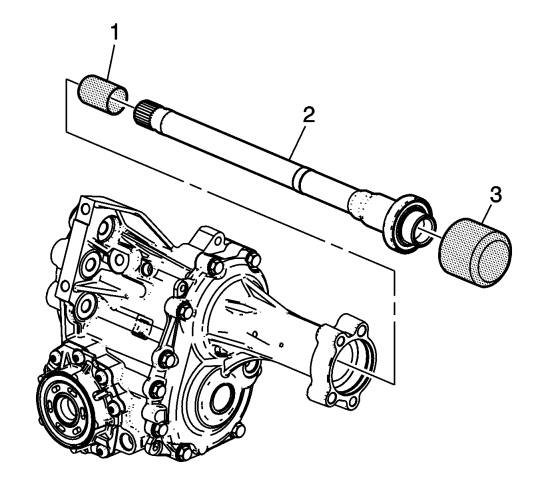
|
|
| 2. |
Remove the
DT-49104
protective collar (1).
|
|
| 3. |
Apply grease to the intermediate shaft output splines (1). See
Adhesives, Fluids, Lubricants, and Sealers
.
|
|
| 4. |
Refer to
Fastener Caution
.
Install the transfer case intermediate shaft retaining ring (1), using suitable snap ring pliers. 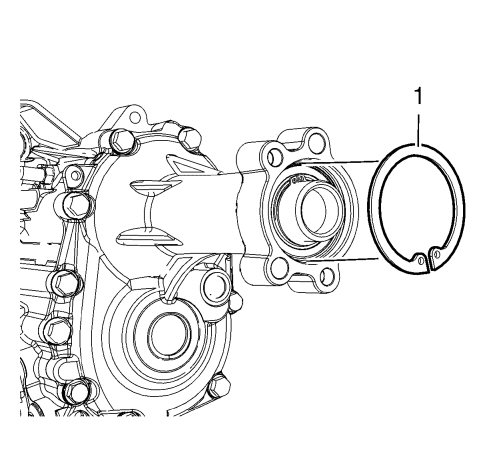
|
|
| 5. |
Fit the NEW dirt deflector/grease seal assembly (1) using
DT-48076
Bearing installer.
|
|
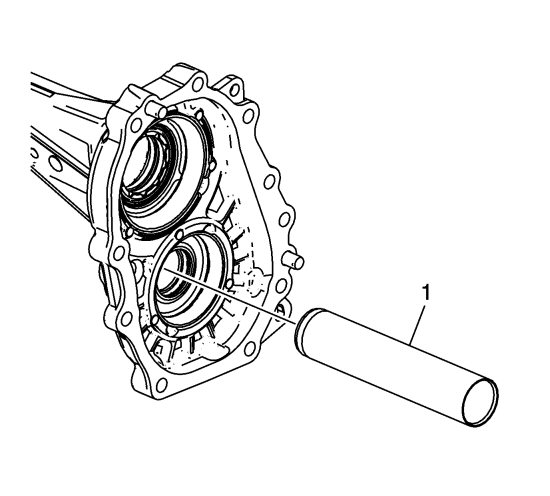
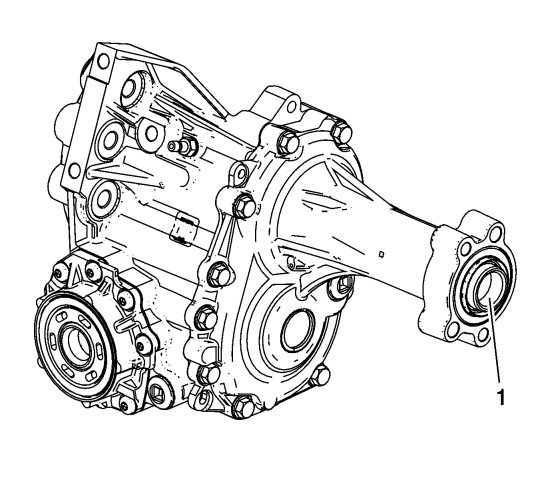
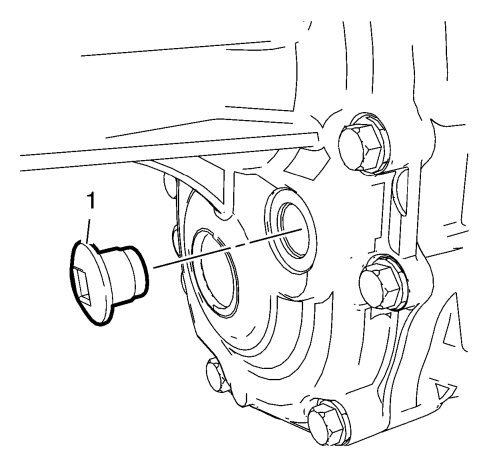
| Locating Bushing Installation |
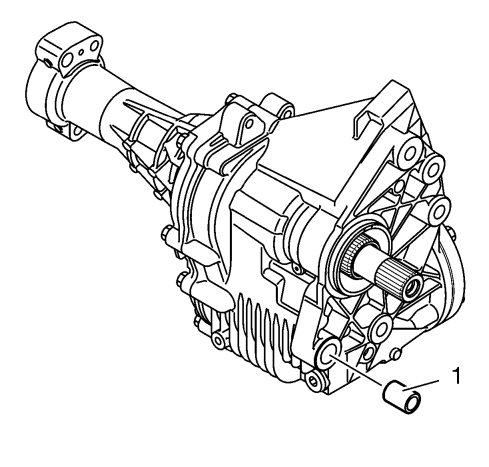
Install the transfer case locating bushing (1) as required using a rubber mallet-RPO MXE.
| Transfer Case-to-Transmission Seal Installation |

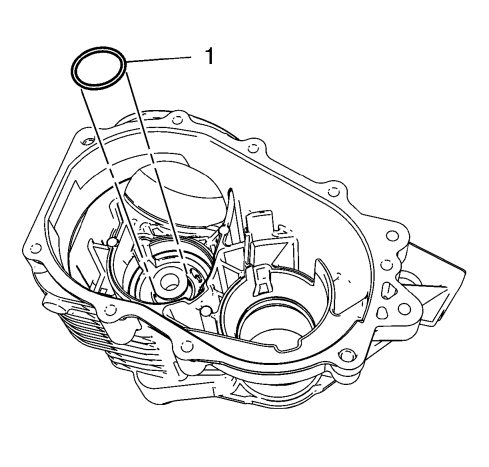
Install the NEW transfer case-to-transmission seal (1).
| Transfer Case Vent Installation |
| 1. |
Apply sealant to the threads of the vent hose connector. Refer to
Adhesives, Fluids, Lubricants, and Sealers
.
|
|
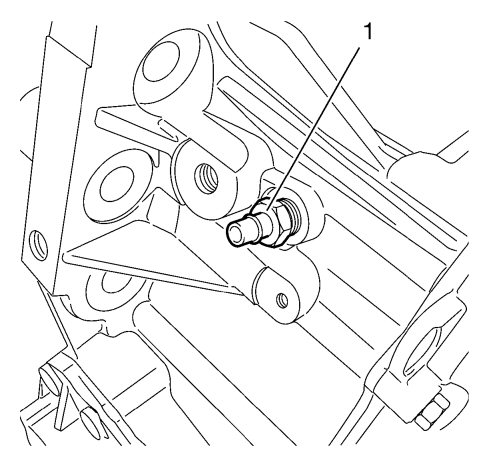
| 2. |
Install the transaxle breather hose contact (1) and tighten to
25 Nm (18 lb ft)
.
|
|
| Oil Drain Plug Installation |
Refer to Fastener Caution .
Install a NEW oil drain plug (1) and tighten to 40 Nm (30 lb ft) .
| Oil Fill Plug Installation |
| 1. |
Install a NEW transfer case oil fill plug (1).
|
|
| 2. |
Once the transfer case has been filled with oil, tighten the oil fill plug to
40 Nm (30 lb ft)
.
|
|
| 3. |
Remove the transfer case (3) from
DT-622-A
bracket (2) and
DT-113-2-A
holder (1).
|
|
