PRE-RELEASE
Mode Control Cam Replacement
| Mode Control Cam Replacement |
| Removal Procedure |
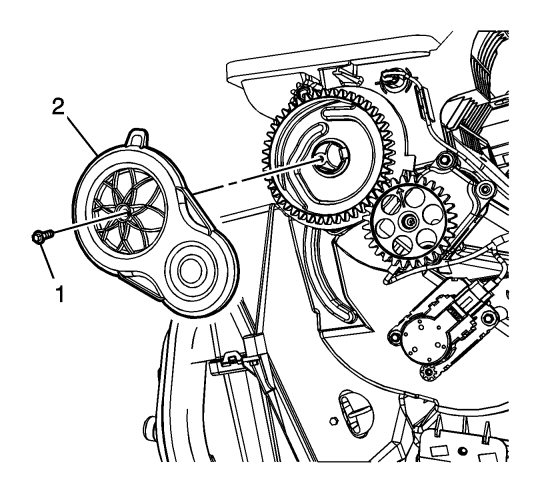
| 1. |
Remove the mode came gear cover screw (1) and cover (2).
|
|
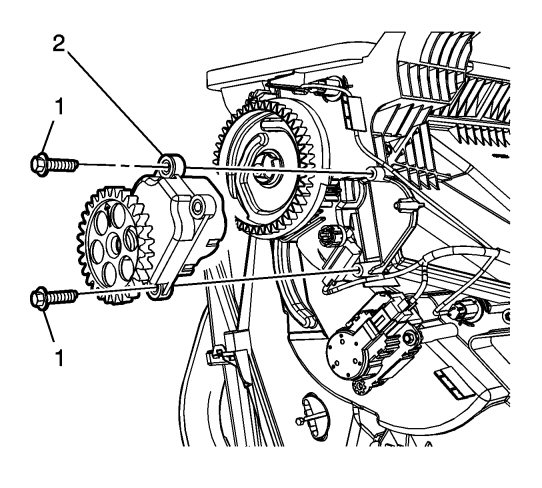
| 2. |
Remove the mode cam gear actuator screws (1) and separate the actuator (2) from the HVAC module.
|
|
| 3. |
Disconnect the mode cam gear actuator electrical connector.
|
|
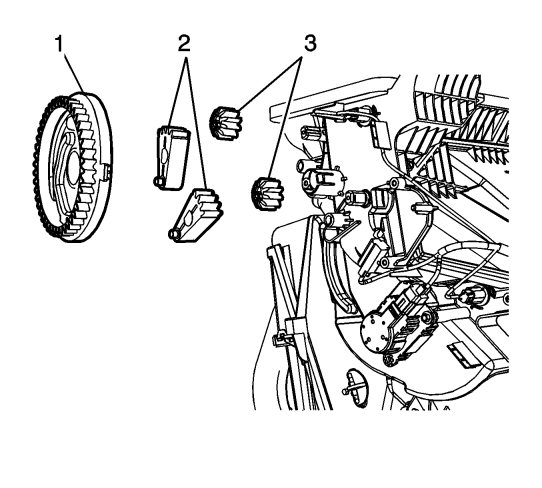
| 4. |
Remove the mode cam gear (1) from the HVAC module.
|
|
| 5. |
For alignment purposes, remove both cam gear levers (2).
|
|
| 6. |
If the valve gears (3) are damaged, remove them from the HVAC module and discard.
|
|
| Installation Procedure |
| 1. |
If the valve gears were removed or replaced, install them onto the HVAC module. |
|||||||
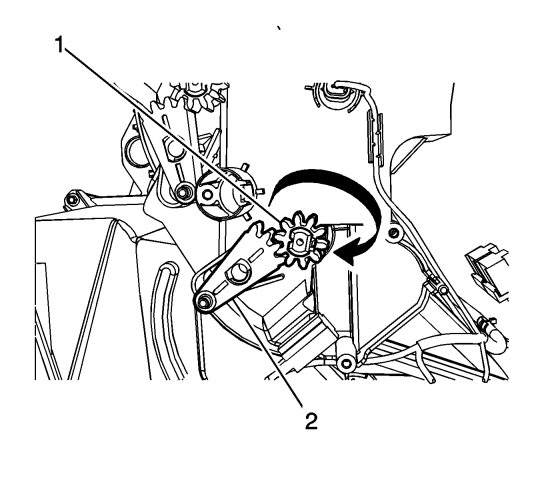
| 2. |
Rotate the defroster gear clockwise (1) as far as it will go, and install the lever by engaging a gear tooth into the rightmost lever gap (2).
|
|
| 3. |
Rotate the heater door gear clockwise (1) as far as it will go, and install the lever by engaging a gear tooth into the rightmost lever gap (2).
|
|
| 4. |
Install the mode cam into position on the levers.

|
|
| 5. |
Continue to push the mode cam onto the case and rotate left and/or right until an audible click is heard locking the mode cam in place.
|
|
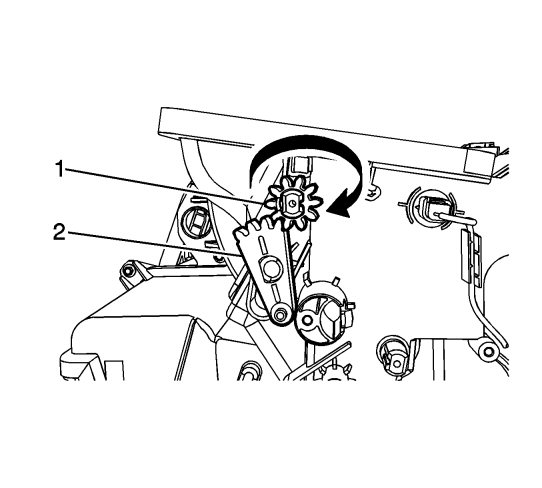
| 6. |
Rotate the mode cam from stop to stop (1). It should rotate completely without binding. If the mode does not rotate from stop to stop, then remove the mode came and levers and repeat steps 2-6.
|
|
| 7. |
Place the mode cam actuator and gear assembly (2) on the HVAC module and install the screws (1) and tighten to
1.7 Nm (5 lb in)
.
|
|
| 8. |
Connect the mode cam actuator electrical connector.
|
|
| 9. |
Install the cam gear cover (1) and screw (2).
|
|
