PRE-RELEASE
Front Side Door Outer Panel Replacement
| Front Side Door Outer Panel Replacement |
| Removal Procedure |
Refer to Approved Equipment for Collision Repair Warning .
Refer to Glass and Sheet Metal Handling Warning .
| Note | ||
|
Before beginning the repair, refer to Metal Panel Bonding for proper adhesive applicator preparations and general information. |
| 1. |
Disable the supplemental inflatable restraint (SIR) system. Refer to
SIR Disabling and Enabling
.
|
|
| 2. |
Disconnect the negative battery cable. Refer to
Battery Negative Cable Disconnection and Connection
.
|
|
| 3. |
Remove all related panels and components.
|
|
| 4. |
Repair as much of the damage as possible to factory specifications. Refer to
Dimensions - Body
.
|
|
| 5. |
Remove the door assembly. Refer to
Front Side Door Replacement
.
|
|
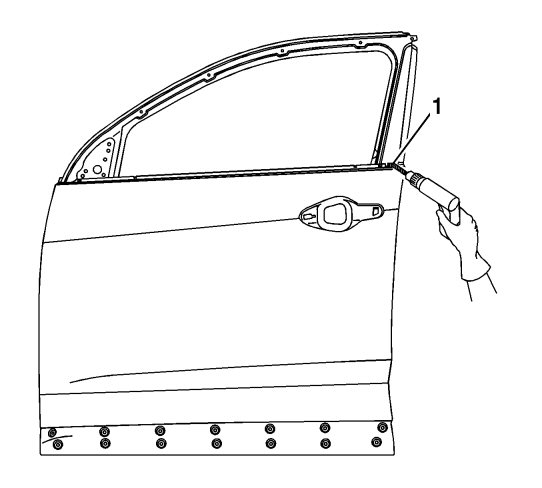
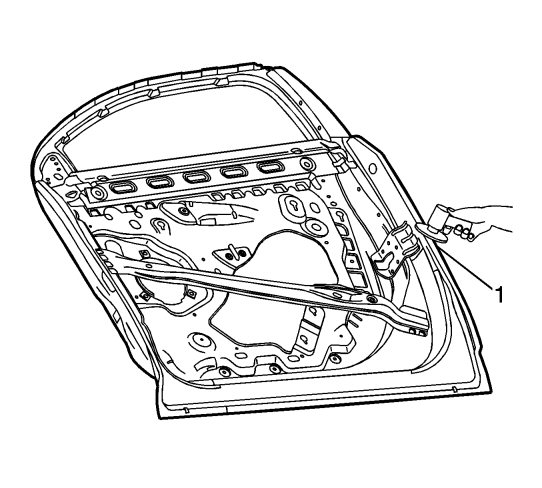
| 6. |
Find all factory welds and drill them out (1). Note the number of welding points and placement at the top window frame and the mounting points of the door mirrors.
|
|
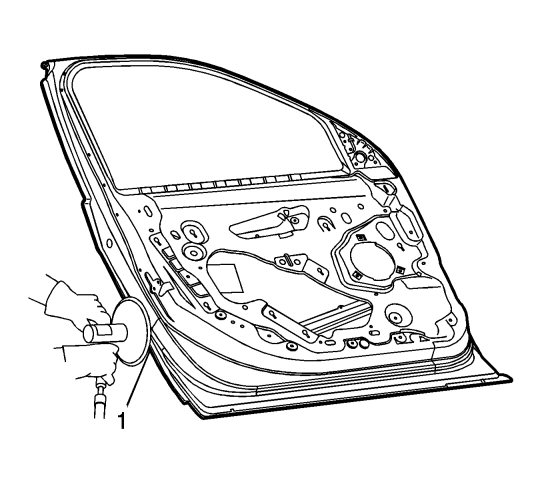
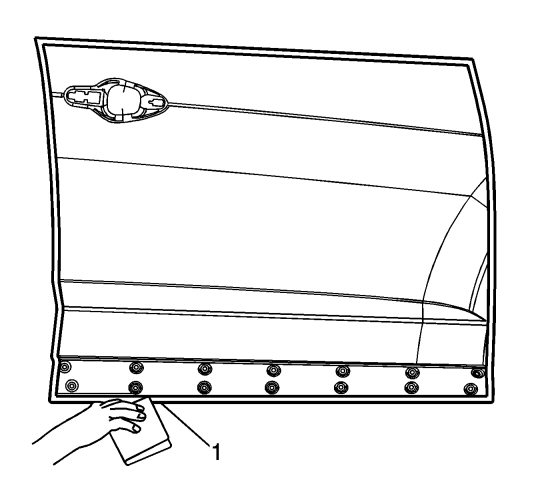
| 7. |
Grind the edges of the door outer panel to separate the outer door panel from the door shell (1).
|
|
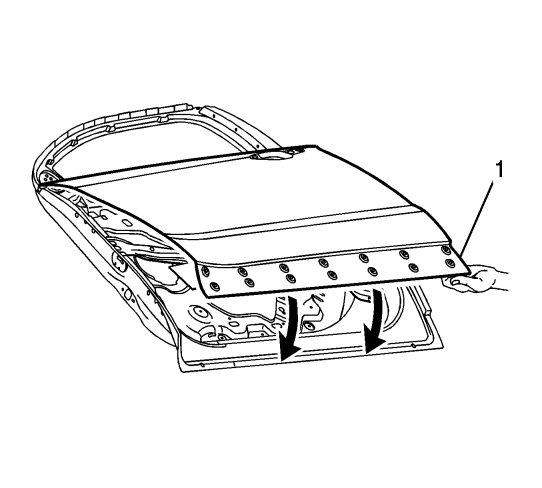
| 8. |
Remove the outer door panel (1). 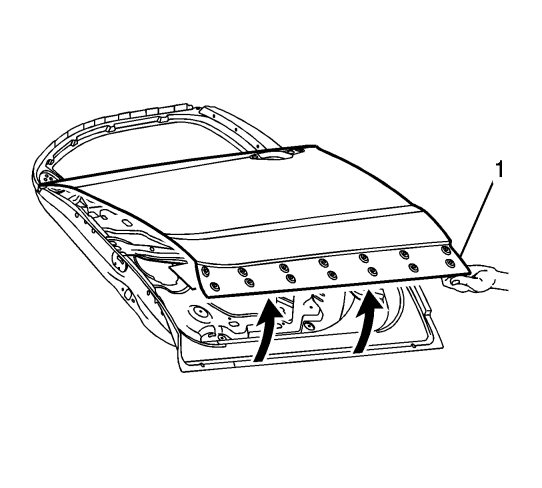
|
|||||||||
 Warning
| 9. |
Remove the sealers and anti-corrosion materials from the repair area, as necessary.
|
|
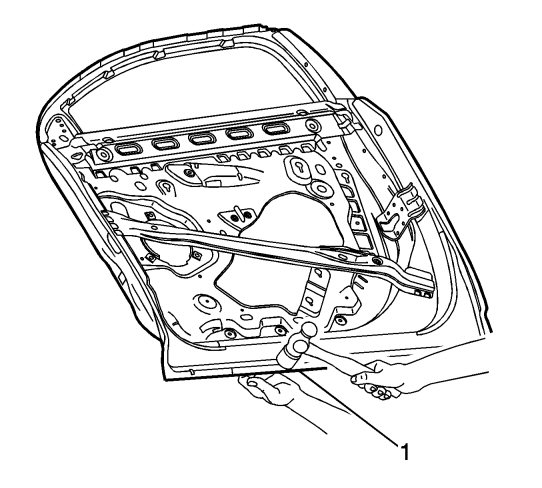
| 10. |
Straighten the edges of the door inner panel (1).
|
|
| Installation Procedure |
| 1. |
Grind the door body surface with an abrasive disc to remove all adhesive (1). Align the flanges to the outer panel.
|
|
| 2. |
Scuff the opposing mating surfaces of the door outer panel to remove the gloss of the E-Coat (1).
|
|
| 3. |
Drill 8 mm (5/16 in) plug weld holes as necessary in locations noted from the original panel (1). 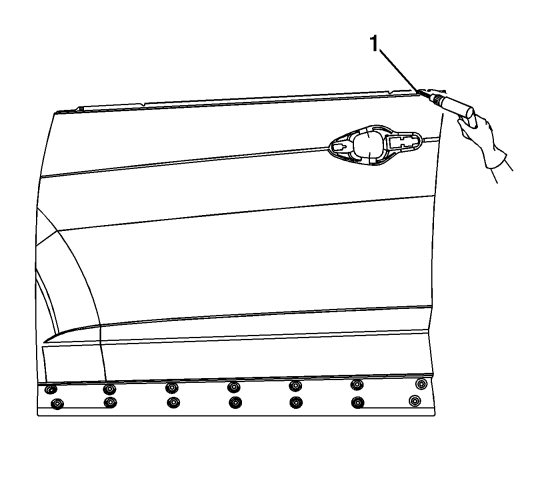
|
|||||||
| 4. |
Clean the mating surfaces.
|
|
| 5. |
Apply a 3-6 mm (1/8-1/4 in) bead of metal panel bonding adhesive to both of the mating surfaces (1). 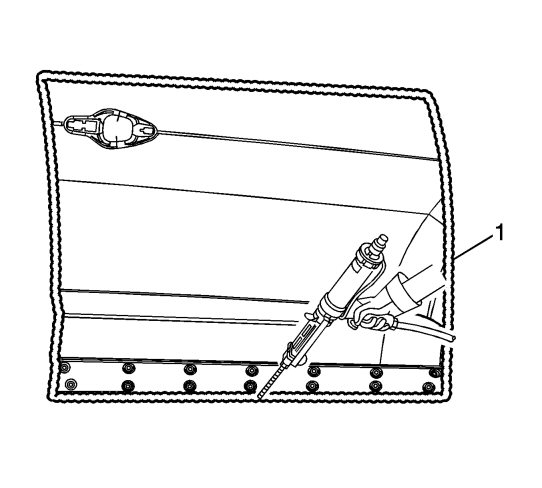
|
|||||||
| 6. |
Using a small acid brush, spread a coat of adhesive to cover all the bare metal surfaces to ensure corrosion protection.
|
|
| 7. |
Install the door outer panel to the door shell (1).
|
|
| 8. |
Clamp the door outer panel into position as required (1). 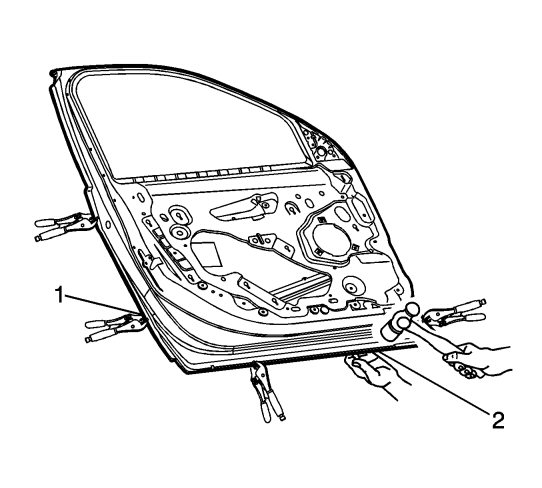
|
|||||||
| 9. |
Using a hammer re-hem the hem flanges around the door shell (2).
Continue to hammer in stages along the hem flanges. |
|
| 10. |
Using lacquer thinner remove the excess adhesive from the door panel area.
|
|
| 11. |
Install the door to the vehicle. Inspect the door outer panel for proper alignment, adjust the alignment as required.
|
|
| 12. |
Using metal-inert gas (MIG), weld the door outer panel to the door frame in the locations noted at the upper door frame (1).

|
|
| 13. |
Clean and prepare all welded surfaces.
|
|
| 14. |
Apply anti-flutter foam at 4-5 evenly spaced points between the door's outer panel and side-impact reinforcement (1).

|
|
| 15. |
Apply sealers and anti-corrosion materials to the repair area, as necessary.
|
|
| 16. |
Paint the repair area. Refer to
Basecoat/Clearcoat Paint Systems
.
|
|
| 17. |
Install the door assembly. Refer to
Front Side Door Replacement
.
|
|
| 18. |
Install all related panels and components.
|
|
| 19. |
Connect the negative battery cable. Refer to
Battery Negative Cable Disconnection and Connection
.
|
|
| 20. |
Activate the SIR system. Refer to
SIR Disabling and Enabling
.
|
|
