Quarter Outer Panel Sectioning
|
|
Quarter Outer Panel Sectioning
|
Refer to
Approved Equipment for Collision Repair Warning
See
Warning during the repair of collision damage with repair sheet metal
Refer to
Glass and Sheet Metal Handling Warning
See
|
Note
|
|
The door frame can be replaced at factory seams, but requires the removal of the windshield and the roof. The specific area to be sectioned is determined by the extent of the damage to the vehicle.
|
|
3.
|
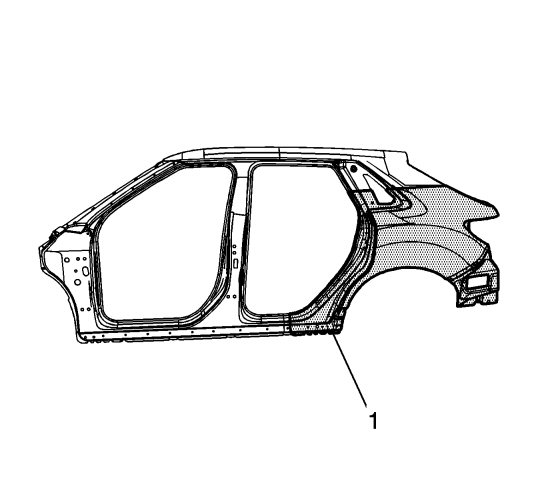
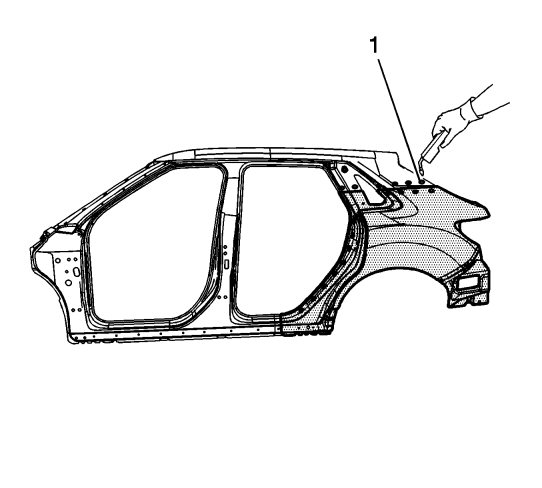
Remove all related panels and components (1).
|
|
4.
|
Repair as much of the damage as possible to factory specifications. Refer to
Dimensions - Body
.
|
|
5.
|
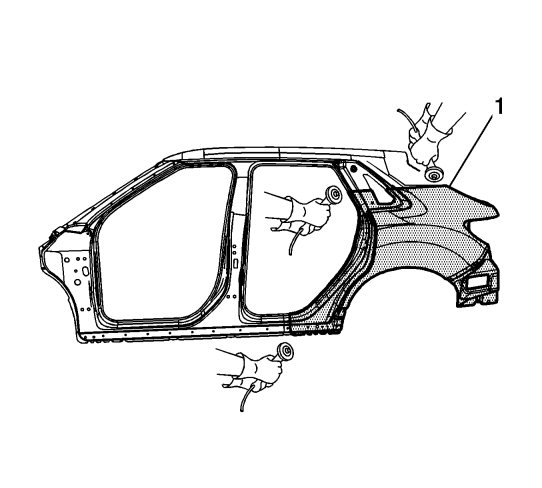
Note the location and remove the sealers and anti-corrosion materials from the repair area, as necessary..
|
|
6.
|
|
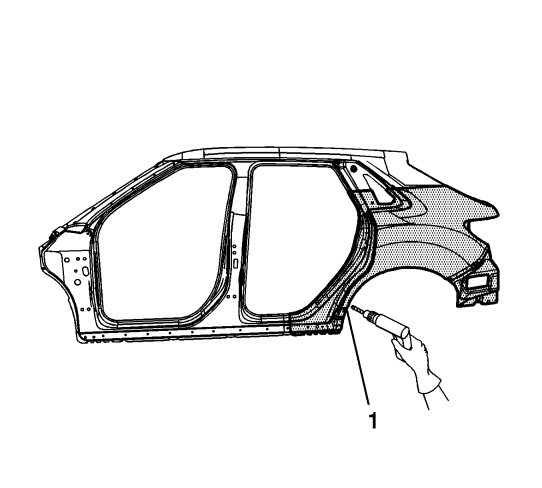
Note
|
|
Do NOT damage any inner panels or reinforcements.
|
Cut the panel where sectioning is to be performed (1).
|
|
8.
|
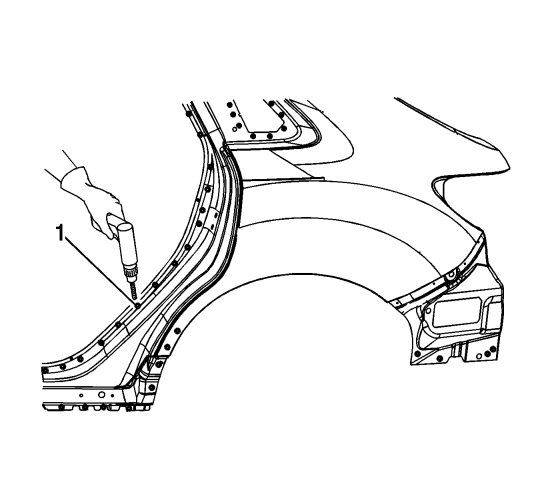
Locate and drill out all factory welds. Note the number and location of the welds for installations of the service par (1)t.
|
|
9.
|
Remove the damaged quarter panel.
|
|
1.
|
Cut out the panel from the service part (1) to overlap the original panel with 25 mm (1 inch) at the joining points.

|
|
2.
|
|
Note
|
|
In any area damaged beyond recognition, or if structural Weld-Thru adhesive is present, space the plug weld holes 40 mm (11/2 in) apart.
|
Drill as many 8 mm (5/16 in) plug weld holes along the sectioning cut in the remaining service part. Place the holes 13 mm (1/2 in) from the edge and with 40 mm (11/2 in) spacing.
|
|
3.
|
Prepare all mating surfaces, as necessary.
|
|
4.
|
Apply GM-approved Weld-Thru Coating or equivalent to all mating surfaces.
|
|
5.
|
Position the quarter panel.
|
|
6.
|
Plug weld accordingly (1).
|
|
7.
|
|
Note
|
|
To create a solid weld with minimum heat distortion make 25 mm (1 in) stitch welds along the seam with 25 mm (1 in) gaps between. Then go back and complete the stitch weld.
|
Stitch the weld sectioning joint.
|
|
8.
|
Clean and prepare all welded surfaces.
|
|
9.
|
Apply the sealers and anti-corrosion materials to the repair area, as necessary.
|
|
11.
|
Install all related panels and components.
|
