Air Conditioning Condenser and Evaporator Hose Replacement (LAU)
|
|
Air Conditioning Condenser and Evaporator Hose Replacement (LAU)
|
|
4.
|
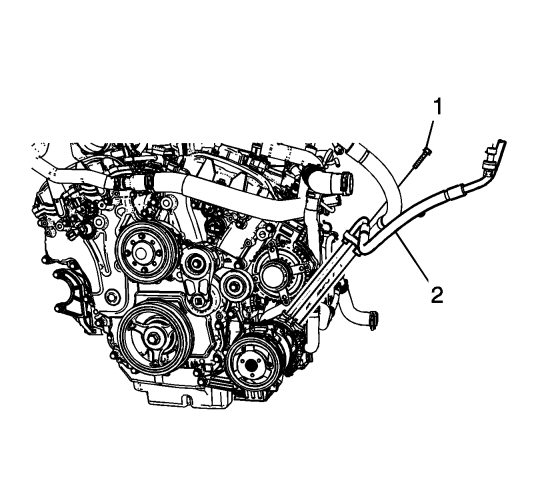
Remove the air conditioning condenser and evaporator hose bolt (1) at the compressor.
|
|
5.
|
Remove the air conditioning condenser and evaporator hose (2) from the compressor.
|
|
6.
|
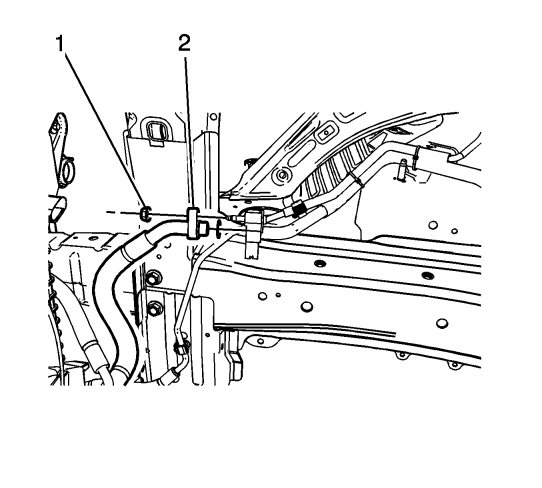
Remove the air conditioning condenser and evaporator hose nut (1) at air conditioning condenser and air conditioning evaporator tube.
|
|
7.
|
Remove the air conditioning condenser and evaporator hose (2) from air conditioning condenser and air conditioning evaporator tube.
|
|
8.
|
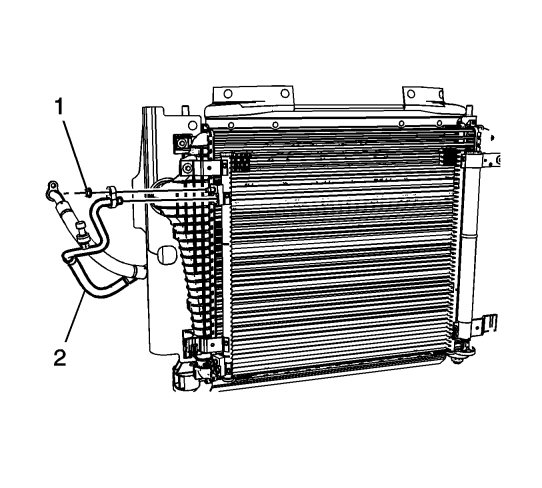
Remove the air conditioning condenser and evaporator hose nut (1) at the condenser.
|
|
9.
|
Remove the air conditioning condenser and evaporator hose (2) from the condenser.
|
|
10.
|
Remove the air conditioning condenser and evaporator hose (2) from vehicle.
|
|
11.
|
Remove and discard all sealing washers.
|
|
2.
|
Install the air conditioning condenser and evaporator hose (2) to the condenser.
|
|
3.
|
Refer to
Fastener Caution
.
Install the air conditioning condenser and evaporator tube nut (1) on the condenser and tighten to
15 Nm (11 lb in)
.
|
|
4.
|
Install the air conditioning condenser and evaporator hose (2) to the air conditioning condenser and air conditioning evaporator tube.
|
|
5.
|
Install the air conditioning condenser and evaporator hose nut (1) at air conditioning condenser and air conditioning evaporator tube and tighten to
15 Nm (11 lb in)
.
|
|
6.
|
Install the air conditioning condenser and evaporator hose (2) to the compressor.
|
|
7.
|
Install the air conditioning condenser and evaporator tube nut (1) on the compressor and tighten to
15 Nm (11 lb in)
.
|
